Oregon Scientific WS907 User manual

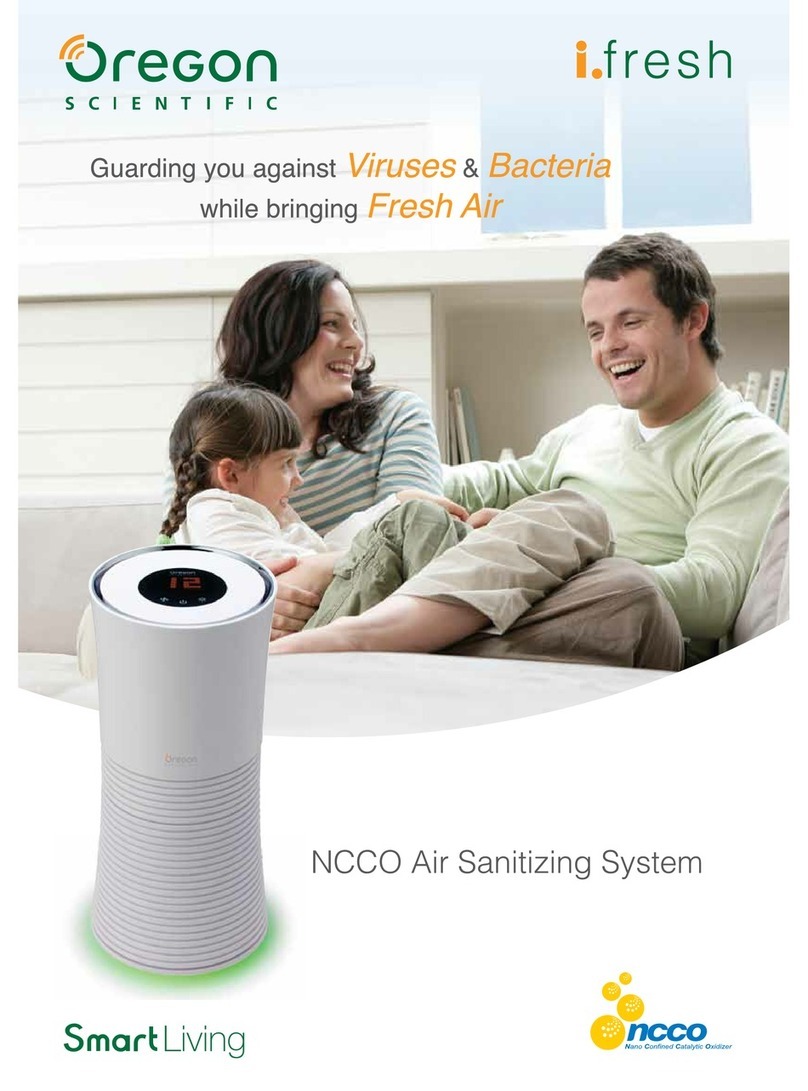
i.fresh NCCO Air Sanitizing System
Model: WS907
USER MANUAL


i.fresh NCCO Air Sanitizing System
Model: WS907
USER MANUAL
CONTENTS
Important Safety Instructions ..............................
Introduction ........................................................
How the Air Purier Works.....................................
Precautions ........................................................
Overview
Front View........................................................
LCD Display.....................................................
Features .............................................................
GettingStarted.....................................................
Air Sanitizing....................................................
AirQualityMonitor................................................
Air Quality Indicator Light................................
Cleaning and Mainenance..................................
Filter Replacement..............................................
Specications......................................................
Troubleshooting..................................................
About Oregon Scientic ......................................
EU-Declaration Of Conformity ............................
1
1
1
1
2
2
2
2
3
3
3
3
4
4
4
5
5
EN

WHEN USING ELECTRICAL PRODUCTS,
ESPECIALLY WHEN CHILDREN ARE
PRESENT, BASIC SAFETY PRECAUTIONS
SHOULD ALWAYS BE FOLLOWED, INCLUDING
THE FOLLOWING:
Read all instructions before using this appliance.
DANGER
WARNING
EN
INTRODUCTION
HOW THE AIR SANITIZING SYSTEM WORKS
IMPORTANT SAFETY INSTRUCTIONS
Thank you very much for purchasing “WS907
i.fresh NCCO Air Sanitizing System”. This
instruction manual contains useful information on
the proper use and care of this product. In order
to enjoy its features, read through this manual
We recommend that you place this unit in a room
in which you stay most of your time and where
plants or pets are present.
This unit will start air quality monitor function once
power is connected. There is no standby mode
for this unit; to stop the air quality monitor, please
remove the power adaptor from the main socket.
Polluted air enters the air sanitizing system from
the bottom air inlet. As the air is pulled through,
hair, etc.). Then the active oxygen sterilises
a wide range of harmful gases and odours. Next,
clean out the trapped gases and odours, so that
passes back into the room through the top air
outlet.
There is a small chance that the air coming out
is normal as the nano material will have a slight
chemical reaction with air. Should this happened
it will last for about 20 minutes only.
Do not let water or any other liquid or
Do not clean the unit with water or any other
Please use this unit with bundled power
adaptor. Do not use other power adaptor.
Do not use the unit if the plug, the mains cord
or the unit itself is damaged.
This unit is not intended for use by children
or persons with reduced physical,
sensory or mental capabilities, or lack of
experience and knowledge, unless they
have been given supervision or instruction
concerning use of the unit by a person
responsible for their safety.
Do not block the air inlet and outlet, e.g. by
placing items on the air outlet or in front of the
air inlet.
Children should be supervised to ensure that
they do not play with the unit.
This unit is not a substitute for proper
ventilation, regular vacuum cleaning or use of
an extractor hood or fan while cooking.
If the wall socket used to power the unit has
poor connections, the plug of the appliance will
become hot. Make sure you plug the unit into a
properly connected wall socket.
Always place and use the unit on a dry, stable,
level surface.
Leave at least 10 cm free space behind and on
both sides of the unit.
Avoid knocking against the unit (the air inlet
and outlet in particular) with hard objects.
outlet or the air inlet.
Do not use this unit when you have used
indoor smoke-type insect repellents or in
places with oily residues, burning incense or
chemical fumes lately.
Do not use the unit near gas appliances,
Always unplug the unit after use and before
you clean it.
Do not use the unit in a room with major
temperature and humidity changes, as this
may cause condensation inside the unit.
Do not use the unit in a room that is larger
or smaller than the recommended size. The
recommended room size for WS907 is 6 m²
to 20 m².
To prevent interference, place the unit at least
2 m away from electrical appliances that use
airborne radio waves such as TV, radio and
radio-controlled clock.
The unit is equipped with a safety device. If
on the unit.
If the indoor air quality is poor (e.g. due to
smoking or cooking or after renovation), we
strongly advise you to open the windows when
you use the unit to enhance the air circulation.
The unit is only intended for household use
under normal operating conditions.
Do not use the unit in wet surroundings or in
surroundings with high ambient temperature,
such as bathroom, toilet or kitchen.
The unit does not remove carbon monoxide (CO).
Save this user manaul.
•
•
•
•
•
•
•
•
•
•
•
•
•
•
•
•
•
•
•
•
•
•
•
•
1
PRECAUTIONS

7.
10.
11.
16.
8.
9.
12.
13.
14.
15.
7.
8.
9.
10.
11.
12.
13.
14.
15.
16.
Air outlet cover
Nano lter security lock
Nano lter
Main body unit
Air quality sensor
Air inlet cover
Dust lter holder
Dust lter
DC jack
Air quality indicator light
OVERVIEW
FRONT VIEW
Air quality level (1-20)
TVOC level
Check lter and covers
Auto Mode
High / Low Speed
Silent Mode
1.
2.
3.
4.
5.
6.
5.
4.
3.
1.
6.
2.
LCD DISPLAY
2
1.
2.
6.
3.
4.
5.
FEATURES
NCCO technology sterilizes airborne bacteria and
Volatile Organic Compounds (VOC) efciently.
Pre-lter captures large airborne particles.
No harmful emission of chemicals and
particles into the air.
Volatile Organic Compound (VOC) air quality
sensor with air quality level display in the scale
of 1 (best) to 20 (worst) on the top.
LED air quality detector with light sensing
function adjusts the light according to the
environment.
Fan with Auto / Hi / Lo intensity draws
in airborne particles and accelerates air
purication process. Fan speed can be
adjusted according to air quality.
Long-life lter lasts up to 3 years.
Simple lter replacement and safety lock
avoids insecure cover and lter.
•
•
•
•
•
•
•
•
•
•
LCD display
Fan speed button
ON / OFF button
Air quality indicator light button
Air outlet
Light sensor
1.
2.
3.
4.
5.
6.
GETTING STARTED
Placing the Nano lter
The unit is equipped with a safety device.
If the washable dust lter and the Nano lter
are not placed properly in the unit, you will not
be able to switch on the appliance. The LCD
display will show “check lter and cover”.
You will not be able to switch on the unit if the
lter covers are not put in the unit properly.
NOTE
EN

CLEANING AND MAINTENANCE
3
1.
2.
3.
Put the plug to a main socket and connect the
DC jack to the product unit.
The standby light appears on the LCD display
and the count down of the air quality sensor
warm up timer starts. After approximately
5 minutes, the air quality level (1-20) will be
shown. The light indicator at the bottom will
glow in different colours according to the air
condition: blue for good air quality, green for
fair and amber for poor.
Press the buttons to choose required function
and setting.
Fan speed button :
To select the desired fan speed.
The LCD display will show the icons accordingly:
= Auto
= High
= Low
= Silent
AIR SANITIZING
AIR QUALITY INDICATOR LIGHT
Put the plug to a main socket and connect the DC
jack to the unit.
The standby light appears on the LCD display
and the count down of the air quality sensor
warm up timer starts. After 2 minute the fan will
automatically turn on.
Turn the nano lter cover counterclockwise and
gently pull the air outlet cover.
Slide the nano lter security lock to unlock
position.
Remove the packaging from the nano lter then
push it into the lter cartridge lightly with the
arrow on the top of the lter facing the unit.
Slide the nano lter security lock to lock
position. You should hear a “click” sound from
the lock if the cartridge is properly placed.
Reattach the nano lter cover. Turn the cover
clockwise until you hear a “click” sound and the
dots align vertically.
1.
2.
3.
4.
5.
The air quality level will show on the LCD
display: from 1 (best air quality) to 20 (worst
air quality).
To stop air quality level display, unplug the unit.
The air quality indictor light will turn on after
5 minutes warm up of the air quality sensor.
The air quality indicator light will show a
corresponding light colour: blue for good air
quality, green for fair air quality and amber for
poor air quality.
The air quality indicator light will change the
light colour in gradient accord to the existing
air quality.
The brightness (high / low) of the air quality
indicator light is controlled by the light sensor;
the brighter / dimmer the environment, the
brighter / dimmer of the air quality indicator light.
Always unplug the unit before you clean it.
Do not clean the unit with water or any other
liquid or a (ammable) detergent to avoid
electric shock and/or a re hazard.
Clean the unit regularly to avoid accumunating
dust and dirt.
Wipe away dust with a dry, soft cloth from the
unit body.
Clean the air inlet and outlet with a dry soft cloth.
Remove the pre-lters from the unit before
cleaning with water. Allow the lter to dry
completely before putting back to the unit.
•
•
•
•
•
•
•
•
•
•
•
•
AIR QUALITY MONITOR
Auto Mode: The built-in air sensor detacts the
ambient air quality and automatically selects the
most appropriate speed.
High speed mode: the appliance operates at high
speed for 30 minutes.
Silent mode: the appliance operates at very low
speed with lowest noise level for bedroom use.
ON / OFF button :
To turn on / off the air purifying function, press the
ON / OFF button .
Air quality indicator light button :
To turn on / off the air quality indicator light, press
the air quality indicator light button .
EN

FILTER REPLACEMENT
4
1.
2.
3.
1.
2.
3.
4.
1.
2.
Turn the air outlet cover counterclockwise and
lift it up gently.
Slide the nano lter security lock to unlock
position.
Pull the nano lter out gently.
Turn the air outlet cover counterclockwise and
lift it up gently.
Push the nano lter into the lter cartridge
lightly with the arrow on the top of the lter
facing the unit.
Slide the nano lter security lock to lock
position. You should hear a “click” sound from
the lock if the cartridge is properly placed.
Reattach the nano lter cover. Turn the cover
clockwise until you hear a “click” sound.
Pull the air inlet cover out with your thumb and
middle nger.
Take the cartridge out from the unit and
remove the pre-lter away from the holder.
In case of using in a non-smoking normal
household and in case of proper maintenance
(see chapter ‘Cleaning and maintenance’).
Clean the nano lter with a vacuum cleaner
or a brush.
Remove the nano lter before cleaning with a
vacuum cleaner.
Nano Filter
In case of normal household use in a non-smoking
environment and in case of proper maintenance
(see chapter ‘Cleaning and maintenance’), the
nano lter lasts up to 3 years.
Note: You may need to replace the nano lter
sooner in case of using in a more extreme
environment (smoking environment, just
renovated room, non-domestic use etc) and
insufcient maintenance.
Removing the lter
Inserting the lter
Removing the lters
Pre-Filter
•
•
1.
2.
3.
Pull the air inlet cover out with your thumb and
middle nger.
Put the pre-lter into the product unit properly.
Press on the both sides of inlet cover lightly
with your thumb and middle nger. Push it to
the unit with the markings of main unit and the
inlet cover aligned as illustrated below.
Inserting the lters
NOTE
TROUBLESHOOTING
This chapter summarizes the most common
problems you could encounter when using the
unit. If you are unable to solve the problem with
the information below, contact the Consumer Care
Centre in your country.
Problem
The unit doesn’t
work.
The clean air doesn’t
come out smoothly
from the air outlet
The odors are not
removed properly.
The unit produces
an unusual noise
(e.g. a hissing,
sizzling or
crackling) during
operation.
Solution
There may be a connection
problem. Check if the plug
is inserted to the wall socket
properly.
The lters are not inserted
yet or not inserted properly.
Insert the lters and reattach
the inlet and outlet covers.
Perhaps you have not
removed the plastic wrapper
from the new lter. Remove
the plastic wrapper and
switch on the unit again.
Perhaps the ambient air
quality of the room is very
poor. In that case, open
the windows to improve the
air circulation.
The nano filter may be too
dirty or may have reached
the end of its life. You
should clean the nano filter
(see chapter “Cleaning and
Maintenance”) or replace
it (see chapter “Filter
Replacement”).
Perhaps the room size
is bigger than the unit is
intended for. Use the unit
in a smaller room. The
recommended room size is
5m² up to 20m².
The air inlet or outlet may be
blocked by external objects.
Remove the object that
blocks the air inlet or outlet.
•
•
•
•
•
•
•
SPECIFICATIONS
TYPE
Weight
MAIN UNIT
L x W x H
DESCRIPTION
150mm(L)x150mm(W)x325mm(H)
(5.9in x 5.9in x 12.8in)
1800g (62.79oz)
12V DC power adaptor:
INPUT 110-240V 50/60Hz
Power
EN

EU-DECLARATION OF CONFORMITY
Hereby, Oregon Scientic, declares that this i.fresh
NCCO Air Sanitizing System (Model: WS907) is in
compliance with the essential requirements and
other relevant provisions of Directive 1999 / 5 /
EC. A copy of the signed and dated Declaration of
Conformity is available on request via our Oregon
Scientic Customer Service.
ABOUT OREGON SCIENTIFIC
Visit our website (www.oregonscientic.com)
to learn more about Oregon Scientic products.
If you’re in the US and would like to contact our
Customer Care department directly, please visit:
www2.oregonscientic.com/service/support
OR
Call 1-800-853-8883.
For international inquiries, please visit:
www2.oregonscientic.com/about/international
5
EN


Sistema di depurazione dell’aria
NCCO i.fresh
Modello: WS907
MANUALE PER L’UTENTE
INDICE
IT
Importanti Informazioni sulla Sicurezza..............
Introduzione........................................................
Come Funziona il Sistema di Depurazione
Dell’aria...............................................................
Aavertenze..........................................................
Panoramica
Vista Anteriore.................................................
Display LCD.....................................................
Caratteristiche.....................................................
Operazioni Preliminari.........................................
Depurazione Dell’aria......................................
Monitoraggio Della Qualità Dell’aria.....................
Indicatore Luminoso Della Qualità Dell’aria....
Pulizia e Manutenzione.......................................
Sostituzione del Filtro..........................................
Speciche............................................................
Risoluzione dei Problemi.....................................
Informazioni su Oregon Scinetic........................
Dichiarazione di conformita’UE...........................
1
1
1
1
2
2
2
2
3
3
3
3
4
4
4
5
5

DURANTE L’UTILIZZO DI PRODOTTI
ELETTRICI, SOPRATTUTTO IN PRESENZA DI
BAMBINI, SEGUIRE SEMPRE LE PRECAUZIONI
FONDAMENTALI E LE ISTRUZIONI RIPORTATE
DI SEGUITO:
Leggere interamente le istruzioni prima di
utilizzare questo prodotto.
PERICOLO
AVVISO
IT
INTRODUZIONE
COME FUNZIONA IL SISTEMA DI
DEPURAZIONE DELL’ARIA
IMPORTANTI INFORMAZIONI SULLASICUREZZA
Grazie per aver acquistato il Sistema di
depurazione dell’aria NCCO i.fresh WS907.
Questo manuale di istruzioni contiene
informazioni utili sull’uso e sulla manutenzione
corretti di questo prodotto. Per poter usufruire
delle sue funzioni, leggere il manuale prima del
primo utilizzo e conservarlo per riferimento futuro.
Si consiglia di collocare l’unità nella stanza in cui
si trascorre la maggior parte del tempo e dove
siano presenti piante o animali domestici.
Dopo essere stata collegata alla corrente, l’unità
avvia la funzione di monitoraggio della qualità
dell’aria. Quest’unità non è dotata di modalità
stand-by. Per interrompere il monitoraggio della
qualità dell’aria, staccare l’alimentatore dalla
corrente.
L’aria inquinata entra nel sistema di depurazione
dall’ingresso dell’aria situato nella parte inferiore
dell’unità. Quando l’aria penetra, il pre-ltro
consente di intrappolare le particelle (polvere,
polline, capelli etc.). Successivamente, l’ossigeno
attivo sterilizza i batteri e i virus rimasti intrappolati.
Il nanoltro cattura una vasta serie di gas dannosi
e odori. Successivamente, l’ossigeno attivo reagisce
Per evitare scosse elettriche e/o pericolo di
incendio, non far entrare nell’unità acqua o
altro liquido o detergente inammabile.
Per evitare scosse elettriche e/o pericolo di
incendio, non pulire l’unità con acqua o altro
liquido o con detergenti (inammabili).
Prima di collegare l’unità, vericare che il
voltaggio indicato sulla parte inferiore della
stessa corrisponda al voltaggio locale.
Non utilizzare l’unità se la spina, il cavo o
l’unità stessa sono danneggiati.
Questa unità non è destinata all’utilizzo da
parte di bambini o persone con capacità
siche, sensoriali o mentali ridotte oppure
prive di esperienza e di conoscenze.
Non ostruire l’ingresso e l’uscita dell’aria, ad
esempio collocando oggetti sull’uscita dell’aria
o davanti all’ingresso della stessa.
I bambini devono essere sotto la supervisione di
un adulto, per evitare che giochino con l’unità.
Quest’unità non è sostitutiva di una corretta
ventilazione, della regolare pulizia con
l’aspirapolvere o di una cappa o ventola da cucina.
Se i collegamenti della presa di corrente che
viene utilizzata non sono buoni, la spina del
prodotto si scalda. Collegare l’unità ad una
presa con collegamenti che funzionano in
modo corretto.
Posizionare e usare sempre l’unità su superci
asciutte, stabili e regolari.
Lasciare almeno 10 cm di spazio libero dietro
l’unità e da entrambi i lati.
Evitare di urtare l’unità (in particolare,
l’ingresso e l’uscita dell’aria) con oggetti duri.
Non inserire le dita o oggetti nell’uscita e
nell’ingresso dell’aria.
Non utilizzare questa unità in luoghi in cui si
usano repellenti per insetti che emettono fumo
oppure in presenza di residui oleosi, incenso
o fumi chimici.
Non utilizzare l’unità vicino ad apparecchi a
gas, dispositivi riscaldanti o caminetti.
Scollegare sempre l’unità dopo l’uso e prima di
procedere alla sua pulizia.
Non utilizzare l’unità in ambienti in cui si
vericano notevoli sbalzi di temperatura
o variazioni di umidità, dal momento che
ciò potrebbe causare condensa all’interno
dell’unità.
Non utilizzare l’unità in ambienti di dimensioni
maggiori o minori rispetto a quelle consigliate.
Le dimensioni consigliate per l’unità WS907
sono da 6 a 20 m².
Per evitare interferenze, collocare l’unità ad
almeno 2 m di distanza dagli elettrodomestici
che utilizzano onde radio, come televisione,
radio e orologi radiocontrollati.
L’unità è dotata di un dispositivo di sicurezza.
Se il nanoltro e il ltro lavabile per la polvere
non sono stati inseriti in modo corretto, non
sarà possibile accendere l’unità.
Se la qualità dell’aria interna è scarsa (ad
es. perché si è fumato, cucinato o dopo un
restauro), si consiglia caldamente di aprire
le nestre durante l’utilizzo dell’unità per
migliorare la circolazione dell’aria.
L’unità è destinata unicamente ad un uso
•
•
•
•
•
•
•
•
•
•
•
•
•
•
•
•
•
•
•
•
•
•
1
AVVERTENZE
con il nanoltro per puricare i gas e gli odori
catturati, in modo che il ltro si rinnovi. Inne, l’aria
depurata ritorna nella stanza dall’uscita dell’aria
situata sulla parte superiore.
È possibile che l’aria in uscita dall’unità si scaldi
durante il primo utilizzo. La cosa è normale, dal
momento che il materiale del nanoltro subisce
una lieve reazione con l’aria. Se questo fenomeno
si verica, dura soltanto una ventina di minuti.

domestico in condizioni normali di
funzionamento.
Non utilizzare l’unità in ambienti umidi o con
un’elevata temperatura ambiente, come
stanze da bagno o cucine.
L’unità non elimina il monossido di carbonio
(CO).
Conservare questo manuale per l’utente.
•
•
•
7.
8.
9.
10.
11.
12.
13.
14.
15.
16.
Copertura dell’uscita dell’aria
Blocco di sicurezza del nanoltro
Nanoltro
Unità principale
Sensore della qualità dell’aria
Copertura dell’ingresso dell’aria
Supporto del pre-ltro
Pre-ltro
Connettore DC
Indicatore luminoso della qualità dell’aria
PANORAMICA
VISTA ANTERIORE
Livello della qualità dell’aria (1-20)
Livello VOC totali
Controllare ltro e coperture
Modalità automatica
Velocità alta / bassa
Modalità silenziosa
1.
2.
3.
4.
5.
6.
DISPLAY LCD
2
5.
4.
3.
1.
6.
2.
1.
2.
6.
3.
4.
5.
CARATTERISTICHE
La tecnologia NCCO elimina i batteri e i
composti organici volatili (VOC) in modo
efcace
Il preltro cattura grandi particelle sospese
nell’aria
Nessuna emissione nell’aria di sostanze
chimiche e particelle pericolose
Sensore della qualità dell’aria con composti
organici volatili (COV) con visualizzazione del
livello della qualità dell’aria su una scala da 1
(migliore) a 20 (peggiore) nella parte superiore
Rilevatore LED della qualità dell’aria
fotosensibile che regola l’illuminazione
secondo l’ambiente
L’intensità automatica / alta / bassa del
ventilatore risucchia le particelle sospese
nell’aria e ne accelera il processo di
puricazione. La velocità del ventilatore può
essere regolata secondo la qualità dell’aria
Filtro a lunga durata (no a 3 anni)
Semplice sostituzione del ltro con blocco di
sicurezza per garantire la massima sicurezza
della copertura e del ltro
•
•
•
•
•
•
•
•
•
•
Display LCD
Pulsante della velocità del ventilatore
Pulsante accensione / spegnimento
Pulsante dell’indicatore luminoso della qualità
dell’aria
Uscita dell’aria
Sensore luminoso
1.
2.
3.
4.
5.
6.
OPERAZIONI PRELIMINARI
Inserimento del nanoltro
sono stati inseriti correttamente
nell’unità, non sarà possibile accendere
quest’ultima. Sul display LCD verrà
visualizzata la scritta “controllare filtro e
copertura”.
Non è possibile accendere l’unità se
le coperture del filtro non sono state
posizionate in modo corretto.
NOTA
7.
10.
11.
16.
8.
9.
12.
13.
14.
15.
IT

PULIZIA E MANUTENZIONE
3
1.
2.
3.
Inserire la spina nella corrente e collegare il
connettore DC all’unità.
Sul display LCD appare la luce di stand-by
e si avvia il conteggio regressivo del timer
del riscaldamento del sensore della qualità
dell’aria. Dopo circa cinque minuti, verrà
visualizzato il livello della qualità dell’aria (1-
20). L’indicatore luminoso sulla parte inferiore
si illumina in diversi colori a seconda della
condizione dell’aria: blu per una qualità buona,
verde per discreta e ambra per scarsa.
Premere i pulsanti per scegliere la funzione e
l’impostazione desiderata.
Pulsante della velocità del ventilatore :
per selezionare la velocità desiderata del ventilatore.
Sul display LCD appariranno le seguenti icone a
seconda della velocità:
= Automatica = Bassa
= Alta = Silenziosa
DEPURAZIONE DELL’ARIA
INDICATORE LUMINOSO DELLA QUALITÀ
DELL’ARIA
Inserire la spina nella corrente e collegare il
connettore DC all’unità.
Sul display LCD appare la luce di stand-by e
si avvia il conteggio regressivo del timer del
riscaldamento del sensore della qualità dell’aria.
Dopo due minuti si accende automaticamente il
ventilatore.
Ruotare in senso antiorario la copertura del
nanoltro ed estrarre delicatamente quella
dell’uscita dell’aria.
Spostare il blocco di sicurezza del nanoltro
sulla posizione di sblocco.
Rimuovere l’involucro del nanoltro, quindi
spingere quest’ultimo delicatamente nella
cartuccia del ltro con la freccia sulla parte
superiore rivolta verso l’unità.
Spostare il blocco di sicurezza del nanoltro
sulla posizione di blocco. Se la cartuccia è
stata posizionata in modo corretto, si dovrebbe
sentire uno schiocco.
Riposizionare la copertura del nanoltro.
Ruotare la copertura in senso orario no a
sentire uno schiocco e nché i puntini non si
allineano in verticale.
1.
2.
3.
4.
5. Il livello della qualità dell’aria verrà visualizzato
sul display LCD: da 1 (la qualità migliore) a 20
(la qualità peggiore).
Per interrompere la visualizzazione del livello
della qualità dell’aria, scollegare l’unità.
L’indicatore luminoso della qualità dell’aria si
accende dopo che il sensore della stessa si è
riscaldato per cinque minuti.
L’indicatore luminoso della qualità dell’aria
diventa dei seguenti colori: blu per una qualità
buona, verde per discreta e ambra per scarsa.
L’indicatore luminoso della qualità dell’aria
cambia gradazione di colore a seconda della
qualità dell’aria.
La luminosità (alta / bassa) dell’indicatore
luminoso della qualità dell’aria è controllata dal
sensore luminoso: quanto più l’illuminazione
dell’ambiente è forte / debole, tanto più
l’indicatore sarà luminoso / evole.
Scollegare sempre l’unità prima di procedere
alla sua pulizia.
Per evitare scosse elettriche e/o pericolo di
incendio, non pulire l’unità con acqua o altro
•
•
•
•
•
•
•
•
M ONITORAGGIO DELLA QUALITÀ DELL’ARIA
Modalità automatica: il sensore incorporato
dell’aria rileva la qualità dell’aria dell’ambiente e
seleziona automaticamente la velocità più adatta.
Modalità alta velocità: l’unità funziona a velocità
elevata
Modalità bassa velocità: l’unità funziona a velocità
ridotta
Modalità silenziosa: l’unità funziona a velocità
molto ridotta con una rumorosità estremamente
bassa che la rende adatta alla camera da letto.
Pulsante accensione / spegnimento :
per attivare / disattivare la funzione di depurazione
dell’aria, premere il pulsante di accensione /
spegnimento .
Pulsante dell’indicatore luminoso della qualità
dell’aria :
per accendere / spegnere l’indicatore luminoso
della qualità dell’aria , premere il relativo
pulsante.
IT

SOSTITUZIONE DEL FILTRO
4
1.
2.
3.
1.
2.
3.
4.
1.
2.
Ruotare delicatamente in senso antiorario
la copertura dell’uscita dell’aria e sollevarla
delicatamente.
Spostare il blocco di sicurezza del nanoltro
sulla posizione di sblocco.
Estrarre delicatamente il nanoltro
Ruotare delicatamente in senso antiorario
la copertura dell’uscita dell’aria e sollevarla
delicatamente.
Spingere delicatamente il nanoltro nella
cartuccia del ltro con la freccia sulla parte
superiore rivolta verso l’unità.
Spostare il blocco di sicurezza del nanoltro
sulla posizione di blocco. Se la cartuccia è
stata posizionata in modo corretto, si dovrebbe
sentire uno schiocco.
Riposizionare la copertura del nanoltro.
Ruotare in senso orario la copertura nché
non si sente uno schiocco.
Estrarre la copertura dell’ingresso dell’aria con
il pollice e il medio.
Estrarre la cartuccia dall’unità e rimuovere il
pre-ltro dal supporto.
In caso di utilizzo in un normale ambiente
domestico senza fumo e in caso di manutenzione
corretta (si veda il paragrafo “Pulizia e
manutenzione”).
liquido o con detergenti (inammabili).
Pulire regolarmente l’unità per evitare
l’accumulo di polvere e sporcizia.
Togliere la polvere dall’unità principale con un
panno morbido e asciutto.
Pulire l’ingresso e l’uscita dell’aria con un
panno morbido e asciutto.
Togliere i pre-ltri dall’unità prima di pulire
con acqua. Lasciare che il ltro si asciughi
completamente prima di reinserirlo nell’unità.
Pulire il nanoltro con un aspirapolvere o una
spazzola.
Togliere il nanoltro prima di procedere alla
pulizia con l’aspirapolvere.
Nanoltro
In caso di normale uso domestico in un ambiente
senza fumo e in caso di manutenzione corretta
(si veda il paragrafo “Pulizia e manutenzione”), il
nanoltro dura no a tre anni.
Nota può essere necessario sostituire il
nanoltro prima se si utilizza l’unità in un ambiente
più critico (ambiente con presenza di fumatori,
stanza appena restaurata, uso non domestico
etc.) e in caso di manutenzione insufciente.
Rimozione del ltro
Inserimento del ltro
Rimozione dei ltri
Nuovo ltro
•
•
•
•
1.
2.
3.
Estrarre la copertura dell’ingresso dell’aria con
il pollice e il medio.
Inserire correttamente il pre-ltro nell’unità.
Premere leggermente entrambi i lati della
copertura dell’ingresso dell’aria con il pollice
e il medio. Spingerlo verso l’unità con i segni
dell’unità principale e la copertura dell’ingresso
allineati, come nell’illustrazione seguente.
Inserimento dei ltri
NOTA
RISOLUZIONE DEI PROBLEMI
In questo paragrafo vengono riassunti i problemi
più comuni che si possono riscontrare durante
l’utilizzo dell’unità. Se non si è in grado di risolvere
il problema con le informazioni riportate di
seguito, contattare il Centro di Assistenza Clienti
del proprio paese.
Problema
L’unità non
funziona.
L’aria depurata non
esce liberamente
dall’uscita dell’aria.
Soluzione
Può trattarsi di un problema di
collegamento. Vericare che
la spina sia correttamente
collegata alla corrente.
I ltri non sono stati ancora
inseriti o non sono stati inseriti
in modo corretto. Inserire i ltri
e riposizionare le coperture
dell’ingresso e dell’uscita.
Forse non è stato tolto
l’involucro di plastica
dal ltro nuovo. Togliere
l’involucro di plastica e
riaccendere l’unità.
•
•
•
SPECIFICHE
TIPO
Peso
UNITÀ PRINCIPALE
L x P x H
DESCRIZIONE
150mm(L)x150mm(P)x325mm(H)
(5.9in x 5.9in x 12.8in)
1800g
Alimentatore DC da 12V:
ENTRATA 100-240V 50/60Hz
Alimentazione
IT

DICHIARAZIONE DI CONFORMITA’ UE
Oregon Scientic dichiara che questo prodotto
Sistema di depurazione dell’aria NCCO i.fresh
(Modello: WS907) è conforme alla direttiva EMC
89 / 336 / CE. Una copia rmata e datata della
Dichiarazione di Conformità è disponibile, su
richiesta, tramite il servizio clienti della Oregon
Scientic.
INFORMAZIONI SU OREGON SCIENTIFIC
Per avere maggiori informazioni sui nuovi prodotti
Oregon Scientic visita il nostro sito internet www.
oregonscientic.it , dove potrai trovare tutte le
informazioni di cui hai bisogno, o collegati a www.
oregonscienticstore.it.
Per ricerche di tipo internazionale puoi visitare
invece il sito www2.oregonscientic.com/about/
international.asp .
IT
Gli odori non
vengono eliminati
correttamente.
L’unità fa un
rumore insolito
(ad es. un sibilo,
uno sfrigolio o un
crepitio) durante il
funzionamento.
Forse la qualità dell’aria
dell’ambiente è molto
scarsa. In tal caso, aprire
le nestre per migliorare la
circolazione dell’aria.
Il nanoltro potrebbe essere
troppo sporco o essere
arrivato alla ne della sua
vita. Pulire il nanoltro
(si veda il paragrafo
“Pulizia e manutenzione”)
oppure procedere alla sua
sostituzione (si veda il
paragrafo “Sostituzione del
ltro”).
Forse l’ambiente è troppo
grande per l’unità. Usare
l’unità in un ambiente più
piccolo. Le dimensioni
consigliate sono da 5 a
20 m².
L’ingresso o l’uscita dell’aria
possono essere ostruiti da
oggetti esterni. Spostare
l’oggetto che ostruisce
l’ingresso o l’uscita dell’aria.
•
•
•
•
5


Puricateur d’air i.fresh à
technologie NCCO
Modèle : WS907
MANUEL DE L’UTILISATEUR
TABLE DES MATIERES
FR
Informations Importantes Relatives a la Securite .......
Introduction ........................................................
Fonctionnement du Puricateur D’air..................
Precautions ........................................................
Vue D’ensemble
Face Avant......................................................
Ecran LCD.......................................................
Fonctionnalites...................................................
AuCommencement.............................................
Depurazione Dell’aria.....................................
Controle de la Qualite D’air................................
Voyant Indicateur dela Qualite D’air...............
Entretien et Maintenance.....................................
Remplacement du Filtre.......................................
Caracteristiques..................................................
Depannage.........................................................
A Propos de Oregon Scientic............................
Europe - Déclaration de Conformité...................
1
1
1
1
2
2
2
3
3
3
3
4
4
4
4
5
5

EN UTILISANT DES PRODUITS ELECTRIQUES,
ET PARTICULIEREMENT EN PRESENCE
D’ENFANTS, VEUILLEZ TOUJOURS SUIVRE
LES PRECAUTIONS DE SECURITE DE BASE,
Y COMPRIS LES CONSIGNES SUIVANTES :
Veuillez lire toutes les instructions avant d’utiliser
l’appareil.
DANGER
MISE EN GARDE
FR
INTRODUCTION
F ONCTIONNEMENT DU PURIFICATEUR D’AIR
INFORMATIONS IMPORTANTES
RELATIVES A LA SECURITE
Nous vous remercions d’avoir acheté ce «
Puricateur d’air i.fresh à technologie NCCO
WS907 ». Ce manuel d’instructions contient
les informations pratiques sur l’utilisation et
l’entretien approprié de ce produit. Pour apprécier
ces fonctionnalités, veuillez lire entièrement
ce manuel avant la première utilisation et le
conserver pour toute rèrfèrence ultèrieure. Nous
vous recommandons de mettre l’appareil dans
une pièce où vous passez le plus clair de votre
temps et en prèsence de plantes et d’animaux.
Cet appareil commencera à contrôler la qualité de
l’air une fois mis sous tension. Il n’est pas équipé
de mode veille. Pour interrompre le contrôle de la
qualité de l’air, veuillez retirer l’adaptateur secteur
de la prise murale.
L’air pollué pénètre dans le puricateur par l’orice
d’entrée d’air. Une fois l’air dans le puricateur, le
pré-ltre retient les particules (poussières, pollen,
Ne laissez pas l’eau ou tout autre liquide ou
détergent inammable entrer dans l’appareil
pour empêcher les risques d’incendie et / ou
d’électrocution.
Ne nettoyez pas l’appareil avec de l’eau ou
tout autre liquide ou détergent (inammable)
pour éviter les risques d’électrocution et/ou
d’incendie.
Vériez si la tension indiquée au bas
de l’appareil correspond à la tension de
l’alimentation principale avant de le brancher.
Ne pas utiliser l’appareil si la prise, le cordon
d’alimentation ou l’appareil lui-même est
endommagé.
Cet appareil ne doit pas être utilisé par
des enfants ou des personnes souffrant
de déciences physiques, sensorielles ou
mentales, ou n’ayant pas l’expérience ou la
connaissance du produit.
N’obstruez pas les orices d’entrée ou
d’évacuation d’air, comme par exemple en
plaçant des objets sur l’évacuation d’air ou
devant l’entrée d’air.
Il est recommandé de surveiller les enfants
pour s’assurer qu’ils ne jouent pas avec
l’appareil.
Cet appareil n’a pas pour objectif de se
substituer à une ventilation, au nettoyage
régulier par aspirateur ou à l’utilisation d’une
hotte aspirante ou d’un ventilateur de cuisine.
Si les connexions de la prise murale utilisée
pour brancher l’appareil sont vétustes, la
prise de l’appareil chauffera. Assurez-vous de
brancher l’appareil dans une prise murale dont
les connexions sont appropriées.
Veuillez toujours placer l’appareil sur une
surface stable, à niveau et sèche.
Laissez environ 10 cm d’espace derrière et sur
chaque côté de l’appareil.
Evitez de cogner l’appareil (orices d’entrée
et d’évacuation d’air en particulier) avec des
objets durs.
Ne pas insérer les doigts ou des objets
étrangers dans les orices d’évacuation ou
d’entrée d’air.
Ne pas utiliser cet appareil si vous avez
récemment utilisé des fumigènes insecticides
ou des émanations chimiques, encens, ou
résidus huileux.
Ne pas utiliser l’appareil à proximité d’appareils
au gaz, de chauffages ou d’une cheminée.
Débranchez toujours l’appareil après
utilisation et avant de le nettoyer.
Ne pas utiliser l’appareil dans une pièce à
forte variation de température et d’humidité,
ce peut causer une condensation à l’intérieur
du produit.
Ne pas utiliser l’appareil dans une pièce plus
grande ou plus petite que la taille recommandée.
Le volume recommandé pour le modèle WS907
est compris entre 6 m² et 20 m².
Pour éviter les interférences, placez l’appareil
à au moins 2 m des appareils électriques
utilisant les ondes radio comme les téléviseurs,
radios et horloges radio-pilotées.
L’appareil est équipé d’une fonction de
sécurité. Si vous n’avez pas correctement
placé le nano ltre ou le ltre à poussière lavable,
•
•
•
•
•
•
•
•
•
•
•
•
•
•
•
•
•
•
•
•
1
PRECAUTIONS

cheveux, etc.). L’oxygène actif stérilise ensuite
les bactéries et les virus pris au piège. Le nano
ltre retient de nombreux gaz et odeurs nocifs.
L’oxygène actif réagit ensuite avec le nano ltre
pour nettoyer les gaz et les odeurs pris au piège,
pour que le ltre se régénère. L’air est enn
redirigé dans la pièce par l’orice d’évacuation
supérieur.
Lors de la première utilisation, l’air évacué de
l’appareil peut être légèrement chaud. C’est tout à
fait normal, les nano matériaux provoqueront une
légère réaction chimique en contact avec l’air. Si
tel le cas, cela devrait durer environ 20 minutes.
Other manuals for WS907
3
This manual suits for next models
1
Table of contents
Languages:
Other Oregon Scientific Air Cleaner manuals

Oregon Scientific
Oregon Scientific WS903 User manual

Oregon Scientific
Oregon Scientific WS907 User manual

Oregon Scientific
Oregon Scientific i.fresh Compact User manual

Oregon Scientific
Oregon Scientific WS908 User manual

Oregon Scientific
Oregon Scientific WS908 User manual

Oregon Scientific
Oregon Scientific WS904 User manual

Oregon Scientific
Oregon Scientific WS907 User manual

Oregon Scientific
Oregon Scientific CF-8410 User manual

Oregon Scientific
Oregon Scientific WS907 User manual

Oregon Scientific
Oregon Scientific IAD80014-FIL User manual