ORFELD ZM1513 User manual

CAREFULLY READ ALL INSTRUCTIONS BEFORE OPERATION
AND SAVE FOR FUTURE REFERENCE.


• The input voltage of this juicer is 220V~240V (50Hz). Please confirm the voltage in your socket before usage .
• Before dis-assembly, assembly or adjustment of any parts, please unplug the cord.
• The device is equipped with a “Y connection”. Should the cord be damaged or torn, please contact our customer service
for further assistance. Do not attempt to disassemble or repair without professional instructions.
• Please make sure the cord, plug, juice filter, spiral rod and all parts are not damaged before each use. For any damages,
please contact our customer service for further assistance. Do not attempt to disassemble or repair the juicer yourself.
Should repair or maintenance is required, please contact our customer service.
• Make sure the juicer, spiral rod, juicer top and all detachable parts are assembled as instructed before you plug in the juicer.
• Do not insert hands or sharp objects into the inlet when the juicer is turned on. Do not replace the spiral rod with any other
object. Ensure a safe distance is observed between your eyes and the ingredient inlet to prevent injuries.
• Prepare ingredients in sizes smaller than the ingredient inlet.
• Hard ingredients in fruits and vegetables (such as peach pits, hard seeds, thick rinds and shells) have to be removed before juicing.
• Push to ingredients into the juicer gently. Do not exert excessive force.

• Discoloration of juice filter, juicer top, spiral rod and any other parts may result from certain types of fruits
and vegetables. It would neither affect juice purity, nor harm your health.
• Equipped with an intelligent protective chip, the juicer would shut down automatically after 20 minutes. In the event, please take a
break for 20-30 minutes and restart the juicer after the motor has cooled down. Restarting immediately would affect its service life.
• A mechanism has been designed for current limit. Hence, the motor would be locked and the current would rise when a very hard
ingredient is juiced. When the current reaches 1.3A (or above), the motor would be alerted and shut down immediately, followed
by 3-5 seconds of reverse motion, and other shut down. Obstruction (of ingredients) would be discharged when the motor is reversing.
After the motor shuts down again, hit the ”O” button on the control panel.
• In the event of activation of current limit , locking of motor or failure of auto reverse, please hit the “O” button to turn off the juicer,
followed by the “ON” button to discharge the obstruction inside. Then, hit the “REV” button to reverse the juicer. If the motor is still locked,
please remove any obstruction in the spiral rod first before turning on the appliance again. This action aims to protect the motor.
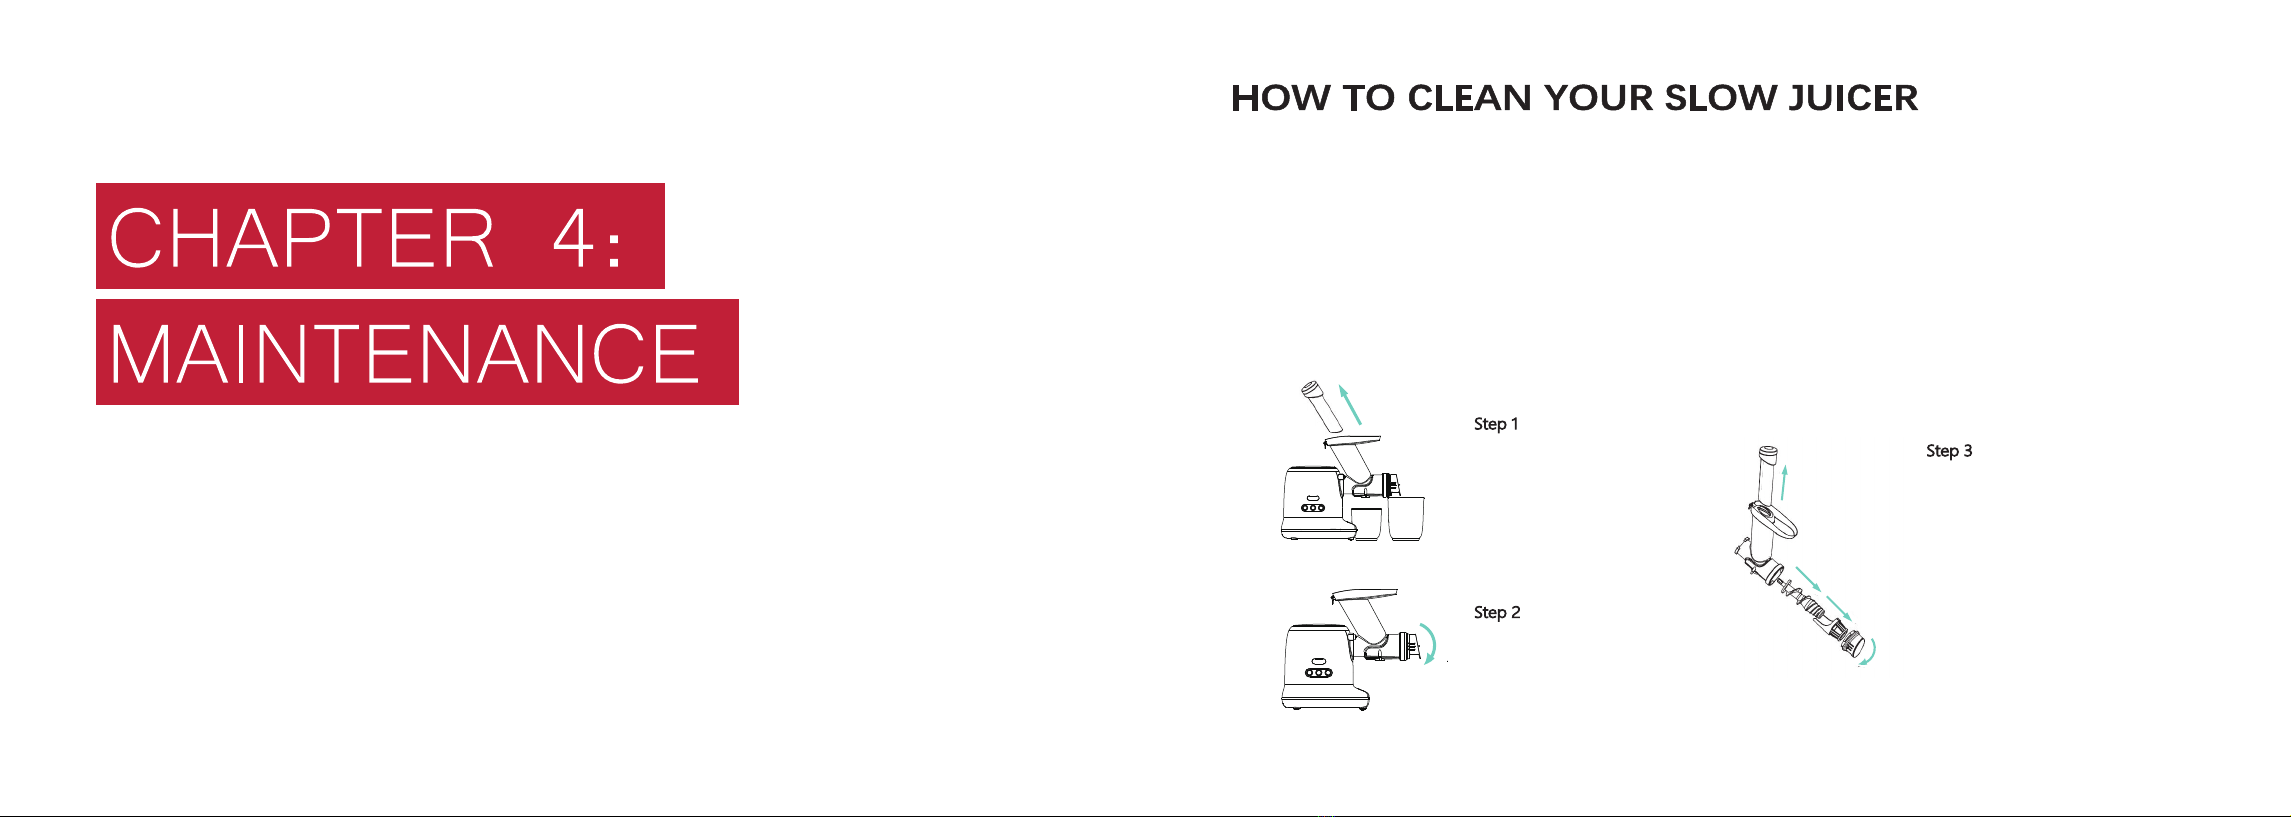
• After juicing, do not disassemble any parts with the cord plugged in. Make sure the motor and spiral rod has come to a completel
stop before dis-assembly.
• Do not sterilize any parts in hot water (80ºC/ 176ºF and above) or microwave oven. It would lead to permanent deformation and damage.
All surfaces/ sections in direct contact with ingredients should comply with food hygiene standards. Make sure they are clean and hygienic.
• Do not immerse the juicer body (with embedded motor and chip) in water or any otherany liquids. to prevent damages.
• Store this appliance out of reach of children. This appliance is not intended for use by children and persons with any physical,
sensory and mental disability. It is also not intended for use by persons lacking knowledge and experience unless they are under
close supervision and guidance.
• Do not clean the appliance with steel wool, abrasive cleaning agents or corrosive liquids (such as gasoline and acetone).
• Please make sure the appliance is disconnected from the power supply during assembly, dis-assembly and cleaning.
When children are left unattended, the appliance must be unplugged and stored out of reach.
Do not replace or touch moving parts
before the appliance is completely shut
down and unplugged.
Do not clean surfaces or parts that are
in contact with ingredients when the
juicer is plugged in.
Potential danger would arise if these safety instructions are not adhered to closely.
This portable appliance is designed for domestic and indoor use only.
Apart from the accessories, there is an instruction manual included as well.

Main body of juicer
Deliver power from power supply
Juicer body
Cord
PARTS FUNCTIONS
1
2

PARTS FUNCTIONS
Operating buttons ON, OFF (off/ pause), REV (reverse).
For securing of juicer body to prevent detachment during operation.
Main unit to juice ingredients. Feed ingredients through juicer inlet,
for respective extraction via juice outlet and residue outlet
Ingredients are crushed by spiral rod, and filtered before pure juice
is collected.
Main juicing tool to move, cut and smash ingredients.
Residue dispenser.
.Juice collection.
Residue collection.
For pushing ingredients queue,into contact with spiral rod,
to enhance extraction rate.
3
4
5
6
7
8
9
10
11

/
P
completed rebound.
Push the spiral rod straight into the jack in center of the conjunction inlet.
Gently adjust the spiral rod to meet the correct angle.
(The spiral rod is now latched onto the main body).
Push the filter into the conjunction inlet, Make sure the longer half passes
along the bottom of the inlet. The filter will remove all residue
to enhance juice purity.
Push and twist to install the residue outlet into appliance.
Note that the residue outlet should
face downwards.

Position the juice container
directly below the juice outlet.
Position the residue container
directly below the residue outlet
Plug in the appliance.
Make sure the SLOW JUICER
is at the ‘OFF’ position.
Hit the “ON” button to start
the juicer. Don’t run the appliance
for more than 10 minutes.
Feed prepared ingredients into t
he juicer inlet. Gently push
them with the push rod.
Prepare ingredients in small pieces
(ease of entry into the juicer inlet).

• Hit the “OFF” button to cut the power supply before cleaning.
• Clean immediately after each use.
• Do not flush rinse the appliance under running water or with any other liquids. Use a damp towel to get rid of
dirt. If the dirt is stubborn, use a warm towel.
TIPS ON HOW TO CLEAN YOUR SLOW JUICER.
FOLLOW THESE STEPS
FOR EASE OF MAINTENANCE.
Extract the push rod.
Remove the filter and,
the spiral rod. To disassemble
the juicer (“Z” part), please hold
the black button in the appliance
and simultaneously twist the
juicer till the “▼” mark meet
the “Unlocked” mark.
Twist to disassemble
the residue outlet.

SPECIFICATIONS PARAMETERS
Maximum Usage Duration
Interval Between Usage
SPECIFICATIONS
120V/220-240V
150W
50/60Hz
Table of contents