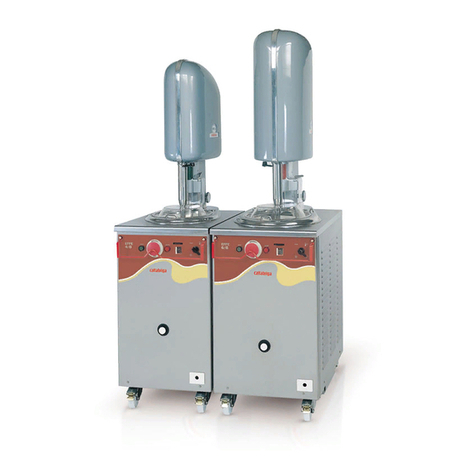
ORIGO ICM-02 User manual

軟雪糕機
為了使您能更瞭解本產品的性能和使用時的安全,請使用前務必詳細閱讀以下說明書並保留給將來翻閱。
各部名稱
1. 開關旋鈕
2. 主機體
3. 頂蓋
4. 攪拌槳
5. 內鍋
6. 固定圈
7. 外鍋
8. 固定扣
9. 雪糕出口組件
10. 材料注入口
11. 底座支架
12. 電源線及插頭
1
注意安全事項
1.
使用本產品前,請確定規格標貼上所示的額定電壓與當地供電電壓相同。如有疑問可向服務中心查詢。
2.
本產品只可以用附設的電源線使用。
3.
打開包裝,檢查產品。如發現產品有損壞,請勿使用及即時聯絡服務中心。
4.
為防止損害電源線,請勿把電源線掛放在檯邊上或接觸發熱的物體。
5.
請把插頭緊插於插座上,不可使用萬能插頭或拖板。
6.
本產品只供室內使用。
7.
請勿在本產品上自行加上產品不包括之組件,以免發生意外。
8.
切勿把本產品放置於火爐或發熱的物體附近。
9.
如需移動使用中的雪糕機,應倍加注意安全。
10.
手部、頭髮、衣服、抹刀及其他餐具應遠離使用中的雪糕機,以免發生意外。
11.
清洗或不使用本產品時,請先拔除電源線後,方可清洗。
12.
為免凍傷,從冰箱取出內鍋時應先戴上手套保護。
13.
切勿將雪糕機主機體浸於水或其他液體中,以免引起火災或漏電,導致受傷。
14.
如本產品的電源線有損壞痕跡,為保障安全,請立即停止使用並聯絡供應商或代理商或合資格人員作更換。
: ICM-02
: 220-240伏特~, 50赫茲
: 18瓦特
: 1.2公升
型號
電壓
功率
容量
提示
本機不是為體質、感覺或智力有障礙人士(包括小孩)或缺乏經驗及知識者使用,除非他們曾經接受負責安全人士
的監督或指示。
大人應指導小孩不可把玩電器。

使用前準備
1. 先拿出全部配件(主機體除外),以濕潤毛巾清潔。
2. 使用前請確保已拆除所有包裝物料。
3. 請確定規格標貼上標示的額定電壓與當地供電電壓相同。如有疑問可向服務中心查詢。
4. 請將已組裝完成的內鍋放入零下18 C以或以下的冰箱內八小時。
5. 將已準備完成的雪糕或雪芭材料混合物放入冷藏箱內降溫。
使用方法
1. 將內鍋安裝在固定圈上,把兩個凹槽與緊固扣對正後逆時針方向旋轉,把兩者鎖緊。將已組裝完成的內鍋
放入零下18 C以或以下的冰箱內最少八小時。若冰箱高度不足,可以不安裝固定圈,只放入內鍋亦可。
2. 將外鍋安裝在底座支架上。
3. 將已裝上固定圈的內鍋放入外鍋內,確定固定圈的扣與外鍋的缺口對正及扣緊,內鍋穩固地安裝在外鍋
內。確保內鍋在雪糕機工作時不會移位。
4. 將主機體安裝在頂蓋上。
5. 將攪拌槳插入主機體內。
6. 將已組合的主機體、頂蓋及攪拌槳放入鍋內. 將頂蓋的3個扣與固定圈上的3個缺口對正後順時針方向旋轉
,把兩者鎖緊。
7. 將雪糕出口組件安裝在外鍋底部。
8. 在加入雪糕或雪芭材料混合物前,請先確定雪糕出口已關上。
9. 接上電源並啟動雪糕機。
在加入雪糕或雪芭材料混合物前,必須先啟動雪糕機。以防止材料混合物接觸冰凍內鍋而立即凝固。
10. 從材料注入口注入雪糕或雪芭材料混合物,注意注入的材料混合物份量不可超過內鍋頂邊對下4厘米水平
,因材料混合物在攪拌及凝固過程中體積會膨漲增大。
11. 攪拌及凝固至所需狀態,大約需時30分鐘。
在攪拌及凝固過程中,切勿中途關機後再開機。因材料混合物在關機後會立即凝固並粘附於內鍋壁上,
這樣是會阻礙攪拌槳的轉動。
為防止電機過熱,本產品設有安全自動關閉電機系統。當遇上自動關閉電機情況,請立即關機及拔掉插
頭,讓電機溫度下降後才可重新啟動。
12. 當雪糕製作完成,把盛載器皿放於雪糕出口下端,打開雪糕出口,把雪糕擠出。
請緊記在擠出雪糕的同時,保持攪拌槳的轉動。
請勿使用金屬餐具掏出雪糕,因金屬餐具會刮花內鍋內壁表面。
13. 剩下在雪糕機內的雪糕,請用膠刮把雪糕掏出,然後把容器放入冷藏箱(這雪糕,不能再用雪糕機
擠出軟雪糕)。
2
提示
1. 將內鍋放入冰箱前,可先用膠袋包好,並保持直立放置。
2. 將內鍋放入冰箱前,請確定內鍋完全乾透。
3. 請勿將內鍋加熱或穿刺。
4. 為得到最佳效果,請將材料預先放入冷藏箱降溫。加入含酒精的材料是會抑制凝固過程。
o
o

3
推薦食譜
牛奶雪糕
材料:牛奶 - 220ml, 淡忌廉 - 250ml, 白沙糖 - 85g
製作方法:
1. 把淡忌廉放在其他器皿(不要用本機內鍋)內手動撥打約10分鐘或至粘稠狀態。
2. 將牛奶、白沙糖及粘稠狀淡忌廉混合攪拌均勻。將材料混合物放入冷藏箱降溫至5 -10 C。
3. 啟動雪糕機,將已降溫的材料混合物從材料注入口注入內鍋。
4. 將已降溫的材料混合物攪拌及凝固至所需狀態。攪拌開始後12 - 15分鐘後每隔數分鐘檢查粘稠度是否
已達至自己所需。
5.
製成品的最佳效果應為軟雪糕狀態,雪糕較容易從雪糕出口擠出 (如太硬,軟雪糕便不能擠出)。
香蕉雪糕
材料:香蕉 - 160g, 牛奶 - 140ml, 淡忌廉 - 175ml, 白沙糖 - 55g
製作方法:
1. 將香蕉去皮。
o
2. 把淡忌廉放在其他器皿(不要用本機內鍋)內手動撥打約10分鐘或至粘稠狀態。
3. 將香蕉、牛奶、白沙糖及粘稠狀淡忌廉混合攪拌均勻。將材料混合物放入冷藏箱降溫至5 -10 C。
4. 啟動雪糕機,將已降溫的材料混合物從材料注入口注入內鍋。
5. 將已降溫的材料混合物攪拌及凝固至所需狀態。攪拌開始後12 - 15分鐘後每隔數分鐘檢查粘稠度是否
已達至自己所需。
6. 製成品的最佳效果應為軟雪糕狀態,雪糕較容易從雪糕出口擠出 (如太硬,軟雪糕便不能擠出)。
o
芒果雪糕
材料:芒果 - 190g, 牛奶 - 140ml, 淡忌廉 - 170ml, 白沙糖 - 50g
製作方法:
1. 將芒果去皮,取出果肉。
2. 把淡忌廉放在其他器皿(不要用本機內鍋)內手動撥打約10分鐘或至粘稠狀態。
3. 將芒果、牛奶、白沙糖及粘稠狀淡忌廉混合攪拌均勻。將材料混合物放入冷藏箱降溫至5 -10 C。
4. 啟動雪糕機,將已降溫的材料混合物從材料注入口注入內鍋。
5. 將已降溫的材料混合物攪拌及凝固至所需狀態。攪拌開始後12 - 15分鐘後每隔數分鐘檢查粘稠度是否
已達至自己所需。
6. 製成品的最佳效果應為軟雪糕狀態,雪糕較容易從雪糕出口擠出 (如太硬,軟雪糕便不能擠出)。
o
草莓雪糕
材料:草莓 - 220g, 牛奶 - 115ml, 淡忌廉 - 140ml, 白沙糖 - 75g
製作方法:
1. 將草莓果肉打碎或切成幼粒。
2. 把淡忌廉放在其他器皿(不要用本機內鍋)內手動撥打約10分鐘或至粘稠狀態。
3. 將芒果、牛奶、白沙糖及粘稠狀淡忌廉混合攪拌均勻。將材料混合物放入冷藏箱降溫至5 -10 C。
4. 啟動雪糕機,將已降溫的材料混合物從材料注入口注入內鍋。
5. 將已降溫的材料混合物攪拌及凝固至所需狀態。攪拌開始後12 - 15分鐘後每隔數分鐘檢查粘稠度是否
已達至自己所需。
6. 製成品的最佳效果應為軟雪糕狀態,雪糕較容易從雪糕出口擠出 (如太硬,軟雪糕便不能擠出)。
o

4
清理及維護
1.
清洗本產品前請先拔掉電源。
2.
切勿將雪糕機主機體浸於水或其他液體中。
3.
請用濕軟布團擦拭主機體表面,如有難以擦拭的污垢,可使用日用的洗潔精進行擦拭。內鍋、頂蓋、
攪拌槳
及其他配件可以直接放入水中清洗。
4.
切勿使用帶腐蝕性的清潔劑或溶液,也不宜使用鋼絲球類狀物進行磨擦。
保用
本機可獲自領取日起
1
年免費保用(商業用途只享有三個月免費保用)。此保用只包含生產所導致的品質問
題;並不包含機殼及其他附件,及因誤用或不依說明書指示使用而導致的損壞。
***額外3個月保用: 凡於購買產品後10天內完成網上登記,即可免費延長保用期3個月,即15個月免費保
用(商業用途除外)。請即登入網站 : www.origo.hk
服務中心
源澤市務有限公司
香港新界葵涌青山公路403號
匯城集團大廈21樓H室(近華星街12號)
電話 :2156 8238
辦公時間
上午10:30 - 下午12:30 (星期一至五)
下午02:30 - 下午05:30 (星期一至五)
上午10:30 - 下午12:30 (星期六)
(星期日及公眾假期休息)
源澤地圖
注意:保用時,須帶同收據及先致電服務中心。

Soft Ice-cream Maker
Thank you for your purchase of our Soft Ice-cream Maker. To use the Soft Ice-cream Maker properly
and safely, please read the following instruction carefully. Appropriately keep it for future reference
when necessary.
MODEL & SPECIFICATION
Model
Voltage
Power
Capacity
: ICM-02
: 220-240V~50Hz
: 18W
: 1.2L
MAIN PARTS
1. On/Off Knob
2. Main Unit
3. Lid
4. Paddle Unit
5. Inner Tank
6. Fastening Loop
7. Outer Tank
8. Fastening Buckle
9. Outlet Pedestal unit
10. Filling Chute
11. Supporter
12. Power Cord & Plug
1
IMPORTANT SAFETY INFORMATION
1. Before using the appliance, check if the voltage marked on the rating label corresponds to the
mains in your home.
2. This appliance can only use with the attached power cord.
3. Open the package and ensure that the appliance is undamaged. In case of doubt, do not use and
contact the service centre.
4. Do not hang the power cord on the edge of table or touch the surface with high temperature in
order to avoid damage the power cord.
5. The power cord must be closely plugged into the outlet. Do not plug into multi-sockets with other
appliances.
6. Do not use the appliance outdoor.
7. Do not use parts that are not provided by recommended manufacturer as to avoid happen
accident.
8. Do not place the Cooker on or near gas stove or electric stove.
9. Pay attention when you are moving the ice-cream maker during operation.
10. Avoid contact with moving parts. Keep hands, hair, clothing, spatulas, and other utensils away
during operation.
11. To avoid danger of electric shock, unplug from outlet when not in use and before cleaning.
12. To prevent freezer burn, always ensure that hands are protected when handling the inner tank
from the freezer.
13. Do not dip the main unit into water or other liquid as to avoid accident.
14. If the power cord is damaged, it must be replaced and repaired by service centre.
REMINDER
This appliance is not intended for use by persons(including childen) with reduced physical, sensory or
mental capabilities, or lack of experience and knowledge, unless they have been given supervision or
instruction concerning use of the appliance by a person responsible for their safety. Children should
be supervised to ensure that they do not play with the appliance.

PREPARATION BEFORE USE
1. Take out all the parts (except main unit) and clean with a soft damp cloth.
2. Make sure that all packing materials are removed before use.
3. Before using the product, check if the volatage marked on the rating label corresponds to the
mains at your home.
4. Place the installed inner tank into a freezer at least Eight hours that is operating at a temperature
of -18 C or below.
5. Prepare the ice-cream or sorbet mix (see recipe) and place the mixture to cool in the refrigerator.
OPERATIONS
1. Install the inner tank into the fastening loop, let the two grooves match up to the fastening buckle
and rotate it anticlockwise to fasten. Place the installed inner tank into a freezer at least 8
hours that is operating at a temperature of -18 C or below. If the inner space of freezer is not high
enough, only place the inner tank into freezer.
2. Install the outer tank onto the supporter. It will insert into place.
3. Place the installed inner tank into the outer tank. Make sure the buckle at the back side of the
fastening loop match up to the notch on the back top of the outer tank and the inner tank is installed
properly and stably. The inner tank will be fastened and will not move when the maker is working.
4. Install the main unit into the lid. it will click into place.
5. Install the paddle into the power unit.
6. Place the assembled lid, main unit and paddle onto the tank. Let the 3 buckles of the lid match up
to the grooves of the loop and turn clockwise to lock into position.
7. Install the outlet pedestal unit is in the middle position.
8. Be sure of the outlet pedestal unit is shut off before adding the ice-cream or sorbet mixture.
9. Plug in and switch on the ice-cream maker.
THE MACHINE MUST BE SWITCHED ON BEFORE ADDING THE ICE-CREAM OR SORBET
MIXTURE TO PREVENT THE MIXTURE IMMEDIATELY FREEZING ON THE INSIDE OF THE
INNER TANK.
10. Pour the mixture into the inner tank though the filling chute. Always stop at least 4 cm from the top
of the inner tank, as the mixture will increase in volume during freezing.
11. Allow the mixture to churn until frozen or the desired consistency is reached. This can take up to
to 30 minutes.
Do not stop and start the machine during the freezing process, as the mixture may freeze in
contact with the tank and prevent movement of the paddle.
To prevent the motor overheating, the motor will be stopped automatically by a safety cut off
system. If this happens, switch off and unplug the machine to cool down the motor.
12. When the ice-cream is ready, place a bowl under the outlet pedestal unit. Open the outlet pedestal
unit and squeeze out the ice-cream.
The motor must be running during squeeze out the ice-cream.
Do not use metal utensils to remove ice-cream from the inner tank.
13. If the ice-cream is too hard, it cannot be dispensed from the machine. Use rubber spatula to take
out the rest and put inside refrigerator (it cannot be re-dispensed from the machine).
2
HINTS
1. Keep the inner tank in the freezer in the urpright position. Place the inner tank in a plastic bag
before freezing.
2. Make sure the inner tank is thoroughly dry before freezing.
3. Do not puncture or heat the inner tank.
4. For best results, alwarys refrigerate the ingredients before making ice-cream.
The addition of alcohol to receipes inhibits freezing process.
o
o

3
RECIPES
MILK ICE-CREAM
Ingredients: Pure milk - 220ml, Whipping cream - 250ml, White sugar - 85g
Method:
1. Manually stir the whipping cream for 10 minutes, or until sticky status (DON'T use inner tank).
2. Mixing the whipping cream, pure milk and white sugar. Then place mixture in refrigerator and
cool down to 5 -10 C.
3. Switch on the ice-cream maker and the pour the mixture into the inner tank.
4. Let the ice-cream churn and freeze in the ice-cream maker until it has reached the desired
consistency. Checking after 12 - 15 minutes and then every few minutes until it is thick enough.
5. For best results, the consistency should be soft type, so that it can easily be dispensed from the
outlet or spooned out of the tank. If it is too hard, it cannot be dispensed from the machine.
BANANA ICE-CREAM
Ingredients: Ripe banana - 160g, Pure milk - 140ml, Whipping cream - 175ml, White sugar - 55g
Method:
1. Mash the banana.
2. Manually stir the whipping cream for 10 minutes, or until sticky status (DON'T use inner tank).
3. Mixing the whipping cream, mashed banana, pure milk and white sugar. Then place mixture in
refrigerator and cool down to 5 -10 C.
4. Switch on the ice-cream maker and the pour the mixture into the inner tank.
5. Let the ice-cream churn and freeze in the ice-cream maker until it has reached the desired
consistency. Checking after 12 - 15 minutes and then every few minutes until it is thick enough.
6. For best results, the consistency should be soft type, so that it can easily be dispensed from the
outlet or spooned out of the tank. If it is too hard, it cannot be dispensed from the machine.
MANGO ICE-CREAM
Ingredients: Mango - 190g, Pure milk - 140ml, Whipping cream - 170ml, White sugar - 50g
Method:
1. Mash the mango.
2. Manually stir the whipping cream for 10 minutes, or until sticky status (DON'T use inner tank).
3. Mixing the whipping cream, mashed mango, pure milk and white sugar. Then place mixture in
refrigerator and cool down to 5 -10 C.
4. Switch on the ice-cream maker and the pour the mixture into the inner tank.
5. Let the ice-cream churn and freeze in the ice-cream maker until it has reached the desired
consistency. Checking after 12 - 15 minutes and then every few minutes until it is thick enough.
6. For best results, the consistency should be soft type, so that it can easily be dispensed from the
outlet or spooned out of the tank. If it is too hard, it cannot be dispensed from the machine.
STRAWBERRY ICE-CREAM
Ingredients: Strawberries - 220g, Pure milk - 115ml, Whipping cream - 140ml, White sugar - 75g
Method:
1. Mash the strawberries.
2. Manually stir the whipping cream for 10 minutes, or until sticky status (DON'T use inner tank).
3. Mixing the whipping cream, mashed strawberries, pure milk and white sugar. Then place mixture in
in refrigerator and cool down to 5 -10 C.
4. Switch on the ice-cream maker and the pour the mixture into the inner tank.
5. Let the ice-cream churn and freeze in the ice-cream maker until it has reached the desired
consistency. Checking after 12 - 15 minutes and then every few minutes until it is thick enough.
6. For best results, the consistency should be soft type, so that it can easily be dispensed from the
outlet or spooned out of the tank. If it is too hard, it cannot be dispensed from the machine.
o
o
o
o

4
GENERAL CLEANING & CARE
1. Always unplug from the mains supply before cleaning.
2. Do not immerse the main unit in water or other liquid.
3. Clean the main unit with soft cloth that has has been dampened with warm soapy water. Clean the
inner tank, lid, paddle and accessories in water directly.
4. DO NOT use hard brush or scratchy materials for the cleaning purpose. DO NOT use gasoline,
benzene, thiner harsh cleaners, etc, as they will damge the appliances. NEVER use ALCOHOLor
any other SOLVENTS
WARRANTY
This product is guaranteed for 1 year (commercial use for 3 months) from the date of receipt against
manufacturing defect. The warranty does not cover the housing and other accessories, damage or
defect caused by negligence or use not according to this instruction manual.
***Extra 3 months warranty: just complete Online Warranty Registration within 10 days
from the date of receipt, free warranty will be extended to 15 months (not applicable to
commercial use). Please enter our website: www.origo.hk
Remark: For any repair service, please contact and bring with the invoice or receipt to the Service
Centre.
SERVICE CENTRE
ORIGIN MARKETING LIMITED
Unit H, 21/F., Reason Group Tower
(nearby 12 Wah Sing Street),403 Castle Peak Road,
Kwai Chung, N.T., Hong Kong.
Tel: 21568238
OFFICE HOUR
10:30am - 12:30pm (Mon ~ Fri)
02:30pm - 05:30pm (Mon ~ Fri)
10:30am - 12:30pm (Sat)
(Closed on Sunday and Holiday)
ORIGIN MAP
Table of contents