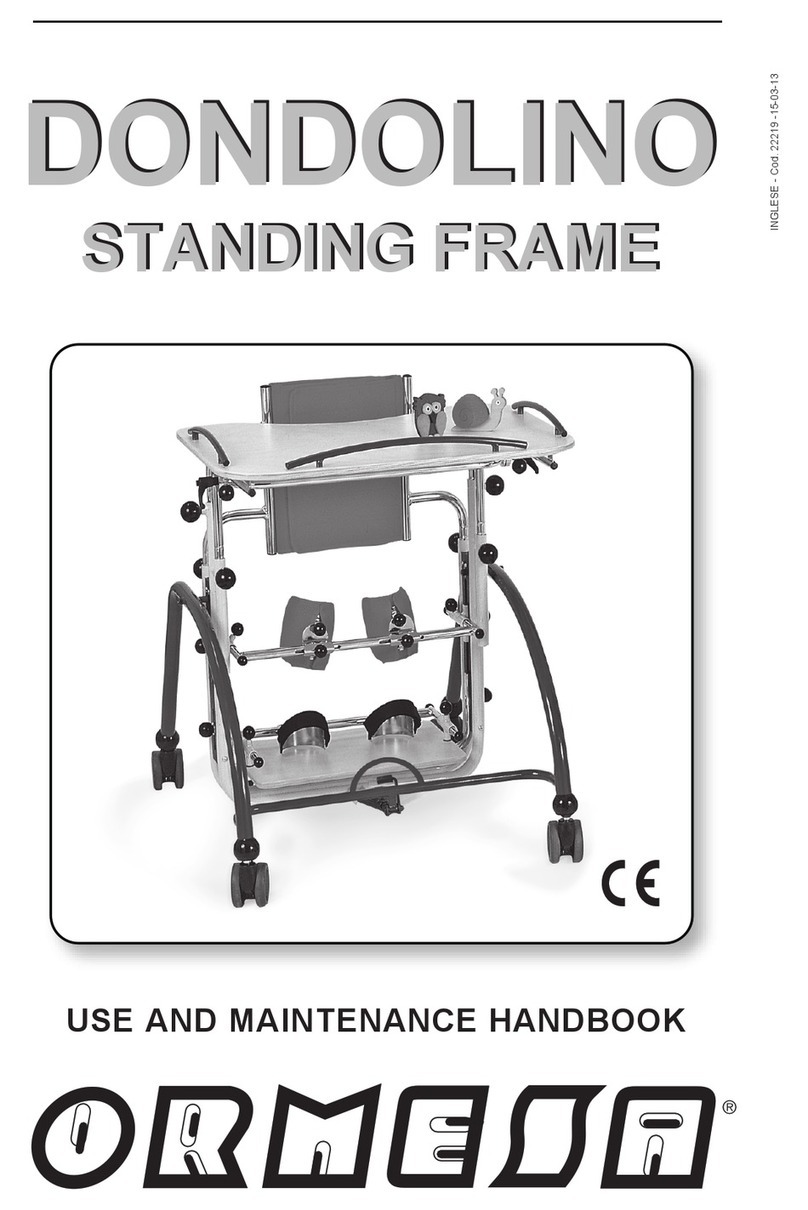
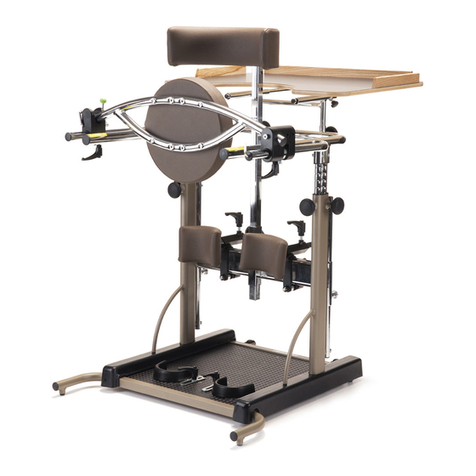
Ormesa MINI STANDY Manual

USE AND MAINTENANCE HANDBOOK
USA - cod. 22626 - 13-06-18
STANDING FRAME
MINI STANDY
STANDING FRAME
MINI STANDY


Pagina 1 di 36
ORMESA thanks you for the confidence placed in choosing our MINI STANDY standing
frame.
MINI STANDY is a standing frame where the attention to its functionality unites with the re-
spect of
ergonomic and safety principles.
ORMESA then suggests you to read this handbook very careful to fully understand its
contents. It will help you in becoming familiar with MINI STANDY soon and more effica-
ciously, and you will also find many practical advices to use it safely and in the best possible
way and to keep it perfectly efficient.
Following our advice we’ll help you in reaching the rehabilitation aim this aid has been de-
signed for.
Luigi Menichini
Managing Director
If, after reading it, you still have questions, contact your retailer, who will be happy to help you,
or call INNOVATION IN MOTION directly at 1.260.665.2769, send a fax to 1.260.665.3047 or

Pag. 2 / 36
INDEX
WARNINGS ...................................................................................................................... 4
GUARANTEE.................................................................................................................... 6
HOW TO STORE AND TRANSPORT THE MEDICAL DEVICE....................................... 6
LABELS AND PLATES .................................................................................................... 7
SOME EXAMPLES OF WHAT SHOULDN’T BE DONE WHILE USING MINI STANDY . 7
HOW IT IS COMPOSED................................................................................................... 8
TECHNICAL SPECIFICATIONS....................................................................................... 8
DIMENSIONS of MINI STANDY....................................................................................... 9
WHAT MINI STANDY IS AND WHAT IT IS FOR.............................................................. 10
HOW MINI STANDY WORKS.......................................................................................... 11
INITIAL PREPARATION................................................................................................... 12
HOW TO ASSEMBLE MINI STANDY............................................................................... 13
HOW TO ADJUST MINI STANDY.................................................................................... 14
HOW TO BRAKE MINI STANDY................................................................................... 15
Adjustment of the HEELRESTS in WIDTH.................................................................... 16
Adjustment of the HEELRESTS in DEPTH ................................................................... 17
Adjustment of the KNEEPADS in WIDTH...................................................................... 18
Adjustment of the KNEEPADS in DEPTH..................................................................... 19
Adjustment of the KNEEPADS in HEIGHT.................................................................... 20
Adjustment of the KNEEPADS in a ROTATORY WAY ................................................. 21
ADJUSTMENT of the TRUNK and PELVIC SUPPORT in its CIRCUMFERENCE........ 22
ADJUSTMENT of the PELVIC SUPPORT in HEIGHT.................................................. 23
ADJUSTMENT of the TRUNK SUPPORT in HEIGHT................................................... 24
ADJUSTMENT of the TRAY in HEIGHT........................................................................ 25

Pag. 3 / 36
ADJUSTMENT of the TRAY in DEPTH......................................................................... 26
ADJUSTMENT of the TRAY in TILT.............................................................................. 27
MOUNTING OF ACCESSORIES...................................................................................... 28
HEADREST 865................................................................................................................ 28
CIRCUMFERENCE REDUCTION PARTS 944................................................................. 33
MAINTENANCE, CLEANINGAND DISINFECTION OF MINI STANDY........................... 34
CUSTOMER SERVICE AND SPARE PARTS.................................................................. 35
CONDITIONS FOR DURABILITY, REUSE AND REASSIGNMENT TO A NEW USER.. 36

Pag. 4 / 36
WARNINGS
-CAREFULLY READ AND UNDERSTAND THE INSTRUCTIONS IN THIS MANUAL
BEFORE USING THE DEVICE BECAUSE THEY HAVE BEEN WRITTEN WITH THE
USER'S SAFETY IN MIND and they will help the carer use the product safely and
keep it in good working order. The Use and Maintenance Manual is an integral part of
the product and must be carefully preserved for future reference.
-THE MANUAL IS INTENDED FOR TECHNICALLY QUALIFIED RETAILERS AND
FOR USERS AND THEIR ASSISTANTS; it provides instructions for using the product
correctly and must be supplemented by adequate knowledge of the rehabilitation pro-
gram for which it has been prescribed.
-
The manual reflects the technical state of the product at the time it was sold.
ORMESA RESERVES THE RIGHT TO MAKE ANY CHANGES TO THE PRODUCT
OR MANUAL suggested by experience, technical considerations or regulatory devel-
opments without any obligation to update its previous production and relevant manuals.
-MINI STANDY must be prescribed by a MEDICAL SPECIALIST who will also super-
vise its use.
-The effective use of MINI STANDY requires training by SPECIALIZED PERSON-
NEL such as ORTHOPAEDIC TECHNICIANS, THERAPISTS OR DOCTORS.
-ATTENTION!: ADJUST MINI STANDY to the CORRECT POSITION for its use (see.
§ «HOW TO ADJUST MINI STANDY DJ»page 14)
-ATTENTION!: after making any type of adjustment MAKE SURE that ALL AD-
JUSTABLE PARTS ARE LOCKED, in order to avoid any possible danger to the User (see.
§ «HOW TO ADJUST MINI STANDY »page 14)
-MIMI STANDY must only be used by persons whose bodily measurements and
weight conform to the specifications in the paragraph “TECHNICAL SPECIFICA-
TIONS” on page 9
-MINI STANDY is only for INDOOR USE
-MINI STANDY must be used with the assistance and constant presence of quali-
fied personnel or a family member.
-ATTENTION!: THE PRODUCT IS NOT FIREPROOF, so keep MINI STANDY far from
flames, cigarettes or fires.

Pag. 5 / 36
MINI STANDY IS A MECHANICAL MEDICAL
DEVICE:
Perform
REGULAR MAINTENANCE
and
CLEAN-
ING following the instructions shown in the "Main-
tenance" chapter on page 34-35 and HAVE THE DE-
VICE INSPECTED AT THE INTERVALS INDI-
CATED to VERIFY that it is WORKING PROPERLY
and in GOOD CONDITION, otherwise warranty will fail
and marking will lapse
PRODUCT
REPAIRS
other than the regular mainten-
ance shown on page 34-35 of the manual must be
ONLY MADE by a SPECIALIZED SERVICE CEN-
TER in the maintenance of mechanical aids for dis-
ables, otherwise warranty and marking will be
voided
Any CHANGES in the product and the REPLACE-
MENT WITHOUT ORIGINAL PARTS OR COM-
PONENTS ARE NOT AUTHORIZED. REFER ONLY
TO ORMESA, otherwise warranty and marking will
be voided
In case of
DOUBT
about the
SAFETY
of the product
or DAMAGE to parts or components, you are urged
to IMMEDIATELY DISCONTINUE USE and CON-
TACT a SPECIALIZED SERVICE CENTER in the
maintenance of mechanical aids for disables, or di-
rectly ORMESA.

Pag. 6 / 36
GUARANTEE
ORMESA will not be liable for damage in the following cases:
-use by an unsuitable person;
- incorrect assembly of parts or accessories;
-unauthorized modifications or service;
- use of other than original replacement parts and parts subject to wear (upholstery, wheels, etc);
- improper use (such as, transporting objects or loads larger or heavier than those shown in the
instruction manual);
-damage caused by incorrect use and lack of regular maintenance, as shown in the instruction
manual;
- exceptional events;
- failure to follow the instructions in this manual.
THE GUARANTEE DOES NOT COVER WEAR PARTS, which are subject to wear
and tear, such as the upholsteries and the wheels.
HOW TO STORE AND TRANSPORT THE MEDICAL DEVICE
TORE AND TRANSPORT THE MEDICAL DEVICE
THE DEVICE MUST BE STORED AND PACKED using the Ormesa original packag-
ing materials, unless the guarantee willbe voided
Once unpacked, THE TRANSPORT OF THE DEVICE must be done by ANCHORING
ADEQUATELY it to the vehicle
When travelling by plane, or in the car, DO NOT SUBJECT THE FOLDED FRAME TO
LOADS THAT, especially with road bumps, COULD DAMAGE ITS STRUCTURE
THE DEVICE MUST BE PARKED / STORED IN CLOSED AND DRY PLACES
The operating environment has no particular influence on the device unless it is
used incorrectly, such as by leaving it parked for a long time in direct sunlight or
exposed to bad weather such as rain, or in marine environments, where the salt air
could corrode the paint and sliding parts. In this case, we recommend carefully
cleaning and drying the frame following the instructions shown in the “Mainten-
ance, Cleaning and Disinfection” chapter on pages 34-35 AND THE WARNINGS
ON PAGE 34
ORMESA and INNOVATION IN MOTION warrant the product for 2 years; in case of
problems, contact the retailer where you purchased it. Always ask for original spare parts,
otherwise the guarantee will decline

Pag. 7 / 36
LABELS AND PLATES
THE MARKING CERTIFIES THAT MINI STANDY IS IN CONFORMITY WITH THE SAFETY
STANDARDS FIXED BY THE EUROPEAN COMMUNITY, AND PARTICULARLY WITH THE
93/42/EEC AND SUBSEQUENT MODIFICATION AND SUPPLEMENTS.
SOME EXAMPLES OF WHAT SHOULDN’T BE DONE WHILE
USING MINI STANDY
-MINI STANDY has to beused by those children whose bodily size and weight are
just like the ones we specify: it has to be prescribed by a specialized doctor ac-
cording to the laws, standards and rules in force
-Never put the aid on a slope
-Never lift the standing frame in order to move it while the Useris using it
-Don’t put anything too hot on the tray because the wood or covering could be
hardly damaged
-Don’tlet other people use the aid, not even to play with it
-In order to adjust the parts while the user is using it scrupulously follow the pa-
ragraph § “HOW TO ADJUST MINI STANDY ” on page 14 of the Use and Mainten-
ance Handbook
-Never leave the user alone on the aid
-MINI STANDY has not been designed for the outdoor use unless it is on flat
paved ground, well sheltered from bad weather
-Never leave the aid under the sun for a long time or near heat sources. This will
avoid its overheating and the discoloration of the padded parts
-Never use the product if there are damaged or missing parts
-Always ask for original spare parts, on the contrary the guarantee decays and
ORMESA will be no more responsible for the product
Series number Article number
Max load
Date of
production
Warning! Read the
use and maintenance
handbook before use
Conformity with the
European safety
standards
LOT code
®
s.r.l.
ViaA.DaSangallo,1 06034 Foligno(PG)ITALY Tel.+39074222927 Fax +39074222637
MO DEL . PART N°
S N
LOT MAX. KG
!
Name of the model

Pag. 8 / 36
HOW IT IS COMPOSEDTray
front wheels
Trunk support
rear wheels with brake
Pelvic support
Knee pads
Heel rests
footboard
TECHNICAL SPECIFICATIONS
MINI STANDYJ is available in three sizes (see “DIMENSIONS” on page 9 )
All adjustments are made by knobs, without using wrenches.
FRAME varnished with non-toxic epoxy-powder paint and with chromium-plated
adjustable parts. It is adjustable in tilt
TRAY in multilayer wood. It is adjustable in height, tilt and depth. It can be removed
KNEE-PADS adjustable in height, width, depth and in a rotatory movement
HEELRESTS adjustable in depth and width
MULTILAYER WOOD FOOTBOARD
PELVIC SUPPORT adjustable in its circumference thanks to Velcro straps, in
height, back and forward
Trunk SUPPORT adjustable in its circumference thanks to
Velcro straps and in height
Unpierceable WHEELS, diam. 75 mm, rear wheels with brakes. Thanks to the
wheels the aid can be moved from one room to anotherwith the User
MINI STANDY size 1: from 75 to 100 cm
MINI STANDY size 2: from 95 to 125 cm
MINI STANDY size 3: from 120 to 150 cm
IMPORTANT:
Make sure that the heights shown in figure A and B do fall within the
measuring range indicated for the trunk and pelvic support (see page 9)
USER HEIGHT
AB
C

Pag. 9 / 36
DIMENSIONS of MINI STANDY
MINI STANDY 1
Weight of the aid Kg. 17
Max. Load Kg. 35
MINI STANDY 2 Weight of the aid Kg. 21 Max. Load Kg. 45
MINI STANDY 3
Weight of the aid Kg. 23 Max. Load Kg. 55
The numbers divided by the dash specify a minimum and a maximum adjustment
DIMENSIONI in cm
14-26
14 - 36
14 - 42

Pag. 10 / 36
WHAT MINI STANDY IS AND WHAT IT IS FOR
MINI STANDY IS A STANDING FRAME DESIGNED AND MANUFACTURED TO HELP
CHILDREN FROM 1 TO 12 YEARS TO ACHIEVE AND MAINTAIN AN UPRIGHT POSI-
TION.
MINI STANDY HAS BEEN DESIGNED AND MANUFACTURED :
-To train and achieve an independent upright position
-to maintain a vertical position with a two-foot load, as an alternative to an independent position that
would otherwise be impossible
-to make therapy time pleasant both eliminating the “boredom” factor and also increasing the
number of stimuli the child receives
It is important to remember that:
-the upright position is the ideal antigravity posture for human beings. It represents the conquest of a
two-legged bearing that thus frees the upper limbs and hands from acting as support and protection
-what we mean by posture is the body’s constant relation with its environment, achieved by maintain-
ing a balance between the elastic forces of the protagonist and antagonist muscles, and between
the body’s inner forces and the forces exerted on it by the outside environment
-posture is maintained by integrating visual, vestibular and somatic-sensory proprioceptor information
MINI STANDY is an aid that allows this information to be integrated and facilitates this process
MORE SPECIFICALLY AN APPROPRIATE USE OF MINI STANDY CAN FACILITATE:
-Gaining experience with a posture that can act as an alternative to the one that has been “forced” or
“partially forced” on the child by his pathology, as well as enabling proper placement of the joints so
that controlled and modulated variations can be introduced. The aim of all this is to prevent from
deformity
-Training the antigravity musculature
-Controlling and straightening the head. Conditions that are facilitated by the reduced antigravity
involvement of the trunk: this is achieved thanks to the tray which is considered as an adjustable
trunk support (the tray can be removed once adeguate control of the trunk has been attained)
-Experiencing visually guided manual activity. Thanks to this it is possible to integrate the visual
information drawn from the objects with the information coming from the child’s own body when it is
in the correct posture
-Therefore this involves the possibility of grasping, catching and exploring, initially on an
-overall level and then selectively, and handling through simple or complex constructive activities,
-using objects. This is also facilitated by the fact that the upper limbs have been relieved of their
protective and support functions
IN ADDITION, THE UPRIGHT POSTURE ALSO ENABLES THE FOLLOWING:
A – IMPROVED RESPIRATORY CAPACITY through increased ventilation and a decrease in
obstructive phenomena
B – IMPROVED PERISTALSIS
C – IMPROVED CIRCULATION
Above all it is important to emphasize that MINI STANDY is an AID THAT CAN ENHANCE THE
CHILD’S CAPACITY TO ADAPT TO HIS SURROUNDINGS, or in other words, to interact positively
with the world around him.
This will ultimately lead to MORE PERSONAL AUTONOMY, so that the child can establish good
relations with himself, with the others and with his physical environment: his skill at “getting in
touch with”.

Pag. 11 / 36
HOW MINI STANDY WORKS
It works very simply and safely.
MINI STANDY is a standing frame composed of a lateral frame that is graduated so that its
height can be easily adjusted and of a patented electronic kit fixed under the footboard
When the child is standing he is supported by wide straps across the pelvis and trunk that
can be adjusted from the front to the back (to follow knee-hip flexion) as well as in its circumfe-
rence.
Two front knee pads and two heel rests fix the position of the lower limbs. The physiatrist
and/or therapist must continuously monitor the child’s position on the MINI STANDY. In
fact it is used by disabled children during their developmental period. Since they grow up quickly
and they can also change in terms of their pathological picture, this entails constant assess-
ment and adjustment.
ATTENTION: Before starting to position the child, brake the wheels of MINI STANDY !
When starting it is advisable to have an adult stand behind the child and hold his sides firmly if
the child has an adequate control of the trunk. Otherwise, the child should be supported by his
armpits.
The therapist should temporarily position the lower limbs first, followed by the pelvis and the
trunk. At this point, always attempting to get the child cooperate as actively as possible and
explaining him what is being done and why, the position of the feet in the heel rests and knee
pads must be controlled, following any flexion that may be present. Subsequently, the pelvis
must be controlled through the pelvic support and then, the trunk must be controlled using the
trunk support.
It is important to pay special attention to “dosing” the right amount of trunk and pelvic
support. There must be an adeguate support to assure a minimum amount of stability.
Avoid any excessive support since it could give the child a heavy feeling of “confinement”.
At the same time, however, the support must not be too “light” since this could cause a
reaction of “ fear of falling” or instability.
If the child is able to communicate, it is important to listen to his feelings and impressions so that
the amount of restraint can be “modulated” as correctly as possible.
Always bear in mind that MINI STANDY is a standing frame that must allow the child to carry
out several activities and that it was not designed to keep him still and immobilized. This is the
main objective that must be taken as a guideline in using this aid, which should work as a tool “
to do things in a correct and favourable position”. Using MINI STANDY we try to make this ther-
apy moment enjoyable both eliminating the “boredom” factor and increasing the number of sti-
muli the child receives significantly
Naturally the correct posture will be different from one child to another according to their age,
motor picture and overall picture. However, the general rule is to set a position that is the most
correct and aligned one.

Pag. 12 / 36
INITIAL PREPARATION
INFORMATION ABOUT THE PACKING
STANDING FRAME
HOW TOTAKE MINI STANDY OUT OF THE CARTON
ATTENTION!
CUT WITHOUT PRESSING TOO HARD
WITH THE BLADE SO AS NOT TO
DAMAGE THE CONTENTS OF
THE BOX
WEIGHT

Pag. 13 / 36
HOW TO ASSEMBLE MINI STANDY
SCREW
WRENCH

Pag. 14 / 36
HOW TO ADJUST MINI STANDY
WHILE ADJUSTING THE STANDING FRAME IT IS IMPORTANT TO FOLLOW THREE
PHASES AND IT MUST BE ADJUSTED UNDER THE DIRECT CONTROL OF THE
DOCTOR WHO PRESCRIBES IT
1ST. PHASE: YOU HAVE TO CONSIDER:
1.the height of the child from under his chest to the ground is needed to fix the
trunk support;
2.the height from the knee-cap to the ground is needed to fix the knee-pads of
the standing frame;
You can measure while the child is standing or while he is laying.
2ND. PHASE: INITIAL ADJUSTMENT WITHOUT THE CHILD AND CONSIDERING THE
MEASURES THAT YOU MUST MEASURE BEFORE
3RD. PHASE: SUBSEQUENT ADJUSTMENT WITH THE CHILD
Check:
1.that the back strap, once it is closed, is in the middle of the bottom. The
height of the arm supports depends on the position of the back support of the
pelvis;
2.the position of the knee-pads;
3.the position of the heel rests in width and depth;
4.the position of the tray. It must be fixed controlling the height of the User from
under his elbow to the ground (minimum height). Shouldn’t it be possible to make
this control, you can measure the distance from the bended elbow to his feet while
the User is laying.
5.the vertical alignment of the chest and pelvis
6.the flexion of the limbs: the vertical position is determined by the front and
back adjustment of the pelvis support, of the knee-pads and of the heel
rests.
WARNINGS: ALL THE ADJUSTABLE PARTS MUST HAVE BEEN WELL LOCKED!!!
Always check that all the adjustments have been correctly fixed in order to avoid any
possible danger to the User.
WARNINGS:
THE ADJUSTMENTS MUST BE ALWAYS CONTROLLED BY THE DOCTOR WHO PRE-
SCRIBES THE AID AND BY THE THERAPIST WHENEVER THEY THINK IT IS NEEDED.
THIS IS IMPORTANT TO OPTIMIZE THE VERTICAL POSITION BECAUSE THE RIGHT
USE OF THE STANDING FRAME CONDITIONS THE FLEXION OF THE USER AND IT
REDUCES HIS RIGIDITY

Pag. 15 / 36
HOW TO BRAKE MINI STANDY
LOCK UNLOCK

Pag. 16 / 36
Adjustment of the HEELRESTS in WIDTH

Pag. 17 / 36
Adjustment of the HEELRESTS in DEPTH
adjustment
indicator

Pag. 18 / 36
Adjustment of the KNEEPADS in WIDTH
Other manuals for MINI STANDY
1
Table of contents
Other Ormesa Medical Equipment manuals
Popular Medical Equipment manuals by other brands

Hillrom
Hillrom Mortara Welch Allyn Diagnostic Cardiology... Service manual

Smith & Nephew
Smith & Nephew RENASYS GO user manual

ARJO HUNTLEIGH
ARJO HUNTLEIGH NIMBUS Instructions for use

B. Braun
B. Braun Aesculap MACS T 011148 Instructions for use/Technical description

Ama Tech
Ama Tech F-ABMT1 Instructions for use

B. Braun
B. Braun Easypump C-bloc RA manual