Osmio Duo Hydrogen User manual
Telephone: 0330 113 7181
Email: [email protected]
Osmio Duo Hydrogen Water Bottle
Instructions Manual

Important features
Proton Exchange Membrane (PEM) technology from DuPont®
State of the art Solid Polymer Electrolysis (SPE) technology
Works with all types of drinking water but the water used must be safe to
drink.
Separates and expels harmful by-products of Chlorine, Ozone and
Oxides. Use the bottle on a flat surface or table to allow the ozone gas
release valve to open.
High quality Platinum coated Titanium Electrode Plates
Thank you for purchasing this product, please read this manual carefully
before using the system, and keep it for future reference. If you have any
questions after reading this manual , please call us on
0330 113 7181
Product specifications
Power
USB 5V / 2A Output: ≤10W
Bottle Capacity
400 ml
Water Type Required
All potable drinking water
Water Temperature Range 32°- 140°F / 0°- 60°C
Dimensions 2.6” x 9” H 67 mm W 225 mm
Unit Net Weight
1.2 lbs / 544 g
Hydrogen Generation Range
1.2 -2.4 ppm (depends on working time)
ORP Range
-350 mv ~ -750 mv
Bottle Material
Borosilicate glass
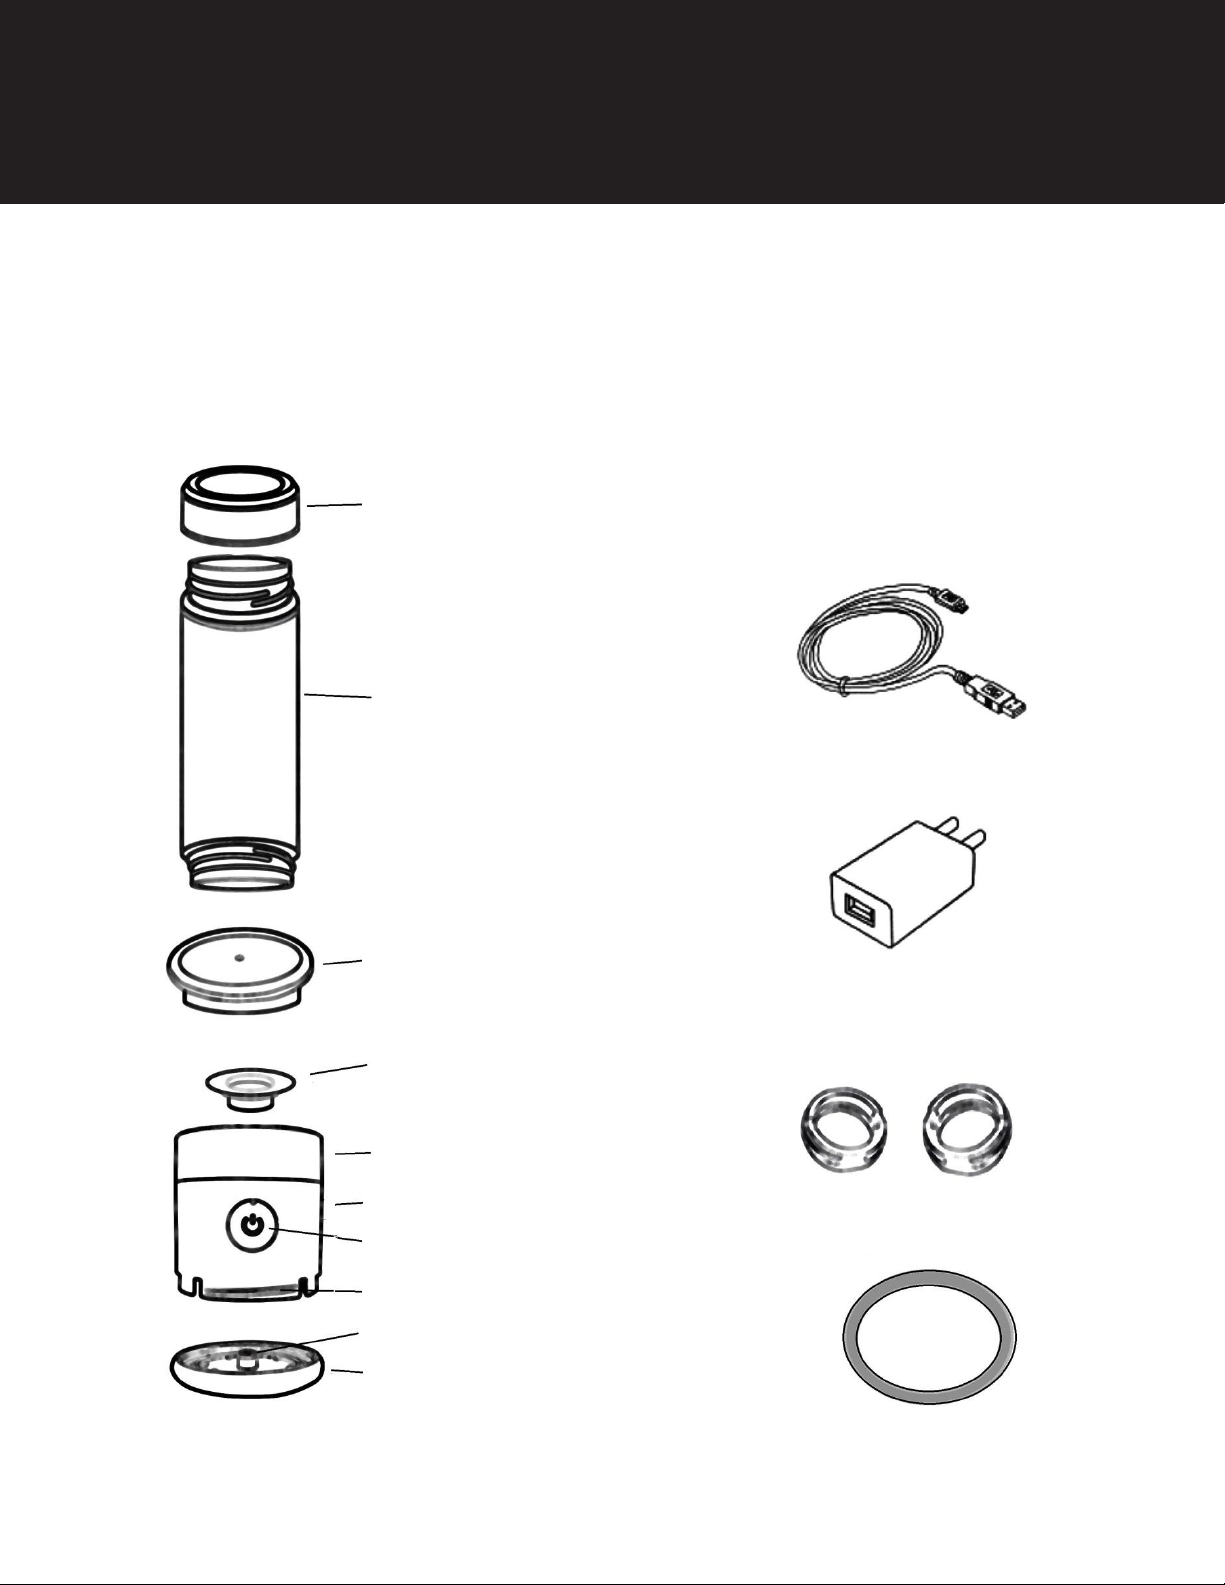
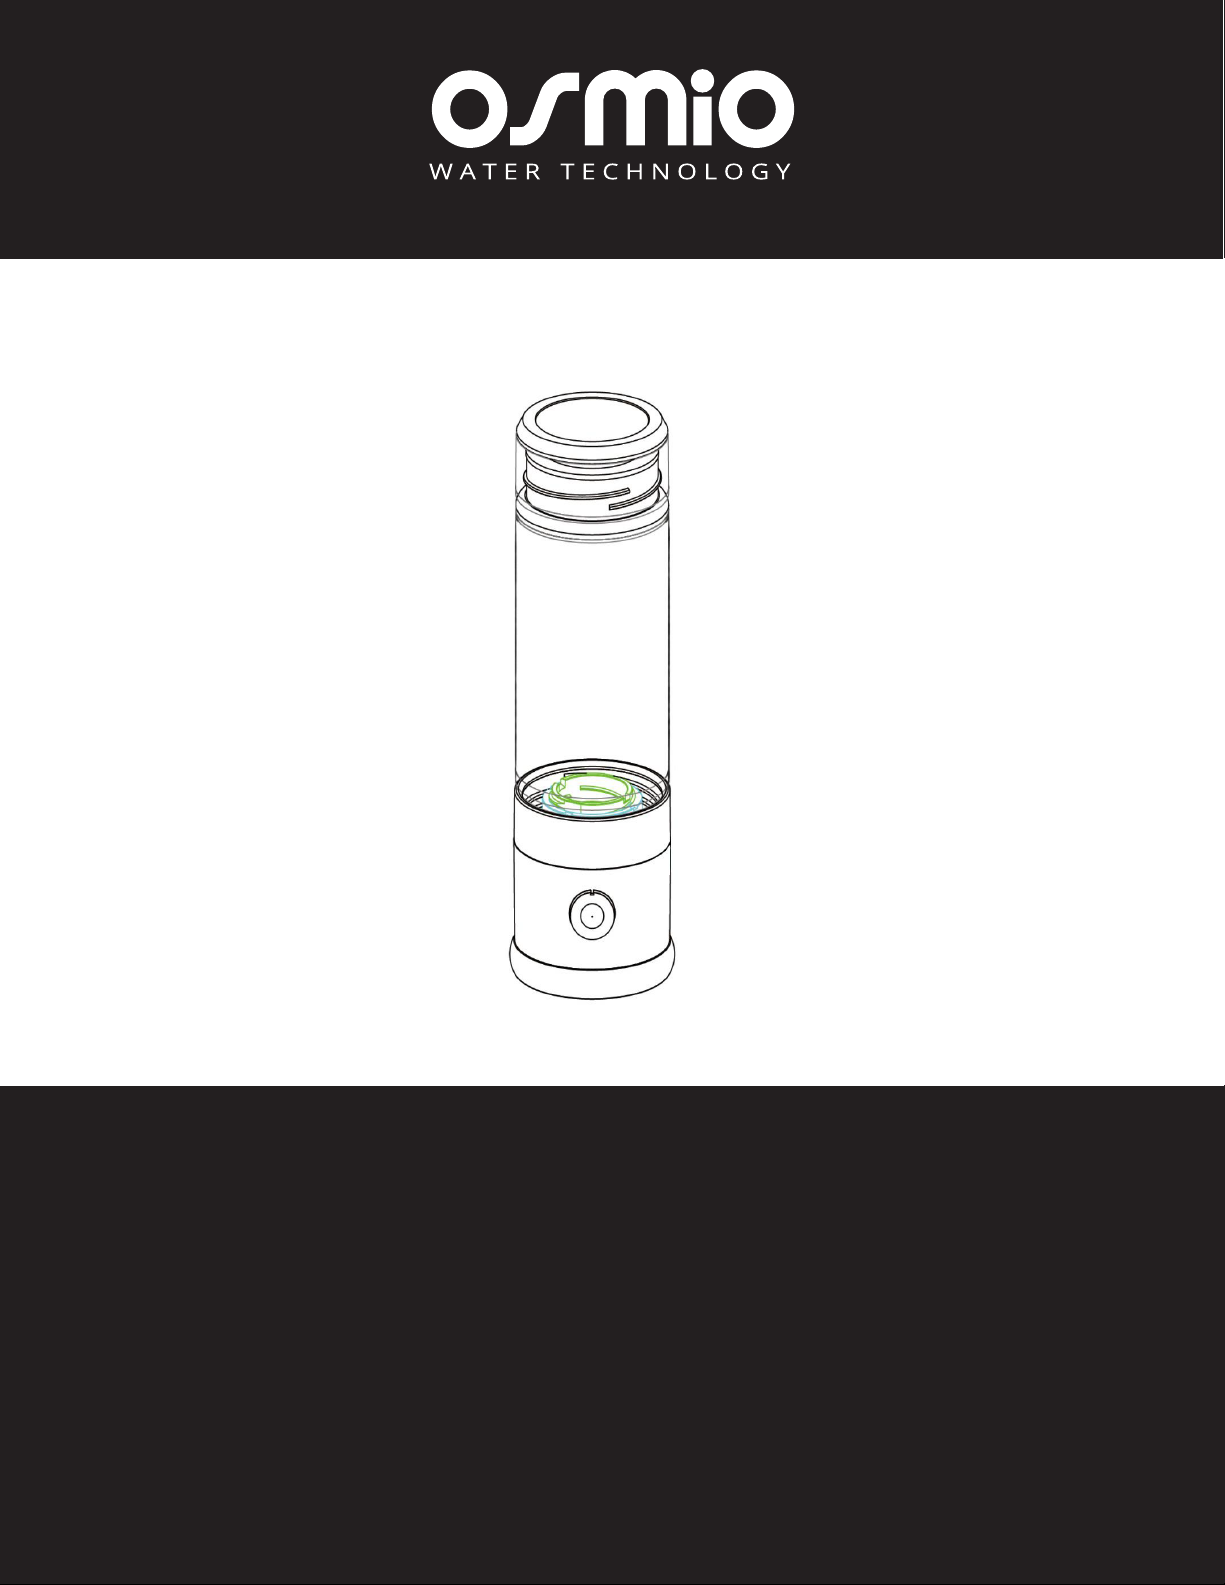
List of components
Please ensure that you have everything in this diagram as well as the adap-
tor lid for the breathing cannula and the cannula tube. If there is anything
missing please contact Osmio water for support.
Bottle Cap
Glass Bottle
Generator Cover
(Protect for Travel)
Rubber Plug
(Wet storage)
Generator Base
Generator Waste Chamber
USB Charge port (in rear)
Generator Timer/Power
Generator Waste Cap
Ozone Gas Release Valve
USB Power Cable
USB Power Plug
Bottle Adaptors
(2 sizes)
Spare washers x 3
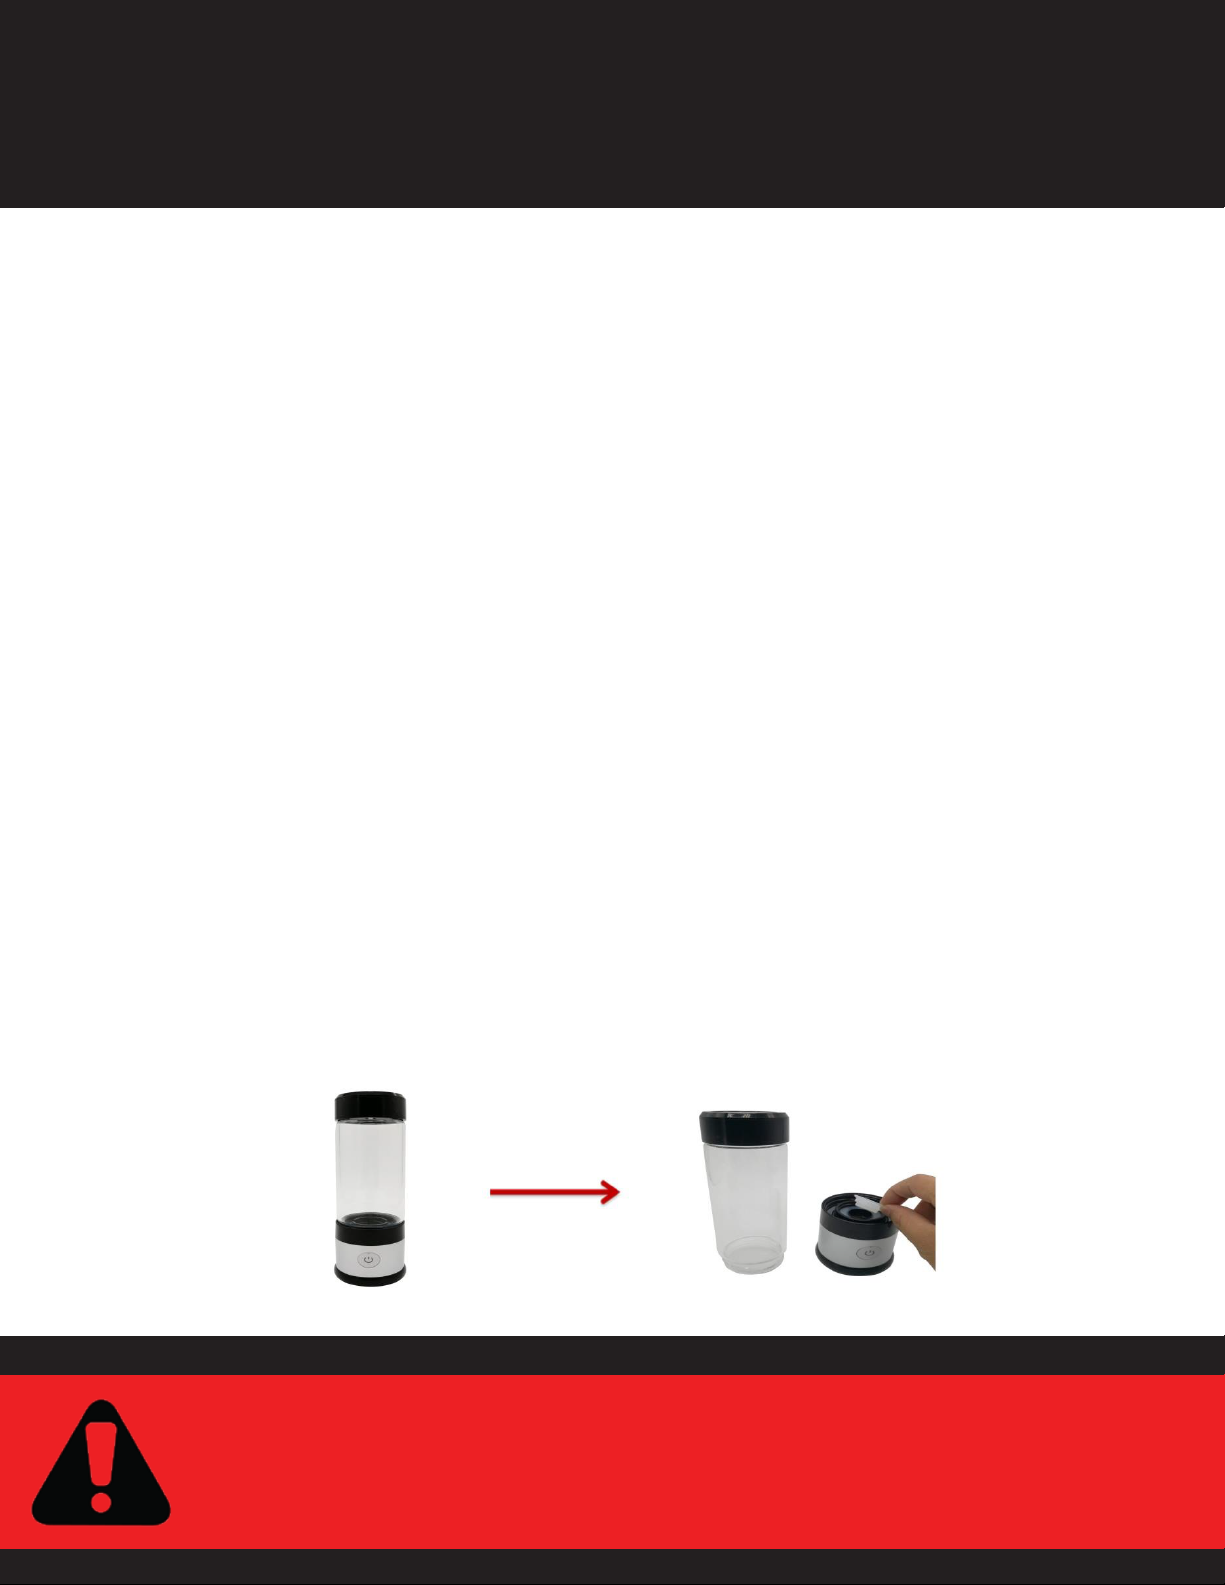
Setting up
• Before using the bottle, please wash off the sanitisation liquid. To do this, remove
the glass bottle from the generator and wash with warm soapy water. Do not forget
to wash the lid too.
• Once you have washed the bottle, remove the silicone plug which is sealing the
generator, this is used to keep the generator moist during shipment.
• Now that the bottle is clean you can attach it back to the generator by twisting the
bottle on to the generator and hand tightening.
• Place the lid back onto the bottle and insert the charging cable into the charging
port (this has a silicone cover flap). Then insert the USB side of the cable into the
power plug and plug into an outlet.
• Charge the bottle for 2-3 hours until fully charged and then remove charger.
• With the bottle attached rinse out the generator with warm water.
• Fill the bottle with clean drinking water.
• Now you are ready to start the electrolysis process
Important : DO NOT OVER-CHARGE. OVER-CHARGING
WILL LEAD TO SHORTENED BATTERY LIFE.
Quick start up guide
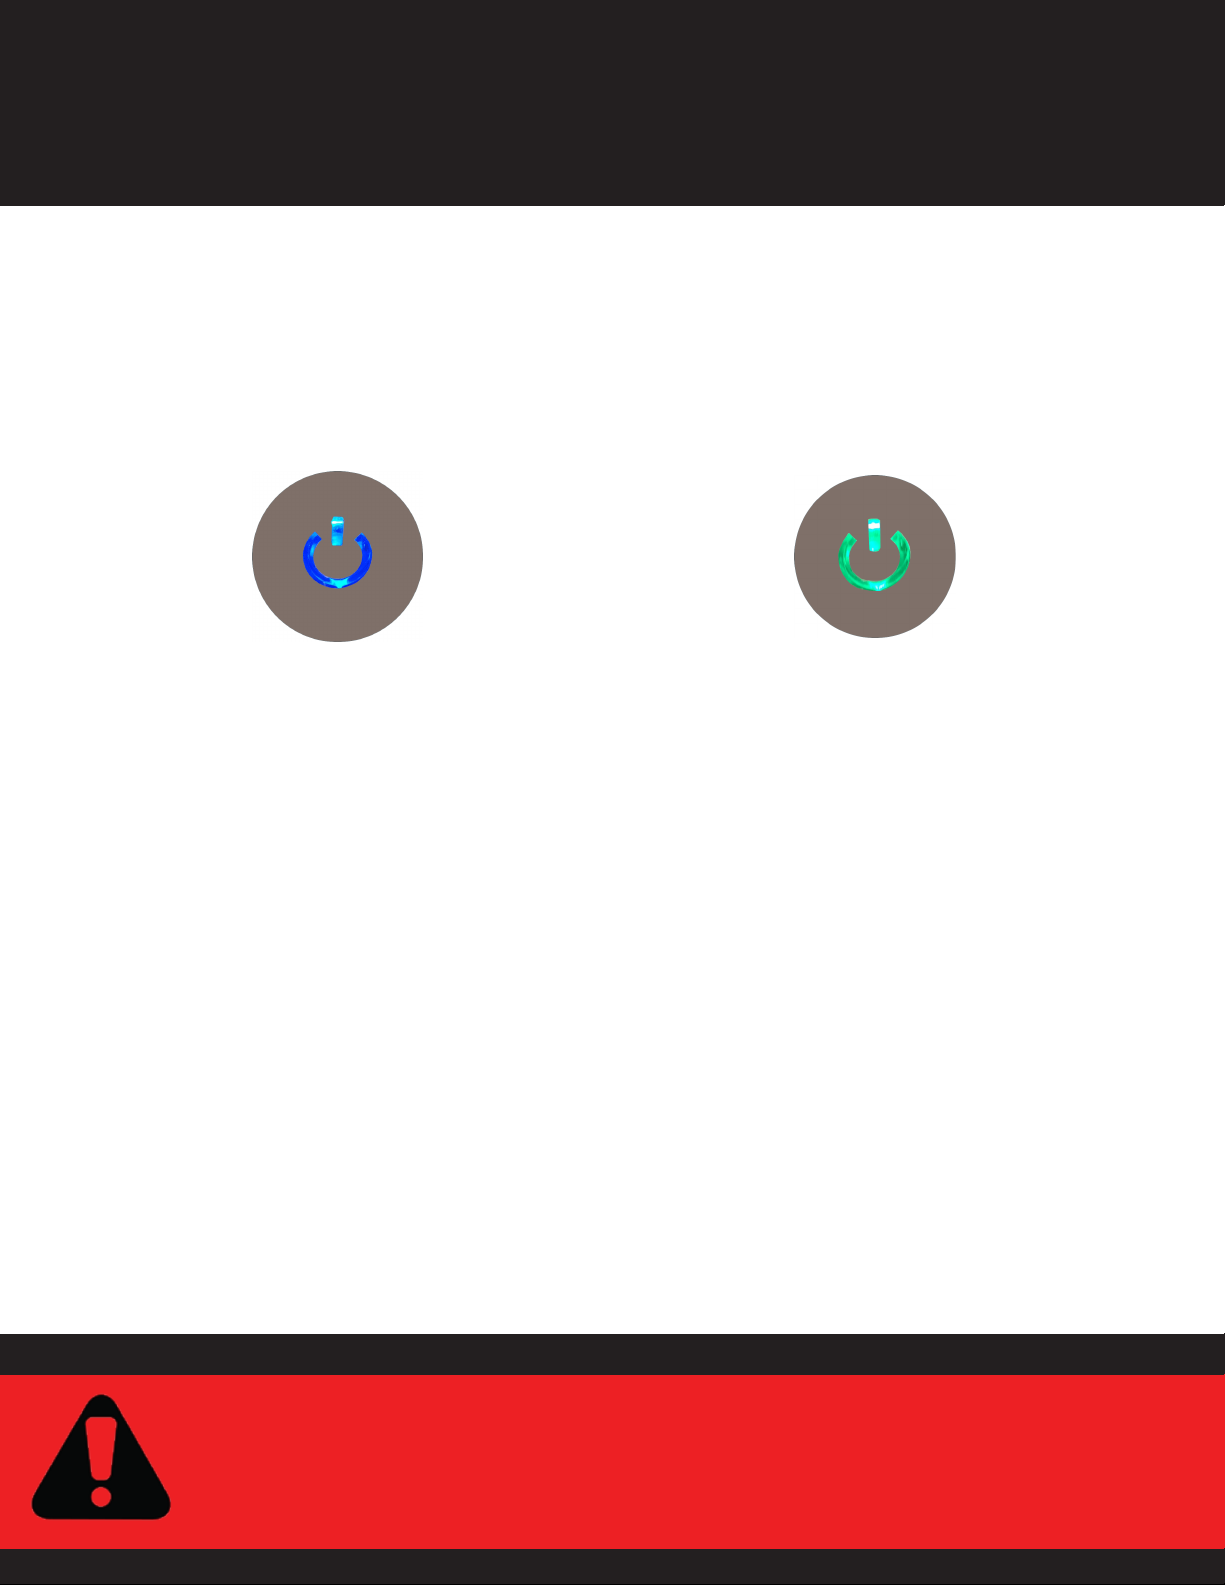
1.To begin the electrolysis process press the power button. The working indicator light
will turn blue, making H2 for 5 minutes.
Pressing the button for a second time will turn the working indicator light green,
making H2 for 7 minutes. Pressing the button a third time will turn power off.
2. After a 5 or 7 minutes cycle the working indicator light will turn off, completing
process. For higher concentration of H2, use the 7 minute cycle.
3. You can drink the hydrogen water directly out of the bottle or pour it into another
container. It is best to drink water within one hour. Hydrogen will dissipate over time.
4. If the working indicator light flashes red, this means the battery power is low and
needs to be charged.
5. Do not cycle the bottle more than once.
6. Make sure to operate the unit on a table or flat surface to allow the opening of the
ozone gas release valve on bottom.
Important : DO NOT CYCLE THE BOTTLE MORE THAN ONCE
BEFORE DRINKING OR USING THE INHLER.
Blue indicates a 5 minute cycle Green indicates a 7 minute cycle
How to operate the bottle
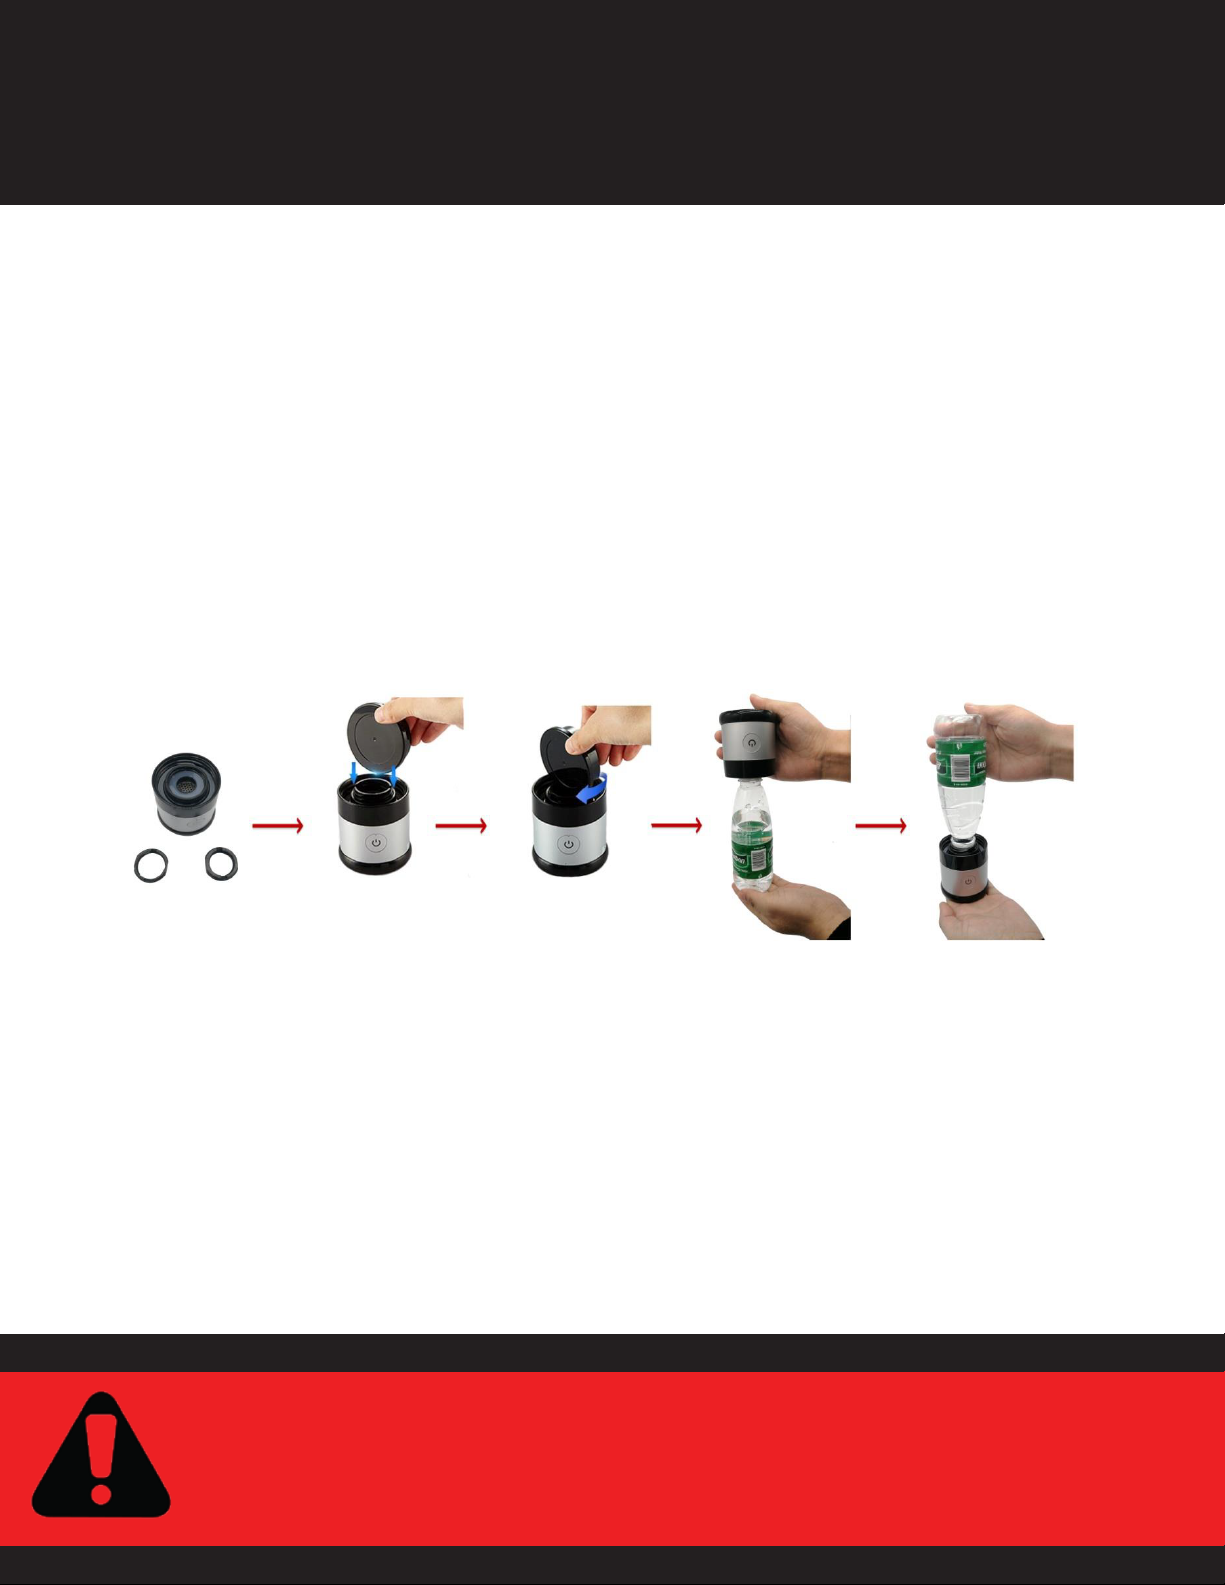
If you are attaching any other bottle to this device follow the steps below.
1. Choose a suitable adaptor to match the bottle neck (from the two different ones
supplied), then screw the adaptor onto the generator tightly. Use the generator
cover sideways to screw the adaptor onto the generator
2. Screw the generator (with adapter attached ) on to your bottle of choice, make sure
this is fairly tight like a cap to avoid leaking.
3. Turn over and generate up into bottle.
Important : USE THE GENERATOR COVER WHEN THERE IS
NO BOTTLE ATTACHED TO HELP KEEP THE
GENERATOR MOIST
How to use adaptors for other bottles

Do not leave the bottle on charge for longer than 3 hours. Always ensure to use all
the battery before recharging again. Unit will stop charging when LED light stops blink-
ing, when this happens remove the bottle from charge. Over charging will lead to dras-
tic deterioration of the battery.
Never operate Generator without water in the bottle. Do not soak or submerge
Generator Unit under water. Do not place Generator unit in a refrigerator or cooler.
Never use any chemical cleaners on Generator unit. Do not pull cable from wire or
plug with wet hands.
Depending on the mineral oxide content in your drinking water, clean the electrolysis plates by descaling
once or twice a month.
After 3 or more cycles some waste water may accumulate in the bottom chamber, to
release this, unscrew the bottom chamber and drain the water. If no water is dis-
charged in the waste chamber, that is normal, the machine is controlling pressure
adequately, waste O3 and Chlorine are discharged as a gas.
Never let the generator dry out, to ensure this does not happen leave a small
amount of water in the bottom to keep the electrode plates moist.
Keep USB Port sealed by plugging its cover back in.
Operate only with clean and safe drinking water, filtered water is preferable but tap
water can also be used. Not for use with hot, carbonated or other beverages. Use
room temperature water. Never freeze or use ice.
Avoid direct sun light or heat that can dry out the plates.
Release gas pressure at lid if cycling more than twice.
Keep away from children, Pets, Heat and Flames.
Important things to remember

Depending on the mineral oxide content in your drinking water, clean the electrolysis
plates by descaling once or twice a month.
Using filtered water will prevent the need of descaling but this is a good process to
follow to clean the bottle.
To descale simply add 1 part either white vinegar, lemon juice or citric acid to 3 parts
water into the bottle and leave generator soaking in mix overnight.
Dump and rinse thoroughly with warm water before using the next day.
The main thing to remember is to not over-charge and to keep the generator moist so
that the elecrolysis plates do not dry out
Trouble shooting
No visible bubbles
• Check power source
• Remove plug and obstacles
Light blinks when
operating unit
• Low battery indicator
• Charge Unit
Low PPM levels
when tested with
Blue Drops
• Allow 7 days to break-in
• Operate for 7 minutes (2nd cycle option)
Wetness in Generator
• Units are shipped wet
Battery not charging
• Check for defective Plug or cable.
Bottle has odour or
Unit makes less gas
• Clean and de-scale as needed
• Use different water source
Unit stopped working
• Contact For Support
Glass bottle broke
• Contact to order replacement
Machine is
Leaking water
• Check all seals, tighten lid
• Check or empty waste chamber
• Fill water to ½ of top rim
Occasional Descaling and Maintenance
If you have any other issues or queeries please contact us using the following contacts
WhatsApp +447852323666
Telephone: 0330 113 7181
Email: [email protected]
The breathing cannula is an alternative to drinking water when drinking becomes
restricted during air or car travel or in evenings when drinking water before bed can
interrupt sleeping with necessary trips to the bathroom.
There is only so much water you can physically drink in a day, but you can breathe as
long as you want to.
H2 Gas Flow: 10~20ml/min approximately.
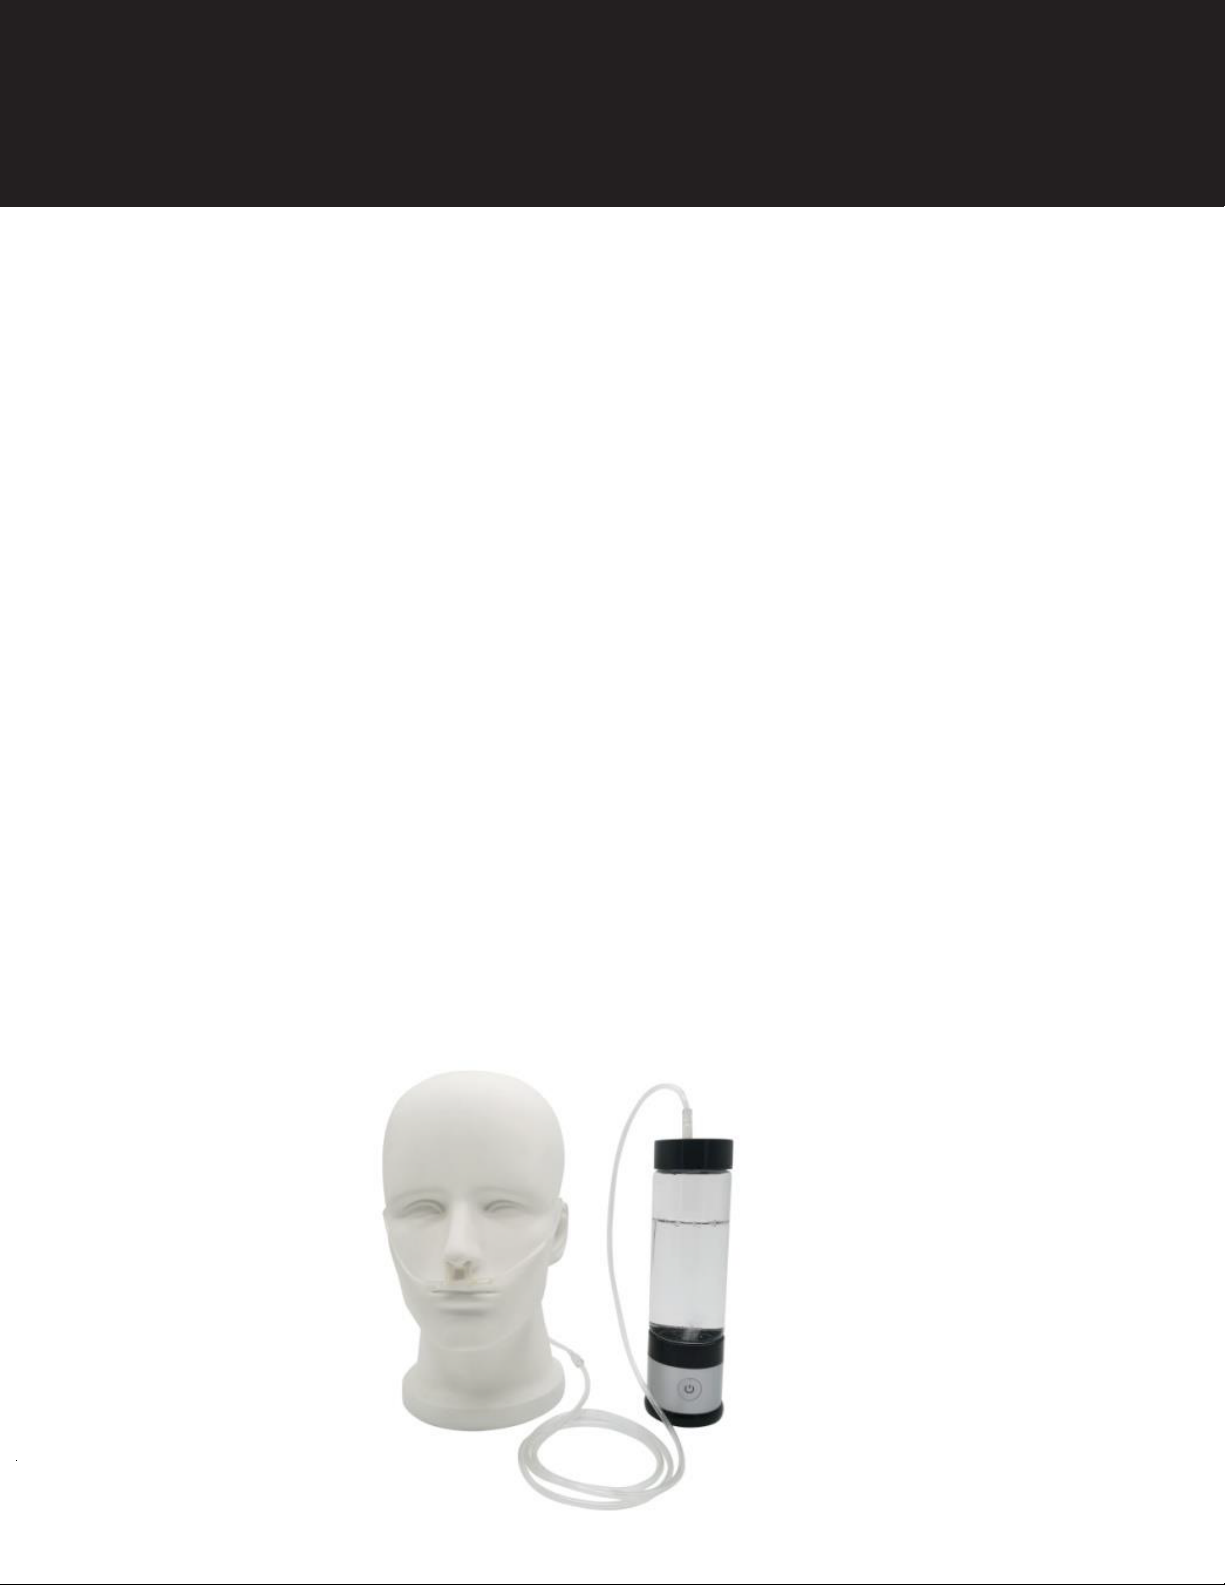
Instructions
1. To use the breathing cannula please use the second bottle lid provided, this has
a snorkel valve protruding in the centre,
2. Attach the Cannula breathing tube to the lid.
3. Fill the bottle ¾ of the way full, with water and screw on the adapter-Lid to the
top of the bottle with the Cannula breathing tube attached.
4. Place the loop end of the Cannula tube over your head and the two breathing
prongs into each nostril
5. Adjust the slack-bead behind your neck to be snug against the back of your
head. Begin cycling the bottle on a 7 minute cycle repeatedly to create enough
pressure to push Hydrogen gas up the Cannula tube and into your nose.
6. Continue cycling until no longer desired to inhale gas.
7. If using for a longer than 7 cycles please replace the water
How to use the Breathing Cannula
Enjoy your bottle!
If you have any questions, issues or concerns about this products please
contact Osmio Water for support. You can do this by visiting
https://www.osmiowater.co.uk/ or using the below contact options
Telephone: 0330 113 7181
Email: [email protected]
Other manuals for Duo Hydrogen
1
Table of contents
Other Osmio Water Dispenser manuals


Popular Water Dispenser manuals by other brands


Follett
Follett Symphony Plus installation instructions

Elkay
Elkay EMABF8 1B Series Installation, care & use manual

Elkay
Elkay EBFATL8 1C Series Installation, care & use manual

Elkay
Elkay LZS8WS 2FQ Series Installation, care & use manual

Avanti
Avanti WD31 instruction manual

Watts
Watts Flow-Pur RV PRO 10000 installation guide