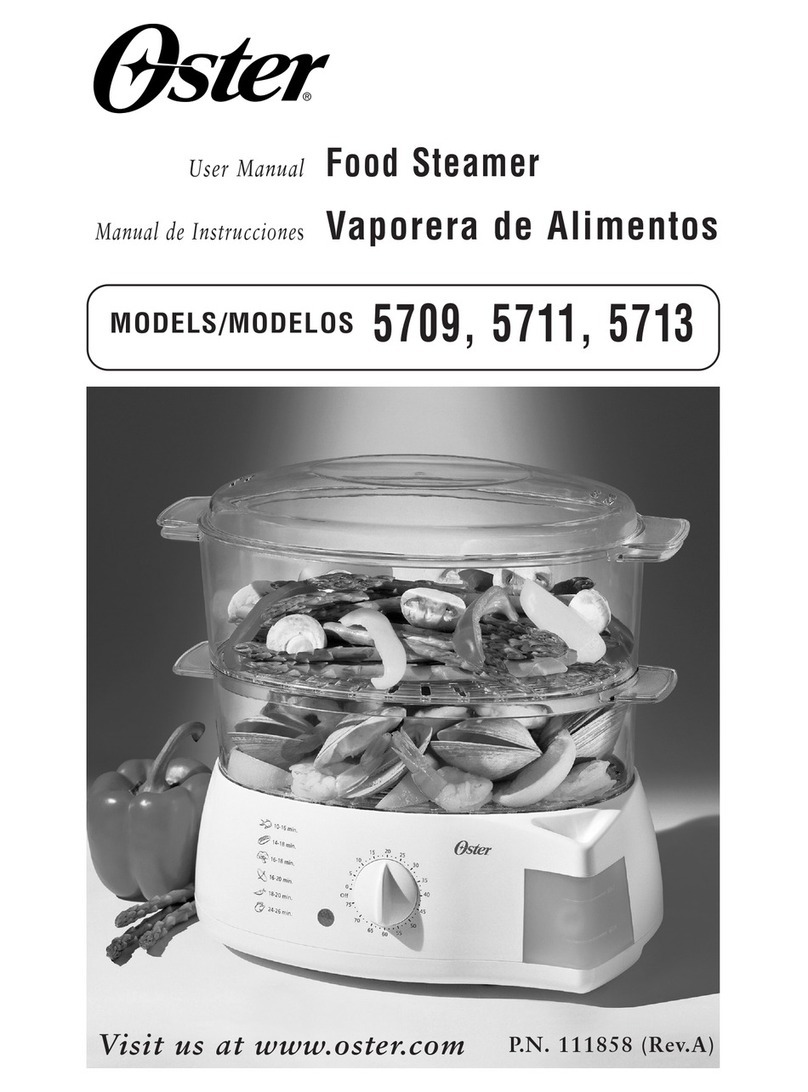
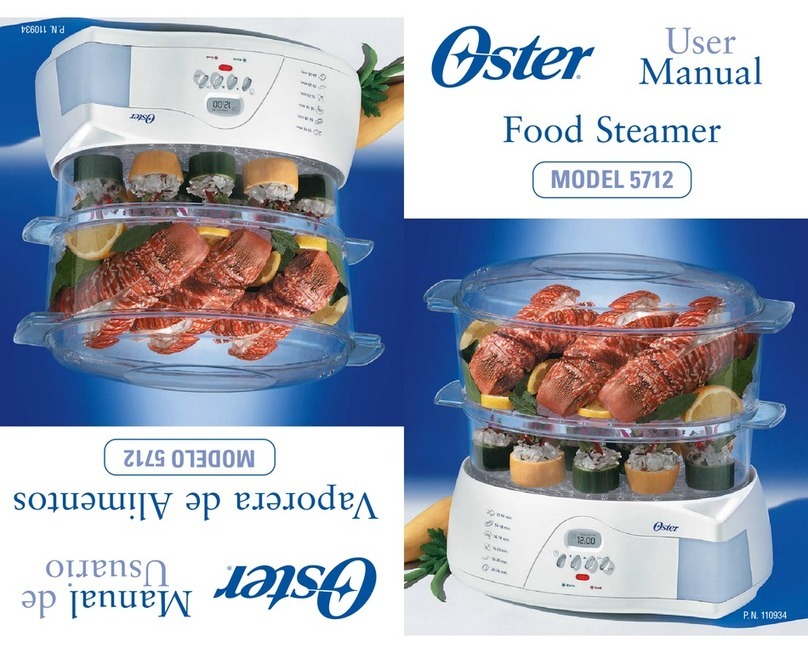
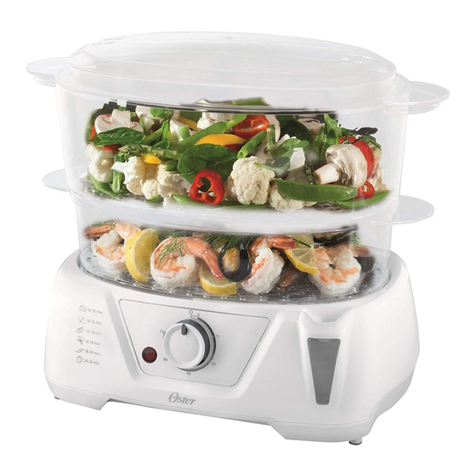
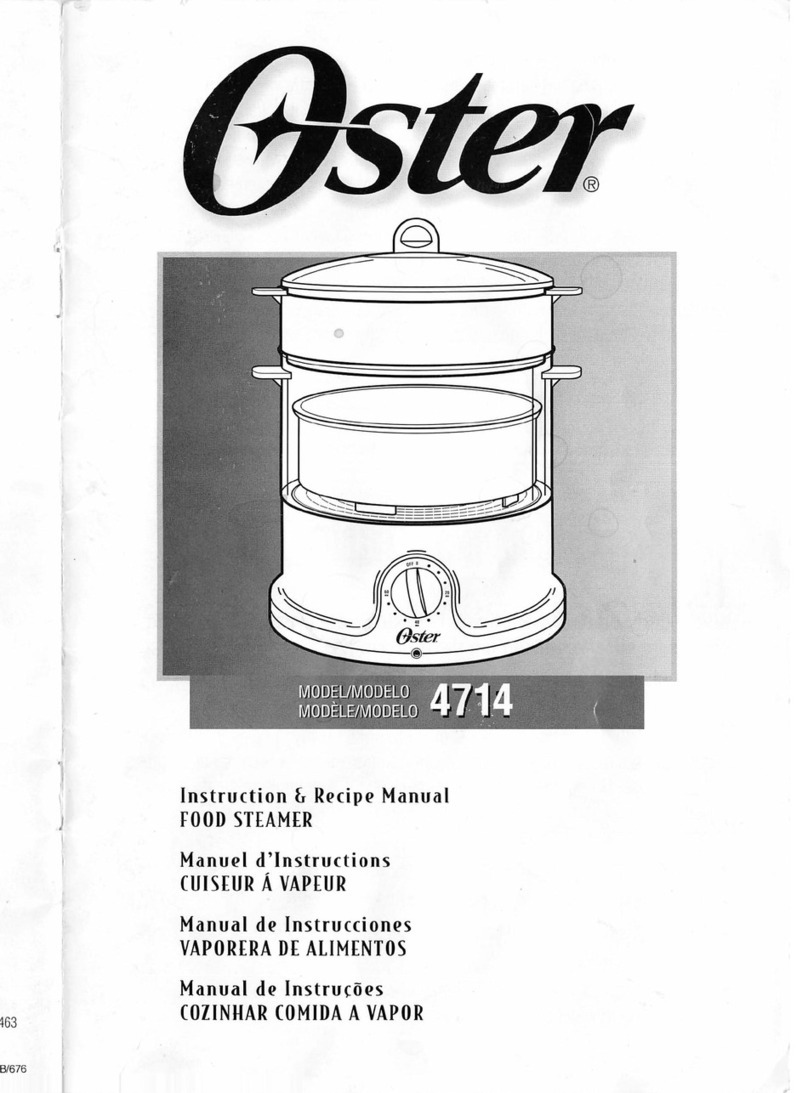
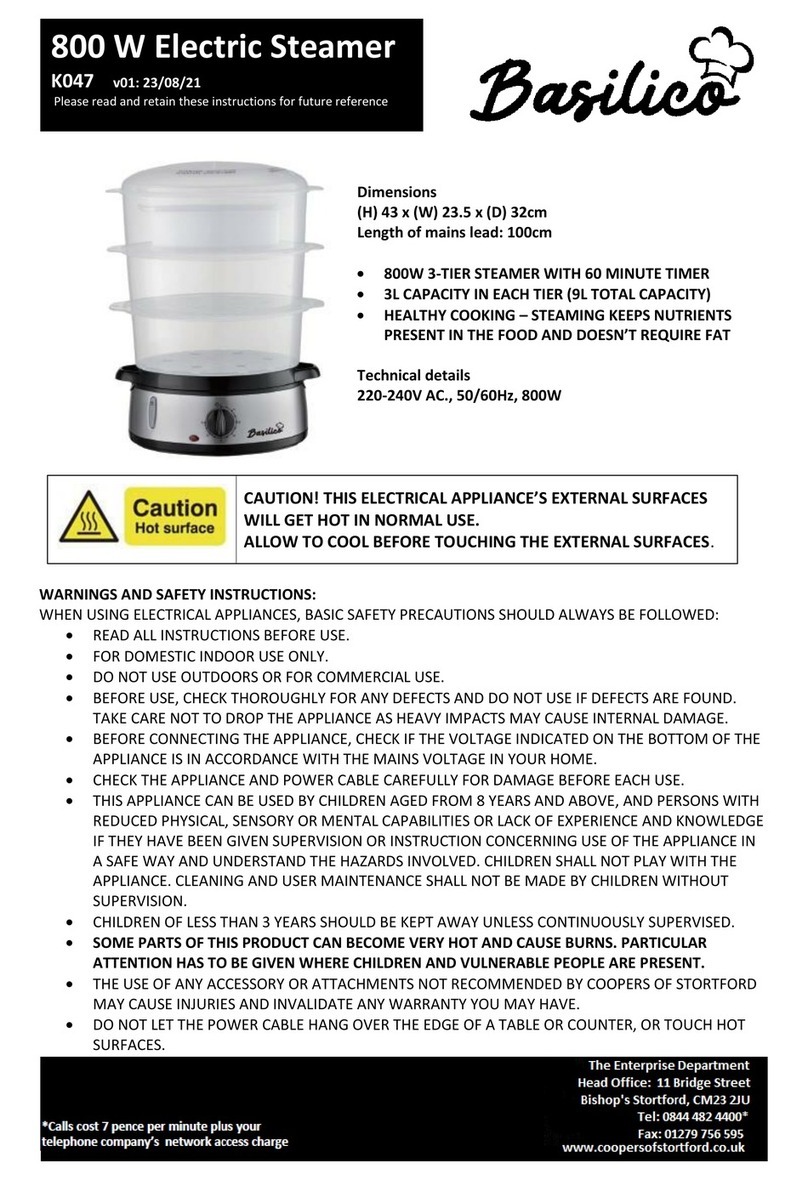
Oster DESIGNER 4711 Technical specifications


Congratulations, you are now the owner of an
Oster@
Designer@Food
Steamer,
and will soon be creating complete, flavorful, healthy meals with steam heat!
Steaming retains the vitamins and minerals in foods that are often lost with other
cooking methods. Nutritious dishes are minutes away without added oil or fat. Cook fish
and fowl, vegetables, rice, and even quick breads with ease of preparation and clean-up.
Entire meals can be cooked in the 2 large 3 quart steamer bowls, without greasy pots
-.
and pans or burnt-on food to clean up afterwards And, with our “Instant Steam”
technology, your Food Steamer will be producing steam in less than a minute!
The following pages contain simple recipes and guidelines for perfect steam cooking.
Practice with steaming vegetables and then move on to more sophisticated dishes,
Use your imagination to create exciting recipes with healthy steam heat!
120VOLTS/900WATTS
Special Instructions
This appliance has a short supply cord to reduce the risk resulting from becoming
entangled in or tripping over a long cord. Longer extension cords are available and
may be used if care is exercised in their use. If a longer extension cord is used,
the marked electrical rating of the cord set or extension cord should be at least as great
as the electrical rating of the appliance. The cord should be arranged so that it will not
drape over the countertop or tabletop where it can be pulled on by children or
tripped over unintentionally.
To reduce the risk of electric shock, this appliance has a polarized plug (one blade is
wider than the other). This plug will fit in a polarized outlet only one way. If the plug
does not fully fit into the outlet, reverse the plug. If it still does not fit, contact a
qualified electrician to install the proper outlet. Do not change the plug in any way.
When using electrical appliances, basic safety precautions should always be
observed including the following:
l Read all instructions, product labels and warnings before using your Food Steamer.
l Do not touch hot surfaces. Use handles or knobs. Always use oven mitts when handling
hot materials, Avoid hot steam rising from top of Steamer at all times when in use.
Do not reach over appliance while it is generating steam. Remove lid by lifting slowly
away from you. When checking food, use long handled utensils.
l Allow the Food Steamer to cool completely before washing or storing.
l Allow the unit to cool before putting on or taking off parts.
l When unit is not in use and before cleaning, unplug the Food Steamer
from the electrical outlet.

l To protect against risk of electrical shock, do not immerse the appliance, cord,
or plug in water or other liquids.
l Close supervision is always necessary when this or any appliance is used by
or near children.
l Do not allow anything to rest on the power cord. Do not plug in cord where it may
be walked on or accidentally tripped over. Do not let cord hang over edge of table
or counter, or touch hot surfaces.
l Do not operate this or any appliance with a frayed or damaged cord or plug or after
the appliance malfunctions or is dropped or has been damaged in any manner.
Return appliance to the nearest Sunbeam Appliance Service Station for
servicing or repairs.
l Do not use outdoors.
l Do not place on or near a hot gas or electric burner or in a heated oven or microwave
l Use extreme caution when moving the appliance if it contains hot water
or any other hot liquids.
l Do not operate appliance near walls or cabinets to prevent damage from steam.
l Use the appliance on a level, stable work surface away from water.
l Always use sufficient water for steaming time.
l The use of accessory attachments not recommended by the appliance manufacturer
may cause injuries.
l Do not use appliance for other than intended use.
l To disconnect, turn any control to “off”, then remove plug from wall outlet,
l
CAUTION: To reduce risk of electric shock, cook only in
remowab!e
con!alner.
This Unit for Household Use Only

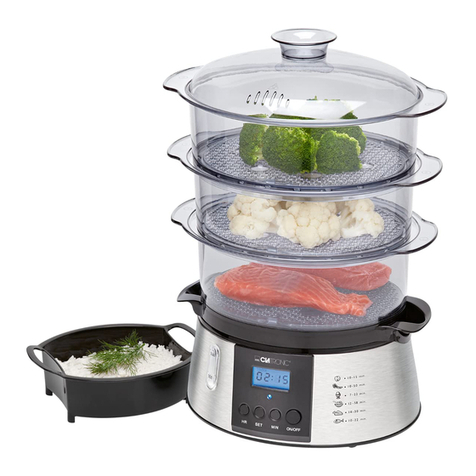
FOOD STEAMER COMPONENTS
A) STEAMER LID has a convenient handle on top to avoid burning fingers when it is removed.
However, use caution when removing lid due to the small steam vents in the top of the cover
which constantly emit hot steam when appliance is in use. Also be careful of the surge of steam
that will result when cover is lifted. Lift cover away from person when opening.
Use oven mitts at all times when handling hot Steamer parts.
B) STEAMER BOWL is made with clear
plastic, has a 3-quart capacity, and an
oblong shape to accommodate all kinds of
vegetables and foods. (Two Steamer Bowls
are supplied with your unit.)
C) RICE BOWL is made of white plastic, has
a
~-CUP
capacity, and is placed inside the
Steamer Bowl when in use. It is used for
cooking rice. This bowl may stain if tomato
based or red food is cooked in it.
D) SEPARATOR RING divides the two
Steamer Bowls. Never use two Steamer
Bowls without the Separator Ring.
E) DRIP TRAY prevents water condensation
and food liquids from dripping back into
the Water Reservoir to ensure that steam
is always produced from clean water.
F)
WATER RESERVOIR BASE holds water
for steaming. Do not use any other type of
liquid in the reservoir.
G) TIMER operates up to sixty (60) minutes
and includes a bell to indicate when
cooking time expires.
A-
/-
Y
J-W
E
H) INDICATOR LIGHT identifies when appliance
is cooking.
FORHOUSEHOLOUSEONLY

COOKINGWlTHYOURFOODSTEAMER
l Place the appliance on a stable, level surface away from walls and
overhanging cupboards.
l Pour cold tap water into Water Reservoir to MAX level for foods requiring
13 to 60 minutes steaming time, or MIN level for food requiring less than
13 minutes. See Figure 1. MIN and MAX levels are indicated by raised lines
in the Water Reservoir. Refer to Steaming Charts or Recipes for
recommended cooking times. If the appliance stops producing steam,
or there is a noticeable reduction in steam before food is ready, add extra
water to the basin.
Note: Do not add any salt, pepper, seasonings, herbs, wine, stock or any
liquid other than tap water to the Water Reservoir,
l Place Drip Tray in base and be sure it sits flat.
l Your appliance can be used in four ways:
Using one Steaming Bowl alone
-
Place food in Steaming Bowl
and then position the Bowl on the base. See Figure 2. Do not use the
Separator Ring.
Using two Steaming Bowls
-
Place the largest pieces of food with
the longest cooking time in the lower Bowl and position it on the base.
Place the Separator Ring in position. Rest the upper Steaming Basket on top.
See Figure 3.
The Separator Ring ensures the two Bowls are well fitted and stable when
stacked together. Never use your Oster” Designer@ Food Steamer without
the Separator Ring as the two Steaming Bowls may lock tightly together.
If this happens, use some vegetable oil around the ring to separate them.
Using the Rice Bowl
-
Liquid such as water or stock is added together
with rice in the Rice Bowl. The Steaming Bowl must be placed on the base
first, then the Rice Bowl is placed inside the Steamer Bowl for use.
See Figure 4. Measure the required quantity of rice and liquid in the
Rice Bowl. Refer to steaming charts or recipes on page 9. The Rice Bowl
can be used in either Steam Bowl.
Using a Loaf Pan (An 8” x 4” loaf pan will fit in the steamer)
-
Cakes and
quick breads can be made in this Steamer also. Pour cake or bread batter
into greased pan and place pan in Steaming Bowl. Always place tin foil on
top of pan and seal tightly before cooking. See Figure 5. Refer to steaming
recipes on page 12.
l Cover with Lid.
l Plug into wall outlet. Do not operate the appliance without the
Steaming Bowl and Lid in place.
l Set timer for the recommended time. Steaming will begin in less than a minute,
Condensation during steaming is normal. The indicator light will light up when timer is set.
Note: The timer operates regardless of whether the unit is plugged into the electrical outlet or not
Be sure the indicator light is on when setting the timer.

WARNING: During use do not touch the base, steamer bowls or lid as they get very hot.
Always use oven mitts when handling the steamer.
l When steaming is complete, the timer will give a single ring and automatically shut off the
steaming function.
l When you have finished using the appliance, unplug from the wall socket and leave to cool completely
before removing the Drip Tray.
WARNING: Use caution when removing the Drip Tray. While other parts of the unit
may be cool, the water in the Water Reservoir and the Drip Tray may still be very hot.
USEFUL HINTS
l For high altitude cooking, steaming times may need to be increased. Exact times vary by location
l Steaming times stated in the charts and recipes are only a guide. Times may vary depending on the
size of food pieces, spacing of the food in the Steamer Bowl, freshness of food, and personal
preference. As you become familiar with the Steamer, adjust cooking times.
l A single layer of food steams faster than several layers. Therefore, the cooking time for a larger quantity
of food will be increased. For example, 2 Ibs. of broccoli florets will need longer to steam than 1 lb.
l For best results, be sure pieces of food are similar in size. If pieces vary in size and layering is
required, place smaller pieces on top.
l Do not crowd food in the Steaming Bowl or Rice Bowl. Arrange the food with spaces between pieces
to allow for maximum steam flow.
l When steaming large quantities of food, remove lid about halfway through the steaming time
and stir using a long handled utensil, protecting your hands from the steam with oven mitts.
l Do not add salt and seasoning to the Steaming Bowl until after cooking. This is to avoid possible
damage to the heating element located in the Water Reservoir
l Save liquid in Drip Tray to use in soups, sauces, and gravies
l Never steam meat, poultry or seafood from frozen. Always thaw completely first.
l All the times stated in the “Steaming Charts and Recipes” are based on the use of cold water in the
Water Reservoir.
l The Rice Bowl is an ideal container for steaming other foods such as fruit. vegetables. puddings,
quick breads, cakes, etc. For best results, cook quick breads and cakes in a loaf pan.
Using two Steaming Bowls
l Always place the largest pieces of food with the longest cooking time in the lower bowl
l You may place a different food in the upper and lower bowls. Condensation will drip from the upper
bowl onto the lower bowl; be sure the flavors compliment each other.
l Steaming times for food in the upper bowl are usually slightly longer so allow an extra 5 minutes.
l If foods with different cooking times are being steamed, start the food with the longest cooking time in
the lower Bowl. Then when the remaining steaming time reaches that of food with the shortest cooking
time, carefully remove the Lid with oven mitts and place the Separator Ring and upper Basket on top.
Cover with lid and continue steaming.
TO CLEAN YOUR FOOD STEAMER
Before its first use, be sure to clean all parts of the Food Steamer as directed below
to ensure cleanliness.
l NEVER IMMERSE THE BASE, CORD OR PLUG IN WATER OR ANY OTHER LIQUID.
l Unplug at the wall socket and leave the appliance to cool completely before cleaning.
l Do not clean any part of the unit with abrasive cleaners such as metal scouring pads,
scouring powders or bleach.
l We recommend washing the Steamer Lid, Rice Bowl, Steamer Bowl, and Drip Tray in hot,
soapy water. Rinse and dry thoroughly. Alternatively, all these parts, except the Water Reservoir,
can be cleaned in a dishwasher in the upper basket. However, continual cleaning in a dishwasher
may result in a slight loss of exterior gloss and dulling.
l Empty the water basin and change the water after each use.
9
Do not immerse the Water Reservoir in water. Fill it with warm, soapy water, then rinse thoroughly.
Wipe dry with a soft cloth.
STORAGE AND MAINTENANCE
Allow appliances to cool completely before storing. Store Food Steamer in a dry location such as
on a table top or counter top, or in a cupboard shelf. Wind the electrical cord into a coil and secure
with a twist fastener.
Other than the recommended cleaning, no further user maintenance should be necessary. Return the
Food Steamer to an authorized Sunbeam Appliance Service Station for servicing or repairs.
DESCAHNGTHEWATERRESERVOIR
After 2-3 months of consistent usage, chemical deposits may buildup in the Water Reservoir and
heating element inside your Food Steamer. This a normal process and the build-up will depend on
the degree
oi
water haruness in your area. It is essential that the appliance is descaled regularly
to maintain steam production and extend the life of the unit.
l Fill the Water Reservoir to the MAX level with approximately 3 cups of clear vinegar
(not brown vinegar). IMPORTANT: Do not use any other chemical or a proprietary descaler.
l Plug in a wall socket. Drip Tray, Steamer Bowl and Lid should be in place during this procedure.
l Set timer for 20-25 minutes to begin steaming. WARNING: If vinegar begins to boil over the
edge of base, unplug the unit and switch the timer off. Reduce the quantity of vinegar slightly.
l When the timer rings, unplug from the wall socket and allow to cool completely before pouring
out vinegar.
l Rinse the Water Reservoir several times with cold water. Clean other steamer parts as
directed above.

FOOD
CIIARTS
FRUITS AND VEGETABLES
l Cut off thick stems from broccoli, cauliflower, and cabbage.
l Steam leafy, green vegetables for the shortest possible time as they lose color easily,
l Salt and season vegetables after steaming for best results.
l Frozen vegetables should not be thawed before steaming. Cooking time will vary from
chartbelow.
CAULIFLOWER

MEAT AND POULTRY
l Steaming has the advantage of allowing all the fat to drip away during cooking. Due to the gentle
heat only choose tender, lean cuts of meat and trim off all fat. Steam in Steam Bowl for best results
l Serve steamed meat and poultry with flavorsome sauces or marinate before steaming.
l Thoroughly cook all food before serving. Pierce with a knife or skewer to check that the center is
cooked and juices run clear.
l Sausage must be completely cooked before steaming.
FOOD TYPE WATER
QUANTIN
LEVEL
STEAM TIME SPECIAL NOTES
BEEF
CHICKEN
l/2-rn. slices of
112
lb. MIN B-10 mm Trim off all fat.
rump, sirloin or Steamed beef has
fillet steak a firm texture
Boneless breast 4 pieces MAX 12-15 min. Remove skin
4
oz
each before cooking.
Layer for maximum
steam flow.
CHICKEN
LAMB
PORK
Drumsticks 4 pieces MAX 20-25 min. After steaming
brown skrn in
oven, if desired.
Chops with or 4 chops MAX lo-15 mm Trim off all fat.
without bone (314-m thick)
Loin cut Into 1 lb. MAX IO-15 min. Trim off all fat
pieces
Tenderlorn, fillet,
1
lb. or 4 pieces MIN 5-10 min. Trim off all fat.
loin steaks or (l/2-in. thick)
SAUSAGES
(precooked)
loin chops
Frankfurters 1 lb.
Knockwurst 1 lb.
MIN
MAX
II-13
min.
16-18 min.
Pierce skins
before steaming.
RICE/GRAINS
l Cook rice and required quantity of liquid together in the Rice Bowl.
l 2 cups uncooked rice will make 5 cups cooked rice. Follow recipes below.

FISH AND SEAFOOD
l Fish is cooked when it is opaque and flakes easily with a fork.
l Frozen fish may be steamed without defrosting if separated before steaming and the cooking time
is extended.
l Add lemon wedges while steaming to improve flavor.
FOOD
FISH,fillets TYPE
Sole
Cod, haddock,
trout
UUANTITY
112 lb.
112 lb.
WATER
LEVEL
STEAM TIME
SPECIAL NOTES
MIN
9-13 min.
MIN
5-10 min.
FISH,3/4in
thick steaks Cod, salmon 4 steaks
MAX
15-18
min.
CLAMS
Fresh 1 lb.
MAX IO-20 min.
Layer shells for maximum
steam flow. Steaming is
done when shells are
completely open.
LOBSTER,
tails Fresh
1
or 2 tails MAX
16-19 min. Meat will be opaque
when done. Cook longer
if necessary.
MUSSELS
Fresh 1 lb.
MIN
6-12 min. Steaming is done when
shells completely open.
OYSTERS Fresh 6
MAi
lo-16 min.
Steaming is done when
shellscomoletelv
ooen.
SCALLOPS Fresh
112
lb.
I
MIN lo-13 min.
Stir halfway through
steam time. Meat opaque
and flaky when done.
SHRIMP
Fresh
l/2
lb. MAX lo-15 min.
Meat will be opaque
when done. Cook longer
if necessary.
RECIPES
DINNERS
TARRAGON CHICKEN BREASTS with GREEN BEANS AND SLICED ALMONDS
4 4 oz. chicken breasts 2 cups fresh green beans
2 tablespoons chopped tarragon
l/4
cup sliced almonds
1 cup cream of chicken soup* Salt and pepper to taste
Pour cream of chicken soup in Rice Bowl. Add chicken breasts sprinkled with tarragon, salt and pepper to taste.
Arrange cleaned green beans and almonds in Steamer Bowl around Rice Bowl. Fill Water Reservoir to
MAX Level. Cover and Steam for 20-25 minutes.
*Heavy cream can be substituted for cream of chicken soup if necessary
YIELD: 4
SERVINGS

TROUT FILLETS WITH VEGETABLES
4 trout fillets (6 oz. each)
4 shces lean bacon
2 raw carrots, sliced
Salt and pepper to taste
l/2 cup raw green beans
l/4 cup raw mushrooms, sliced
l/4 cup butter or margarine
Wash and peel the vegetables, and cut them into
l-114
inch sticks. Butter 4 pieces of aluminum foil and lay
a slice of bacon, a trout fillet, and a quarter of the vegetables onto each one. Season with salt and pepper,
and add a small pat of butter to each before wrapping in foil. Fill Water Reservoir to MAX level. Place in
Steaming Bowl, cover and steam for 15 minutes. Remove foil before serving.
YIELD:
4 SERVINGS
SALMON STEAKS WITH FENNEL
4 salmon steaks (5 oz. each)
2 tbsp. fennel seeds
114 cup butter or margarine
Lemon juice to taste
Salt and pepper to taste
Season the salmon steaks with salt and pepper. Sprinkle them with fennel and place in the Steaming Bowl.
Fill Water Reservoir to MAX level. Steam for 10
-
15 minutes. Separately melt the butter and add the lemon
juice. Carefully remove the skin from the cooked salmon. Serve basted with melted butter and lemon juice.
CREAMY SHRIMP AND RICE
1 cup uncooked white or wild rice Salt and pepper
l-1/4
cup chicken broth 2 tbsp. sliced green onions
l-314 cup cream of potato soup 1 cup frozen cooked shrimp
l/2 cup shredded Swiss cheese 2 tbsp. sliced almonds, toasted
Combine rice, chicken broth, potato soup, onions, cheese, shrimp, and salt and pepper in Rice Bowl. Stir well.
Fill Water Reservoir to MAX level. Steam for 60 minutes. Stir once while cooking. Garnish with sliced almonds
Y
IELD
: 4 S
ERVINGS
VEGETABLES
VEGETABLES AU GRATIN
1 cup raw carrots 1 cup celery
114 cup butter or margarine l/4 cup grated cheddar cheese
2 raw baking potatoes Salt and pepper to taste
Peel the vegetables and cut them into
l-112
inch pieces. Place in Steaming Bowl. Fill Water Reservoir
to MAX level. Steam for 15 minutes. Remove from Steaming Bowl. While still piping hot, baste with butter
or margarine, then sprinkle with cheese. Add salt and pepper to taste.
Y
IELD
: 4 S
ERVINGS
DESSERTS
RICE PUDDING
112 cup white rice
1 cup milk
l/2 cup sugar
1 tbsp. vanilla extract
Raisins (optional)
Combine rice, milk, sugar, vanilla extract, and raisins in Rice Bowl. Fill Water Reservoir to MAX level.
Steam for 35 minutes. Stir once while cooking.
Y
IELD
: 4 S
ERVINGS

STEWED APPLES WITH CINNAMON
4 apples Cinnamon to taste
112 cup sugar
Peel and core the apples. Cut them into quarters. Place the apples in the Steaming Bowl, and sprinkle with
cinnamon. Fill Water Reservoir to MAX level Steam for 20 minutes. Remove the apples and mash them with
a fork until blended. Stir in sugar and serve. YIELD:
4
SERVINGS
QUICK BREADS
Believe it or not, you can even make delicious Quick Breads in your Food Steamer! They are actually ideal for
steam cooking because they contain no yeast. These breads can be enjoyed throughout the day. They offer a
tasty change as a breakfast food, a light but satisfying dessert at lunch, in place of bread or rolls at dinner,
and of course a delicious snack for children and adults alike. If these breads, or any other breads accidentally
become dried out, just place them back in your Food Steamer uncovered for 2-3 minutes, and they will regain
their original freshness.
MOIST &DELICIOUS MOLASSES CAKE
2 cups flour
1
cup water
l/2 cup sugar l/2 cup molasses
112 cup brown sugar 1 teaspoon baking soda
l/4 cup butter or margarine
Combine flour, sugar, brown sugar and butter or margarine in a bowl. Set aside l/2 cup mixture for topping.
Add water, molasses, and baking soda to large portion of crumb mixture. Pour into greased and floured Rice
Bowl. Sprinkle with remaining crumb mixture. Cover Rice Bowl with aluminum foil to prevent water from
entering. Be sure the foil creates a tight seal around the Rice Bowl. Fill Water Reservoir to MAX level.
Place Rice Bowl in Steaming Bowl. Steam for 60 minutes
COFFEE CAKE
112 cup margarine 2 cups flour
1 cup sugar l-112 teaspoons baking powder
2
ems 1teaspoon baking soda
1 cup milk 1 teaspoon vanilla
Cinnamon, to taste
Combine all ingredients except cinnamon in a bowl. Pour into greased and floured Rice Bowl. Sprinkle with
cinnamon. Cover Rice Bowl with aluminum foil to prevent water from entering. Be sure the foil creates a tight
seal around the Rice Bowl. Fill Water Reservoir to MAX level. Place Rice Bowl in Steaming Bowl. Steam for
60 minutes. Sprinkle with more cinnamon when finished.
BANANA BREAD
l-112 cup flour 2-3 ripe bananas mashed (1 cup)
314 cup sugar l/2 cup margarine
2 teaspoons baking powder l/4 cup milk
112 teaspoon baking soda
1
egg
112 teaspoon salt
Combine flour, sugar, baking powder, baking soda, and salt. Add bananas, margarine, milk and egg. Pour into
greased and floured Rice Bowl. Cover Rice Bowl with aluminum foil to prevent water from entering. Be sure the
foil creates a tight seal around the Rice Bowl. Fill Water Reservoir to MAX level. Place Rice Bowl in Steaming
Bowl. Steam for 60 minutes.

LYEARHMITEDWARRANTY
Sunbeam Products Inc. warrants that, for a period of one year from date of purchase, this
product shall be free of mechanical and electrical defects in material and workmanship.
Our obligation hereunder is limited to repair or replacement, at manufacturer’s option,
of this product during the warranty period, provided that the product(s) purchased in the
United States are sent postage prepaid directly to:
SUNBEAM APPLIANCE SERVICE STATION
117 Central Industrial Row
Purvis, MS 39475
Answers to questions regarding this warranty or your nearest U.S.A. authorized service
location may be obtained by calling toll free l-800-597-5978 or by writing to
Sunbeam -Consumer Affairs at
P.O.
Box 948389, Maitland, Florida 32794-8389.
For products purchased in Canada please call to:
SUNBEAM APPLIANCE SERVICE STATION (KND)
1-800-667-8623 or email us at
Answers to questions regarding this warranty or your nearest Canadian authorized service
location may be obtained by calling toll free in Canada l-800-667-8623.
For warranty information or an authorized service location outside of the United States
and Canada please see the warranty service card inserted in the product packaging.
DONOTRETURNTHISPRODUCTTOTHE
PLACE OF PURCHASE; DOING SO MAY DELAY THE
PROCESSING OF YOUR WARRANTY CLAIM.
This warranty does not cover normal wear of parts or damage resulting from any of the
following: negligent use or misuse of the product, use on improper voltage or current, use
contrary to operating instructions, or disassembly, repair or alteration by any person other
than authorized by the service center. Product repair or replacement as provided under this
warranty is your exclusive remedy. Sunbeam Products Inc. shall not be liable for any
incidental or consequential damages for breach of any expressed or implied warranty
on this product. Except to the extent prohibited by applicable law, any implied warranty of
merchantability or fitness for a particular purpose on this product is limited in duration to
the duration of the above warranty. Some states and provinces do not allow the exclusion
or limitation of incidental or consequential damages, or allow limitation on how long an
implied warranty lasts, so the above limitations or exclusion may not apply to you. This
warranty gives you specific legal rights, and you may also have other rights which vary
state to state or province to province.

Félicitations, avec votre nouveau cuiseur à la vapeur
Oster@
Designer@, vous allez bientôt
pouvoir créer des repas complets, délicieux et sains à la vapeur! La cuisine à la
vapeur
permet
de conserver toutes les vitamines et minéraux dans les aliments qui sont souvent perdus par
d’autres méthodes de cuisson. Vous pourrez enfin préparer des petits plats en quelques minutes
seulement sans devoir utiliser du beurre ou de I’huile. Le cuiseur à la vapeur vous permet de
cuisiner du poisson, de la volaille, des légumes, du riz et même du pain sans aucune difficulté
de préparation ou de nettoyage. Vous pourrez préparer des repas entiers dans les 2 grands bols
de 3 litres et éviterez les poêles et casseroles recouvertes de graisse ou d’aliments collés dans
le fond et ennuyeux à laver. Et, grâce à notre technologie de “vapeur instantanée”, vous aurez
de la vapeur en moins d’une minute! Les pages suivantes contiennent des suggestions d’utilisation
pour une parfaite cuisson à la vapeur. Exercez-vous d’abord avec des légumes et aventurez-vous
ensuite avec des plats plus sophistiqués. Utilisez toute votre imagination pour créer des recettes
intéressantes avec de la vapeur!
120VOLTS/900WATTS
Indications Spéciales
Cet appareil est muni d’un fil électrique court afin de réduire l’emmêlement ou le risque
que quelqu’un trébuche sur le fil. Si nécessaire, utiliser une rallonge électrique, en faisant preuve
de précaution. Les rallonges électriques sont à utiliser avec prudence. Si une rallonge électrique
est utilisée, les caractéristiques électriques de celle-ci doivent être au moins de la même valeur
que celles indiquées sur l’appareil. Placer le cordon d’alimentation de manière à ce qu’il
ne pende pas du comptoir ou de la table, où il pourrait être accessible aux enfants
ou provoquer un trébuchement par inadvertance.
Pour réduire le risque de choc électrique, cet appareil est doté d’une fiche polarisée
(une broche est plus large que l’autre). Si la fiche ne s’enfonce pas complètement dans la prise,
la retourne et essayer de nouveau. Si elle ne s’adapte toujours pas à fond, consulter un
électricien qualifié. Veillez à respecter les mesures de
securité
de la prise polarisée.
Lors de l’utilisation d’appareils électriques, certaines précautions essentielles
doivent toujors être observés, notamment:
l Veuillez lire tout le mode d’emploi, les étiquettes et les avertissements avant l’utilisation
du cuiseur à la vapeur.
l Eviter de toucher les surfaces chaudes. Utiliser les manivelles ou les interrupteurs.
Faites attention aux surfaces brûlantes. Utilisez toujours des gants isolants pour manipuler
du matériel brûlant. Ne vous approchez pas de la vapeur brûlante qui s’échappe du couvercle
lorsque le cuiseur à la vapeur est en marche. Ne vous penchez pas au dessus du cuiseur à la
vapeur lorsque celui-ci génère de la vapeur. Retirez le couvercle en le soulevant loin de vous.
Pour vérifier la cuisson des aliments, utilisez des ustensiles de cuisine munis d’un long manche.

l Laissez refroidir complètement le cuiseur avant de le nettoyer ou de le ranger
l Laissez refroidir complètement le cuiseur avant d’ajouter ou de retirer des pièces,
l Retirez toujours la prise du cuiseur à la vapeur lorsque vous ne l’utilisez pas
etavantdelenettoyer.
l Pour vous protéger des risques d’électrocution, ne plongez jamais le cordon,
ou l’appareil dans l’eau ou tout autre liquide.
l faites particulièrement attention lorsque l’appareil est utilisé par, ou en présence
d’enfants ou d’invalides.
l Ne posez rien sur le fil électrique. Ne branchez pas le fil électrique dans un endroit où
il y a beaucoup de passage et où l’on risque de trébucher dessus. Ne laissez pas que
le cordon pendre du bord d’une table ou d’un meuble; ne le laissez pas non plus entrer
en contact avec des surfaces chaudes.
l Ne faites pas fonctionner cet appareil si le fil électrique est usé ou si la prise est endommagée
ou si l’appareil fonctionne mal ou est tombé par terre ou à été endommagé d’une autre façon.
Retourner l’appareil au Centre de Service Autorisé Sunbeam Appliance le plus près aux fins
d’inspection, de réparation.
l Nepasutiliseràl’extérieur.
l Ne pas placer sur ou près d’un brûleur à gaz ou électrique, ou dans un four chaud.
l Soyez extrêmement prudent lorsque vous bougez l’appareil et qu’il contient de l’eau ou un autre
liquide brûlant.
. Ne faites pas fonctionner l’appareil à proximité d’un mur ou d’un meuble afin d’éviter
que ceux-ci soient endommagés par la vapeur.
l Utilisez l’appareil sur une table de travail plate et stable loin de l’eau.
l Veillez à ce qu’il y ait toujours suffisamment d’eau pour le temps de cuisson nécessaire.
l L’utilisation d’accessoires non recomandés par le fabricant peut causer des blessures
l Ne pas utiliser l’appareil à des fins autres que celles pour lesquelles il est destiné.
l Pour débrancher, tournez n’importe quelle commande en position “off” et retirez la prise
l ATTENTION: Pour réduire le risque de choque électrique, cuisinez seulement
dans un récipient détachable.
Cet Appareil Est Prévu pour Usage Ménager Uniquement

LES PIECES DU CUISEUR A LA VAPEUR
A) LE COUVERCLE du cuiseur à la vapeur est muni d’une poignée pour éviter de se brûler
les doigts lorsqu’on l’enlève. Soyez toutefois prudent lorsque vous retirez le couvercle car
il y a des petits orifices qui laissent échapper la vapeur lorsque l’appareil est en marche.
Faites attention aussi à la vapeur qui s’échappera lorsque vous ouvrirez le couvercle.
Levez le couvercle loin de vous lorsque vous l’ouvrez. Utilisez toujours des gants isolants
pour manipuler les pièces brûlantes du cuiseur à la vapeur.
B) LE BOL DE CUISSON est en plastique
transparent, peut contenir 3 litres et a
une forme oblongue qui s’adapte à une
grande variété de légumes et d’aliments.
(Votre appareil est livré avec deux bols
de cuisson)
C) LE BOL A RIZ est en plastique blanc et
peut contenir 5 tasses. II doit être placé à
l’intérieur du bol De cuisson et est utilisé
pour faire du riz. Ce bol risque de se
tacher si vous l’utilisez pour cuire des
aliments dans une sauce rouge.
D) L’ANNEAU DE SEPARATION sépare
les deux bols de cuisson. N’utilisez
jamais deux bols de cuisson sans
l’anneau de séparation.
E) LE PLATEAU DE CONDENSATION
empêche la condensation de l’eau et
les liquides alimentaires de tomber
dans le réservoir d’eau afin que la vapeur
soit toujours produite à partir d’une
eau propre.
F)
LE RESERVOIR D’EAU contient l’eau
pour la vapeur. N’utilisez aucun autre
liquide dans ce réservoir.
G) LA MINUTERIE compte jusqu’à soixante
(60) minutes et est munie d’une sonnerie
pour indiquer la fin de la cuisson.
H) LE VOYANT indique lorsque l’appareil est en mode de cuisson.
POUR USAGE MÉNAGER UNIQUEMENT

LA CUISINE AVEC VOTRE CUISEUR A LA VAPEUR
l Placez l’appareil sur une surface plate et stable, éloigné des murs et des
placards en surplomb.
l Versez de l’eau froide dans le réservoir d’eau jusqu’au niveau MAX pour
les aliments qui nécessitent entre 13 et 60 minutes de temps de cuisson
ou jusqu’au niveau MIN pour ceux qui nécessitent moins de 13 minutes.
Voir Figure 1. Les niveaux MAX et MIN sont indiqués par des lignes en
relief à l’intérieur du réservoir d’eau. Consultez les tableaux de cuisson
ou les recettes pour les temps de cuisson recommandés. Si l’appareil
ne produit plus de vapeur ou si il y a une nette reduction de la vapeur
avant que les aliments soient cuits, rajoutez de l’eau au réservoir d’eau.
REMARQUE: Ne pas ajouter du sel, du poivre, de l’assaisonnement,
des herbes, du vin, du bouillon ou tout autre liquide au réservoir d’eau.
l Placez le plateau de condensation dans la base et veillez à ce qu’il reste plat.
l Votre appareil peut être utilisé de quatre façons:
L’Utilisation d’un Seul Bol -Mettez les aliments dans le bol de cuisson
et placez-le ensuite sur la base. Voir Figure 2. II ne faut pas utiliser l’anneau
de separation.
L’Utilisation des Deux Bols
-
Mettez les plus gros aliments qui nécessitent
un temps de cuisson plus long dans le bol du dessous et placez-le sur la base.
Mettez l’anneau de séparation en place. Faites reposer dessus le panier
supérieur.
L’anneau de séparation permet aux deux bols de cuisson d’être bien remplis et
stables lorsqu’ils sont empilés l’un sur l’autre. N’utilisez jamais votre cuiseur à
la
WWII
flcbrw
bSnrn+
sanc l’anneau
de
séparation car
les
deux bols
de Figure
3w
utre. Si c’est le cas, mettez un peu
7
,Y
‘“yvu,
““LVI
YYV’.jIYI
vu,,.,
I
UII
cuisson pourraient se coller l’un à l’a
d’huile
végétale autour de l’anneau pour les séparer.
L’Utilisation du Bol
À
Riz -II faut ajouter de l’eau ou du bouillon avec le
riz dans le bol à riz. Le bol de cuisson doit d’abord être placé sur la base et
ensuite le bol à riz est placé à l’intérieur du bol de cuisson. Voir Figure 4.
Mesurez la quantité de riz et de liquide qu’il faut et mettez tout dans le bol à
riz. Referez-vous aux tableaux de cuisson et aux recettes à la page 21. Le bol à
riz s’utilise avec n’importe quel bol de cuisson.
L’lttilisation
d’un Moule à Pain (un moule à pain de 20 x 10 cm rentrera
dans le cuiseur à la vapeur) -Vous pourrez même faire des cakes et du pain
avec votre cuiseur à la vapeur. Versez la pâte pour le cake ou le pain dans le
moule à pain et mettez celui-ci dans le bol de cuisson. Couvrez toujours le
moule d’une feuille de papier aluminium avant la cuisson. Voir Figure 5.
Consultez les recettes de cuisine à la vapeur à la page 22.
l Fermez le couvercle.
l Mettez la prise dans le contact. Ne faites jamais fonctionner le cuiseur à la
vapeur sans que le bol de cuisson et le couvercle soient bien en place.
l Réglez la minuterie au temps de cuisson recommandé. La cuisson à la
vapeur commencera en moins d’une minute. II est normal qu’il y ait de la
condensation pendant la cuisson. Le voyant s’allumera lorsque la minuterie
se met en marche.
REMARQUE: La minuterie fonctionne même si l’appareil n’est pas
branché. Veillez à ce que le voyant soit allumé lorsque vous
mettez la minuterie en marche.

ATTENTION: Ne touchez pas la base, les bols de cuisson ou le couvercle pendant la
cuisson car ils peuvent être brûlants. Utilisez toujours des gants isolants lorsque vous
manipulez le cuiseur à la vapeur.
l La minuterie sonnera à la fin de la cuisson et la fonction de cuisson à la vapeur s’éteindra
automatiquement.
l Lorsque vous avez fini d’utiliser l’appareil, débranchez-le et laissez-le refroidir avant de retirer
le plateau de condensation.
ATTENTION: Retirez le plateau de condensation avec prudence. Alors que les autres
pièces de l’appareil sont déjà refroidies, l’eau dans le réservoir d’eau et dans le plateau
de condensation peut encore être brûlante.
CONSEILSD'UTILISATION
l Les temps de cuisson devront être augmentés pour la cuisson à haute altitude. Les temps exactes
varieront selon l’endroit.
l Les temps de cuisson dans les tableaux et les recettes sont atitre indicatif uniquement. Les temps
de cuisson peuvent variés selon la taille des morceaux d’aliments, l’espace entre les aliments
dans le bol de cuisson, la fraîcheur des aliments et vos préférences personnelles, Adaptez les temps
de cuisson au fur et à mesure que vous familiarisez avec le cuiseur.
l Une seule couche d’aliments cuit plus vite que plusieurs couches. Ainsi, le temps de cuisson pour
une grande quantité d’aliments devra être augmenté.
Il
faudra plus de temps par exemple pour cuire
1 kg de brocolis que pour cuire 500 g.
l Pour obtenir les meilleurs résultats veillez à ce que les aliments soient tous plus ou moins
de la même taille. Si les morceaux sont de tailles différentes et si il faut les mettre sur
plusieurs couches, placez les petits morceaux au dessus.
l Ne remplissez jamais le bol de cuisson ou le bol à riz jusqu’à ras bord. Veillez à ce qu’il y
ait un peu d’espace entre les aliments pour permettre un bon passage de la vapeur.
l Pour cuire une grande quantité d’aliments, retirez le couvercle à mi-chemin du temps de cuisson
et remuer les aliments à l’aide d’un ustensile à longue manche tout en protégeant vos mains
de la vapeur avec des gants isolants.
l N’ajoutez pas de sel ou de l’assaisonnement au bol de cuisson avant la fin de la cuisson.
Vous éviterez ainsi d’endommager I’elément chauffant qui se trouve dans le réservoir d’eau.
l Conservez le liquide du plateau de condensation pour faire des soupes, des sauces et des jus.
l Ne cuisez jamais de la viande, de la volaille ou des fruits de mer
congeles.
Dégelez-les d’abord.
l Tous les temps de cuisson dans les <<Tableaux de cuisson et les recette+ sont basés sur l’utilisation
d’eau froide dans le réservoir d’eau.
l Le bol à riz est un récipient idéal pour cuire d’autres aliments tels que des fruits, des légumes,
des puddings, des pains, des cakes etc. Pour de meilleurs résultats, faites les pains et les cakes
dans un moule à pain.
L’tftilisation
de Deux Bols de Cuisson
l Mettez toujours les plus gros morceaux d’aliments qui nécessitent le plus de temps de cuisson
dans le bol du dessous.
l Vous pouvez mettre des aliments différents dans le bol supérieur et inférieur.
Des gouttes de condensation tomberont du bol supérieur dans le bol inférieur.
Veillez donc à ce que les saveurs soient complémentaires.
l Les temps de cuisson sont généralement un peu plus longs pour le bol supérieur.
Calculez donc 5 minutes de plus.
l Si vous devez cuire des aliments aux temps de cuisson variables, commencez par cuire les aliments
qui nécessitent le plus de temps de cuisson dans le bol inférieur. Lorsque le temps de cuisson restant
atteindra celui des aliments avec le temps de cuisson plus court, retirez le couvercle prudemment
avec des gants isolants et placez l’anneau de séparation et le bol supérieur sur le bol du dessous.
Mettez le couvercle et laissez continuer la cuisson.

POUR NETTOYER VOTRE CUISEUR A LA VAPEUR
Avant de l’utiliser pour la première fois, nettoyez bien toutes les pièces de votre cuiseur à la vapeur
comme il est indiqué ci-dessous.
. NE JAMAIS PLONGER LA BASE, LE FIL ELECTRIQUE OU LA PRISE DANS DE L’EAU
OU DANS TOUT AUTRE LIQUIDE.
l Débranchez l’appareil et laissez-le refroidir complètement avant de le nettoyer.
l Ne jamais nettoyer les pièces de l’appareil avec des produits d’entretien corrosifs tels que
des éponges ou des poudres à récurer ou de l’eau de Javel.
l Nous vous recommandons de nettoyer le couvercle, le bol à riz, le bol de cuisson, et le plateau
de condensation dans de l’eau chaude savonneuse. Rincez et séchez minutieusement.
Toutes ces pièces, sauf le réservoir d’eau, peuvent être lavées dans le panier supérieur
du lave-vaisselle. Cependant, un nettoyage fréquent dans le lave-vaisselle peut causer
une légère perte du brillant extérieur et ternir les pièces.
l Videz la cuvette d’eau et changez l’eau après chaque usage.
l Ne plongez pas le réservoir d’eau dans de l’eau. Remplissez-le avec de l’eau chaude savonneuse
et rincez-le minutieusement. Essuyez avec un chiffon doux.
RANGEMENT ET ENTRETIEN
Laissez refroidir l’appareil entièrement avant de le ranger. Ranger le cuiseur à la vapeur dans un endroit
sec tel que sur une table ou dans une armoire. Enroulez le fil électrique et serrez avec une attache.
A part le nettoyage recommande, aucun autre entretien est nécessaire. Renvoyez le cuiseur à la vapeur
à un centre de service après-vente pour appareils Sunbeam pour tout autre entretien ou réparation.
DETARTRAGE DU RESERVOIRD'EAU
Après 2 ou 3 mois d’usage fréquent, du tartre viendra se poser dans le réservoir d’eau et sur l’élément
chauffant à l’intérieur de votre cuiseur à la vapeur. C’est tout à fait normal et la quantité de tartre
dépendra de la qualité de l’eau dans votre région. Il est important de détartrer l’appareil régulièrement
afin de maintenir une bonne production de vapeur et pour garder l’appareil en bon état de marche.
l Remplissez le réservoir jusqu’au niveau MAX avec environ 3 tasses de vinaigre blanc
(pas du vinaigre de vin rouge). IMPORTANT: N’utilisez aucun autre produit chimique de détartrage.
l Mettez la prise dans le contact. Le plateau de condensation, le bol de cuisson et le couvercle doivent
être en place pendant cette procédure.
l Mettez la minuterie à 20
-
25 minutes pour commencer la cuisson. ATTENTION: Si le vinaigre
commence à déborder en bouillant, débranchez l’appareil et arrêtez la minuterie. Diminuez la quantité
de vinaigre.
l Lorsque la minuterie aura sonné, débranchez l’appareil et laissez refroidir complètement avant
de déverser le vinaigre.
l Rincez le réservoir d’eau plusieurs fois à l’eau froide. Nettoyez les autres pièces du cuiseur
à la vapeur comme il est indiqué ci-dessus.

TABLEAUX ALIMENTAIRES
FRUITSETLEGUMES
l Taillez les pieds des brocolis, des choux-fleurs et des choux.
l Cuisez les légumes à feuilles vertes le moins longtemps possible car ils perdent vite leur couleur.
l Salez et assaisonnez les légumes après la cuisson pour obtenir de meilleurs résultats.
l II n’est pas nécessaire de décongeler les légumes congelés avant de les cuire à la vapeur.
Le temps de cuisson sera cependant différent que celui indiqué ci-dessous.
JEUNESPOUSSES
HARICOTSVERTS
PÊCHES
Fraîches
PRUNES Fraîches
POMMESDETERRE, Fraîches, petites
nouvelles
POMMESDETERRE Fraîches, coupées
en morceaux
COURGES Fraîches
Table of contents
Languages:
Other Oster Electric Steamer manuals