Oster 4728 User manual

Instruction Manual
MULTI-USE RICE COOKER WITH UNIFORM COOKING TECHNOLOGY
PLEASE READ ALL INSTRUCTIONS BEFORE USING THIS APPLIANCE
Manuel d'Instructions
CUISEUR À RIZ À MULTI-USAGE À CUISSON UNIFORME
LIRE TOUTES LES INSTRUCTIONS AVANT D'UTILIZER CET APPAREIL
Manual de Instrucciones
ARROCERA MULTI-USOS CON COCCIÓN UNIFORME
LEA TODAS LAS INSTRUCCIONES ANTES DE USAR ESTE APARATO
Manual de Instruções
PANELA ELÉTRICA DE ARROZ MULTI-USO COM COZIMENTO UNIFORME
LEIA TODAS AS INSTRUÇÕES ANTES DE USAR ESTE APARELHO
4728, 4729,
4730 & 4731
4728, 4729,
4730 & 4731

1
IMPORTANT SAFEGUARDS
When using electrical appliances, basic safety instructions should always be followed,
including the following:
• READ ALL INSTRUCTIONS BEFORE USING YOUR RICE COOKER.
• Do not touch hot surfaces. Use pot holders when removing Lid or handling hot
containers to avoid steam burns.
• To protect against risk of electric shock, do not immerse the Heating Body in water or
other liquids.
• Close supervision is necessary when any appliance is used near children.
• Unplug from outlet when not in use. Unplug before putting on or taking off parts, and
allow to cool before cleaning.
• Do not operate any appliance with a damaged cord or plug, or after the appliance
malfunctions or has been damaged in any manner. Return appliance to an Authorized
Oster® Service Center for examination, repair or adjustment.
• Do not use outdoors.
• Do not let Cord hang over edge of table or counter, or touch hot surfaces.
• Do not place on or near a hot gas or electric burner, or in a heated oven.
• Extreme caution must be used when moving an appliance containing hot food or water
or other hot liquids.
• Do not use appliance for other than its intended use.
• Lift and open Lid carefully to avoid scalding and allow water to drip into the Inner Pot.
• Do not operate this appliance without the Lid in place on the unit. Steam is generated
during use.
• The use of accessory attachments not recommended by this appliance manufacturer
may cause hazards.
• If a longer detachable power-supply cord or extension cord is used, (1) the marked
electrical rating of the extension cord should be arranged so that it will not drape over
the countertop or tabletop where it can be pulled on by children or tripped over
unintentionally.

2
SAVE THESE INSTRUCTIONS
(For 120 & 127 Volts)
To reduce the risk of electrical shock, this appliance has a polarized plug (one blade is
wider than the other). This plug fits a polarized outlet only one way. This is a safety
feature intended to help reduce the risk of electrical shock. If the plug does not fit fully
into the outlet, reverse the plug. If it still does not fit, contact a qualified electrician. Do
not attempt to defeat this safety feature.
THIS UNIT IS FOR HOUSEHOLD USE ONLY.

3
DESCRIPTION OF THE APPLIANCE
1. Glass Lid
2. Heating Body
3. Keep Warm Light (yellow)
4. Cook Light (red)
5. On-Switch Button
6. Power Cord
7. Measuring Cup
8. Paddle
9. Handle
10. Inner Pot
11. Steaming Tray (model 4731 only)
3
4
2
1
5
7
8
9
10
11
6

4
INSTRUCTIONS FOR USE
BEFORE USING FOR THE FIRST TIME
Clean the Glass Lid, Inner Pot, Paddle, Steaming Tray (model 4731 only) and Measuring
Cup according to the user maintenance instructions.
USING YOUR MULTI-USE RICE COOKER
1. Make sure appliance is unplugged.
2. Measure raw rice for desired amount with the Measuring Cup (180 ml) provided.
3. One cup of the uncooked rice will make about two cups of cooked rice. Maximum of
7 cups (1.2 L) uncooked rice for model 4728. Maximum of 10 cups (1.8 L) uncooked
rice for models 4729 and 4731. Maximum of 12 cups (2.2 L) uncooked rice for model
4730. Add rice to Inner Pot.
4. By using the Measuring Cup, add proper amount of water to the rice inside the Inner
Pot (for every cup [180 ml] of raw rice, add 1-1/4 cups of water). For sticker rice,
add slightly more water. For fluffier rice, use slightly less water.
5. Set the Inner Pot into the Rice Cooker. Make sure that the Inner Pot sits directly in
contact with the heating plate by turning it slightly from right to left until it is seated
properly. Cover with Lid. DO NOT OPERATE THIS APPLIANCE UNCOVERED.
STEAM IS GENERATED DURING USE.
6. Plug the Power Cord into an electrical outlet. Activate the Rice Cooker on by pushing
down the On-Switch Button down. Make sure the Cook Light (red) is on.
7. After 15 minutes mix the rice. Lift and remove the Lid carefully to avoid scalding and
allow water to drip into the Inner Pot. Use the Paddle or another long handheld utensil
to scoop and mix the rice. After mixing, cover the Inner Pot with the Lid.
8. When your rice is cooked, the Rice Cooker will automatically switch to the warm
function and the Keep Warm Light (yellow) will turn on. The Rice Cooker will keep
the rice warm until the unit is disconnected from the wall outlet.
9. The Rice Cooker will automatically keep rice warm at 140°F – 175°F (60°C – 80°C).
10. When the rice temperature dips below this range, the yellow Keep Warm Light will
turn off and the red Cook Light will turn on indicating that the heat preservation
process has begun. When the rice temperature reaches 140°F, the Keep Warm
Light (yellow) will once again turn on and the Cook Light (red) will turn off.
11. Allow the appliance to cool completely before cleaning.
Disconnect the plug from the wall outlet when not in use.

5
INSTRUCTIONS TO REHEAT RICE
To reheat cold rice, add 1/4 cup (4 Tbsp.) of cold water per cup of cooked rice,
stir to mix, then press On-Switch Button to start cooking.
When rice is warm, the Rice Cooker will automatically switch to the keep warm
function.
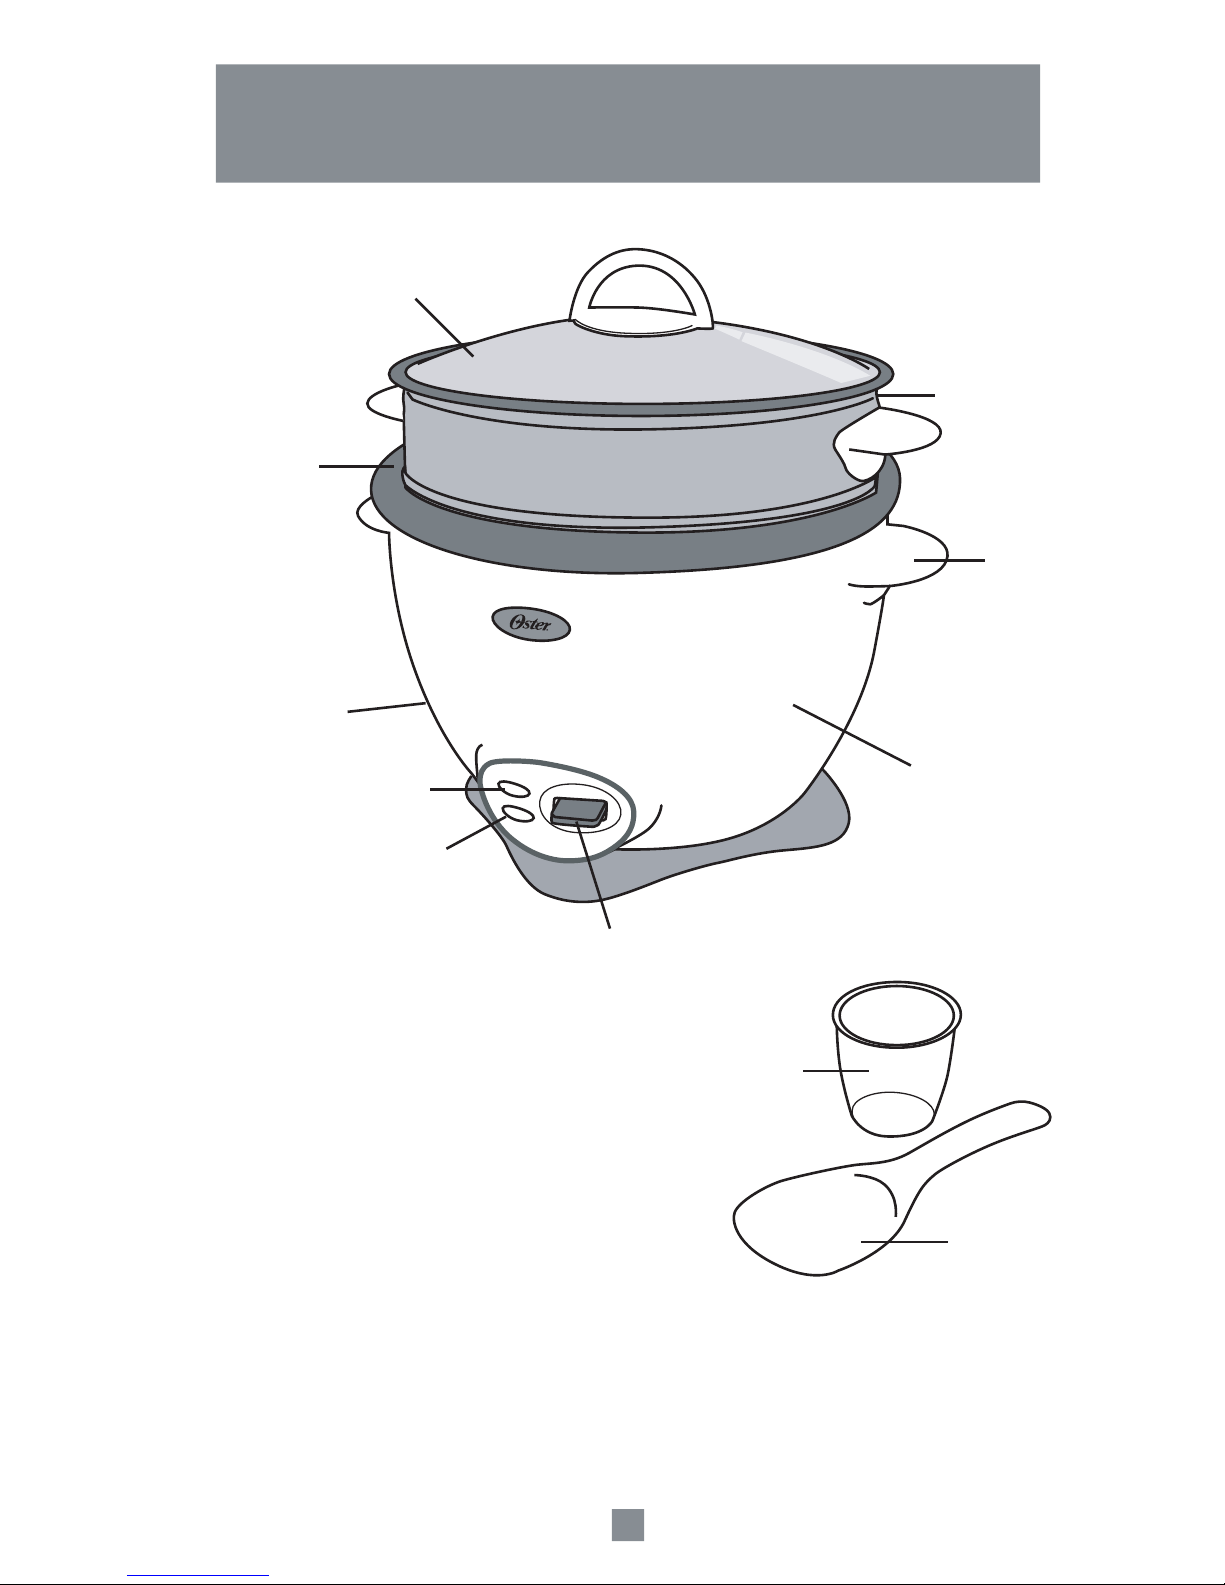
USING THE STEAMING TRAY (MODEL 4731 ONLY)
Steam cooking vegetables retains more nutrients than boiling or baking, while
preserving the bright, natural color.
1. Prepare vegetables by washing, peeling and then cutting into smaller sized pieces.
2. Make sure the unit is unplugged.
3. Fill the Inner Pot with the appropriate amount of water. (See Chart)
4. Set the Inner Pot into the heating body. Make sure that the Inner Pot sits directly
in contact with the heating plate.
5. Place vegetables in the Steaming Tray and position the Tray on top of the Inner
Pot. Cover with Lid. DO NOT OPERATE THIS UNIT UNCOVERED. STEAM IS
GENERATED DURING USE.
6. Plug the Power Cord into a wall outlet. Activate the Rice Cooker by pushing down
the On-Switch Button. Make sure the red Cook Light is on.
7. Time the cooking manually according to the chart below. The unit will automatically
switch to the keep warm cycle once all the water evaporates. If all the water
evaporates and you wish to extend the cooking cycle, add more water.
8. Once the vegetables have been steamed according to your personal preference,
remove the Steamer Tray from the Rice Cooker.
9. Disconnect from the wall outlet and allow the unit to cool completely before cleaning.
VEGETABLE QUANTITY WATER TIME
Green Beans 10 ounces / 300 g 1/3 Cup / 50 ml 30-35 minutes
Broccoli 10 ounces / 300 g 1/3 Cup / 50 ml 30-35 minutes
Carrots (Sliced) 8 ounces / 200 g 1/3 Cup / 50 ml 30-35 minutes
Cauliflower 8 ounces / 200 g 1/3 Cup / 50 ml 30-35 minutes
Corn (Kernel) 10 ounces / 300 g 1/3 Cup / 50 ml 40-45 minutes
Peas 10 ounces / 300 g 1/3 Cup / 50 ml 30-35 minutes
Spinach 5 ounces / 150 g 1/3 Cup / 50 ml 20-30 minutes
Mixed Vegetables 10 ounces / 300 g 1/3 Cup / 50 ml 30-35 minutes
NOTE: These times are approximate. It is recommended that you monitor the steaming process and
adjust the cooking time according to your preference. Stir vegetables occasionally during the cooking
process. When cooking rice, steaming times may vary.
NOTES:
Wash the rice in a separate bowl, prior to cooking, if desired.
For softer rice, we suggest preparing rice and water in the Inner Pot and letting soak for
10 – 20 minutes before cooking.

6
This appliance should be cleaned after every use.
1. Unplug the Rice Cooker from the wall outlet when not in use or before cleaning.
Never immerse the Heating Body in water or any other liquid! Allow the Rice Cooker
to cool completely before cleaning.
2. Do not use abrasive cleaners or scouring pads or steel wool to clean the Rice Cooker.
3. Heating Body: lightly wipe the exterior with a damp cloth or sponge.
DO NOT IMMERSE HEATING BODY INTO WATER OR ANY OTHER LIQUID.
Dry thoroughly with a soft cloth.
4. Inner Pot: fill with hot water and let sit for a while and then wash with hot, soapy water
using a sponge and dry thoroughly with a cloth or use dishwasher.
5. Lid, Measuring Cup, Paddle and Steaming Tray: wash in warm, soapy water. Rinse
thoroughly and dry. CAUTION: handle the Lid with extreme care, as it may become
slippery when wet or use dishwasher.
6. Heating plate: grains of rice or other foreign matter may stick to the heating plate.
These must be removed to prevent inadequate cooking. To remove cooked rice,
smooth sandpaper can be used. Smooth out and polish the spot for good contact
between the heating plate and the bottom of the Inner Pot.
7. There are no user serviceable parts inside this appliance. Do not attempt to repair this
appliance yourself as you could render it dangerous to use.
USER MAINTENANCE INSTRUCTIONS

7
Spanish Rice
250 grams of sausage (chorizo) 1 medium onion
1 tablespoon yellow pepper, ground 1 teaspoon paprika
2 cups tomatoes, diced, without skin or seeds 1 cup green peas
1 red pepper, diced 2 celery stalks, sliced
1 green pepper, diced 2 cups long-grain rice
3 cups chicken broth Salt and pepper
Preparation
Chop the onion with the Oster® chopper accessory. In the Oster® Multi-Use Rice Cooker,
sauté the sausage cut in slices, add onion, yellow pepper, paprika and tomatoes. Mix
together. Add the remaining vegetables, the rice and the broth. Check seasoning, cover
and cook until done. Garnish with curly parsley. Serve hot.
Fettuccini with Apple, Shrimp
and Curry Sauce
½ kg fettuccini 4 tablespoons butter
3 tablespoons flour 1 teaspoon curry
½ cup cream 1 cup chicken broth
2 cups apples, peeled and diced ½ kg shrimp
Parmesan cheese to taste Juice of one lemon (for the apples)
Preparation
In the Oster® Multi-Use Rice Cooker, melt butter, add flour and curry. Cook for 2 minutes.
Add cream, chicken broth, apples and shrimp. Stir until thickened. Remove from heat
and keep hot. In the Oster® Multi-Use Rice Cooker, pour sufficient water and salt to
cook fettuccini al dente. Serve the fettuccini with the sauce and sprinkle with Parmesan
cheese.
RECIPES

8
Rice with Shellfish
1 package (16 ounces or 400 grams) saffron rice 12 small clams
¼ lb (240 grams) shrimp, shelled and deveined, ¼ lb (250 grams) oysters
with or without tails 1 cup sweet peas
¼ red pepper, diced
Preparation
Wash clams, shucking thoroughly, and rinse well. Cook rice in the Oster® Multi-Use Rice
Cooker, following the instructions on the package. Add clams, shrimp, oysters, sweet
peas and red pepper five minutes before the rice is fully cooked. Mix well, without
stirring. Serve with French bread croutons and a fresh salad. Option: The saffron rice
may be substituted with brown rice.
Milanese Minestrone
½ kg chicken breast 2 cloves garlic, chopped
1 tablespoon basil ½ cup celery
½ cup fresh beans ½ teaspoon thyme
½ teaspoon oregano ½ cup onions, sliced
½ cup green pepper, chopped ½ cup mushrooms, sliced
½ cup squash, diced 2 cups tomatoes, diced,
3 medium potatoes, peeled and diced without skin or seeds
2 teaspoons of Worcestershire sauce ½ kg fine noodles
1 cup Parmesan cheese 3 tablespoons margarine
2 quarts water Salt
Preparation
In the Oster® Multi-Use Rice Cooker, pour water and boil chicken with the salt. When
chicken is cooked, remove and dice. Reserve the broth. In the Oster® Multi-Use Rice
Cooker, melt butter, add garlic, onion, celery, green pepper, mushrooms, beans and
squash. Sauté until soft. Add the tomatoes, then the potatoes and sauté for 5 more
minutes. Add this mixture to the chicken broth, add Worcestershire sauce, the herbs
bouquet (basil, thyme, oregano), salt, chicken and noodles. Cook 10 minutes until the
potatoes are cooked, but firm. Add Parmesan cheese while stirring. Cook 2 minutes
longer. Serve and sprinkle with more cheese.

9
Rice with Chicken
2 lb rice 1 onion
3 green peppers 2 carrots
4 cloves garlic celery to taste
4 chicken breasts 3 tablespoons salt
black pepper to taste oregano to taste
chicken broth, 1 envelope tomato paste
Preparation
Cook the chicken in water, salt, black pepper, oregano, chicken broth in the Oster®
Multi-Use Rice Cooker. When done, shred the chicken in the water in which it was
cooked and add green peppers, onion, garlic, celery and carrots, everything well
chopped. Cook 10 minutes, and add tomato paste and shredded chicken. After the
sauce is cooked, add the uncooked, washed rice and cover the rice somewhat more
than normal.
Rice and Tuna Salad
2 cups cooked rice 2 peppers in vinegar*
1 can tuna 100 gr green olives
3 hard-boiled eggs Mayonnaise
Salt and pepper Lettuce leaves
Olive oil Vinegar
Preparation
Cook the rice in the Oster® Multi-Use Rice Cooker in the traditional manner, remove and
place on a platter until it is completely cool. Dice the cooked peppers and slice the eggs.
Shred the tuna and add along with the remaining ingredients to the rice, reserving
some of the egg slices and olives to garnish the salad. Season with olive oil, salt, pepper
and vinegar. Serve the salad on a platter with lettuce leaves and garnish with hard-boiled
egg and olives.
* Peppers in vinegar: wash and cut the peppers in two lengthwise. Remove the seeds
and cook the peppers in a saucepan with two cups water and one-half cup vinegar with
a pinch of salt. After 15 minutes, remove from heat.

10
Rice Pudding
1 cup rice 3 cups water
1 cinnamon stick 2 whole cloves
1¾ cup evaporated milk 1¼ cup condensed milk
1 teaspoon grated lemon and orange peel ½ cup dark raisins
1 teaspoon vanilla ¼ cup grape brandy
1 egg yolk Powdered cinnamon
Preparation
In the Oster® Multi-Use Rice Cooker, cook the pre-washed rice with 3 cups of water,
cinnamon stick and cloves. Once the rice is cooked, add evaporated and condensed
milk, grated lemon and orange peel, and raisins. Continue stirring until set. Add vanilla,
grape brandy and the egg yolk well beaten. Sprinkle with cinnamon and serve.

11
1 - YEAR LIMITED WARRANTY
Sunbeam Products, Inc, warrants that for a period of ONE year from the
date of purchase, this product will be free from defects in material and workmanship.
Sunbeam, at its option, will repair or replace this product or any component of the
product found to be defective during the warranty period. Replacement will be made
with a new or remanufactured product or component. If the product is no longer available,
replacement may be made with a similar product of equal or greater value. This is your
exclusive warranty.
This warranty is valid for the original retail purchaser from the date of initial retail
purchase and is not transferable. Keep the original sales receipt. Proof of purchase
is required to obtain warranty performance. Oster® dealers, service centers, or retail
stores selling Oster® products do not have the right to alter, modify or any way change
the terms and conditions of this warranty.
This warranty does not cover normal wear of parts or damage resulting from any of the
following: negligent use or misuse of the product, use on improper voltage or current,
use contrary to the operating instructions, disassembly, repair or alteration by anyone
other than an Authorized Oster® Service Center. Further, the warranty does not cover:
Acts of God, such as fire, flood, hurricanes and tornadoes.
Sunbeam shall not be liable for any incidental or consequential damages caused by the
breach of any express, implied or statutory warranty or condition. Except to the extent
prohibited by applicable law, any implied warranty or condition of merchantability or
fitness for a particular purpose is limited in duration to the duration of the above warranty.
Sunbeam disclaims all other warranties, conditions or representations, express, implied,
statutory or otherwise. Sunbeam shall not be liable for any damages of any kind resulting
from the purchase, use or misuse of, or inability to use the product including incidental,
special, consequential or similar damages or loss of profits, or for any breach of contract,
fundamental or otherwise, or for any claim brought against purchaser by any other party.
How To Obtain Warranty Service: Please see the country specific warranty insert or
contact your local authorized distributor.
PLEASE DO NOT RETURN THIS PRODUCT TO THE PLACE OF PURCHASE

12
PRÉCAUTIONS IMPORTANTES
II est important d’observer un certain nombre de règles de sécurité élémentaires
pendant l’utilisation du cuiseur à riz automatique ou de tout appareil électrique:
• LISEZ TOUTES LES DIRECTIVES.
• Eviter de toucher les surfaces chaudes. Utiliser les manivelles ou les interrupteurs.
Utiliser des poignées pour saisir le couvercle ou manipuler le récipient lorsqu’il est chaud.
• Pour vous protéger des risques d’électrocution, ne plongez jamais le cordon
ou la cafetière dans l’eau ou tout autre liquide.
• Faites particulièrement attention lorsque l’appareil est utilisé par ou en présence
d’enfants.
• Débrancher l’appareil lorsqu’il n’est pas utilisé, laissez refroidir avant d’y placer
ou y retirer des pièces et avant de le nettoyer.
• Ne pas faire fonctionner un appareil dont le fil ou la fiche est endommagé ou
après que l’appareil ait mal fonctionné, qu’il ait été échappé ou endommagé
d’une façon quelconque. Retourner l’appareil au Centre de Service Autorisé
Sunbeam le plus près aux fins d’inspection, de réparation, de réglage électrique
ou mécanique.
• Ne pas l’utiliser à l’extérieur. Cet appareil est conçu pour usage domestique
seulement.
• Ne pas laisser le fil pendre de la table ou d’un comptoir et éviter qu’il touche
à une surface chaude.
• Ne pas placer sur ou près d’un poêle chaud ou dans un four chaud.
• Déplacer un appareil électroménager contenant de I’huile bouillante ou tout autre
liquide chaud en faisant preuve de la plus grande prudence.
• Ne pas utiliser cet appareil à des fins autres que celles pour lesquelles il est conçu.
• Soulever et ouvrir le couvercle avec précaution pour éviter tout risque de brûlure
et permettre à l’eau de couler dans l’appareil.
• Ne faites pas fonctionner cet appareil sans que le couvercle ne soit en place sur l’unité.
De la vapeur est produite durant son utilisation.
• L’utilisation d’accessoires non conseillés ou vendus par le fabricant présente
des risques d’incendie, d’électrocution ou de blessure.
• Un cordon de 15 ampères doit être utilisé si une rallonge est absolument nécessaire.
Un cordon possédant une classe d’ampérage inférieure peut surchauffer. Vous devez
prendre soin de disposer la rallonge de façon à ne pas l’accrocher ou trébucher sur elle.

13
CONSERVER CES INSTRUCTIONS
(Pour 120 & 127 Volts seulement)
Pour réduire le risque de choc électrique, cet appareil est doté d’une fiche polarisée
(une broche eslplus large que /‘autre). Cette fiche ne va que dans un sens seulement sur
une prise de courant polarisée. Si la fiche ne s’enfonce pas complètement dans la prise,
la retourne et essayer de nouveau. Si elle ne s’adapte toujours pas à fond, consulter
un électricien qualifié. Veillez à respecter les mesures de securité de la prise polarisée.
CET A PPAREIL EST POUR USAGE DOMESTIQUE SEULEMENT.

14
PIECES
1. Couvercle
2. Corps Chauffant
3. Voyant Lumineux CUlSSON GARDER A CHAUD
4. Voyant Lumineux CUlSSON
5. Interrupteur
6. Cordon d’Alimentation Électrique
7. Verre Gradué (180ml)
8. Louche
9. Poignée
10. Récipient Intérieur
11. Plateau de cuisson à la vapeur (Modèle 4731 seulement)
3
4
2
1
5
10
11
6
7
8
9

15
MODE D’EMPLOI
AVANT LA PREMIERE UTILISATION
Nettoyez le couvercle en verre, le récipient intérieur et le verre gradué selon les
Instructions Données au Chapitre Entretien.
MODE D’EMPLOI DU CUISEUR DE RIZ
1. Assurez-vous que l’appareil n’est pas branché..
2. Mesurer la quantité requise de riz cru à l’aide de la tasse graduée fournie, 180 ml.
3. Une tasse de riz cru donnera environ deux tasses de riz cuit. Un maximum
de 7 tasses (1,2 L) de riz cru pour le Modèle Nr. 4728. Un maximum de 10 tasses
(1,8 L) de riz cru pour les Modèles 4729 et 4731. Un maximum de 12 tasses (2,2 L)
de riz cru pour le Modèle Nr. 4730.
4. À l’aide de la tasse graduée, ajouter la quantité appropriée d’eau au riz dans
le contenant intérieur (pour chaque tasse [180 ml de riz cru, ajouter 1,25 tasses d’eau).
Pour du riz plus épais, ajouter un peu plus d’eau. Pour du riz plus léger, utiliser
moins d’eau.
5. Posez le récipient intérieur dans l’appareil en vous assurant qu’il est bien en contact
avec la plaque chauffante. Pour cela, faites-le pivoter légèrement jusqu’à ce qu’il soit
bien en contact avec la plaque.Mettez le couvercle. L’APPAREIL GÉNÉRANT DE
LA VAPEUR, NE L’UTILISEZ PAS SANS COUVERCLE.
6. Brancher le cordon dans une prise électrique. Appuyer sur le bouton de commutation
pour mettre l’appareil à cuire le riz en marche. S’assurer que le voyant de <<Marche,,
rouge est allumé.
7. Mélanger le riz. Après 15 minutes de cuisson, enlevez le couvercle en faisant attention
à la vapeur qui s’échappe. Mélangez avec une louche ou une cuiller à long manche.
Remettez le couvercle sur le récipient intérieur.
8. Une fois le riz cuit, l’appareil se mettra automatiquement en functionnement au chaud
et le témoin indiquant cette fonction de (chaud,) jaune s’allumera. L’unité demeurera
en fonctionnement au chaud jusqu’à ce qu’elle soit débranchée de la prise murale.
9. La cocotte conservera automatiquement le riz au chaud à 14O”F- 175°F (6O”C- 80°C).
10. Lorsque la température du riz descend en-dessous de ce niveau, la lampe rouge
s’allumera à nouveau, indiquant que la procédure de conservation de la chaleur
a commencé.
11. Laissez refroidir l’appareil avant de le nettoyer.
Débranchez l’appareil après usage.

16
POUR RÉCHAUFFER LE RIZ
Pour réchauffer le riz, mettez 1/4 de tasse (4 cuillers à soupe) d’eau froide par tasse
de riz cuit, mélangez et mettez l’appareil en marche.
Lorsque le riz est chaud, l’appareil se mettra automatiquement sur la position
Keep Warm/Garder au Chaud.
UTILISATION DU PLATEAU DE CUISSON À LA VAPEUR
(MODÈLE 4731 SEULEMENT)
La cuisson des légumes à la vapeur conserve plus d’éléments nutritifs que de faire
bouillir ou de faire cuire au four, tout en préservant la couleur éclatante et naturelle.
1. Préparez les légumes en les lavant, en les pelant et en les coupant en plus petits
morceaux.
2. Assurez-vous que l’unité n’est pas branchée.
3. Remplissez la marmite intérieure avec la quantité d’eau appropriée (Voir le tableau).
4. Insérez la marmite intérieure dans la partie chauffante. Assurez-vous que la marmite
entre directement en contact avec la plaque chauffante.
5. Déposez les légumes dans le plateau de cuisson à la vapeur et placez celui-ci
par-dessus la marmite intérieure. Couvrez à l’aide du couvercle. NE FAITES PAS
FONCTIONNER CETTE UNITÉ SANS COUVERCLE. DE LA VAPEUR EST
PRODUITE DURANT SON UTILISATION.
6. Branchez le cordon électrique dans la prise murale. Démarrez le cuiseur de riz en
abaissant le bouton du commutateur. Assurez-vous que le témoin rouge de cuisson
est allumé.
7. Réglez manuellement la durée de cuisson selon le tableau suivant. L’unité
va automatiquement passer au cycle garde-au-chaud lorsque toute l’eau s’est évaporée.
Ajoutez plus d’eau si toute l’eau s’est évaporée et que vous désirez prolonger le cycle
de cuisson.
8. Retirez le plateau de cuisson à la vapeur du cuiseur de riz lorsque les légumes sont
cuits à la vapeur selon votre préférence personnelle.
9. Débranchez le cordon de la prise murale et laissez l’unité refroidir parfaitement avant
de la nettoyer.
Fèves vertes 10 onces/ 300 g 1/3 tasse/ 50 ml 30-35 minutes
Brocoli 10 onces/ 300 g 1/3 tasse/ 50 ml 30-35 minutes
Carottes 8 onces/ 200 g 1/3 tasse/ 50 ml 30-35 minutes
Chou-fleur 8 onces/ 200 g 1/3 tasse/ 50 ml 30-35 minutes
Maïs (en grain) 10 onces/ 300 g 1/3 tasse/ 50 ml 40-45 minutes
Pois 10 onces/ 300 g 1/3 tasse/ 50 ml 30-35 minutes
Macédoine 10 onces/ 300 g 1/3 tasse/ 50 ml 30-35 minutes
NOTE: Ces durées sont approximatives. Il est recommandé de surveiller le processus de cuisson
à la vapeur et de régler la durée de cuisson selon vos préférences. Remuez les légumes de temps en temps.
Les durées de cuisson à la vapeur peuvent varier lorsque vous faites cuire du riz.
REMARQUES:
Le riz peut être lavé dans un récipient différent.
Pour obtenir un riz plus tendre, mettez le riz et l’eau dans le récipient intérieur
et laissez tremper pendant 10 à 20 minutes avant de le faire cuire.
LÉGUMES QUANTITÉ EAU DURÉE

17
Nettoyez l’appareil après chaque utilisation.
1.Débranchez l’appareil lorsque vous ne l’utilisez pas ou avant de le nettoyer
N’immergez pas le corps chauffant dans l’eau ou dans tout autre liquide.
L’appareil doit être complètement refroidi avant de le nettoyer.
2. N’utilisez pas de détergents abrasifs, de tampons de récurage ou de laine d’acier.
3. Corps Chauffant: Nettoyez légèrement l’extérieur avec un chiffon ou une éponge
humide. N’immergez pas l’appareil dans l’eau ou dans tout autre liquide!
Séchez avec un chiffon doux.
4. Récipient Intérieur: remplissez le récipient avec de l’eau, laissez tremper puis lavez à
l’eau savonneuse chaude à l’aide d’une éponge. Essuyez minutieusement avec un
torchon.
5. Couvercle, verre gradué et louche: Lavez à l’eau savonneuse chaude. Rincez
minutieusement. ATTENTION: Le couvercle doit être manipulé avec précaution car
il peut glisser lorsqu’il est humide.
6. Plaque chauffante, thermostat: les grains de riz, morceaux de légumes, etc. qui
peuvent coller à la plaque chauffante doivent absolument être enlevés pour assurer
une bonne cuisson. II est possible d’enlever le riz cuit avec du papier-émeri très fin.
Polissez la tache afin d’assurer un bon contact entre la plaque chauffante et le
dessous du récipient intérieur.
7. Aucune pièce intérieure ne peut être réparée par l’utilisateur. N’essayez pas de
réparer l’appareil sous peine de rendre son utilisation dangereuse. Pour toute
réparation,veuillez-vous adresser à un service après-vente agréé.
ENTRETIEN

18
Riz espagnol
250 grammes de saucisse (chorizo) 1 oignon médium
1 c. à soupe de poivre jaune, moulu 1 c. à thé de paprika
2 tasses de tomates, en dés, sans la 1 tasse de pois verts
peau ni les pépins 1 poivron rouge, en dés
2 tiges de céleri, en dés 1 poivron vert, en dés
2 tasses de riz à grain long 3 tasses de bouillon de poulet
Sel et poivre
Préparation
Hacher l’oignon à l’aide de l’accessoire de hachoir Oster. Dans le cuiseur de riz Oster
à usages multiples, faire sauter la saucisse coupée en tranche, ajouter l’oignon, le
poivre jaune, le paprika et les tomates. Mélanger le tout. Ajouter le reste des légumes,
le riz et le bouillon. Vérifier l’assaisonnement, couvrir et faire cuire jusqu’à la cuisson
complète. Garnir de persil frisé. Servir chaud.
Fettucine avec sauce aux pommes,
aux crevettes et au curry
½ kg fettucine 4 c. à soupe de beurre
3 c. à soupe de farine 1 c. à thé de curry
½ tasse de crème 1 tasse de bouillon de poulet
2 tasses de pommes, pelées et en dés ½ kg de queues de crevettes
Fromage parmesan au goût Jus d’un citron (pour les pommes)
Préparation
Dans le cuiseur de riz Oster à usages multiples, faire fondre le beurre, ajouter la farine
et le curry. Faire cuire pendant 2 minutes. Ajouter la crème, le bouillon de poulet, les
pommes et les queues de crevettes. Remuer jusqu’à l’épaississement. Retirer de la
chaleur et garder au chaud. Dans le cuiseur de riz Oster à usages multiples, verser
suffisamment d’eau et de sel pour faire cuire le fettucine al dente. Servir le fettucine
avec la sauce et saupoudrer de fromage Parmesan.
RECETTES

19
Riz avec crustacés
1 boîte (16 onces ou 400 grammes) 12 petites palourdes
de riz au safran ¼ lb (250 grammes) d’huîtres
¼ lb (240 grammes) de crevettes, 1 tasse de pois sucrés
décortiquées et déveinées, ¼ poivron rouge, en dés
avec ou sans les queues
Préparation
Laver les palourdes, les écailler parfaitement et bien les rincer. Faire cuire le riz dans
le cuiseur de riz Oster à usages multiples tout en suivant les directives sur l’emballage.
Ajouter les palourdes, les crevettes, les huîtres, les pois sucrés et le poivron rouge cinq
minutes avant que le riz ne soit parfaitement cuit. Bien mélanger sans agiter. Servir
avec des croûtons de pain français et de la salade fraîche. Option: Le riz au safran
peut être remplacé par du riz brun.
Minestrone milanais
½ kg de poitrine de poulet 2 gousses d’ail, hachées
1 c. à soupe de basilic ½ tasse de céleri
½ tasse de fèves fraîches ½ c. à thé de thym
½ c. à thé d’origan ½ tasse d’oignons, tranchés
½ tasse de poivron vers, haché ½ tasse de champignons, tranchés
½ tasse de courge, en dés 2 tasses de tomates, en dés, sans la
3 patates médiums, pelées et en dés peau ni les pépins
2 c. à thé de sauce Worcestershire ½ kg de nouilles fines
1 tasse de fromage parmesan 3 c. à soupe de margarine
2 litres d’eau Sel
Préparation
Dans le cuiseur de riz Oster à usages multiples, verser l’eau et faire bouillir le poulet
avec du sel. Enlever le poulet et le couper en dés lorsqu’il est cuit. Conserver le
bouillon. Dans le cuiseur de riz Oster à usages multiples, faire fondre le beurre, ajouter
l’ail, l’oignon, le céleri, le poivron vert, les champignons, les fèves et la courge. Faire
sauter pour ramollir. Ajouter les tomates, ensuite les patates et faire sauter pendant
encore 5 minutes. Ajouter ce mélange au bouillon de poulet, ajouter la sauce
Worcestershire, le bouquet d’herbes (basilic, thym, origan), le sel, le poulet et les
nouilles. Faire cuire pendant 10 minutes jusqu’à ce que les patates soient cuites mais
fermes. Ajouter le fromage parmesan tout en remuant. Cuire pendant 2 autres minutes
de plus. Servir tout en saupoudrant plus de fromage.
Other manuals for 4728
3
This manual suits for next models
3
Table of contents
Languages:
Other Oster Rice Cooker manuals

Oster
Oster CKSTRC8030B User manual

Oster
Oster CKSTRCMS65 User manual

Oster
Oster Rice Cooker User manual

Oster
Oster CKSTRC8029K User manual

Oster
Oster 4751 User manual

Oster
Oster CKSTRC1700W User manual

Oster
Oster 4715 User manual

Oster
Oster 4718 User manual

Oster
Oster 4722 User manual

Oster
Oster CKSTRC7029 User manual

Oster
Oster 3071 User manual

Oster
Oster 6028 User manual

Oster
Oster CKSTRC4722 User manual

Oster
Oster 4728 User manual

Oster
Oster 6-Cup Rice Cooker User manual

Oster
Oster CKSTRC01WD-033 User manual

Oster
Oster CKSTRC4722-049 User manual

Oster
Oster 4728 User manual

Oster
Oster 6028 User manual

Oster
Oster 4728 User manual