oticon FittingLINK 3.0 User manual
Other oticon Adapter manuals

oticon
oticon FittingLINK 3.0 User manual

oticon
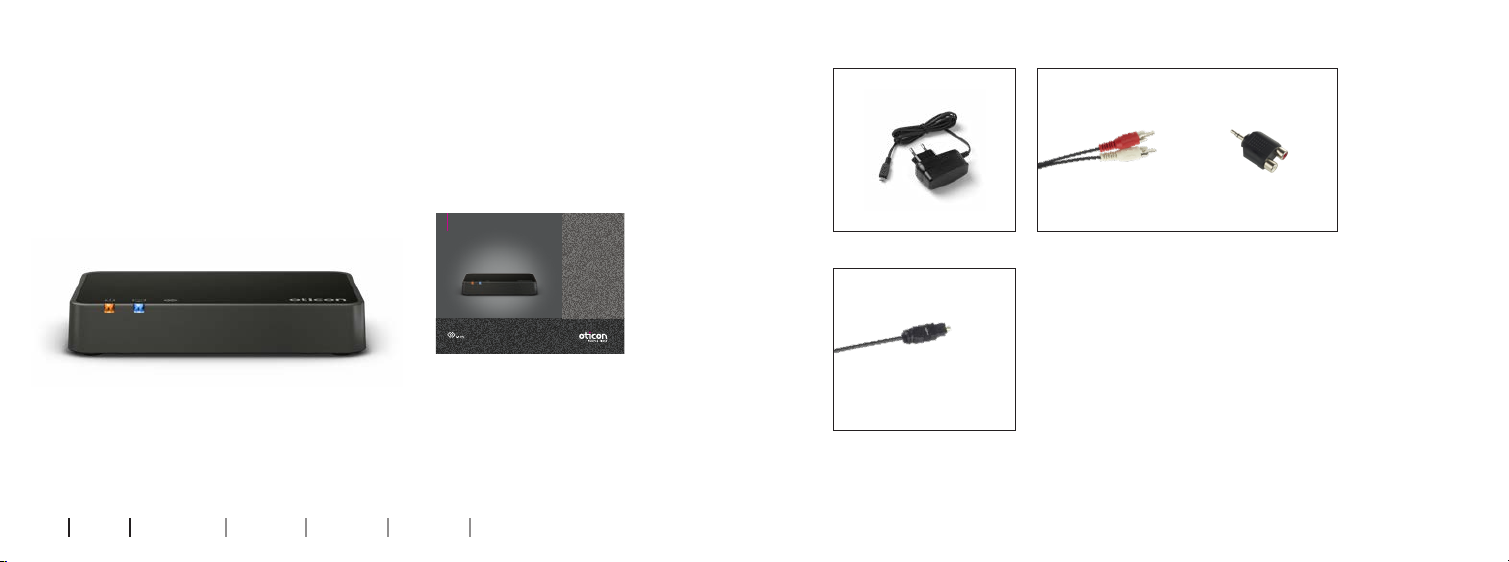
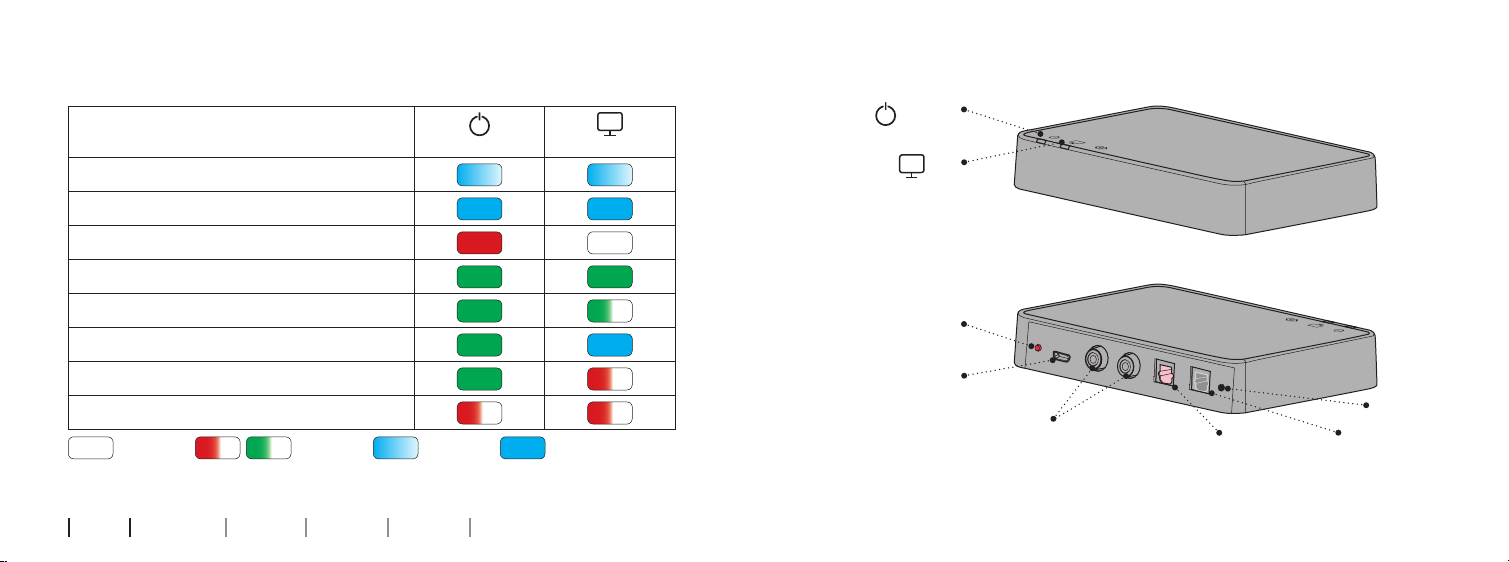
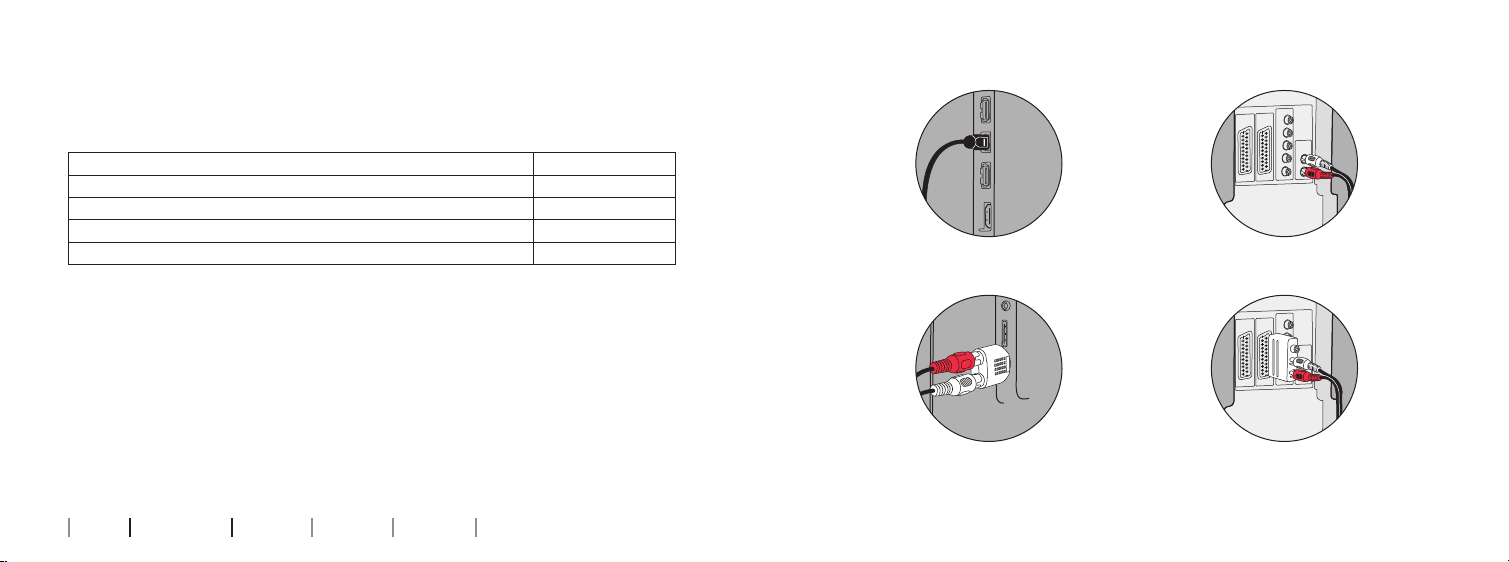
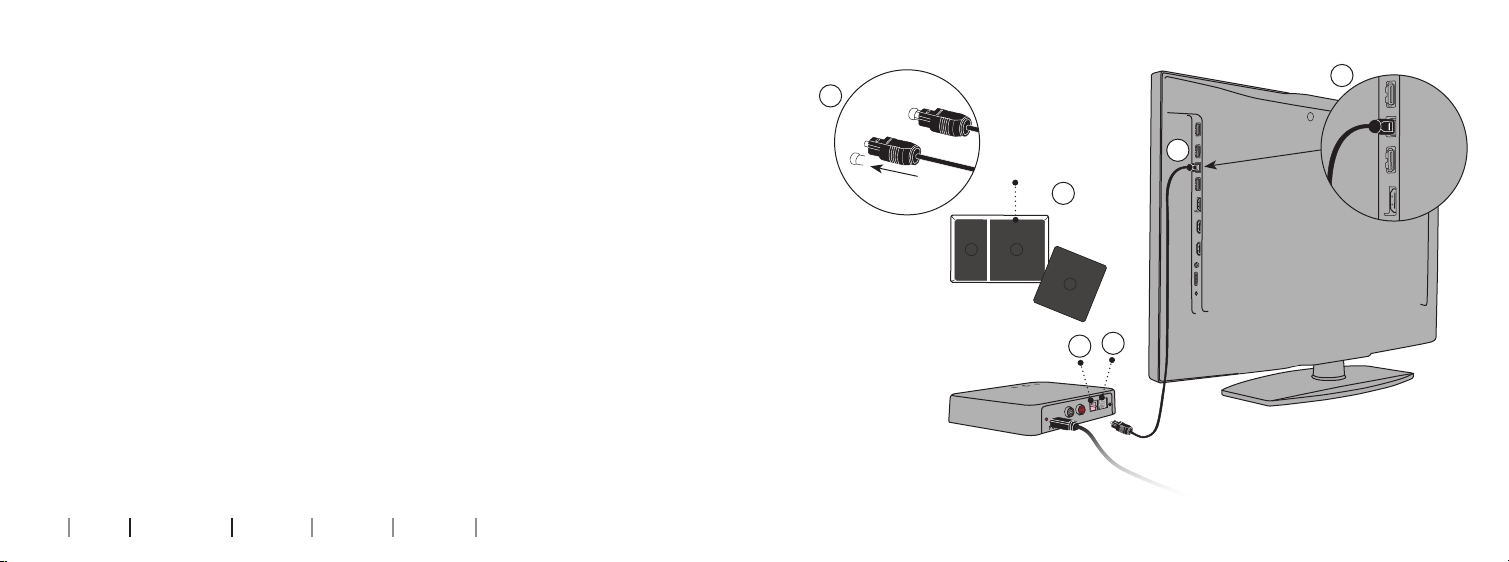
oticon ConnectLine TV 2.0 User manual

oticon
oticon TVA3 User manual

oticon
oticon ConnectLine Phone Adapter 2.0 User manual

oticon
oticon streamer User manual

oticon
oticon ConnectLine User manual

oticon
oticon BS-H200 User manual

oticon
oticon TVA3 User manual

oticon
oticon ConnectLine Phone Adapter 2.0 User manual

oticon
oticon Phone 2.0 User manual