FÉLICITATIONS!
Vous avez fait l’achat de la plus innovatrice technologie
naturelle et de renom en éclairage avec votre produit
OttLite®.
FORMULAIRE D’ENREGISTREMENT DE PRODUIT
Compléter le formulaire d’enregistrement qui est inclus
pour votre produit et nous le retourner dès aujourd’hui
par le retour du courrier, ou enregistrez-vous en ligne en
allant à : OttLite.com/warranty.
NREMARQUE : CET ARTICLE EST COMPLÈTEMENT ASSEMBLÉ
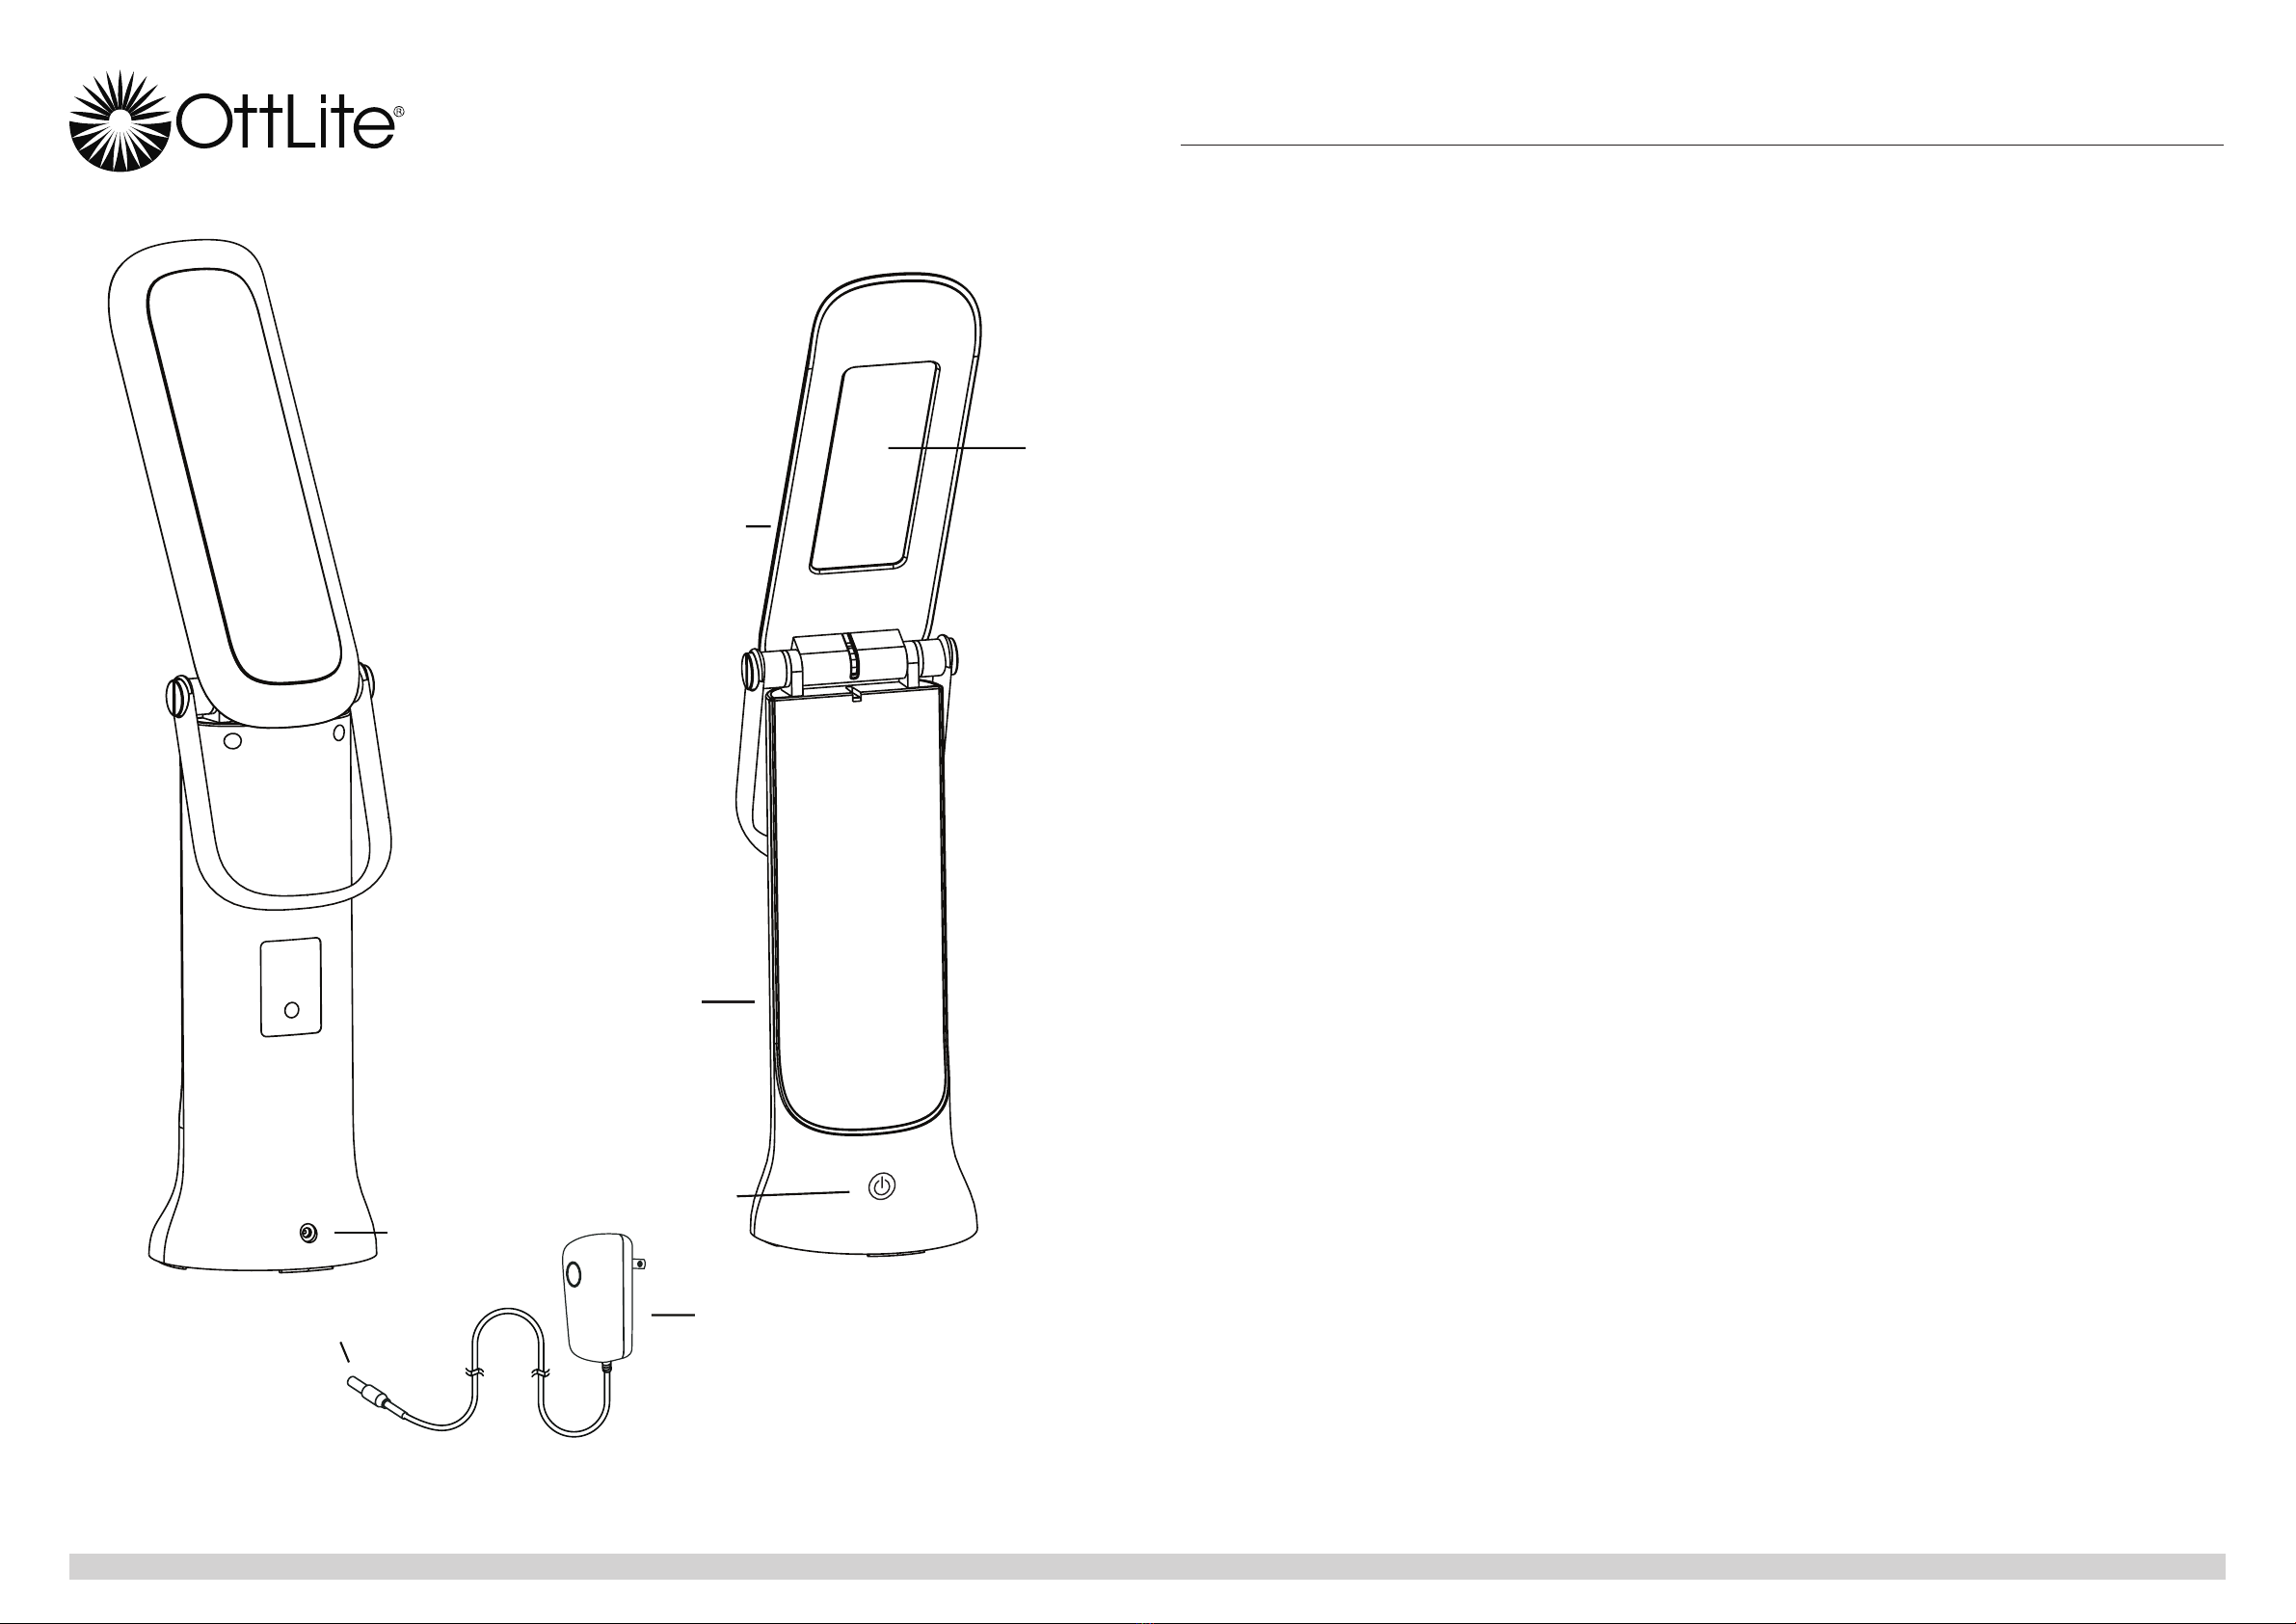
1. Retirer la lampe de son emballage pour l’utiliser sur une
table horizontale.
2. Connecter la fiche de l’adaptateur CA (G) dans le
connecteur (H) localisé au bas de l’arrière de la
lampe.
3. Brancher l’adaptateur CA (F) dans une prise murale
CA standard de 120 V. Remarque : N’utiliser
qu’avec l’adaptateur CA fourni pour éviter tout
dommage ou risque d’incendie.
4. Allumer et éteindre la lampe (ON/OFF) en utilisant
l’interrupteur d’alimentation (B) situé sur le devant
de la base (A). L’interrupteur (B) est un interrupteur
tactile permettant de régler la luminosité des DEL.
5. Pour allumer l’éclairage à DEL, effleurer l’interrupteur
pour obtenir les résultats qui suivent :
• Pour allumer (ON) la lampe au 1er niveau de
luminosité; effleurez l’interrupteur « une fois »
• Pour le 2e niveau de luminosité, effleurez
l’interrupteur « deux fois »
• Pour le 3e niveau de luminosité, effleurez
l’interrupteur « trois fois »
• Pour éteindre (OFF) la lampe; effleurez l’interrupteur
« quatre fois » .
6. Pour repositionner l’abat-jour, maintenir la base (A)
fermement puis saisir l’abat-jour (C) et lever pour
faire l’ajustement.
7. Consulter les schémas pour voir la plage des
ajustements maximaux. REMARQUE : NE PAS
FORCER l’abat-jour hors de la plage de réglage
admissible, car un réglage excessif peut causer des
dommages.
AVERTISSEMENT DE SÉCURITÉ :
POUR RÉDUIRE LES
RISQUES D’INCENDIE, DE DÉCHARGE ÉLECTRIQUE OU DE BLESSURES
1. Éteindre/débrancher et ATTENDRE QUE LA TÊTE DE
LA LAMPE (C) SOIT REFROIDIE avant de manipuler.
2. La tête de la lampe (E) peut devenir chaud après
plusieurs heures d’utilisation continue : NE PAS placer
les mains directement sur le panneau à DEL.
3. Ne jamais utiliser une rallonge à moins que la fiche ne
puisse être insérée à fond.
4. Ne pas modifier la fiche.
5. La tête de lampe fournie avec cet appareil ne peut pas
être remplacée par le client.
6. POUR USAGE À L’INTÉRIEUR SEULEMENT.
REMARQUE : les directives de sécurité importantes citées
dans ce feuillet d’instructions ne sont pas exhaustives;
elles ne couvrent pas toutes les conditions ou situations
possibles. Prière d’utiliser une prudence d’usage et le
bon sens comme il se doit avec tout produit électrique.
ATTENTION ! SI LE CÂBLE OU LE CORDON SOUPLE EXTERNE DE CE
LAMPADAIRE EST ENDOMMAGÉ, CELUI-CI DOIT ÊTRE REMPLACÉ EXCLUSIVE-MENT
PAR LE FABRICANT, SON AGENT DE SERVICE OU TOUTE PERSONNE COMPÉTENTE AFIN
D’ÉVITER TOUT DANGER. POUR USAGE À L’INTÉRIEUR SEULEMENT.
ATTENTION ! LA SOURCE DE LUMIÈRE DE CETTE LAMPE N’EST PAS
REMPLAÇABLE; LORSQUE LA SOURCE DE LUMIÈRE ARRIVE À SA FIN DE VIE UTILE, LA
LAMPE AU COMPLET DOIT ÊTRE REMPLACÉE.
SECTION 15 DES RÈGLEMENTS DE LA FCC
Remarque : Ce matériel a été testé et a été déclaré conforme aux limites
en vigueur concernant les équipements numériques de catégorie B, en
vertu du paragraphe 15 de la réglementation FCC. Ces limites visent à
assurer une protection raisonnable contre tout brouillage nuisible dans
une installation résidentielle. Ce matériel produit, consomme et peut
émettre une énergie de radiofréquence et, s’il n’est pas installé et utilisé
conformément aux directives qui l’accompagnent, il peut entraîner
un brouillage nuisible des communications radio. Cependant, nous
ne garantissons pas l’absence de brouillage dans une installation en
particulier. Si, après avoir effectué une vérification en mettant l’appareil
hors tension puis sous tension, l’utilisateur s’aperçoit que ce matériel
provoque un brouillage nuisible à la réception des signaux de radio ou de
télévision, il lui faudra essayer de corriger ce brouillage en prenant une
ou plusieurs des mesures ci-dessous :
• Réorienter ou repositionner l’antenne de réception.
• Augmenter la distance entre l’appareil et le récepteur.
• Brancher le matériel dans une prise électrique située sur un circuit
différent de celui du récepteur.
• Consulter le distributeur ou un technicien radio/télévision
expérimenté pour obtenir de l’aide.
Cet appareil est conforme aux exigences de la Section 15 des règles de
la Commission fédérale des communications (FCC). Son utilisation est
assujettie aux deux conditions suivantes :
(1) Cet appareil ne doit pas causer d’interférences nuisibles
(2) Cet appareil doit accepter toute interférence reçue, y compris les
interférences pouvant entraîner son dysfonctionnement
ATTENTION : Toute modification ou tout changement apporté au produit,
lorsque non reconnu expressément par OttLite Technologies, annule la
responsabilité d’OttLite en ce qui a trait au bon fonctionnement du produit.
CAN ICES-005 (B)/ NMB-005 (B)
FICHE TECHNIQUE DE L’ADAPTATEUR D’ALIMENTATION :
Entrée : CA 100-240V, 50-60Hz, 0,5A
Sortie : 27V CC 0,4A avec prise mâle CC
FRANÇAIS Lampe de travail à DEL à intensité variable
INS-21-0636 REV022521
Lampe de travail à DEL à intensité variable
CSY1300C CSY13WGC CSY13WGC-SHPR CSY1321C-SHPR CSY1381C-SHPR K5
C
A
B
H
GF


