Out-Front GameCycle User manual

1826 W Broadway Rd Ste 43, Mesa, AZ 85202
Ph. 480-833-1829 | customercare@3rivers.com

IMPORTANT SAFETY INSTRUCTIONS 2
SUPPORT 3
GAMECYCLE QUICKSTART 4
FEATURES ON YOUR GAMECYCLE 6
ADJUSTABLE HEIGHT 6
ADJUSTABLE CRANK ARM POSITION 7
TILT/STEERING WITH LOCKING FEATURE 8
ADJUSTABLE CRANK LENGTH 8
CRANK FORWARD OR BACKWARD
GRIP OPTIONS FOR THE CRANK HANDLES
USING YOUR GAMECYCLE 10
QUICKSTART GAMES 10
PLAYING GAMES ON THE GAMECYCLE 10
MAIN SCREEN DISPLAY DURING GAME-PLAY 14
ADJUSTING RESISTANCE DURING GAME-PLAY 15
PAUSING THE GAME DURING A SESSION 16
CHANGING THE CRANK DIRECTION DURING A SESSION 17
COMPLETING A SESSION 17
CHANGING GAMES ON THE GAMECYCLE 18
ADVANCED SOFTWARE FEATURES FOR YOUR GAMECYCLE 1
PASSWORD FOR SOME ADVANCED FEATURES 1
ACCESSING THE ADDITIONAL SOFTWARE FEATURES 1
OPTIONS FOR GAMECYCLE SETTINGS 21
CALIBRATION SETTINGS FOR GAMECYCLE 22
SETTING THE CONTROL TYPE 23
GAMECUBE CONTROLLER 24
PLAYING OTHER GAMES 25
RESETTING THE GAMECYCLE 26
THE GAMECYCLE AS A STANDARD ARM ERGOMETER 27
BASIC TROUBLESHOOTING 28
APPENDIX 1: SETTING UP YOUR GAMECYCLE 2

- 2 -
Important Safety Instructions
When usin the GameCycle, always take basic precautions, includin the followin :
•Read all instructions before usin the GameCycle. These instructions are written
for your safety and to protect the unit.
•Do not leave children unsupervised around the unit.
•Use care when be innin to crank on the GameCycle. Do not crank with one
arm.
•Never place your hands or feet in the path of the cranks because injury may
occur to you or dama e may occur to the unit.
•Always set the hei ht of the GameCycle so that the crank arms are at shoulder
hei ht
•Do not rock the unit or use excessive force to move the unit while in operation.
•Do not overexert yourself to exhaustion. If you feel any pain or abnormal
symptoms, stop immediately and consult your physician.
•Please review the GameCube Instruction Booklet for important safety information
about the use of video ames.
•Please be careful when movin the GameCycle. It is heavy and should be moved
with caution. Wheels and a handle have been provided for assistance in
transportin the GameCycle. Do not bump into other objects durin
transportation.

- 3 -
Support
Three Rivers is dedicated to providin friendly and comprehensive support for this and
all our products. The objective of this User’s Guide is to include all of the necessary
information for the successful start-up, operation, maintenance and service of your
GameCycle. If you have any su estions on how we mi ht improve this document or if
you have any problems or questions, please contact us at the number below.
Three Rivers Holdin s LLC
1826 W. Broadway Rd.
Suite 43
Mesa AZ, 85202
CUSTOMER SUPPORT: (480) 833-1834
Fax: (480) 833-1837
Web Site: www.3rivers.com
Email: customercare@3rivers.com

- 4 -
GameCycle Quickstart

- 5 -

- 6 -
Features on your GameCycle
The GameCycle allows you to control video ames and have fun while exercisin . You
can interact with the GameCycle throu h the crank arms, and thereby control the
speed, direction and steerin of video ame objects such as racin cars or monster
trucks. It can also be used as a simple arm-er ometer by turnin off the TV, and
lockin down steerin . The GameCycle is equipped with the followin features that will
help sustain an enjoyable experience:
•Adjustable Hei ht
•Adjustable Crank Arm Position
•Tilt/Steerin with Lockin Feature
•Adjustable Crank Len th
•Crank Forward or Backward
•Grip Options for the Crank Handles
Adjustable Height
The head of the GameCycle (where the crank arms are) can be raised or lowered to
accommodate the user while seated or standin . Note that ideally the crank
arms should be at shoulder height.
To adjust the overall hei ht at which the crank arms of the GameCycle are with respect
to your position, first ensure that your hei ht adjustment screw is loosened. Then, lift
or pull up on the lever for the as-assist near the bottom frame while at the same time
pushin down or pullin up on the head or the control unit of the GameCycle. You can
easily slide the GameCycle control unit upwards or downwards. If needed, ti hten down
the screw for additional support.

- 7 -
Adjustable Crank Arm Position
Crank arms can be set to be synchronous (cranks arms in-line, at the same level) or
asynchronous (reciprocal) as shown below. Remember to loosen and pull the knob fully
to release the crank arm from its current position.
Synchronous Crank Position
(Recommended for amin )
Asynchronous Crank Position
For game play, the cranks should always be in the synchronous,
in-line position.

- 8 -
Tilt/Steering with Locking Feature
You may tilt the arm cranks of the GameCycle to the left or ri ht in order to steer the
car or truck. Also, side to side tilt for steerin (durin ame play) can be "locked" to
mimic a standard, fixed arm-er ometer with no side to side tiltin .
To do this, please ti hten the screw at the bottom of the head (just underneath the
cover). You may need to ji le the steerin sli htly in order to ensure that the lock
properly en a es. Please ti hten the screw all the way to fully lock the steerin .
Adjustable Crank Length
The crank len th on each crank arm can be shortened or len thened to accommodate
the user. Remember to loosen and pull the knob fully to release the crank arm from its
current position. Adjust the crank arm up or down, and release the pin on the knob so
that it properly en a es into one of the three preset holes on the crank, thereby
varyin the crank arm len th.

- 9 -
Crank Forward or Backward
Games can be played by crankin either forward or backward. Faster crankin will
result in faster speeds. In the “Forward Mode,” crankin forward moves the object
forward. In the “Reverse Mode,” crankin backward moves the object forward. This
can be chan ed at anytime durin ame play from the touch-screen menu. For more
information on how to chan e this, please review the section titled “Chan in the Crank
Direction durin a Session”.
Grip Options for the Crank Handles
There are a variety of hand rip options available for varyin hand function such as
horizontal rips, vertical rips and quad- rips. These rips are desi ned to be “quick-
release” rips so that you can easily chan e out one rip with another in order to
accommodate users with varyin hand function.
To chan e rip, simply rasp the rip firmly and pull outwards until the rip detaches
from the post. Put the replacement rip on the post and push until it snaps into place.
To learn more about the rips (if you don’t have them) please visit us online at
www.TheGameCycle.com

- 10 -
Using your GameCycle
This section provides more information on how to et up and runnin quickly with your
GameCycle and walks you throu h all the basic software features in your GameCycle.
Before startin your ame, please ensure that your GameCycle is turned off, and insert
one of the ame discs provided to you into the Nintendo GameCube. Then turn on the
GameCycle. You may have to turn your TV on (from standby mode). The GameCube
should turn on automatically, but if not, please press the button labeled “POWER” on
your Nintendo GameCube. Also, your TV has been automatically confi ured to select
the A/V mode as the TV input, but if this settin is chan ed accidentally, you should set
the input mode to A/V.
Please consult the Nintendo GameCube and the LCD TV Users Manuals for more
information on how to respectively operate them.
Quickstart Games
Your GameCycle has been pro rammed to allow you to rapidly start any one of four
popular ames – “
Need for Speed Underground
”, “
Racing Evolution
”, “
Monster
4x4 Masters of Metal”
and “
Cars
”. If you are new to the GameCycle, it is stron ly
recommended that you use these ames, and play the prepro rammed setup by
followin the instructions in the next session.
Playing Games on the GameCycle
Always ensure that the Memory Card for
the Nintendo GameCube console is
inserted into Slot 1. The absence of the
memory card in the correct slot will cause
the automated starting software to fail.
STEP 1. Select your Game
After insertin your ame and turnin the GameCycle on, you will be shown a screen
with different ame selections. There are four default ames to allow you to start-up
quickly, as well as an advanced option (Other Games). For new users of the
GameCycle, it is stron ly recommended to play the pre-pro rammed settin s for the

- 11 -
four listed ames before pro ressin to advanced-level setup. Select your ame to
continue.
STEP 2. Verify your Game
Ensure that the ame disc you have inserted into the Nintendo GameCube matches the
ame that you selected in the previous step. It is very important to have the correct
ame before you continue!

- 12 -
STEP 3. Choose your Session Duration
The GameCycle can monitor information about usa e such as distanced covered while
crankin , an estimate of calories expended, etc. over the duration of a session, and
display this information upon completion of the session time.
Use the and buttons respectively to increase or decrease the duration of
the workout. When done, press the button to continue.
STEP 4. Choose your Resistance Level
The GameCycle allows variation of the resistance of the crank arms when crankin
forward or backward.
Use the and buttons respectively to increase or decrease the resistance to a
level between 0 and 19. The default resistance level is set to 3.
When done, press the button to continue. You can always chan e your
resistance level durin the session if you need to.

- 13 -
STEP 5. Choose your Program Type
The GameCycle lets you select various pro rams for your session. You may choose one
of four options: Manual, Interval, Hill 1 and Hill 2.
The “Manual” option sets a constant resistance (chosen in Step 4) for the entire
session. The other options vary the resistance level over the duration of the session.
Please select “Manual” if you are unsure or if you want to control
resistance during game-play.

- 14 -
STEP 6. Wait until Game Finishes Loading and Start Playing!
That’s it!!! The GameCycle will automatically load and confi ure the ame for you, set
up your session and then start the ame in a predetermined state for you. Please make
sure you are ready to start as soon as the ame is loaded. A screen with a pro ress bar
will keep you posted on the status of the auto-start.
Main Screen Display during Game-play
The main screen is the default screen shown while a session on the GameCycle is in
pro ress, and is shown below.

- 15 -
•The center displays a blinkin column amon st columns representin the
pro ram you have chosen and indicatin your current position in the pro ram
•The top-center part of the screen displays the pro ram chosen, as well as a
three-letter code for the ame currently bein played
•The button on the top-ri ht allows you to adjust the current resistance
•The button switches steerin between forward and reverse modes
•The time or duration of the current session is shown in the top-left part of the
main screen
•The distance covered (in miles) is shown underneath the time
•The approximate number of Calories expended is shown below the distance
•The button completes the session in pro ress and displays a screen
showin a workout summary for the session
•The button pauses the current ame (if supported by ame)
•The button allows access to several other GameCycle settin s options
Adjusting Resistance during Game-play
The GameCycle allows smooth variation of the resistance of the crank arms when
crankin forward or backward, durin use.
In order to access this menu-option, please press the button from the main
screen. You will be shown the session resistance screen that will allow you to chan e
the current resistance. Please note that if you have selected a pro ram such as interval
or hill, the overall pro ram resistance will adjust accordin ly.
Use the and buttons respectively to increase or decrease the resistance to a
level between 0 and 19. Default level is set to 3.
When done, hit the button to continue.

- 16 -
Pausing the Game during a Session
At any time after the ame has started, you may press the button and stop the
ame as well as the on oin session on the GameCycle. Please note that not all
Nintendo ames support this feature, and some ames such as “Cars” only support
pausin after the user has played the ame for a few moments.
When paused, you will be shown the followin screen. Press the button in
order to return to the main screen and continue ame-play.

- 17 -
Changing the Crank Direction during a Session
Steerin on the GameCycle can be set up in two modes – the “Forward Mode” and the
“Reverse Mode”. In the “Forward Mode”, acceleratin the car or truck you are
controllin is achieved by turnin the crank arms forward or away from you, while the
brakin is controlled be crankin backwards or towards you. In “Reverse Mode” this
crankin direction is simply reversed, and you can accelerate by crankin towards you,
and brake by crankin away from you.
Chan in between the two modes allows trainin of different sets of muscles, as well as
variation in hand-eye coordination and co nitive abilities.
In order to chan e from “Forward Mode”, press the button on the main screen.
After bein shown a confirmation screen, your GameCycle will now switch to “Reverse
Mode”.
To chan e back to “Forward Mode”, please press the button.
Completing a Session
The GameCycle tracks the duration of a workout session, and automatically tracks
information about usa e durin the session. A session can end in two different ways.
1. The session automatically ends upon completion of the preset duration (selected
before the session commenced).
2. The session can be ended at any time by the user by pressin on the button.
Upon completion of the workout, the user is presented with a screen displayin a
summary of certain information that the GameCycle tracked durin the session, as
shown below. Please note that the information on calories expended is an estimate that
is based on the computation of the mechanical work done in turnin the crank-arms
a ainst the resistance level over the duration of the workout session.

- 18 -
Changing Games on the GameCycle
It is very easy to chan e your ame on the GameCycle. To do so, simply turn the
GameCycle OFF by pushin the power switch located at the lower back of the unit
frame. Then chan e out the ame disc inside the Nintendo GameCube. Turn the
GameCycle back ON, and follow the steps outlined previously in the section “Playin
Games on the GameCycle”.

- 19 -
Advanced Software Features for your
GameCycle
This section explains how to confi ure and use various options that may be available
throu h the GameCycle software menu.
Password for Some Advanced Features
Certain advanced features may be locked and you will require a password to continue.
When prompted by the screen askin you for a password (Shown below), please enter
5612.
Accessing the Additional Software Features
From the main screen (shown below), press the button for more options.
Other manuals for GameCycle
1
Table of contents
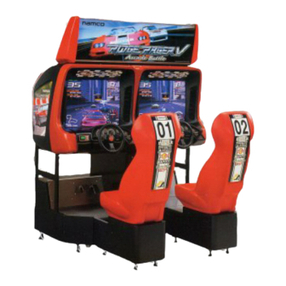
Popular Arcade Game Machine manuals by other brands

NAMCO
NAMCO TEKKEN 4 Connections and Ajustments

Medalist
Medalist Spectrum Avanti Elite Setup and installation manual

NAMCO
NAMCO NINJA ASSAULT Operator's manual

Roberto Sport
Roberto Sport COMPETITION instructions

Benchmark Games
Benchmark Games Fire & Ice X-Treme manual

NAMCO
NAMCO Ace Driver Victory Lap Operator's manual