Outland Living TTCK 102 User manual

FMI BRANDS INC. 107 – 19052 26th Avenue | Surrey, B.C. Canada V3Z 3V7
Toll Free: 1-888-514-1663 | Tel: (+1) 778-294-0988 | Email: info@outlandliving.com D.772.000.V1
Portable Propane
Tonga Torch
Conversion Kit
Model number TTCK 102-103
Convert FMTT-102 to FMTT-103
OUTLAND LIVING | the OUTLAND flame | Outdoor Living Perfected are registered trademarks of FMI Brands Inc.
FMTT-102
FMTT-103
LP Cylinder
not included
OUTDOOR LIVING PERFECTED

PORTABLE PROPANE
TONGA TORCH
En-1
Conversion Kit
Owner and Safety Manual
D.772.000.V1
OUTLAND LIVING PORTABLE PROPANE TONGA TORCH - CONVERSION KIT OWNER AND SAFETY MANUAL
Tonga Torch Conversion Kit TTCK 102-103
CAUTION:
For residential and recreational use only.
CAUTION:
Watch for sharp edges, especially as noted in the manual. Wear protective gloves if necessary.
DANGER:
If you smell gas:
1. Shut off gas to the appliance.
2. Extinguish any open flame.
3. If odour continues, keep away from the appliance and immediately
call your gas supplier or fire department.
WARNING:
Do not store or use gasoline or other flammable vapors and liquids in the
vicinity of this or any other appliance.
An LP-cylinder not connected for use shall not be stored in the vicinity of
this or any other appliance.
WARNING:
For outdoor use only.
HANDLE WITH CARE
WARNING! HOT SURFACE!
CARBON MONOXIDE HAZARD
This appliance can produce carbon monoxide
which has no odour.
Using it in an enclosed space can kill you.
Never use this appliance in an enclosed space
such as a camper, tent, car or home.
CALIFORNIA PROPOSITION 65
WARNING: This product can expose you to chemicals including carbon monoxide
(CO), soot and other gas-fuel combustion by-products, which are known to the State of
California to cause cancer, birth defects or other reproductive harm. For more information
go to Cancer and Reproductive Harm - www.P65Warnings.ca.gov.

En-2
1-888-514-1663 | WWW.OUTLANDLIVING.COM
GAS SAFETY:
Max. Input: 7,000 BTU/h
Max Gas Supply Pressure: 250 PSI
MINIMUM CLEARANCES:
• Bottom: Non-Combustible Surface
• Top: 2.03m (80 inches)
• Sides: 0.914m (36 inches)
For Installation on (or over) non-combustible floors only.
This appliance shall be used only outdoors in a well-ventilated
space and shall not be used in a building, garage or any other
enclosed area.
Never leave this appliance unattended while in operation.
Never use this appliance as a heater.
20lb LP cylinder only: The gas supply must be turned off at the
LP-gas supply cylinder when this appliance is not in use.
1lb LP cylinder only: Disconnect the gas cylinder when the
appliance is not in use.
Indoor storage of this appliance is permissible only if the cylinder
is disconnected and removed from the appliance.
Product is compatible with FMTT-102.
Cylinders must be stored outdoors in a well-ventilated area out
of the reach of children.
Disconnected cylinders must have threaded valve plugs tightly
installed and must not be stored in a building, garage or any
other enclosed area.
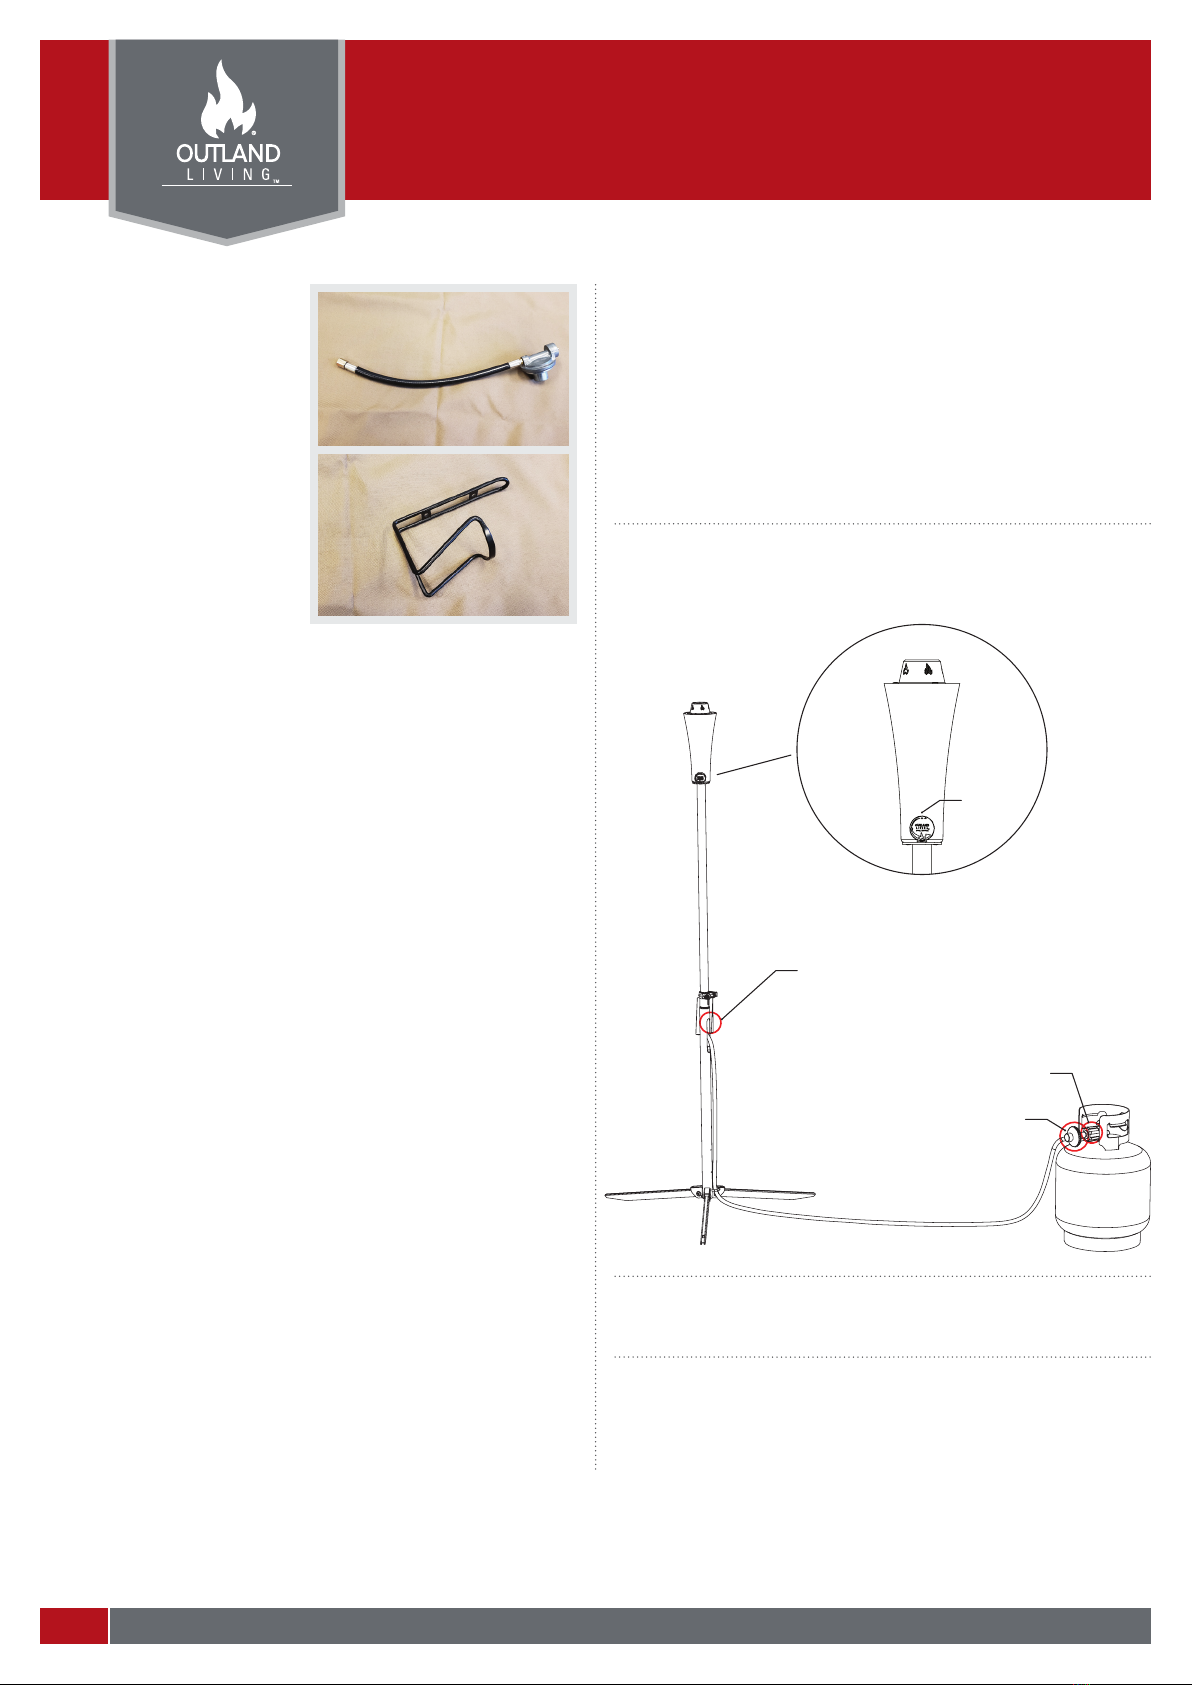
The gas pressure regulator provided with this appliance must be
used, and must be the same model as supplied with the unit.
Replacement parts and a list of such parts are available from FMI
Brands Inc. through the contact information provided on the last
page of this Manual.
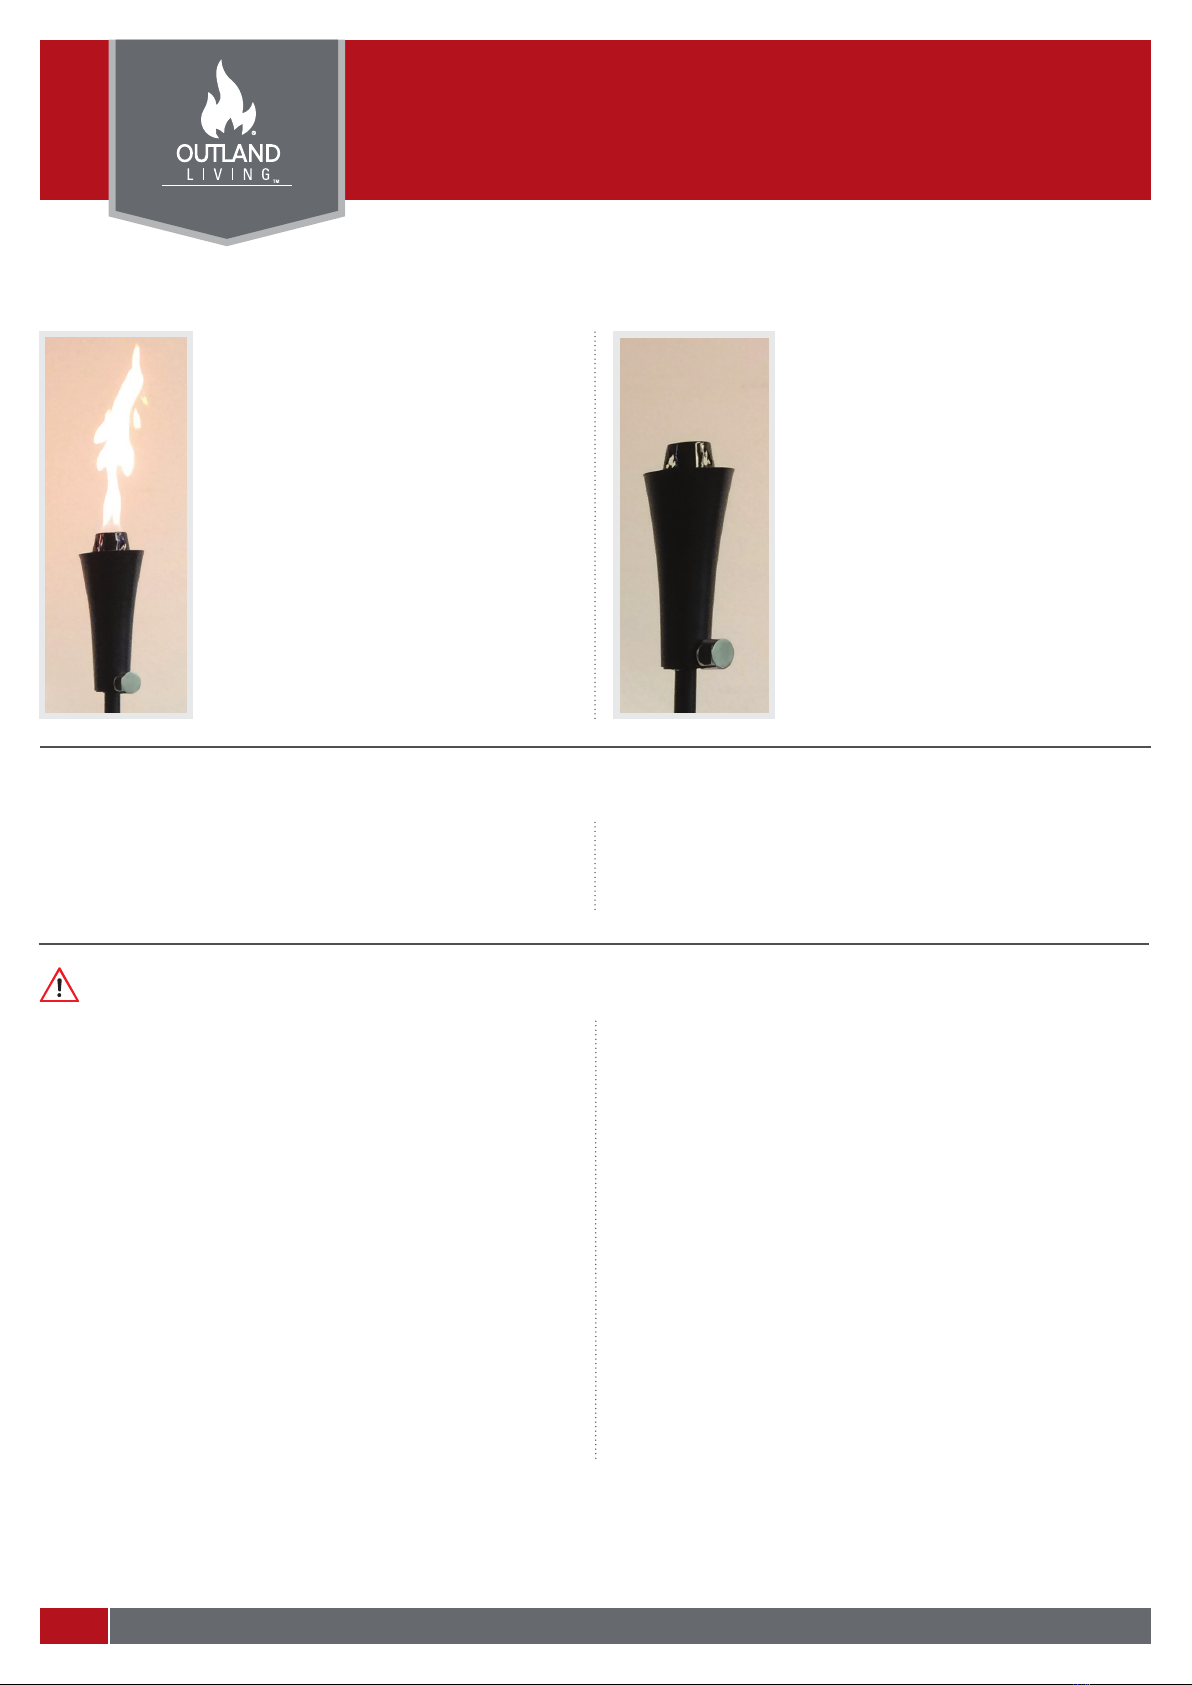
WARNING:
Please ensure that all adults and children which use or
are near a unit in use are aware of the hazard of high-
surface temperatures present on the unit during use
and should use caution and stay away to avoid burns or
clothing ignition.
Carefully supervise young children in the area of this
appliance. Clothing or other flammable materials should
not be hung from the appliance or placed on or near
the appliance. Any guard or other protective device
removed for servicing the appliance must be replaced
prior to operating the appliance.
Installation and repair should be done by a qualified
service person. The appliance should be inspected
before use and at least annually by a qualified service
person. More frequent cleaning may be required as
necessary. It is imperative that control compartment,
burners and circulating air passageways of the
appliance be kept clean.
WARNING:
Improper installation, adjustment, alteration, service or
maintenance can cause injury or property damage. Read
the installation, operating and maintenance instructions
thoroughly before installing or servicing this equipment.
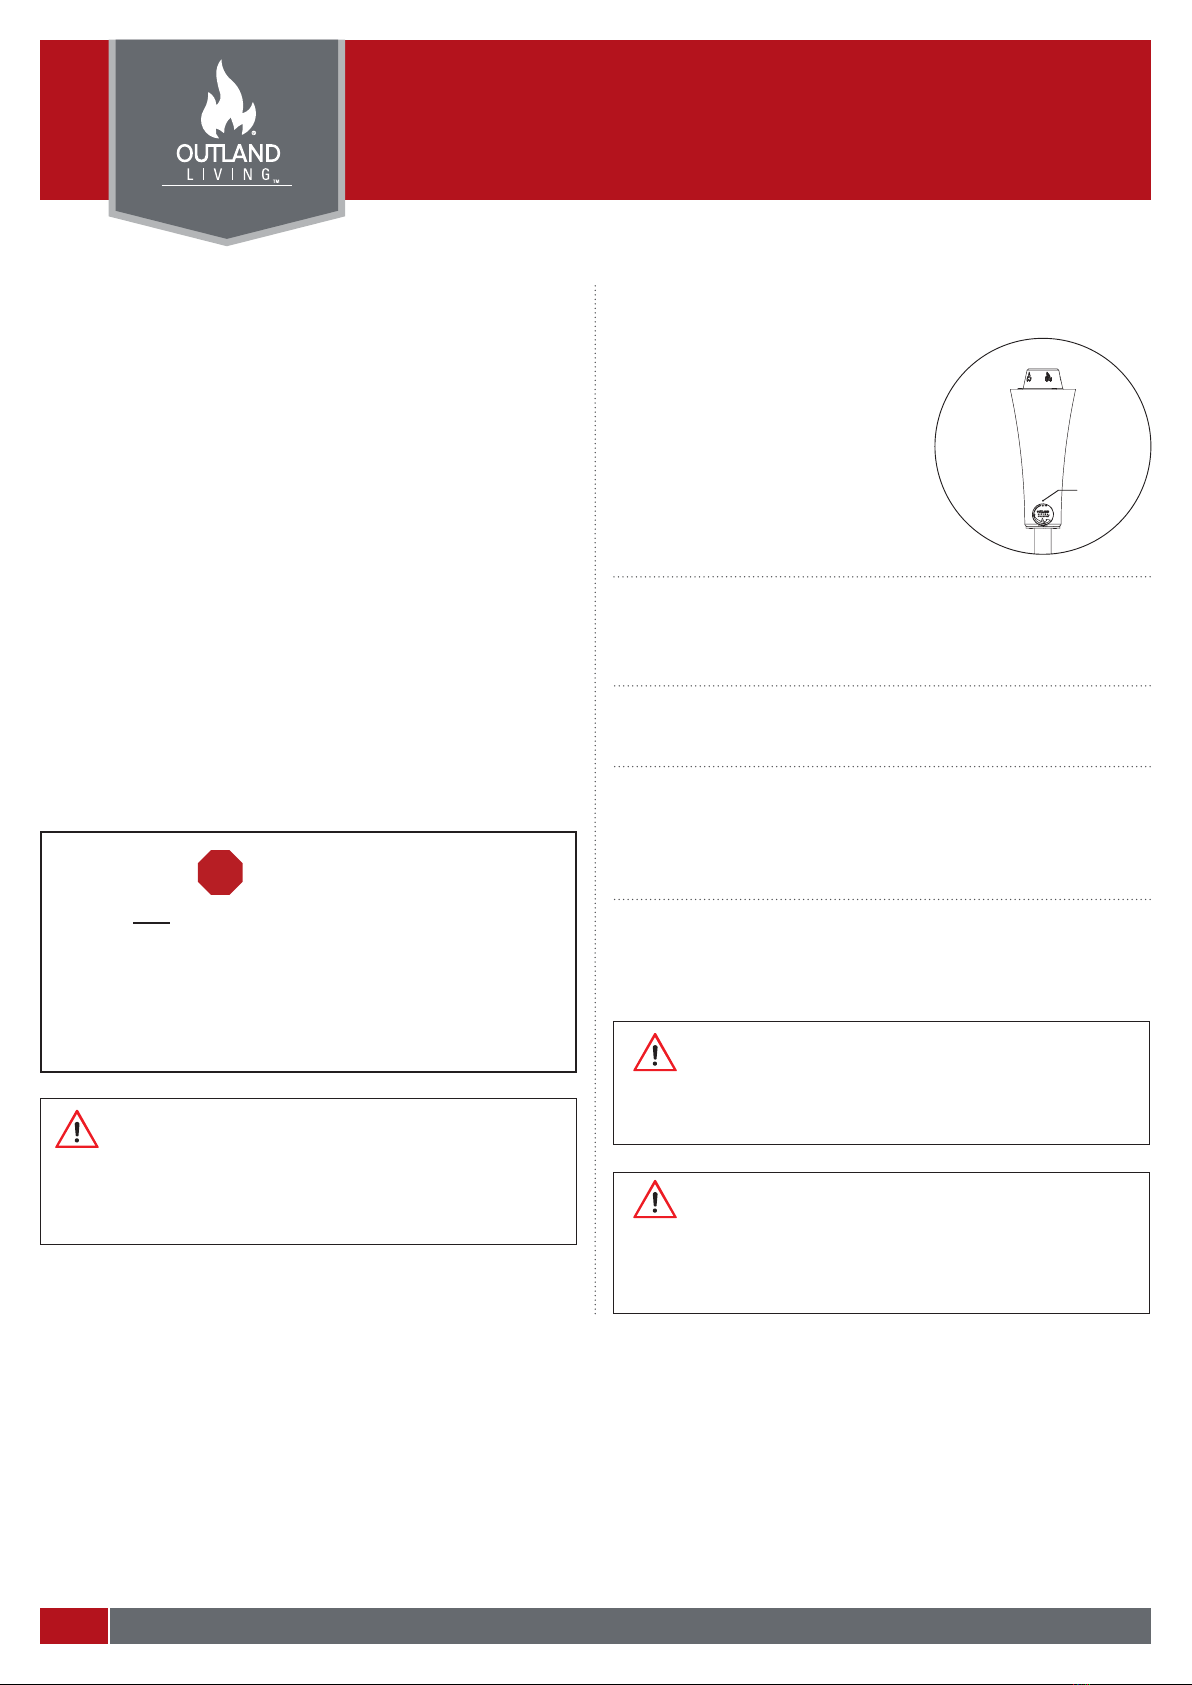
DANGER:
NEVER USE TONGA TORCH UNDER TREES, ROOFING,
TARPS, CANOPIES OR UNDER ANY OVERHANGING
STRUCTURE OR MATERIAL.
WARNING:
If the information in this manual is not followed exactly,
a fire or explosion may result causing property damage,
personal injury or loss of life. Installation and service must be
performed by a qualified installer, service agency or the gas
supplier.
WARNING:
a. Do not store a spare gas cylinder under or near this
appliance.
b. Never fill the cylinder beyond 80 percent full.
c. If the information in “(a)” and “(b)” is not followed exactly,
a fire causing death or serious injury may occur.
DANGER:
• Do not use this appliance under overhead combustible
surfaces.
• For Installation on (or over) a level, stable, non-combustible
surface only.
• This appliance is not for use in or on recreational vehicles
and/or boats.

PORTABLE PROPANE
TONGA TORCH
En-3
Conversion Kit
Owner and Safety Manual
D.772.000.V1
OUTLAND LIVING PORTABLE PROPANE TONGA TORCH - CONVERSION KIT OWNER AND SAFETY MANUAL
CONTENTS
• (x1) 0.32 m / 12.6”
gas hose with KR-124
pressure regulator +
CGA600 connection
• (x1) 1lb cylinder holder
basket + (x2) Mounting
Screws
• Tonga Torch
Conversion Kit manual
REQUIRED TOOLS (NOT SUPPLIED)
• Cross (Philips) Screw Driver
• Knife
• 5/8” (17mm) Wrench
• ¾” (19mm) Wrench
• Soap Water Spray Bottle
• Lighter Wand
LP CYLINDER (not included):
All LP cylinders to be used with this appliance must be:
a. Only a 16 oz. / 453 g (1 lb.) LP (propane) gas cylinder is
to be used with this appliance, approximately 8” (20
cm) high & 3.9” (10 cm) diameter, with CGA600 style
gas regulator connection (1”-20UNF).
b. Only cylinders marked with “propane” shall be used.
c. Constructed and marked in accordance with the
specifications for LP-gas cylinders of the U.S.
Department of Transportation (DOT) or for Canada,
Standard, CAN/CSA B339, Cylinders, Spheres and
Tubes for the Transportation of Dangerous Goods.
d. Provided with a listed overfilling prevention device.
e. Provided with a cylinder connection device compatible
with the connection for the appliance.
f. Always keep LP cylinders in upright position during
use, transit or storage.
The use of an approved LP gas cylinder stabilizer, such as
the one included, must be used when using this appliance in
order to prevent the LP gas cylinder from tipping over.
SECTION 1: CONVERSION
Refer to appliance owner’s manual for extra reference.
The owners manual can also be found as a free download at
www.outlandliving.com.
STEP 1
Ensure the appliance gas valve is in the OFF position and the
20lb LP Cylinder valve is closed.
STEP 2
Disconnect the hose and regulator from the 20lb LP Cylinder.
STEP 3
Retract legs. Carefully lay the Tonga Torch onto level ground.
STEP 4
Loosen the tube collar clamp. Carefully separate the Tonga Torch
top from the Tonga Torch base.
Mid-point gas connection
(Sealed gas fitting)
OFF
LP Cylinder Valve Coupling
Gas Hose Regulator

En-4
1-888-514-1663 | WWW.OUTLANDLIVING.COM
STEP 10
Connect the gas hose threaded coupling to the mid-point gas
connection. Use two wrenches to firmly tighten.
STEP 11
Prior to ignition, follow proper set up, connection, leak test and
ignition procedures.
STEP 12
Your Outland Living Portable Propane Tonga Torch is now
converted. Follow normal lighting procedures as per your
owner’s manual.
SECTION 1: CONVERSION (continued)
STEP 5
Carefully cut and
remove the black
heat shrink seal
without cutting the
tubing.
STEP 6
Unscrew the appliance
gas hose threaded
coupling from the mid-
point gas connection
with two wrenches.
Use 5/8” (17mm) and
3/4” (19mm) wrenches.
STEP 7
Remove and set aside the 3.048 m / 10 ft gas hose.
STEP 8
Use the mounting screws provided to mount the 1lb LP cylinder
holder onto the bottom of the Tonga Torch base where the two
screw holes are located.
STEP 9
Insert the new
0.32 m / 12.6” gas
hose threaded
coupling through
the gas hose hole,
located on the Tonga
Torch base.
CAUTION:
Take care not to cross thread the connection!
SECTION 2: SET UP
STEP 1
Insert Tonga Torch top into base tube.
STEP 2
Deploy legs. Stand the Tonga Torch straight. Tighten the nuts.
STEP 3
Unwind any twists or kinks in the gas hose. Ensure the hose is
straight.
STEP 4
Lock down the tube collar clamp.
Note: unwinding clamp counter clockwise will loosen clamp
force; winding clamp clockwise tightens clamp force.
Important adjustment points:
a. Legs: Tighten the nuts. Always ensure the torch
stands straight and the leg joints are firmly set.
b. Tube Collar Clamp: Always ensure the tube collar
clamp is tightly locked in position.
Hold firm
(Use 5/8” (17mm) wrench)
Turn Counter Clockwise
(Use 3/4” (19mm) wrench)
1lb Propane Cylinder
Holder & (2x)
Mounting Screws

PORTABLE PROPANE
TONGA TORCH
En-5
Conversion Kit
Owner and Safety Manual
D.772.000.V1
OUTLAND LIVING PORTABLE PROPANE TONGA TORCH - CONVERSION KIT OWNER AND SAFETY MANUAL
SECTION 3: APPLIANCE INSPECTION &
TEST SEQUENCE
Each time the appliance is put to use, and prior to ignition,
conduct the following appliance inspection and test
sequence:
• Ensure all joints are firmly fastened and the appliance is
standing straight.
• Inspect the hose prior to each use. The hose assembly
must be replaced prior to the appliance being put into
operation if there is evidence of excessive abrasion or
wear, or if the hose is damaged. Contact FMI Brands Inc.
should you require a replacement hose.
• Inspect the mid-point gas connection (sealed gas fitting)
prior to each use. Check the fitting is firm and the seal
is not broken or damaged. WARNING: Removal of the
sealed gas fitting and/or seal is not permitted for safe
operation and may affect warranty or claims.
• Inspect the burner prior to each use. Ensure all holes are
clear and there are no leaves, pine needles, spider webs
or other debris in burner area. Burner must be replaced
prior to the appliance being put into operation if there is
evidence of damage. Replacement parts such as burners
are available from FMI Brands Inc.
• Ensure the proper gas connections are made. See
section labelled “Connection”.
• Leak Test all connections. See section labelled “Leak
Tes t ”.
• Ensure that the LP gas cylinder and gas hose is placed
in an area where it is unlikely to be tripped over (such
as pathways or trails) or subject to other accidental
damage.
SECTION 2: SET UP
Lock down
the tube
collar clamp
Unwind any
twists or kinks in
the gas hose
Tighten
the nuts
IMPORTANT:
• Always ensure the Tonga Torch stands straight and vertical.
• The Tonga Torch is meant to be deployed on level ground.
In the event of uneven ground adjust the fixed angle of the
legs.
• It is recommended to use large flat rocks to level the
appliance if the ground is very uneven.
Insert Torch
Top into
Base Tube
Deploy Legs
and stand
Tonga Torch
straight
Stake Holes
(up to 8mm Ø)
Stakes not included

En-6
1-888-514-1663 | WWW.OUTLANDLIVING.COM
SECTION 5: LEAK TEST
IMPORTANT: Leak testing should be done once per year or
whenever the LP gas cylinder or any other gas system part is
taken apart, serviced or replaced, whichever is more frequent.
1. Be sure the appliance valve is “off”.
2. Ensure all gas system coupling joints are tight and properly
attached.
3. Prepare a leak testing solution of half liquid detergent and
half water.
4. Apply the solution to the LP gas delivery system at points as
shown in illustration:
• LP Cylinder Valve Coupling
• Gas Hose Regulator
• Mid-point gas connection
a) If parts of the fitting begin to produce bubbles, spray
liquid, or if you smell liquid propane gas, immediately
close the valve on the tank. Wait 5 minutes for any gas
to dissipate. After waiting for
5 minutes, the leak(s) must be
stopped by tightening the loose
joints, if possible, or by replacing
the faulty parts(s) with the part(s)
recommended by the appliance
manufacturer.
b) If no adverse reaction is observed
and the connections all seem fine
then move to the ignition sequence.
SECTION 4: CONNECTION
1. Ensure the Tonga Torch gas
valve is “off”.
2. Connect the 1lb LP (Propane)
cylinder.
a) Engage threaded coupling
connection to gas regulator.
b) Turn LP cylinder clock-wise
to connect.
c) Do not use tools. Hand
tighten only.
3. Unwind any twists or kinks
in the gas hose. Ensure the
hose is straight.
4. Slide the 1lb LP gas cylinder
into cylinder holder.
WARNING:
DO NOT USE OR PERMIT SOURCES OF IGNITION IN THE
AREA WHILE DOING THE LEAK TEST.
THIS INCLUDES SMOKING.
Mid-
point gas
connection
LP Cylinder
Valve Coupling
Gas Hose
Regulator
CAUTION:
The 1lb LP cylinder does not have a shut off valve. As soon
as the LP cylinder is connected to the gas regulator the gas
will flow. Ensure the appliance gas valve is ‘OFF’ before
connecting the LP cylinder!
OFF
Connect 1lb
LP Cylinder
CAUTION:
When making the connection, hold the regulator in a
straight line with the cylinder valve, so as not to cross thread
the connection.

PORTABLE PROPANE
TONGA TORCH
En -7
Conversion Kit
Owner and Safety Manual
D.772.000.V1
OUTLAND LIVING PORTABLE PROPANE TONGA TORCH - CONVERSION KIT OWNER AND SAFETY MANUAL
STEP 1
Ensure that the appliance valve dial
is in the “OFF” position by pushing
and turning clockwise until the dial
stops.
SECTION 6: IGNITIONSECTION 5: LEAK TEST (continued)
DANGER:
Keep hair tied back and keep head and face away from Tonga
Torch during ignition!
WARNING:
Ensure that no parts of your body, clothing, or any other
combustible material are above the burner before, during
and after ignition.
OFF
STEP 2
Securely attach regulator (large end of hose) to your propane
cylinder. See section labeled “Connection”.
STEP 3
Leak Test all connections. See section labelled “Leak Test”.
STEP 4
Using a lighter or match, ignite lighter and hold flame slightly
above the burner, then open the valve on the appliance slowly by
turning (counter-clockwise) until the unit ignites.
STEP 5
Once the unit is burning normally set the dial to desired flame
height.
THE APPLIANCE IS NOT TO BE USED UNTIL ANY LEAK IS
CORRECTED.
A gas appliance repairman or LP gas dealer should be called if
attempts to stop the leak(s) are unsuccessful and, in such case,
the LP gas supply must be shut off at the cylinder valve or the
cylinder must be removed from the appliance until the leak(s) is
corrected.
IMPORTANT: Call OUTLAND for quick delivery of replacement
parts. DO NOT RETURN THE APPLIANCE TO THE RETAILER.
Installation and service must be performed by a qualified
installer, service agency or the gas supplier.
NOTE TO INSTALLER:
Leave this guide with the consumer.
NOTE TO CONSUMER:
Please retain this guide for future use.
STOP:
Do not return this product to the store.
If you need help or parts, call the Outland Hotline:
1-888-514-1663
Get help for:
Missing/damaged parts • Assembly • Troubleshooting
Warranty Assistance • Product Information
WARNING:
If the information in this manual is not followed exactly, a fire
or explosion may result causing property damage, personal
injury or loss of life.

En-8
1-888-514-1663 | WWW.OUTLANDLIVING.COM
Gas Burner
Place
foot
Appliance Gas
Knob/Gas Valve
TIP: You may find it convenient
to place your foot on one of the
legs to help stabilize the appliance
during the ignition sequence.
CAUTION:
Always ensure the burner area, burner
screen and burner orifices are clear of all
debris including spider webs.
STEP 6
GOT A LOW FLAME? OR FLAME HEIGHT DOES NOT APPEAR
TO BE NORMALLY ADJUSTED BY THE GAS KNOB?
CORRECTIVE ACTION:
1. Confirm your propane tank is NOT empty J, then;
2. Close appliance gas knob valve “OFF”.
3. Disconnect and reconnect the propane cylinder connection.
4. Perform Leak Test and follow Ignition sequence.
The whole story…
A low flame can be caused by an empty propane tank or if the
Excess Flow Safety Valve (the EFV) has been tripped.
WHAT IS AN EXCESS FLOW VALVE? (EFV)
The EFV is a safety
mechanism contained
within the gas regulator.
The purpose of the EFV is
to restrict the gas supply
if too much gas is flowing
too quickly through the gas
hose. For example this could
happen if the gas hose was
severed. It is normal that your EFV trips if you open the gas
valve too quickly or if you leave the gas knob open before
lighting, or both.
HOW TO PREVENT LOW FLAME OR EFV TRIPS
Always check that your Outland appliance gas valve/gas
knob is closed before connecting the 1lb bottle of propane.
PLEASE DO NOT RETURN TO STORE –
IT’S NOT BROKEN
Questions? Outland support team:
1.888.514.1663
GAS
REGULATOR
NIPPLE WITH EXCESS
FLOW LIMITING
DEVICE (EFV)
GAS HOSE

PORTABLE PROPANE
TONGA TORCH
En-9
Conversion Kit
Owner and Safety Manual
D.772.000.V1
OUTLAND LIVING PORTABLE PROPANE TONGA TORCH - CONVERSION KIT OWNER AND SAFETY MANUAL
SECTION 8: EXTINGUISHING THE APPLIANCE
STEP 1
1. Turn gas valve on appliance to “OFF” position.
2. Wait for flame to visibly extinguish.
3. Disconnect the cylinder when not in use.
STEP 2
Allow unit to cool for at least five (5) minutes before relighting.
Upon igniting the appliance, visually
verify that the burner is indeed burning
as demonstrated in the image to the left.
The presence of flames will confirm that
the burner is burning.
Periodically check that the burner flame
is present during operation by visually
inspecting the burner to ensure the
presence of flames.
SECTION 7: PERIODIC INSPECTION OF BURNER FLAMES
If there are no flames present, as
demonstrated in the image to the left,
the appliance is likely not burning. If this
is the case, IMMEDIATELY turn the valve
to the “off” position if it is not already.
Allow unit to cool for at least five (5)
minutes before relighting. Repeat the
ignition procedure (See section labelled
“IGNITION”).
WARNING NOTES:
• The portable propane Tonga Torch appliance is NOT a toy.
• Never leave this appliance unattended while in operation.
• Expected burn time: Your torch has a maximum power rating
of 7,000 BTU / hr. You can expect a 3 - 3.5 hour burn time for
your OUTLAND Tonga propane torch, assuming you start
with a full 16 oz. / 453 g (1 lb.) LP propane cylinder (25,000 BTU
capacity) and that you use it with the gas valve fully open.
Using the torch with a lower flame intensity will increase the
burning time.
• When using this unit, children should be supervised at all
times, without exception.
• Do not place any objects inside the burner component.
• Do not add wood or any other materials to the fire. It is
designed to safely combust propane only.
• Solid fuels shall not be burned in this appliance.
• Keep the appliance area clear and free from combustible
materials, gasoline and other flammable vapors and liquids.
• Do not connect to a remote gas supply.
• Do not use this appliance if any part has been under water.
Immediately call a qualified service technician to inspect the
appliance and to replace any part of the control system and
any gas control which has been under water.
• Always inspect and clear all valve and gas orifices of any
foreign debris including spider webs prior to lighting.
IMPORTANT: Only use the base provided.
• Appliance accessories and parts can be purchased at
www.outlandliving.com or by calling 888-514-1663.
• Replacement parts:
• FMTT-103 Low pressure gas hose and regulator

En-10
1-888-514-1663 | WWW.OUTLANDLIVING.COM
SECTION 10: APPLIANCE DIMENSIONS
(Approximate)
SECTION 9: APPLIANCE MAINTENANCE
Your Outland appliance requires periodic maintenance to keep
it in good running order. Follow the steps below to ensure your
appliance will provide you with the best possible performance:
1Keep your appliance out of the rain and store it in a dry place.
2 If you experience any signs of your propane cylinder ‘freezing
off’ or start to experience lower flames than usual, please
simply turn the burner control setting to low for 5–10 minutes,
or replace the cylinder with a full one.
3 Ensure that you clean the top of your Outland appliance after
every use to keep it looking GREAT. Simply use warm soap
water to wipe down your appliance to keep it clean. Do not use
abrasive cleaners.
4. Should any part of this appliance (including the burner)
become soiled or dirty, wipe lightly with a damp cloth. Do not
use flammable or corrosive cleaning products on or near this
unit.
5 Periodically clean the burner orifice holes out with a small pin.
a. Remove top screw
b. Remove Burner Screen
c. Locate burner
d. Clean burner and burner screen orifice holes with small pin
or paperclip.
Torch Head
Wind
Guard
Burner
Burner
Orifices
Burner
Screen
Top Screw
70.5” +/- .2” (1.79m +/- 5mm)
STANDING HEIGHT
Ø 34” (Ø 862mm)
TRIPOD FOOTPRINT DIA.
TOP
FRONT

PORTABLE PROPANE
TONGA TORCH
E n -11
Conversion Kit
Owner and Safety Manual
D.772.000.V1
OUTLAND LIVING PORTABLE PROPANE TONGA TORCH - CONVERSION KIT OWNER AND SAFETY MANUAL
FOR REPLACEMENT PARTS AND ACCESSORIES PLEASE VISIT
WWW.OUTLANDLIVING.COM
The owner’s manual is available as a free download from www.outlandliving.com
Should you have any questions or comments regarding this appliance, please do not hesitate to contact FMI Brands Inc. at (888) 514-1663 or
STOP:
Do not return this product to the store.
If you need help or parts, call the Outland Hotline: 1-888-514-1663
Get help for:
Missing/damaged parts • Assembly • Troubleshooting
Warranty Assistance • Product Information
1 YEAR LIMITED WARRANTY
Customers in Canada and USA
All components are warranted by the manufacturer for a period of 1 year after date of purchase by the
original owner against defects in materials and workmanship under normal use. This warranty does NOT
cover normal wear and weathering, assembly and/or maintenance OR use in a commercial application. At
FMI Brands’ sole discretion, products under warranty will be repaired and/or replaced at no charge to the
customer. Any returns sent back to FMI Brands must be sent via prepaid freight and in the original retail
packaging.
Please register your OUTLAND Living product for proof of purchase and warranty at
http://outlandliving.com/register-products/
For more warranty information and details please contact FMI Brands Inc. at info@outlandliving.com
This manual suits for next models
1
Table of contents
Other Outland Living Flashlight manuals