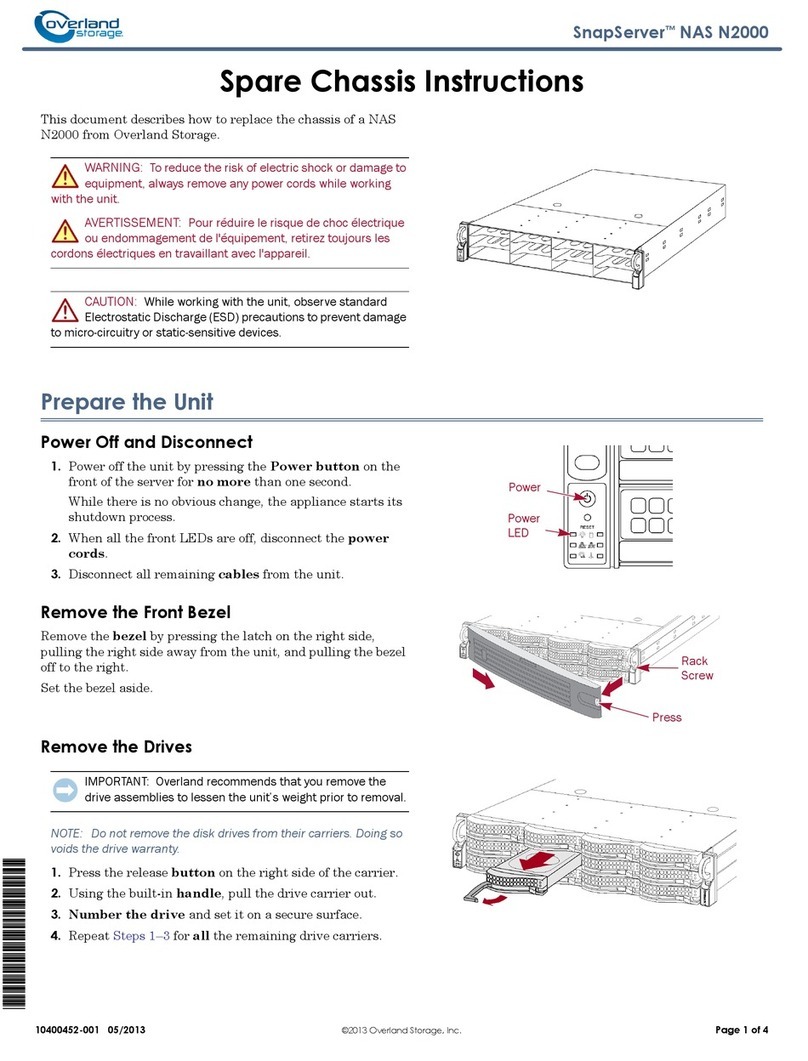
Overland Storage NEO 200S Guide

10400370-002 ©2012-16 Overland Storage, Inc. Page 1 of 5
*10400370002*
NEO®200s / 400s
Chassis Replacement Instructions
This document describes how to remove and replace the chassis
of a NEO 200s or NEO 400s library from Overland Storage.
WARNING: To reduce the risk of electric shock or damage to
equipment, always remove any power cords while working with
the unit.
WARNUNG: Um das Risiko eines elektrischen Schlags oder
Schäden am Gerät zu vermeiden, ziehen Sie stets den
Netzstecker, bevor Sie an der Einheit arbeiten.
AVERTISSEMENT: Pour réduire le risque de choc électrique
ou endommagement de l'équipement, retirez toujours les
cordons électriques en travaillant avec l'appareil.
CAUTION: While working with the unit, observe standard
Electrostatic Discharge (ESD) precautions to prevent damage
to micro-circuitry or static-sensitive devices.
Prepare the Unit
Save Library Configuration
If possible, save the current configuration of the old library:
1. Plug a USB drive into the rear panel.
2. At the Operator Control Panel, press:
Configure > Save/Restore > Save Library Config.
3. Remove USB drive.
Power Off and Disconnect
1. If possible, use Operator Control Panel to unload drives
that contain a cartridge (Control > Move Cartridges).
2. Power OFF the library.
3. Disconnect the power cord ().
4. Disconnect all other cables ( & ).

10400370-002 ©2012-16 Overland Storage, Inc. Page 2 of 5
NEO 200s / 400s Library Chassis Replacement Instructions
Remove Old Library from Rack
WARNING: It is recommended that a mechanical lifter (or at
least two people) be used during rack installation or removal
to prevent injury.
WARNUNG: Um Verletzungen zu vermeiden, empfehlen wir
zur Rack-Installation oder -Deinstallation die Nutzung einer
mechanischen Hebehilfe (oder mindestens zwei Personen).
AVERTISSEMENT: Pour éviter toute blessure il est
recommande qu'un monte-charge (ou deux personnes au
moins) soit utilisé lors de l'installation ou de l'enlèvement du
support.
1. Remove and retain the two screws ( ) on the front side
of the library anchoring the mounting brackets.
2. Slide the old chassis out of the rack onto the lifter.
3. Move the chassis onto a secure surface.
4. Unpack the new chassis and place it next to the old one.
Remove Shipping Lock
IMPORTANT: The shipping lock must be removed before the
replacement library is powered ON.
1. On the replacement library, remove blue label ().
2. Lift and remove the shipping lock ().
3. Store the shipping lock and blue label at the top right ( )
of the rear panel of the library.
Transfer Components
Move Rack Mounts
1. Remove the mounting brackets ()and anchors ()
from each side of the old library and install them on the
replacement library.
2. Move the screws removed from the replacement library
and install them on the old library.
Remove Covers for Drives
NOTE: If there is only a single drive in the old library, skip this step.
1. Loosen the blue captive thumbscrews and remove the
cover plate from the same drive bays of replacement
chassis as the ones being used on the old chassis.
2. Set aside the covers for installation on the old chassis
being returned.
Old Chassis New Chassis
ESD-safe Surface

10400370-002 ©2012-16 Overland Storage, Inc. Page 3 of 5
NEO 200s / 400s Library Chassis Replacement Instructions
Move Tape Drives
IMPORTANT: Install the drives from the old library into the
same positions in the replacement library to maintain your
current library configuration.
1. Extend the black pull-out tab ()located under the new
chassis and keep it extended while moving the drives.
CAUTION: Damage to the connector pins may occur if this
procedure is not followed.
2. Loosen both blue captive thumbscrews () on a sled.
3. Pull the drive sled handle ()straight back to remove.
4. While supporting the drive bottom, use the handle ()to
slowly insert the drive sled into the same drive bay of the
new chassis until the sled is seated against the back.
5. Tighten the thumbscrews ()to secure the drive.
6. Repeat Steps 2–5 for any remaining drives.
7. Push the black tab back underneath the library.
8. If any drive covers were removed from the replacement
library, install them on the old library.
Verify the Library Replacement
1. Reattach power cords to the library temporarily and
turn the library ON.
During the Power-On Self Test (POST), all four LEDs are
illuminated briefly, followed by a flashing Ready LED.
When the initialization sequence is complete, the
Operator Control panel will either show the Home Screen
or the New Library Detected message.
2. If the Home screen is displayed after initialization,
navigate to Monitor > Library > Identity > Serial Number to
verify that the serial number on the pull tab matches the
serial number displayed on the Operator Control Panel.
Refer to the NEO 200s/400s User Guide for more detailed
instructions.
3. If the New library detected message is displayed, follow
the instructions listed on the Operator Control Panel to
run the Library Verify test (Service > Library Verify).
NOTE:
If these options do not display, proceed to
“Troubleshoot Library Installation.”
4. The verify test requires the use of a blank scratch tape
cartridge. Insert it using the Mail Slot.
5. Do one of the following:
•If the test passes, remove the cartridge, press Cancel
to exit, turn the unit off, and remove the power cords
for the library’s re-installation in the rack.
•If the test fails, an error code will be displayed.
Proceed to “Troubleshoot Library Installation.”
New library detected
1. Perform Library Verify
2. Power off and insert LCC from old library
Mail Slot

10400370-002 ©2012-16 Overland Storage, Inc. Page 4 of 5
NEO 200s / 400s Library Chassis Replacement Instructions
Troubleshoot Library Installation
If the Library Verify test in “Verify the Library Replacement”
successfully completed, skip this section and proceed to “Move
Cartridge Magazines (Optional).”
1. If the Error LED turns on while trying to complete
“Verify the Library Replacement,” Power OFF the
replacement library enclosure.
2. Remove and replace the library controller card as
described in “Swap Library Controller Cards.”
3. Power on again and repeat “Verify the Library
Replacement.”
4. If the test fails, an error code will be displayed. Refer to
the Troubleshooting chapter in the NEO 200s/400s User
Guide for additional instructions.
Swap Library Controller Cards
NOTE: Only swap library controller cards if directed to do so in
“Troubleshoot Library Installation.”
1. Loosen the two blue captive thumbscrews on the old
library controller card in the old chassis.
2. Grasp the thumbscrews and pull the card out of the
library.
3. Grasp the library controller card faceplate and align the
card in the same location in the new library, aligning the
card with the library controller card groove.
4. Push the library controller card forward until it is
properly seated.
NOTE: You will hear a snap when the Library Controller Card is
fully engaged and installed properly.
5. Tighten the thumbscrews to secure the card in place.
IMPORTANT: The Library Enclosure contains a copy of
your current library configuration within the Library
Controller Card. In rare occurrences, the replacement
library enclosure may contain valid (non-zero) data. If this
occurs, the library firmware will detect this mismatch and
display the VPD Selection message on the Operator
Control Panel. If this VPD Selection is displayed, highlight
the VPD from Controller > OK. This will copy VPD from the
controller to the replacement library enclosure.
Move Cartridge Magazines (Optional)
If the magazines are full of tapes, carefully move them to the
replacement library.
1. Manually release and remove all magazines from both
the defective library and the replacement library:
a. Find the access holes for the magazines.
b. Push the end of a straightened paper clip into the
access hole for each magazine at the back of the library.
DO NOT push the paper clip in more than ½ inch.
c. While holding the paper clip in place, have a second
person pull each magazine out from the front.
NOTE:
To prevent dropping the magazine, support both ends
of the magazine before it clears the front edge of the library.
2. Insert the cartridge magazines from the old library into
the same positions in the replacement library.
3. Insert the cartridge magazines from the replacement
library into the same positions in the old library.
Power Button Error LED
10400370-002 ©2012-16 Overland Storage, Inc. Page 5 of 5
http://support.overlandstorage.com
You can get additional technical support on the Internet at the Overland Storage Support web page, or by contacting Overland Storage using
the information found on the Contact Us page on our web site.
NEO 200s / 400s Library Chassis Replacement
Move Extra Power Supply (NEO 400s Only)
If an extra power supply has been added to a NEO 400s for
redundancy, it should be move to the replacement chassis:
1. Use a Phillips screwdriver to remove and retain the three
screws holding the power supply bay cover. Set aside.
2. Loosen the three blue captive thumbscrews on the
power supply in the top bay of the old library.
3. Pulling on two of the thumbscrews, pull the redundant
power supply out of the library a couple of inches.
4. Grasp the power supply and remove it from the library.
5. Slide the power supply into the replacement library.
6. Use the retained screws to secure the cover plate to the
bay of the old library.
Reinstall Library in Rack
Install the New Library
1. Using the lifter (or assistance), align the refreshed library
with the rails in the rack.
2. Slide the library into the rack until the front brackets
make contact.
The side “donuts” should be under the rail bump-outs.
3. Use the retained screws to secure the library.
Reconnect Cables and Cords
Reverse the steps in “Power Off and Disconnect” to reconnect
the cables and power cords.
Verify the connections are good and then turn the power ON.
Complete the Exchange
Load Library Configuration
1. Plug a USB drive into the rear panel.
2. At the Operator Control Panel, press:
Configure > Save/Restore > Restore Library Config.
3. Remove USB drive.
Return Old Chassis to Overland
For return shipping details and RMA number, go to:
http://docs.overlandstorage.com/return-instructions
1. Place the old chassis in the anti-static bag and put it in
the replacement part’s box.
2. Use a return merchandise authorization (RMA) number to
return the part to Overland Storage.
Other manuals for NEO 200S
4
This manual suits for next models
1
Table of contents
Other Overland Storage Chassis manuals

Overland Storage
Overland Storage SnapServer EXP E2000 Expansion Array User manual

Overland Storage
Overland Storage SnapServer NAS N2000 User manual

Overland Storage
Overland Storage NEO 2000e User manual

Overland Storage
Overland Storage SnapServerXSR 40 Guide

Overland Storage
Overland Storage SnapServer DX2 Quick start guide

Overland Storage
Overland Storage SnapServer DX2 Quick start guide

Overland Storage
Overland Storage NEO 4000e User manual

Overland Storage
Overland Storage SnapServer DX2 Guide

Overland Storage
Overland Storage SnapExpansion XSR Guide

Overland Storage
Overland Storage SnapExpansion DX Series Guide