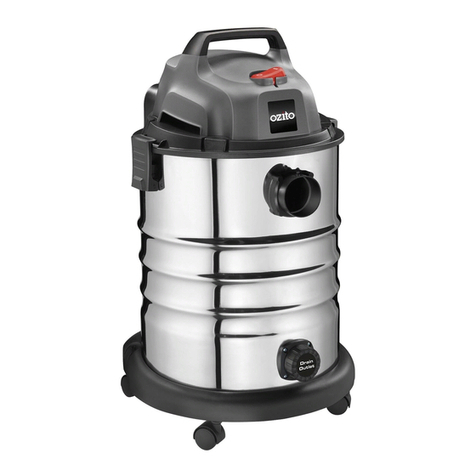
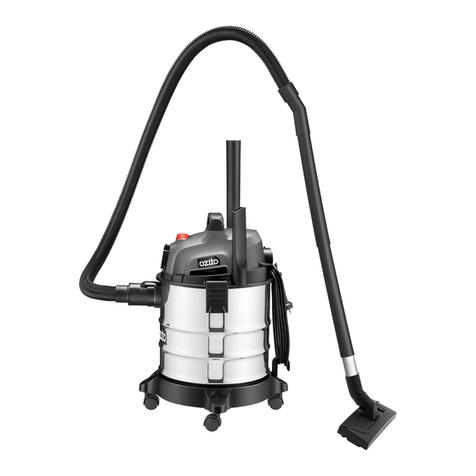
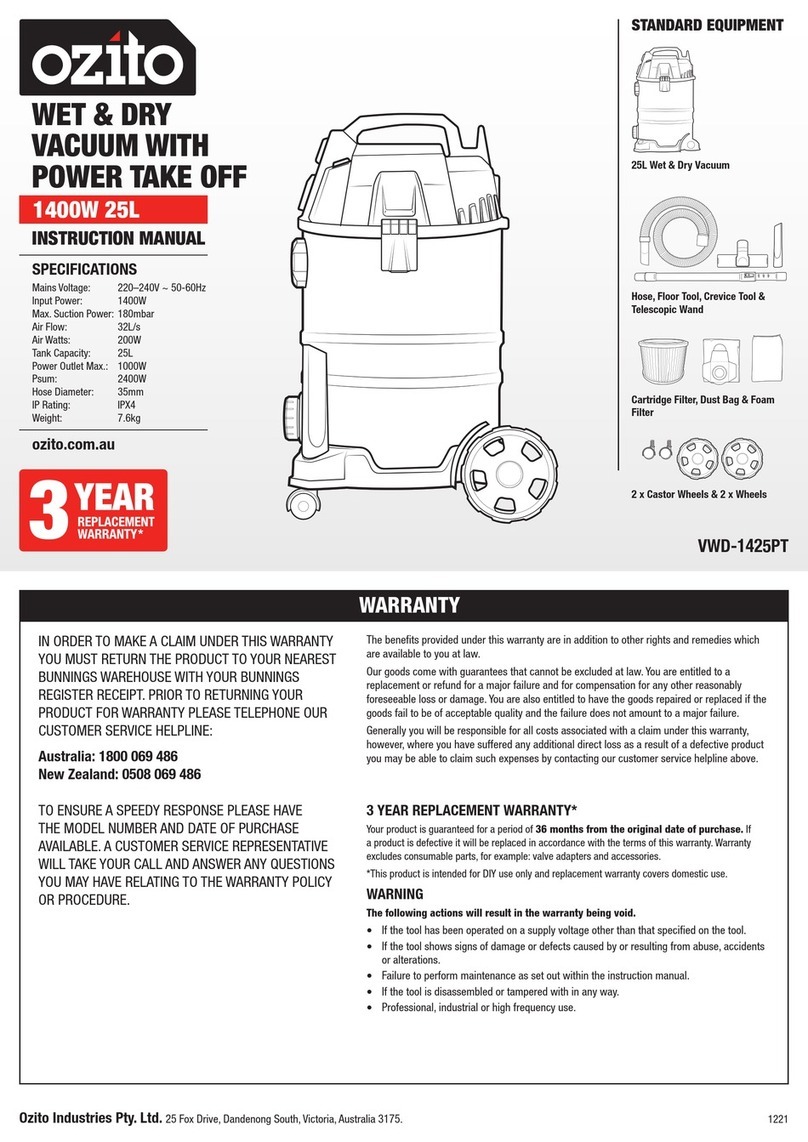
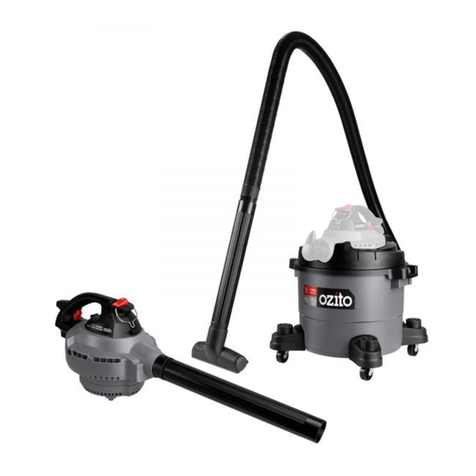
Ozito VWD-1225PT User manual

WET & DRY
VACUUM
1250W 25L
INSTRUCTION MANUAL
SPECIFICATIONS
Mains Voltage: 230 – 240V ~ 50Hz
Input Power: 1250W
Max. Suction Power: 140mbar
Air Flow: 27.2L/s
Tank Capacity: 25L
Power Outlet Max.: 1150W
Psum: 2400W
IP Rating: IP24
Product weight: 5.3kg
VWD-1225PT
STANDARD EQUIPMENT
IN ORDER TO MAKE A CLAIM UNDER THIS
WARRANTY YOU MUST RETURN THE PRODUCT
TO YOUR NEAREST BUNNINGS WAREHOUSE WITH
YOUR BUNNINGS REGISTER RECEIPT. PRIOR TO
RETURNING YOUR PRODUCT FOR WARRANTY
PLEASE TELEPHONE OUR CUSTOMER SERVICE
HELPLINE:
Australia 1800 069 486
New Zealand 0508 069 486
3 YEAR REPLACEMENT WARRANTY
Your product is guaranteed for a period of 36 months from
the original date of purchase. If a product is defective it will
be replaced in accordance with the terms of this warranty.
Warranty excludes consumable parts, for example: Filters and dust
bag.
WARNING
The following actions will result in the warranty being void.
• If the tool has been operated on a supply voltage other
than that specified on the tool.
• If the tool shows signs of damage or defects caused
by or resulting from abuse, accidents or alterations.
• Failure to perform maintenance as set out within the
instruction manual.
• If the tool is disassembled or tampered with in any way.
• Professional, industrial or high frequency use.
WARRANTY
TO ENSURE A SPEEDY RESPONSE PLEASE
HAVE THE MODEL NUMBER AND DATE OF
PURCHASE AVAILABLE. A CUSTOMER SERVICE
REPRESENTATIVE WILL TAKE YOUR CALL
AND ANSWER ANY QUESTIONS YOU MAY
HAVE RELATING TO THE WARRANTY POLICY
OR PROCEDURE.
OZITO Australia/New Zealand (Head Office) 1-23 Letcon Drive, Bangholme, Victoria, Australia 3175.
The benefits provided under this warranty are in addition
to other rights and remedies which are available to you at law.
Our goods come with guarantees that cannot be excluded
at law. You are entitled to a replacement or refund for a major
failure and for compensation for any other reasonably foreseeable
loss or damage. You are also entitled to have the goods repaired
or replaced if the goods fail to be of acceptable quality and the
failure does not amount to a major failure.
Generally you will be responsible for all costs associated with
a claim under this warranty, however, where you have suffered
any additional direct loss as a result of a defective product you
may be able to claim such expenses by contacting our customer
service helpline above.
ozito.com.au
1218
25L Wet & Dry Vacuum
Floor Tool, Crevice Tool & Power
Tool Adaptor
Hose, Premium Extension Tubes &
Adaptor
Filter Bag, Dust Bag & Foam Filter
Castor Wheels, Handle Screws

3
ONLINE MANUAL
Scan this QR Code with your
mobile device to take you to
the online manual.
KNOW YOUR PRODUCT
1. ASSEMBLY
SETUP & PREPARATION
Fitting the Motor
1. Whenttingthemotortothetank,
positionitsothatthemotorsecuring
clipsonthetankalignwiththe
fasteningpointsonthemotor.
2.Fastenthemotorsecuringclipsto
themotor,makingsurethatthey
lock into place correctly.
3. Toremovethemotor,openthe
motorsecuringclipandliftthemotorout
of the tank.
Fitting the Handle
1. Aligntheholesoneithersideofthe
handle with the holes in the top side
of the motor.
2. Insert two screws (supplied) into the
handleandtightenwithascrewdriver
(not supplied).
Assembling the Castors
1. Turn the container
upside down.
2. Insert the castor
assemblies into
the base of the tank. Use
rmhandpressure.
WARNING! ENSURE THE TOOL IS DISCONNECTED FROM
THEPOWERSUPPLYBEFORE PERFORMINGANYOFTHE
FOLLOWING OPERATIONS.
1. On/O/PowerTakeOSwitch
2. Carry Handle
3. Accessory Mount
4. Motor
5. FilterCage
6. Safety Float
7. Blow Outlet
8. PowerTake-OSocket
9. Vacuum Inlet
10. Tank
11.MotorSecuringClips
12. Castors
13. Cable Hook
WET & DRY VACUUM
ACCESSORIES
14. Hose
15. Premium Extension Tubes
16.FilterBag
17. Adaptor
18. Floor Tool
19. Crevice Tool
20. Power Tool Adaptor
21.DustBag
22. Foam Filter
4
8
14 21
17 18 19
15 22
16
123
5
9
7
11 12 13
6
10
20

Mounting the Cable Hook
1. Press the cable hook for the cable store
into the mount on the base of the unit.
2. Afteruse,thepowercablecan
be conveniently wound onto the
cable hooks.
Fitting the Dust Bag
1. Forvacuumingne,drydirt,
itisrecommendedthatyout
thedustbag.Thedustbagis
suitablefordryvacuumingonly.
Usingthedustbagmakesit
easier to dispose of the dust that
has been collected.
2. Toattach,slipthedustbagover
the vacuum inlet.
NOTE: Do not use the dust bag
whenvacuumingliquid.
Fitting the Foam Filter -
Vacuuming Liquid
Forwet-vacuuming,slipthe
suppliedfoamlteroverthelter
basket.
NOTE: Do not use the lter bag
and/or dust bag whenvacuuming
liquid
Fitting the Filter Bag -
Vacuuming Dry Matter
Fordryvacuumcleaningalways
usethelterbag.Mountthelter
bag,sothatnoairissucked
throughtheltercagewithout
beingltered.
NOTE: Do not use the foam lter
whenvacuumingdrymatter.
2. FITTING THE FILTER
IMPORTANT! NEVER USE THE WET AND DRY VACUUM
CLEANER WITHOUTA FILTER!ALWAYS ENSURE THAT
THE FILTERS ARE PERFECTLY SECURE!

3. FITTING HOSES & NOZZLES 4. OPERATION
Connect the suction hose to
thecorrespondingconnector
onthewetanddryvacuum,
dependingontheapplication
required:
Vacuuming
Connect the suction hose to
the vacuum inlet.
Blowing
Connect the suction hose to
the blow outlet.
Extension Tube and
Adaptor
1. Thesuctionhosecanbeextendedbyattachingoneormore
sections of the 3 part extension tubes.
2. The adapter must be inserted
between the extension tube and
whicheverofthenozzlesisrequired.
Suction Tools
Floor Tool
Theoortoolisforvacuumingsolidsand
liquidsovermediumtolargeareas.
Crevice Tool
Thecrevicetoolisdesignedforcleaning
crevicesandedges.
OPERATION
IMPORTANT! SWITCH OFF THE EQUIPMENT IF LIQUID
OR FOAM IS EMITTED WITH THE EXHAUST AIR WHEN
WET VACUUM CLEANING.
IMPORTANT! WHEN WET VACUUMING, THE SAFETY
FLOAT TURNS OFF THE WET AND DRY VACUUM
CLEANER AUTOMATICALLY WHEN THE MAXIMUM
LEVEL IS REACHED.
IMPORTANT! THE WET AND DRY VACUUM CLEANER
IS NOT SUITABLE FOR THE VACUUMING OF
COMBUSTIBLE LIQUIDS.
VWD-1225PT
On/O/Auto Switch
Switch position 0: OFF
Switch position I: Normal operation
Switch position AUTO: Power Take
OMode
Power Take O Mode (1150W max.)
1. Connect the power cable on your electric tool to the Power
TakeOSocketandconnectthesuctionhosetotheextractor
connector on your power tool. Check that the connections are
secureandairtight.
NOTE: You can use the supplied Adaptor or Power Tool Adaptor
toconnectthesuctionhosetothepowertool.Todoso,tit
between the suction hose and the extractor port on the power tool.
2. Set the switch on the wet and dry
vacuum cleaner to the Auto: Power
TakeOmode.Themomentyou
switchonthepowertool,thewet
and dry vacuum cleaner switches
onaswell.Whenyouswitcho
thepowertool,thewetanddry
vacuumcleanerswitchesoas
well after a preset delay.
AUTO
CAUTION: TO REDUCE THE RISK OF ELECTRICAL SHOCK,
A RESIDUAL CURRENT DEVICE (RATED 30mA OR LESS)
SHOULD BE USED.
AUTO

Cleaning
Keepallsafetydevices,airventsandthemotorhousingfree
of dirt and dust as far as possible.
Werecommendthatyoucleantheequipmentimmediatelyafter
you use it.
Cleaning the motor housing
Cleantheapplianceregularlywithadampcloth.Donotusecleaning
agentsorsolvents;thesemaybeaggressivetotheplasticpartsinthe
appliance.
Cleaning the tank
The tank can be cleaned with a damp cloth and some soft soap or under
runningwater,dependingontheamountofdirt.
Cleaning the foam lter
Cleanthefoamlterwithalittlesoftsoapunderrunningwaterandallow
it to air-dry.
Storing
Ensure the Wet & Dry Vac has been fully emptied of any dry matter or
liquidbeforeitisstored.
Wrap the power cable around the cable hooks.
Keepalltheaccessorieswiththeunittoavoidlosingthem.
Keep in a dry place out of reach of children.
IMPORTANT! BEFORE CLEANING YOUR WET &
DRY VAC OR CARRYING OUT ANY MAINTENANCE
PROCEDURE, MAKE SURE THAT THE MOTOR IS OFF
AND THE VACUUM IS DISCONNECTED FROM THE
POWER SUPPLY TO PREVENT ACCIDENTAL STARTING.
MAINTENANCE DESCRIPTION OF SYMBOLS
CARING FOR THE ENVIRONMENT
Powertoolsthatarenolongerusableshouldnotbedisposedof
with household waste but in an environmentally friendly way. Please
recycle where facilities exist. Check with your local council authority
forrecyclingadvice.
Recyclingpackagingreducestheneedforlandllandrawmaterials.
Reuse of recycled material decreases pollution in the environment.
Pleaserecyclepackagingwherefacilitiesexist.Checkwithyour
localcouncilauthorityforrecyclingadvice.
Spare parts can be ordered from the Special Orders Desk
at your local Bunnings Warehouse.
For further information, or any parts not listed here, visit
www.ozito.com.au or contact Ozito Customer Service:
Australia 1800 069 486
New Zealand 0508 069 486
E-mail: [email protected]
SPARE PARTS
VVolts Hz Hertz
~Alternating current WWatts
Litres L/s Litres per second
Ingress Protection from water
Read instruction manual Double Insulation
L
mbarIPX4 Pressure rating (millibar)
Warning Regulator Compliance Mark

IMPORTANT!
Whenusingtheequipment,afewsafetyprecautionsmustbeobservedtoavoidinjuries
anddamage.Pleasereadthecompleteoperatingmanualwithduecare.Keepthismanual
inasafeplacesothattheinformationisavailableatalltimes.Ifyougivetheequipmenttoanyother
person,givethemtheseoperatinginstructionsaswell.
Wecannotacceptanyliabilityfordamageoraccidentswhichariseduetoafailuretofollowthese
instructions and the safety information.
• Donotleaveapplianceunattendedwhenpluggedin.Unplugfromoutletwhennotinuseand
beforeservicingandcleaning.
• Toavoidelectricshock,donotexposetorain.Storeindoors.
• Neveruseinthepresenceofexplosiveliquids,vapoursorexplosivedust–suchascoal
orgrain.
• Never pick up asbestos or asbestos dust.
• Wooddustandchipsinaconnedareacangiverisetoreoranexplosion.Guardagainst
possibleignitionsources.
• Donotpickupanythingthatisburningorsmouldering–suchasmetalgrindingdust,cigarette
ends,hotcoals,matchesorsimilar.
• Theapplianceisnotintendedforusebyyoungchildrenorinrmpersonswithoutsupervision.
Youngchildrenshouldbesupervisedtoensuretheydonotplaywiththeappliance.
• Use only manufacturer’s recommended attachments and consumables.
• Nevermodifythecleanerinanyway-thisisdangerousandwillinvalidatethewarranty.
• Donotusecleanerwithoutthelterinplace.
• Ifmotorsoundbecomeshigherpitchedalwayscheckforthefollowing:
- Blocked hose or accessory.
-Blockedlter.
- Full container.
• Nevertrytomovethecleanerbypullingwiththemainslead.
• Alwayscheckthatthelterisclearandnotblocked.Keepallopeningsclearofanyblockages.
• Whenliftingtheunit,alwaysliftitwiththehandleorunderrimofbucket.Bewareofexcess
weight.
• Alwaysswitchtheunitobeforechangingattachmentsorconnectingdierentpowertools.
• Alwaysdisconnectequipmentfromtheappliancewhenitisnotinuse.
• Ifthecordsetisdamagedhaveitrepairedbyanauthorisedservicecentre.
• Thisapplianceisnotintendedforusebypersons(includingchildren)withreducedphysical,
sensoryormentalcapabilities,orlackofexperienceandknowledge,unlesstheyhavebeen
givensupervisionorinstructionconcerninguseoftheappliancebyapersonresponsiblefor
their safety.
• Thewetanddryvacuumcleanerisdesignedforwetanddryvacuumingusingtheappropriate
lter.Theapplianceisnotsuitableforthevacuumingofcombustible,explosiveorharmful
substances.
• Theequipmentistobeusedonlyforitsprescribedpurpose.Anyotheruseisdeemedtobea
caseofmisuse.Theuser/operatorandnotthemanufacturerwillbeliableforanydamageor
injuriesofanykindcausedasaresultofthis.
WET & DRY VACUUM SAFETY WARNINGS
WARNING! When using mains-powered tools, basic safety precautions, including
the following, should always be followed to reduce risk of re, electric shock,
personal injury and material damage.
Readthewholemanualcarefullyandmakesureyouknowhowtoswitchthetooloinan
emergency,beforeoperatingthetool.
Save these instructions and other documents supplied with this tool for future reference.
Theelectricmotorhasbeendesignedfor230Vand240Vonly.Alwayscheckthatthepower
supplycorrespondstothevoltageontheratingplate.
Note:Thesupplyof230Vand240VonOzitotoolsareinterchangeableforAustraliaand
New Zealand.
Note: The power outlet used for the vacuum must be protected by a 30mA residual current device
orearthleakagecircuitbreaker.
ThesupplycoredassessedastypeYattachedbyusingAS/NZS60335-1.
Ifthesupplycordisdamaged,itmustbereplacedbyanelectricianorapowertoolrepairerin
order to avoid a hazard.
Using an Extension Lead
Alwaysuseanapprovedextensionleadsuitableforthepowerinputofthistool.Beforeuse,
inspecttheextensionleadforsignsofdamage,wearandageing.Replacetheextensionleadif
damagedordefective.
Whenusinganextensionleadonareel,alwaysunwindtheleadcompletely.Useofanextension
leadnotsuitableforthepowerinputofthetoolorwhichisdamagedordefectivemayresultina
riskofreandelectricshock.
WARNING! Read all safety warnings and all instructions. Failure to follow the
warningsandinstructionsmayresultinelectricshock,reand/orseriousinjury.
Save all warnings and instructions for future reference. The term “power tool” in the
warnings refers to your mains-operated (corded) power tool or battery-operated (cordless)
power tool.
1. Work area safety
a. Keep work area clean and well lit. Cluttered or dark areas invite accidents.
b.
Do not operate power tools in explosive atmospheres, such as in the presence of
ammable
liquids, gases or dust.Powertoolscreatesparkswhichmayignitethedustor
fumes.
c. Keep children and bystanders away while operating a power tool. Distractions can cause
you to lose control.
2. Electrical safety
a. Power tool plugs must match the outlet. Never modify the plug in any way.
Do not use any adapter plugs with earthed (grounded) power tools.Unmodiedplugsand
matchingoutletswillreduceriskofelectricshock.
b. Avoid body contact with earthed or grounded surfaces, such as pipes, radiators, ranges
and refrigerators. There is an increased risk of electric shock if your body is earthed or
grounded.
c. Do not expose power tools to rain or wet conditions.Waterenteringapowertoolwill
increase the risk of electric shock.
d. Do not abuse the cord. Never use the cord for carrying, pulling or unplugging the power
tool. Keep cord away from heat, oil, sharp edges or moving parts.Damagedorentangled
cords increase the risk of electric shock.
e. When operating a power tool outdoors, use an extension cord suitable for outdoor use.
Use of a cord suitable for outdoor use reduces the risk of electric shock.
f. If operating a power tool in a damp location is unavoidable, use a residual current device
(RCD) protected supply with a rated residual current of 30 mA or less. Use of an RCD
reduces the risk of electric shock.
3. Personal safety
a. Stay alert, watch what you are doing and use common sense when operating a power
tool. Do not use a power tool while you are tired or under the inuence of drugs, alcohol
or medication.
Amomentofinattentionwhileoperatingpowertoolsmayresultinseriouspersonalinjury.
b. Use personal protective equipment. Always wear eye protection.Protectiveequipment
suchasdustmask,non-skidsafetyshoes,hardhat,orhearingprotectionusedforappropriate
conditionswillreducepersonalinjuries.
c. Prevent unintentional starting. Ensure the switch is in the o-position before connecting
to power source and/or battery pack, picking up or carrying the tool. Carryingpower
toolswithyourngerontheswitchorenergisingpowertoolsthathavetheswitchoninvites
accidents.
d. Remove any adjusting key or wrench before turning the power tool on.
Awrenchorakeyleftattachedtoarotatingpartofthepowertoolmayresultinpersonalinjury.
e. Do not overreach. Keep proper footing and balance at all times. This enables better control
of the power tool in unexpected situations.
f. Dress properly. Do not wear loose clothing or jewellery. Keep your hair, clothing and gloves
away from moving parts.Looseclothes,jewelleryorlonghaircanbecaughtinmovingparts.
g. If devices are provided for the connection of dust extraction and collection facilities,
ensure these are connected and properly used. Use of dust collection can reduce dust-
related hazards.
4. Power tool use and care
a. Do not force the power tool. Use the correct power tool for your application. The correct
powertoolwilldothejobbetterandsaferattherateforwhichitwasdesigned.
b. Do not use the power tool if the switch does not turn it on and o. Any power tool that
cannotbecontrolledwiththeswitchisdangerousandmustberepaired.
c. Disconnect the plug from the power source and/or the battery pack from the power tool
before making any adjustments, changing accessories, or storing power tools. Such
preventivesafetymeasuresreducetheriskofstartingthepowertoolaccidentally.
d. Store idle power tools out of the reach of children and do not allow persons unfamiliar
with the power tool or these instructions to operate the power tool. Power tools are
dangerousinthehandsofuntrainedusers.
e. Maintain power tools. Check for misalignment or binding of moving parts, breakage of
parts and any other condition that may aect the power tool’s operation. If damaged,
have the power tool repaired before use. Many accidents are caused by poorly maintained
power tools.
f. Keep cutting tools sharp and clean.Properlymaintainedcuttingtoolswithsharpcutting
edgesarelesslikelytobindandareeasiertocontrol.
g. Use the power tool, accessories and tool bits etc. in accordance with these instructions,
taking into account the working conditions and the work to be performed. Use of the
powertoolforoperationsdierentfromthoseintendedcouldresultinahazardoussituation.
h. Keep handles and grasping surfaces dry, clean and free from oil and grease. Slippery handles and
graspingsurfacesdonotallowforsafehandlingandcontrolofthetoolinunexpectedsituations.
5. Service
a. Have your power tool serviced by a qualied repair person using only identical
replacement parts. This will ensure that the safety of the power tool is maintained.
b. If the supply cord is damaged, it must be replaced by the manufacturer,
itsserviceagentorsimilarlyqualiedpersonsinordertoavoidahazard.
GENERAL POWER TOOL SAFETY WARNINGS
ELECTRICAL SAFETY
Table of contents
Other Ozito Vacuum Cleaner manuals

Ozito
Ozito Work-Shed Vac WVG-951 User manual

Ozito
Ozito VWD-1220 User manual

Ozito
Ozito VWD-1212U Installation instructions

Ozito
Ozito VWD-1235PTO User manual

Ozito
Ozito HVR-006 User manual

Ozito
Ozito PXVWDS-1818 User manual

Ozito
Ozito OZDE1015WA User manual

Ozito
Ozito PXHVS-250 User manual

Ozito
Ozito VWD-1220S User manual

Ozito
Ozito PXC PXHVS-218 User manual

Ozito
Ozito VWD-1530 User manual

Ozito
Ozito VWD-1220U User manual

Ozito
Ozito VWD-1235PT User manual

Ozito
Ozito PXHVS-250U User manual

Ozito
Ozito HVR-006 User manual

Ozito
Ozito PXVWDS-1818U User manual

Ozito
Ozito WVG-951 User manual

Ozito
Ozito VWD-1220PTU User manual

Ozito
Ozito VWD-1212 User manual

Ozito
Ozito PXWDVS-1080 User manual