manuals.online logo
Brands
  1. Home
  2. •
  3. Brands
  4. •
  5. Paaschburg & Wunderlich
  6. •
  7. Motorcycle Accessories
  8. •
  9. Paaschburg & Wunderlich HIGHSIDER FLIGHT Manual

Paaschburg & Wunderlich HIGHSIDER FLIGHT Manual

H
R3
R2
A2
R1
A1
C
T
E2
E1
B
- Adapter A1 und A2
a b c
Lenkerinnendurchmesser/
Inner diameter of handlebar
12mm - 13,9mm
Lenkerinnendurchmesser/
Inner diameter of handlebar
14mm - 15,9mm
Lenkerinnendurchmesser/
Inner diameter of handlebar
16mm - 17,9mm
Lenkerinnendurchmesser/
Inner diameter of handlebar
18mm - 20,9mm
Lenkerinnendurchmesser/
Inner diameter of handlebar
> 21mm
- Adapter A1 und A2
- Konusmutter H
- Schlitzhülse E1
- Adapter A1 und A2
- Konusmutter H
- Schlitzhülse E1
- Ring R1
- Adapter A1 und A2
- Konusmutter H
- Schlitzhülse E1+E2
- Ring R1
- Adapter A1 und A2
- Konusmutter H
- Schlitzhülse E1+E2
- Ring R2
- Adapter A1 und A2
- Konusmutter H
- Schlitzhülse E1+E2
- Ring R3
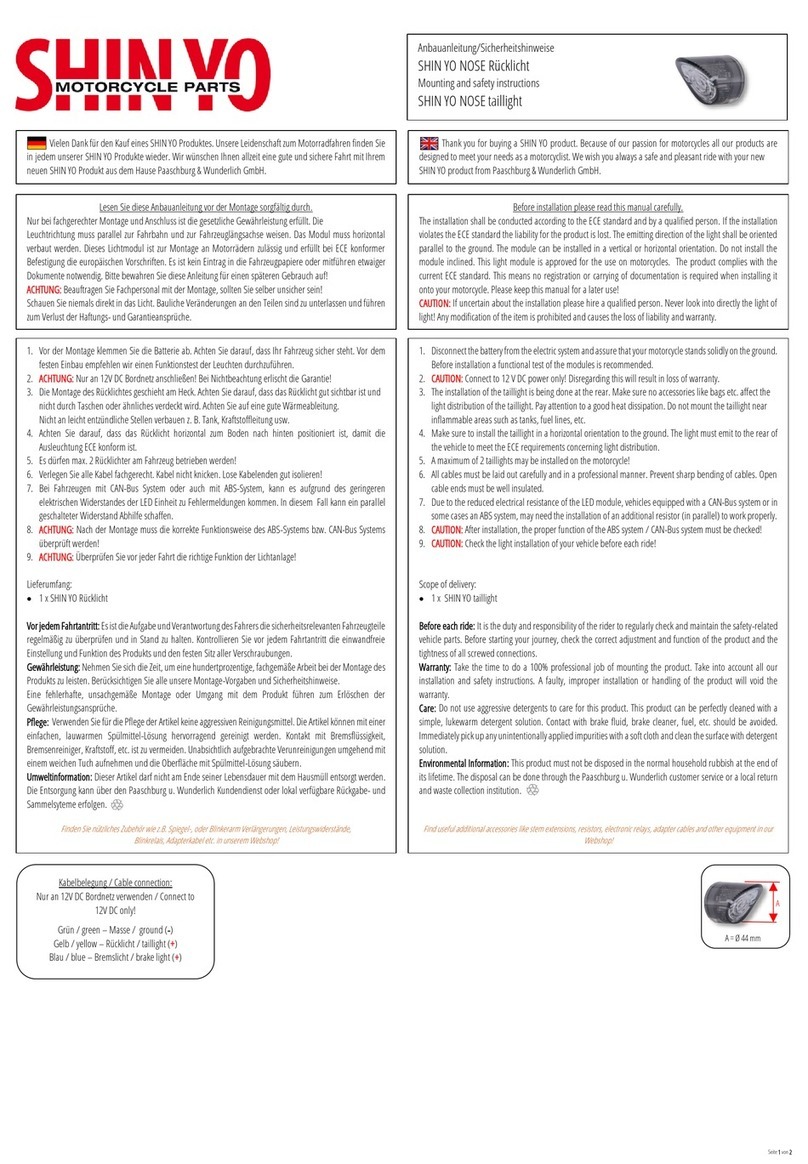
Bedienungs- und Montageanleitung für den LED Lenkerenden-
Blinker „FLIGHT“
Instruction and installation manual for LED handlebar end
indicator „FLIGHT“
Vielen Dank für den Kauf eines HIGHSIDER Produktes. Unsere Leidenschaft zum
Motorradfahren finden Sie in jedem unserer HIGHSIDER Produkte wieder. Wir wünschen
Ihnen allseits eine gute und sichere Fahrt mit Ihrem neuen HIGHSIDER Produkt aus dem
Haus Paaschburg & Wunderlich GmbH.
Lesen Sie diese Anbauanleitung vor der Montage sorgfältig durch!
Nur bei fachgerechter Montage und Anschluss ist die gesetzliche Gewährleistung erfüllt. Die
Leuchtrichtung muss parallel zur Fahrbahn und zur Fahrzeuglängsachse in Fahrtrichtung
weisen. Das Modul darf nicht geneigt verbaut werden. Dieses Lichtmodul ist zur Montage an
Motorrädern zulässig und erfüllt bei ECE konformer Befestigung die europäischen
Vorschriften. Es ist kein Eintrag in die Fahrzeugpapiere oder mitführen etwaiger Dokumente
notwendig.
Beauftragen Sie Fachpersonal mit der Montage, sollten Sie selber unsicher sein! Schauen
Sie niemals direkt in das Licht der LED’s! Die Blinker sind nur als vordere Blinker
zugelassen!
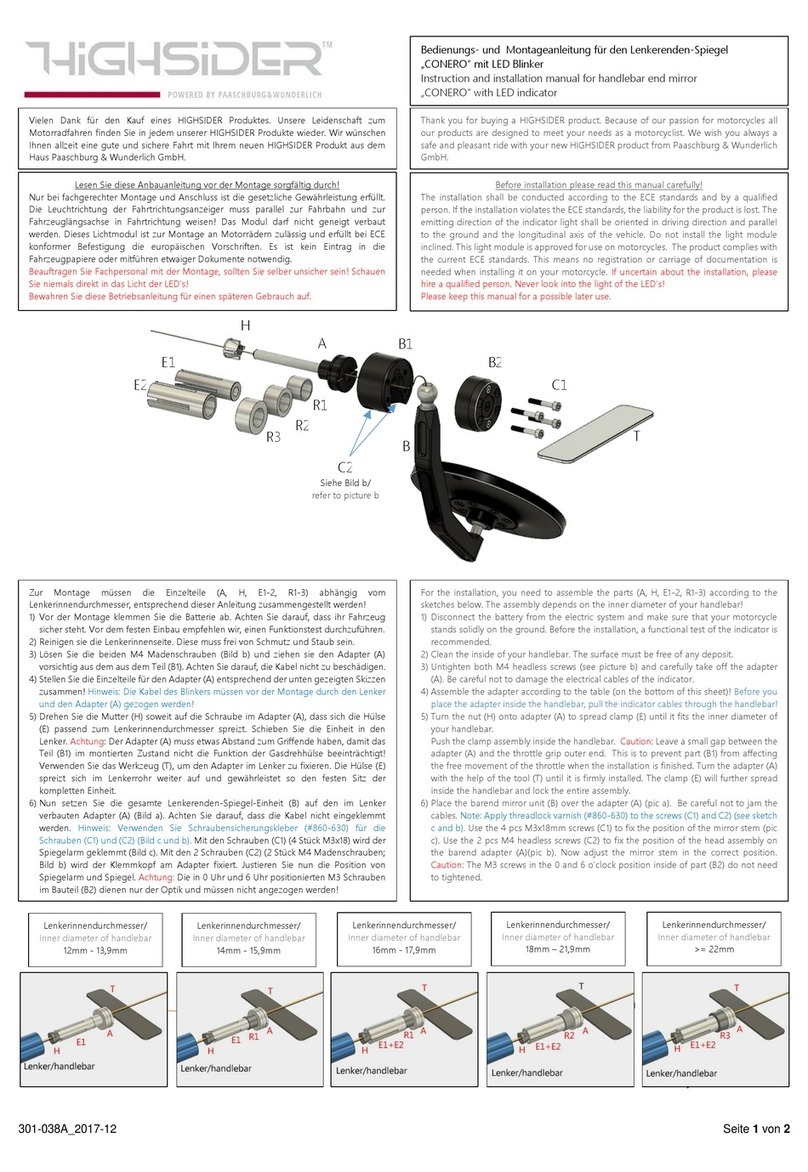
Zur Montage müssen die Einzelteile (A, H, E1-2, R1-3, C) abhängig vom
Lenkerinnendurchmesser, entsprechend dieser Anleitung zusammengestellt werden!
Teil B
wir nur benötigt, wenn ein Lenkerenden Spiegel (optional erhältlich) montiert werden soll.
Bezeichnung der Einzelteile:
1) Vor der Montage klemmen Sie die Batterie ab. Achten Sie darauf, dass ihr Fahrzeug
sicher steht. Vor dem festen Einbau empfehlen wir, einen Funktionstest durchzuführen.
2) Reinigen sie die Lenkerinnenseite. Diese muss staub- und fettfrei sein.
3) Stellen Sie die Einzelteile für den Adapter (A) entsprechend obenstehender Tabelle
zusammen! Die Kabel für den Blinker vor der Montage durch den Lenker und den
Adapter (A) ziehen!!
Before installation please read this manual carefully!
The installation shall be conducted according to the ECE standard and by a qualified
person. If the installation violates the ECE standard, the liability for the product is lost. The
emitting direction of the light shall be orientated in driving direction, parallel to the ground
and the longitudinal axis of the vehicle. Do not install the module inclined. This light
module is approved for use on motorcycles. The product complies with the current ECE
standard. This means no registration or carriage of documentation is needed when
installing it onto your motorcycle. If uncertain about the installation please hire a qualified
person. Never look into the light of the LED’s! The indicators are approved for forward
installation only. For the installation you need to assemble the parts (A, H, E1-2, R1-3, C)
according to the table below. The assembling depends on the inner diameter of your
handlebar!
Part B is only necessary in case you want to install an optional bar end mirror
onto your motorcycle.
Parts list:
Thank you for buying a HIGHSIDER product. Because of our passion for motorcycles all
our products are designed to meet your needs as a motorcyclist. We wish you always a
safe and pleasant ride with your new HIGHSIDER product from Paaschburg & Wunderlich
GmbH.
1) Disconnect the battery from the electric system and assure that your motorcycle stand
solidly on the ground. Before final installation a functional test is recommended.
2) Clean the inside of your handlebar. The inner surface must be free of deposit / grease.
3) Assemble the adapter according to the table above! Before installation pull the indicator
cables through the adapter (A) and the handlebar!
4) Drehen Sie die Mutter H auf die Schraube des Adapters A, bis sich die Hülse E passend
zum Lenkerinnendurchmesser spreizt. Die gespreizte Hülse muss soweit gespreizt sein,
dass ein weiterdrehen der Hülse durch die Lenkerinnenwand verhindert wird. Zur
Montage verwenden Sie das Werkzeug T. Dieses passt in den Schlitz des Adapters A.
Halten Sie die Mutter H mit einer Zange fest.
5) Schieben Sie die Einheit in den Lenker. Verwenden Sie das Werkzeug T, um den Adapter
im Lenker festzuziehen. Die Hülse E spreizt sich im Lenkerrohr weiter und gewährleistet
so den festen Sitz der kompletten Einheit.
6) Nun setzen Sie den Lenkerenden-Blinker (C) auf den Adapter (A) und drehen diesen so,
dass die Leuchtrichtung parallel zum Boden und in Fahrtrichtung zeigt. Fixieren Sie den
Blinker in dieser Position mithilfe der Madenschraube.
ACHTUNG: Die Bauteile dürfen in keiner Weise die Funktion der Gasdrehhülse bzw. die
Bedieneigenschaften beeinflussen.
4) Turn the nut H onto adapter A to spread the sleeve E until it fits to the inner diameter of
your handlebar. Hold the nut with a gripper while turning adapter A using the tool T. The
sleeve must be spread so it touches the inner surface of the handlebar and can not turn
when the assembly is inside of the handlebar.
5) Position the assembly inside the handlebar and turn the adapter (A) tight using the tool
(T). Inside the handlebar the sleeve E will spread and fixate the entire assembly.
6) Place the bar end indicator (C) onto the adapter (A). Align the indicator so the light
emits in driving direction and parallel to the ground. Tighten the headless screw to fixate
this position and keep the indicator in place.
CAUTION: The assembly must not touch the throttle sleeve or affect in any case the
handling qualities of your motorcycle.
Weitere HIGHSIDER Produkte der FLIGHT Designlinie finden Sie auf: www.highsider-germany.de
Exclusion of liability and guarantee regulation:
In case of inappropriate use or installation of the device, all guarantee claims and liability
for direct or indirect or subsequent damage become invalid. Paaschburg & Wunderlich
GmbH is not liable for any damage resulting usage, installation or connecting of the device.
In particular the liability on damage to person and financial loss is excluded. The use of the
device in public traffic is at owner’s risk solely.
Paaschburg & Wunderlich GmbH, Am alten Lokschuppen 10A, D-21509 Glinde
Tel.: +49 (0) 40 248 277-0; E-Mail: sales@pwonline.de
All rights reserved. Changes and errors are excepted.
06/2016 # 203-001A
Haftungsausschluss und Garantiebestimmungen:
Bei unsachgemäßer Handhabung, Montage oder Verwendung des Gerätes erlischt jeglicher
Garantie- und Gewährleistungsanspruch. Aufgrund der Nicht-Überprüfbarkeit der
sachgemäßen Anwendung übernimmt die Firma Paaschburg und Wunderlich GmbH keine
Haftung für direkte oder indirekte Schäden bzw. Folgeschäden die aus dem Betrieb des
Gerätes entstehen. Zu diesen zählen unter anderem: Personen-, Finanzielle- und Sach-
schäden jeglicher Art. Die Verwendung im öffentlichen Verkehr geschieht auf eigene Gefahr.
Paaschburg & Wunderlich GmbH, Am alten Lokschuppen 10A, D-21509 Glinde
Tel.: +49 (0) 40 248 277-0; E-Mail: [email protected]
Alle Rechte, Änderungen und Irrtümer bleiben vorbehalten.
06/2016 #203-001A
Scan it !
8)Das gelbe Kabel (Blinklicht) wird an Plus (+), das schwarze Kabel an Masse ( – )
angeschlossen. Achtung: Nur an 12V DC Bordnetz anschließen! Bei Nichtbeachtung
erlischt die Garantie!
9)Verlegen Sie alle Kabel fachgerecht. Kabel nicht knicken. Lose Kabelenden gut isolieren!
10) Die Montage von Blinkern geschieht paarweise. Achten Sie darauf, dass die Blinker gut
sichtbar sind und nicht durch Taschen oder ähnliches verdeckt werden.
11) Bei Fahrzeugen mit CAN-Bus System, oder auch mit ABS, kann es aufgrund des
geringeren elektrischen Widerstandes der LED Einheit zu Fehlermeldungen kommen. In
diesem Fall kann ein parallel geschalteter Widerstand Abhilfe schaffen.
Achtung: Nach der Montage muss die korrekte Funktionsweise des ABS/CAN-Bus
überprüft werden!
12) Sollte die Blinkfrequenz zu hoch sein, müssen entweder Widerstände parallel zum
Blinker angeschlossen oder ein lastunabhängiges Blinkrelais im Bordnetz eingebaut
werden. Bei Verwendung von Widerständen muss auf gute Wärmeabfuhr geachtet werden.
Achtung: Bei Ausfall eines Blinkers ändert sich die Blinkfrequenz nicht. Daher muss die
Blinkfunktion vor jeder Fahrt überprüft werden!
Vor jedem Fahrtantritt muss der feste Sitz aller Teile überprüft werden!
7)Connect the yellow cable (indicator) to plus (+) and the black cable to ground (-).
Caution: Only connect to 12 V DC power supply. Disregarding this will terminate the
guarantee.
9)All cables must be laid out carefully and in a professional manner. Prevent sharp bending of
cables. Open cable ends must be insulated.
10) Always install pairs of indicators. Make sure no accessories like bags etc. affect the light
distribution of the indicator.
11) Due to the reduced electrical resistance of the LED modules, vehicles equipped with CAN-
bus system or in some cases ABS system, may need the installation of an additional resistor
(in parallel) to work properly.
Caution: After installation, the proper function of the ABS/CAN-bus must be checked!
12) If the indicating frequency is too high, additional resistors installed in parallel to the
indicator or the use of a load independent indicator relay will remedy the problem.
Caution: No change of the indicating frequency occurs in case of failure of one indicator.
Due to this fact, a check of the indicating function needs to be performed before each ride!
Check the solid and correct fit of the entire assembling before each ride!
Fahrtrichtung/ driving direction
Adapter A
Body C
Lenker/ handlebar
Werkzeug / tool T
Verwenden Sie das Werkzeug T um den Adapter
festzuschrauben / Use tool T to tighten the Adapter
Optional: Montage eines Lenkerenden Spiegel:
Zur Montage des Lenkerenden Spiegel verwenden Sie den im Set enthaltenen Adapter B.
•Zunächst montieren Sie den Adapter A wie oben beschrieben (Schritte 1-5)
•Setzen Sie Adapter B auf den Adapter A.
•Ziehen Sie alle vier M4 Madenschrauben fest. Adapter B sitzt nun fest auf Adapter A.
•Schieben Sie den Arm des Lenkerenden Spiegels auf den Adapter B, richten Sie den Arm
korrekt aus und ziehen Sie die Klemmschraube des Armes fest.
•Nun wird der Blinker auf den herausschauenden Teil des Adapters B geschoben, parallel
zum Boden ausgerichtet und mit der Madenschraube gesichert.
Option: Installation of a bar end mirror:
Use adapter B to install a bar end mirror onto your handlebar end.
•Install the adapter A as described above (steps 1-5).
•Place adapter B onto adapter A.
•Tighten all four pcs M4 headless screws to secure the adapter B.
•Place the mirror bar end stem on the adapter B, adjust the position and tighten the screw
of the stem.
•Now place the bar end indicator onto the extruding part of the adapter B, align the
indictor parallel to the ground, and tighten the M4 headless screw to fixate the indictors
positon.
Der Blinker ist nur als vorderer Blinker zugelassen!
The indicator is approved for forward installation only!
Other Paaschburg & Wunderlich Motorcycle Accessories manuals

Paaschburg & Wunderlich HIGHSIDER VICTORY Technical manual

Paaschburg & Wunderlich

Paaschburg & Wunderlich HIGHSIDER VICTORY Technical manual

Paaschburg & Wunderlich SHIN YO NOSE Technical manual

Paaschburg & Wunderlich

Paaschburg & Wunderlich SHIN YO NOSE Technical manual

Paaschburg & Wunderlich HIGHSIDER CNC FRAME-R1 Technical manual

Paaschburg & Wunderlich

Paaschburg & Wunderlich HIGHSIDER CNC FRAME-R1 Technical manual

Paaschburg & Wunderlich HIGHSIDER CONERO Manual

Paaschburg & Wunderlich

Paaschburg & Wunderlich HIGHSIDER CONERO Manual

Paaschburg & Wunderlich SHIN YO TEXAS Technical manual

Paaschburg & Wunderlich

Paaschburg & Wunderlich SHIN YO TEXAS Technical manual

Popular Motorcycle Accessories manuals by other brands

Chicago Electric 91212 Assembly and operating instructions

Chicago Electric

Chicago Electric 91212 Assembly and operating instructions

hepco & becker 6503530 00 01 Mounting instructions

hepco & becker

hepco & becker 6503530 00 01 Mounting instructions

Sundstrom SR 592 Instructions for use

Sundstrom

Sundstrom SR 592 Instructions for use

KTM Power Parts 60312913044 Information

KTM Power Parts

KTM Power Parts 60312913044 Information

Rekluse Motor Sports RadiusCX Clutch Installation & user guide

Rekluse Motor Sports

Rekluse Motor Sports RadiusCX Clutch Installation & user guide

Airoh HELMET AVIATOR III instructions

Airoh

Airoh HELMET AVIATOR III instructions

SRC Y-900GT-14-01-SL quick start guide

SRC

SRC Y-900GT-14-01-SL quick start guide

Most V1000 instruction manual

Most

Most V1000 instruction manual

Jesse Luggage Slide Lock Plate install guide

Jesse Luggage

Jesse Luggage Slide Lock Plate install guide

Ohlins FGHO 691 Mounting instructions

Ohlins

Ohlins FGHO 691 Mounting instructions

GIVI E22N Mounting instructions

GIVI

GIVI E22N Mounting instructions

Cardo Systems Packtalk NEO Pocket guide

Cardo Systems

Cardo Systems Packtalk NEO Pocket guide

Spartus 901X user manual

Spartus

Spartus 901X user manual

AKE NG4 user manual

AKE

AKE NG4 user manual

HealTech Electronics GIpro DS Series Installation and operation manual

HealTech Electronics

HealTech Electronics GIpro DS Series Installation and operation manual

Sena R2 EVO quick start guide

Sena

Sena R2 EVO quick start guide

RDMOTO Y36S Instructions for assembly

RDMOTO

RDMOTO Y36S Instructions for assembly

Salewa Vayu user manual

Salewa

Salewa Vayu user manual

manuals.online logo
manuals.online logoBrands
  • About & Mission
  • Contact us
  • Privacy Policy
  • Terms and Conditions

Copyright 2025 Manuals.Online. All Rights Reserved.