PAC HEIGH10 User manual

Stinger HEIGH10®Radio Replacement Kit
2015-2021 Chrysler 300
2015-2021 Dodge Challenger / Charger
SRK-CHR15H
© 2022 AAMP Global.All rights reserved. PAC is a Power Brand of AAMP Global.
PAC-Audio.com
Pacific Accessory Corporation
Page 1
Rev: V3
Date: 032222
®
Introduction and Features
Important Notes
Included Components
We recommend reading this manual thoroughly to familiarize yourself with
the entire process prior to beginning the installation.
1. Mounting Bucket 1 (CDJ13H-1)
2. Mounting Bucket 2 (CDJ13H-2)
3. Display Mounting Frame (CDJ13H)
4. CAN-Bus Connection Harness (MQS4PT36V2)
5. Mounting Hardware:
4- #8 X 1/2” PHP POINT TIP SCREWS
4 - #8 X 3/4” PHP POINT TIP SCREWS
1 - M4 X 8, FHP, BLACK DISPLAY SET SCREW
6. 6” Data Harness (10P-2-10P-6-HAR)
7. Main Wiring Harness (SRK-CHR16-HAR)
8. Side Brackets (CDJ13H-LH/RH)
9. Spacers (CDJ13H_Bracket Spacer) x2
10. Satellite Antenna Adapter (SAT-01)
11. AM/FM Antenna Adapter (BAA22)
12. PAC-LINK Interface Module (PL1)
13. RadioPRO Interface Module (CH4A-SRK)
14. Chime Speaker & Hardware (RPA-SPK)
15. Media Hub (USBHUB-CH1B-RCA-48)
16. Zip Ties (Not shown)
1
4
6
10
8
5
2
11
3
79
12 13 14
15
1. Does Not Retain:
Cluster Display Features
• Compass (when equipped with 5” or 8.4” screen)
• Clock
• Phone pop-ups
• Navigation pop-ups
• Launch Control Timers
Factory Amplier Features
• Speed Controlled Volume
• Surround Sound
Uconnect Features
• Uconnect Access Remote Start / Lock / Unlock
• SOS / Assist
• Vehicle Location Service
• WiFi-Hotspot
2. Not compatible with SRT or Hellcat trim levels.
3. Not compatible with 2015 model year vehicles equipped with drive modes.
4. EnsurethattheCH4A-SRKandPL1moduleshavebeenupdatedtothelatestversionofrmwarebeforeinstallinginto
thevehicle.RefertotheUpdatingFirmwaresectionattheendofthemanualforrmwareupdateinstructions.
5. The vehicle should be OFF and key removed during entire disassembly and installation. Turning on the vehicle during
the installation may cause error codes / check engine light.
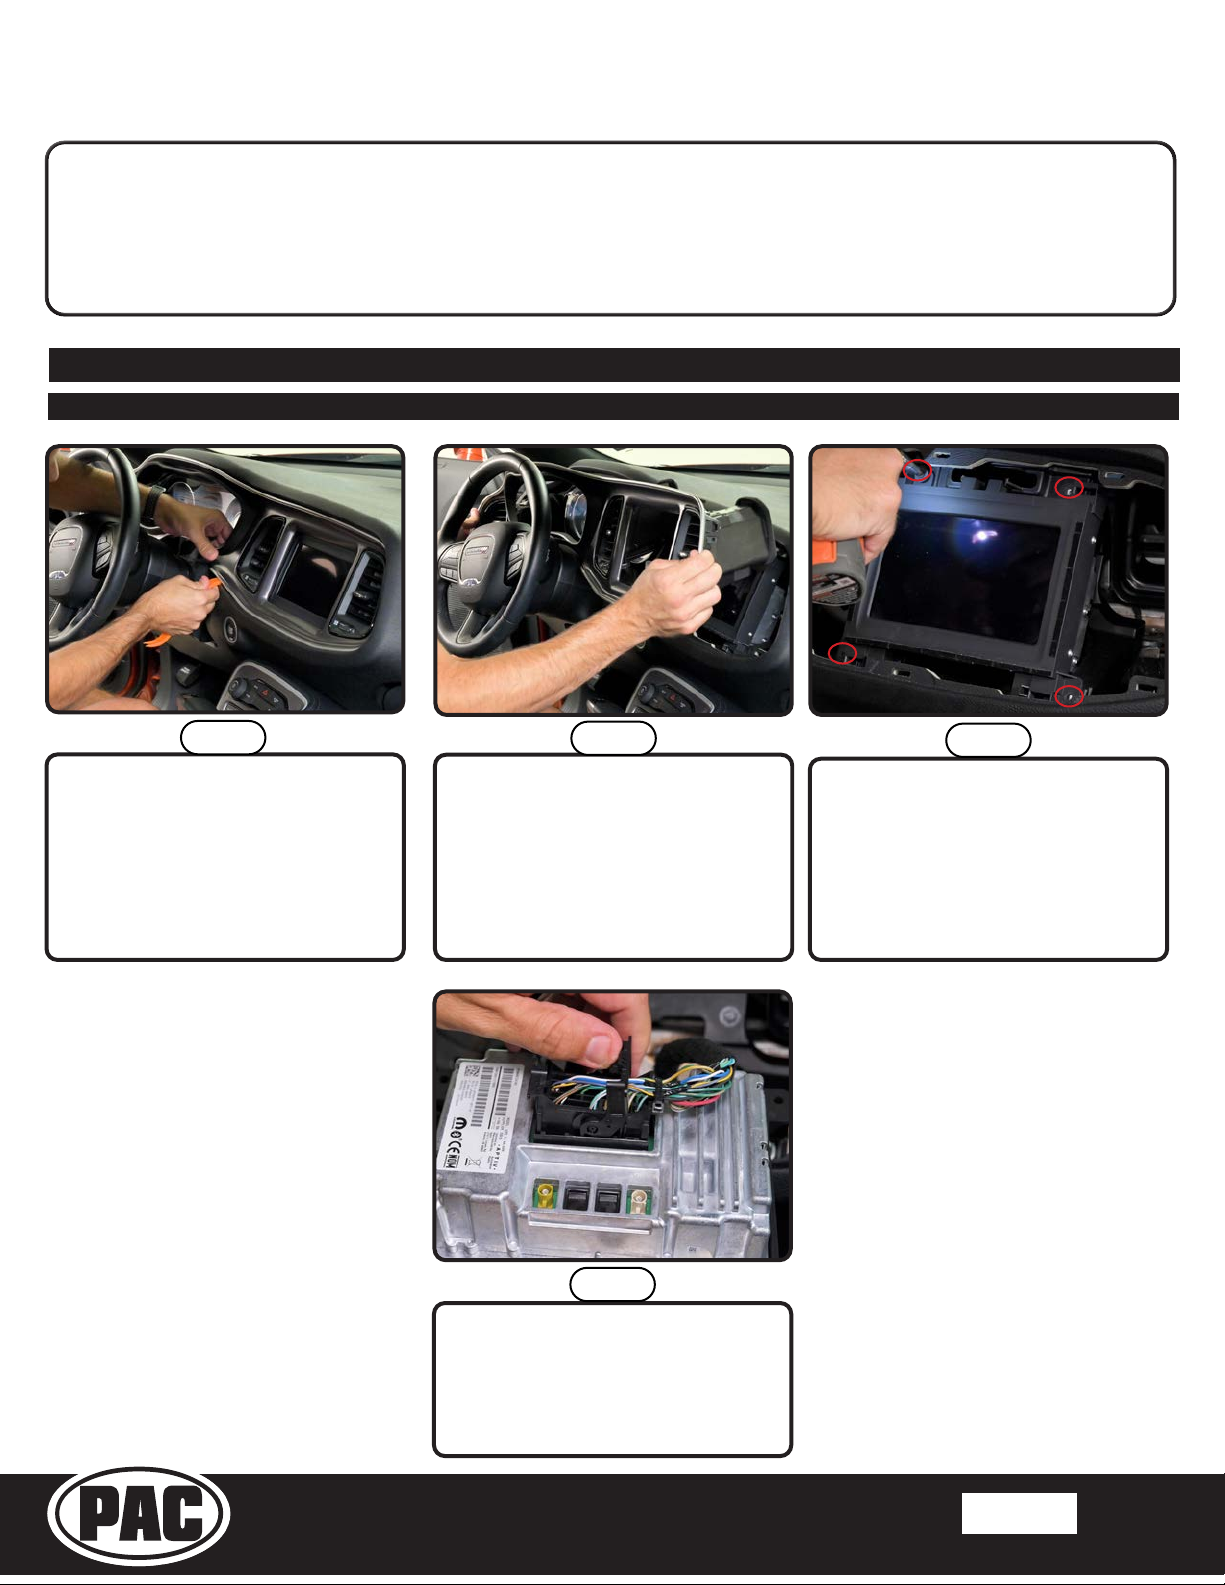
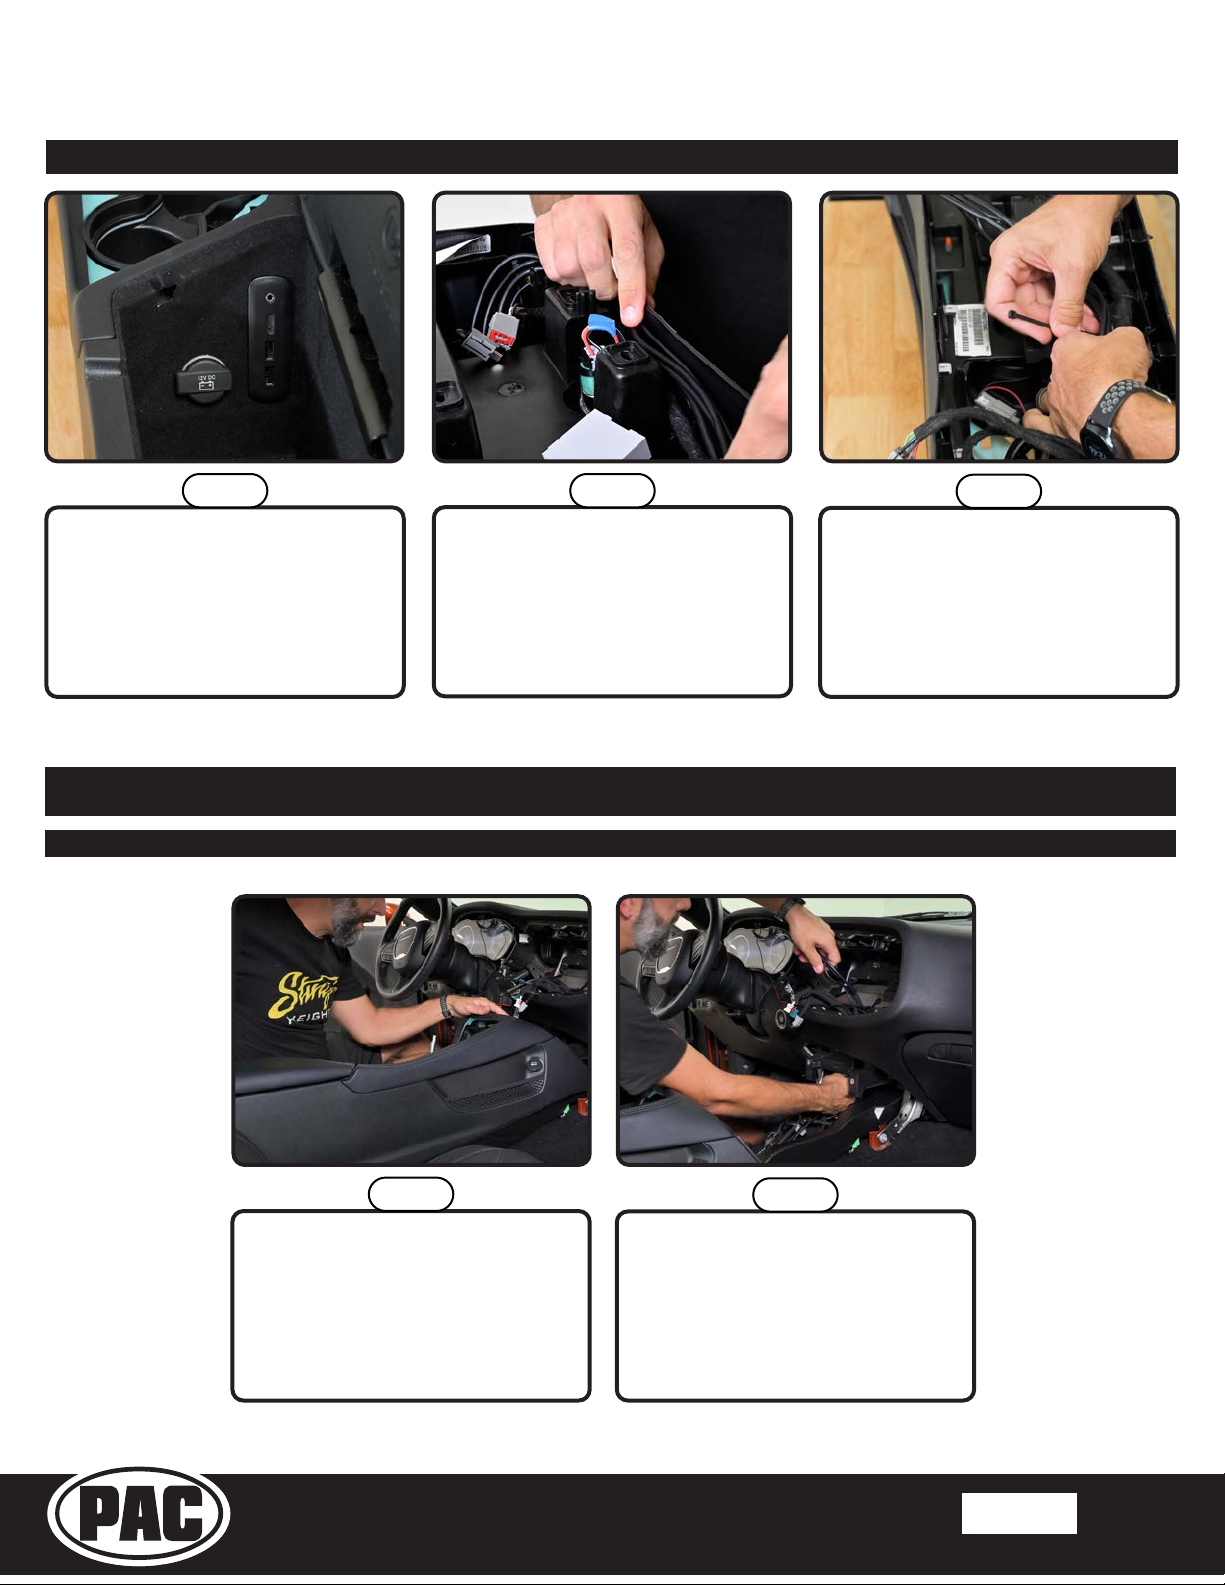
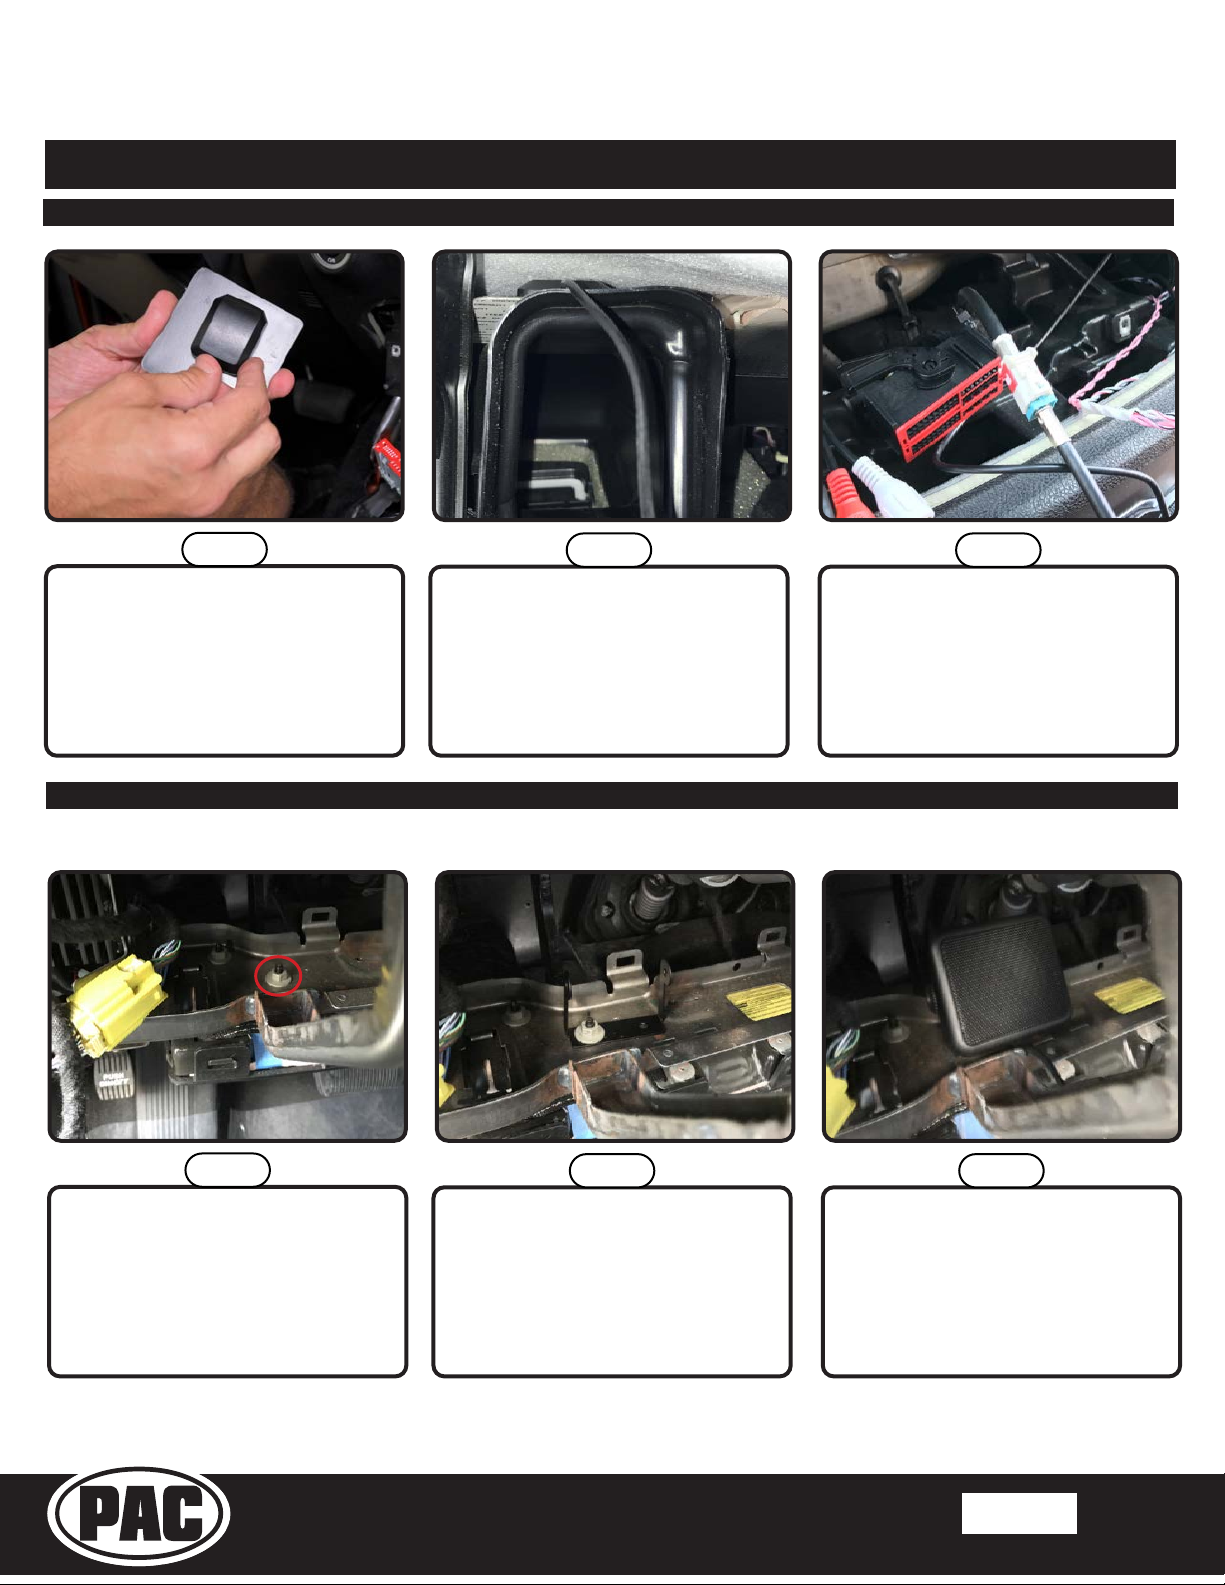
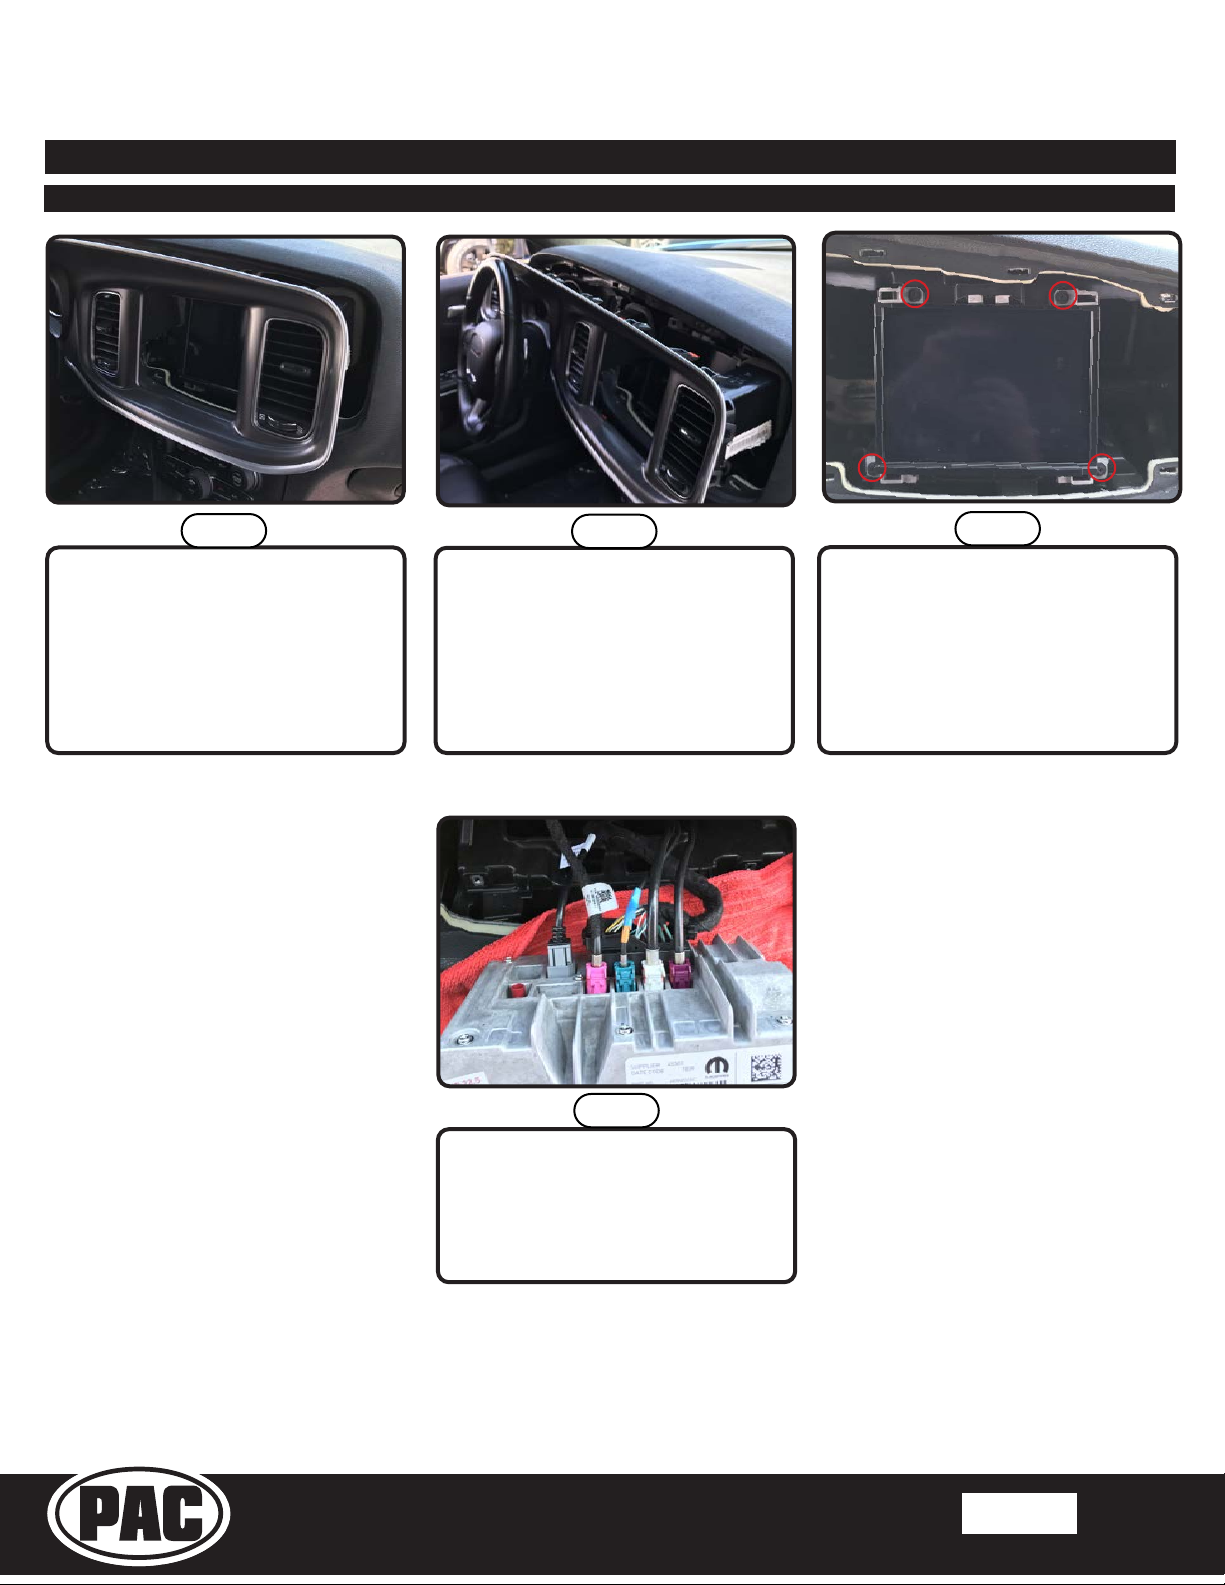
The SRK-CHR15H is a complete radio replacement kit for the installation of the Stinger HEIGH10® modular radio in Chrysler 300,
Dodge Challenger or Dodge Charger equipped with either 5” or 8.4” factory display radios. All modules, cables and adapters
are included to retain important features of the factory system, including: steering wheel-mounted radio controls, factory
amplier, factory reverse camera, USB port and AM/FM reception. Plug & Play wiring harnesses allow for quick and easy
installation without the need to cut or splice any wiring. The display mounting panel allows mounting the 10-inch display
without modifying/cutting any part of the vehicle’s sub-dash.
NOTE: Along with the SRK-CHR15H components, additional
hardware and wire harnesses from the HEIGH10 (UN1810) kit
will also be used in the installation.
Performance Features
• Launch Control with Launch RPM
• Line Lock
• G-Force status on radio (still on instrument cluster)
SiriusXM Guardian Services
• SiriusXM Radio

Stinger HEIGH10®Radio Replacement Kit
2015-2021 Chrysler 300
2015-2021 Dodge Challenger / Charger
SRK-CHR15H
© 2022 AAMP Global.All rights reserved. PAC is a Power Brand of AAMP Global.
PAC-Audio.com
Pacific Accessory Corporation
Page 2
Rev: V3
Date: 032222
®
Wiring Diagram Overview
Chime
Speaker* GPS
UN1810
PAC-LINK
PL1
CH4A-SRK
RadioPRO
ADVANCED
HDMI
USB1 USB2
STINGER
BLACK
GRAY
10PIN6PIN
24PIN 16PINGPS AM/FM
ANT.
SRK-CHR16-HAR
16PIN RADIO
PAC
Connection
Stinger
Connection
Main Harness
Connection Connections shown are
all required for full
functionality of the kit
and radio. If adding
additional components,
additional connections
will be needed.
CHIME
Connects to
SXV300 Satellite
Radio Tuner
(sold separately)
*Only required in vehicles
with Safety Group features
SWI
PAC LINK
REVERSE CAM
REVERSE CAM
A/V IN
CAN BUS
RPA-VA1 REVERSE CAM VA1

Stinger HEIGH10®Radio Replacement Kit
2015-2021 Chrysler 300
2015-2021 Dodge Challenger / Charger
SRK-CHR15H
© 2022 AAMP Global.All rights reserved. PAC is a Power Brand of AAMP Global.
PAC-Audio.com
Pacific Accessory Corporation
Page 3
Rev: V3
Date: 032222
®
Section 1.1: Dodge Challenger Disassembly
Using a plastic trim tool, release all
the retaining clips holding the trim
panel around the instrument cluster
and radio display.
NOTE: If this dash panel has not
been removed before, it may require
extra force to remove.
Step 1
Lower the steering column and
remove the panel by pulling outward
far enough that the air vents are clear
of the sub-dash.
NOTE: During removal, air vents may
detach from the panel; they can be
reattached to the back of the panel.
Step 2
Remove the four screws securing the
factory radio display and pull radio
out to access the connectors on the
back.
Disconnect all cables and connectors
from the back of the radio and
remove radio.
Step 3
Step 4
Part One: Radio Removal
Dodge Challenger
Start Section 1.1
Page: 3
Dodge Charger
Start Section 1.2
Page: 10
Chrysler 300
Start Section 1.3
Page: 18
This installation guide covers three vehicles. Start at the appropriate section listed below:

Stinger HEIGH10®Radio Replacement Kit
2015-2021 Chrysler 300
2015-2021 Dodge Challenger / Charger
SRK-CHR15H
© 2022 AAMP Global.All rights reserved. PAC is a Power Brand of AAMP Global.
PAC-Audio.com
Pacific Accessory Corporation
Page 4
Rev: V3
Date: 032222
®
Section 1.1: Dodge Challenger Disassembly (cont.)
Part Two: Access Driver and Passenger CAN Junction Blocks (STAR Connectors)
Using a trim tool, remove the drivers
side dashboard end panel.
Step 1
Remove the two Phillips screws
securing the lower dash knee panel.
Step 2
The passenger side CAN junction
block is located below the glove box.
Step 4
Remove the three push fasteners
holding the fabric closeout panel
below the glove box. Temporarily let it
layontheoorboard.
Looking up under the glove box,
locate the green CAN junction block
with white plugs.
Step 5 Step 6
Pull the lower knee panel outward to
release the retaining clips along the
top allowing access to the white CAN
junction block below the steering
column
Step 3

Stinger HEIGH10®Radio Replacement Kit
2015-2021 Chrysler 300
2015-2021 Dodge Challenger / Charger
SRK-CHR15H
© 2022 AAMP Global.All rights reserved. PAC is a Power Brand of AAMP Global.
PAC-Audio.com
Pacific Accessory Corporation
Page 5
Rev: V3
Date: 032222
®
Section 1.1: Dodge Challenger Disassembly (cont.)
Part Three: Center Console Removal for Media Hub Installation
Using a plastic trim tool, unclip the
shifter boot trim panel.
Remove the inner console / cup
holder trim by pulling up to release
the retaining clips.
Step 1
Step 4
Unplug the connector on the
backside of the panel and lift panel
up to expose the shift lever lock
screw.
Unplug the climate / radio controls
connector on the backside of the
console trim panel.
Unplug the console power and USB
harnesses (1). Remove the two
screws (2) at the front of the console.
Step 2
Step 5 Step 6
Remove the shift lever lock screw
and pull up to remove the shift lever
and shifter boot assembly. (Manual
shifter will have two bolts at the base
of the shift lever.)
Step 3
1
2
Other manuals for HEIGH10
1
This manual suits for next models
1
Table of contents
Other PAC Car Video System manuals