- - - - - - - - - - - - - - - - - - - - - - - - - - - - - - - - - - - - - - - - - - - - - - - - - - ▲ INSTRUCTION MANUAL
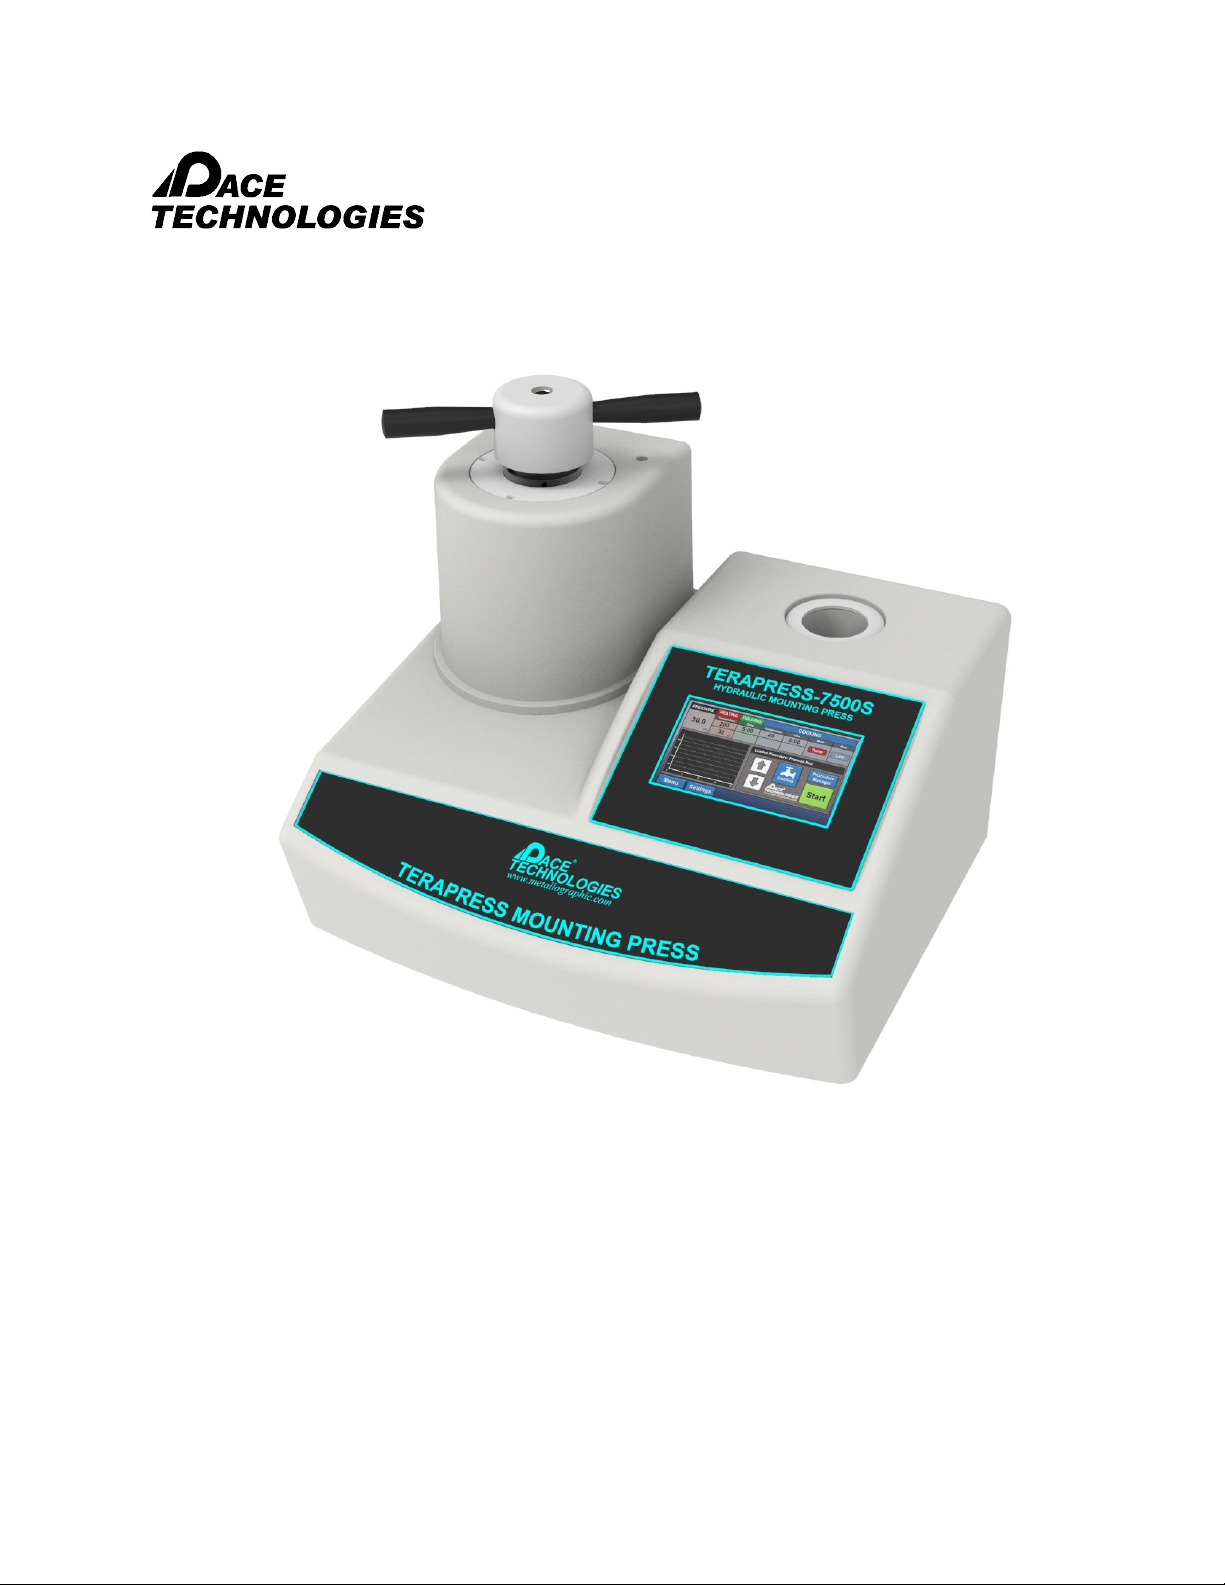
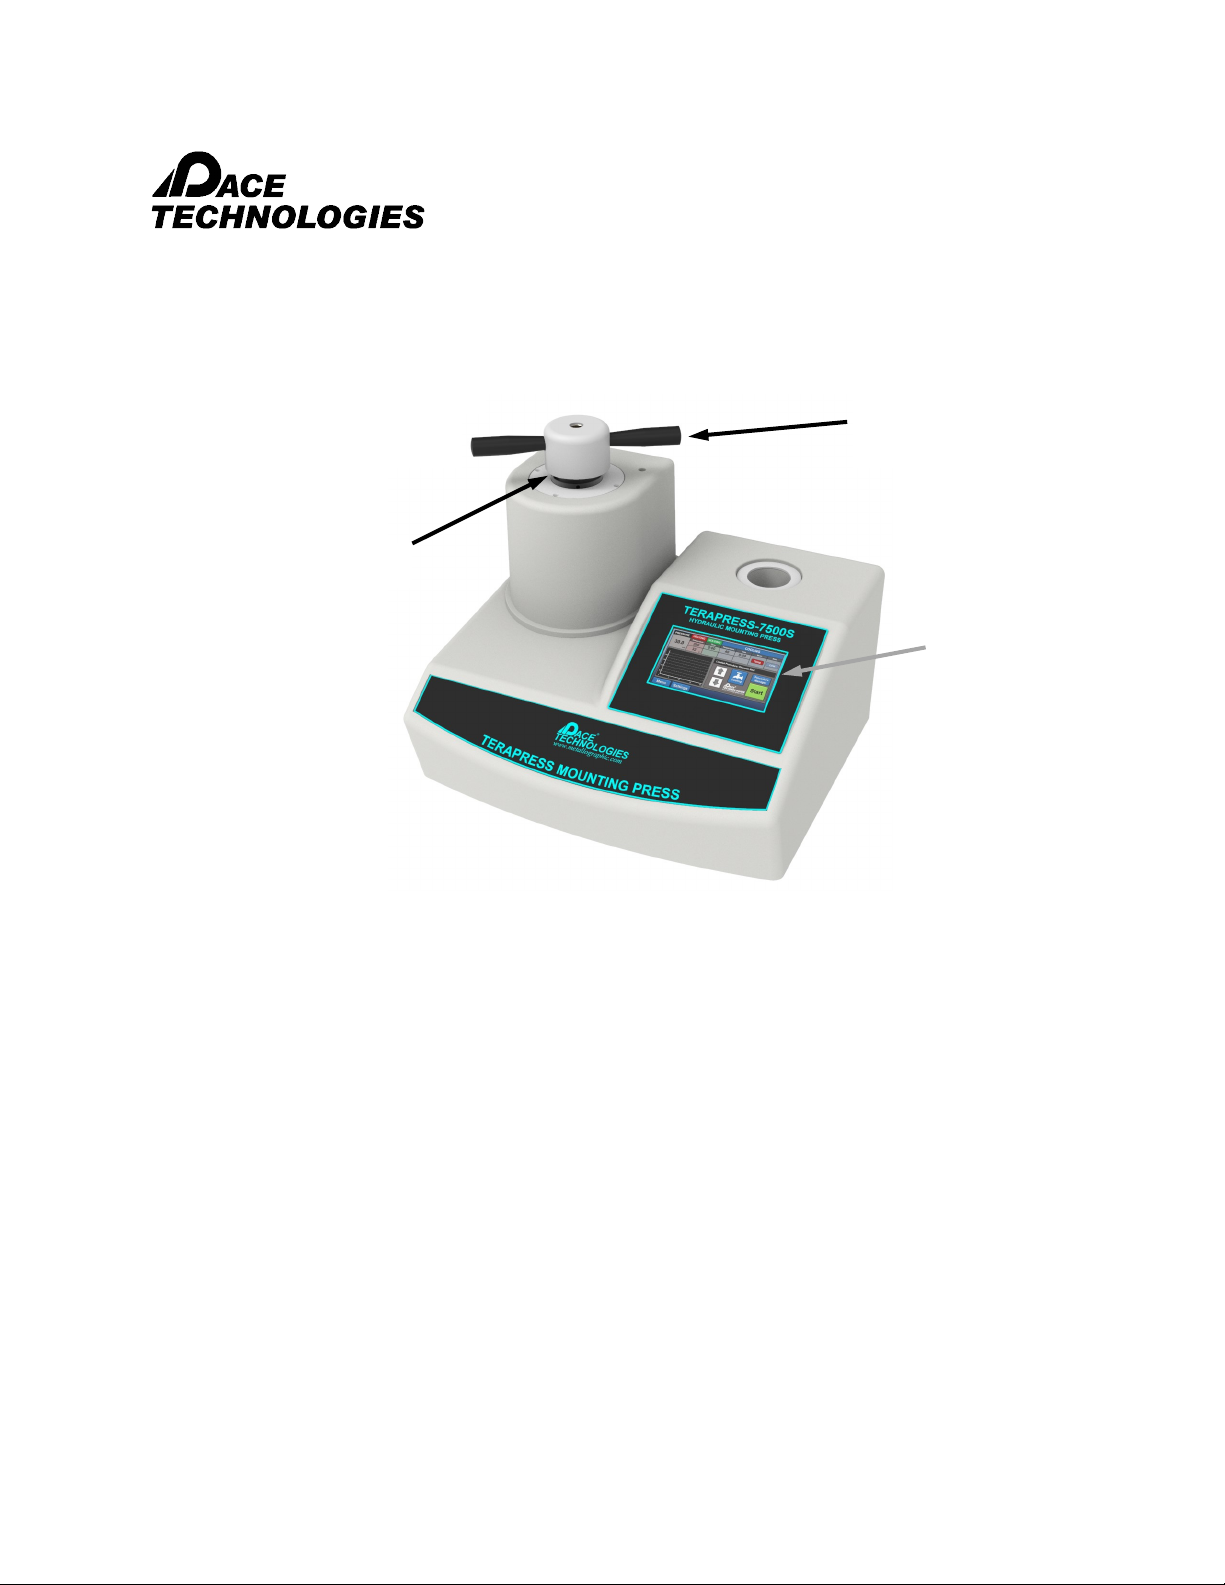
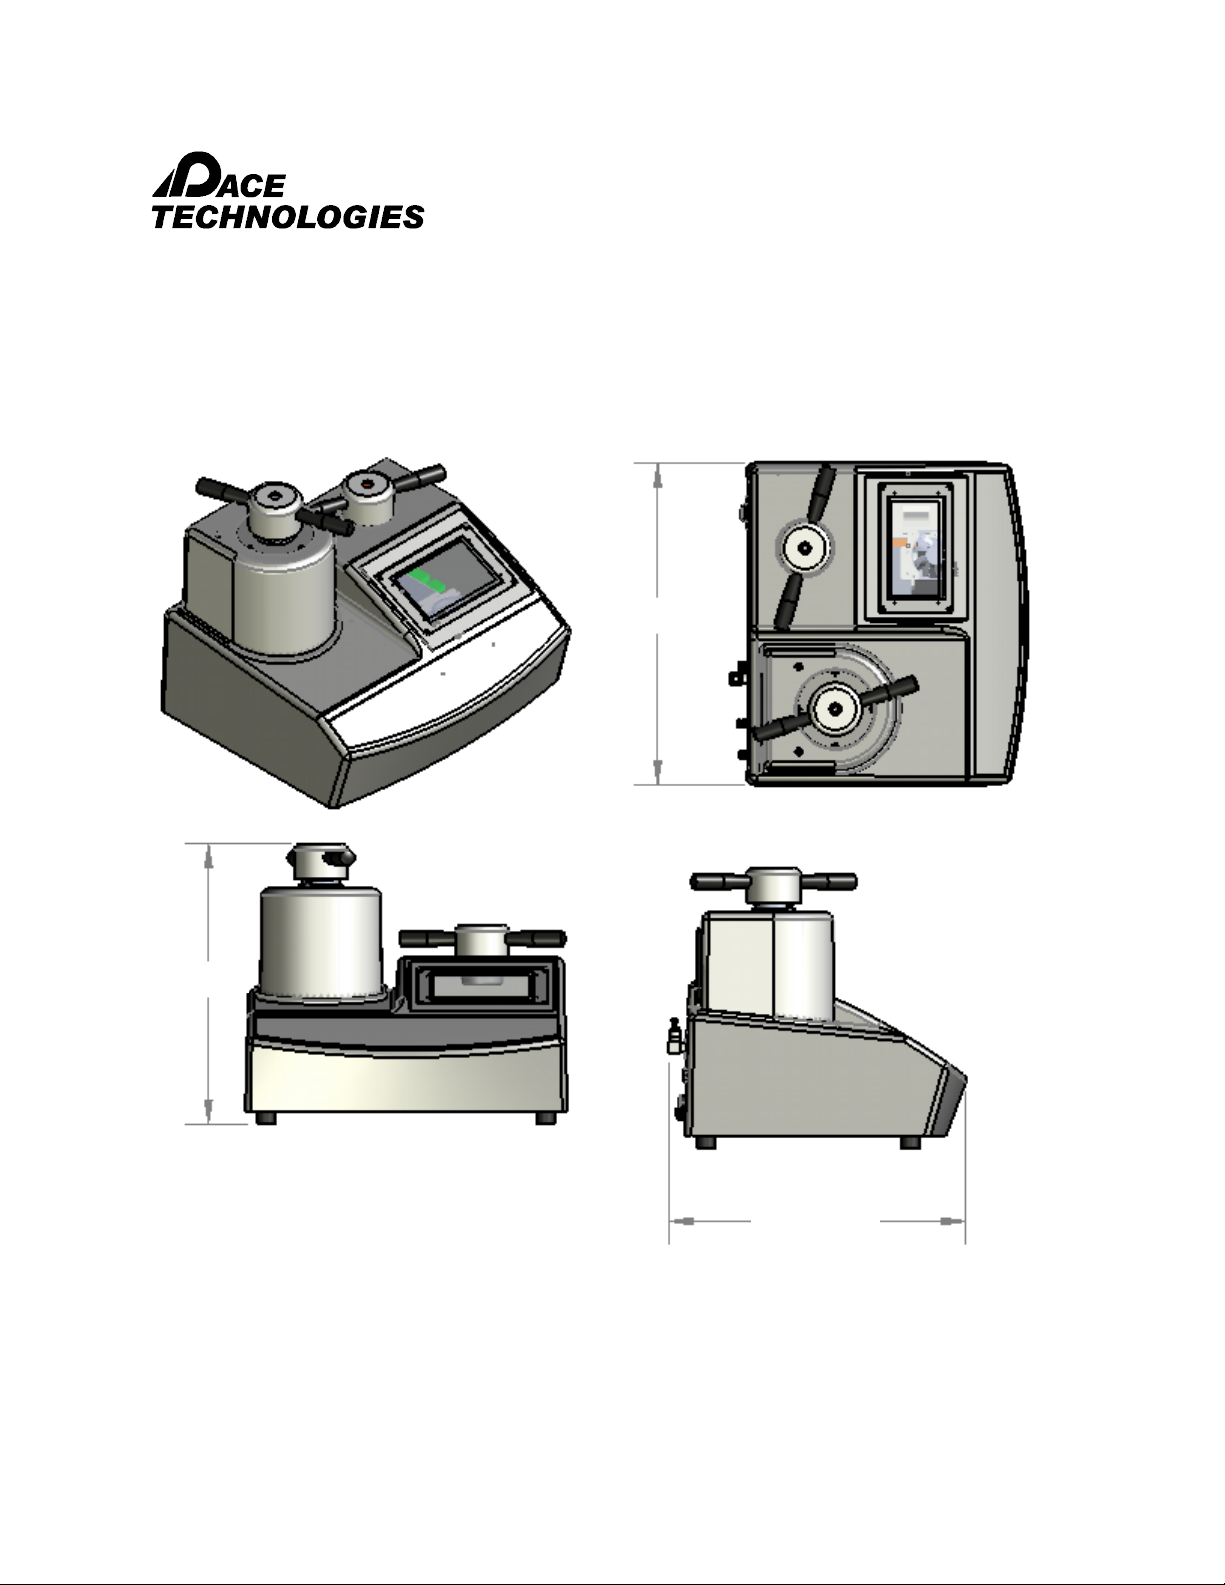
TERAPRESS TP 7500S
Mounting Press
Please read this instruction manual carefully and follow all installation, operating and safety guidelines.
3601 E. 34th St. Tucson, AZ 85713 USA Tel. +1-520-882-6598 Fax +1-520-882-6599 email: pace@metallographic.com Web: https://www.metallographic.com
i
WARRANTY
Terms and Conditions applying to all PACE Technologies Products
1. LIMITED WARRANTY AND DISCLAIMER:
PACE Technologies Products are warranted for two years from the purchase date to be free from defects in
material and workmanship under correct use, normal operating conditions, and proper application. PACE
Technologies obligation under this warranty shall be limited to the repair or exchange, at PACE
Technologies option, of any PACE Technologies Product or part which proves to be defective as provided
herein. PACE Technologies reserves the right to either inspect the product at Buyer’s location or require it
to be returned to the factory for inspection. Buyer is responsible for freight to and from factory on all
warranty claims. The above warranty does not extend to goods damaged or subjected to accident, abuse or
misuse after release from PACE Technologies warehouse, nor goods altered or repaired by anyone other
than specifically authorized PACE Technologies representatives. PACE Technologies shall not in any way
be responsible for the consequences of any alteration, modification or misuse unless previously approved
in writing by an officer of PACE Technologies. Note: Corrosion is considered a maintenance issue and not
a warranty issue.
PACE TECHNOLOGIES MAKES NO EXPRESS WARRANTIES OTHER THAN THOSE WHICH ARE
SPECIFICALLY DESCRIBED HEREIN. Any description of the goods sold hereunder, including any
reference to Buyer’s specifications and any description in catalogs, circulars and other written material
published by PACE Technologies, is the sole purpose of identifying such goods and shall not create an
express warranty that the goods shall conform to such description.
THIS WARRANTY IS EXPRESSLY IN LIEU OF ALL OTHER WARRANTIES, EXPRESSED OR
IMPLIED. THERE ARE NO IMPLIED WARRANTIES OF MERCHANTABILITY OR FITNESS FOR
PARTICULAR PURPOSE. THIS WARRANTY STATES PACE TECHNOLOGIES ENTIRE AND
EXCLUSIVE LIABILITY AND BUYER’S EXCLUSIVE REMEDY FOR ANY CLAIM FOR DAMAGES IN
CONNECTIONS WITH PACE TECHNOLOGIES PRODUCTS. PACE TECHNOLOGIES WILL IN NO
EVENT BE LIABLE FOR INCIDENTAL OR CONSEQUENTIAL DAMAGES WHATSOEVER, NOR FOR
ANY SUM IN EXCESS OF THE PURCHASE PRICE.
2. LIABILITY CAP:
PACE Technologies maximum aggregate liability for loss and damage arising under, resulting from or in
connection with the supply or use of the Equipment and Consumables provided under this purchase, or
from the performance or breach of any obligation (s) imposed hereunder, whether such liability arises
from any one or more claims or actions for breach of contract, tort, (including negligence), delayed
completion, warranty, indemnity, strict liability or otherwise, unless otherwise limited by the terms hereof,
shall be limited to one hundred percent (100%) of the purchase price.
3. DELIVERY:
Customer assumes and shall bear the risk of all loss or damage to the Products from every cause whatsoever,
whether or not insured, and title to such Products shall pass to Customer upon PACE Technologies delivery of
the Products to the common carrier of Pace Technologies choice, or the carrier specified in writing by
Customer, for shipment to Customer. Any claims for breakage, loss, delay, or damage shall be made to the
carrier by the Customer and Pace Technologies will render customer reasonable assistance in prosecuting
such claims.