Carefully check which is the
outside and inside of each piece.
Outside Inside
Design
Instruction for making a stitch ribbon
Instruction for making a stitch ribbon
See the plan
view on page 4
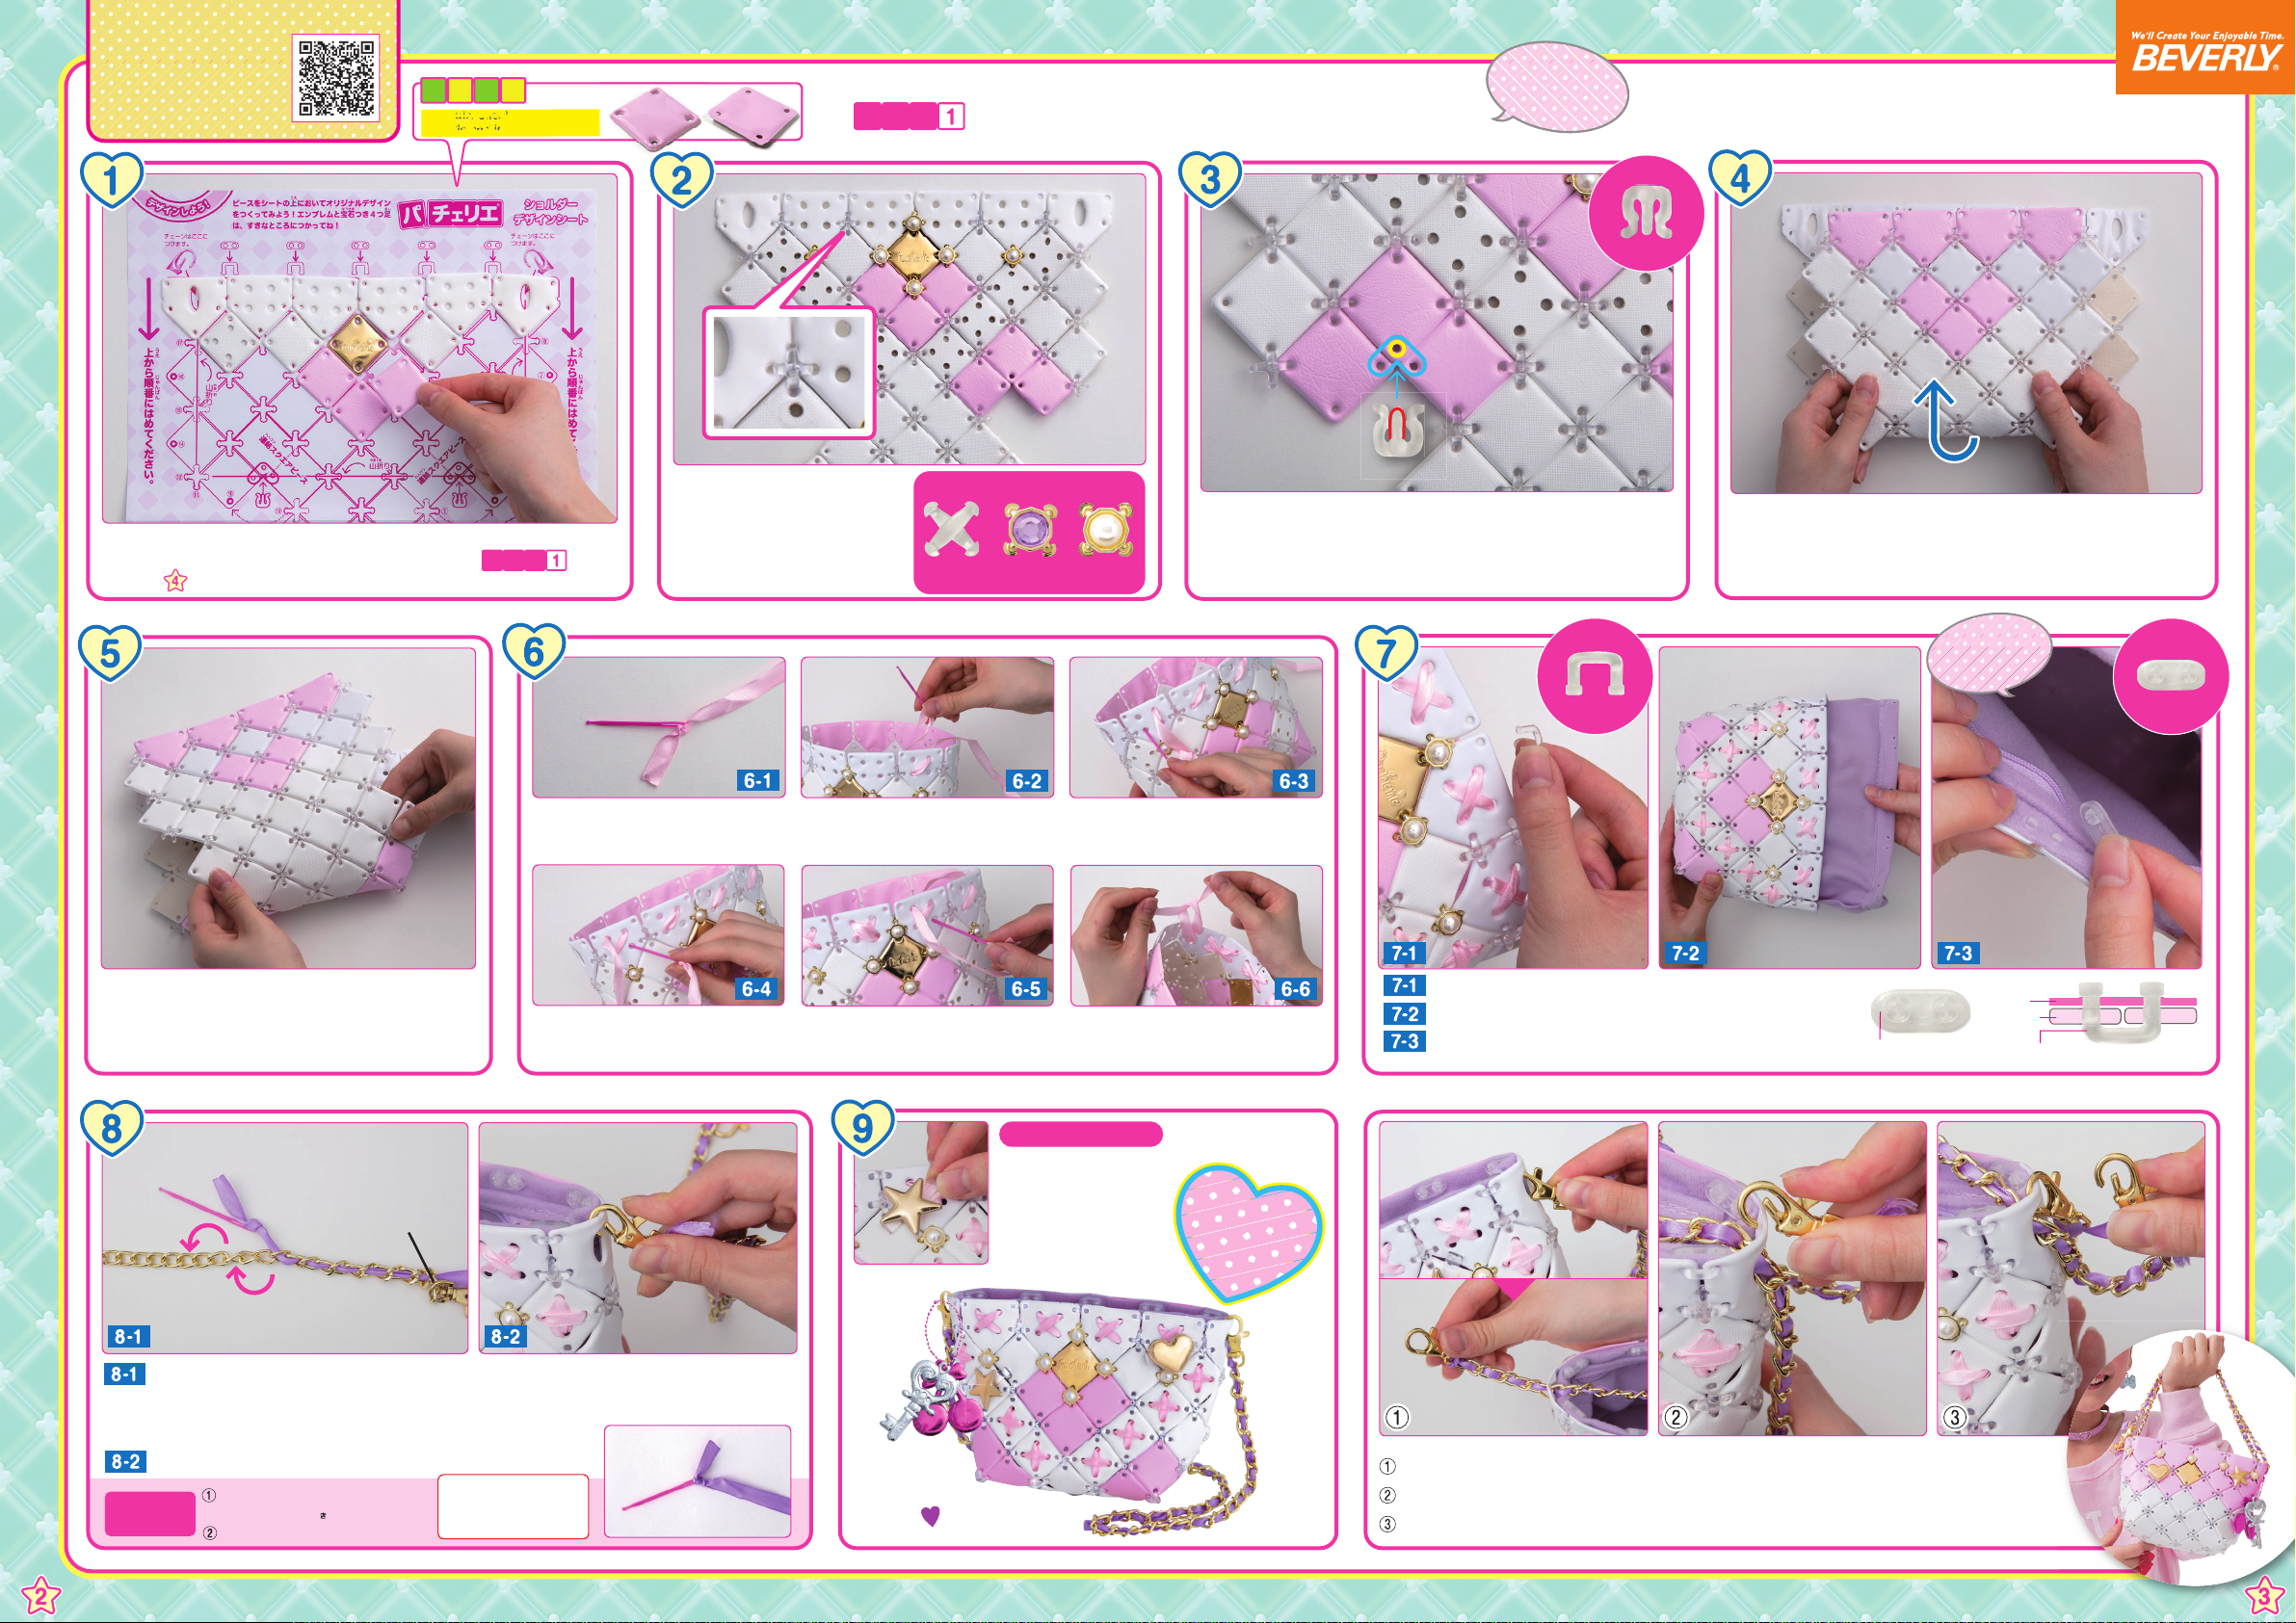
Design a bag
Arrange the square pieces, five-sided pieces, and double-square
pieces on a design sheet according to the plan view
on page
Design
Connect with fixings
Insert the 4-pin fixings
in all the
parts shown in the expansion
plan view. Use shiny 4-pin fixings
with gem
wherever you like!
Use these three
4-pin
fixings
Shiny 4-pin
fixings with
gem Pearl
Shiny 4-pin
fixings with gem
Amethyst
Connect with 3-pin fixings
Use this!
3-pin fixing
Connect the double-square piece with the square pieces with
the 3-pin fixings
Insert the short pin into the yellow hole and
insert the two long pins into the other holes. Connect the same
pieces on the other side of the bag.
Fold
Fold downwards along the line shown on the design sheet.
*If it does not stay down and returns to the original shape,
fold and hold down for a little while.
Make a bag shape
Fold the pieces on the side gussets along the line shown
on the design sheet.
Then, connect them by inserting the 4-pin fixings
into the
holes with the same numbers.
Attach the ribbon ! Be careful with eyes when using a plastic needle
Put the ribbon through the hole
of a needle and tie up softly.
Insert the needle from the back
of the piece with holes.
Put the needle through in numerical
order on a design sheet.
Fold and knit obliquely. Knit up to the point where it
started.
Make a knot tightly in the ribbon
at the backside after put the ribbon
through the holes. Cut off if any
excess ribbon.
Use this!
2-pin fixings
Assemble the inner bag
Insert the 2-pin fixings into the top of the five-sided pieces.
Put the bag inner into the bag.
Put the pins for the 2-pin fixings through the holes of the
bag inner, attach the 2-pin receptacles, and press them
until they click.
2-pin receptacle
Bag inner
Pieces
2-pin fixings
Attach the shoulder chain
Metal fixings
Get the shoulder chain and a needle.
Put the ribbon through the hole of a needle and tie up softly.
Put the ribbon through the holes of the chain and make a knot tightly in the
ribbon at the end of the chain.
Attach the chain to the part as shown in the design sheet.
Remarks
Make a knot tightly in the ribbon
on a metal fixings.
Cut off if any excess ribbon.
Caution !
Please handle the needle
with care
Instructions for attaching
decorations
Just put the clip into the
gap between the pieces
and bag inner wherever
you like!
With charms and
decorations
Done!
Try to make it as a handbag!
Insert the chain with metal fixings through a hole of five-sided piece to the other side
of the hole of five-sided piece.
Take the chain to the first hole and attach the metal fixings.
Attach the opposite side of the metal fixings to the same hole.
PC014-2
Use this!
2-pin
receptacle
Connect the bag
inner and the bag
Instruction for
making the bag
Video Release!
NOTE


