manuals.online logo
Brands
  1. Home
  2. •
  3. Brands
  4. •
  5. Pacific
  6. •
  7. Ventilation Hood
  8. •
  9. Pacific AC-3100 User manual

Pacific AC-3100 User manual

-RANGE HOOD-
tm5m~m
f~
m
~Si
a~
=it
AC-3100
AC-3136
:t:
~
5¥
idJ
~m
it
tI
fi!m~aij~
13
~
~
Features···············
1
n
ControlPanel···
.. ,
'"
1
ill
Use &
Functions
of
Buttons
··
·.. ·.. · ·
2-3
N
One
Touch
Automatic
Cleaning
Programme
3-4
- ,
lhligM1'l"
·
·5
='
~ftjU;f&M1'l"
5
.=.
'
ni£HtAJJJfjgflffl
~1J,ij
·
..
· · 6
1m
' -
ni
is
IJJ
5.
5;t
lh
fi~
~
1J,ij
·7
- ,
JJJtmM1l-
:
1
J.I1.Jjj,.
rr~
f~~
~l!ifJ
0
2
¥!-llf
-
m5GJ1X(
38~fj
~)
131fJ~r7t
fJq
$JJJij~
0
~M~~:~.ttft~.mR.Bm*u7t~~~"~M~~~·~
fi~.·-m~~I3~.r7t·WWMllfmr7t~~~~~m~o
3
~llf~j!lM~Jjj1J~
0
4
~
llf
- m
1m
M
Jjj
1J~
0
5
l~HI[ II1H~
~
~
~
0
='
~mtJ*&M1l-
:
A.nciH~~m
1.
"Im/M"
~
2. u
~~M~"
~
3.
"11m"
~
4.
"
I3l1JMfJt"
~
B.
nciH~-&mHll(E8:6~~'
l:~'"F)
:
~)!f
lUI
tt!H~
-if-
it
00
00000000
minutes
delay
off
f);~,.nHjiFit
i'ili~"'1H~-if-m
(@lllJmlS\;1~-if-m
)
(4) (3) (2)
(1
)
-5-
_ '
~jH~JhfiE1f,EJH#.a~
:
A.
fmlm*"
U
1.
m-;X~
"lm/M"
~
,
,*rriflj~~.'
'
o-fl;O
ON/OFF
Mff\
tl
~
raJ
~
ff
if
0
2.
m=;X~
"lm/M"
~
,
,*rrf~~~,'
' 400
ON/OFF
1i:
tE
~
m
1.:
if
0
000
3.
m=~~"lm/Im"
~,~rrf.!f1l:.tJf'F'
ON/DFF
m~~,
'
~
Jlt
lbf'F
tt
{ItJf'F 0
B.
u
~~,",M"
~
1.
"~~Mmt"
l!!~~5~~~rdB!m
'
tff'F~1J~fm~
,
5~~~r~'5t~IJ
m' 571 ' 1071 ' 1571 '
205t
'
M~
0
2.~~
..
~~M~"
~~~~r~,
,
1i:;b~rrraJ~iIM
' tEff\mftFX*
~,a~~~*~,~rr~lJJW1l:.~"'M~m~~.o
3.
~~
"~~I5A1~"
$!~~~rdJ
'
~rdJ~~fJt
55t-7105t-H5)1-7
20)1-7W
~;:R~tJ
0 0
00000
Mlnulu
c.
U
~m"
~
O.'.yoft
~~~~~~.m~lmM,~-~.m.ffm*,~~-~.m~.
:@
.•
O
000
D.
13:I1J
~Ji51t"
.,.
O.'.y
0"
U
~~----'
1.
~
..
~
lb
~
tJt"
$!
,
~
lJJ
~
tJt
fj
A
en
00
~
@1fJ'
..
Hi"
,
"Lo"
tE
~
m
raJ
~
r~
1:t
0
2.
~
lb~rJtfjA~f¥~
;
~rr
§
lIJ~
"3fJ;-7m~~
IlJtl0fJ;-7J1trr~
~25fJ;-7~
AjG~
ME.
EIlb
..
w1l:.
o
3.~m-;:R~~IfJ"
~lfJmtJtfjA"
,ncm=~~l'iJr:p~IUlI¥jfjA
-6-
0
2Q
' -
nc
I3IJJ
5.)S't
I1J
tm
~
a,ij
A.lj}tm~B~
:
1.
*MfU m
$~Jt
~J!f.m
fl'g
~ittlm~~W*~fitJt
(ttf91J1:
3)t!AM
l*
(7g*~«ti
m '
fU
m
,*n~~~HI.'~Z~fH.,:tJ.&
OO.:tJ
'
jj¥IJ
mfJt
(7g00~~n,~*~~~~m(7g~.~,&~~~~.~m.~o
B.ttfFmBFI
:
l.~mWm*fl
'
JlGtmAm~m¥iJf~JE5t.
'
~
ff1JA.*~fi
(.Itf?tJf-J
* :
.~m
3:1)
~:
0
2.~*fltttml*Zt!AD~JAm~~J
'
~~~tm
'*!
~~~~~*~'~.W*~ffi~o
.-
~
3.
&-
j'Q
*
fL
j'Q
l±J
•
~
~J
&.f
Iln
~
;F
*
f~
B
1i¥i
'
If!.
w
tt
7)(
0
rr~t!m~mA*fl$o
7)(m
4.~"
EltJJmfJt"
~~p~lfJlftn,
tml*ElIIJUftl±J
m~~J
'
mfJt~~(7g00
0
5.
'M~W*f~¥IJl£J~~&.f
'
IlPH!~~~J*~15
'
j;;'
l~fj)1-
ia
0
C.5:£~$J1j.&.~t~~
:
l.~~mm~zJL~J!f.m~~m~~J
0
2.
~~ttcJlijfljtl[lf1~
~
*fl
L
t~;F~:tJD
*Wm
i~
~J
(tt.f71J
3:
1)
0
3.
~
~5
m
It
~
mt
~
~
Bm
fJt
~
~
~
tl-
;):.
~n
~,
?F
~
ttc
~~
~~'
m
fJt
;.x~j;Jrn~m~~J
0
4.
t!Am~~J~
,
~~m~fH~[lf1~fl'g*fi
'
!J\Jc.'ff1J~*~
,
W~m~
~J
ia
lli
tl
>1-
0
5.
mfJt~~it~
,
W~~f:1m~ittJ~'B~~
,
j;J~Jj~
f:1la.lli
0
6 .
~
~1f
W5
~
~
mE
A*
~
$ ,
j;;'
W5
.lt
PJt
*
fL
~
it
0
7
.~-*flro.W(7g*~ffi~
,
~~m5"'6;.x
'
~~~;.xm~fHJt
'
PJ
.~m~~m~.~B'~W5~1i¥io~(7g*m~1i¥i'*.EllfJmlli
~
>1-
il~Ji
~
ittJ
~
0
8 .
B!
;.x
~
it
M
£'
JIG
00
M!
ittItI
~
,
::r
1m
tzS
~
it
'
IiJ
W5
.lt
iWi
tg
m
~
M!
ittJ
~
~o
9.
~ltltl";~.H~tla~
,
&>m~~E8~i!1ilfitl~~N~JJli~£Dfl:J
••
tr-JA
iii
!J!
~
, iiHi!
i§
~
m;
Il11
0
-7-
I Features:
1.
Individual left and right fan motors.
One touch automatic internal cleaning function (in 38 seconds).
Characteristics: this pioneered technology brings total convenience
to
modern
families.The automatic cleaning function can simply be done by one touch function
without dissembling the machine.
2. Delay
off
Button.
3.
One touch
On/Off
Button.
4. Micro-Computer Programmed functions.
II Control Panel:
A.
Name
of
control button
1.
"On/Off Button"
2. "Delay
Off
Button"
3. "Lamp" Button
4. "Auto Clean" Button
B.
Button positions (from right
to
left)
00
(4)
(3)
5 10
15
20
10
hi
0000
00
oo
minutes
delay
off
ON/OFF
(2)
(1
)
-1-
ill
Use & Functions
of
Buttons:
A.
"On/Off
Button"
l.When
the
On/Off
Button is pressed the first time, The motor will be high speed
turned on the high speed indicators will be on
at
the same time.
2.When the
On/Off
Button is pressed the second time, The motor will be low speed
control the low speed indicator will be on.
3. When the
On/Off
Button is pressed the third time,
The
motor will be turned off.
All the indicators will be off. Continuous operation should follow the above order.
B. "Delay
Off'
Button
1. The
"Delay
Off'
Button provides 4 time delay periods for selection with simple
operation. The 4 time delay periods are 5 minutes,lO minutes,
15
minutes, and
20
minutes.
2. When the .
"Delay
Off'
Button
is
pressed to set the delay time, the left and right
motors will be turned on simultaneously. The indicators will be turned on
sequcntially, When the time selected
is
up, the motors will stop automatically. The
indicator goes off.
3. When the
"Delay
Off'
Button
is
pressed, the delay time can be selected in
sequential order:5 minutes-+10 minutes-+
15
mintes-+20 minutes-+off.
C. "Lamp" Button
The light
of
the cookerhood will be turned on by pressing the "Lamp" Button and
off
by pressing the "Lamp" Button again.
D. "Auto Clean" Button
I.The automatic cleaning programme starts whilst the "Auto Clean" Button
is
turned
on. The "L" and "R" indicators will be on simultaneously.
2.
The automatic cleaning programme operates in the sequential order as follows:
the motors operate without cleaner for 3 seconds
-+
cleaner will be injected for
10 seconds
-+
the motors will revolve for
25
seconds
-+
cleaning program finishes
and stops automatically.
-2-
water inlet
3.The
..
Automatic Cleaning Progranune" starts by pressing the
..
Auto Clean" Button
once and the progranune can be stopped during operation by' pressing the "Auto
Clean" Button again.
N One Touch Automatic Cleaning
Programme:
A.
Functions:
The cookerhood shall be cleaned by using the special cookerhood cleaner available
in the market. After the cleaner
is
mixed with water (ratio 1:3 ), the cleaner
mixture shall
t>e
poured into the cleaner storage unit and stored
in
the cookerhood
for cleaning later. The cleaning process works on the centrifugal force and
cleaning power generated
by
revolving the motors at high speed,It keeps the inside
of
the cookerhood clean and prolongs the life
of
the cookerhood.
B.
Operating Instructions:
1.
Mix the cleaner and water
by
pouring water
and the cleaner
to
the marked level
of
the
provided jar.(water: cleaner ratio
-+
3:
1)
2. Pour the cleaner mixture in the
jar
into Cleaner
storage
the hidden cleaner storage unit
of
the unit
cookerhood through the water hole
as
shown in the picture. The volume
of
the cleaner storage unit
is
identical to Excess'water hole
the volume
of
the jar.
3.
If
cleaner mixture comes out from the excess water hole down into the oil retainer,
it
means the cleaner storage unit
is
full and no more cleaner mixture shall
be
poured into the unit.
4. Press the
..
Auto Clean" Button
to
start the motors and the cleaner will
be
discharged automatically and cleans the inside
of
the cookerhood.
5.
The oil retainer shall
be
taken out to remove the dirty oil once the
dirty oil reaches the marked line
to
prevent spillage.
-3-
1
I
C. Precautions
1.
Only
special cookerhood cleaner available in the market shall be used.
(Recommended agean: Kao Magiclean Household I Kitchen cleaner)
2.
Follow the water and cleaner mixture ratio marked on the supplied
jar
(ratio
3:
I).
3. Consumers are advised
to
clean the cookerhood once a day. It may be cleaned less
frequently according
to
individual needs.
4.
When filling the cookerhood with the cleaner mixture, use only the special
jar
provided with the cookerhood and take precautions not
to
overfill the cleaner storage
unit.
5. Check the oil retainer during the cleaning process
to
prevent oil spillage. Do
not allow dirty oil to exceed the marked level.
6. Do not put any other substances into the cleaner compartment unit
as
this will cause
blockage
of
its injection hole.
7. The cleaer storing unit and the supplied jar are
of
identical size. The leaner mixture
stored can be used for 5
to
6 times.The cleaner storage unit may be refilled
by
diluted cleaner mixture every time ofter use. To prevent overfilling, excess cleaner
mixture will be discharged into the oil retainer automatically.
8. Always turn the cookerhood on first before turning the cooktop on as
high heat may damage the cookerhood.
9.
If
the supply cord is damaged, it must be replaced by the
manufacturer
or
its
service agent
or
a similar qualified person
in
order
to avoid a
hazard.
-4-
'1'11iE
~Jl
~-&
~
(SPECIFICATIONS)
Mli
AC·3100
Model
AC-3136
MUi!&
Weight
ij}m
N.w.16
.
17.5Kg
tm
G.W.18
.
19.5Kg
mMlR'f(~x
~
x~)
Dimension(D
x
HX
W)
756X560X195
910X560x195
1Q.!J{R'f(~
x
r'aJ
x
J[)
Packing
Dimension{Dx
Hx
W)
840X630X277
992X
630x
277
{~FIHIUI~
Electrical
Specification
120V·60HZ
f'JJ.~1J:ct:
~.~ii
Transmission
style
Twin
motor
t]j1!£\DflIi:
Dia
outlet
pipe
150mm
~B)J
SOw
B~H~~
Lighting
system
60w,
Bulb
~~W~(60HZ)
Speed
ranges
1600
rpm
.~iliH.·1U:fi'1:
Load
of
motor
170W
n.M*.~~
Clean
motor
4W
IDic
*t
~
(CIRCUIT
DIAGRAM)
EI
!h
5~
~1't
~
~*
5m
~~
~l1l§
~
rAiiTOl
l...illMLJ
rn
80
s
s s
pet.&:
s
120V
r-
~
~
~
~
:±(REMARKSl:
1.~jjft~IH20V
60Hz
3.5/lF+3.
5/lF
250V
AC~~~
,
(CONDENSER
3. 5/lF+3.
5/lF
250V
AC
FIT
AC
120V
60Hz)

This manual suits for next models

1

Other Pacific Ventilation Hood manuals

Pacific PR-9630 Instruction Manual

Pacific

Pacific PR-9630 Instruction Manual

Pacific SC8130BS User manual

Pacific

Pacific SC8130BS User manual

Pacific AK-9800 Guide

Pacific

Pacific AK-9800 Guide

Pacific PR6108-U70 User manual

Pacific

Pacific PR6108-U70 User manual

Pacific AC-Green Instruction Manual

Pacific

Pacific AC-Green Instruction Manual

Pacific PR-2107 Installation guide

Pacific

Pacific PR-2107 Installation guide

Pacific PLA-E30AS Installation guide

Pacific

Pacific PLA-E30AS Installation guide

Pacific PQ6830AB User manual

Pacific

Pacific PQ6830AB User manual

Pacific TruSteam SC9830AS User manual

Pacific

Pacific TruSteam SC9830AS User manual

Pacific PR-9830AS User manual

Pacific

Pacific PR-9830AS User manual

Pacific AC3300 User manual

Pacific

Pacific AC3300 User manual

Pacific PR836AS Installation guide

Pacific

Pacific PR836AS Installation guide

Pacific SC8830S Installation guide

Pacific

Pacific SC8830S Installation guide

Pacific T30 Operation manual

Pacific

Pacific T30 Operation manual

Pacific PR-9930AS Installation guide

Pacific

Pacific PR-9930AS Installation guide

Pacific SC8230S User manual

Pacific

Pacific SC8230S User manual

Pacific PSU-E30AS Installation guide

Pacific

Pacific PSU-E30AS Installation guide

Pacific AC-PRO30S Instruction Manual

Pacific

Pacific AC-PRO30S Instruction Manual

Pacific PR-TS11 User manual

Pacific

Pacific PR-TS11 User manual

Pacific PR-6830AS User manual

Pacific

Pacific PR-6830AS User manual

Pacific PR830BS Installation guide

Pacific

Pacific PR830BS Installation guide

Pacific PRH-E36AG Installation guide

Pacific

Pacific PRH-E36AG Installation guide

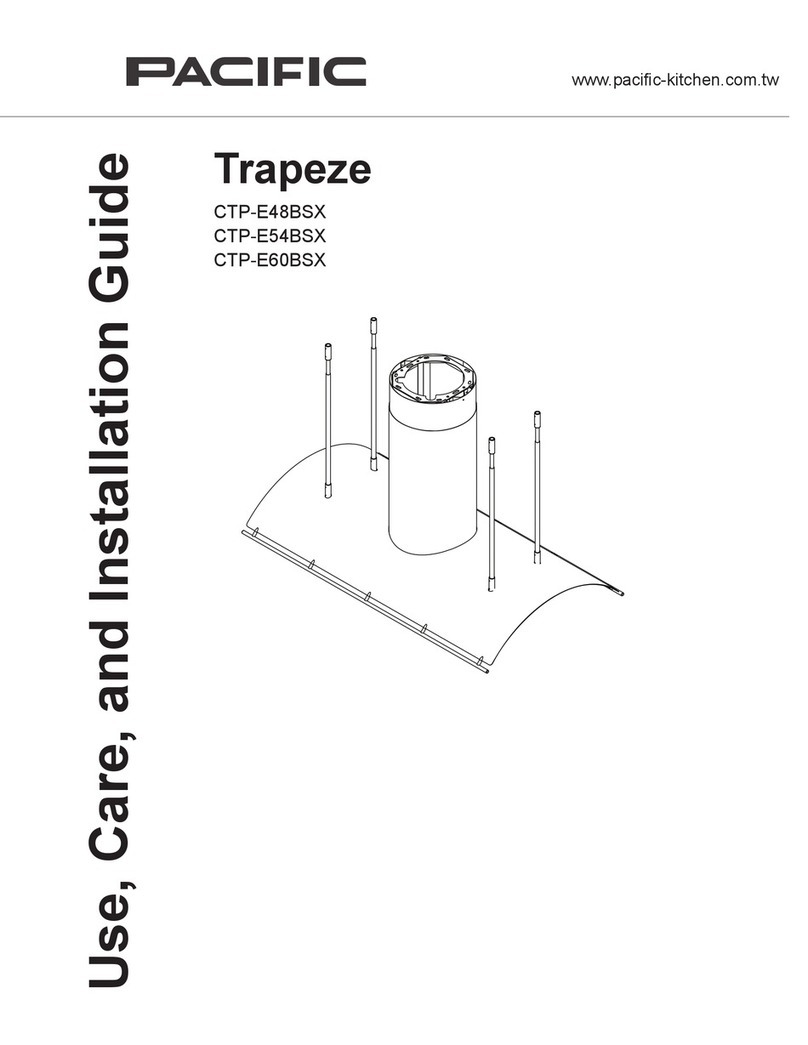
Pacific Trapeze CTP-E48BSX Installation guide

Pacific

Pacific Trapeze CTP-E48BSX Installation guide

Popular Ventilation Hood manuals by other brands

Signature 218 Series Installation guide and user's manual

Signature

Signature 218 Series Installation guide and user's manual

Broan 46000 Specification sheet

Broan

Broan 46000 Specification sheet

Grundig GDKP 2460 B user manual

Grundig

Grundig GDKP 2460 B user manual

AIRFORCE F139 A Instruction on mounting and use

AIRFORCE

AIRFORCE F139 A Instruction on mounting and use

IKEA Vented Range Hood Installation Instructions and Use & Care Guide

IKEA

IKEA Vented Range Hood Installation Instructions and Use & Care Guide

Faber Value PB 4 2L Cream A60 manual

Faber

Faber Value PB 4 2L Cream A60 manual

ETS NORD NORDcanopy HR Installation, use and maintenance manual

ETS NORD

ETS NORD NORDcanopy HR Installation, use and maintenance manual

AEG EFA 55 Installation and operating instructions

AEG

AEG EFA 55 Installation and operating instructions

KOBE INX2730SQB-700-1Brillia Series Installation instructions and operation manual

KOBE

KOBE INX2730SQB-700-1Brillia Series Installation instructions and operation manual

Monsher ROUEN 60 Noir user manual

Monsher

Monsher ROUEN 60 Noir user manual

Monsher TOWN user manual

Monsher

Monsher TOWN user manual

Beko BHCB67841BBHSI user manual

Beko

Beko BHCB67841BBHSI user manual

BOMANN DU 7600 IX instruction manual

BOMANN

BOMANN DU 7600 IX instruction manual

Faber PELLICANO installation instructions

Faber

Faber PELLICANO installation instructions

Belling BEL CHIM 603PYR user manual

Belling

Belling BEL CHIM 603PYR user manual

Miele DA 289-3 Operating and installation instructions

Miele

Miele DA 289-3 Operating and installation instructions

FALMEC Plane Black Isola 90 instructions

FALMEC

FALMEC Plane Black Isola 90 instructions

AEG DS 60 i GB Installation and operating instructions

AEG

AEG DS 60 i GB Installation and operating instructions

manuals.online logo
manuals.online logoBrands
  • About & Mission
  • Contact us
  • Privacy Policy
  • Terms and Conditions

Copyright 2025 Manuals.Online. All Rights Reserved.