manuals.online logo
Brands
  1. Home
  2. •
  3. Brands
  4. •
  5. packright
  6. •
  7. Automobile Accessories
  8. •
  9. packright rightline GEAR StrapRight Strap Set User manual

packright rightline GEAR StrapRight Strap Set User manual

Attaching the car top carriers with two straps front
to back between the cross bars (Fig 2) or two straps
side to side between the side rails will sufciently se-
cure the carrier, however, using all four straps pro-
vides the most secure method of attachment (Fig 3).
1-Each StrapRight strap has two
strap pieces connected through a
center buckle. Unthread the short
piece from the buckle and secure
it to your rack by threading its end
through its loop and pulling tight (Fig
4). Go to the opposite side of the
vehicle and secure the long piece
to the rack by the same method.
2-Run both strap pieces through
the d-rings on each side of the
Sport cargo bags (Fig 5) or
through the handles of the Clas-
sic cargo bags and bring them
together on top of the bag.
3-Threadtheshortstrapbackthrough
the center buckle (Fig 6). Make sure
that you have enough length on
each side of the buckle so that the
straps will not pull out under tension.
Through The Vehicle
Run the StrapRight
Straps through the open
doors of the vehicle and
around the carrier to
secure the load (Fig 7).
Using the StrapRight Strap Set WITH a Roof Rack
Using the StrapRight Strap Set WITHOUT a Roof Rack
Directions for: StrapRight Strap Set and Car Clip Strap
Set
The correct attachment of this product is critical and
beyond the control of Rightline Gear. The safe use
and long life of this product depends entirely on
your good judgment and following these directions.
1-Each strap has two strap piec-
es connected through a center
buckle. First, unthread the short
strap piece from the center buckle
and connect its loop end with the
loop end of the long piece (Fig
8) to make one long strap again.
2-Run the strap through the open vehicle and through
the d-rings on each side of the Sport cargo bags or
through the handles on the sides of the Classic cargo
bag, bringing the two ends together over the top of the
carrier. Then rethread the short strap back through the
center buckle (Fig 6 above) and tighten appropriately.
Fig 5
Fig 8
Fig 4
Fig 6
Fig 7
Fig 3
When using the StrapRight Strap Set for your carrier, nev-
er exceed the roof rack’s weight limit. If you are unsure of
the rack’s weight limitations, please contact your dealer or
manufacturer.
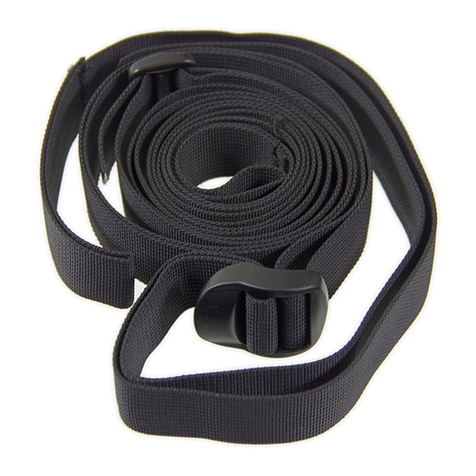
The StrapRight Strap Set (Fig
1) comes standard with all
PackRight Car Top Carriers ex-
cept the Sport Jr. Each set is
comprised of (4) nylon straps,
1” W and over 10’ L, with an
800 lb breaking capacity.
The PackRight StrapRight Strap Set
The straps are treated with a waterproof coating to prevent
water from wicking through the material. They can be used to
attach the carriers to vehicles with or without a luggage rack.
Fig 1
NOTE: With some larger vehicles, one strap may not be
longenough. If that isthe case,youcanconnecttwostraps
together using a similar procedure as described above:
1-Leave one strap as originally provided and separate
the two pieces of the second strap by unthreading the
short strap piece from the center buckle.
Fig 2
2-Connect the loop end of each of those piec-
es to each loop end of the rst strap (Fig 8 above).
3-You will end up with one double long strap that can be
run through the vehicle, through the d-rings or handles on
the sides of the cargo bag, and over the top of the carrier.
4-Rethread the short strap back through the center buckle
(Fig 6 above) and tighten.
1-Each strap has two strap pieces connected through a
center buckle. Unthread the short strap piece from the
center buckle and thread both the short and long strap
pieces through the d-rings on each side of the Sport cargo
bags, or the handles of the Classic cargo bags, bring-
ing the two ends together over the top of the carrier.
2-Then rethread the short strap back through the center
buckle (Fig 11).
3-Clip the ends in the open door frame and tighten
the strap at the buckle. The door of the vehicle is shut
over the clips/straps, securing them in place (Fig 12).
Final Adjustments For All Straps
LIMITED WARRANTY
Rightline Gear warrants that for one (1) year, from the
date of purchase that all PackRight and CampRight
products will be free of material defect and Rightline
Gear will repair or replace any defective or damaged
product free of charge if it is returned in original con-
dition by the consumer to Rightline Gear or the place
of purchase. Claims of defective material and/or
workmanship must be made in a timely manner. Safe
and maintenance-free use of this product depends
upon the consumer’s or user’s proper installation of the
product and good judgment in its use. Rightline Gear
is not responsible for the consumer’s or user’s use or
misuse of this product. Damage to Purchaser’s vehicle
or any other vehicle caused by Purchaser’s improper
use of this product may cause serious injury or death.
The Purchaser acknowledges that Rightline Gear has
no control over the attachment of its products to ve-
hicles or the attachment of items to the Rightline Gear
products. Accordingly, Rightline Gear cannot assume
responsibility for any damage to any property arising
out of the improper attachment or use of its products.
RIGHTLINE GEAR SPECIFICALLY DISCLAIMS ANY AND
ALL OTHER WARRANTIES WHETHER EXPRESS OR IM-
PLIED, INCLUDING BUT NOT LIMITED TO WARRANTY
OF MERCHANTABILITY AND WARRANTY OF FITNESS
FOR A PARTICULAR PURPOSE. RIGHTLINE GEAR FUR-
THER DISCLAIMS ANY WARRANTY OR OTHER PROM-
ISE THAT GIVES RISE TO ANY SORT OF CONSE-
QUENTIAL, EXTRAORDINARY, PUNITIVE, EXEMPLARY,
SUBSEQUENT, OR NONECONOMIC DAMAGES OR
ATTORNEY FEES. THE CONSUMER OR USER’S SOLE
REMEDY AGAINST RIGHTLINE GEAR FOR ANY DEFECT
IN THIS PRODUCT IS LIMITED TO FULL RETURN OF THE
PURCHASE PRICE.
RIGHTLINE GEAR SPECIFICALLY ENCOURAGES
COMPLIANCE WITH ALL MOTOR VEHICLE LAWS,
AND EXPRESSLY DISCLAIMS ANY AND ALL LIABIL-
ITY FOR FAILURE TO COMPLY WITH SAME.
Visit: www.rightlinegear.com
Always check straps before driving. Use the plastic tri-
glide (Fig 13) to secure the extra length of the strap
and tie off any excess length (Fig 14). If the straps
are too long, cut off the extra length and melt the cut
end to prevent fraying. These steps will prevent the
straps from apping in the wind. Position the straps at
least 20” apart on each side of the vehicle (Fig 15).
Fig 11 Fig 12
Fig 13 Fig 14 Fig 15
The Car Clip Strap Set (Fig 9) is included with the Sport
Jr. Carrier, but can also be purchased separately. The
Car Clips work with all PackRight Car Top Carriers to
attach the carrier to a vehicle without a luggage rack.
The Strap Set is comprised of (2) straps with a one inch
wide, rubber coated steel hook on each end. Each hook
has a 5/8” opening and requires a sturdy ledge inside of
the car door opening for connection. You can use a rain
gutter, a metal ledge, a ledge under the weather mold-
ing, or the outside of the weather molding itself. (Fig 10)
When using the Car Clip Strap Set on a vehicle with
a roof rack, remove the clips from the ends of the two
straps. You may use the straps front to back between
the cross bars or side to side between the side rails.
Follow the same directions in the section titled, “Us-
ing the StrapRight Strap Set WITH a Roof Rack.”
The PackRight Car Clip Strap Set
Using the Car Clip Strap Set WITHOUT a Roof Rack
Using the Car Clip Strap Set WITH a Roof Rack
NOTE: The Non-Skid Roof Protection Pad is recom-
mended when using Car Top Carriers on vehicles with-
out roof racks.
IMPORTANT: DO NOT ATTACH STRAPS TO
THE PLASTIC D-RINGS OR HANDLES AS THEY
WILL CAUSE THEM DAMAGE. The strap ten-
sion from one side of the vehicle to the other
over the top of the cargo bag secures the load.
NOTE: The PackRight Car Clip Straps will work on most
vehicles. They will not work on all vehicles. Please
inspect your vehicle for potential mounting points. If
you have a minivan with a sliding door, make sure
the straps will not interfere with the door in any way.
Fig 9 Fig 10

This manual suits for next models

1

Other packright Automobile Accessories manuals

packright rightline GEAR StrapRight Strap Set User manual

packright

packright rightline GEAR StrapRight Strap Set User manual

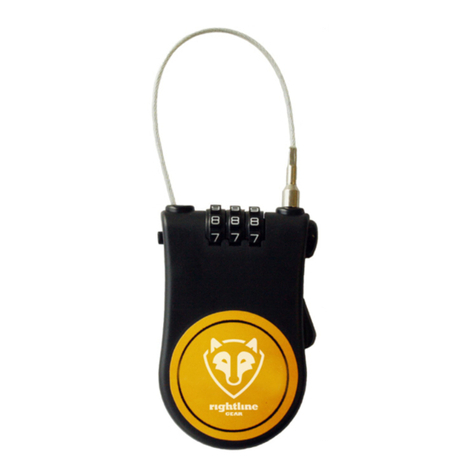
packright rightline GEAR Security Cable Lock User manual

packright

packright rightline GEAR Security Cable Lock User manual

Popular Automobile Accessories manuals by other brands

Dynojet POWER VISION 3 installation guide

Dynojet

Dynojet POWER VISION 3 installation guide

Prime Design AR1930 manual

Prime Design

Prime Design AR1930 manual

FuelTech EGT-8 CAN owner's manual

FuelTech

FuelTech EGT-8 CAN owner's manual

K&K M7500 manual

K&K

K&K M7500 manual

Whispbar K807W Fitting instructions

Whispbar

Whispbar K807W Fitting instructions

Prorack K602 Fitting instructions

Prorack

Prorack K602 Fitting instructions

Schartec CR 4 manual

Schartec

Schartec CR 4 manual

HP RC5 user manual

HP

HP RC5 user manual

true-i HMBS-200 user manual

true-i

true-i HMBS-200 user manual

Automotive Data Solutions TR2410ATL owner's manual

Automotive Data Solutions

Automotive Data Solutions TR2410ATL owner's manual

Metra Electronics 99-3309B installation instructions

Metra Electronics

Metra Electronics 99-3309B installation instructions

Kleinn JEEPKIT-99 user manual

Kleinn

Kleinn JEEPKIT-99 user manual

Orzly Multi-Point Visor user manual

Orzly

Orzly Multi-Point Visor user manual

AiRide WR17602632 installation instructions

AiRide

AiRide WR17602632 installation instructions

Carefree SR0023 Installation & operation manual

Carefree

Carefree SR0023 Installation & operation manual

Fortin Electronic Systems PATS 2 installation guide

Fortin Electronic Systems

Fortin Electronic Systems PATS 2 installation guide

Fiat Connect Nav+ manual

Fiat

Fiat Connect Nav+ manual

Havis-Shields KK-K9-F12-K installation instructions

Havis-Shields

Havis-Shields KK-K9-F12-K installation instructions

manuals.online logo
manuals.online logoBrands
  • About & Mission
  • Contact us
  • Privacy Policy
  • Terms and Conditions

Copyright 2025 Manuals.Online. All Rights Reserved.