manuals.online logo
Brands
  1. Home
  2. •
  3. Brands
  4. •
  5. Palram
  6. •
  7. Outdoor Storage
  8. •
  9. Palram SanRemo 4x4.25 User manual

Palram SanRemo 4x4.25 User manual

SanRemoTM 4x4.25
17.03_83394_V4_MV-2
10mm
13/32”
x2
8 mm
5/16”
13mm
1/2”
CAULK / SILICON
Approx Dim.
425L x 382W x 285-310H cm / 167.3"L x 150.4"W x 112.2-122"H
Snow Load
30lbs/ft
150kg/m
Wind Resistant
120 km/hr
75ml/hr
EN Attention!
It is imperative that the ground surface be perfectly flat
and leveled and in a 90˚ angle to the supporting wall.
DE Achtung!
Es ist unbedingt erforderlich, dass die Bodenoberfläche
ganz flach und gleichmäßig und in einem 90 Grad Winkel
zur Stützmauer ist.
FR Attention !
La surface du sol doit, impérativement, être parfaitement
plate et nivelée et former un angle de 90˚ avec le mur de
support.
ES ¡Atención!
Es imperativo que la superficie del suelo esté
perfectamente plana y nivelada y en un ángulo de 90º con
respecto al muro de apoyo.
DA OBS!
Det er bydende nødvendigt, at grundens overflade er
fuldstændig flad og i niveau og er i en vinkel på 90˚ til den
støttende væg.
CS Pozor!
Je nezbytné, aby povrch země byl dokonale plochý a
srovnán a zarovnaný do 90˚ úhlu k nosné zdi.
FI Huomio!
On tärkeää, että maan pinta on täydellisen tasainen ja
suora sekä 90˚ kulmassa tukevaan seinään nähden.
NO Merk!
Det er ytterst nødvendig at grunnflaten er helt flat og
jevn, samt har en 90˚ vinkel til veggen.
NL Opgelet!
Het is absoluut noodzakelijk dat het grondoppervlak
vlak, horizontaal en precies 90 graden ten opzichte van de
wand is uitgericht.
17.03_83591_V1
425 cm / 167”
382 cm / 150.4”
90o
90o
285 - 310 cm
112.2”- 122”
285 - 310 cm
112.2”- 122”
90o
www.chalet-jardin.com
Ligne service après-vente
Phone: 01-34-07-99-00
Fax: 01-34-07-99-19
82657
co
Please read these instructions carefully before you start to assemble this
product and carry out the steps in the order set out in these instructions.
When encountering the information icon, please refer to the relevant
assembly step for additional comments and assistance.
Care and Safety Advice
For safety purposes we strongly recommend the product to be assembled
by at least two people.
Some parts may have sharp edges. Please be careful when handling components.
Always wear gloves, eye protection, and long sleeves when assembling or performing
any maintenance on your product.
Do not attempt to assemble the product in windy or wet conditions.
Dispose of all plastic bags safely - keep them out of reach of small children.
Keep children away from the assembly area.
Do not attempt to assemble the product ifyou are tired, have taken drugs,
medications or alcohol, or if you are prone to dizzy spells.
When using a stepladder or power tools, make sure you follow the manufacturer's
safetyadvice.
Do not climb or stand on the roof.
Heavy articles should not be leaned against the poles.
Do not hang or lay on the profiles.
Keep roof and gutter clear of snow, dirt & leaves.
Heavy snow load on roof can damage the product making it unsafe to stand
belowor nearby.
Keep these instructions in a safe place for future reference.
Ifcolor was scratched during assembly it can be fixed with the following tints:
White -RAL 9016
Cleaning Instructions
When your product needs cleaning, use a mild detergent solution and rinse with cold
clean water.
Do not use acetone, abrasive cleaners, or others special detergents to clean the panels.
Before Assembly
This product must be assembled on a solid, level base / surface (such as concrete or
asphalt) and anchored to the ground.
Choose your site carefully before beginning assembly.
Sort the parts and check according to the contents parts list.
Please consult your local authorities if any permits are required prior to constructing
the product.
Tools & Equipment
T001 (Supplied)
Notes During Assembly
When encountering these icons, you are requested to either
keep the screws slightly loose or to fully tighten the screws.
orl Steps
Step 8: Please apply silicone sealants above beam 7288 + 7290, in order to prevent water from
seeping in (drawing b).
Step 12: Please note the profile's direction (8063), the canal should be on the internal side.
Step 13: Make sure that the angle between the back wall profile and the panel supporting
profiles is 90 degrees.
Step 24: Please apply silicone sealants to the inner edges of parts 7043 & 7042 in order to
prevent water from seeping in.
Step 25 a + b: Please apply silicone sealant on the inner part of 8116 & 8117 (a) and connect to
the profile (b).
Step 25 c: Adjust the gutter head's angle according to your needs and tighten screw 4043 from
the inside.
* It is possible to connect standard drainage pipes (2.07" diameter) to the gutter heads' exit.
Step 29: Important! Please make sure the frame is perfectly centered before fixing.
Step 34: Please loosen the screws as shown in diagram c, set the beam exactly on top of the
poles, once done re-tighten the screws.
Step 35: Please do not cut profile 8487 unless needed.
Step 36: Please do not cut profile 8482 unless needed.
Step 47: Important! Do not over tighten the screws. Use compatible screws and masonry
anchors for your type of base /foundation.
Step 48: Please do not cut the Acrylic sheets 8494, 8495,8496 unless needed, all precautions
must be taken.
Step 49: Please do not cut profile 8488 & 8489 unless needed.
Step 51: Install the sealing strip on the outer side as shown in the diagram.
Step 55: Note the doors' corners should be at a 90° angle. Should you have difficulties in
manipulating the doors, tap on the door's corner with a rubber mallet. (Do not tap directly on
the corner, use a small wooden plank)
Step 59: Please note! The master key attached to the doors, locks from the inside.
Step 60: Optional! Part 8531 sets the grey marked doors, thus creating smaller openings.
*Tighten all screws when completing assembly.
Please note:
Anchoring this product to the ground is essential to its stability and rigidity, and required in
order for your warranty to be valid.
The wall anchoring kit supplied with this product is suitable only for concrete walls.
Other wall types need an accordant wall fixation kit.
Veuillez lire attentivement ces instructions avant de commencer a assembler ce
produit et suivre toutes les etapes dans l'ordre indique dans ces instructions.
Conseils d'entretien et de securite
Pourdes raisons de securite, nous recommandons fortement que le produit soit assemble par
au moins deux personnes.
Certaines pieces peuvent avoir des bords tranchants. Veuillez etre prudent(e) lorsque vous
manipulez les composants. Portez toujours des gants, des lunettes de protection et des
manches longues durant le montage ou toute operation d'entretien sur votre produit.
Ne tentez pas de monter le produit par temps de pluie ou de grand vent.
Jetez tous les sacs en plastique de fawn securitaire - gardez-les hors de portee des enfants.
Gardez les enfants loin de la zone d'assemblage.
Ne tentez pas de monter le produit si vous etes fatigue, avez pris de la drogue, des medicaments
ou de l'alcool, ou si vous etes sujet a des vertiges.
Si vous utilisez un escabeau ou des outils electriques, assurez-vous de suivre les conseils de
securite du fabricant.
Ne pas grimper ou se tenir debout sur le toit.
Les objets lourds ne devraient pas etre appuyes contre les poteaux.
Ne pas s'accrocher et s'allonger sur les profils.
Nettoyez le toit et la gouttiere de la neige, la salete et les feuilles.
Une lourde chargede neige sur le toit peut endommager le produit et vous mettre en danger si
vous vous tenez en dessous de ce dernier ou a proximite.
Conservez ces instructions dans un endroit pourtoute consultation ulterieure.
Si la peinture a ete rayee lors de l'assemblage, elle peut etre reparee en utilisant les teintes
suivantes :
Coloris: Blanc - RAL 9016
Instructions de nettoyage
Pour le nettoyage de votre produit, utilisez un detergent neutre et rincez a l'eau froide.
Ne pas utiliser de ('acetone, des nettoyants abrasifs ou autres detergents speciaux pour nettoyer
les panneaux.
Avant l'assemblage
Ce produit dolt etre assemble sur une base / surface plane et solide (comme du beton ou de
l'asphalte) et ancre au sol.
Choisissez votre emplacement attentivement avant de commencer l'assemblage.
Triez les composants et comparez-les avec la liste des pieces incluses.
Veuillez consulter les autorites locales si des permis sont exiges avant la construction du produit.
Outils & Equipement
T001 (fourni)
Notes pendant l'assemblage
Lorsque vous rencontrez ces icones, vous devez soit
laisser les vis assez laches, soit les serrer jusqu'au bout.
Les etapes
Lorsque vous rencontrez l'icone d'information, veuillez vous reporter a l'etape
d'assemblage en question pour les commentaires et l'aide supplementaire.
Etape 8: Veuillez appliquer du silicone au-dessus des poutres 7288 + 7290, afin d'empecher l'eau d'y
penetrer (schema b).
Etape 12: Veuillez noter la direction du profil (8063), le canal dolt etre sur la face interne.
Etape 13: Assurez-vous que l'angle entre le profil de la paroi arriere et le panneau de support des
profils est de 90 degres.
Etape 24: Veuillez appliquer du silicone sur les bords interieurs des pieces 7043 et 7042 afin
d'empecher l'eau d'y penetrer.
Etape 25 a + b : Veuillez appliquer le silicone sur la partie interieure de 8116 et de 8117 (a) et les
joindre au profil (b).
Etape 25 c: Ajustez l'angle de la tete de la gouttiere selon les besoins et serrez la vis 4043 de l'interieur.
II est possible de raccorder des tuyaux de drainage standard (2,07 "de diametre) pour la sortie de la
tete de la gouttiere.
Etape 29: Important !Veuillez vous assurer que le cadre est parfaitement centre avant la fixation.
Etape 34: Veuillezdesserrer les vis comme indique dans le schema c, mettre la poutre exactement
au-dessus des poles, une fois cela fait, resserrer les vis.
Etape 35: Veuillez ne pas couper le profil 8487 sauf si necessaire.
Etape 36: Veuillez ne pas couper le profil 8482 sauf si necessaire.
Etape 47 : Important! Ne pas trop serrer les vis. Utiliser des vis et des ancrages de maconnerie
compatibles avec votre base /vos fondations.
Etape 48: Veuillez ne pas couper les feuilles en acryliques8494, 8495, 8496, sauf si necessaire, toutes
les precautions doivent etre prises.
Etape 49: Veuillez ne pas couper le profil 8488 & 8489 sauf si necessaire.
Etape 51: Posez la bande d'etancheite sur le cote exterieur, comme illustre dans le schema.
Etape 55: Veuillez notez que les coins des portes devraient etre a un angle de 90 °.
Si vous avez des difficultes a manipuler les portes, tapez sur leur coin avec un maillet en caoutchouc.
(Ne tapez pas directement sur le coin mais utilisez une petite planche de bois)
Etape 59: Important ! La cle passe-partout attachee a la porte ferme de l'interieur.
Etape 60: Facultatif ! La piece 8531 fixe les portes marquees en gris, creant ainsi des ouvertures plus
petites.
*Serrez toutes les vis une fois l'assemblage termine.
Veuillez noter que :
L'ancrage de ce produit au sol est essentiel pour sa stabilite et sa rigidite ;
et est necessaire pour que votre garantie soit valide.
Le kit d'ancrage mural fourni avec ce produit ne convient qu'aux murs en beton.
Les autres types de murs necessitent un kit de fixation murale adapte.
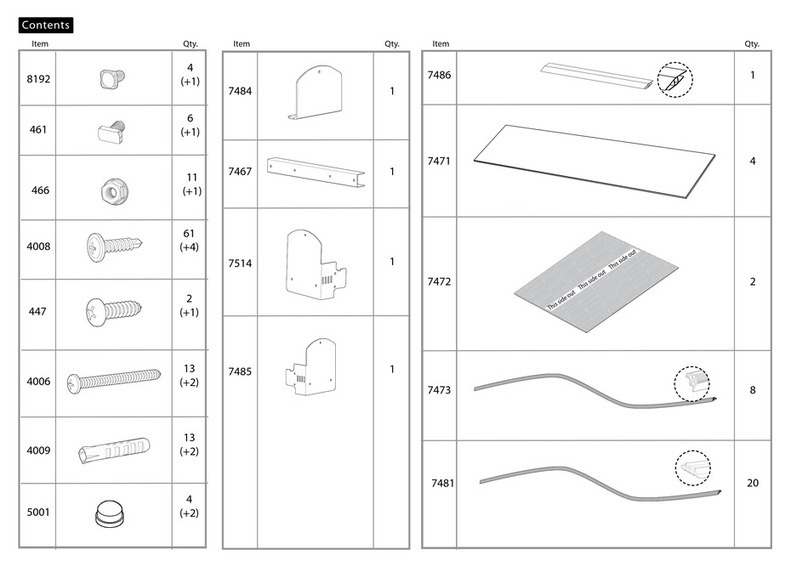
Contents
Item
8063
Qty. Item Qty.
8578
7286
7290
7288
01.
I
7291
7293
7042
7043
8177
8178
8179
8060
8061
8052
8127
8051
1
1
I
1
1
Item Qty.
Contents
Item Qty.
7298
8492
8493
8494
8495
8496
7
4
2
2
2
2
7039
7506
8490
Item
8132
8130
8131
8129
8145
8146
8348
Qty.
1 3
3
3
3
1
1
2
2
Item Qty.
8478
8143
8068
8066
8067
8303
7038
8531 Iz%
4
2
1
1
6
14
Contents
Item
8116
8117
8118
8119
5000
5001
TO01
Qty.
1
1
2
1
8(+4)
48(+6)
1
Item
8192
466
461
450
4043
4045
4008
4000
4010
433
425
4006
4009
Qty.
SO)))))))))))))))))))))))))))
52(+5)
60(+6)
20(+2)
8(+1)
26(+3)
66(+7)
25(+2)
25(+2)
25(+2)
12
16
12
2 433 2
1
4000 2 401 0
425 cm /167"
4010
00.
x2
2
[7039 1 4045 1
3
7288 , 4010 6
D
4010
aP
.1
.00
al
al
arl
,-o
x6
6
4045 1
6433 ®
4
7288 4000
5
7293 8192 7 466
7291
6
7291 1 7293
.....,.......
1
OP
7
[8303 1 8192 1 466 1
.
8
A-
r
L
8143 2 4008 6
x2-gile 4008
4008
4008
CAULK / SILICON
1
ir
9
8177 1
8178
, I
1
II
8179 1
7506 2 4045 8
8178 1
... ., .....
I/ 7506
.,
... .. ..
... .0
/
aN.
8177
., .
/ 7506
i ei@1/I
... ... ...
.. _ ....
8179
10
r
8060
L
8061
8067 1
11
[8063 ) 2 8478 4 8192 8 466 8
12

Other Palram Outdoor Storage manuals

Palram Canopia SkyLight 702297 Administrator Guide

Palram

Palram Canopia SkyLight 702297 Administrator Guide

Palram Skylight Shed User manual

Palram

Palram Skylight Shed User manual

Palram CANOPIA SKYLIGHT 4x3/1.2x1 Administrator Guide

Palram

Palram CANOPIA SKYLIGHT 4x3/1.2x1 Administrator Guide

Palram SkyLight Shed-4x6 User manual

Palram

Palram SkyLight Shed-4x6 User manual

Palram Skylight Shed-6x3 User manual

Palram

Palram Skylight Shed-6x3 User manual

Palram CANOPIA DALLAS COLORADO 14x20 Administrator Guide

Palram

Palram CANOPIA DALLAS COLORADO 14x20 Administrator Guide

Palram SanRemo 3x4.25 User manual

Palram

Palram SanRemo 3x4.25 User manual

Palram CANOPIA RUBICON 8x10 / 2.4x3 User manual

Palram

Palram CANOPIA RUBICON 8x10 / 2.4x3 User manual

Palram Skylight Shed-6x10 Tan User manual

Palram

Palram Skylight Shed-6x10 Tan User manual

Palram Skylight 6047791 User manual

Palram

Palram Skylight 6047791 User manual

Palram CANOPIA SKYLIGHT User manual

Palram

Palram CANOPIA SKYLIGHT User manual

Palram SkyLight Shed 6x8 Tan / Deco User manual

Palram

Palram SkyLight Shed 6x8 Tan / Deco User manual

Palram Skylight Shed - 6x3 User manual

Palram

Palram Skylight Shed - 6x3 User manual

Palram Yukon Shed - 11 'x9' S User manual

Palram

Palram Yukon Shed - 11 'x9' S User manual

Palram Skylight Shed User manual

Palram

Palram Skylight Shed User manual

Palram Skylight Shed 6x12 Administrator Guide

Palram

Palram Skylight Shed 6x12 Administrator Guide

Palram CANOPIA RUBICON 8x10 User manual

Palram

Palram CANOPIA RUBICON 8x10 User manual

Palram CANOPIA RUBICON 6x12 / 2x3.8 Administrator Guide

Palram

Palram CANOPIA RUBICON 6x12 / 2x3.8 Administrator Guide

Palram Sky Light 8x8 User manual

Palram

Palram Sky Light 8x8 User manual

Palram CANOPIA RUBICON 8x8/2.4x2.4 Administrator Guide

Palram

Palram CANOPIA RUBICON 8x8/2.4x2.4 Administrator Guide

Palram CANOPIA RUBICON Administrator Guide

Palram

Palram CANOPIA RUBICON Administrator Guide

Palram 20200100000-EA User manual

Palram

Palram 20200100000-EA User manual

Palram CANOPIA RUBICON 6x8 / 2x2.3 Administrator Guide

Palram

Palram CANOPIA RUBICON 6x8 / 2x2.3 Administrator Guide

Palram SKYLIGHT 6x8 / 2x2 Administrator Guide

Palram

Palram SKYLIGHT 6x8 / 2x2 Administrator Guide

Popular Outdoor Storage manuals by other brands

Backyard Products HANDY HOME PRODUCTS MARCO Series Assembly manual

Backyard Products

Backyard Products HANDY HOME PRODUCTS MARCO Series Assembly manual

Lifetime 60138 Assembly instructions

Lifetime

Lifetime 60138 Assembly instructions

Patiowell T-PS1268S0BN-1A Assembly instructions

Patiowell

Patiowell T-PS1268S0BN-1A Assembly instructions

garofalo TUSCANY EVO 100.1P user manual

garofalo

garofalo TUSCANY EVO 100.1P user manual

Keter DUOTECH Grande Store user manual

Keter

Keter DUOTECH Grande Store user manual

Arrow VD108-A Owner's manual & assembly instructions

Arrow

Arrow VD108-A Owner's manual & assembly instructions

Rubbermaid 1W21 manual

Rubbermaid

Rubbermaid 1W21 manual

NuTone 401ADJ Specification sheet

NuTone

NuTone 401ADJ Specification sheet

Duratuf GL65 Assembly instructions

Duratuf

Duratuf GL65 Assembly instructions

Sheds Direct Ireland SD-XN56-AP owner's manual

Sheds Direct Ireland

Sheds Direct Ireland SD-XN56-AP owner's manual

Biohort CasaNova Assembly manual

Biohort

Biohort CasaNova Assembly manual

Riverlea Duratuf Garrison Sheds PL46 Assembly instructions

Riverlea

Riverlea Duratuf Garrison Sheds PL46 Assembly instructions

Forest garden FGCLGSTHD instructions

Forest garden

Forest garden FGCLGSTHD instructions

Biohort StoreMax 190 Owner's manual & assembly instructions

Biohort

Biohort StoreMax 190 Owner's manual & assembly instructions

Biohort HighLine Assembly manual

Biohort

Biohort HighLine Assembly manual

Kinying KY-GS002-2 installation instructions

Kinying

Kinying KY-GS002-2 installation instructions

Arrow Storage Products EG1014AB Owner's manual & assembly guide

Arrow Storage Products

Arrow Storage Products EG1014AB Owner's manual & assembly guide

Arrow Storage Products HDVAGY107 Series Owner's manual & assembly guide

Arrow Storage Products

Arrow Storage Products HDVAGY107 Series Owner's manual & assembly guide

manuals.online logo
manuals.online logoBrands
  • About & Mission
  • Contact us
  • Privacy Policy
  • Terms and Conditions

Copyright 2025 Manuals.Online. All Rights Reserved.