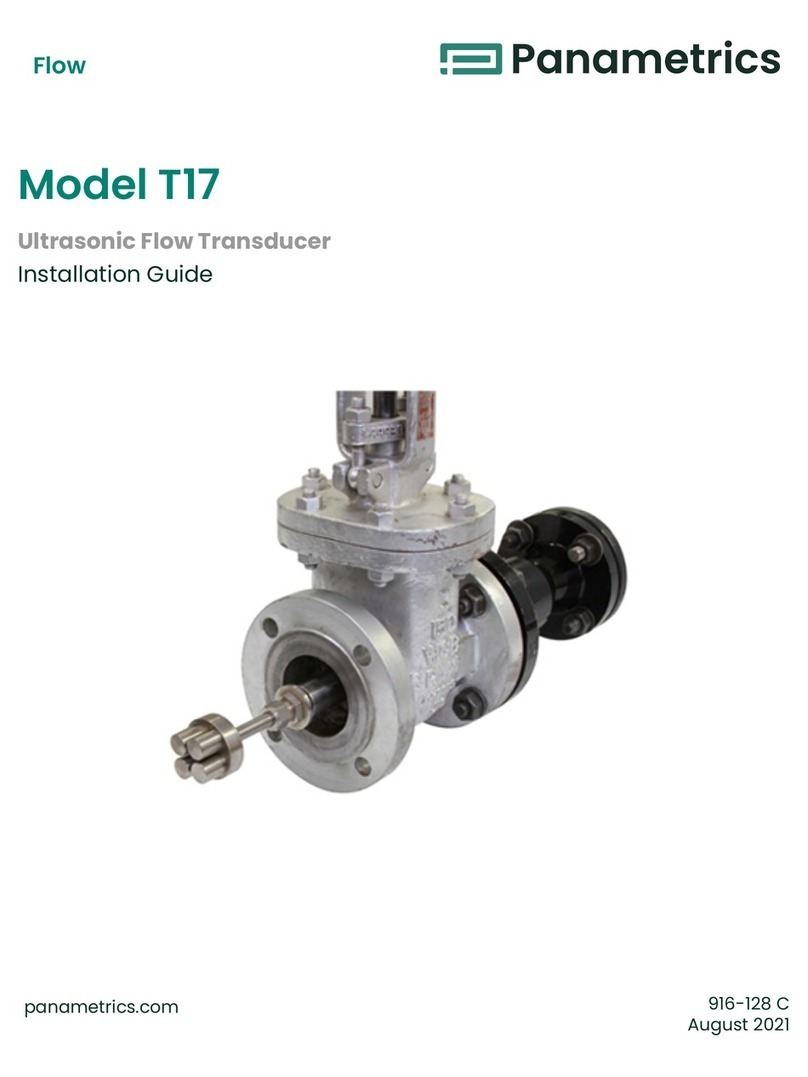
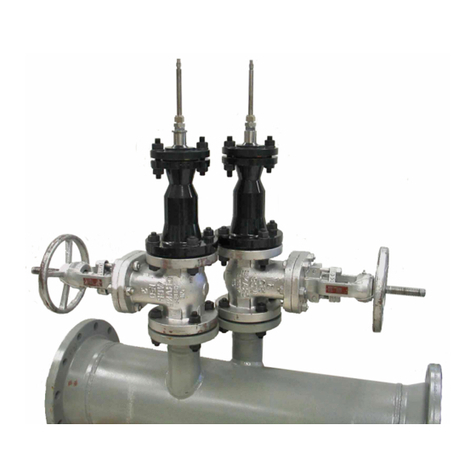
Panametrics C-ET User manual


Flow
panametrics.com
Copyright 2021 Baker Hughes company.
This material contains one or more registered trademarks of Baker Hughes Company and its subsidiaries
in one or more countries. All third-party product and company names are trademarks of their respective
holders.
Model C-ET
Ultrasonic Flow Transducer System
Installation Guide
916-083 Rev. B
August 2021

ii
[no content intended for this page]

Model C-ET Installation Guide iii
Contents
1.1 Introduction . . . . . . . . . . . . . . . . . . . . . . . . . . . . . . . . . . . . . . . . . . . . . . . . . . . . . . . . . . . . . . . . . . . . . . . . . . . . . . . . . . . . . . . . . . . . . . . . . . . . . .1
1.2 Transducer Construction . . . . . . . . . . . . . . . . . . . . . . . . . . . . . . . . . . . . . . . . . . . . . . . . . . . . . . . . . . . . . . . . . . . . . . . . . . . . . . . . . . . . . . . . .1
1.2.1 Solid Sheet Couplants . . . . . . . . . . . . . . . . . . . . . . . . . . . . . . . . . . . . . . . . . . . . . . . . . . . . . . . . . . . . . . . . . . . . . . . . . . . . . . . . . . . . . . . .1
1.3 Installing the C-ET Transducer System . . . . . . . . . . . . . . . . . . . . . . . . . . . . . . . . . . . . . . . . . . . . . . . . . . . . . . . . . . . . . . . . . . . . . . . . . . 3
1.3.1 Choosing an Installation Location . . . . . . . . . . . . . . . . . . . . . . . . . . . . . . . . . . . . . . . . . . . . . . . . . . . . . . . . . . . . . . . . . . . . . . . . . . . 4
1.3.1.1 Application Guide - Wall Thickness (in inches) . . . . . . . . . . . . . . . . . . . . . . . . . . . . . . . . . . . . . . . . . . . . . . . . . . . . . . . 5
1.3.1.2 Application Guide - Wall Thickness (in millimeters). . . . . . . . . . . . . . . . . . . . . . . . . . . . . . . . . . . . . . . . . . . . . . . . . . 6
1.3.1.3 Application Guide — Cryo Calculations . . . . . . . . . . . . . . . . . . . . . . . . . . . . . . . . . . . . . . . . . . . . . . . . . . . . . . . . . . . . . . 7
1.3.2 Obtaining the Transducer Spacing. . . . . . . . . . . . . . . . . . . . . . . . . . . . . . . . . . . . . . . . . . . . . . . . . . . . . . . . . . . . . . . . . . . . . . . . . . 9
1.3.2.1 Determining Special Transducer Parameters . . . . . . . . . . . . . . . . . . . . . . . . . . . . . . . . . . . . . . . . . . . . . . . . . . . . . . . . 9
1.3.2.2 Pipe Survey to Determine OD and Wall Thickness. . . . . . . . . . . . . . . . . . . . . . . . . . . . . . . . . . . . . . . . . . . . . . . . . . . .13
1.3.2.3 Fluid Soundspeed . . . . . . . . . . . . . . . . . . . . . . . . . . . . . . . . . . . . . . . . . . . . . . . . . . . . . . . . . . . . . . . . . . . . . . . . . . . . . . . . . . 14
1.3.3 Installing the V Clamping Fixtures and Transducers . . . . . . . . . . . . . . . . . . . . . . . . . . . . . . . . . . . . . . . . . . . . . . . . . . . . . . . 14
1.3.3.1 Tools and Equipment Needed. . . . . . . . . . . . . . . . . . . . . . . . . . . . . . . . . . . . . . . . . . . . . . . . . . . . . . . . . . . . . . . . . . . . . . . 14
1.3.3.2 Setting the Transducer Spacing . . . . . . . . . . . . . . . . . . . . . . . . . . . . . . . . . . . . . . . . . . . . . . . . . . . . . . . . . . . . . . . . . . . . 15
1.3.3.3 Installing the Fixture . . . . . . . . . . . . . . . . . . . . . . . . . . . . . . . . . . . . . . . . . . . . . . . . . . . . . . . . . . . . . . . . . . . . . . . . . . . . . . . . .17
1.3.3.4 Preparing the Pipe. . . . . . . . . . . . . . . . . . . . . . . . . . . . . . . . . . . . . . . . . . . . . . . . . . . . . . . . . . . . . . . . . . . . . . . . . . . . . . . . . . 20
1.3.3.5 Mounting the Transducers . . . . . . . . . . . . . . . . . . . . . . . . . . . . . . . . . . . . . . . . . . . . . . . . . . . . . . . . . . . . . . . . . . . . . . . . . 22
1.3.4 Installing the PI Fixture and Transducers . . . . . . . . . . . . . . . . . . . . . . . . . . . . . . . . . . . . . . . . . . . . . . . . . . . . . . . . . . . . . . . . . . . 25
1.3.4.1 Tools and Equipment Needed. . . . . . . . . . . . . . . . . . . . . . . . . . . . . . . . . . . . . . . . . . . . . . . . . . . . . . . . . . . . . . . . . . . . . . . 25
1.3.4.2 Preparing the Pipe. . . . . . . . . . . . . . . . . . . . . . . . . . . . . . . . . . . . . . . . . . . . . . . . . . . . . . . . . . . . . . . . . . . . . . . . . . . . . . . . . .26
1.3.4.3 Surveying the Pipe. . . . . . . . . . . . . . . . . . . . . . . . . . . . . . . . . . . . . . . . . . . . . . . . . . . . . . . . . . . . . . . . . . . . . . . . . . . . . . . . . . 26
1.3.4.4 Installing the First Mounting Block . . . . . . . . . . . . . . . . . . . . . . . . . . . . . . . . . . . . . . . . . . . . . . . . . . . . . . . . . . . . . . . . . . 29
1.3.4.5 Installing the Second Mounting Block . . . . . . . . . . . . . . . . . . . . . . . . . . . . . . . . . . . . . . . . . . . . . . . . . . . . . . . . . . . . . . .31
1.3.4.6 Mounting the Transducers . . . . . . . . . . . . . . . . . . . . . . . . . . . . . . . . . . . . . . . . . . . . . . . . . . . . . . . . . . . . . . . . . . . . . . . . .34
1.4 Maintenance . . . . . . . . . . . . . . . . . . . . . . . . . . . . . . . . . . . . . . . . . . . . . . . . . . . . . . . . . . . . . . . . . . . . . . . . . . . . . . . . . . . . . . . . . . . . . . . . . . . 37
1.5 Specifications . . . . . . . . . . . . . . . . . . . . . . . . . . . . . . . . . . . . . . . . . . . . . . . . . . . . . . . . . . . . . . . . . . . . . . . . . . . . . . . . . . . . . . . . . . . . . . . . . .38

Contents
iv Model C-ET Installation Guide

Model C-ET Installation Guide vii
Preface
Information Paragraphs
•Note paragraphs provide information that provides a deeper understanding of the situation, but is not essential
to the proper completion of the instructions.
•Important paragraphs provide information that emphasizes instructions that are essential to proper setup of the
equipment. Failure to follow these instructions carefully may cause unreliable performance.
•Caution! paragraphs provide information that alerts the operator to a hazardous situation that can cause
damaPanametrics to property or equipment.
•Warning! paragraphs provide information that alerts the operator to a hazardous situation that can cause injury
to personnel. Cautionary information is also included, when applicable.
Safety Issues
WARNING! It is the responsibility of the user to make sure all local, county, state and national codes, regulations,
rules and laws related to safety and safe operating conditions are met for each installation.
Auxiliary Equipment
Local Safety Standards
The user must make sure that he operates all auxiliary equipment in accordance with local codes, standards,
regulations, or laws applicable to safety.
Working Area
WARNING! Auxiliary equipment may have both manual and automatic modes of operation. As equipment can
move suddenly and without warning, do not enter the work cell of this equipment during automatic
operation, and do not enter the work envelope of this equipment during manual operation. If you do,
serious injury can result.
WARNING! Make sure that power to the auxiliary equipment is turned OFF and locked out before you perform
maintenance procedures on the equipment.
Qualification of Personnel
Make sure that all personnel have manufacturer-approved training applicable to the auxiliary equipment.
Personal Safety Equipment
Make sure that operators and maintenance personnel have all safety equipment applicable to the auxiliary
equipment. Examples include safety glasses, protective headgear, safety shoes, etc.
Unauthorized Operation
Make sure that unauthorized personnel cannot gain access to the operation of the equipment.

Preface
viii Model C-ET Installation Guide
Environmental Compliance
Waste Electrical and Electronic Equipment (WEEE) Directive
Baker Hughes is an active participant in Europe’s Waste Electrical and Electronic Equipment (WEEE) take-back
initiative, directive 2002/96/EC.
The equipment that you bought has required the extraction and use of natural resources for its production. It may
contain hazardous substances that could impact health and the environment.
In order to avoid the dissemination of those substances in our environment and to diminish the pressure on the
natural resources, we encourage you to use the appropriate take-back systems. Those systems will reuse or recycle
most of the materials of your end life equipment in a sound way.
The crossed-out wheeled bin symbol invites you to use those systems.
If you need more information on the collection, reuse and recycling systems, please contact your local or regional
waste administration.
Visit www.bakerhughesds.com/health-safetyand-environment-hse for take-back instructions and more
information about this initiative.

Model C-ET Installation Guide 1
1.1 Introduction
The clamp-on extended temperature (C-ET) range transducer system provides liquid flow measurement in very
low- or very high-temperature applications. It represents Panametrics’s latest generation of non-contact,
demanding measurement transducers and capitalizes on more than 20 years of experience from the OKS
transducer system.
The C-ET system is designed to isolate the transducer from the extreme process conditions, enabling it to measure
high temperature hydrocarbon liquids, superheated water, heat transfer oils and cryogenic liquids. In addition, the
C-ET system retains all of the characteristics that make ultrasonic technology best for critical process
measurements under harsh conditions.
The C-ET clamp-on ultrasonic flow transducers are used exclusively with the Panametrics line of ultrasonic
flowmeters. These transducers are used to measure the flow of various liquids through pipes having diameters from
3 in. (75 mm) to 24 in. (600 mm). This document provides details on the following topics:
• Transducer Construction
• Installation
• Maintenance
• Specifications
1.2 Transducer Construction
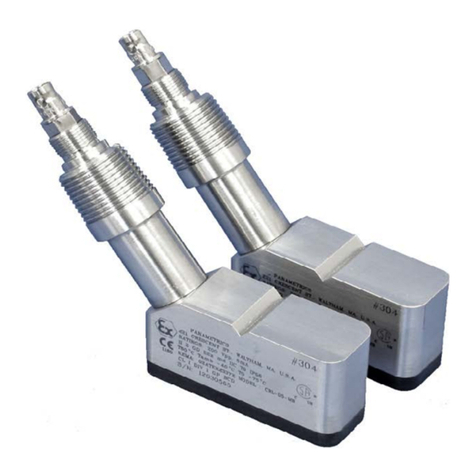
The C-ET transducer consists of a C-RS transducer, a waveguide, and a holder pre-assembled from the factory.
The transducer assembly includes a 316 stainless steel housing with a plastic wedge attached and a BNC-type
electrical connector. The transducer features integral 3/4” NPT-M threads for mounting a junction box and integral
5/8-24 threads for mounting a submersible connector if desired (see Figure 1).
Figure 1: Transducer Assembly
1.2.1 Solid Sheet Couplants
Panametrics supplies a solid sheet couplant for C-ET transducer installations. The purpose of the couplant is to
provide reliable transmission of ultrasound between two adjacent solid surfaces. Generally speaking, couplants
perform this task by excluding air from between the adjacent surfaces. Therefore, the C-ET transducers should be
pressed tightly against the pipe surface.
BNC Connector
5/8” UNF Thread
3/4” NPT Thread
Holder
Waveguide

2 Model C-ET Installation Guide
Panametrics provides a variety of solid sheet couplants for extremely high- and low-temperature applications.
Standard Panametrics couplants are listed in Table 0.
Part No. Type Temp. Range Use
CPL-12 Standard –20° to +400°C (-4° to +752°F) Permanent
CPL-13 Cryogenics –250° to 100°C (-418° to +212°F) Permanent
CPL-14 Gold Only Applications –20° to +400°C (-4° to +752°F) Permanent
CPL-15 Zinc Only Applications –20° to +400°C (-4° to +752°F) Permanent
CPL-S Special As required Difficult Applications*
*Installations where gold or zinc cannot be used. Consult Panametrics for these applications.

Model C-ET Installation Guide 3
1.3 Installing the C-ET Transducer System
Panametrics offers the following fixtures to suit your applications needs:
• V clamping fixture
• PI clamping fixture
Figure 2 shows the V and PI fixture assemblies (less solid couplant). Complete the steps in the following sections to
position and install the transducers and fixtures.
Figure 2: V and PI Fixtures
V Fixture
PI Fixture

4 Model C-ET Installation Guide
1.3.1 Choosing an Installation Location
1. Locate the transducer measurement point at least 3 ft (1 m) from any butt welds or flanges, ideally in the center
of a 20 diameters of straight run of pipe. Keep appropriate clearance on either side of the pipe for easy
transducer installation:
•6 in. (15 cm) if you are not using a junction box, or
•9 in. (23 cm) if you are using a junction box.
Note: To guarantee the specified accuracy of the flowmeter there is no substitute for straight run and
fully-developed flow profile. However, if straight run is not available, the transducer location should be in a
position such that the acoustic signal travels through the full distribution of the under-developed flow profile
for best repeatability.
2. Choose a location that has at least 10 pipe diameters of straight, undisturbed flow upstream and 5 pipe
diameters downstream from the measurement point. Providing undisturbed flow means avoiding sources of
turbulence such as flanges, elbows and tees; avoiding swirl; and avoiding disturbed flow profiles. Never install the
flowmeter directly downstream of control valves, especially butterfly valves. If you cannot find an ideal location,
use a downstream location of straight run in excess of 5 pipe diameters.
3. Place the transducers as close as possible to the horizontal plane. Locate the transducers on opposite sides of
the pipe 180o apart, ideally at the 3 and 9 o’clock positions. Do not place transducers on the top or bottom of the
pipe.
Figure 3: Transducer Locations
4. The following is a guide for the recommended wall thickness in which to install the C-ET transducers. The C-ET
transducer cannot be installed on wall thicknesses between 0.27 in (6.86 mm) and 0.33 in (8.38 mm). On page 5
and page 6 are two charts showing typical pipe sizes.
Transducer
Pipe
Signal Path
End View

Model C-ET Installation Guide 5
1.3.1.1 Application Guide - Wall Thickness (in inches)
Note: Pipe sizes not suitable for C-ET installations are highlighted in red.
Nomina
l Pipe
Size
Outside
Diamet
er
Schedule
(in) (in) 10 20 30 STD 40 60 XS 80 100 120 140 160 XXS
Wall Thickness (in)
3 3.500 0.216 0.216 0.300 0.300 0.438 0.600
3 1/2 4.000 0.226 0.226 0.318 0.318
4 4.500 0.237 0.237 0.337 0.337 0.438 0.531 0.674
5 5.563 0.258 0.258 0.375 0.375 0.500 0.625 0.75
6 6.625 0.280 0.280 0.432 0.432 0.562 0.719 0.864
8 8.625 0.250 0.277 0.322 0.322 0.406 0.500 0.500 0.594 0.719 0.812 0.906 0.875
10 10.750 0.250 0.307 0.365 0.365 0.500 0.500 0.594 0.719 0.844 1.000 1.125 1.000
12 12.750 0.250 0.330 0.375 0.406 0.562 0.500 0.688 0.844 1.000 1.125 1.312 1.000
14 14.000 0.250 0.312 0.375 0.375 0.438 0.594 0.500 0.750 0.938 1.094 1.25 1.406
16 16.000 0.250 0.312 0.375 0.375 0.500 0.656 0.500 0.844 1.031 1.219 1.438 1.594
18 18.000 0.250 0.312 0.438 0.375 0.562 0.750 0.500 0.938 1.156 1.375 1.562 1.781
20 20.00
00.250 0.375 0.50
00.375 0.594 0.812 0.500 0.938 1.156 1.375 1.562 1.781
22 22.00
00.250 0.375 0.50
00.375 0.875 0.500 1.125 1.375 1.625 1.875 2.125
24 24.00
00.250 0.375 0.562 0.375 0.688 0.989 0.500 1.219 1.531 1.812 2.062 2.344

6 Model C-ET Installation Guide
1.3.1.2 Application Guide - Wall Thickness (in millimeters)
Note: Pipe sizes not suitable for C-ET installations are highlighted in red.
Nominal
Pipe Size Outside
Diameter
Schedule
(mm) (mm) 10 20 30 STD 40 60 XS 80 100 120 140 160 XXS
Wall Thickness (mm)
80 88.90 5.49 5.49 7.62 7.62 11.13 15.24
90 101.60 5.74 5.74 8.08 8.08
100 114.30 6.02 6.02 8.56 8.56 11.13 13.49 17.12
125 141.30 6.55 6.55 9.53 9.53 12.70 15.88 19.05
150 168.28 7.11 7.11 10.97 10.97 14.27 18.26 21.95
200 219.08 6.35 7.04 8.18 8.18 10.31 12.70 12.70 15.09 18.26 20.62 23.01 22.23
250 273.05 6.35 7.80 9.27 9.27 12.70 12.70 15.09 18.26 21.44 25.40 28.58 25.40
300 323.85 6.35 8.38 9.53 10.31 14.27 12.70 17.48 21.44 25.40 28.58 33.32 25.40
350 355.60 6.35 7.92 9.53 9.53 11.13 15.09 12.70 19.05 23.83 27.79 31.75 35.71
400 406.40 6.35 7.92 9.53 9.53 12.70 16.66 12.70 21.44 26.19 30.96 36.53 40.49
450 457.20 6.35 7.92 11.13 9.53 14.27 19.05 12.70 23.83 29.36 34.93 39.67 45.24
500 508.00 6.35 9.53 12.70 9.53 15.09 20.62 12.70 23.83 29.36 34.93 39.67 45.24
550 558.80 6.35 9.53 12.70 9.53 22.23 12.70 28.58 34.93 41.28 47.63 53.98
600 609.60 6.35 9.53 14.27 9.53 17.48 25.12 12.70 30.96 38.89 46.02 52.37 59.54

Model C-ET Installation Guide 7
1.3.1.3 Application Guide — Cryo Calculations
Process
Temp. Theta1 Soundspeed Tw (0.5
MHz) Tw (1.0
MHz) Process
Temp. Theta
1 Soundspeed
Tw
(0.5
MHz)
Tw
(1.0
MHz)
° F °C deg. ft/s m/s usecs usecs ° F °C deg. ft/s m/s usecs usecs
-328 -200 55.5 9,979
.9 3,041.
9145.1 142.4 392 200 56.6 10,065
.2 3,067.
9148.3 145.1
-310 -190 55.5 9,985
.2 3,043
.5 145.1 142.4 410 210 56.7 10,064
.0 3,067.
5148.4 145.2
-292 -180 55.6 9,990
.3 3,045
.0 145.1 142.5 428 220 56.7 10,062
.7 3,067.1 148.5 145.3
-274 -170 55.6 9,995
.3 3,046
.6 145.2 142.5 446 230 56.7 10,061.
23,066.
6148.6 145.4
-256 -160 55.6 10,00
0.1 3,048
.0 145.3 142.5 464 240 56.8 10,059
.5 3,066.1 148.7 145.5
-238 -150 55.6 10,00
4.7 3,049
.4 145.3 142.6 482 250 56.8 10,057.
73,065.
6148.8 145.7
-220 -140 55.6 10,00
9.2 3,050
.8 145.4 142.6 500 260 56.9 10,055
.7 3,065.
0149.0 145.8
-202 -130 55.7 10,013
.5 3,052
.1 145.4 142.7 518 270 56.9 10,053
.5 3,064.
3149.1 145.9
-184 -120 55.7 10,017
.7 3,053
.4 145.5 142.7 536 280 56.9 10,051.
23,063.
6149.2 146.0
-166 -110 55.7 10,021
.7 3,054
.6 145.5 142.7 554 290 57.0 10,048
.7 3,062.
8149.3 146.1
-148 -100 55.7 10,02
5.5 3,055
.8 145.6 142.8 572 300 57.0 10,046
.0 3,062.
0149.5 146.3
-130 -90 55.8 10,02
9.2 3,056
.9 145.7 142.8 590 310 57.1 10,043
.2 3,061.2 149.6 146.4
-112 -80 55.8 10,03
2.7 3,058
.0 145.7 142.9 608 320 57.1 10,040
.3 3,060.
3149.7 146.5
-94 -70 55.8 10,03
6.1 3,059
.0 145.8 142.9 626 330 57.1 10,037.
13,059.
3149.8 146.7
-76 -60 55.8 10,03
9.2 3,060
.0 145.9 143.0 644 340 57.2 10,033.
83,058.
3150.0 146.8
-58 -50 55.9 10,04
2.3 3,060
.9 146.0 143.1 662 350 57.2 10,030
.4 3,057.
3150.1 146.9
302 150 56.5 10,06
8.7 3,068
.9 147.7 144.6 680 360 57.3 10,026
.8 3,056.
2150.2 147.1
320 160 56.5 10,06
8.3 3,068
.8 147.8 144.7 698 370 57.3 10,023.
03,055.
0150.4 147.2
338 170 56.5 10,06
7.8 3,068
.7 147.9 144.8 716 380 57.4 10,019.
03,053.
8150.5 147.4
356 180 56.6 10,06
7.1 3,068
.5 148.0 144.9 734 390 57.4 10,014.
93,052.
6150.7 147.5
374 190 56.6 10,06
6.2 3,068
.2 148.1 145.0 752 400 57.4 10,010.
73,051.3 150.8 147.6

8 Model C-ET Installation Guide
Ambient 20°C, 68°F
Increase wedge angle 0.5 degrees for every 10°C, 18°F increase in ambient temperature
Decrease Tw 1.5 microseconds for every 10°C, 18°F increase in ambient temperature

Model C-ET Installation Guide 9
1.3.2 Obtaining the Transducer Spacing
1.3.2.1 Determining Special Transducer Parameters
The C-ET transducers must be programmed in the flowmeters as special transducers. As specials, four parameters
are required: Frequency, Tw, Wedge Angle, and Wedge Soundspeed.
Frequency: Frequency is determined based on the part number of the C-ET transducer, and it can be found on the
C-ET label.
Figure 4: C-ET Parameters Label
The CRS-XX-MB defines the frequency of the transducers as follows:
If “XX” = 05, then the frequency =.5MHz.
If “XX” = 10, then the frequency = 1MHz.
Tw: Tw (time in wedge) is determined by the transducer frequency, nominal process temperature, and ambient
temperature using Graph #1 (Figure 5 on page 10) or Graph #2 (Figure 6 on page 11) based on the transducer
frequency.
As an example: If Transducer Frequency = 0.5MHz
Ambient Temperature = 20°C
Nominal Process Temperature = 340°C
Tw would be: 150µs
Wedge Angle: Wedge angle is determined by the nominal process temperature and ambient temperature using
Graph #3 on page 12 similar to Tw above.
As an example: If Ambient Temperature = 20°C
Nominal Process Temperature = 340°C
Wedge Angle would be: 57.2 degrees
Wedge Soundspeed: Wedge soundspeed is always 10104.9 ft/s (3080.0 m/s) for the C-ET transducer.

10 Model C-ET Installation Guide
Figure 5: Graph #1: Tw (0.5 MHz Transducer)
139
140
141
142
143
144
145
146
147
148
149
150
151
152
153
154
155
156
157
158
159
160
161
162
163
164
165
166
0 25 50 75 100 125 150 175 200 225 250 275 300 325 350 375 400
Tw (μs)
Nominal Process Temperature (ȗͿ
Tamb: -ϮϬȗ
dĂŵďϬȗ
dĂŵďϮϬȗ
dĂŵďϰϬȗ
dĂŵďϲϬȗ

Model C-ET Installation Guide 11
Figure 6: Graph #2: Tw (1.0 MHZ Transducer)
136
137
138
139
140
141
142
143
144
145
146
147
148
149
150
151
152
153
154
155
156
157
158
0 25 50 75 100 125 150 175 200 225 250 275 300 325 350 375 400
Tw (μs)
EŽŵŝŶĂůWƌŽĐĞƐƐdĞŵƉĞƌĂƚƵƌĞ;ȗͿ
Tamb: -ϮϬȗ
dĂŵďϬȗ
dĂŵďϮϬȗ
dĂŵďϰϬȗ
dĂŵďϲϬȗ

12 Model C-ET Installation Guide
Figure 7: Graph #3: Wedge Angle
53.50
54.00
54.50
55.00
55.50
56.00
56.50
57.00
57.50
58.00
58.50
59.00
59.50
60.00
60.50
0 25 50 75 100 125 150 175 200 225 250 275 300 325 350 375 400
Wedge Angle (Degrees)
EŽŵŝŶĂůWƌŽĐĞƐƐdĞŵƉĞƌĂƚƵƌĞ;ȗͿ
Tamb: -ϮϬȗ
dĂŵďϬȗ
dĂŵďϮϬȗ
dĂŵďϰϬȗ
dĂŵďϲϬȗ
Table of contents
Other Panametrics Transducer manuals
Popular Transducer manuals by other brands

GREISINGER
GREISINGER GPHU 014 MP operating manual

Iskra
Iskra MT4 Series user manual

Endress+Hauser
Endress+Hauser iTEMP TMT82 Safety instructions

MKS
MKS Baratron 631F manual

Campbell
Campbell KPSI Series instruction manual

S+S Regeltechnik
S+S Regeltechnik THERMASGARD TM 65 - EtherCAT P Operating Instructions, Mounting & Installation