manuals.online logo
Brands
  1. Home
  2. •
  3. Brands
  4. •
  5. Panasonic
  6. •
  7. Amplifier
  8. •
  9. Panasonic CY-M9054EN User manual

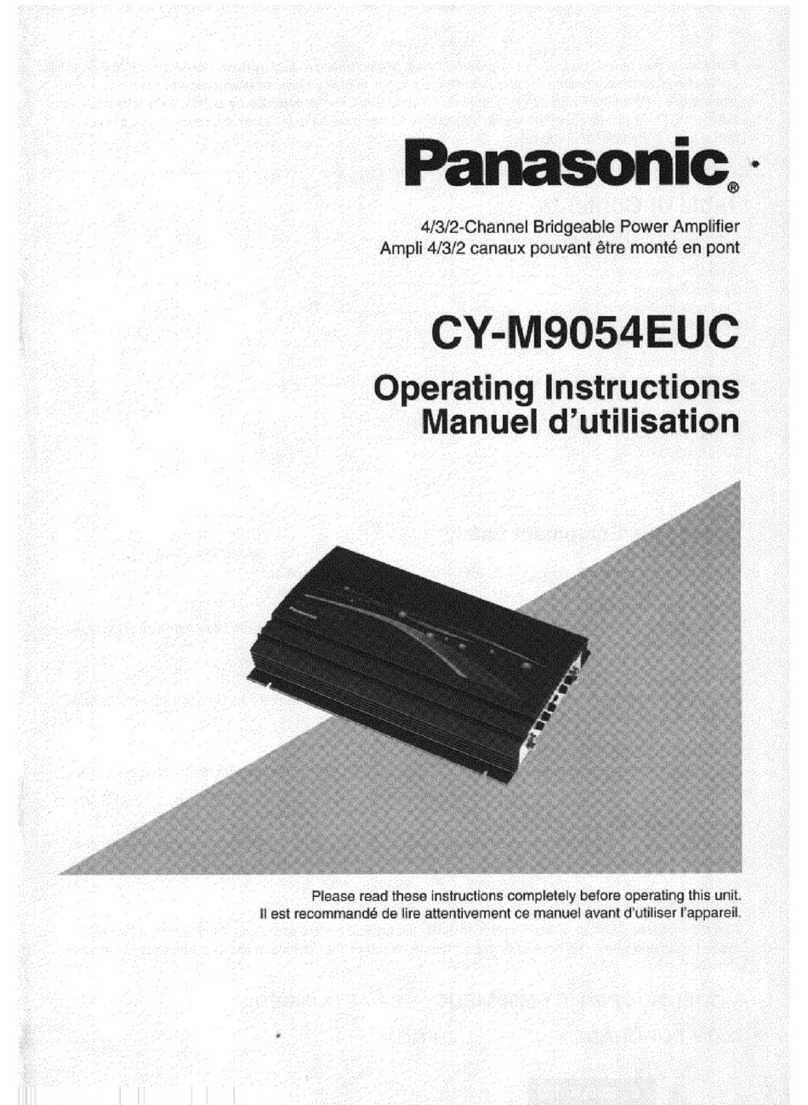
Panasonic CY-M9054EN User manual

Operating
Instructions
Bedienungsanleitung
Manuel
d’instructions
Gebruiksaanwijzing
Bruksanvisning
Manuale
di
istruzioni
Manual
de
Instrucciones
4/3/2-Channel
Bridgeable
Power
Amplifier
4/3/2-Kanal-Briickenleistungsverstarker
Ampli
4/3/2
canaux
powart
etre
mont6
en
pont
4/3/2-Kanaals
eindversterker
met
bruginstelling
4/3/2-Kanals
bryggkopplad
effektforstarkare
Amplificatore
di
potenza
a
4/3/2
canali
ccollegabili
con
pomte
(AMPLIFICATORE
DI
POTENZA)
Amplificador
de
potencia
puenteable
de
4/3/2
canales
CY-M9054EN
Panasonic
Before
operating
this
set,
please
read
these
instructions
completely.
Bitte
lesen
Sie
diese
Bedienungsanleitung
vor
der
Inbetriebnahme
aufmerksam
durch.
Nous
vous
recommandons
de
lire
attentivement
ces
instructions
avant
d'utiliser
cet
appareil.
Lees
deze
gebruiksaanwijzing
in
zijn
geheel
door
alvorens
dit
apparaat
in
gebruik
te
nemen.
Las
noga
dessa
anvisningar
fore
apparatens
anvandning.
Prima
di
adoperare
I’apparecchio,
vogliate
leggere
attentamente
le
istruzioni.
Antes
de
poner
en
marcha
el
aparato,
sirvase
leer
atentamente
estas
instrucciones.
Table
of
Contents
Precautions.3
Location
of
Controls..7
Operating
Procedures.8
System
Diagram.
9
Cautions
on
Proper
Handling
.10
Page
Installation.10
Electrical
Connection.11
Fuse.13
Maintenance.13
Specifications.13
Inhaltsverzeichnis
VorsichtsmaBnahmen.4
Lage
der
Kontrollfunktionen.14
Grundlegende
Geratebedienung.15
Systemschema.16
VorsichtsmaBnahmen
bei
der
Handhabung.17
Seite
Einbau
.17
Elektrischer
AnschluB
.18
Sicherung.20
Pflege.20
Technische
Daten.20
Sommaire
Precautions.
Emplacement
des
commandes.
Procedures
de
fonctionnement.
Schema
general.
Precautions
pour
la
manutention
adequate
Page
Page
...4
Installation.24
.21
Connexion
electrique.25
.22
Fusible.27
.23
Entretien.27
.24
Specifications.27
Inhoudsopgave
Bladzijde
Voorzorgsmaatregelen.5
Plaatsing
van
de
bedieningselementen.28
Bediening.29
Systeemschema.30
Maatregelen
voor
een
juist
gebruik.31
Bladzijde
Inbouwen.
.31
Bedradingsschema.
.32
Zekering.
.34
Onderhoud.
.34
Technische
gegevens.
.34
Innehdll
Observera.
Delarne
och
deras
placering.
Handhavande.
Kopplingsschema.
Forsiktighet
gallande
korrekt
hantering
Sida
Sida
...5
Montering.38
,35
Electriska
anslutningar.39
,36
Sakring.41
.37
Underh&ll.41
.38
Tekniska
data.41
Contenuto
Precauzioni.
Posizione
dei
comandi.
Procedure
di
funzionamento.
Schema
di
collegamento.
Precauzioni
per
il
maneggiamento
corretto
Pag.
Pag.
...6
Installazione.45
.42
Collegamenti
elettrici.46
.43
Fusibile.48
.44
Manutenzione.
4
8
.45
Dati
tecnici.48
Indice
Precauciones.
Ubicacion
de
los
controles.
Procedi
mi
entos
de
operacion.
Diagrama
del
sistema.
Precauciones
sobre
la
manipulacibn
correcta
Pag.
Pag.
...6
Instalacion.
5
2
49
Conexiones
electricas.53
50
Fusible.55
51
Mantenimiento.55
.52
Especificaciones.55
Panasonic
welcomes
you
to
their
constantly
growing
family
of
electronic
products
owners.
We
endeavor
to
give
you
the
advantages
of
precise
electronic
and
mechanical
engineering,
manufactured
with
carefully
selected
components,
and
assembled
by
people
who
are
proud
of
the
reputation
their
work
has
built
for
our
company.
We
know
this
product
will
bring
you
many
hours
of
enjoyment,
and
after
you
discover
the
quality,
value
and
reliability
we
have
built
into
it,
you
too
will
be
proud
to
be
a
member
of
our
family.
V_______,
Precautions
Volume
Level
For
your
driving
safety,
keep
the
volume
level
low
enough
to
be
aware
of
road
and
traffic
conditions.
Car
Washing
To
avoid
electrical
shorts
which
may
cause
fire
or
other
damage,
do
not
expose
this
equipment
(includ¬
ing
the
speakers
and
tape)
to
water
or
excessive
moisture.
Car
Ventilation
If
your
car
is
parked
for
several
hours
in
direct
sun¬
light,
the
temperature
inside
the
car
may
become
very
high.
It
is
advisable
to
drive
the
car
and
give
the
interior
a
chance
to
cool
down
before
switching
the
unit
on.
Power
Supply
This
equipment
is
designed
to
be
used
in
a
car
hav¬
ing
12-Volt
negative
ground
battery
system.
Service
This
unit
is
made
of
precision
parts.
Do
not
attempt
to
disassemble
or
adjust
any
parts.
For
repair,
please
consult
your
nearest
authorized
Panasonic
Service
Center.
3
Lieber
Panasonic-Kunde
Wir
mochten
Ihnen
dafur
danken,
daB
Sie
sich
fur
dieses
Gerat
entschieden
haben.
Wir
heilBen
Sie
hiermit
herzlich
willkommen
in
der
standig
wachsenden
Familie
zufriedener
Besitzer
von
Panasonic-GerSten
in
der
ganzen
Welt.
Wir
sind
sicher,
daB
mit
dieser
Neuerwerbung
alle
ihre
Anspruche
befriedigt
werden.
Lesen
Sie
bitte
diese
Bedienungsanleitung
sorgfaltig
durch,
und
halten
Sie
sie
immer
griffbereit.
Denn
sie
enthalt
eine
Anzahl
wichtiger
Hinweise,
die
gewahrleisten,
daB
Sie
die
Moglichkeiten
ihres
Gerates
voll
ausnutzen
konnen.
VorsichtsmaBnahmen
Lautstarkepegel
Aus
Grunden
der
Fahrsicherheit
ist
der
Lautstarke¬
pegel
so
einzustellen,
daB
auch
andere
Verkehrsge-
rausche
(Hupen,
Warnsignale,
usw.)
vernommen
werden
konnen.
Autowasche
Dieses
Gerat
(einschlieBlich
Lautsprecher
und
Ton-
bander)
ist
vor
Wasser
und
ubermaBiger
Feuchtig-
keit
zu
schutzen,
um
elektrische
Kurzschlusse
zu
vermeiden,
da
dieses
zu
Beschadigungen
fuhren
konnte.
Beliiftung
Falls
Ihr
Wagen
fur
langere
Zeit
in
direktem
Sonnen-
licht
geparkt
war,
kann
sich
das
Innere
sehr
stark
erwarmen.ln
einem
solchen
Fall
sollte
das
Fahrzeug
mit
geoffneten
Fenstern
fiir
einige
Zeit
gefahren
wer¬
den,
damit
sich
das
Wageninnere
abkuhlen
kann.
Erst
danach
sollte
das
Gerat
einschaltet
werden.
Stromversorgung
Dieses
Gerat
darf
nur
in
Fahrzeuge
mit
12
V-Batterie
und
negativer
Batterieklemme
an
Masse
eingebaut
werden.
Kundendienst
Dieses
Gerat
ist
aus
Prazisionsteilen
zusammen-
gebaut.
Niemals
selbst
das
Gerat
zerlegen
bzw.
einzelne
Teile
einstellen.
Fur
Reparaturen
wenden
Sie
sich
bitte
an
den
Panasonic-Kundendienst.
Panasonic
vous
souhaite
la
bienvenue
parmi
la
familie
toujours
croissante
des
possesseurs
de
nos
ap-
pareils
6lectroniques.
Nous
avons
fait
de
notre
mieux
pour
vous
apporter
les
avantages
de
la
precision
mecanique
et
electronique
de
pointe,
etant
donne
que
I’appareil
a
ete
compose
avec
des
pieces
soigneusement
choisies
et
montees
par
des
gens
qui
sont
fiers
de
la
renommee
de
leur
Societe
que
leur
travail
consciencieux
lui
a
value.
Nous
sommes
surs
que
cet
appareil
vous
permettra
de
profiter
de
nom-
breuses
heures
d’bcoute,
et
aprfcs
avoir
dScouvert
la
qualite
intrinsSque
et
la
fiabilite
de
I’appareil,
vous
serez
vous
aussi
fier
d’appartenir
k
la
familie
Panasonic.
Precautions
Niveau
du
volume
Par
mesure
de
s£curite
routi£re,
maintenez
le
niveau
de
volume
assez
bas
pour
pouvoir
entendre
les
bruits
de
la
rue.
Nettoyage
de
la
voiture
Pour
6viter
les
court-circuits
6lectriques
qui
peuvent
provoquer
un
incendie
ou
autre
dommage,
n’ex-
posez
pas
I’appareil
(y
compris
les
hautparleurs,
les
cassettes)
a
I’eau
ou
k
une
humidity
excessive.
Ventilation
de
la
voiture
Si
votre
vdhicule
est
stationne
pendant
plusieurs
heures
au
soleil,
la
temperature
interieure
peut
etre
tres
6lev6e.
Pour
revenir
au
mode
de
temperature
normal,
il
est
recommand6
de
conduire
un
certain
temps
avant
de
mettre
I’appareil
sous
tension.
Alimentation
Cet
equipement
est
congu
pour
fonctionner
avec
du
12
V
cc,
masse
negative.
Entretien
Cet
appareil
est
congu
a
partir
d’£l£ments
de
pre¬
cision.
N’essayez
pas
de
d^monter
ces
elements.
Pour
I’entretien,
adressez-vous
k
votre
service
d’en-
tretien
Panasonic
le
plus
proche.
Het
doet
ons
veel
plezier
dat
u
hebt
gekozen
voor
een
Panasonic
product.
Door
continu
onderzoek
en
ontwikkeling
streeft
Panasonic
ernaar
haar
elektronische
producten
verder
te
verbeteren
voor
nog
meer
gebruiksgemak
en
kwaliteit.
Wij
zijn
ervan
overtuigd
dat
dit
product
aan
uw
verwachtingen
vol-
doet.
Zoals
vele
andere
gebruikers
van
Panasonic
apparatuur
over
de
gehele
wereld,
zult
u
ook
enthousiast
zijn
over
onze
producten.
Wij
wensen
u
veel
luisterplezier.
Voorzorgsmaatregelen
Volume-niveau
Houdt,
voor
de
verkeersveiligheid,
het
volume
laag
genoeg
om
bewust
van
weg-
en
verkeerskondities
te
kunnen
zijn.
Wassen
van
de
auto
Stel
deze
apparatuur
(inclusief
autoradio
luidsprek-
ers
en
de
tapes)
niet
bloot
aan
water
of
overmatig
vocht
om
kortsluiting,
wat
brand
kan
veroorzaken,
te
voorkomen.
Auto-ventilatie
De
temperatuur
in
de
auto
stijgt
als
de
auto
verschil-
lende
uren
Laat
geparkeerd
wordt.
Het
is
ter
aan-
beveling
om
het
interieur
van
de
auto
at
koelen
alvorens
de
audio-instelletie
in
te
schakelen.
Volym
Anpassa
ljudvolymen
sk
att
saker
bilkorning
ej
hin-
dras.
Biltvattning
Se
till
att
apparaten
och
hogtalarna
ej
utsatts
for
vat-
ten
eller
fukt.
Det
kan
fororsaka
kortslutning
och
brand.
Ventilation
inom
bilen
Ar
det
mycket
varmt
i
bilen,
kor
den
d&
en
stund
for
att
sanka
temperaturen
innan
apparaten
kopplas
p&.
Netspanning
Dit
apparaat
is
ontworpen
voor
gebruik
met
een
12
volts
gelijkstroom
accusysteem
(auto-accu)
met
negatieve
aarding.
Service
Dit
apparaat
is
gemaakt
van
precisie
onderdelen.
Voer
reparaties
of
bijstellingen
niet
zelf
uit.
Raad-
pleeg
voor
service
het
dichtstbijzijnde
Panasonic
servicecentrum.
Stromforsorjning
Apparaten
f&r
enbart
anslutas
till
ett
fordon
vars
elektriska
system
ar
12V
likspanning
och
negativ
jordning.
Service
Apparaten
ar
tillverkad
av
precisionsdelar.
Tag
aldrig
isar
eller
justera
n&gonting
sjalv.
For
reparation,
lamna
apparaten
till
en
Panasonic-Sterforsaljare.
Valkommen
till
den
standigt
vaxande
gruppen
av
agare
till
Panasonic
elektroniska
produkter.
Varje
pro-
dukt
tillverkas
av
noggrant
utvalda
komponenter
och
sammansatts
av
valutbildad
personal
under
strang
kvalitetskontroll.
Las
bruksanvisningen
noga
och
lar
apparaten
val
innan
den
anvands.
Observera
Panasonic
Vi
db
il
benvenuto
nella
famiglia
in
costante
aumento
dei
proprietari
dei
suoi
prodotti
elettroni-
ci.
Noi
cerchiamo
sempre
di
offrirvi
i
vantaggi
di
una
tecnica
elettronica
e
di
una
meccanica
perfetta
nei
nostri
prodotti
fabbricati
con
componenti
altamente
selezionati
e
lavorati
da
persone
che
godono
di
piena
fiducte
presso
la
nostra
compagnia.
Noi
siamo
sicuri
che
questo
prodotto
Vi
offrirb
molte
ore
piacevoli
e
che
dopo
averne
scoperto
la
quality,
il
valore
e
I’affidabilitb,
anche
Voi
sarete
orgogliosi
di
essere
un
membra
della
nostra
famiglia.
Precauzioni
Livello
del
volume
Per
la
vostra
sicurezza
quando
portate
I’automobile,
tenete
il
volume
su
un
livello
abbastanza
basso
per
poter
sentire
i
suoni
di
awertimento
del
traffico.
Lavaggio
dell’automobile
Per
evitare
cortocircuiti,
che
potrebbero
causare
in-
cendi
o
altri
danni,
non
esponete
quest’unita
(inclusi
gli
altoparlanti,
i
nastri)
all’acqua
o
ad
eccessive
quantity
di
umidita.
Ventilazione
deU’automobile
Nel
caso
in
cui
lasciate
I’automobile
parcheggiata
per
parecchie
ore
nella
luce
diretta
del
sole,
la
tem-
peratura
all’interno
dell’automobile
pub
diventare
molto
alta.
Per
far
ritornare
la
temperatura
interna
ad
un
livello
normale,
b
consigliabile
guidare
I’automo-
bile
un
po’
di
tempo
prima
di
accendere
I’unitb.
Precauciones
Nivel
de
volumen
Para
su
seguridad
en
la
conduccibn,
mantenga
el
nivel
de
volumen
suficientemente
bajo
para
estar
atento
a
la
carretera
y
las
condiciones
del
trbfico.
Lavado
del
automovil
Procure
no
exponer
este
equipo
{incluidos
los
altavoces
y
la
cinta)
al
agua
o
a
excesiva
humedad,
a
fin
de
evitar
cortocircuitos
que
podrfan
causar
un
incendio
u
otros
danos.
Ventllaclon
del
automovil
Si
su
coche
esta
estacionado
durante
varias
horas
a
plena
luz
del
sol,
la
temperatura
interior
del
mismo
puede
aumentar
considerablemente.
Por
ello,
es
re-
comendable
poner
el
vehiculo
en
marcha
y
dejar
que
se
enfrfe
el
interior
antes
de
utilizar
el
aparato.
Allmentazione
Quest’unita
b
stata
disegnata
per
essere
alimentata
con
12
V
di
corrente
continua,
massa
negativa.
Servizio
Quest’unitb
b
stata
costruita
con
parti
di
precisione.
Non
cercate
di
smontare
o
aggiustare
queste
parti.
Per
lavori
di
servizio,
consultate
il
piu
vicino
centra
assistenza
della
Panasonic.
Alimentacion
Este
equipo
ha
sido
diseriado
para
su
uso
en
autombviles
con
una
tensibn
de
12
V
mediante
sis-
tema
de
bateria
con
negativo
a
tierra.
Servicio
Este
aparato
ha
sido
fabricado
con
piezas
de
alta
precisibn.
No
intente
desmontarlo
ni
ajustar
ninguna
pieza.
Para
la
reparacibn,
consulte
al
Servicio
Tbcnico
de
Panasonic
mbs
proximo.
Panasonic
le
da
la
bienvenida
a
la
familia
constantemente
en
aumento
de
poseedores
de
productos
elec-
trbnicos.
Nos
esforzamos
en
proporcionarle
las
ventajas
de
la
ingenieria
mecbnica
y
electrbnica
de
pre¬
cisibn,
de
una
fabricacion
con
componentes
cuidadosamente
seleccionados,
y
de
un
montaje
realizado
por
personas
orguilosas
de
la
reputacion
que
su
trabajo
ha
cimentado
para
nuestra
empresa.
Estamos
se-
guros
de
que
este
producto
le
proporcionarb
muchas
horas
de
distraccibn
y,
una
vez
comprobada
la
cali-
dad,
el
valor
y
la
fiabilidad
incorporados,
usted
tambien
se
sentirb
orgulloso
de
pertenecer
a
nuestra
fami¬
lia.
Location
of
Controls
(Side
View)
a
r-
-
2®
QOOcOO
MIN
MAX
(MB
.HdB
0*
-140B
^
^
BOH.
BOOH,
MIN
MAX
,
/Yf^\
gLn
b«ss
b/Jss
gain
,
INPUT)-FRONT
GAIN
INPUT-REAR
r-
POWER—n
,-REAR-SPEAKER-FRONT-
GND
BATT
CONT
L+
L-
R-
R+
L+
L-
R-
R+
Side
View
(Output
side)
®
(|)
©
®
©
©
For
use
in
a
4-channel
system:
Rear
Channel
Rear
Channel
Rear
Channel
Rear
Channel
Front
Channel
Front
Channel
Front
Channel
Front
Channel
Left
Side
(+)
Left
Side
{-)
Right
Side
{-)
Right
Side
(+)
Left
Side
(+)
Left
Side
(-)
Right
Side
(-)
Right
Side
(+)
For
use
in
a
3-channel
system
(D
;
Rear
Channel
(Bridge)
(-
For
use
in
a
2-channel
system:
Rear
Channel
(Bridge)
(-)
:
Rear
Channel
(Bridge)
(-)
Rear
Channel
(Bridge)
(+)
:
Rear
Channel
(Bridge)
(+)
Front
Channel
Left
Side
(+)
©
:
Front
Channel
(Bridge)
B
Front
Channel
Left
Side
{-)
:
Front
Channel
(Bridge)
W
<©
:
Front
Channel
Right
Side
(-)
(ED
:
Front
Channel
Right
Side
(+)
Even
if
the
connection
is
bridged,
both
left
and
right
channel
of
the
input
connector
should
be
connected,
Otherwise
the
amplifier
will
not
work.
Power
Indicator
Lights
up
when
the
power
of
the
cassette/CD
player
connected
to
this
unit
is
switched
on.
Protect
Indicator
Bass
Level
Adjust
Volume
(For
Rear
Chan¬
nels)
Used
for
adjusting
the
bass
output
level
for
rear
channels.
Lights
up
when
the
protect
circuit
of
the
amplifi¬
er
is
activated.
0
Input
Connector
(For
Rear
Channels)
(RCA
Terminal)
For
connection
with
the
cassette/CD
player’s
output.
O
Level
Adjust
Volume
(For
Rear
Channels)
Used
for
adjusting
the
amplifier
output
level
for
rear
channel.
0
Filter
Frequency
Adjust
Volume
Used
to
change
the
cutoff
frequency
of
the
low-
pass
filter
within
the
range
of
40
to
400
Hz
(when
the
filter
selector
switch
is
on)
0
Filter
Selector
Switch
Used
to
activate
the
low-pass
filter
on
rear
channels.
0
Bass
Level
Adjust
Volume
(For
Front
Chan¬
nels)
Used
for
adjusting
the
bass
output
level
for
front
channels.
0
Level
Adjust
Volume
(For
Front
Channels)
Used
for
adjusting
the
amplifier
output
level
for
front
channel.
0
Input
Connector
(For
Front
Channels)
(RCA
Terminal)
For
connection
with
the
cassette/CD
player’s
output.
0
Fuse
(20AX2)
This
fuse
is
for
circuit
protection.
0
Power
Supply
Terminal
For
connection
with
the
power
supply.
0
Speaker
Output
Terminal
For
connection
with
the
speakers.
7
Operating
Procedures
For
your
driving
safety,
keep
the
voiume
level
low
enough
to
be
aware
of
road
and
traffic
conditions.
Precautions:
■
This
unit
is
designed
to
be
used
with
a
Panasonic
cassette/CD
player
model.
■
This
unit
is
automatically
switched
on
and
off
if
the
power
switch
of
the
cassette/CD
player
is
turned
on
and
off.
The
power
indicator
lights
up
when
the
cassette/CD
player
is
turned
on.
■
Due
to
its
large
output,
the
current
consumption
of
the
unit
is
also
large;
therefore,
the
unit
should
not
be
used
when
the
engine
is
turned
off.
Otherwise,
the
battery
may
deteriorate
so
that
starting
of
the
engine
may
become
impossible.
■
Level
Adjustment:
In
some
instances,
the
acoustical
output
from
each
speaker
may
not
be
balanced
properly
depending
upon
the
type
of
speakers
or
cassette/CD
player
unit
to
be
used.
If
this
occurs,
try
to
adjust
the
volume
level
by
turning
the
level
adjust
volume
0
and
0
to
the
left
or
right
until
the
out¬
put
from
each
amplifier
is
balanced
by
using
the
Level
Adjust
Volume
as
shown
in
the
illustration.
Level
Adjust
Volume
(Side
of
the
unit)
vJ
MIN
MAX
GAIN
■
Bass
Level
Adjustment:
The
bass
output
level
from
the
speakers
can
be
increased
by
using
the
Bass
Level
Adjust
Volume
O
and
©.
You
can
adjust
the
middle
frequen¬
cy
60
Hz
within
the
range
of
0
dB
to
14
dB.
For
some
speakers,
the
sound
may
be
distorted
because
of
the
excessive
data
input
for
them.
In
that
case,
turn
down
the
bass
level
until
the
distortion
stops.
Bass
Level
Adjust
Volume
(Side
of
the
unit)
(A\
QdB
+14dB
BASS
Note:
Before
connecting
the
speaker
code
or
RCA
code
to
this
unit,
the
power
to
the
unit
must
be
switched
off.
■
Low-pass
filter
Cutoff
Frequency
Switching
(Only
for
rear
channels)
The
cutoff
frequency
of
low-pass
filter
for
each
rear
channel
can
be
set
within
the
range
of
40
to
400Hz
using
the
filter
selector
switch
0
and
filter
frequency
adjust
volume
0
.
<Filter
Selector
Switch>
When
the
switch
0
is
set
to
ON,
the
filter
is
connected
to
the
amplifier
circuit
for
rear
channels.
When
it
is
set
to
OFF,
the
filter
is
disconnected
from
it.
(See
Fig.
1
at
right.)
<Filter
Adjust
Frequency>
The
low-pass
filter
cutoff
frequency
can
be
adjusted
within
the
range
of
40
to
400
Hz
by
using
the
filter
frequency
adjust
volume
0
.
(See
Fig.
2
at
right.)
Filter
Selector
Switch
(Side
of
the
unit)
mjo
OFF
ON
re
Filter
Adjust
Frequency
(Side
of
the
unit)
I
if
40Hz
^
*
400Hz
System
Diagram
Use
this
unit
with
Panasonic
car
audio
products
for
best
results.
Various
types
of
speakers
are
available
from
your
nearest
authorized
dealer.
Select
the
speakers
that
are
suitable
for
your
system’s
requirement.
Standard
Example
Other
Example
:
Broken
line
indicates
Tri
mode
connection.
Ci
(capacitor):
220
pF
C
2
(capacitor):
330
pF
Li
(choke
coil):
8
mH
when
each
speaker
imped¬
ance
is
4
Q.
C?'-
-'
Cassette
Player
or
CD
player
CY-M9054LN
•
For
use
as
a
4
CH
Amp.
,
.
■
=»#
L_i_
cV-
Front
Speaker
(Right)
;
Sub-woofer
;
(mono)
Front
Speaker
(Left)
Rear
Speaker
(Right)
J
Sub-woofer
;
(mono)
Rear
Speaker
(Left)
Cassette
Player
or
CD
player
L*
Y-My(Jb4LN
•
For
use
as
a
4
CH
Amp.
Rear
channels
are
con¬
nected
to
Sub-woofers.
Cassette
Player
or
CD
player
OY-MyUo4tN
Right
Speaker
Left
Speaker
Sub-woofer
(Right)
Sub-woofer
(Left)
Right
Speaker
Left
Speaker
•
For
use
as
a
3
CH
Amp.
(Bridged
connection)
Rear
Channel
is
connected
to
Sub-woofer.
For
additional
system
diagrams,
please
consult
your
nearest
authorized
dealer.
Sub-woofer
9
Cautions
on
Proper
Handling
1.
Since
this
unit
is
quite
heavy,
be
sure
to
grip
both
sides
securely
before
attempting
to
move
it.
2.
If
this
unit
is
operated
at
a
high
output
continuously,
the
upper
side
of
the
unit
will
get
very
hot.
Do
not
touch
it
nor
place
anything
on
top
of
the
unit.
When
the
temperature
becomes
abnormally
hot,
the
heat
protection
circuit
operates
and
the
operation
will
temporarily
stop.
In
this
case,
switch
off
the
unit
and
allow
the
unit
to
cool
down.
Decrease
the
volume
level
before
turning
the
unit
on
again.
3.
When
a
short
circuit
occurs,
such
as
in
the
speaker
output
terminal,
etc.
the
overload
protection
circuit
will
operate.
This
circuit
protects
the
power
amplifier
from
further
damage
when
a
short
circuit
occurs.
Op¬
eration
will
temporarily
stop.
In
this
case,
check
the
cause
of
the
short-circuit
and
if
the
problem
is
fixed,
normal
operation
will
resume.
Installation
•
This
equipment,
if
possible,
should
be
installed
by
a
professional
installer.
•
In
case
of
difficulty
please
consult
your
nearest
professional
installer.
•
The
speakers
to
be
used
with
the
amplifier
should
be
able
to
handle
more
than
100W.
Use
of
speakers
with
small
input
ratings
can
result
in
damage
to
the
speakers.
•
Since
the
4-Channel
Power
Amplifier
has
a
very
large
output,
the
unit
should
be
installed
in
the
trunk
of
your
car.
•
The
speaker
cords
and
the
power
amplifier
unit
should
be
kept
away
from
the
antenna
and
antenna
ex¬
tension
cord.
•
When
using
the
RCA
cords,
keep
them
away
from
the
speaker
cords.
Supplied
Hardwares
No.
Description
Q’ty.
©
Tapping
Screw
(5mm
0
x
20
mm)
4
©
Plain
Washer
(5mm
0
)
4
©
Terminal
cover
for
short-circuit
prevention
Large
1
Installing
the
unit
to
a
metallic
portion
of
the
car:
Electrical
Connection
N
Before
wiring:
•
This
unit
is
to
be
used
only
in
a
12-Volt,
DC
battery
system
(Car)
with
negative
ground.
•
Disconnect
the
cable
from
the
negative
(-)
battery
terminal
(see
note
below).
Note:
For
installation
in
cars
with
trip
or
navigational
computers,
all
electronic
memory
settings
previously
regis¬
tered
in
the
computer
will
be
lost
when
the
battery
terminal
is
disconnected.
For
this
type
of
car,
battery
should
not
be
disconnected.
Therefore,
extra
care
should
be
taken
to
prevent
short
circuiting.
Please
read
the
operating
and
installation
instructions
for
your
car
audio
carefully
before
connecting
to
this
unit.
For
4-Channel
System:
The
areas
marked
with
broken
line
indicates
Tri
Mode.
Ci
(capacitor):
220
pF
C
2
(capacitor):
330
pF
Li
(choke
coil):
8
mH
when
each
speaker
impedance
is
4
a
Power
Cord
(Option)
To
battery’s
(+)
terminal.
Ground
Cord
(Option)
Connect
to
a
well
grounded
metallic
part
of
your
car.
Side
View
(Output
Side)
(D
Terminal
cover
for
short-circuit
prevention
Amp.
Relay
Control
Cord
(Option)
(Blue/White
stripe)
To
radio
antenna
relay
control
c=~
--
-
cord.
(Left)
(White)
RCA
Extension
Cord
(Option)
Pre
Output
(Front)
11
LD
Z
O
—1
—
CO
X
For
3-Channel
Svstem:
®®©®®®©(
8
>
•
Connect
the
(+)
cord
of
the
Sub-woofer
to
©
and
(-)
cord
to
®.
•
Connect
the
(+)
cord
of
the
left
speaker
to
©
and
(-)
cord
to
©.
•
Connect
the
(+)
cord
of
the
left
speaker
to
©
and
(-)
cord
to
(8).
Power
Cord
(Option)
To
battery’s
(+)
terminal.
Ground
Cord
(Option)
Connect
to
a
well
grounded
metallic
part
of
your
car.
(Yellow)
(Black)
Amp.
Relay
Control
Cord
(Option)
(Blue/White
stripe)
To
radio
antenna
relay
control
r
--
cord.
Side
View
(Output
Side)
«
m\\
w
itiif
-
i
i
/
(DTerminal
cover
for
short-
[i
j
circuit
prevention
Speaker
Cord
(Supplied
with
Speaker)
Sub
Woofer
Left
Speaker
Right
Speaker
tooofebo
6
Side
View
(Input
Side)
(Left)
(White)
A
A
(Right)
(Left)
A
t
w
f
(
Red)
(White)
g
b
(Right)
(Red)
(Left)
(White)
Pre
Output
(Rear)
RCA
Extension
Cord
(Option)
(Left)
(White)
CD
Player
Pre
Output
(Front)
(Right)
(Red)
Both
of
left
and
right
channel
of
the
input
connector
should
be
connected
for
front
and
rear
side.
The
amplifier
will
not
work
if
both
coennctions
are
not
made
properly.
Terminal
cover
for
short-circuit
prevention
This
terminal
cover
is
for
preventing
short-circuit
be¬
tween
adjacent
terminals.
Before
connecting
each
lead,
pass
it
through
the
terminal
cover.
After
connect¬
ing
the
leads
to
the
terminals,
cover
the
speaker
out¬
put
terminals
and
power
terminals
with
this
cover.
Make
sure
that
the
projections
to
prevent
slipping
out
are
facing
down.
Terminal
cover
for
short-circuit
prevention
Fuse
Be
sure
to
use
a
fuse
of
the
specified
rating
(20A
x
2)
when
replacing
a
blown
fuse.
Fuses
with
higher
capacity
ratings,
use
of
any
substitute,
or
connection
without
a
fuse
may
result
in
a
fire
hazard
or
damage
to
the
unit.
If
the
replacement
fuse
fails,
consult
your
nearest
authorized
Panasonic
Service
Center.
Maintenance
To
clean
the
exterior
of
this
unit,
use
a
soft
cloth
to
wipe
the
surface.
Do
not
use
benzine,
thinner,
or
any
other
type
of
solvents.
Specifications
Power
Supply
Current
Consumption
Speaker
Impedance
Power
Output
(“EIA”
Power)
Maximum
Power
Output
Total
Harmonic
Distortion
Low
Pass
Filter
BASS
Boost
Signal
to
Noise
Ratio
Frequency
Response
Input
Sensitivity
(Pre)
Input
Impedance
Dimensions(W
x
H
x
D)
Weight
:
DC
12
V
(11
-16
V)
Test
Voltage
14.4V
Negative
Ground
:
24
A
(at
45
W
x
4)
:
4
Q
:
2-CH;
90
W
x
2
(20
Hz
-
20,000
Hz,
0.08
%)
3-
CH;
45
W
x
2
+
90
W
(20
Hz
-
20,000
Hz,
0.08
%)
4-
CH;
45
W
x
4
(20
Hz
-
20,000
Hz,
0.08
%)
:
2-CH;
200
W
x
2
3-
CH;
100
W
x
2
+
200
W
4-
CH;
100
W
x
4
:
0.08%
(1,000
Hz,
at
45
W)
40
Hz
-
400
Hz
0
dB
-14
dB
(Middle
Frequency
:
60
Hz)
:
105
dB
(IHF,
A)
:
10
Hz-40
kHz
:
0.15-4
V
:
More
than
10
kQ
234
x
55.5
x
352
mm
3.7
kg
Note:
Specifications
and
the
design
are
subject
to
possible
modification
without
notice
due
to
improvements.
13
iO(/)Hcmo
Lage
der
Kontrollfunktionen
(Vorderansicht)
0
_£
Vorderansicht
(Eingangsseite)
Vorderansicht
(Ausgangsseite)
Fur
4-Kanal-system:
®
:
Hinterer
Kanal,
linke
Seite
(+)
®
:
Hinterer
Kanal,
linke
Seite
(-)
©
:
Hinterer
Kanal,
rechte
Seite
(-)
®
:
Hinterer
Kanal,
rechte
Seite
{+)
©
:
Vorderer
Kanal,
linke
Seite
{+)
©
:
Vorderer
Kanal,
linke
Seite
(-)
©
:
Vorderer
Kanal,
rechte
Seite
(-)
®
:
Vorderer
Kanal,
rechte
Seite
(+)
Fur
2-Kanal-system:
©:
Hinterer
Kanal
(Brucke)
®
:
Hinterer
Kanal
(Brucke)
©
:
Vorderer
Kanal
(Brucke)
®
:
Vorderer
Kanal
(Brucke)
(-)
(+)
(-)
(+)
Fur
3-Kanal-systenn:
®
:
Hinterer
Kanal
(Brucke)
(-)
©
:
Hinterer
Kanal
(Brucke)
(+)
©
:
Vorderer
Kanal,
linke
Seite
(+)
©
:
Vorderer
KanaJ,
linke
Seite
(-)
©
:
Vorderer
Kanal,
rechte
Seite
(-)
®
:
Vorderer
Kanal,
rechte
Seite
(+)
Auch
wenn
die
Anschlusse
iiberbruckt
werden,
sollten
sowohl
der
linke
als
auch
der
rechte
Kanal
des
Eingangssteckers
angeschlossen
wer¬
den.
Anderenfalls
arbeitet
der
Leistungsverstarker
nicht.
O
Betriebsanzeige
Leuchtet
auf,
wenn
das
Autoradio,
das
an
dieses
Gerat
angeschlossen
ist,
eingeschaltet
wird.
0
Schutzanzeige
Leuchtet
auf,
wenn
die
Schutzschaltung
des
Verstarkers
aktiviert
ist.
0
Cinch-Eingang
(fur
hintere
Kanale)
Fur
den
AnchluB
an
den
Ausgang
des
Casset-
ten/CD-spielers.
O
Pegelregler
(fur
hintere
Kanale)
Wird
benutzt,
um
den
Ausgangspegel
des
Verstarkers
fur
den
hinteren
Kanal
einzustellen.
0
Filterfrequenz-Einstellregler
Wird
benutzt,
um
die
Grenzfrequenz
des
Tief-
paBfilters
innerhalb
eines
Bereichs
von
40
bis
400
Hz
einzustellen
(wenn
der
Filterwahlschal-
ter
eingeschaltet
ist).
0
Filterwahlschalter
Wird
benutzt,
um
das
TiefpaBfilter
fur
die
hin¬
teren
Kanale
zu
aktivieren.
0
BaBregler
(fur
hintere
Kanale)
Wird
benutzt,
um
den
BaBpegel
fur
die
hinteren
Kanale
einzustellen.
0
BaBregler
(fur
vordere
Kanale)
Wird
benutzt,
um
den
BaBpegel
fur
die
vorderen
Kanale
einzustellen.
0
Pegelregler
(fur
vordere
Kanale)
Wird
benutzt,
um
den
Ausgangspegel
des
Verstarkers
fur
den
vorderen
Kanal
einzustellen.
0
Cinch-Eingang
(fur
vordere
Kanale)
Fur
den
AnchluB
an
den
Ausgang
des
Casset-
ten/CD-spielers.
0
Slcherung
(20AX2)
Diese
Sicherung
schutzt
den
Stromkreis.
0
Stromversorgungsklemme
Zum
AnschluB
an
die
Stromversorgung
0
Lautsprecherausgangsklemme
Zum
AnschluB
an
die
Lautsprecher.

Other manuals for CY-M9054EN

2

Other Panasonic Amplifier manuals

Panasonic RAMSA WP-1200 User manual

Panasonic

Panasonic RAMSA WP-1200 User manual

Panasonic FX-550L Series User manual

Panasonic

Panasonic FX-550L Series User manual

Panasonic SU-MED640P User manual

Panasonic

Panasonic SU-MED640P User manual

Panasonic Ramsa WZ-AD96M User manual

Panasonic

Panasonic Ramsa WZ-AD96M User manual

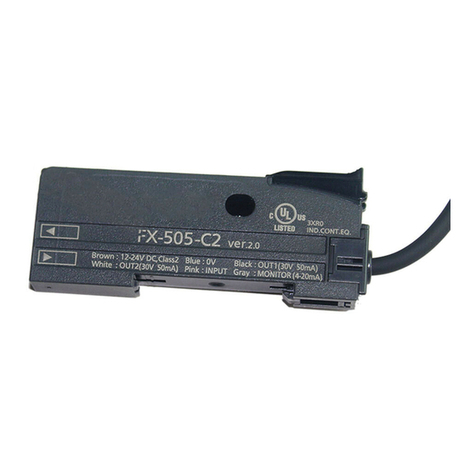
Panasonic FX-505 C2 Series User manual

Panasonic

Panasonic FX-505 C2 Series User manual

Panasonic CY-M7052 Operating User manual

Panasonic

Panasonic CY-M7052 Operating User manual

Panasonic MINAS-BL GP series Owner's manual

Panasonic

Panasonic MINAS-BL GP series Owner's manual

Panasonic WP9440 - RAMSA POWER AMPS User manual

Panasonic

Panasonic WP9440 - RAMSA POWER AMPS User manual

Panasonic WJ300C - SWITCHER/CONTROLLER User manual

Panasonic

Panasonic WJ300C - SWITCHER/CONTROLLER User manual

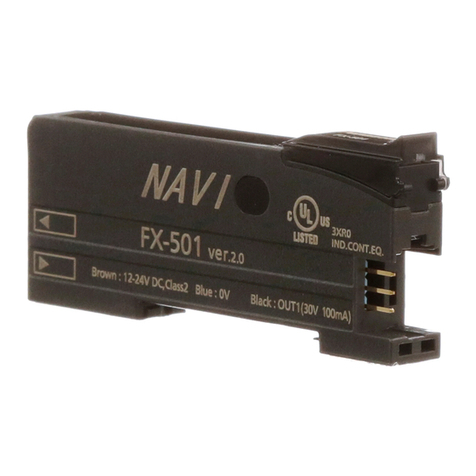
Panasonic FX-501 User manual

Panasonic

Panasonic FX-501 User manual

Panasonic FX-501 Series User manual

Panasonic

Panasonic FX-501 Series User manual

Panasonic System 850 User manual

Panasonic

Panasonic System 850 User manual

Panasonic FX-301-HS User manual

Panasonic

Panasonic FX-301-HS User manual

Panasonic RAMSA WP-1200 User manual

Panasonic

Panasonic RAMSA WP-1200 User manual

Panasonic CY-M9054EN User manual

Panasonic

Panasonic CY-M9054EN User manual

Panasonic FX-551 Series User manual

Panasonic

Panasonic FX-551 Series User manual
Panasonic MJE-FX501 User manual

Panasonic

Panasonic MJE-FX501 User manual

Panasonic FZ-11 User manual

Panasonic

Panasonic FZ-11 User manual

Panasonic PAMIS WA-BA240N User manual

Panasonic

Panasonic PAMIS WA-BA240N User manual
Panasonic CY-PA2003W User manual

Panasonic

Panasonic CY-PA2003W User manual

Panasonic RM-1100 User manual

Panasonic

Panasonic RM-1100 User manual

Panasonic SU-MED640E User manual

Panasonic

Panasonic SU-MED640E User manual

Panasonic FX-411 User manual

Panasonic

Panasonic FX-411 User manual

Panasonic SU-CH7 User manual

Panasonic

Panasonic SU-CH7 User manual

Popular Amplifier manuals by other brands

Kenwood KAC-943 instruction manual

Kenwood

Kenwood KAC-943 instruction manual

Crown PL-2 instruction manual

Crown

Crown PL-2 instruction manual

Plantronics M12 - QUICK START GUIDES Quick start user guide

Plantronics

Plantronics M12 - QUICK START GUIDES Quick start user guide

Vitus Audio Signature Series owner's manual

Vitus Audio

Vitus Audio Signature Series owner's manual

Orion XTR5004 owner's manual

Orion

Orion XTR5004 owner's manual

Electro-Voice TG5 Specifications

Electro-Voice

Electro-Voice TG5 Specifications

moon W5.3 SE owner's manual

moon

moon W5.3 SE owner's manual

Belcat AT-3000 user manual

Belcat

Belcat AT-3000 user manual

Yamaha M-35 owner's manual

Yamaha

Yamaha M-35 owner's manual

Sony XM-DS1300P5 Operating & Mounting operating instructions

Sony

Sony XM-DS1300P5 Operating & Mounting operating instructions

Ashdown WOODSMAN Classic user manual

Ashdown

Ashdown WOODSMAN Classic user manual

Harman Kardon THE TRIO A-224 instruction manual

Harman Kardon

Harman Kardon THE TRIO A-224 instruction manual

SubDude Audio PINWOOFER instructions

SubDude Audio

SubDude Audio PINWOOFER instructions

QSC CX Series Service manual

QSC

QSC CX Series Service manual

McIntosh A116 instruction manual

McIntosh

McIntosh A116 instruction manual

Yamaha DSP-AX2 owner's manual

Yamaha

Yamaha DSP-AX2 owner's manual

Biamp AMP-450BP Installation & operation guide

Biamp

Biamp AMP-450BP Installation & operation guide

James Loudspeaker M102 owner's manual

James Loudspeaker

James Loudspeaker M102 owner's manual

manuals.online logo
manuals.online logoBrands
  • About & Mission
  • Contact us
  • Privacy Policy
  • Terms and Conditions

Copyright 2025 Manuals.Online. All Rights Reserved.