manuals.online logo
Brands
  1. Home
  2. •
  3. Brands
  4. •
  5. Panasonic
  6. •
  7. Printer
  8. •
  9. Panasonic KX-P2180 User manual

Panasonic KX-P2180 User manual

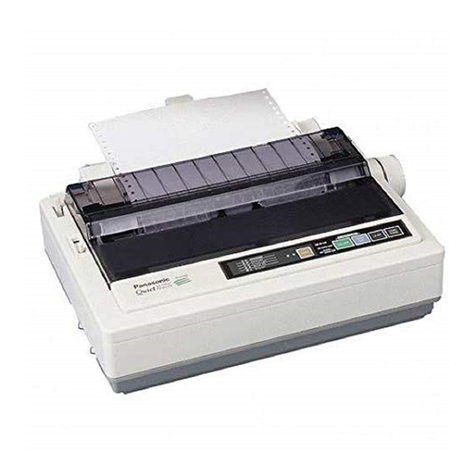
OSE PANASONIC KX-P2180
Print method 9-pin Impact Dot Matrix
Print speed 240 cps draft-micron, 192 cps draft-elite, 160 cps draft-
pica, 32 cps NLQ-micron, 38 cps NLQ-elite, 32 cps
NLQ-pica
Resolution 240 dpi maximum
Fonts Draft (Pica, Elite, Micron), NLQ (Courier, Prestige, Bold
PS, Script, Sans Serif, Roman)
Paper Handling Push/Pull Tractor feed, Friction feed
Interfaces CENTRONICS parallel
Emulations Epson FX-850 plus color extensions, IBM Proprinter lIl
Reliability Printhead: 200 million characters in draft
Options RS-232C Serial Interface Board, RS-232C Current Loop
Serial Interface Board, Auto Cut Sheet Feeder, 32K
Buffer Chip, Color Kit
Control Panel
FONT
PITCH
FORM LENGTH
FONT
PROGRAN
PROGRAN
11"
MARGIN
DRAFT
10
12"
MARGIN
COURIER
12
14"
MACRO
PRESTIGE
15
8.5"
FACTORY
BOLD PS
PS
11 2/3"
OPTION
C1 C2 C3 C4 C5
R1
R2
R3
R4
SUPER
QUIET
TEAR
OFF
LOAD
PACK
TOF OTHERS SET
ON LINE FF LF FUNCTION
FONT PITCH FORM LENGTH EXIT
MICRO LF
MARGIN ON LINE
FUNCTION
SUPER QUIET
POWER
PAPER OUT
ON LINE/FUNCTION light: Indicates printer is online and able to receive
information. Blinks when printer is in the function mode.
SUPER QUIET light: Indicates printer is in a reduced noise mode.
POWER/PAPER OUT light: Indicates power is being supplied to the printer.
A blinking light Indicates absence of paper to the printer.
Column Indicator Lights (C1-C5): Indicate the current column setting on
the control table.
Row Indicator Lights (R1-R4): Indicate the current row setting on the control
table.
SUPER QUIET/TOF key: Turns SUPER QUIET mode off and on. When on,
the SUPER QUIET light will be lit. In the function mode, sets the top-of-fomm.
TEAR OFF/OTHERS key: Advances or reverses paper for tearing off when
printer is not printing. In the function mode, advances the column setting for
OTHERS on the Control Table.
LOAD PARK/SET key: Press to load or park the paper when printer is not
printing. In the function mode, sets or releases functions on the control table.
ON LINE/FONT key: Toggles the printer between online and offline. In the
function mode, advances the column setting for FONTS on the control table.
FF/PITCH key: Advances paper to the top of the next page when printer is not
printing. Press FF key in conjunction with ON LINE key to advance paper one
microline. In the function mode, advances the column setting for PITCH on the
control table.
LF/FORM LENGTH key: Advances paper one line when printer is not printing.
Hold the key down to advance multiple line feeds. Press LF key in conjunction with
ON LINE key to reverse paper one microline. In the function mode, advances the
column setting for FORM LENGTH on the Control Table.
FUNCTION/EXIT key: Press to enter function mode and set the Control Table.
When active, the ON LINE light will be blinking.
Self-test
Press the LF key while turning the printer power on. All ASCII characters will print
in draft and all 6 NLQ fonts will print in 10 cpi. Then for 20 minutes, they will print
in draft. At this time, press the SUPER QUIET key to change the font. Turn power
off to stop the test.
Printer Configuration
The operator panel and Control Table allow the user to make changes in font, pitch,
form length, lpi, or margins. These keys have two separate functions: access to
printer features, which are displayed in the Control Table; and, Initial Setup,
accessing those functions which are normally set with DIP switches.
To set the Control Table, press the FUNCTION key. The ONLINE/FUNCTION light
will blink. Press and release the ONLINE/FONT key until the desired selection is
displayed. Press the FF/PITCH and LF/FORM LENGTH keys in the same manner.
Press LOAD PARK/SET key to store setting temporarily. Press the FUNCTION
key to exit.
To store changes permanently, use the MACRO keys on the Control Table.
1. Confirm that printer is online and in the function mode.
2. Select desired print settings on the rows and columns of the Control Table.
3. Press and release the TEAR OFF/OTHERS key until C3 light is blinking.
4. Press LOAD PARK/SET key to store into permanent memory. The printer will
emit 1 beep and the C3 light will stop blinking.
5. Press FUNCTION key to exit.
Initial setup mode printer conditions can be set turning the power key ON while
pressing the FUNCTION key. The ON LINE/FUNCTION light will blink and the func-
tions of the front panel of the Control Table will be replaced with Initial Setup Func-
tions Table below Press and release SUPER QUIET key until the desired ROW
indicator combination is lit. Press the TEAR OFF (C1), LOAD/PARK (C2), ON
LINE (C3), FF (C4), and LF (C5) keys to change settings on the column indicators
to match the desired condition shown in the following table.
August 1995 Copyright IBM Corporation 1995.
All rights reserved. PA-15 1
PANASONIC KX-P2180 OSE
Setup Functions
R1 R2 R3 R4 C1 C2 C3 C4 C5
ON ON ON ON ON Print Initial Setup Con-
dition Initial Factory defaults
ON OFF OFF OFF Epson + IBM
OFF ON OFF OFF Italic+ Graphic 1 Graphic 2
ON ON OFF OFF USA + Multilingual
OFF OFF ON OFF USA + France Germany England Denmark 1
ON OFF ON OFF Sweden Italy Spain 1 Japan Norway
OFF ON ON OFF Denmark 2 Spain 2 Latin America Legal
ON ON ON OFF Unslashed 0+ Slashed 0 Dotted 0
OFF OFF OFF ON DLL Buffer CFS PO Detect Buzzer Auto load
ON OFF OFF ON Auto LF Auto CR Skip Perf 20 cpi Auto tear off
OFF ON OFF ON Interface Data Length
ON ON OFF ON 150 300 600 1200 2400
OFF OFF ON ON 4800 9600 +
ON OFF ON ON No Parity Ignore Parity Odd Parity Even Parity +
OFF ON ON ON Protocol SDT RDT Signal Parity
To Reset all initial setup mode settings to Factory Default, Place printer in function
mode while turning the power ON. Ensure that all row indicator lights are ON.
Press the LF key. Press FUNCTION key to exit.
Common Problems and Fixes
Printer Not Printing Check power cord. Confirm that ON LINE key is on and cover
is closed. Check Interface cable connection. Check paper supply. Re-insert ribbon
cartridge.
Paper Motion Problems Set paper supply lower than the printer. Ensure that the
paper feed selector 16 in the proper tractor or single sheet position.
Communication Verify correct position of interface cable. Ensure that the Control
Table settings are in the desired positions.
Critical Adjustments
Printhead Gap
The 6 position lever moves the printhead closer or farther from the platen. For
single sheets, set the head gap lever in the upper position (-). For thick paper or
multiple envelopes, move to lower position (+).
Hex Dump
To activate, press LF and FF keys while turning the power ON. All data sent to the
printer will print in hex code as its equivalent ASCII code. To reset, cycle printer
power.
Cover Removal
To remove smoked plastic cover, lift up to a vertical position and remove. Move top
cover away towards the rear of the printer. Remove platen knob and both screws
from the upper cabinet to release cabinet. Unplug flat cable and ground wire from
front panel. Remove the front panel.
Printhead Replacement
Unplug CN2, CN3, CN4, CN5 connectors. Move carriage to the right side and
remove cable cover. Unplug the flat printhead cable from the connector. If the
optional color kit is present, remove color kit flat cable. Using a flathead screw-
driver, remove the 4 chassis screws. Lift off the printhead device. Reverse to install
new printhead.
Paper Loading
Single Sheets
1. Turn on power switch (located on right side of printer near the front).
2. Adjust the printhead gap lever to the correct thickness of paper.
3. Ensure that the paper feed selector is in the single sheet position.
4. Fold back end of smoked plastic cover over the front and set the top cover up
in a vertical position.
5. Set paper guide to the approximate width and insert paper behind platen.
6. Press LOAD PARK key to load paper to the first print line.
7. Press ON LINE key to load paper to first print line.
8. Set the paper feed selector to the tractor position to allow alignment as
required. Set selector back to single sheet position before printing.
9. Press ON LINE key to begin printing.
Fanfold Paper
1. Turn on power switch (located on right side of printer near the rear).
2. Adjust the printhead gap lever to the correct thickness of paper.
3. Place the paper feed selector in the tractor feed position.
4. Fold back end of smoked plastic cover over the front and remove the top
cover.
5. Pull the tractor clamping levers forward to unlock the tractors. Slide out the
tractors to the sides and raise the tractor covers.
6. Align paper support in the center between the tractors.
7. Align the tractor pins with the sprocket holes. Ensure the paper is straight
and then close covers.
8. Press LOAD PARK key to automatically load paper.
9. Replace top cover and smoked plastic cover.
10. Press ON LINE key to begin printing.
Field Replaceable Units
There are no field replaceable units for this printer.
Note:
Be sure to print a menu/configuration list before replacing a PCB or logic
containing configuration settings.
IBM P/N: 90G7031
IBM machine type: 1515-P76
Tech Support 800-877-7764
2PA-15 IBM/TSS Internal Use Only

Other Panasonic Printer manuals

Panasonic Jetwriter KX-CL500 User manual

Panasonic

Panasonic Jetwriter KX-CL500 User manual

Panasonic KX-MB2061CXB User manual

Panasonic

Panasonic KX-MB2061CXB User manual

Panasonic PV-PD2100 User manual

Panasonic

Panasonic PV-PD2100 User manual

Panasonic KX-P1524 User manual

Panasonic

Panasonic KX-P1524 User manual

Panasonic DP-MC210 User manual

Panasonic

Panasonic DP-MC210 User manual

Panasonic KX-P7100 User instructions

Panasonic

Panasonic KX-P7100 User instructions

Panasonic KX-P3123 - KX-P 3123 B/W Dot-matrix Printer User manual

Panasonic

Panasonic KX-P3123 - KX-P 3123 B/W Dot-matrix Printer User manual

Panasonic KX-P3626 User manual

Panasonic

Panasonic KX-P3626 User manual

Panasonic KX-P1124 User manual

Panasonic

Panasonic KX-P1124 User manual

Panasonic AGEP50 - COLOR VIDEO PRINTER User manual

Panasonic

Panasonic AGEP50 - COLOR VIDEO PRINTER User manual

Panasonic KX-PX20M - Photo Printer - 20 Sheets User manual

Panasonic

Panasonic KX-PX20M - Photo Printer - 20 Sheets User manual

Panasonic KX-P3196 - KX-P 3196 B/W Dot-matrix Printer User manual

Panasonic

Panasonic KX-P3196 - KX-P 3196 B/W Dot-matrix Printer User manual

Panasonic NV-MPD1EN User manual

Panasonic

Panasonic NV-MPD1EN User manual

Panasonic WORKIO DP-CL21 Installation and maintenance instructions

Panasonic

Panasonic WORKIO DP-CL21 Installation and maintenance instructions

Panasonic KX-P4401 User manual

Panasonic

Panasonic KX-P4401 User manual

Panasonic KX-P3200 - KX-P 3200 B/W Dot-matrix Printer User manual

Panasonic

Panasonic KX-P3200 - KX-P 3200 B/W Dot-matrix Printer User manual

Panasonic NV-APD1E User manual

Panasonic

Panasonic NV-APD1E User manual

Panasonic Workio DP-CL18 User manual

Panasonic

Panasonic Workio DP-CL18 User manual

Panasonic KX-P3626 User manual

Panasonic

Panasonic KX-P3626 User manual

Panasonic DP-CL21 Series User manual

Panasonic

Panasonic DP-CL21 Series User manual

Panasonic KX-P1180 User manual

Panasonic

Panasonic KX-P1180 User manual

Panasonic KX-P2123 User manual

Panasonic

Panasonic KX-P2123 User manual

Panasonic PV-PD2000 User manual

Panasonic

Panasonic PV-PD2000 User manual

Panasonic Workio DP-CL18 User manual

Panasonic

Panasonic Workio DP-CL18 User manual

Popular Printer manuals by other brands

Epson R320 - Stylus Photo Color Inkjet Printer Product information

Epson

Epson R320 - Stylus Photo Color Inkjet Printer Product information

Canon advanced anywhere print user guide

Canon

Canon advanced anywhere print user guide

FutureLogic GEN2 Guide

FutureLogic

FutureLogic GEN2 Guide

Epson U925 - TM B/W Dot-matrix Printer Specifications

Epson

Epson U925 - TM B/W Dot-matrix Printer Specifications

Seiko I Infotech IP-5620 user guide

Seiko I Infotech

Seiko I Infotech IP-5620 user guide

Epson Stylus Photo PX700W Basic operation guide

Epson

Epson Stylus Photo PX700W Basic operation guide

Xerox 8860MFP - Phaser Color Solid Ink Evaluator guide

Xerox

Xerox 8860MFP - Phaser Color Solid Ink Evaluator guide

Ricoh SP204SF user guide

Ricoh

Ricoh SP204SF user guide

Epson FX-2190IIN quick start guide

Epson

Epson FX-2190IIN quick start guide

Macherey-Nagel NANOCOLOR UV/VIS II user manual

Macherey-Nagel

Macherey-Nagel NANOCOLOR UV/VIS II user manual

Kodak Professional  ML-500 user guide

Kodak

Kodak Professional ML-500 user guide

Star Micronics TSP200 Series Programmer's manual

Star Micronics

Star Micronics TSP200 Series Programmer's manual

Brother MFC-7320 Quick setup guide

Brother

Brother MFC-7320 Quick setup guide

Canon PIXMA MG5350 Getting started

Canon

Canon PIXMA MG5350 Getting started

Samsung CLP-36x Series user guide

Samsung

Samsung CLP-36x Series user guide

Monarch Paxar 9450 RASCAL Operator's handbook

Monarch

Monarch Paxar 9450 RASCAL Operator's handbook

Ricoh Aficio BP20N Administrator's guide

Ricoh

Ricoh Aficio BP20N Administrator's guide

Magtek ExpressCard 500 user guide

Magtek

Magtek ExpressCard 500 user guide

manuals.online logo
manuals.online logoBrands
  • About & Mission
  • Contact us
  • Privacy Policy
  • Terms and Conditions

Copyright 2025 Manuals.Online. All Rights Reserved.