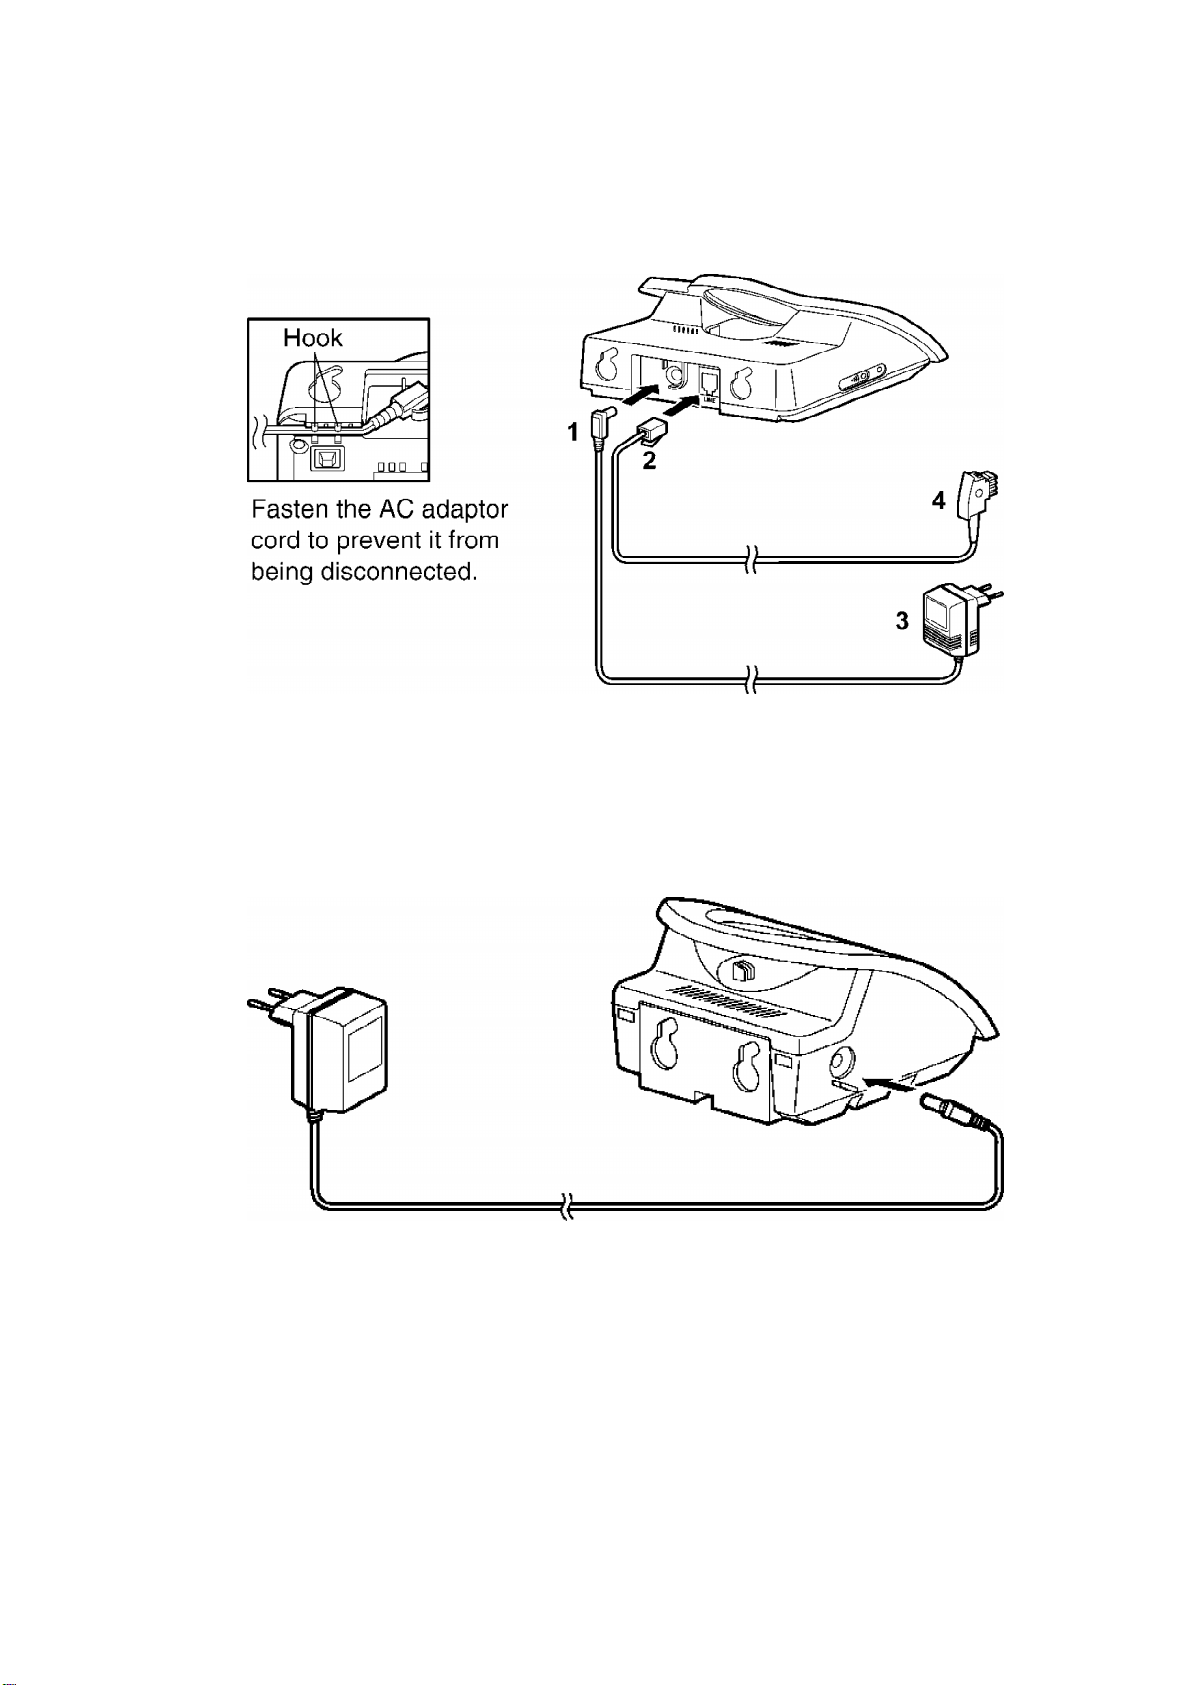
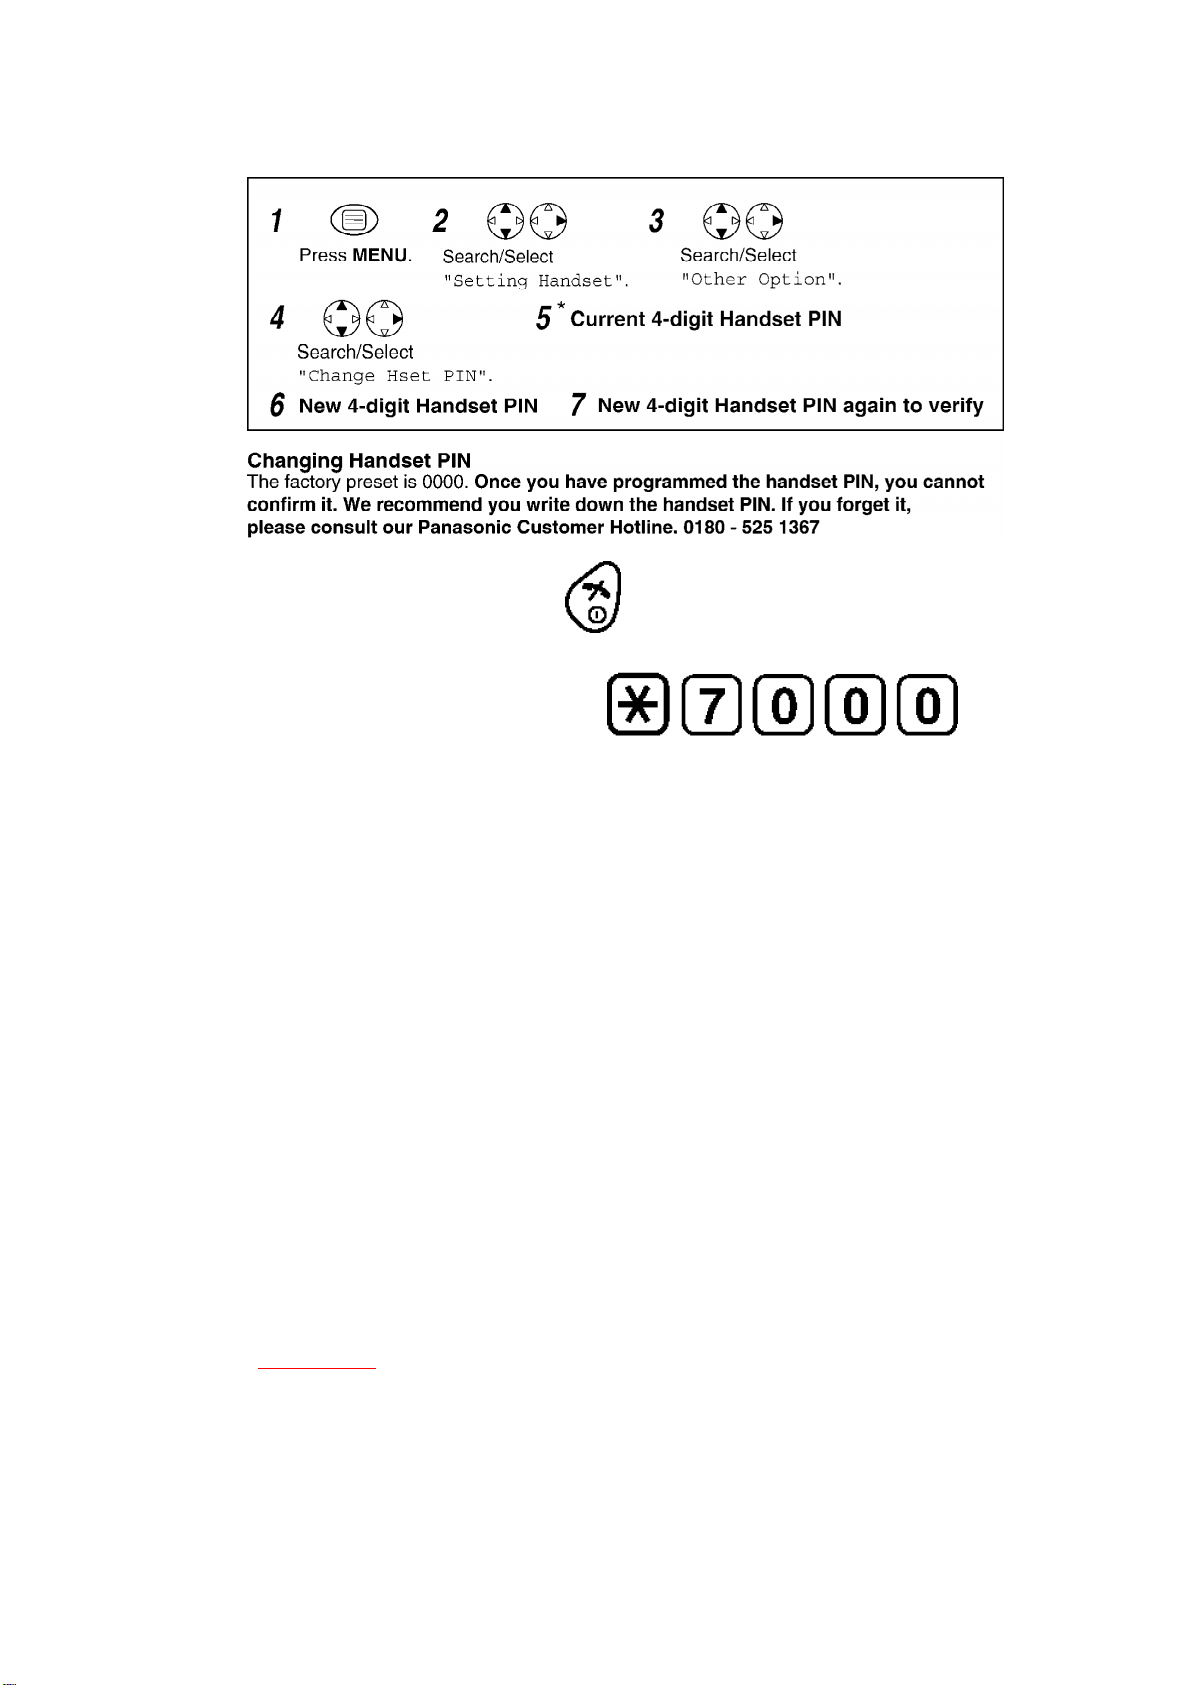
Panasonic KX-TCD455GM User manual
Other Panasonic Telephone manuals

Panasonic
Panasonic KX-T7700 Series User manual

Panasonic
Panasonic VA-309UK User manual

Panasonic
Panasonic KX-TGP600 Operating instructions

Panasonic
Panasonic KX TS208W User manual

Panasonic
Panasonic KX-T7350 User manual

Panasonic
Panasonic AUTO-LOGIC KX-F120 User manual

Panasonic
Panasonic KX-TGF870C User manual

Panasonic
Panasonic KX-T7565NE User manual

Panasonic
Panasonic KX-TPA65 User manual

Panasonic
Panasonic KX-T7335 User manual

Panasonic
Panasonic KX-T7420 User manual

Panasonic
Panasonic KX-TS820MXB User manual

Panasonic
Panasonic TDA 30 User manual

Panasonic
Panasonic KX-TG2236S User manual

Panasonic
Panasonic KX-FG2452CX User manual

Panasonic
Panasonic KX-TD816G User manual

Panasonic
Panasonic KX-HDV430 User manual

Panasonic
Panasonic KX-T7030 User manual

Panasonic
Panasonic KX-T7450 User manual

Panasonic
Panasonic KX-TGP500 User manual