* * ADVISEMENT * *
Read instructions completely prior to
starting installation. All InDash Mounts
aredesignedsothatafterinstallation,phone
is facing normal driver position for left-
hand drive vehicles. This mount is not
designed to be used in foreign countries
withright-handdrivevehicles.Useextreme
care when working around the plastic
componentsonthedash. Excessforce,can
causebreakageof theplasticcomponents.
CELL PHONE & MEDIA MOUNT
INSTALLATIONINSTRUCTIONS
I-751171106
Page 1 of 2
There may be recent updates to this Instruction Sheet, please visit our website or contact PanaVise Products, Inc. for the latest revision as well as for the
most complete up-to-date PanaVise InDash Applications List: 7540 Colbert Dr., Reno, NV, Phone: 800.759.7535, 775.850.2900, Fax: 800.395.8002,
www.panavise.com. © 2002 PanaVise Products, Inc.
12-20-11
MOUNTINGLOCATION:
LeftorRightsideofRadioJLR
TOOLSREQUIRED:
SmallFlatScrewdriver,Taped
Phillipsscrewdriver
5/16"socketdriver
HARDWAREINCLUDED:
(2 ) O - 8-32 Acorn Nut
(1)S7-1854 & (1)75002 & (1)75001
PART#:751171106
MFG:HONDA/SUZUKI
MODELS&YEARS:
HONDA-Ridgeline06-12(W/ONav)
(3-Pieces Mount for L or R Mounting)
SUZUKI-Forenza05-08(Pg.2)
STEP#1:Withtapedflatscrewdrivertoprotect
dash.Insertitintosmallslotbetweenbezelanddash,
atthebottomoflargebezelthatsurroundstheradio
andinstrumentpaneltotherightofthesteering
column.Prytorelease(1)clip.Withyourhandspull
onhtedashbezeltoreleaseMoreclips,(1)above
thelastoneand(12)moreclipsthatsurroundthe
radioandthetopofthedashbezel.
STEP#2:WiththePhillipsscrewdriverremovethe
(1)screwtothecenterRightorLeftsideofthe
radiobuttons.Installthebottompartoverthescrew
holeandguidepin.Replacethescrew.
STEP#3:Replacethelargebezel,beingsuretoget
allclipscompletlybackinplace.InstalldesiredTop
part (There are (2) top pieces one for right side of
radio, and one for left side of radio) by inserting
thestudsintotheholesonbottompartandinstalling
the(2)capnutsontothestudswiththe
5/16"socketdriver.
INSTALLATIONISNOWCOMPLETE.
ENJOY YOURNEW INDASH by PANAVISE
MOUNT.
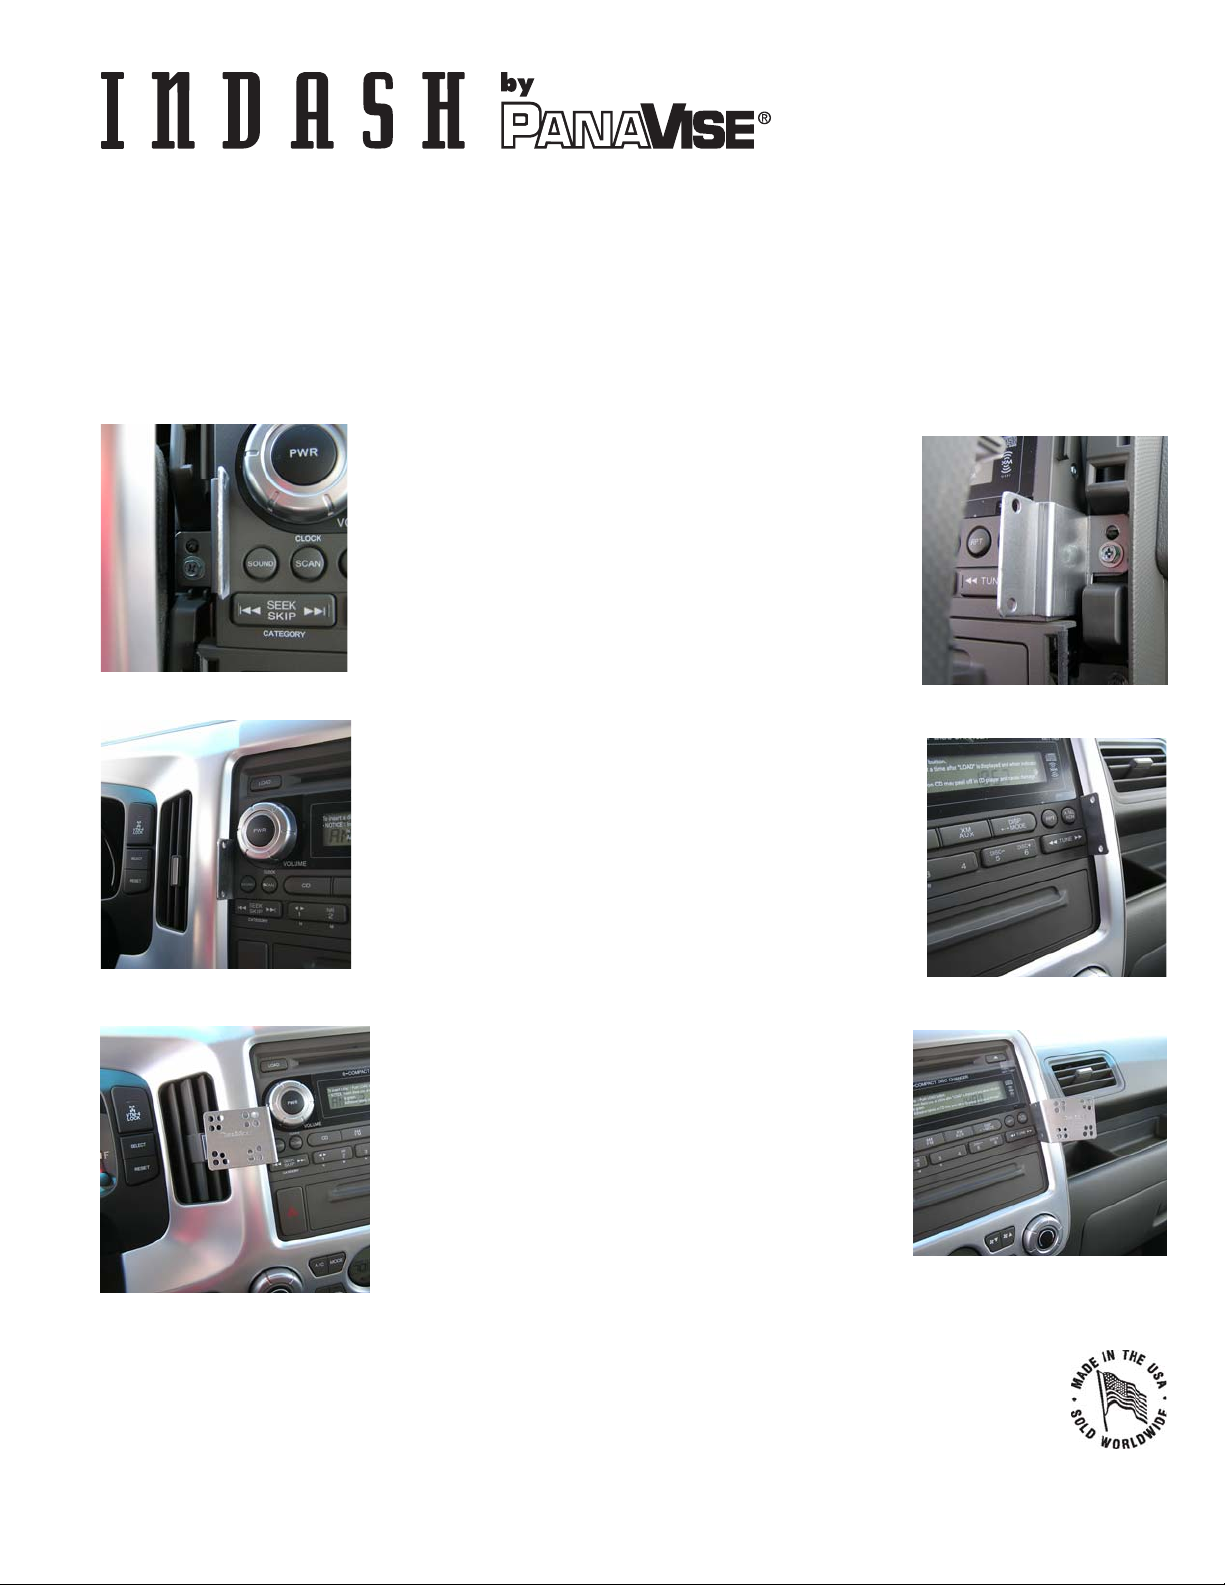
(A)Partinstalledwithbezel
replaced
Prototype (A) Part installed
showing location
InDashinstalledshowing
RightSidelocation
Prototype (A) Part installed
showing location
(A)Partinstalledwithbezel
replaced
InDashinstalledshowing
LeftSidelocation


