03-17-09
MOUNTING LOCATION:
Right side of the radio JR
TOOLSREQUIRED:
(2)Hooktools,(MBtype)
T-15TorxDriver
T-20TorxDriver&Extension
HARDWAREINCLUDED:
None
PART#:75128-905
MFG:MERCEDES-BENZ
MODELS&YEARS:
C-Class2001-04(Incl.) (Pg.1)
C-Class05-07(Pg.2),
CLK-Class05-09(Pg.3)
I-75128-905
Page 1 of 3
There may be recent updates to this Instruction Sheet, please visit our web-site or contact PanaVise Products, Inc. for the latest revision as well as for the
most complete up-to-date PanaVise InDash Applications List: 7540 Colbert Dr., Reno, NV, Phone: 800.759.7535, 775.850.2900, Fax: 800.395.8002,
www.panavise.com © 2002 PanaVise Products, Inc.
* * ADVISEMENT * *
Read instructions completely prior to
starting installation. All InDash Mounts
aredesignedsothatafterinstallation,phone
is facing normal driver position for left-
hand drive vehicles. This mount is not
designed to be used in foreign countries
withright-handdrivevehicles.Useextreme
care when working around the plastic
componentsonthedash. Excessforce,can
causebreakage ofthe plasticcomponents.
CELL PHONE & MEDIA MOUNT
INSTALLATION INSTRUCTIONS
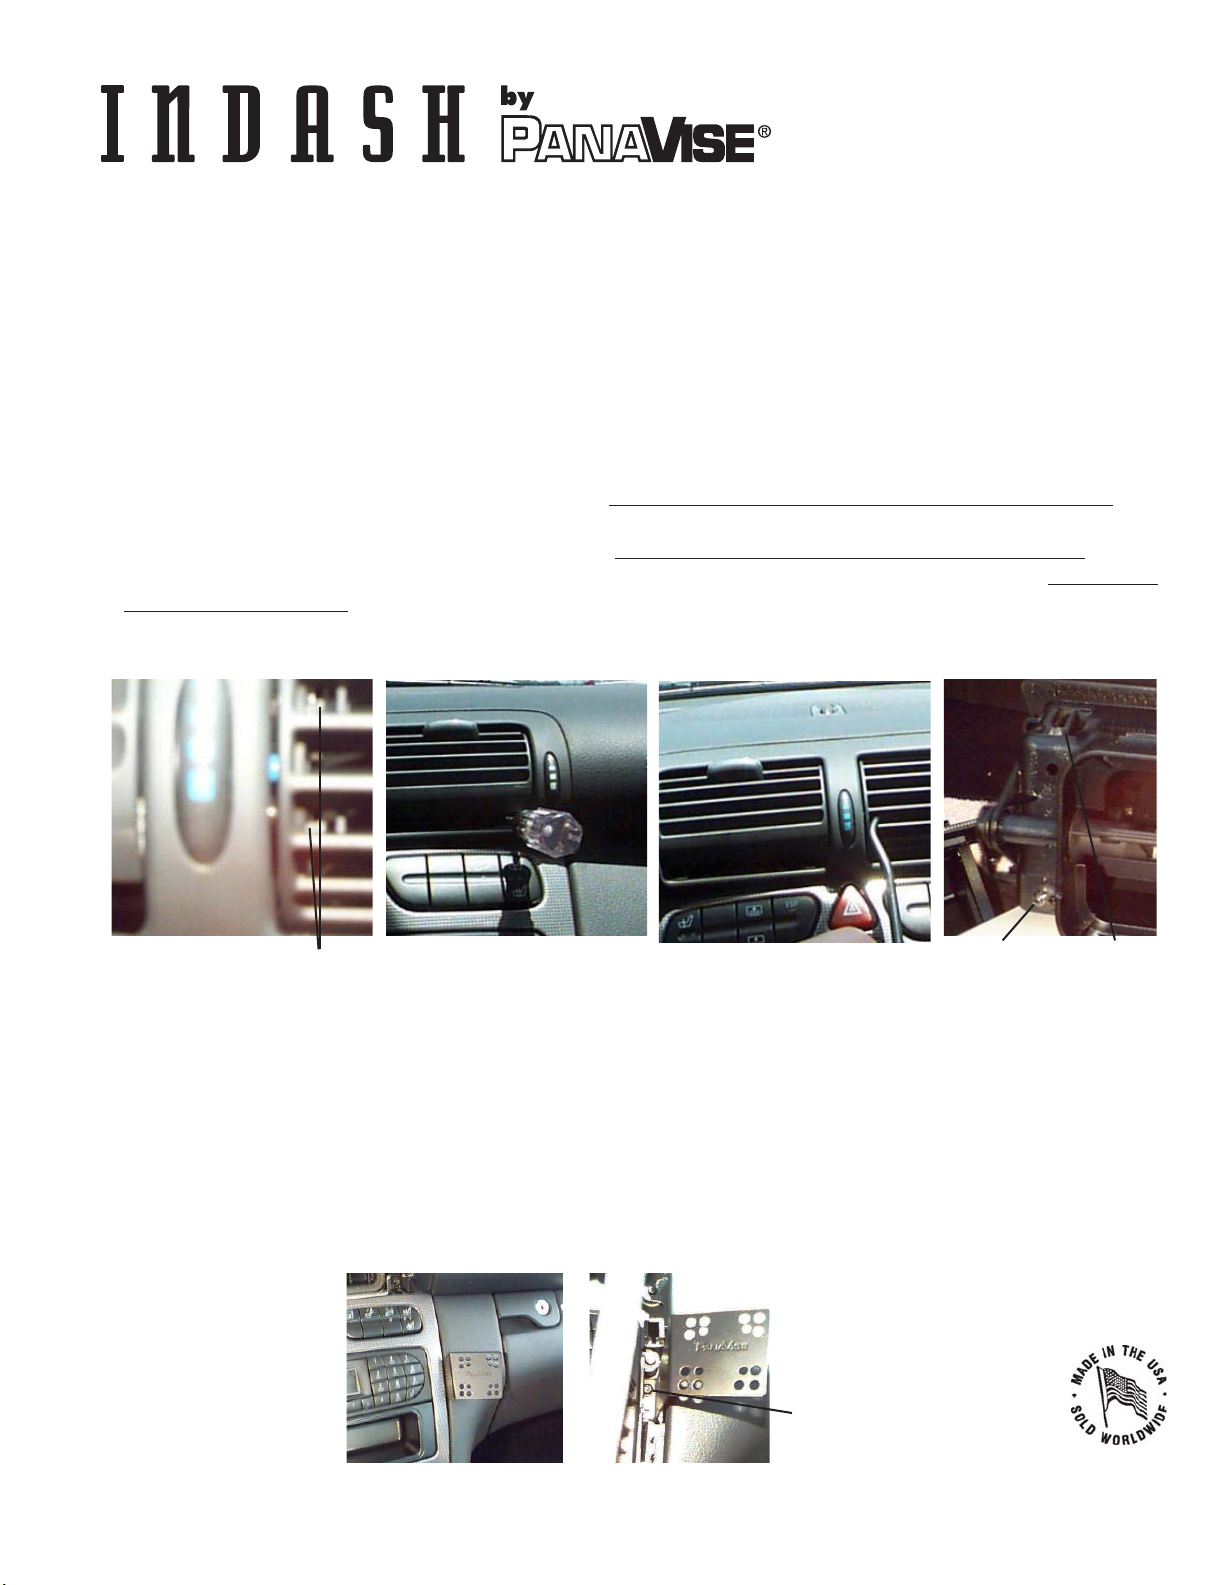
STEP #1: Remove air vents. This is done by locating a (1) small set of lock clips on the left side of each air vent. First,
release the lower clips by inserting hook tool,Pry just enough to pivot the air vents up one at a time and allow
access to the Torx screws inside the air vent assembly. (2) Unscrew screws just enough to release from dash, you do
not need to remove screws completely. Release the upper clips in the vents to turn the vents down by (3) inserting
hook tool into lower clips, and pry out slightly. With flashlight locate the (2) catch lugs at the upper corners of the vent
assembly. Use Torx driver to insert into catch lug and press down to release the top of the air vent assembly. Remove
air vent assembly by working it out carefully, and set aside.
(1) Lock Clips (3) Lower Lock Clip Prying
(2) Torx driver to screw ScrewandCatchLug
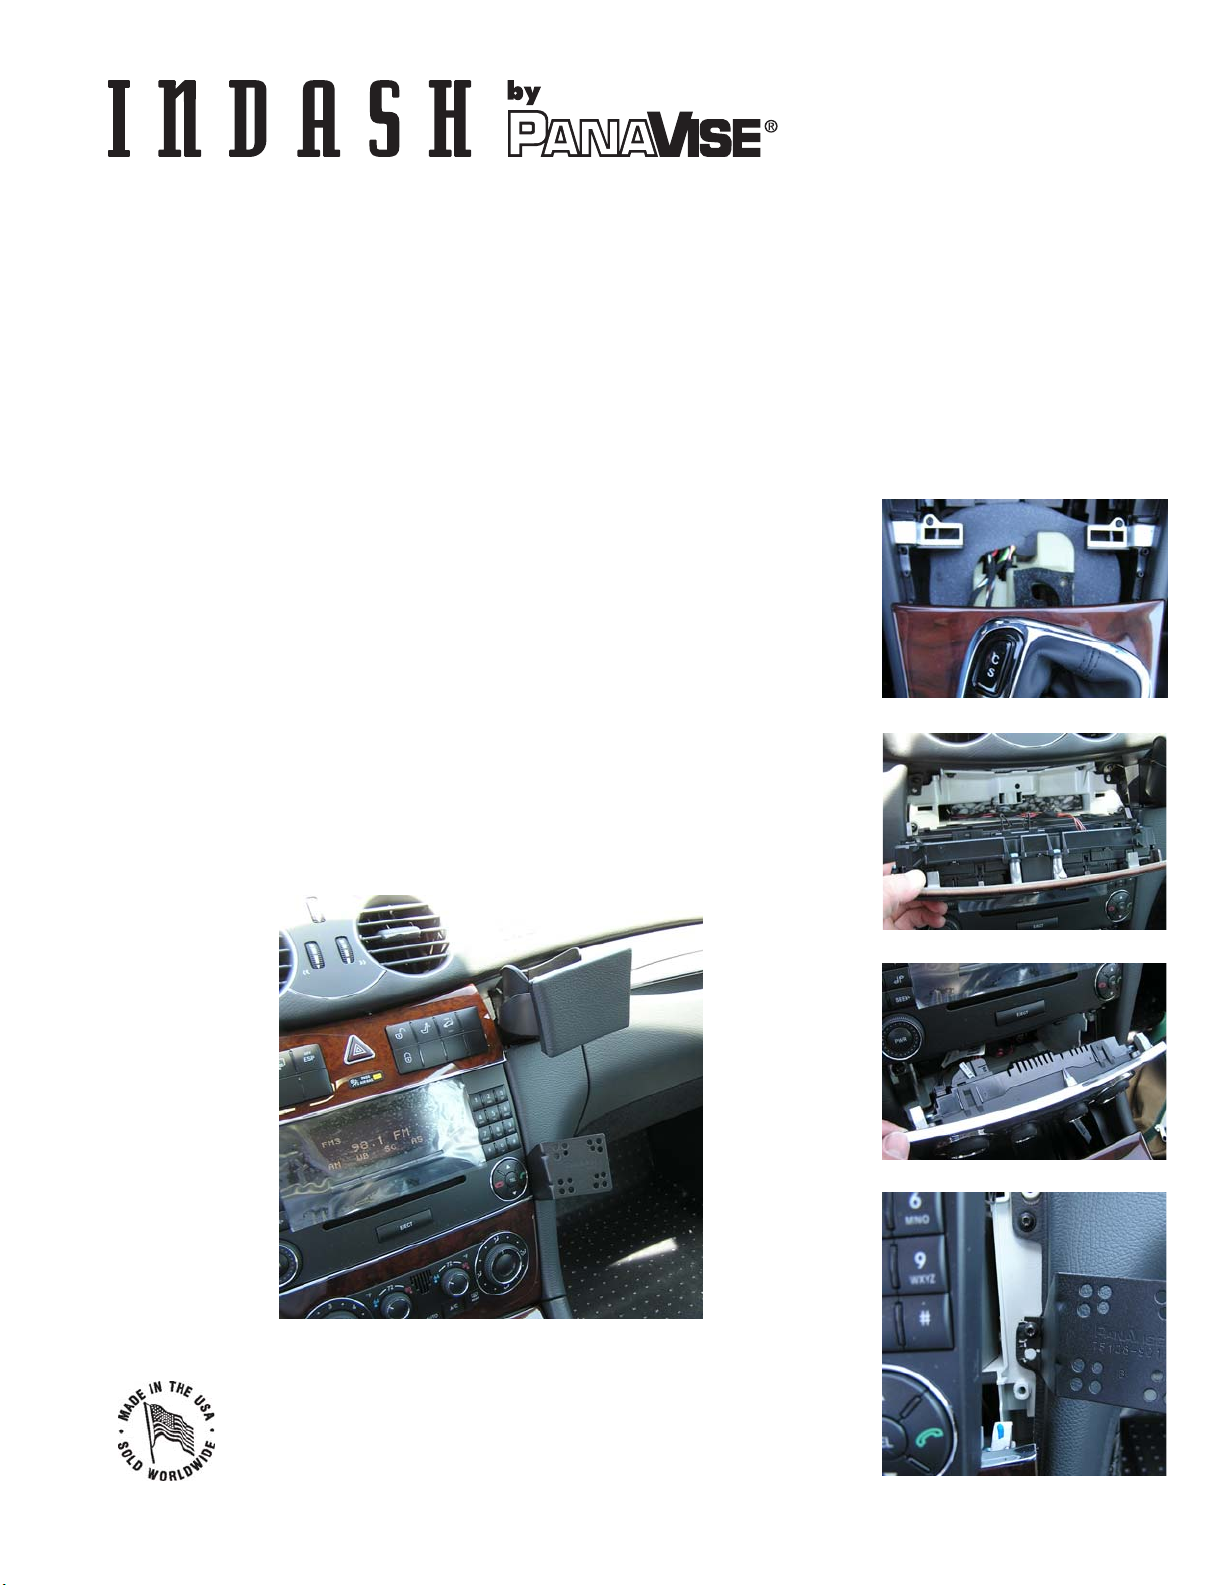
STEP #2: Remove shifter bezel by pulling up the front of the bezel to release (2) clips. Pull up again to release (2) more clips. Slide the
bezel once released towards the front of the car, from under the arm rest sleeve. Remove the ashtray, with hook tool by prying (2)
plastic clips at the front of the ashtray assembly. There are (2) metal spring clips between where the ashtray was and below the
climate control. Use hook tool to pivot them down, as this will release the bezel With the Torx driver remove the screw to the right
side of the radio. This screw is directly above a small plastic pin, and about 2-1/2" deep into the dash. Place the top hole of the
InDash by PanaVise Mount over the screw hole, and the bottom hole over the pin. Reinstall the screw, and tighten.
STEP #3: Replace the bezel in reverse order, making sure that the spring clips at the bottom of the bezel are fully engaged before
putting the ashtray back in. Replace the air vents by inserting the assembly back in, and align the screws to the holes, push the top of
the air vents in until they snap in. Release lock on air vent pivot, and pivot air vents up to tighten the screws inside the air vent
assembly. Check operation of the center thumb wheel on the vent assembly for operation.
Mountingscrew
location
C-ClassFinished
InstallPicture