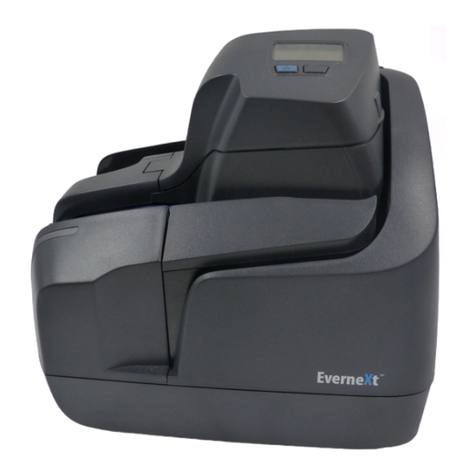
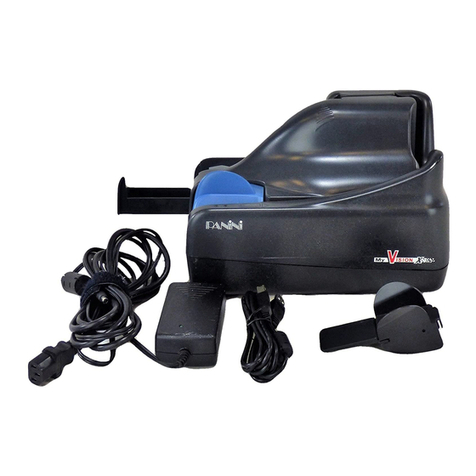
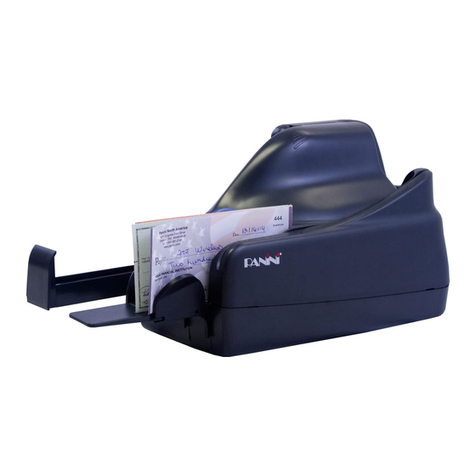
Panini I:Deal User manual

Operator Manual
Rev. 1.0

Operator Manual Page 1 Preface
Preface
This manual and the software described in it are protected under the Panini S.p.A Copyright. All rights reserved.
Reproduction of this material in any form without the express written consent of Panini SpA or its subsidiaries is
prohibited.
PANINI SpA PROVIDES THIS MANUAL “AS IS” WITHOUT WARRANTY OF ANY KIND, EXPRESS OR
IMPLIED, INCLUDING, BUT NOT LIMITED TO THE IMPLIED WARRANTIES OF MERCHANTABILITY AND
FITNESS FOR A PARTICULAR PURPOSE. PANINI SpA MAY MAKE IMPROVEMENTS AND OR CHANGES
IN THE PRODUCT(S) AND OR THE PROGRAM(S) DESCRIBED IN THIS MANUAL AT ANY TIME AND
WITHOUT NOTICE.
This manual could contain technical inaccuracies or typographical errors. Changes are periodically made to the
information herein; these changes will be incorporated in new editions of this publication.
Trademark Acknowledgements
PANINI, I:Deal, Vision API, ICR Vision and MICR Plus are trademarks or registered trademarks of Panini SpA.
The Panini I:Deal™ is also UL 950 compliant
Note: This equipment has been tested and found to comply with the limits for a Class B digital device, pursuant
to part 15 of the FCC Rules. These limits are designed to provide reasonable protection against harmful
interference in a residential installation. This equipment generates, uses and can radiate radio frequency energy
and, if not installed and used in accordance with the instructions, may cause harmful interference to radio
communications. However, there is no guarantee that interference will not occur in a particular installation. If this
equipment does cause harmful interference to radio or television reception, which can be determined by turning
the equipment off and on, the user is encouraged to try to correct the interference by one or more of the
following measures:
• Reorient or relocate the receiving antenna.
• Increase the separation between the equipment and receiver.
• Connect the equipment into an outlet on a circuit different from that to which the receiver is connected.
• Consult the dealer or an experienced radio/TV technician for help.
Modifications not expressly approved by the manufacturer could void the user's authority to operated the
equipment under FCC rules.
© 2009 PANINI S.p.A., ALL RIGHTS RESERVED
Proper Disposal of WEEE
FOR COUNTRIES IN THE EUROPEAN UNION (EU)
The European Commission of the European Union has determined that electrical and electronic equipment on
the market today contain parts and components that may be properly reused or recycled to reduce quantities of
materials ultimately disposed in landfills and other disposal arenas. To address this determination, waste
electrical and electronic equipment (WEEE) should not be collected or disposed with unsorted waste from
private households or businesses. Rather, it must be collected separately. Dumping of these devices at
unequipped and unauthorized places may have hazardous effects on health and environment. Offenders will be
subjected to the penalties and measures laid down by the law.
To that end, Panini products are appropriately marked with the European Union WEEE Directive’s crossed-out
dustbin symbol to indicate the requirement for separate collection of electrical and electronic equipment put on
the market after August 13, 2005, according to the WEEE directive 2002/96/EC (and subsequent amendments)
and your national laws.
To dispose of our devices correctly:
Contact the Local Authorities or local distributor, who will give you the practical information you need and the
instructions for handling the waste correctly, for example: location and times of the waste collection centres,etc.
When you purchase a new device of ours, give a used device similar to the one purchased to our distributor for
disposal.
FOR OTHER COUNTRIES (NOT IN THE EU)
The treatment, collection, recycling and disposal of electric and electronic devices will be carried out in
accordance with the laws in force in the country in question.
First Edition:
February 2009
© 2009
PANINI SpA
Via Po, 39
10124 Torino Italy
Internet: www.panini.com
PANINI NORTH
AMERICA
(Subsidiary)
577 Congress Park Drive
Dayton, OH 45459
(USA)

Operator Manual Page 2 Preface
Contents
Preface .................................................................................................................................................................................... 1
1. Preparation................................................................................................................................................................. 3
1.1. Packaging List........................................................................................................................................................ 3
1.2. External Components ............................................................................................................................................ 3
1.3. Internal Components ............................................................................................................................................. 3
1.4. Safety Precautions................................................................................................................................................. 3
1.5. If the Machine is Damaged .................................................................................................................................... 3
2. Installation .................................................................................................................................................................. 4
2.1. Choose a Location................................................................................................................................................. 4
2.2. Unpack the Scanner .............................................................................................................................................. 4
2.3. Connect Cables ..................................................................................................................................................... 4
2.4. Install Franking Roller (optional)............................................................................................................................ 5
3. Operating the I:Deal™ ............................................................................................................................................... 6
3.1. Preparing Documents ............................................................................................................................................ 6
3.2. Feeding Documents............................................................................................................................................... 6
3.3. LED Indicators ....................................................................................................................................................... 7
3.4. Document Processing / LED Cycle ....................................................................................................................... 7
3.5. Opening / Closing Top Cover ................................................................................................................................ 7
4. Maintenance............................................................................................................................................................... 8
4.1. Cleaning the Scanner ............................................................................................................................................ 8
4.2. Cleaning the Contact Image Sensors .................................................................................................................... 8
5. Troubleshooting ......................................................................................................................................................... 9
5.1. Clearing Jams ........................................................................................................................................................ 9
5.2. Feeding Issues....................................................................................................................................................... 9
5.3. Image Streaking or Fading .................................................................................................................................... 9
6. Specifications ........................................................................................................................................................... 10
6.1. Technical Specifications ...................................................................................................................................... 10
6.2. Warranty .............................................................................................................................................................. 11
Thank you for purchasing the Panini I:Deal™, a breakthrough and revolutionary product that will provide a compelling
check capture solution designed specifically for the needs of small-business users of remote deposit capture (RDC).
The new device, through patented technologies, features:
Innovative paper handling, including document auto-alignment
High quality dual-sided image capture
Advanced reading technologies in the areas of MICR and OCR
Document franking
Virtual endorsement
Pocketing capability, providing document storage while ensuring transaction sequence integrity
Outstanding performance in all critical functions of distributed capture
Please read this manual thoroughly before operating the machine in order to familiarize yourself with its capabilities and
understand proper handling of its many functions.

Operator Manual Page 3 Preparation
1. Preparation
This chapter describes necessary preparations before
using the I:Deal™.
Do not connect the device to your PC before
installing the device drivers. If the device is
connected before installing the drivers, it will
not operate correctly.
Refer to Chapter 2 for the device installation instructions.
1.1. Packaging List
The Panini I:Deal™ packaging includes:
-Panini I:Deal™ scanner unit
-Power Supply
-USB Cable
-Operator Manual CD
-Quick Guide
-Franking Roller (optional)
1.2. External Components
1.3. Internal Components
1.4. Safety Precautions
Before you begin operating or servicing your I:Deal™ as
instructed in this manual, please make sure you read
and understand these important safety instructions.
Do not allow anything to rest on the power cord. Do
not locate the device where people may walk on the
cord
Always unplug the device before cleaning
Do not attempt to service or repair the device,
except as instructed elsewhere in this manual
Attempting to service or repair the external power
supply of the device may expose you to dangerous
voltage points or other risks
Refer all servicing to qualified service personnel
1.5. If the Machine is Damaged
Unplug the device from the wall outlet and refer servicing
to qualified personnel under the following conditions:
If the power cord is damaged or frayed
If liquid has been spilled into the product
If the equipment has been exposed to rain or water
If the equipment does not operate normally when the
operating instructions are followed
If the equipment has been dropped or damaged
If the equipment exhibits a distinct change in
performance, indicating a need for service
Adjust only those controls and replace only those items
that are covered by the instructions in this manual. If you
attempt to make adjustments not covered in this manual,
you may damage the equipment and void the warranty.
Unauthorized adjustments or repairs may result in the
need for extensive work by a qualified technician to
return the equipment to its proper working condition.
LED Status
Indicator
Feeding Tray
Exit Pocket
Power USB
ID Card
Exit Slot
Top Cover Release Button
Top Cover (raised)
Image Sensor Support
Auto Alignment Rollers
Top Cover Latches
MICR Read Head

Operator Manual Page 4 Installation
2. Installation
To set up the Panini I:Deal™ follow the steps below.
2.1. Choose a Location
Place the device on a level surface on or near the host
computer, such as a countertop or table, away from
direct light. Leave enough space to open the pocket
flaps, top cover and to insert documents.
The device should be located as to minimize Electro-
Magnetic Interference (EMI). Keep the device a
minimum of 1 foot away from CRT monitors that can
produce interference and affect the MICR reading.
2.2. Unpack the Scanner
Before unpacking the box, examine it for
damage received during shipping. If the device,
or any component, appears damaged do not
use it. File a claim with the shipping company
and contact your distributor.
When you unpack the I:Deal™, make sure that all parts
are included (see packaging list from section 1.1). Save
all packaging materials in case you need to repack the
scanner.
1.) Open the top of the box
2.) Remove and unwrap the items
2.3. Connect Cables
Ensure that the device drivers have been preinstalled on
the PC. The device drivers are widely available through
supported software applications or by directly installing
Panini’s Vision API. Device drivers are available for
Windows XP and Windows Vista.
Power Cable Connection
1.) Plug the power supply cable in the I:Deal™ power
connector
2.) Connect the I:Deal™ to a dedicated electrical power
outlet. The socket outlet needs to be installed near the
equipment and be easily accessible. The power supply
will be 100-240 VAC (no power selection required), and
the frequency 50/60 Hz. If you are not sure of the type of
power available, consult your Service Representative or
local power company.
USB Cable Connection
Connect the USB cable to the USB port located on the
rear side of the scanner, and then connect the other end
of the cable to an available USB 2.0 port on the PC.
Windows will detect the newly connected hardware and
initiate the “New Hardware Wizard”. The Microsoft
signed drivers previously installed on the PC will be
recognized and the device will be successfully installed.
When removing or disconnecting the USB or Power
Supply Cable from the device, be sure to pull straight
back on the cable and remove.
DO NOT remove the cable by pulling up, vertically or
at an angle. Doing so can damage the connector.
The cables must be removed by gently pulling
straight back on the cable from the connector.
USB Interface
Power Connection

Operator Manual Page 5 Installation
2.4. Install Franking Roller (optional)
The optional Franking Roller is an ink stamp which can
be used to mark the front of a document to read
“ELECTRONICALLY DEPOSITED”.
Follow these steps to insert the franking roller into the
device.
Open the Franking Cover
1.) Open the top cover by pressing the top cover release
button and lifting the cover
2.) Open the franking cover by pressing forward on the
top cover latches and pulling the franking cover down
Insert the Franking Roller
1.) Insert the Franking Roller straight into the roller
harness, aligning the assembly guides on both sides
2.) Align the roller notch to fit into the positioning tab
3.) Apply pressure to the handle until the roller clicks into
place
4.). Close the franking cover by pushing it up until it
clicks into place
5.) Close the top cover. Press firmly in the middle of the
scanner to securely close the top cover.
6.) After replacing franking roller, connect device and
perform franking on a test document. Sample franking
will ensure the correct position and confirm proper
installation of the roller.
CAUTION
•Avoid contact with the main drive roller to
prevent ink transfer to documents
•Ink may be harmful if swallowed
•Avoid contact with eyes
•Damage to the unit or the roller resulting
from modifying the roller is not the
responsibility of Panini
Franking Cover
Franking Roller

Operator Manual Page 6 Operating the I:Deal
3. Operating the I:Deal™
3.1. Preparing Documents
To reduce the possibility of transport errors and damage
to the unit, you should perform the following steps prior
to feeding the documents:
•Remove all folds and creases in the document
•Remove any paper clips, staples, pins, rubber
bands, etc. from the document
3.2. Feeding Documents
The unit is designed to make feeding as easy and hassle
free as possible. The steps below instruct how to
properly feed documents into the unit.
To begin feeding first open the feeding pocket flaps
by lifting up on the flap handle.
Once the software calls the feeding process and the
LED is green then the I:Deal™ unit is ready to accept
documents.
Insert document face up with the MICR line aligned
to the right side of the scanner into the right side of
the feeding tray (as indicated by the check icon).
Once the document is inserted, the machine will
detect the presence of the document and will begin
feeding. The device will automatically align the
document to the proper position regardless of the
angle or alignment in which the document is inserted
into the unit.
The document is scanned and, depending on the
scan mode selected by the application, will either
scan and stop in the exit pocket (which holds up to
10 documents) or scan and return to the feeding tray
for easy removal.
As the document is fed into the device the machine will
detect if the document was not automatically aligned
correctly. If the document is skewed the device will
prevent further processing, stopping the document and
flashing a red LED. Document can be fed again by
removing and reinserting the document.
Flap Handle
Pocket
Flaps
MICR Code Line

Operator Manual Page 7 Operating the I:Deal
3.3. LED Indicators
The 3-color LED on the top cover of the device indicates
the machine’s status. The following table indicates the
meaning of each status light.
LED Description
Off Device disconnected or software not
connected
Yellow Blinking Device connected, software
connected but pocket flaps are
closed
Yellow Solid Device connected, software
connected, pocket flaps open
Green Solid Device is ready to begin feeding
(Device connected, software
connected, pocket flaps open and
feeding enabled)
Green Blinking Machine is processing documents
Red Blinking Document jam or misalignment
Red Solid Firmware being updated
3.4. Document Processing / LED Cycle
1.) Once the unit is powered on, flaps are up and USB
cable connected the status LED will turn solid
yellow, indicating initial power and PC connection to
the device.
2.) When the application requests to start feeding the
LED will turn solid green. Once a document is
loaded into the feeding tray the machine will detect
the document and begin scanning. The LED status
will begin blinking green indicating that the machine
is busy processing a document.
3.) After scanning the machine will stop with the
document either in the exit pocket or feeding tray
according to the processing mode. If exiting to the
feeding tray the LED will continue flashing green
until document is removed from the tray. Once
removed the LED will have be solid green indicating
it is ready to process the next document.
4.) A flashing red LED indicates that either a document
jam or misalignment has been detected. The
machine will stop the document in the track to
prevent capturing a misaligned document or to
prevent damaging a jammed document. If
misaligned, remove document and begin scanning
again. For jammed documents see section 5.1 on
how to remove jammed documents.
5.) A flashing yellow LED indicates that either the top
flaps are closed or the top cover is open.
3.5. Opening / Closing Top Cover
The top cover of the device can be easily opened for
removal of jammed documents, cleaning the device or
for replacing the franking roller.
1.) To open the top cover press the blue release button
on the top side of the feeding tray and lift the cover up.
2.) To close the cover press firmly downwards in the
middle of the top cover. Ensure that both sides of the
scanner securely snap closed.

Operator Manual Page 8 Maintenance
4. Maintenance
The I:Deal™ has been designed as a minimal
maintenance device. As such no regular cleaning
schedule has been defined. However, processing
documents in a scanner can cause some paper dust or
other debris which after continued use could build up to
eventually lead to imaging issues. As a preventative
measure to ensure the expected quality from the device
a general maintenance program can help achieve
optimal results and avoid unnecessary failures.
CAUTION
•Before doing maintenance, remember to
disconnect the USB and power cables from
the device.
•Solvents or harsh cleaners may damage or
discolor the cabinetry.
•Do not spray or try to clean the Contact
Imaging Sensors (CIS) or the inside of the
scanner with any kind of cleaner other than
what is recommended. This may damage
the CIS or the electronics.
4.1. Cleaning the Scanner
Cleaning Inside of Unit: Remove paper dust and
small debris from device by using low pressure
canned air or a dusting brush designed for use on
electronic equipment.
Cleaning Outside of Unit: The outside cabinetry
can be cleaned to remove finger marks and dust
with a damp cloth and mild soap.
4.2. Cleaning the Contact Image Sensors
1.) Gently open the front image camera
a. Manually
rotate the CIS
support,
positioning the
camera on the
bottom.
b. Open the rear CIS
support by pressing
the right tab in and
lifting up.
c. Hold the CIS support
to clean the camera
lens.
2. Remove any debris and dust. Clean the Contact
Image Sensors with a soft, lint-free cloth dampened with
Isopropyl Alcohol or with eye glass cleaner.

Operator Manual Page 9 Troubleshooting
5. Troubleshooting
In the course of everyday operations, you may
encounter minor issues. The topics below should be
reviewed prior to calling for service on the unit.
5.1. Clearing Jams
When a jam occurs, the paper path must be cleared.
The paper path can be easily accessed simply by
opening the cover and extracting the jammed document
simply by gently pulling it out with your fingers.
When clearing a jam clear the paper path and rollers
from any documents, paper dust or debris. Close cover
to resume operation.
5.2. Feeding Issues
The I:Deal™ is designed to make document feeding as
hassle-free as possible. The auto align feature of the
device permits inserting documents in the feeding tray at
varied angles. If the position or angle of the document
insertion is too extreme and the auto alignment is not
able to align the document, then the skewed position of
the document will be detected by the device and the
I:Deal™ will stop feeding.
In this case remove and re-feed document into the
scanner. Ensure that the top cover is properly closed
after removing the document.
If the device fails to recognize a document when inserted
into the feeding tray, try opening the scanner to remove
any paper or debris. Additionally, the feeding sensor and
alignment sensors can be cleaned of any dust build-up
with the use of canned air.
5.3. Image Streaking or Fading
If streaking or fading appears on the images, the Contact
Image Sensors may require cleaning. Refer to section
4.2 for instructions on how to clean the scanners.
Feeding Sensor
Alignment Sensors
Contact Image Sensor
in opened position

Operator Manual Page 10 Specifications
6. Specifications
6.1. Technical Specifications
Dimensions Height: 81 mm (3.19”)
Width: 167 mm (6.57”)
Length: 201 mm (7.91”)
Weight 1,05 Kg (2.3#)
Product layout Positioned on horizontal, level surface
Straight track
Clam-shell structure – easy inspection
No covers to remove, no extensions
Document Specifications Height: Min. 54 mm (2.12”) – Max. 106 mm (4.17”)
Length: Min. 100 mm (3.93”) – Max. 235 mm (9.25”)
Weight: Min. 70 gr/m2 (18.7#) – Max. 120 gr/m2 (32#)
Document Feeder Auto-aligning single document feeder
Automatic loading, document face up
Magnetic Reader E13B/CMC7/Automatic
New Panini MICR Plus® exclusive technology with OCR assist feature
Superior MICR recognition and management
Image Capture Scanning: Contact Image Sensor (CIS) technology; dual sided image capture
Image format: Bitmap in B/W, 256 shades of gray, TIFF, JPEG and Group IV compression
Image resolution: 300 dpi optical, scalable to 200 or 100 dpi
Advanced Dynamic Thresholding
Superior auto calibrated image quality
Dual image: 4 images in one document pass
Front-side Franking Self-inking roll-on stamp, red color
Intelligent franking (based on codeline contents, image contents, IQA controls)
Possibility to capture franked front image with an additional pass
Ink roller (not included) life: up to 10,000 impressions, subject to environmental conditions
Standard text: / ELECTRONICALLY DEPOSITED /
For customized text please contact your Sales representative
Virtual Endorsement Up to 8 different virtual endorsements applicable to rear document image
User can select:
- multi-line text and/or bitmap
- endorsement area (3 pre-defined following ANSI X9 standard for US checks; 5 customizable)
- font and color
- rotation (0, 90, 180 or 270°)
Interface USB 2.0 port
Pockets Exit pocket capable of holding up to 10 documents with sequence integrity
Intelligent sorting to send document to either exit pocket or back to feeding tray
Software Tools Panini Vision API control running on:
Windows XP S.P. 1 and Windows Vista with USB 2.0
ICR Vision function for image snippet definition and download
Easy integration of ICR/Barcode/OCR recognition technology
Software Options OCR Recognition: OCR-A, OCR-B recognition engine
Barcode Recognition: Code 39, Interleaved 2/5, EAN8, EAN13, UPCA, UPCE, Code 128
Bi-dimensional barcode (PDF417)
Image Quality Assurance (IQA) library
PC Minimum Requirements Intel Pentium IV, 2 GHz, 512 Megabytes Ram
Diagnostic Features On board Diagnostics: tests the functionality of the scanner
Power-on Self Testing: automatic self testing and photocells calibration when powering the unit
Power Supply Input Voltage Autosensing from 100 to 240 Vac, 50 to 60 Hz
24 W
Meets CEC IV
Operating Conditions Operating: 15 ÷ 35 °C, 20 ÷ 80 % RH Non-Condensing
Storage: 0 ÷ 40 °C, 10 ÷ 80 % RH Non-Condensing
Altitude: 0 ÷ 3000 meters
Product Life MCBF: 100,000 documents or 4 years
Designed for low-end Remote Deposit Capture applications
Minimal maintenance requirements
Certifications UL / FCC Class B / CE
Electronics and mechanics following the European RoHS and WEEE Directives

Operator Manual Page 11 Specifications
6.2. Warranty
This warranty does not limit in any manner whatsoever,
to the extent applicable, the rights granted under local
laws concerning the sale of consumer goods.
This warranty does not exclude any further warranty
granted by the reseller or distributor, if any, of the Panini
I:Deal product (the “Product”).
Panini SpA warrants that on the date of purchase the
Product shall comply with its technical specifications, be
free from defects in workmanship and material. Panini
SpA warrants the Product as such, meaning not in the
guise of components, spare parts or consumables.
The warranty period for each Product is of 12 (twelve)
months from the date of purchase.
For avoidance of doubt, Panini SpA shall have no liability
if the Product has been damaged by any force or
occurrence beyond its control, including, without
limitation, accident, abuse, misuse, improper
warehousing, conservation, repair, service or
maintenance, modification or alteration by third parties,
combination with other products, normal wear and tear.
In principle, notice of the non compliance or of the
defects shall be sent to the location indicated, as the
case may be, by the reseller, the distributor or Panini
SpA within 10 (ten) days from the date on which you will
have discovered the lack of compliance or the defect.
Upon receipt of a warranty claim, it shall be promptly
verified if the allegedly non compliant or defective
Product is still under warranty and, if that should be the
case, the shipment thereof shall be authorized. You will
be assigned a specific code in such respect and you
shall ship the allegedly non compliant or defective
Product to the location indicated. Should the Product be
found to be non compliant or defective, it shall be
replaced or repaired free of charge, and returned to you.
In any case, please refer to your reseller or distributor for
returning the Product under warranty and for related
shipment costs and expenses, where applicable.
Except as provided herein, Panini SpA disclaims all
other warranties or any express, implied or statutory
remedies regarding the Product, including any warranty
of merchantability and fitness for a particular purpose.
You acknowledge that you have relied on no other
warranties or remedies other than those expressly
provided for herein. In no event, shall Panini SpA be
liable for any indirect, incidental or consequential
damages or loss of profit, loss of data or loss of
opportunities.

Copyright© Panini S.p.A., 2009. All rights reserved.
PANINI and I:Deal are trademarks or registered trademarks of Panini SpA.
PANINI S.p.A.
Via Po, 39
10124 Torino Italy
website: www.panini.com
PANINI NORTH
AMERICA
(Subsidiary)
577 Congress Park Drive
Dayton, OH 45459
(USA)
Table of contents
Other Panini Scanner manuals

Panini
Panini Vision NeXt User manual

Panini
Panini My Vision X User manual

Panini
Panini My Vision X Manual

Panini
Panini mI:Deal User manual

Panini
Panini EverneXt User manual

Panini
Panini My Vision X User manual

Panini
Panini Vision X User manual

Panini
Panini Vision 1 User manual

Panini
Panini My Vision X User manual
Popular Scanner manuals by other brands

Marson
Marson MT8230B user manual

Kodak
Kodak Ngenuity 9000 Series User maintenance guide

Unitech
Unitech MS926 quick start guide

Leuze electronic
Leuze electronic rotoScan ROD4 plus Series Original operating instructions

Canon
Canon ImageFormula DR-7080C specification

Epson
Epson Perfection V350 Series Notices and warranty