ParAid TRANSPORTER+ User manual

Product No. REF: 2-PAR-AMET-08 Serial No. 128051
Introduction
The information within this
document provides clear
guidance for the operation,
maintenance and the servicing
of the custom-made
Transporter Trolley.
Correct handling and operation of the
trolley is essential for the safety of the
infant and user. To avoid errors when
handling or operating the trolley this
document should be accessible by the
user at all times. Instructions and
requirements should be adhered to at
all times during the handling and
operation of the trolley.
The trolley must ONLY be used for it's
described and intended purposes.
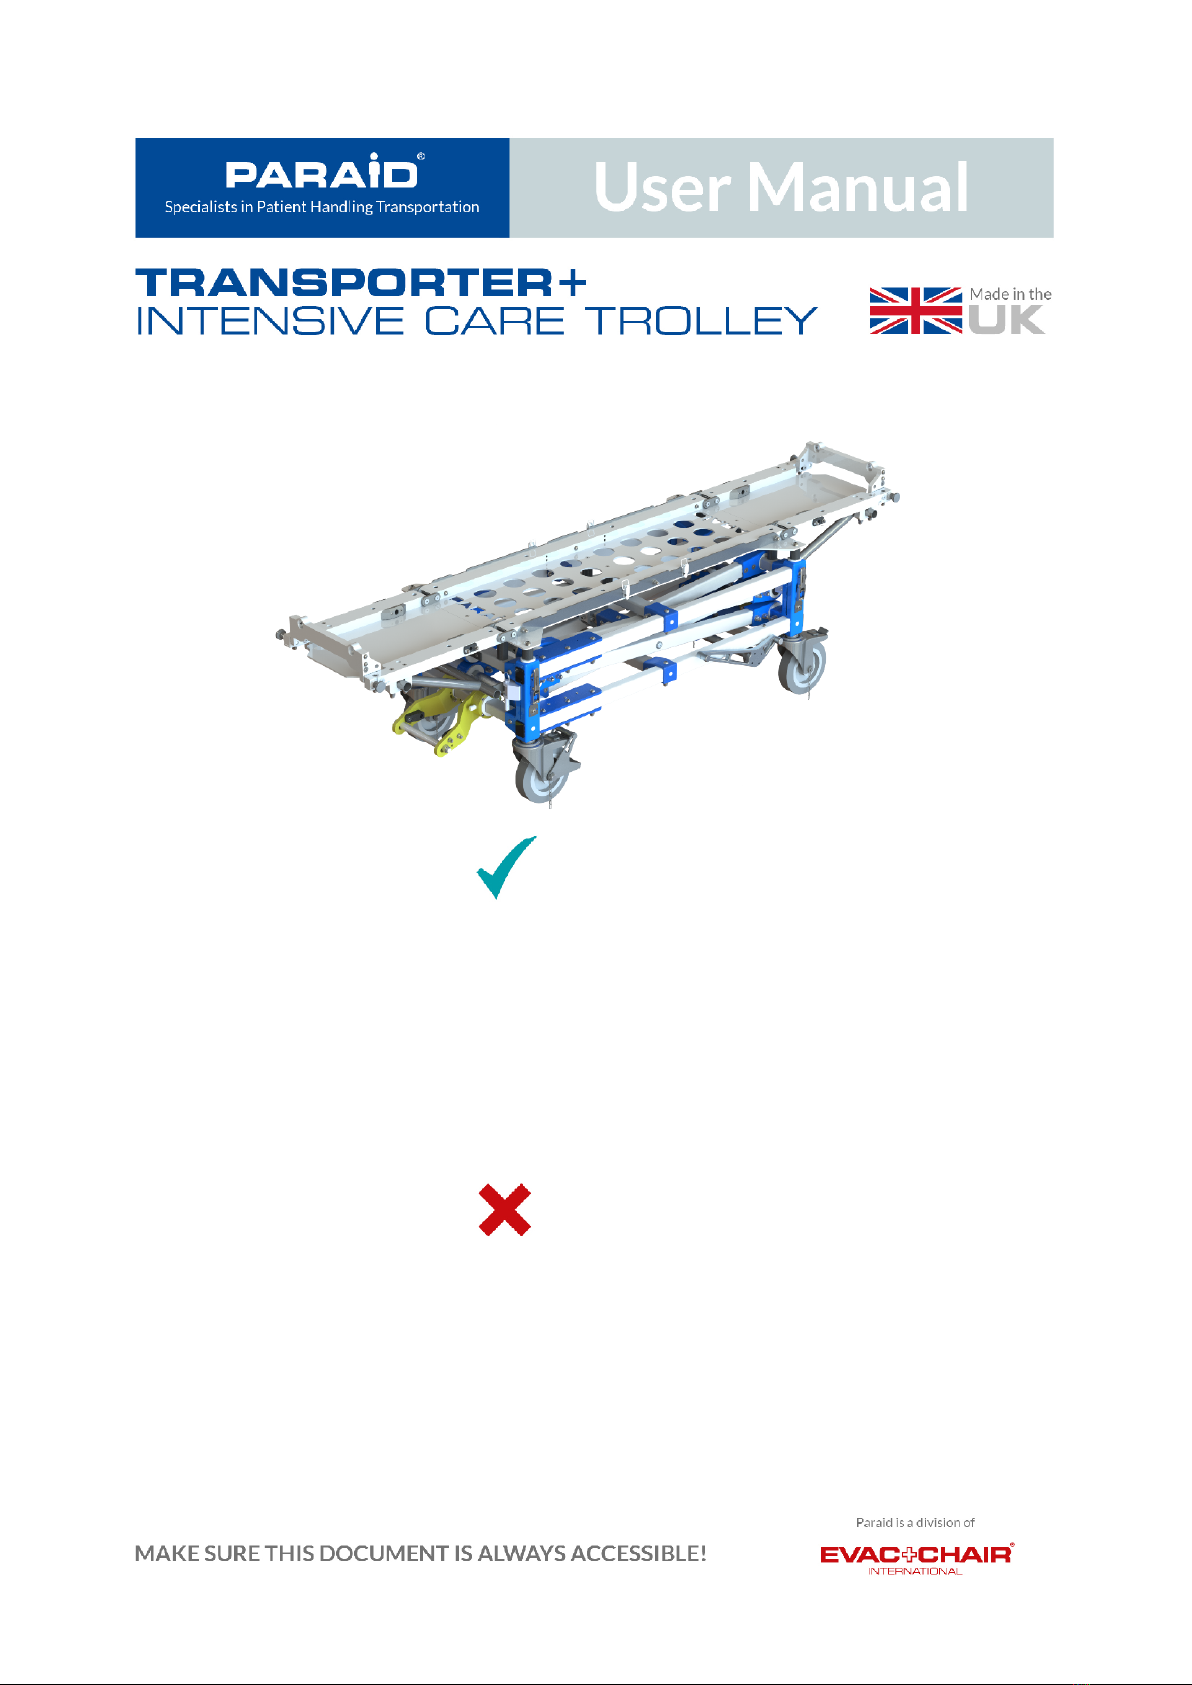
The purpose of the Transport Trolley is to provide:
A transportation facility for a single infant when placed in the incubator.
1.
A means to raise the transport incubator to a level where it can be safely transfered on and off an
2.
aircraft.
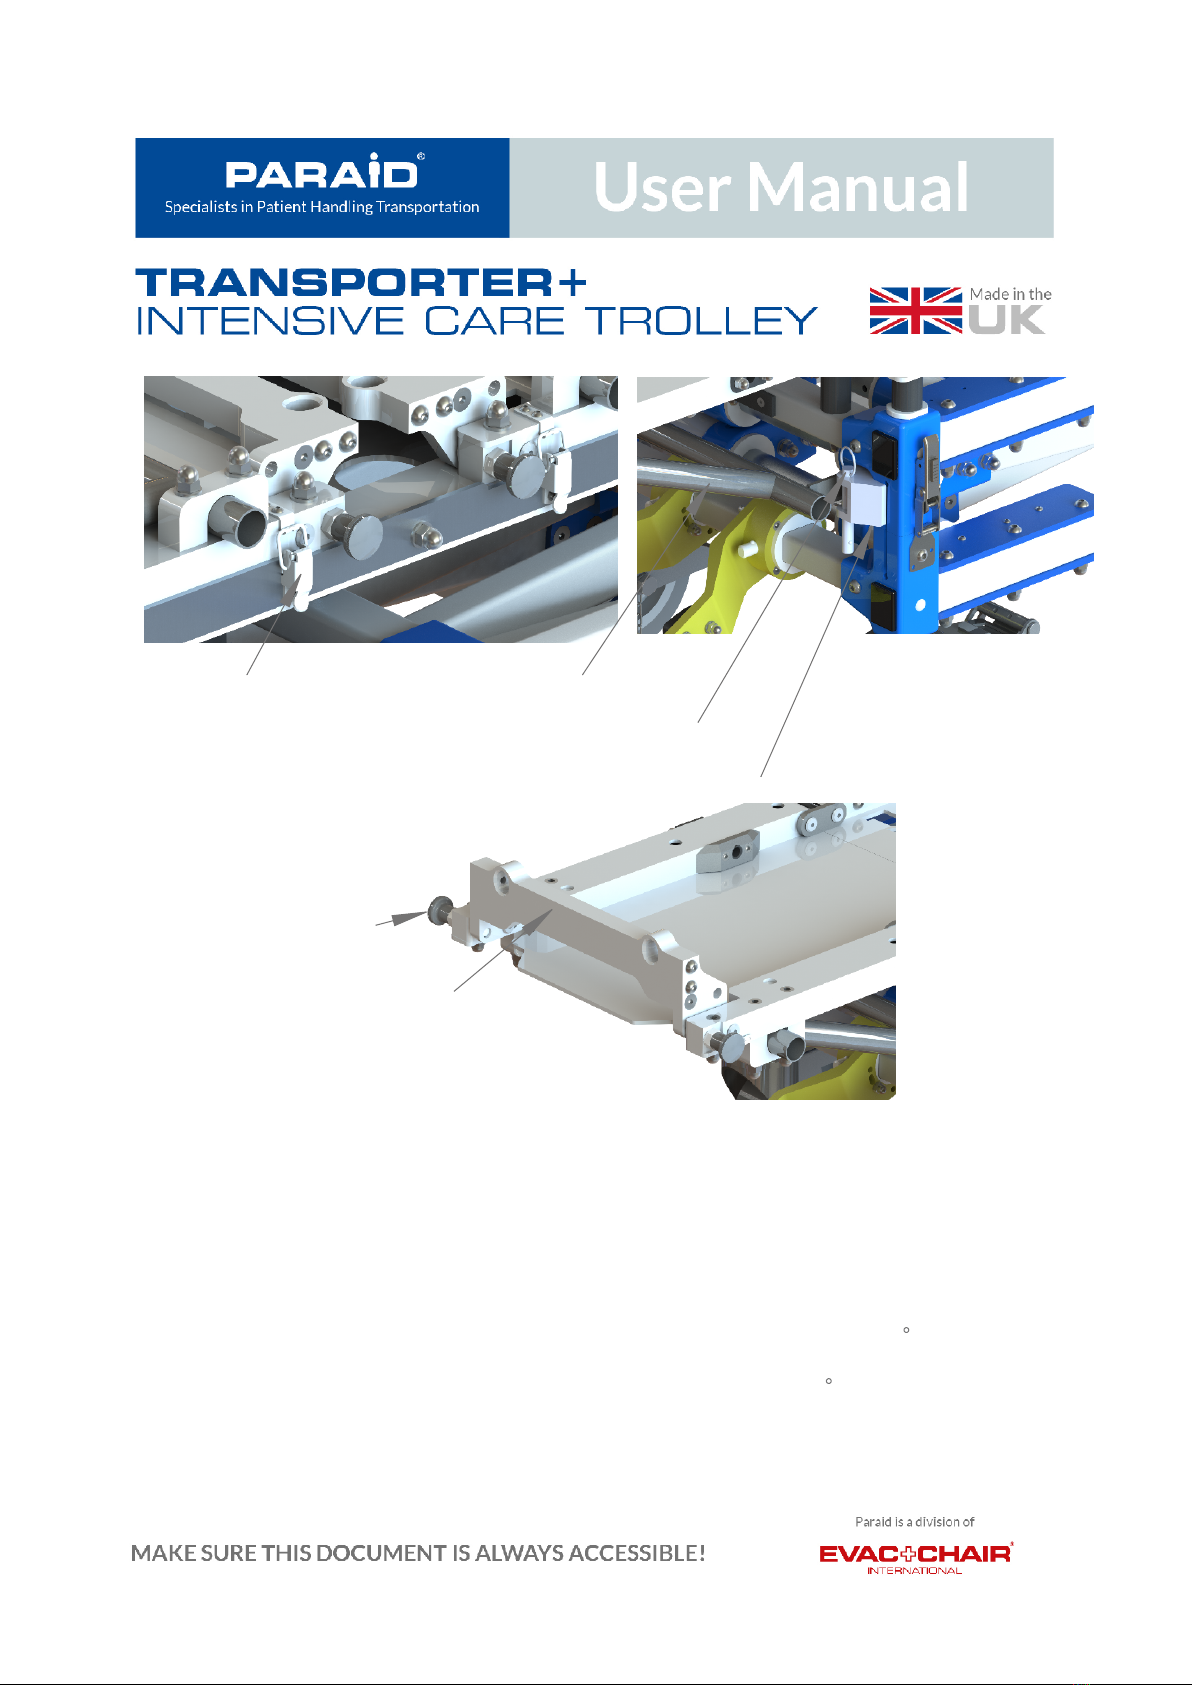
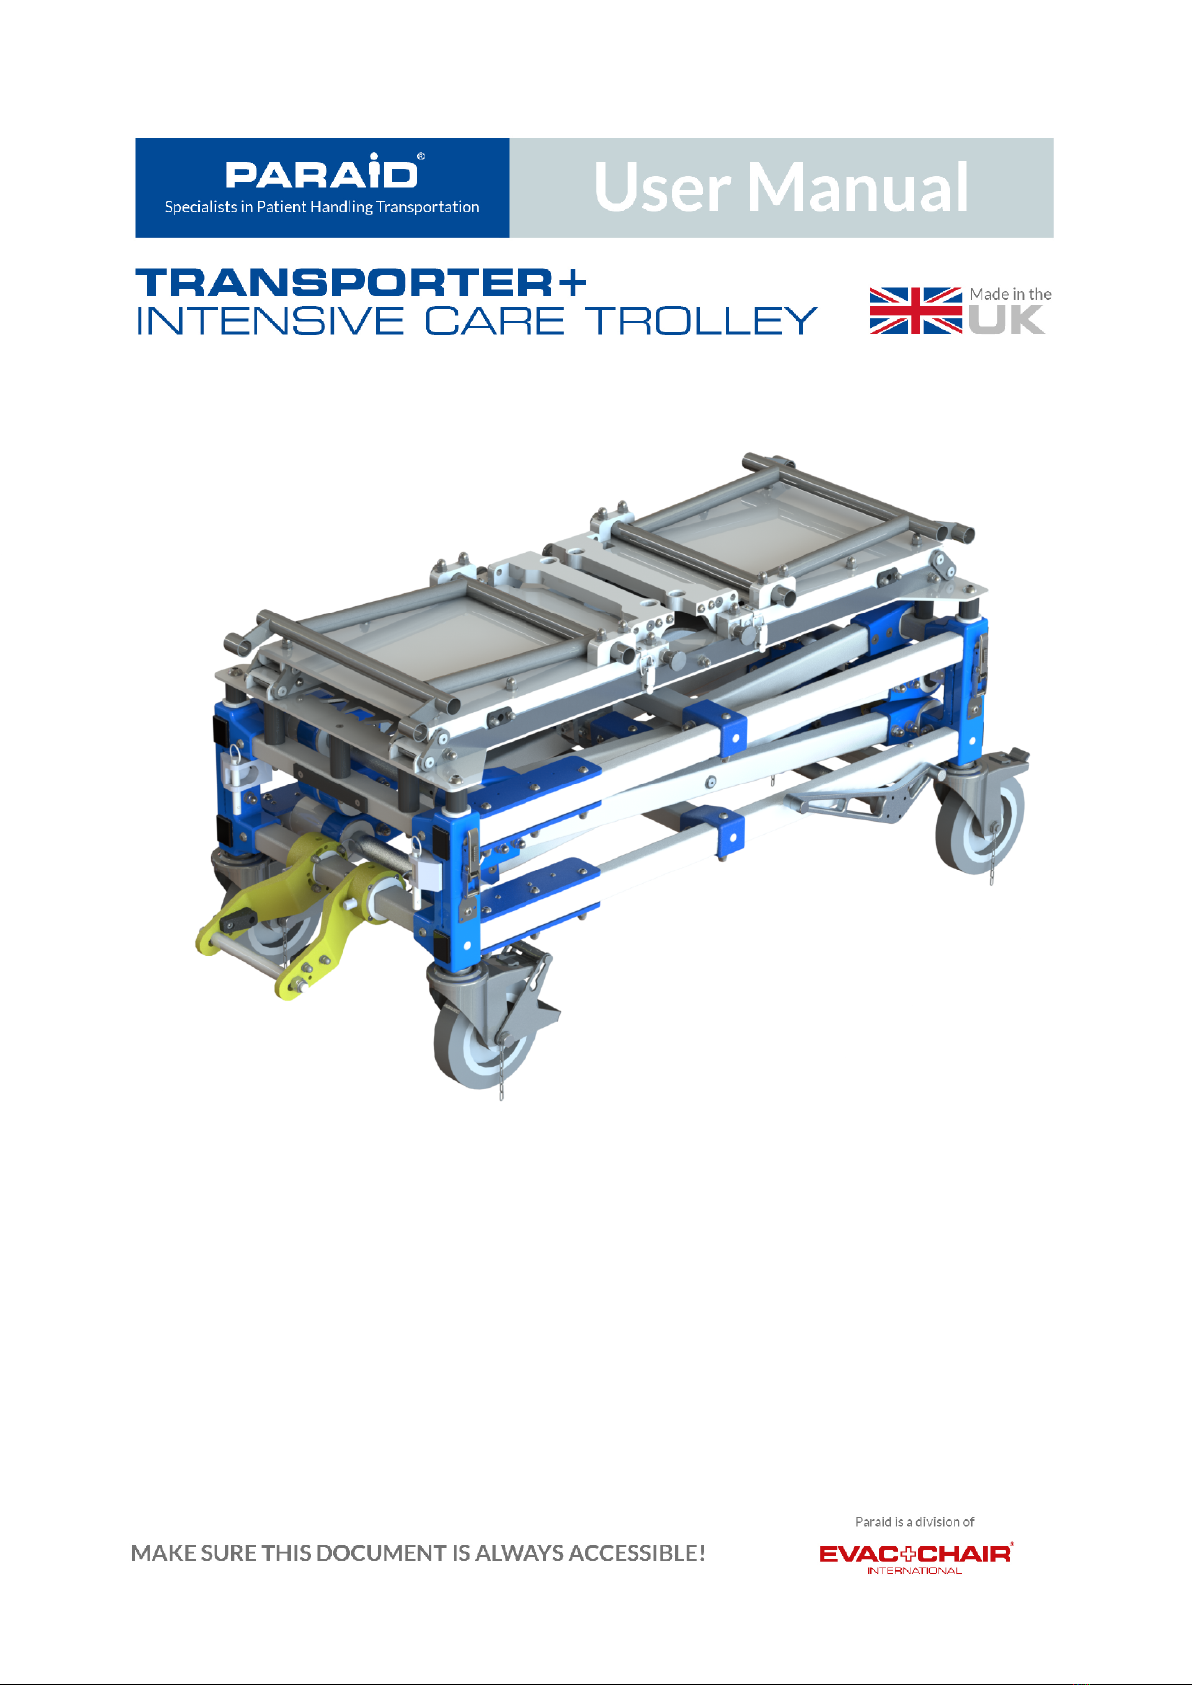
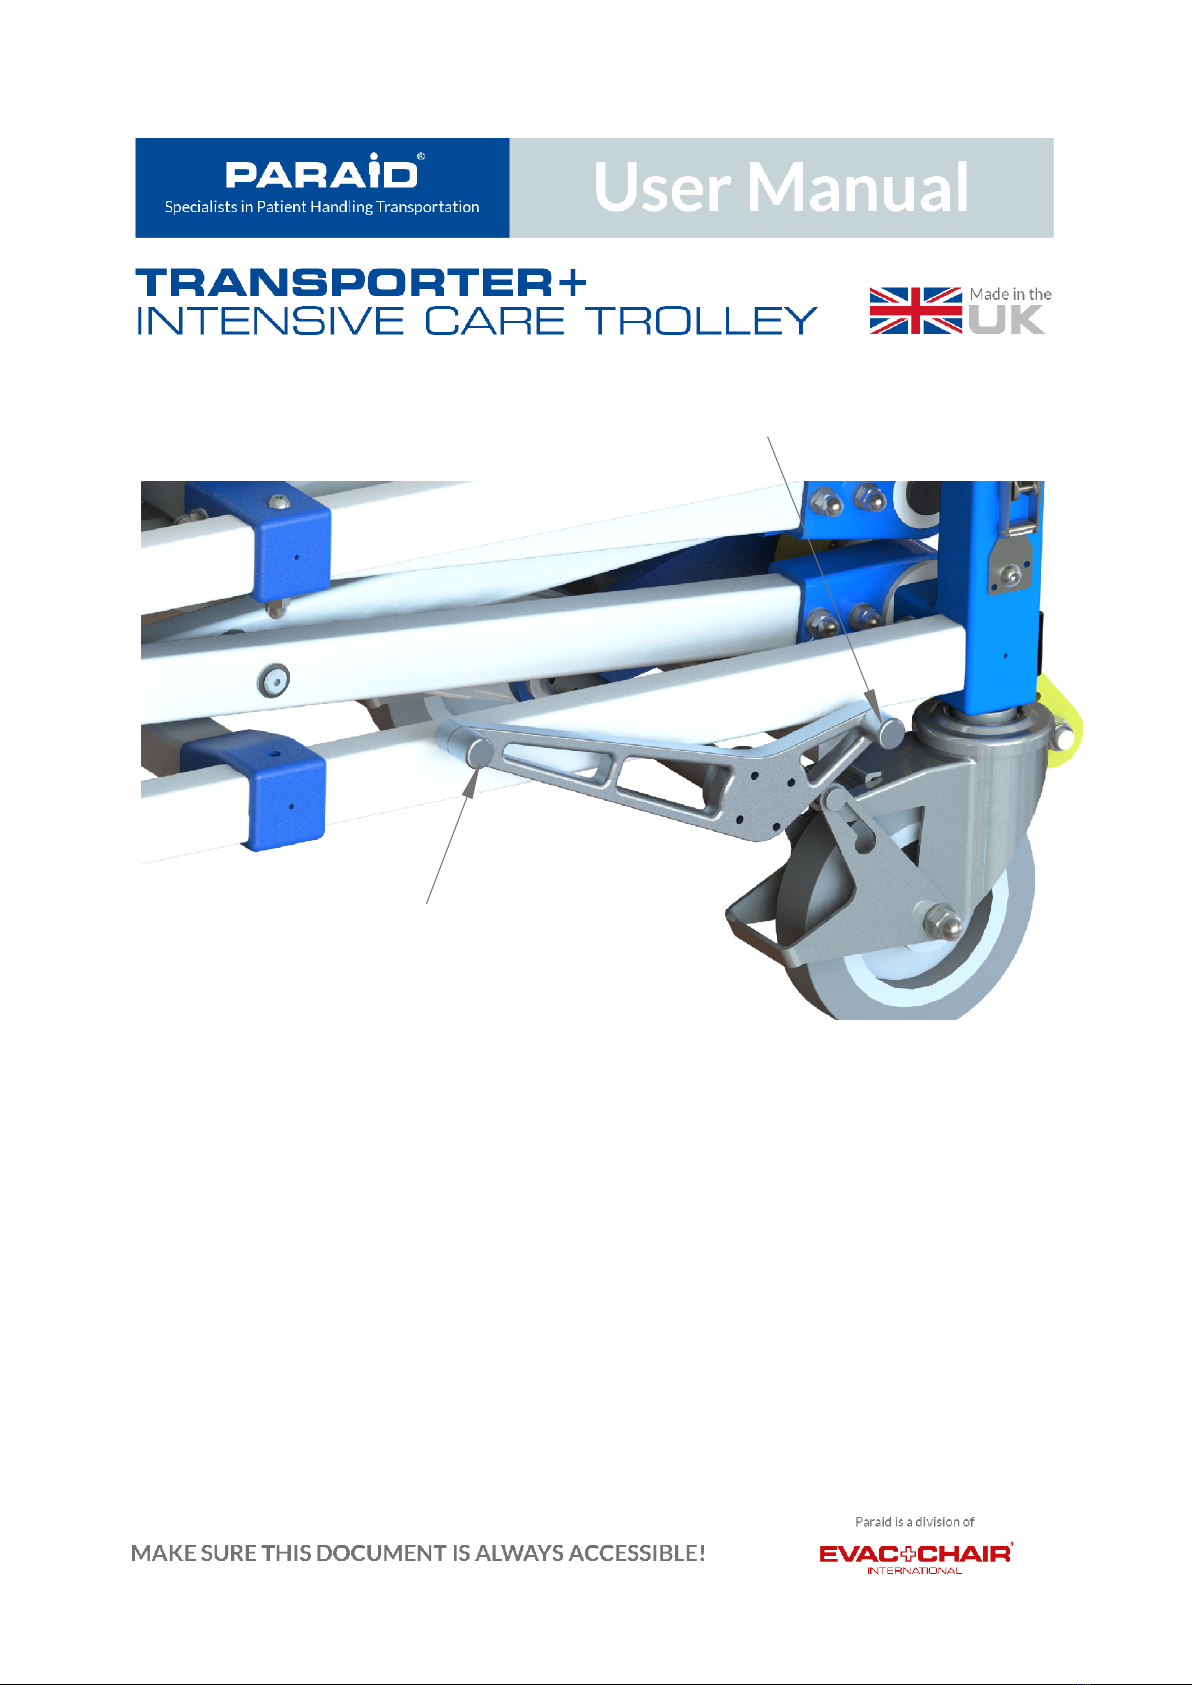
The trolley, and parts provided by Paraid are identified and listed on page 2. The trolley is also fitted
with swivel/brake anti-static locking wheels to allow smooth and easy movement around a hospital
environment or to a new location. The trolley is intended to be used mostly in a hospital environment,
and has the ability to be loaded into and transported in a road ambulance vehicle, which features
suitable and tested securing/locking devices.
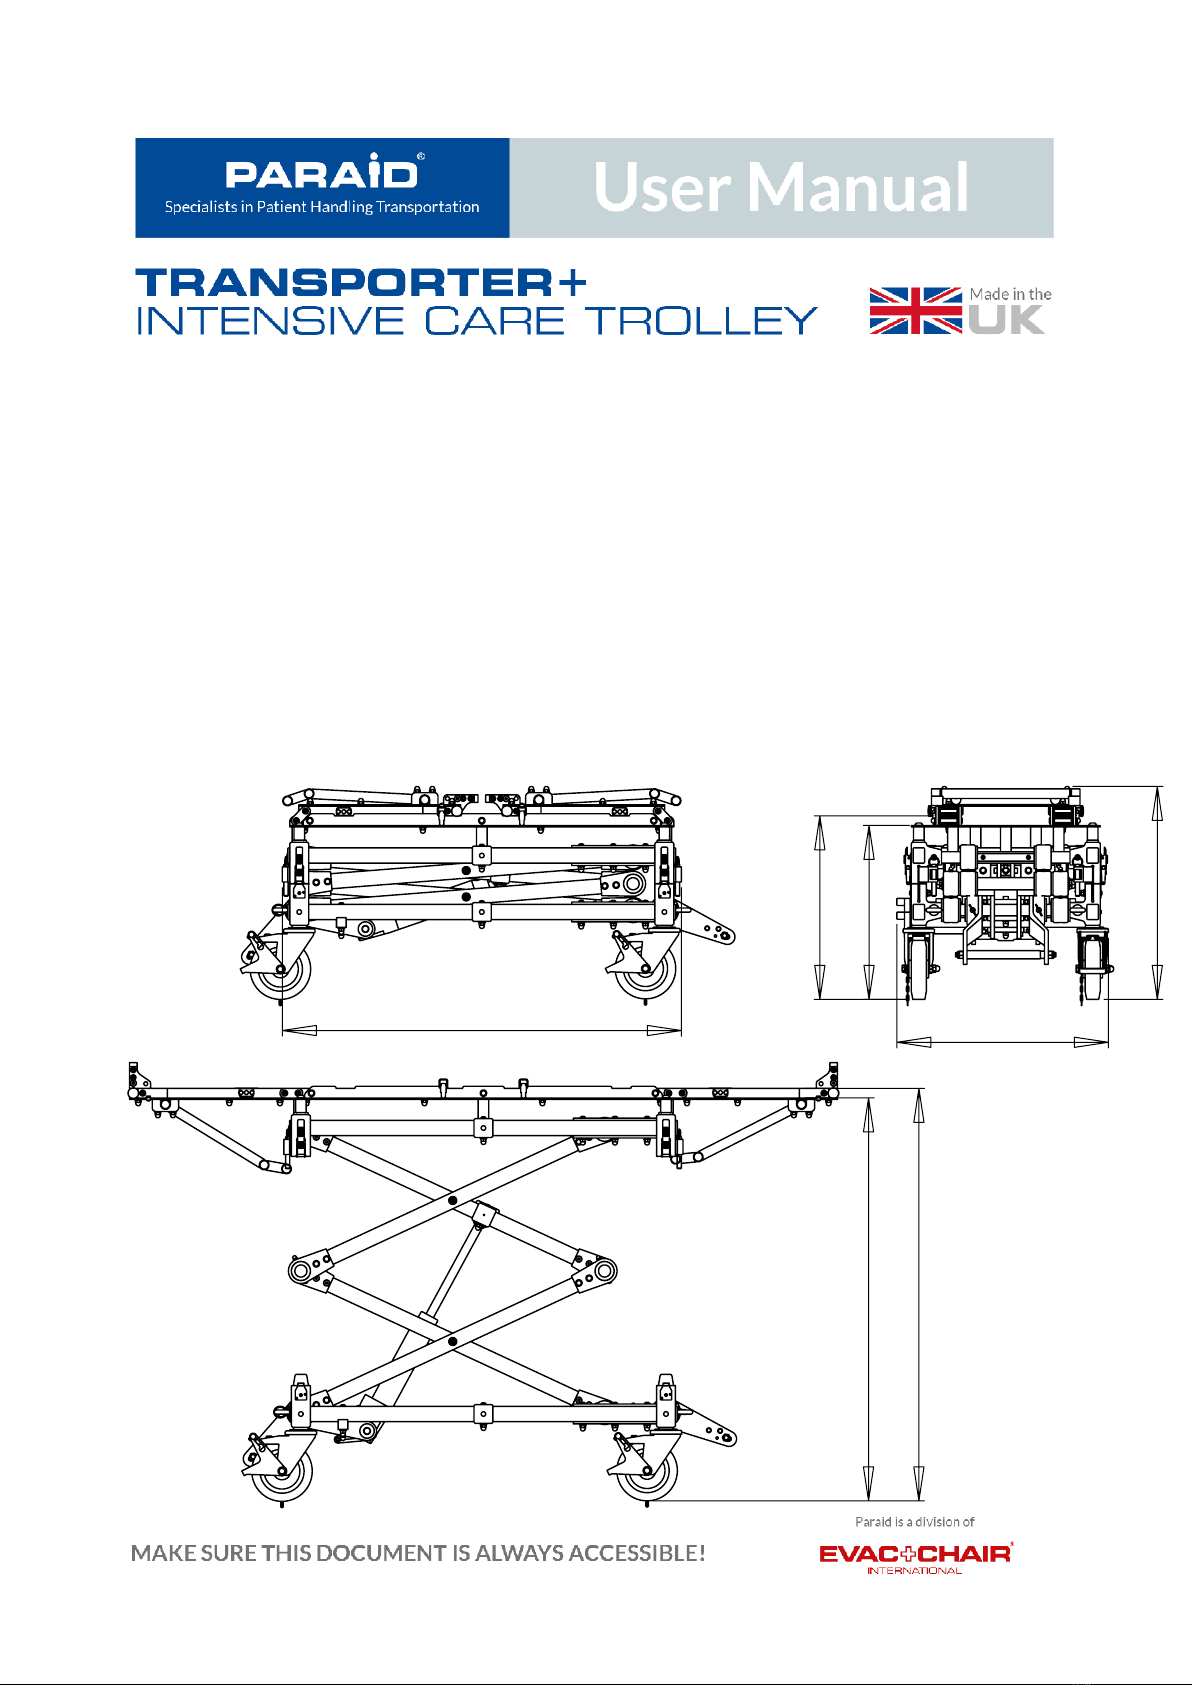
General description and features
NOTE: Any lifting actions must be fully risk-assessed by the operator in advance.
2-PAR-AMET-08 Product Guide Rev_1

1056 560
563
460
490
1080
1055
Dimensions
Height: 490mm (lowered) - 1055mm (raised)
Length: 1056mm (1100mm from eyelet bolts)
Width: 560mm
Weight
70Kg (unladen)
Maximum payload
145Kg (Tested using Finite Element Analysis
with 145Kg payload in accordance with BS EN 1789)
Technical Specifications

1 x AAT Aeromedical
Incubator Sled with or without
Lifeport Interface Plate
The trolley is designed to carry
a load of 145Kg Max.
Medical Devices
The operation, maintenance and servicing of the prescribed medical devices listed is the responsibility of:
Ensure maintenance is carried out [see "maintenance"
•
page].
Visually inspect trolley after use: any wear and tear or signs
•
of damage must be rectified before use.
Only use towing handle when pulling.
•
Make sure all medical devices, connections and mountings
•
are secure before operational use.
Apply & release wheel brake using foot only, unless
•
otherwise hand operated castor wheels are present.
Lift The Trolley! These trolleys are designed to be loaded
•
into a road ambulance with either a suitable ramp or tail-lift.
Transfer the patient unless the trolley wheels are locked
•
[using brake mechanism on wheel].
Let the trolley:
•
- drop off kerbs
- get trapped in gulleys / drains
- run into obstacles.
Apply or release the wheel brake using hand.
•
DO:
DON'T:

NTP-630A Castor Wheel (with hand operated brake)
PAR-1097 Castor Wheel
PAR- 2171 Lock Attachment Detent Pin
PAR-2172 Support Arm Detent Pin
ETT-59 Green Lanyard
ETT-61A Handle Straps
NTP-630A
Castor Wheel
Lock Attachment
Detent Pin
Support Arm
Detent Pin
PAR-1097
Castor Wheel
Trolley Spares
The medical device fixations have been specifically designed
ONLY
for the prescribed medical devices listed in this
document and should not be used for any other equipment or
purpose.

2
1
3
4
NTP-630A CASTOR WHEEL OPERATION
To Apply Brake
Using foot, press down firmly in areas 1 or 2.
1.
To Release Brake
Using a hand, lift up in area 3 and press area 4. This will allow you to control the brake
2.
lever. Using foot only press brake pedal in area 4.

TO UNLOCK/UNFOLD RECEIVER BED
To unlock the receiver, disengage the four latches located in the centre of the
1.
receiver bed.
Fold the ends of the receiver bed over.
2.
Remove the support arm detent pins.
3.
Insert the support arms at each end in the support arm housings.
4.
Re-insert the support arm detent pins fully.
5.
At the end of the receiver bed, pull out the spring pin and rotate 90
(this will lock
6.
the pin in an out position).
Rotate the gate up and release the spring pin by rotating 90
.
7.
Ensure the spring pin is fully engaged and the gate is firm before transporting.
8.
Reverse process to fold away.
9.
<PARA >NOTE: Ensure all detent pins and spring pins are fully engaged before
transportation.
Latch
Support Arm
Gate
Support Arm Housing
Support Arm Detent Pin
Spring Pin

TO UNLOCK/UNFOLD RECEIVER BED
When the receiver bed is folded back, ensure the hinge is folded inwards, and the
1.
latch lines up with the catch plate.

TO LOCK/UNLOCK LATCH
To unlock the latch, slide the middle button on the latch down, and pull down on
1.
the latch.
Unhook the latch and fold back up, ensuring the latch is free of the catch plate.
2.
Reverse the process to lock.
3.
Ensure all latches are free of the catch plate before operating lifting pedal.
4.
Ensure ALL FOUR latches are engaged before transportation.
5.
Latch
Catch Plate

TO RAISE/LOWER THE TROLLEY
Unlock all latches in each corner of the trolley.
1.
Press gently down on the longer end of the pedal until the pedal comes to a stop.
2.
Release the pedal and allow the pedal to return. Repeat process until the trolley
has reached its full height.
Press down on the shorter end of the pedal and keep pressed down to lower.
3.
Lock all latches before transportation.
4.
NOTE: The pedal is only for operating the raising mechanism, and should not be stood
or jumped on. Only enough pressure to depress the pedal should be applied.
Press down to lower
Press down to raise bed

TO RAISE/LOWER THE TROLLEY
When raising and lowering the trolley with the Aerosled locked on board, it is
recommended that a person be either side to steady the trolley.
Ensure the Aerosled is moved slowly across the receiver bed, ensuring the wheels do
not come off the receiver bed.

APPLICATION OF GREASE
Multi purpose grease should be applied in the areas shown on both sides every 6
months, or as required should the scissor action begin to judder.
The grease should be applied to the rack located under the blue plates. Simply work
the trolley up and down until the grease has been worked into the moving parts.
Do not allow the trolley to seize up. It is recommended to raise and lower the trolley at
least once a week.
Apply multi
purpose grease
Apply multi
purpose grease

TO FOLD/ENGAGE THE LOCK ATTACHMENTS
NOTE: The trolley must be in a raised position to lock/unlock the head end lock attachment.
Remove the lock attachment detent pins from the locks.
1.
Rotate the lock attachments around, out of the way (reducing the length of the trolley).
2.
Lower trolley.
3.
Reverse the process to engage the lock attachments, ensuring the detent pins are fully
4.
engaged at both ends of the trolley before transportation.
Lock Attachment Detent Pin

Maintenance
The maintenance schedule described below is essential to retaining warranty cover.
Cleaning
Hand-wash with warm water and a mild detergent using a soft cloth or sponge.
Wipe dry with a soft cloth
Monthly Inspection
A qualified maintenance person should carry out the inspection. If the trolley is damaged or does not
function properly, take it out of service until the problem has been corrected.
Check all fixings on trolley frame and equipment superstructure. They should still be secure and any
moving parts still smooth in operation.
For all medical devices refer to the relevant manuals.
Inspection records must be documented and maintained.
Repair & Service
Use only factory authorised repair parts to maintain the safety and performance of the trolley. Please
contact original supplier for all parts and components.
To order service parts or to request service help contact ParAid Sales department.
Note
The bearing supplied/fitted to the wheels are sealed i.e. do NOT require lubrication.
The hydraulic system onboard the trolley is maintenance free.
CAUTION
Do
NOT
use a high-pressure washer to clean the trolley.
WARNING
Improper maintenance can cause injury and unpredictable
operation. Maintain the trolley to ParAid instructions.

It is strongly recommended the castor wheels are changed
every 12 months (depending on use), as wear to the
wheels can affect the ability for the trolley to engage in
ambulance floor locks.
A general check of the trolley should be performed before
every transfer to ensure wheels are tight, no fasteners are
loose and all detent pins are present.
The following checks are recommended after the corresponding number of months of
use.
Note: An annual maintenance contract is available from Paraid. Please contact for details.
Month
12 3 4 5 6 7 8 9 10 11 12
Change Castor Wheels
X
Inspect Lifting Action
X X X X
Apply Multi Purpose
Grease to Scissor Action
X X
Check Fasteners Are
Tight
X X
Check Detent Pins For
Damage
X X X X
Check For Damage To
Lock Attachments
X X
Maintenance Schedule

Warranty
The trolley is covered by the Paraid Warranty. NOTE: This trolley should only ever be used by trained
personnel. Any required modifications subsequent to the original design can be undertaken by Paraid. Please
note any modifications NOT carried out by, or with the approval of, Paraid will invalidate the warranty.
Warranty Period
The ParAid Trolley is guaranteed for one year against defective material and workmanship.
Warranty Details
Damage caused by abuse and misuse , or any other damage which has occurred due to not adhering to these
guidelines is excluded. No guarantee claim will be accepted for damage caused by operating errors, non-
observation of the operating instructions, improper repairs or the use of spare parts considered to be non-
original.
Issues and claims concerning product failure should be submitted in writing to Paraid. Neither the
manufacturer nor their agents shall make recompense for repairs carried out by outside contractors or be
liable for any other damage either incidental or consequential to property or persons.
Health & Safety
All applicable UK & European regulations should be observed when handling, operating and transporting the
trolley.
Guarantee
We hereby guarantee that the product is free from defect, faulty materials and is suitable for the purpose for
which it is intended.
THE TROLLEY MUST BE MAINTAINED in accordance to the schedule and records maintained. Should you
encounter any problems please contact Paraid.
NOTE: Any unauthorised modification to the Paraid trolley negates all warranties
Manufacturer Details
ParAid, Paraid House, Weston Lane, Birmingham, B11 3RS, United Kingdom
TEL: +44 (0) 121 700 7455 FAX: +44 (0) 121 700 7454
e-mail: [email protected] www.paraid.co.uk
Table of contents
Popular Medical Equipment manuals by other brands

Cardiac Science
Cardiac Science Burdick 8300 Service manual

Dräger Medical
Dräger Medical Narkomed 6400 Operator's instruction manual

Shenzhen mindray
Shenzhen mindray PM 50 Operation manual

LPA Medical
LPA Medical Versatile Z Series instruction manual

Ambu
Ambu Airway Man Directions for use

bort medical
bort medical MalleoStabil SOFT quick guide