Thanks for choosing Paris Rhône Tower Fan. Please read
this User Manual thoroughly before use and retain it for
future reference.
IMPORTANT SAFETY INSTRUCTIONS
BEFORE USING THIS APPLIANCE READ ALL INSTRUCTIONS AND
CAUTIONARY MARKINGS IN YOUR USER MANUAL AND ON THE
APPLIANCE
When using an electrical appliance, basic precautions should always
be followed, including the following:
DANGER!
• DO NOT touch or hold the mains plug with wet hands.
• DO NOT block or cover air flow to or from the Fan while in operation.
• DO NOT insert fingers or objects through the grille while in operation.
INTENDED USE
• This appliance is not intended for use by persons (including children)
with reduced physical, sensory or mental capabilities, or lack of
experience and knowledge, unless they have been given supervision
or instruction concerning the use of the appliance by person
responsible for their safety.
• Close supervision is necessary when any appliance is used by or near
children. Children should be supervised to ensure that they do not
play with the appliance. Cleaning and user maintenance shall not be
done by children unless they are older than 8 and supervised.
• Use the appliance only for intended household purposes as
described in this User Manual. Any other use is not recommended
that may cause fire, electric shock, or injury to persons.
ELECTRICITY SAFETY
• This appliance must be provided with correct voltage via a profession-
ally installed power socket. Make sure the voltage indicated on the
label of the appliance is the same as your local supply.
• DO NOT operate the fan with a damaged cord or plug or if the
product malfunctions, is dropped or damaged in any manner.
• To reduce the risk of fire or electric shock, DO NOT use this fan with
any solid-state speed control device.
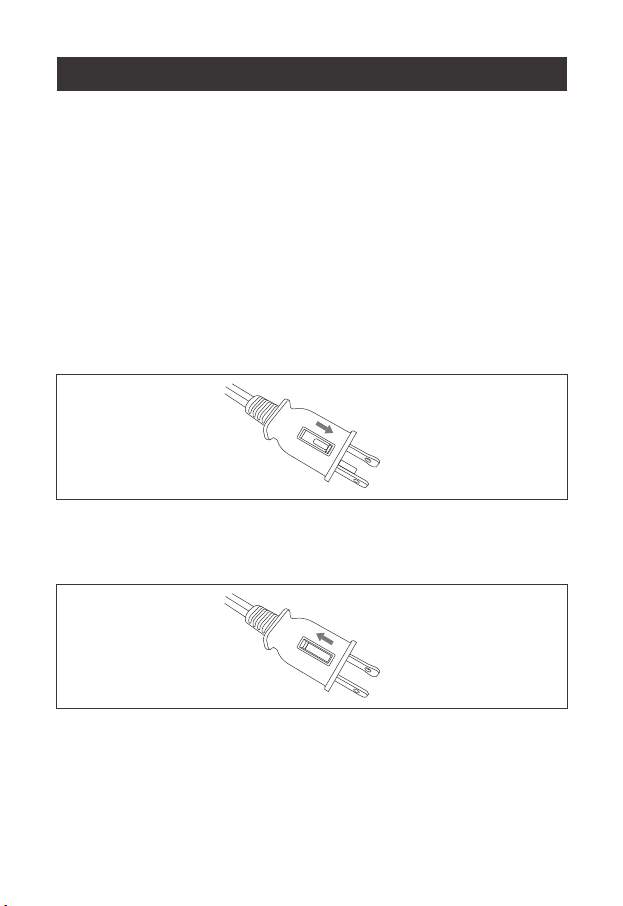
• IMPORTANT - This appliance has a polarized plug (one blade is wider
than the other). To reduce the risk of electric shock, this plug is
intended to fit in a polarized outlet only one way. If the plug does not
fit fully in the outlet, reverse the plug. If it still does not fit, contact a
qualified electrician. Do not attempt to rig this safety feature.
• This product employs overload protection (fuse). A blown fuse
indicates an overload or short-circuit situation. If the fuse blows,
unplug the product from the outlet. Replace the fuse according to the
instructions in this manual (follow product marking for proper fuse
rating) and check the product. If the replacement fuse blows, a
short-circuit may be present and the product should be discarded or
returned to an authorized service facility for examination and/
or repair.
RELATED TO USE
• Avoid contacting moving parts. Wait until all parts have completely
stopped before touching them.
• DO NOT use in a bathroom.
01
03 05 07 09 11 13 15 17 19
02