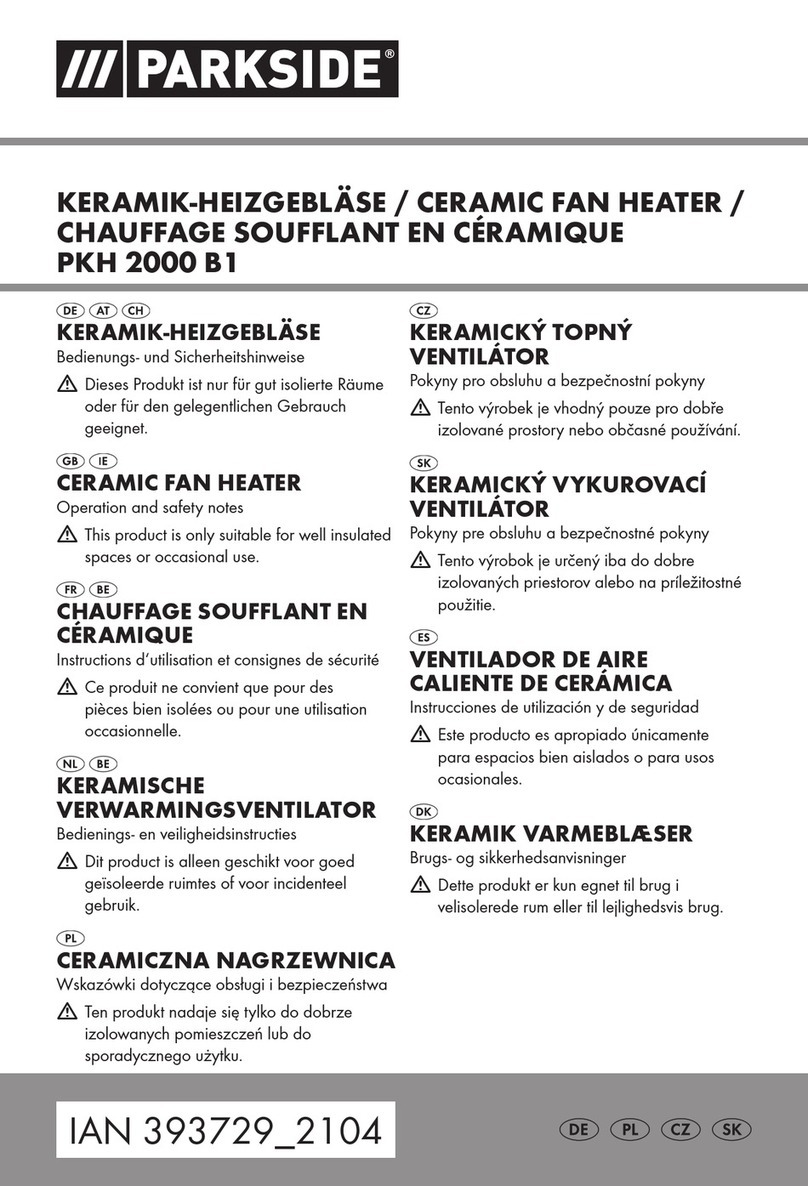
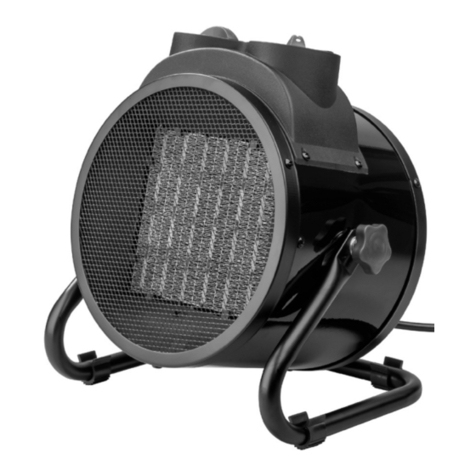
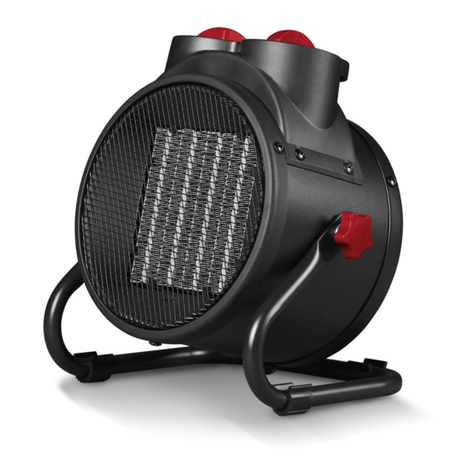
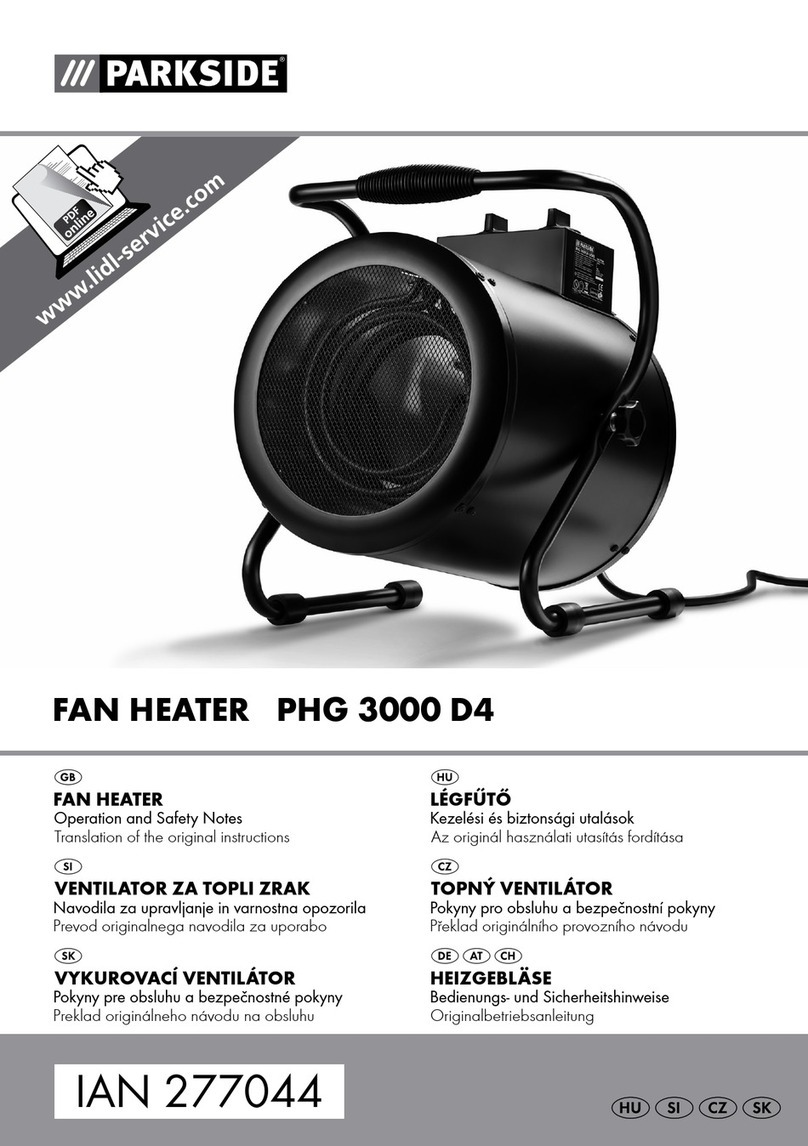
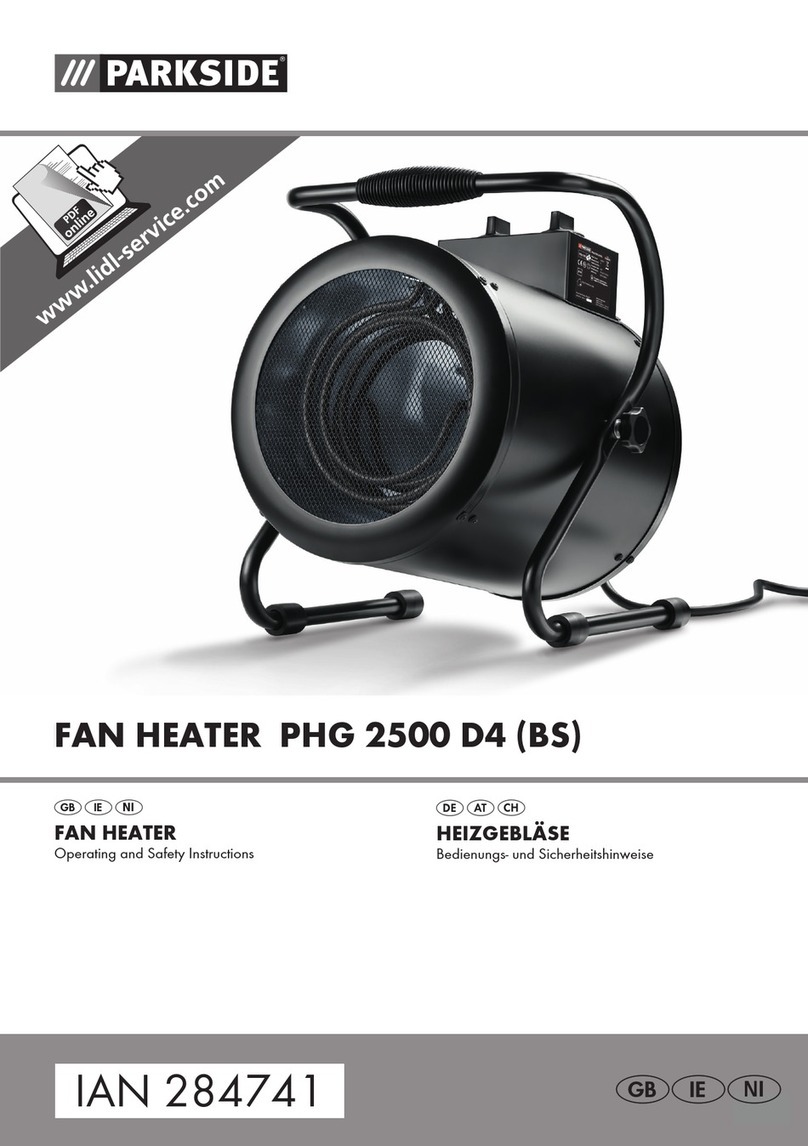
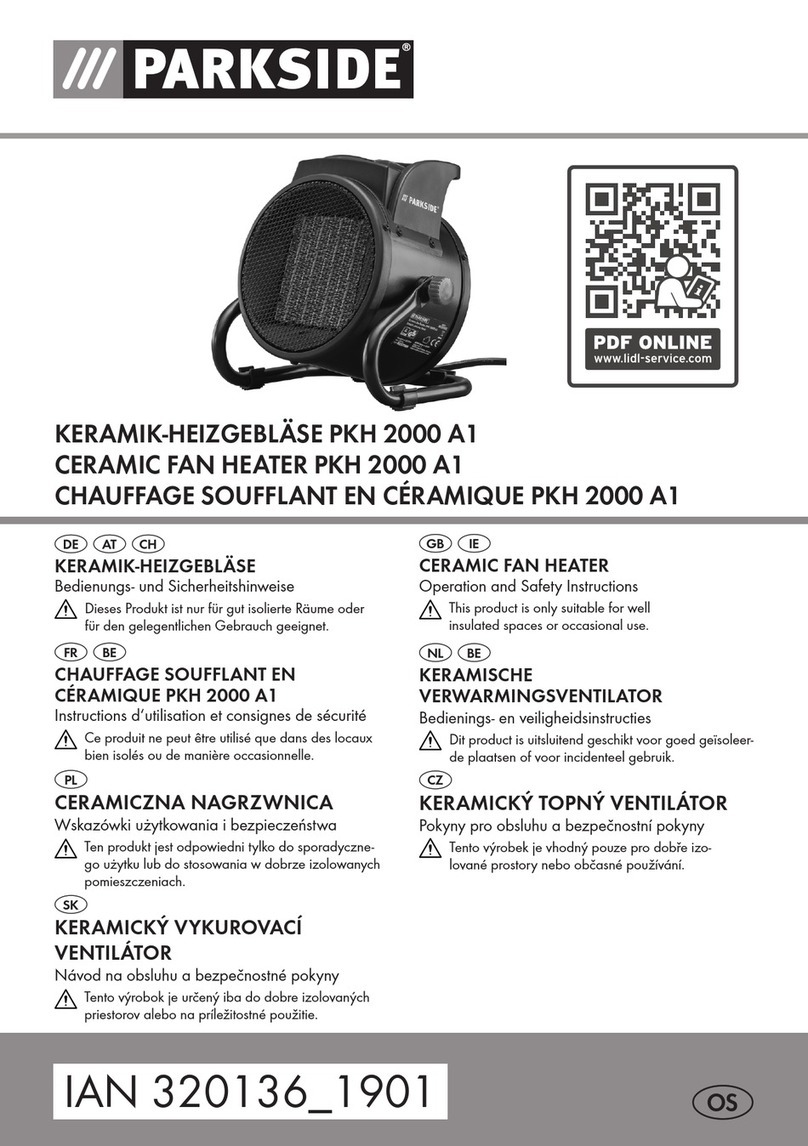
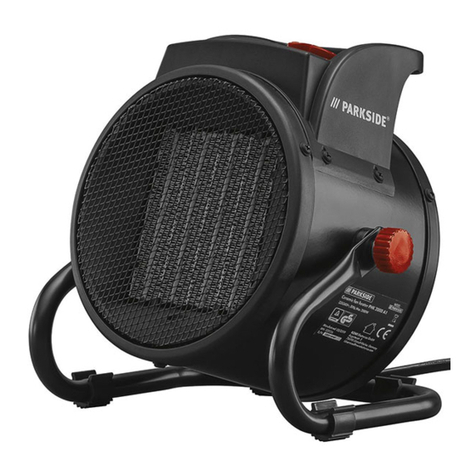
Parkside PKH 2000 A1 Use and care manual

IAN 336765_2001
CERAMIC FAN HEATER PKH 2000 A1
KERAMIČNI TOPLOZRAČNI VENTILATOR
Obratovalni in varnostni napotki
Ta izdelek je primeren le za uporabo v dobro
izoliranih prostorih ali za priložnostno uporabo.
KERAMICKÝ VYKUROVACÍ VENTILÁTOR
Návod na obsluhu a bezpečnostné pokyny
Tento výrobok je určený iba do dobre izolovaných
priestorov alebo na príležitostné použitie.
SI
SK
CZ SK
SI
KERAMICKÝ TOPNÝ VENTILÁTOR
Návod k obsluze a bezpečnostní pokyny
Tento výrobek je vhodný pouze pro dobře
izolované prostory nebo občasné používání.
KERAMIK-HEIZGEBLÄSE
Bedienungs- und Sicherheitshinweise
Dieses Produkt ist nur für gut isolierte Räume oder
für den gelegentlichen Gebrauch geeignet.
CZ
ATDE CH
HU
CERAMIC FAN HEATER
Operation and Safety Instructions
This product is only suitable for well
insulated spaces or occasional use.
GB
KERÁMIA LÉGFŰTŐ
Kezelési és biztonsági utalások
A termék kizárólag jól szigetelt helyiségek fűtésére vagy alkalmankénti
használatra alkalmas.
HU

Klappen Sie vor dem Lesen die Seite mit den Abbildungen aus und machen Sie sich anschließend mit allen
Funktionen des Gerätes vertraut.
SI
CZ
SK
DE AT CH
Pred branjem odprite stran s slikovnim prikazom in se najprej seznanite z vsemi funkcijami te naprave.
Nalistujte před čtením stránku s obrázky a seznamte se následněse všemi funkcemi přístroje.
Prv než začnete čítaťtento návod, rozložte si stránku s obrázkami a oboznámte sa so všetkými funkciami
zariadenia.
GB Operation and Safety Instructions Page 5
HU Kezelési és biztonsági utalások oldal 15
SI Obratovalni in varnostni napotki Stran 27
CZ Návod k obsluze a bezpečnostní pokyny Strana 37
Olvasás előtt kattintson az ábrákat tartalmazó mindkét oldalra és végezetül ismerje meg a készülék
mindegyik funkcióját.
GB
HU
Before reading, unfold the page containing the illustrations and familiarise yourself with all functions
of the device.
SK Návod na obsluhu a bezpečnostné pokyny Strana 47
DE/AT/CH Bedienungs- und Sicherheitshinweise Seite 57
KERAMICKÝ TOPNÝ VENTILÁTOR
Návod k obsluze a bezpečnostní pokyny
Tento výrobek je vhodný pouze pro dobře
izolované prostory nebo občasné používání.
KERAMIK-HEIZGEBLÄSE
Bedienungs- und Sicherheitshinweise
Dieses Produkt ist nur für gut isolierte Räume oder
für den gelegentlichen Gebrauch geeignet.
KERÁMIA LÉGFŰTŐ
Kezelési és biztonsági utalások
A termék kizárólag jól szigetelt helyiségek fűtésére vagy alkalmankénti
használatra alkalmas.

6
7
5
4
2 3
1

GB 5
Key to the pictograms ............................................................................................................ Page 6
Introduction ................................................................................................................................... Page 6
Intended Use .................................................................................................................................... Page 6
Equipment ........................................................................................................................................ Page 6
Scope of Delivery ............................................................................................................................ Page 6
Technical Data ................................................................................................................................. Page 7
Safety Instructions .................................................................................................................... Page 8
General Safety Instructions ............................................................................................................. Page 8
Before the Start of Operation ........................................................................................... Page 10
Setting up the Fan Heater ............................................................................................................... Page 10
Commissioning ........................................................................................................................... Page 10
Switching Heat Settings and Fan on/off ....................................................................................... Page 10
Setting the Temperature .................................................................................................................. Page 10
Switching off the Fan Heater ........................................................................................................... Page 11
Overheating Protection ................................................................................................................... Page 11
Troubleshooting ......................................................................................................................... Page 11
Maintenance, Cleaning and Storage ........................................................................... Page 11
ROWI Germany GmbH warranty ................................................................................ Page 12
Service ............................................................................................................................................. Page 13
Disposal .......................................................................................................................................... Page 13
Table of contents

GB6
Read the operating instructions!
Pay attention to warning and
safety information!
Warning - Danger from
hot surfaces!
Dispose of packaging and
device environmentally friendly!
Observe the marking of the packag-
ing materials for waste separation!
Warning!
Risk of electric shock!
The packaging is made of envi-
ronmentally friendly materials!
Indoor use only!
Warning! Fire hazard!
Warning! To prevent the fan heater
from overheating, the fan heater should
never be covered!
Key to the pictograms:
CERAMIC FAN HEATER PKH 2000 A1
Introduction
Congratulations on the purchase of your new fan
heater. You have opted for a high quality product. The
operating instructions are part of this product. They
contain important information on safety, usage and
disposal. Familiarise yourself with all operating and
safety instructions before you use the product. Use the
product only as described and only for the specified
areas of use. When passing on the product, please do
not forget to hand over all the necessary documents to
the new user.
Intended Use
This fan heater is intended for heating of enclosed
spaces only. The fan heater is not suitable for use in
rooms where special conditions exist, such as a
corrosive or potentially explosive atmosphere (dust,
vapour or gas). Do not use the appliance outdoors.
Any other use or modification of the device shall be
deemed to be improper and entails a considerable
risk of accidents. We assume no liability for damage
resulting from improper use. The fan heater is intended
for private use only.
Equipment
1
2
3
4
5
6
Stand with carrying handle
Heating level switch
Control light
Temperature control
Air outlet
Rotary knobs
Mains cable
Scope of Delivery
1 Ceramic fan heater PKH 2000 A1
1 Operating manual
7

GB 7
electronic heat charge control with room
and/or outdoor temperature feedback
[no]
fan assisted heat output [no]
Type of heat output/room
temperature control (select one)
single stage heat output and no room
temperature control
[no]
Two or more manual stages,
no room temperature control
[no]
with mechanic thermostat room
temperature control
[yes]
with electronic room temperature control [no]
electronic room temperature
control plus day timer
[no]
electronic room temperature
control plus week timer
[no]
Other control options
(multiple selections possible)
room temperature control,
with presence detection
[no]
room temperature control,
with open window detection
[no]
with distance control option [no]
with adaptive start control [no]
with working time limitation [no]
with black bulb sensor [no]
ROWI Germany GmbH
Werner-von-Siemens-Str. 27
76694 Forst
(Germany)
Technical Data
Input voltage: 220-240 V~, 50 Hz
Nominal power consumption: 2000 W
Safety class: I
Heat control setting 1: 1000 W
Heat control setting 2: 2000 W
Fan operation: 25 W
Thermostat: 0 to +65 °C
Dimensions:
210 x 160 x 217 mm
Weight: approx. 1.6 kg
Information requirements for electric local
space heaters
Model identifier(s): PKH 2000 A1
Item Symbol Value Unit
Heat output
Nominal heat output Pnom 2.0 kW
Minimum heat
output (indicative)
Pmin 1.0 kW
Maximum continuous
heat output
Pmax,c 2.0 kW
Auxiliary electricity consumption
At nominal heat
output
elmax na kW
At minimum heat
output
elmin na kW
In standby mode elSB na kW
Item Unit
Type of heat input, for electric storage
local space heaters only (select one)
manual heat charge control, with
integrated thermostat
[no]
manual heat charge control with room
and/or outdoor temperature feedback
[no]

GB8
Safety Instructions
Read all safety informa-
tion and instructions.
Failure to observe the safety
information and instructions
may result in serious injury
or damage to property.
FOR FUTURE REFERENCE, KEEP
ALL SAFETY INSTRUCTIONS AND
PRECAUTIONS IN A SAFE PLACE!
Danger of
life-threatening electric
shock! Mortal danger
through contact with ducts or
components under voltage!
Do not use the fan heater if the
power cord or plug is damaged.
Have an authorised electrician
install a new power cord before
any further use of the fan heater.
Never open the fan heater
housing. There is a danger of
electric shock if the live con-
nections are touched and/or
the electrical and mechanical
installation is changed!
Before connecting the fan heat-
er, compare the connection
data on the rating plate (volt-
age and frequency) with the
data of your electricity supply.
Make sure the data matches,
so that no damage to the fan
heater occurs.
Make sure the mains cable is un-
damaged and is not laid over hot
surfaces and/or sharp edges.
Ensure the power cable does
not kink or become trapped.
Repairs to electrical appliances
should only be performed by pro-
fessionals who have been trained
by the manufacturer. Unauthor-
ised repairs may result in consid-
erable dangers for the user.
FIRE
HAZARD! For that reason,
never use the fan heater in
the vicinity of or below curtains
and other combustible material.
Avoid contact between the fan
heater and combustible material
(e.g. textiles).
To prevent the fan heater
overheating, the heater
must not be covered.
General Safety Instructions
Check the fan heater for exter-
nal visible damage before use.
Do not operate a damaged or
dropped fan heater.
If the power cable of this fan
heater is damaged, to avoid
hazards, it must be replaced
by the manufacturer or its af-
ter-sales service, or a similarly
qualified person.

GB 9
This fan heater can be used by
children over the age of 8 and
by persons with reduced physi-
cal, sensory or mental capabili-
ties, or people who are lacking
in experience and knowledge,
if they are supervised or have
been instructed in the safe use
of the unit and understand the
hazards involved. Children
should not play with the appli-
ance. Cleaning and user main-
tenance must not be undertaken
by children without supervision.
Children under 3 must be kept
away from the fan, unless they
are monitored constantly.
Children between the ages of 3
and 8 may only switch the fan
heater on and off when they
are supervised or have been
instructed in the safe use of the
fan heater and understand the
resulting risks, provided that the
fan heater is placed or installed
in its normal operating position.
Children between the ages of 3
and 8 may not plug the fan into
the wall socket, regulate the fan
heater, clean the fan heater and/
or perform user maintenance.
WARNING OF HOT
SURFACES!
Some parts of this product can
become very hot and cause
burns. Special care is required
when children and vulnerable
persons are present.
Only have the fan heater re-
paired by authorised specialist
companies or by customer ser-
vice. Unauthorised repairs may
result in considerable danger
to the user. In addition, the war-
ranty claim expires.
Defective components must be
replaced only by original spare
parts. Only these parts will
ensure that the safety require-
ments are met.
Protect the fan heater against
moisture and the ingress of liquids.
Disconnect from the power sup-
ply connection only by removing
the plug from the socket.
Do not operate the fan heater
in the vicinity of open flame.
Do not place the fan heater direct-
ly below or above a wall socket.
Pull the plug out of the socket
in the event of malfunctions and
during thunderstorms.
Never use the fan heater in the
immediate vicinity of a bath,
shower or swimming pool.

GB10
Before the Start of Operation
Setting up the Fan Heater
Remove all packaging material and all transport
securing devices from the fan heater.
For safe and error-free operation of the fan heater, the
installation site must meet the following requirements:
– The ground must be firm, flat and level.
– A minimum distance of 30 cm must be kept to
the side, 30 cm to the top, 30 to the rear and
100 cm to the front.
– Do not place the fan heater in a hot, wet or very
humid environment or near flammable material.
– The socket must be easily accessible so that
the mains cable 7can be easily removed in
case of emergency.
Please note: When used for the first time, it may
briefly cause a slight odour.
Commissioning
Switching Heat Settings
and Fan on/off
Make sure the heating level switch 2 is set to 0.
Then connect the heater to a earthed and fused
plug socket protected by a GFCI. Free rotation of
the fan must be ensured.
Now switch on the fan heater by turning the heat-
ing level switch
2
to the desired position. For this:
▪
0Off Position If the heating level switch
2is in this position, the
fan heater is switched off.
Fan position If the heating level switch
2is in this position, only
the fan operates. Move
the switch to this position
when you want to use the
heater as a fan.
Heat control
setting 1
If the heating level switch
2is in this position, the
fan heater produces a
heat output of 1000 W.
Heat control
setting 2
If the heating level switch
2is in this position, the
fan heater produces a
heat output of 2000 W.
MIN position of the thermoregulator
MAX position of the thermoregulator
Setting the Temperature
Start the heater by using the heating level switch
2to set the desired heat level.
Turn the temperature control 4clockwise until it
stops. The control light 3begins to illuminate.
When the desired temperature is reached, turn
the temperature control 4counter-clockwise
until you hear an audible click, the control light
3will then go out. An integrated thermostat
will now automatically switch the heating func-
tion on and off.
Regardless of the actual room temperature, the symbols
shown only represent a guide value for the temperature
range you require.
lowest temperature range
low temperature range

GB 11
medium-high temperature range
highest temperature range
Please note: The fan heater temporarily remains very
hot during the heating intervals. Please take care when
operating the fan heater.
The fan heater has angle adjustment. Turn the rotary
knobs
6
at the side to adjust the tilt.
Switching off the Fan Heater
To avoid heat build-up in the fan heater, allow
the fan to run for approximately 30 seconds
afterwards.
Turn the heating level switch 2to position 0.
Pull out the mains plug to disconnect the heater
from the mains supply, thus switching it off
completely.
Overheating Protection
This fan heater is equipped with overheating pro-
tection. If the fan heater overheats, it will switch off
automatically. The fan continues to run so that rapid
cooling is achieved. The fan heater will switch on
again automatically once it has cooled down properly.
PLEASE NOTE: There is usually a reason for
overheating! It can indicate a fire hazard!
Check whether the fan heater is giving off sufficient
heat: Is the fan heater covered or is it too close to a
wall or other obstruction? Is the grid blocked in the
front or at the back? Is the fan blocked?
Rectify the problem if possible, or contact the ser-
vice hotline (see the section “Service”).
Even if you were unable to identify the cause, if
the overheating protection is triggered a second
time, you must switch off the fan heater and con-
tact the service hotline (see “Service” Section).
Troubleshooting
Fault Possible cause Solution
The fan
heater
will not
switch on.
The mains plug
is not plugged in.
Insert the mains
plug in the socket.
Socket delivering
no voltage.
Check the
house fuses.
The fan
heater
does not
heat up.
Heating level
switch 2is not
switched on.
Set the heating
level switch 2
to the desired
operating mode.
Temperature con-
trol 4is in the
MIN position.
Set temperature
control
4
to the
MAX position.
Faulty heating
element.
Notify customer
services.
Maintenance, Cleaning
and Storage
Always disconnect the mains plug when the fan
heater is not in use, before cleaning or in the event
of operating faults!
Clean the fan heater only when switched off and
cold.
Make sure when cleaning that no moisture pen-
etrates into the fan heater, to avoid irreparable
damage to the fan heater.
Clean the housing with a slightly damp cloth and a
mild detergent.
Use a vacuum cleaner to remove dust from the
safety guard.
Store the heater in a dry environment.

GB12
ROWI Germany GmbH warranty
Dear Customer,
This appliance has a 3-year warranty valid from the date
of purchase. If this product has any faults, you, the buyer,
have certain statutory rights. Your statutory rights are not
restricted in any way by the warranty described below.
Warranty conditions
The validity period of the warranty starts from the
date of purchase. Please keep your original receipt
in a safe place. This document will be required as
proof of purchase.
If any material or production fault occurs within three
years of the date of purchase of the product, we will
either repair or replace the product for you at our
discretion. This warranty service is dependent on you
presenting the defective appliance and the proof of
purchase (receipt) and a short written description of
the fault and its time of occurrence.
If the defect is covered by the warranty, your product
will either be repaired or replaced by us. The repair
or replacement of a product does not signify the be-
ginning of a new warranty period.
Warranty period and statutory claims for defects
The warranty period is not prolonged by repairs
effected under the warranty. This also applies to re-
placed and repaired components. Any damage and
defects present at the time of purchase must be re-
ported immediately after unpacking. Repairs carried
out after expiry of the warranty period shall be subject
to a fee.
Scope of the warranty
This appliance has been manufactured in accordance
with strict quality guidelines and inspected meticulous-
ly prior to delivery.
The warranty covers material faults or production faults.
The warranty does not extend to product parts subject
to normal wear and tear or fragile parts such as switch-
es, batteries, baking moulds or parts made of glass.
The warranty does not apply if the product has been
damaged, improperly used or improperly main-
tained. The directions in the operating instructions for
the product regarding proper use of the product are to
be strictly followed. Uses and actions that are discour-
aged in the operating instructions or which are warned
against must be avoided.
This product is intended solely for private use and not for
commercial purposes. The warranty shall be deemed
void in cases of misuse or improper handling, use of
force and modifications/repairs which have not been
carried out by one of our authorised Service centres.
Warranty claim procedure
To ensure quick processing of your case, please ob-
serve the following instructions:
Please have the till receipt and the item number (IAN
336765_2001) available as proof of purchase.
You will find the item number on the type plate,
an engraving on the front page of the instructions
(bottom left), or as a sticker on the rear or bottom
of the appliance.
If functional or other defects occur, please contact
the service department listed either by telephone
or by e-mail.
You can return a defective product to us free of
charge to the service address that will be pro-
vided to you. Ensure that you enclose the proof
of purchase (till receipt) and information about
what the defect is and when it occurred.
NOTICE: At www.
lidl-service.com you
can download this ma-
nual as well as many
other manuals, product
videos and software. This
QR code will take you
directly to the Lidl service
page (www.lidl-service.
com) and allow you to
open your operating
instructions simply by en-
tering the article number
(IAN 336765_2001).

GB 13
Service
If any problems arise while using your ROWI Germany
product, please proceed as follows:
Contact
You can contact the ROWI Germany Service Team at:
ROWI Germany GmbH
Werner-von-Siemens-Str. 27
76694 Forst, Germany
lidl-services@rowi-group.com
Service-Hotline: +800 7694 7694
(free of charge from a German landline)
IAN 336765_2001
Most problems can be fixed with competent techni-
cal advice from our service team.
Disposal
The packaging is made of environmentally
friendly materials that can be disposed of
at local recycling facilities.
Do not dispose of the product with the nor-
mal household waste, but via municipal
recycling points! Please contact your munici-
pal or city administration to find out options
for the disposal of the used product.
Observe the marking of the packaging
materials for waste separation, which are
marked with abbreviations and numbers
with following meaning: 1–7: plastics/
20–22: paper and fibreboard/80–98:
composite materials.

14

HU 15
Tartalomjegyzék
Az alkalmazott piktogramok magyarázata ........................................................... oldal 16
Bevezetés ...................................................................................................................................... oldal 16
Rendeltetésszerű használat ............................................................................................................ oldal 16
Felszereltség .................................................................................................................................... oldal 16
Csomag tartalma ............................................................................................................................ oldal 16
Műszaki adatok ............................................................................................................................... oldal 17
Biztonsági útmutatások ........................................................................................................ oldal 18
Általános biztonsági útmutatások .................................................................................................. oldal 19
Az üzembe helyezés előtt ................................................................................................... oldal 20
A fűtőventilátor felállítása ............................................................................................................... oldal 20
Üzembe helyezés ..................................................................................................................... oldal 20
A fűtési fokozatok és a ventilátor be-/kikapcsolása ..................................................................... oldal 20
A hőmérséklet beállítása ................................................................................................................ oldal 21
A fűtőventilátor kikapcsolása ......................................................................................................... oldal 21
Túlhevülés elleni védelem ................................................................................................................ oldal 21
Hibaelhárítás .............................................................................................................................. oldal 22
Karbantartás, tisztítás és tárolás ................................................................................... oldal 22
JÓTÁLLÁSI TÁJÉKOZTATÓ .................................................................................................. oldal 23
Szerviz ............................................................................................................................................. oldal 25
Ártalmatlanítás .......................................................................................................................... oldal 25

HU16
Olvassa el a kezelési útmutatót!
Vegye figyelembe a biztonsági út-
mutatásokat és a figyelmeztetéseket!
Figyelmeztetés, forró felületek!
A csomagolást és az eszközt
környezetbarát módon
ártalmatlanítsa!
A hulladékválogatáskor vegye figye-
lembe a csomagolóanyagokon talál-
ható jelöléseket!
Figyelmeztetés! Elektromos
áramütés veszélye!
A csomagolás környezetbarát
anyagokból készült!
Csak beltérben használja!
Figyelmeztetés! Tűzveszély!
Figyelmeztetés!
A fűtőventilátor túl-
hevülésének megelőzése érdekében
a fűtőventilátort tilos letakarni!
Az alkalmazott piktogramok magyarázata:
KERÁMIA LÉGFŰTŐ PKH 2000 A1
Bevezetés
Gratulálunk új kerámia fűtőventilátora megvásárlásá-
hoz. Ezzel egy kiváló minőségű termék mellett dön-
tött. A kezelési útmutató a termék részét képezi. Fon-
tos utasításokat tartalmaz a biztonságra, használatra
és ártalmatlanításra vonatkozóan. A termék hasz-
nálata előtt ismerkedjen meg az összes kezelési és
biztonsági utasítással. A terméket csak a leírt módon
és a megadott alkalmazási területeken használja. A
termék továbbadásakor harmadik személynek adja
át azzal együtt az összes dokumentumot is.
Rendeltetésszerű használat
Ez a kerámia fűtőventilátor zárt terek fűtésére és szel-
lőztetésére alkalmas. A fűtőventilátor nem alkalmas
olyan helyiségekben való használatra, melyekben
különleges körülmények uralkodnak, pl. korrozív vagy
robbanásveszélyes légkör (por, gőz vagy gáz). A
fűtőventilátort ne használja a szabadban. A fűtőven-
tilátor minden más használata vagy módosítása nem
rendeltetésszerű használatnak minősül, és az súlyos
baleseteket eredményezhet. A nem rendeltetésszerű
használatból eredő károkért nem vállalunk semmine-
mű felelősséget. A fűtőventilátor csak magáncélú fel-
használásra alkalmas.
Felszereltség
1
2
3
4
5
6
Hordozófogantyú
Fűtésfokozat-szabályozó
Jelzőlámpa
Hőmérséklet-szabályozó
Légkifúvó nyílás
Elforgatható gombok
7Hálózati csatlakozókábel
Csomag tartalma
1 Kerámia Légfűtő PKH 2000 A1
1 Darab kezelési útmutató

HU 17
Elektronikus töltésszabályozás beltéri
és/vagy külső hőmérséklet-visszacsa-
tolással
[nem]
Ventilátorral segített hőleadás [nem]
A teljesítmény, illetve a beltéri hőmérséklet
szabályozásának típusa (egyet jelöljön meg)
Egyetlen állás, beltéri hőmérsé-
ket-szabályozás nélkül
[nem]
Két vagy több kézi szabályozású állás,
beltéri hőmérséklet-szabályozás nélkül
[nem]
Mechanikus termosztátos beltéri
hőmérséklet- szabályozás
[igen]
Elektronikus beltéri hőmérséklet-sza-
bályozás
[nem]
Elektronikus beltéri hőmérséklet-szabá-
lyozás és napszak szerinti szabályozás
[nem]
Elektronikus beltéri hőmérséklet-szabá-
lyozás és heti szabályozás
[nem]
Más szabályozási lehetőségek
(többet is megjelölhet)
Beltéri hőmérséklet-szabályozás jelen-
lét-érzékeléssel
[nem]
Beltéri hőmérséklet-szabályozás nyitot-
tablak-érzékeléssel
[nem]
Távszabályozási lehetőség
[nem]
Adaptív bekapcsolásszabályozás
[nem]
Működési idő korlátozása
[nem]
Feketegömb-érzékelővel ellátva
[nem]
ROWI Germany GmbH
Werner-von-Siemens-Str. 27
76694 Forst
(Németország)
Műszaki adatok
Feszültségellátás 220-240 V~,50 Hz
Névleges teljesítmény: 2000 W
Érintésvédelmi osztály: I
1. fűtési fokozat: 1000 W
2. fűtési fokozat: 2000 W
Ventilátorüzem: 25 W
Termosztát: 0 és +65 °C között
Méretek: kb. 210 x 160 x 217 mm
Súly: kb. 1,6 kg
Az elektromos egyedi helyiségfűtő berende-
zések termékinformációs követelményei
Modellazonosító(k): PKH 2000 A1
Jellemző Jel Érték Mértékegység
Hőteljesítmény
Névleges hőteljesít-
mény
Pnom 2,0 kW
Minimális hőteljesít-
mény (indikatív)
Pmin 1,0 kW
Maximális folyamatos
hőteljesítmény
Pmax,c 2,0 kW
Kiegészítő villamosenergia-fogyasztás
A névleges hőteljesít-
ményen
elmax na kW
A minimális hőteljesít-
ményen
elmin na kW
Készenléti
üzemmódban
elSB na kW
Jellemző Mértékegység
A hőbevitel típusa (csak a hőtárolós elektromos
egyedi helyiségfűtő berendezések esetében –
egyet jelöljön meg)
Kézi töltésszabályozás beépített
termosztáttal
[nem]
Kézi töltésszabályozás beltéri és/vagy
kültéri hőmérséklet-visszacsatolással
[nem]

HU18
Biztonsági útmutatások
Olvassa át az összes
biztonsági útmutatást
és utasítást.
A biztonsági útmutatások
és utasítások figyelmen kívül
hagyása súlyos sérüléseket
és / vagy anyagi károkat
vonhat maga után.
AZ ÖSSZES BIZTONSÁGI ÚTMU-
TATÁST ÉS UTASÍTÁST ŐRIZZE
MEG KÉSŐBBI FELHASZNÁLÁS
CÉLJÁBÓL!
Életveszély elektromos
áram által!
A feszültség
alatt álló vezetékek vagy alka-
trészek érintése esetén életves-
zély áll fenn!
Ha a hálózati tápkábel vagy a
csatlakozódugó sérült, ne hasz-
nálja a készüléket. A készülék
további használata előtt hivata-
los szakemberrel cseréltesse ki
a sérült hálózati tápkábelt.
Soha ne nyissa ki a készülék há-
zát. A feszültség alatt álló csat-
lakozások érintése és / vagy
az elektromos és mechanikus
konstrukció módosítása esetén
áramütés veszélye fenyeget!
A készülék elektromos csatlakoz-
tatása előtt hasonlítsa össze a
típustáblán szereplő csatlakozta-
tási adatokat (feszültség és frek-
vencia) az Ön elektromos háló-
zatának adataival. Ügyeljen rá,
hogy az adatok egyezzenek,
nehogy károsodjon a készülék.
Győződjön meg róla, hogy a há-
lózati tápkábel nem sérült, és azt
nem forró felületekre és / vagy
éles peremeken át fektette le.
Ügyeljen rá, hogy a hálózati
tápkábel ne legyen megtörve
vagy összenyomva.
Az elektromos készülékeken ja-
vításokat csak a gyártó által ok-
tatásban részesült szakemberek
végezhetnek. A szakszerűtlen
javítások a felhasználó részére
jelentős károkat okozhatnak.
TŰZVESZÉLY! Ezért a
készüléket soha ne hasz-
nálja függönyök és más gyúl-
ékony anyagok közelében vagy
azok alatt.
Gondoskodjon róla, hogy a ké-
szülék ne érintkezzen gyúlékony
anyagokkal (pl. textíliákkal).
A fűtőventilátor túlhevü-
lésének megelőzése ér
dekében a fűtőventilátort
tilos letakarni.

HU 19
Általános biztonsági útmu-
tatások
Használat előtt ellenőrizze a
készülék külső látható sérülésit.
Sérült vagy a leejtett készüléket
ne helyezzen üzembe.
Ha sérült a készülék hálózati táp-
kábele, akkor a veszélyek meg-
előzése érdekében a gyártónak,
vagy a gyártó ügyfélszolgálatá-
nak vagy hasonló képzettségű
személynek kell kicserélnie ezt.
Ez a fűtőventilátort 8 éves és
annál idősebb gyermekek, va-
lamint korlátozott fizikai, érzé-
kelési és szellemi képességű,
illetve megfelelő tapasztalattal
és tudással nem rendelkező sze-
mélyek csak felügyelet mellett,
illetve a fűtőventilátor bizton-
ságos használatát és az abból
eredő veszélyeket megértve
használhatják. Gyermekek nem
játszhatnak a fűtőventilátorral. A
termék tisztítását és felhasználói
karbantartását felügyelet nélküli
gyermekek nem végezhetik.
A 3 évnél fiatalabb gyermeke-
ket tartsa távol a készüléktől, ki-
véve, ha folyamatos felügyelet
alatt állnak.
A 3 évnél idősebb és 8 évnél
fiatalabb gyermekek a fűtőven-
tilátort csak akkor kapcsolhat-
ják be és ki, ha felügyelet alatt
állnak, vagy ha a fűtőventilátor
biztonságos használata tekinte-
tében oktatásban részesültek és
megértik az ebből eredő veszé-
lyeket, feltéve, hogy a fűtőventi-
látort normál használati helyén
helyezték el vagy telepítették. A
3 évnél idősebb és 8 évnél fia-
talabb gyermekek számára tilos
a csatlakozódugót a dugaszoló-
aljzatba dugni, a fűtőventilátort
szabályozni, a fűtőventilátort
tisztítani és / vagy a felhasználói
karbantartást elvégezni.
FIGYELMEZTETÉS,
FORRÓ
FELÜLETEK!
A termék egyes részei nagyon
felforrósodhatnak és égési sé-
rüléseket okozhatnak. Különö-
sen figyelmesen járjon el, ha
gyermekek és védelmet igénylő
személyek is jelen vannak.
A fűtőventilátor javítását csak
hivatalos szakemberrel, vagy
az ügyfélszolgálattal végeztes-
se el. A szakszerűtlen javítások
a felhasználó részére jelentős
károkat okozhatnak. Ezen kívül
megszűnik a garanciaigény is.
A meghibásodott alkatrészeket
csak eredeti pótalkatrészekre
szabad kicserélni. Csak ezek-

HU20
nél az alkatrészeknél garantált,
hogy azok teljesítik a biztonsá-
gi követelményeket.
A fűtőventilátort óvja nedvesség-
től és a folyadékok bejutásától.
A hálózati csatlakozókábelt
csak a csatlakozódugónál fogva
húzza ki a dugaszolóaljzatból.
A fűtőventilátort ne működtesse
nyílt láng közelében.
A fűtőventilátort ne állítsa köz-
vetlenül a fali dugaszolóaljzat
alá, vagy fölé.
Üzemzavarok jelentkezése, va-
lamint viharok esetén a csatla-
kozódugót húzza ki a dugaszo-
lóaljzatból.
A fűtőventilátort soha ne használ-
ja fürdőkád, zuhany vagy úszó-
medence közvetlen közelében.
Az üzembe helyezés előtt
A fűtőventilátor felállítása
Távolítson el minden csomagolóanyagot és szál-
lítási biztosítóeszközt a fűtőventilátorról.
A fűtőventilátor biztonságos és zavartalan üzemelte-
téséhez a felállítási helynek a következő előfeltételek-
nek kell megfelelnie:
– A talaj legyen szilárd, sík és vízszintes.
– A fűtőventilátor háza körül tartsa be a követke-
ző minimális távolságokat: oldalirányban 30
cm, felfelé 30 cm, hátrafelé 30 cm és előre
100 cm.
– A fűtőventilátort ne állítsa fel forró, nedves, vagy
nagyon nedves környezetben, vagy gyúlékony
anyagok közelében.
– A csatlakozóaljzatnak könnyen hozzáférhető-
nek kell lennie, hogy a hálózati csatlakozóká-
belt vészhelyzetben gyorsan ki lehessen húzni.
Útmutatás: Az első használatkor átmenetileg enyhe
szag jelentkezhet.
Üzembe helyezés
A fűtési fokozatok és a ventilátor
be-/kikapcsolása
Győződjön meg arról, hogy a fűtési fokozat kap-
csoló
2
0 állásban van. A fűtőventilátort ezután
csatlakoztassa egy földelt, hibaáram védőkap-
csolóval ellátott csatlakozóaljzathoz. Biztosítsa a
ventilátor szabad forgását.
Kapcsolja be a fűtőventilátort, ehhez a fűtési fo-
kozat kapcsolót 2állítsa a kívánt helyzetbe. A
következők érvényesek:
0KI-állás Ha a fűtési fokozat
kapcsoló 2ebben a
helyzetben van, akkor a
fűtőventilátor ki van kap-
csolva.
Ventilátor
állás
Ha a fűtési fokozat
kapcsoló 2ebben a
helyzetben van, akkor
csak a ventilátorkerék
üzemel. Akkor kapcsolja
a kapcsolót ebbe a hely-
zetbe, ha a fűtőventilátort
ventilátorként szeretné
használni.
1. fűtési
fokozat
Ha a fűtési fokozat
kapcsoló 2ebben a
helyzetben van, akkor a
fűtőventilátor 1000 W
teljesítménnyel üzemel.
2. fűtési
fokozat
Ha a fűtési fokozat
kapcsoló 2ebben a
helyzetben van, akkor a
fűtőventilátor 2000 W
teljesítménnyel üzemel.

HU 21
MIN pozícióba Hőmérséklet-szabályozó
MAX pozícióba Hőmérséklet-szabályozó
A hőmérséklet beállítása
A fűtési fokozat kapcsoló 2a fűtési teljesít-
ményre állításával indítsa el a fűtőventilátort.
Forgassa el a hőmérséklet-szabályozót 4az
óramutató járásával egyező irányban ütközésig.
Világítani kezd a jelzőlámpa 3.
Ha a készülék elérte a kívánt hőmérsékletet, akkor
forgassa el visszafelé óramutató járásával ellenté-
tes irányba a hőmérséklet-szabályozót
4
amíg
egy egyértelmű kattanást nem hall, ekkor
elalszik
a jelzőlámpa
3.
Ekkor egy beépített termosztát
automatikusan be / ki kapcsolja a fűtési funkciót.
A tényleges szobahőmérséklettől függetlenül a feltünte-
tett szimbólumok csak a kívánt hőmérsékleti tartomány
iránymutatását képviselik.
legalacsonyabb hőmérsékleti tartomány
alacsony hőmérsékleti tartomány
közepes-magas hőmérsékleti tartomány
legmagasabb hőmérsékleti tartomány
Útmutatás: A fűtési szünetek során a fűtőventilátor igen
meleg marad. Kérjük, hogy a fűtőventilátor kezelése során
ügyeljen erre.
A fűtőventilátor rendelkezik egy szögbeállítóval.
A dőlésszög beállításához forgassa el az oldalt
elhelyezett elforgatható gombokat 6.
A fűtőventilátor kikapcsolása
A fűtőventilátorban a hő feltorlódásának meg-
előzése érdekében a ventilátort hagyja még kb.
30 másodperc forogni.
Forgassa a fűtési fokozat szabályozót 20 ál-
lásba.
A fűtőventilátor az elektromos hálózatról való
leválasztásához és ezzel a teljes kikapcsoláshoz
húzza ki a csatlakozódugót.
Túlhevülés elleni védelem
Ez a fűtőventilátor túlhevülés elleni védelemmel ren-
delkezik. Ha a fűtőventilátor nagyon felforrósodik,
akkor a fűtőelem automatikusan lekapcsol. A minél
gyorsabb lehűlés érdekében a ventilátor viszont to-
vább forog. Amint lehűlt a megfelelő hőmérsékletre,
a fűtőventilátor automatikusan bekapcsol.
FIGYELEM! A túlhevülésnek rendszerint valami-
lyen oka van! Ez tűzveszélyt jelenthet!
Ellenőrizze, hogy a fűtőventilátor képes-e leadni
a hőjét a kellő mértékben: A fűtőventilátort leta-
karták vagy túl közel áll a falhoz vagy más aka-
dályhoz? Az elülső és hátsó oldalon levő rácsok
szabadok? Blokkolja valami a ventilátort?
Ha lehetséges, hárítsa el a problémát, vagy a
forródróton kérje a szerviz segítségét (lásd a
„Szerviz“ fejezetben).
Amennyiben nem találja meg a probléma okát, de
a túlhevülés elleni védelem újra bekapcsol, akkor
kapcsolja ki a fűtőventilátort, és a forródróton kérje
a szerviz segítségét (lásd a „Szerviz“ fejezetben).
Other manuals for PKH 2000 A1
2
This manual suits for next models
1
Table of contents
Languages:
Other Parkside Heater manuals
Popular Heater manuals by other brands

Consort
Consort FANFAIR PFH15T manual

Gabarron
Gabarron Elnur ECOMBI HHR Series installation instructions

MILL
MILL Invisible & Glass Series Assembly and instruction manual

EdilKamin
EdilKamin CRISTAL 45 N Installation, use and maintenance

Plein Air
Plein Air TC-TPD2000 instruction manual

EAS Electric
EAS Electric EHC2200 instruction manual