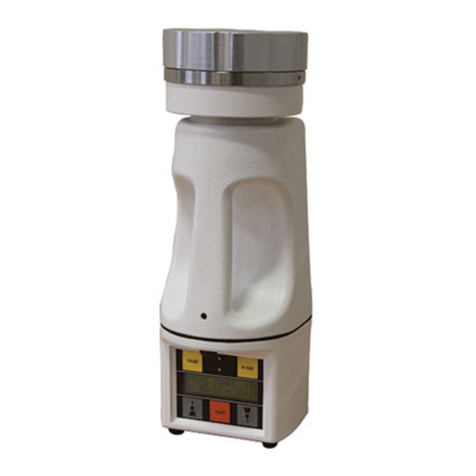
PBI CheckMate 3 User manual

ON THE QUALITY LINE
CheckMate 3
User Guide
EN
PBI-300042-B
10/2010

PBI-Dansensor A/S COPYRIGHT © PBI-300042-B 10/2010
CheckMate 3 EN User Guide
CheckMate 3
User Guide
PBI-Dansensor A/S
Rønnedevej 18 • DK-4100 Ringsted • Denmark
Tlf.: 57 66 00 88 • Fax: 57 66 00 99
EN

PBI-300042-B 10/2010 COPYRIGHT © PBI-Dansensor A/S
2UserGuide EN CheckMate 3

PBI-Dansensor A/S COPYRIGHT © PBI-300042-B 10/2010
CheckMate 3 EN User Guide 3
Table of Contents
1. Introduction . . . . . . . . . . . . . . . . . . . . . . . . . . . . . . . . . . . . . . . . 7
Register your product . . . . . . . . . . . . . . . . . . . . . . . . . . . . . . . . . . . . . . . . . .7
About this Manual . . . . . . . . . . . . . . . . . . . . . . . . . . . . . . . . . . . . . . . . . . . . .7
Intended Use of this Manual. . . . . . . . . . . . . . . . . . . . . . . . . . . . . . . . . . . . . . . . . . . . . . . 7
Reservations . . . . . . . . . . . . . . . . . . . . . . . . . . . . . . . . . . . . . . . . . . . . . . . . . . . . . . . . . . . 7
Important! . . . . . . . . . . . . . . . . . . . . . . . . . . . . . . . . . . . . . . . . . . . . . . . . . . . .7
Safety and Use. . . . . . . . . . . . . . . . . . . . . . . . . . . . . . . . . . . . . . . . . . . . . . . . . . . . . . . . . . 7
Notes, cautions and warnings! . . . . . . . . . . . . . . . . . . . . . . . . . . . . . . . . . . .8
Explanation . . . . . . . . . . . . . . . . . . . . . . . . . . . . . . . . . . . . . . . . . . . . . . . . . . . . . . . . . . . . 8
Safety Instructions . . . . . . . . . . . . . . . . . . . . . . . . . . . . . . . . . . . . . . . . . . . . .9
General. . . . . . . . . . . . . . . . . . . . . . . . . . . . . . . . . . . . . . . . . . . . . . . . . . . . . . . . . . . . . . . . 9
Installation . . . . . . . . . . . . . . . . . . . . . . . . . . . . . . . . . . . . . . . . . . . . . . . . . . . . . . . . . . . . . 9
Operation and Maintenance. . . . . . . . . . . . . . . . . . . . . . . . . . . . . . . . . . . . . . . . . . . . . . . 9
CheckMate 3 Overview . . . . . . . . . . . . . . . . . . . . . . . . . . . . . . . . . . . . . . . 10
Setting up . . . . . . . . . . . . . . . . . . . . . . . . . . . . . . . . . . . . . . . . . . . . . . . . . . 12
Connection of additional equipment . . . . . . . . . . . . . . . . . . . . . . . . . . . . . . . . . . . . . . . 13
2. Operation and Maintenance . . . . . . . . . . . . . . . . . . . . . . . . . .15
Modes . . . . . . . . . . . . . . . . . . . . . . . . . . . . . . . . . . . . . . . . . . . . . . . . . . . . . 15
Login . . . . . . . . . . . . . . . . . . . . . . . . . . . . . . . . . . . . . . . . . . . . . . . . . . . . . . 16
Logging off . . . . . . . . . . . . . . . . . . . . . . . . . . . . . . . . . . . . . . . . . . . . . . . . . 17
Daily Start-Up . . . . . . . . . . . . . . . . . . . . . . . . . . . . . . . . . . . . . . . . . . . . . . . 17
Measuring . . . . . . . . . . . . . . . . . . . . . . . . . . . . . . . . . . . . . . . . . . . . . . . . . . 18
Getting the best measurement performance . . . . . . . . . . . . . . . . . . . . . . . . . . . . . . . . 18
Explanation of the “Response time (T95)” . . . . . . . . . . . . . . . . . . . . . . . . . . . . . . . . . . . 19
Correction for CO2cross-sensitivity . . . . . . . . . . . . . . . . . . . . . . . . . . . . . . . . . . . . . . . . 20
O2offset calibration. . . . . . . . . . . . . . . . . . . . . . . . . . . . . . . . . . . . . . . . . . . . . . . . . . . . . 21
O2sensor temperature sensitivity . . . . . . . . . . . . . . . . . . . . . . . . . . . . . . . . . . . . . . . . . 21
CO2sensor temperature sensitivity . . . . . . . . . . . . . . . . . . . . . . . . . . . . . . . . . . . . . . . . 21
The Measuring screen. . . . . . . . . . . . . . . . . . . . . . . . . . . . . . . . . . . . . . . . . . . . . . . . . . . 22
Measuring modes . . . . . . . . . . . . . . . . . . . . . . . . . . . . . . . . . . . . . . . . . . . . . . . . . . . . . . 23
Selecting a product for measuring . . . . . . . . . . . . . . . . . . . . . . . . . . . . . . . . . . . . . . . . . 24
Performing a measurement . . . . . . . . . . . . . . . . . . . . . . . . . . . . . . . . . . . . . . . . . . . . . . 26
Daily Shut-down . . . . . . . . . . . . . . . . . . . . . . . . . . . . . . . . . . . . . . . . . . . . . 28
Error messages. . . . . . . . . . . . . . . . . . . . . . . . . . . . . . . . . . . . . . . . . . . . . . 28
Cleaning and Maintenance . . . . . . . . . . . . . . . . . . . . . . . . . . . . . . . . . . . . 29
General. . . . . . . . . . . . . . . . . . . . . . . . . . . . . . . . . . . . . . . . . . . . . . . . . . . . . . . . . . . . . . . 29
Cleaning . . . . . . . . . . . . . . . . . . . . . . . . . . . . . . . . . . . . . . . . . . . . . . . . . . . . . . . . . . . . . . 29
Replacing measuring gas hose, filter and needle. . . . . . . . . . . . . . . . . . . . . . . . . . . . . 29
Replacing printer paper. . . . . . . . . . . . . . . . . . . . . . . . . . . . . . . . . . . . . . . . . . . . . . . . . . 30

PBI-300042-B 10/2010 COPYRIGHT © PBI-Dansensor A/S
4UserGuide EN CheckMate 3
3. Menus and Settings . . . . . . . . . . . . . . . . . . . . . . . . . . . . . . . . .31
General . . . . . . . . . . . . . . . . . . . . . . . . . . . . . . . . . . . . . . . . . . . . . . . . . . . . 31
Main menu . . . . . . . . . . . . . . . . . . . . . . . . . . . . . . . . . . . . . . . . . . . . . . . . . 31
Product menu . . . . . . . . . . . . . . . . . . . . . . . . . . . . . . . . . . . . . . . . . . . . . . . 33
Edit product . . . . . . . . . . . . . . . . . . . . . . . . . . . . . . . . . . . . . . . . . . . . . . . . . . . . . . . . . . . 33
New product. . . . . . . . . . . . . . . . . . . . . . . . . . . . . . . . . . . . . . . . . . . . . . . . . . . . . . . . . . . 34
Copy product . . . . . . . . . . . . . . . . . . . . . . . . . . . . . . . . . . . . . . . . . . . . . . . . . . . . . . . . . . 35
Delete product . . . . . . . . . . . . . . . . . . . . . . . . . . . . . . . . . . . . . . . . . . . . . . . . . . . . . . . . . 35
View collected data . . . . . . . . . . . . . . . . . . . . . . . . . . . . . . . . . . . . . . . . . . . . . . . . . . . . . 35
Delete collected data . . . . . . . . . . . . . . . . . . . . . . . . . . . . . . . . . . . . . . . . . . . . . . . . . . . 35
Delete all collected data . . . . . . . . . . . . . . . . . . . . . . . . . . . . . . . . . . . . . . . . . . . . . . . . . 35
Data log . . . . . . . . . . . . . . . . . . . . . . . . . . . . . . . . . . . . . . . . . . . . . . . . . . . . 36
Diagnostic menu. . . . . . . . . . . . . . . . . . . . . . . . . . . . . . . . . . . . . . . . . . . . . 36
General setup . . . . . . . . . . . . . . . . . . . . . . . . . . . . . . . . . . . . . . . . . . . . . . . 37
Data log setup ... . . . . . . . . . . . . . . . . . . . . . . . . . . . . . . . . . . . . . . . . . . . . . . . . . . . . . . . 38
Serial data dump specification. . . . . . . . . . . . . . . . . . . . . . . . . . . . . . . . . . . . . . . . . . . . 39
Network setup ... . . . . . . . . . . . . . . . . . . . . . . . . . . . . . . . . . . . . . . . . . . . . . . . . . . . . . . . 41
Custom fields setup .... . . . . . . . . . . . . . . . . . . . . . . . . . . . . . . . . . . . . . . . . . . . . . . . . . . 41
User setup ... . . . . . . . . . . . . . . . . . . . . . . . . . . . . . . . . . . . . . . . . . . . . . . . . . . . . . . . . . . 42
Access level . . . . . . . . . . . . . . . . . . . . . . . . . . . . . . . . . . . . . . . . . . . . . . . . 43
Calibration. . . . . . . . . . . . . . . . . . . . . . . . . . . . . . . . . . . . . . . . . . . . . . . . . . 44
Offset (20,9%) calibration. . . . . . . . . . . . . . . . . . . . . . . . . . . . . . . . . . . . . . . . . . . . . . . . 44
Export/Import . . . . . . . . . . . . . . . . . . . . . . . . . . . . . . . . . . . . . . . . . . . . . . . 47
Standby . . . . . . . . . . . . . . . . . . . . . . . . . . . . . . . . . . . . . . . . . . . . . . . . . . . . 47
Sleep . . . . . . . . . . . . . . . . . . . . . . . . . . . . . . . . . . . . . . . . . . . . . . . . . . . . . . 48
Language. . . . . . . . . . . . . . . . . . . . . . . . . . . . . . . . . . . . . . . . . . . . . . . . . . . 48
4. Technical Information . . . . . . . . . . . . . . . . . . . . . . . . . . . . . . .49
Technical specifications . . . . . . . . . . . . . . . . . . . . . . . . . . . . . . . . . . . . . . 49
Electrical connections . . . . . . . . . . . . . . . . . . . . . . . . . . . . . . . . . . . . . . . . . . . . . . . . . . . 49
Mechanical data . . . . . . . . . . . . . . . . . . . . . . . . . . . . . . . . . . . . . . . . . . . . . . . . . . . . . . . 49
Connectivity . . . . . . . . . . . . . . . . . . . . . . . . . . . . . . . . . . . . . . . . . . . . . . . . . . . . . . . . . . . 50
Gas connection . . . . . . . . . . . . . . . . . . . . . . . . . . . . . . . . . . . . . . . . . . . . . . . . . . . . . . . . 50
Basic specifications. . . . . . . . . . . . . . . . . . . . . . . . . . . . . . . . . . . . . . . . . . . . . . . . . . . . . 50
Zirconia O2sensor. . . . . . . . . . . . . . . . . . . . . . . . . . . . . . . . . . . . . . . . . . . . . . . . . . . . . . 51
Electrochemical O2sensor . . . . . . . . . . . . . . . . . . . . . . . . . . . . . . . . . . . . . . . . . . . . . . . 51
CO2sensor . . . . . . . . . . . . . . . . . . . . . . . . . . . . . . . . . . . . . . . . . . . . . . . . . . . . . . . . . . . . 51
Accuracy specification (excl. calibration) . . . . . . . . . . . . . . . . . . . . . . . . . . . . . . . . . . . . 52
Standard calibration specification . . . . . . . . . . . . . . . . . . . . . . . . . . . . . . . . . . . . . . . . . 52
Specification conditions . . . . . . . . . . . . . . . . . . . . . . . . . . . . . . . . . . . . . . . . . . . . . . . . . 53
Conformity . . . . . . . . . . . . . . . . . . . . . . . . . . . . . . . . . . . . . . . . . . . . . . . . . . . . . . . . . . . . 53

PBI-Dansensor A/S COPYRIGHT © PBI-300042-B 10/2010
CheckMate 3 EN User Guide 5
Consumable parts and options . . . . . . . . . . . . . . . . . . . . . . . . . . . . . . . . . 54
Ordering items . . . . . . . . . . . . . . . . . . . . . . . . . . . . . . . . . . . . . . . . . . . . . . . . . . . . . . . . . 54
Available User Guides . . . . . . . . . . . . . . . . . . . . . . . . . . . . . . . . . . . . . . . . . . . . . . . . . . . 54
Consumable parts . . . . . . . . . . . . . . . . . . . . . . . . . . . . . . . . . . . . . . . . . . . . . . . . . . . . . . 54
Options . . . . . . . . . . . . . . . . . . . . . . . . . . . . . . . . . . . . . . . . . . . . . . . . . . . . . . . . . . . . . . . 54
Toxic and Hazardous Substances or Elements . . . . . . . . . . . . . . . . . . . . 54

PBI-300042-B 10/2010 COPYRIGHT © PBI-Dansensor A/S
6UserGuide EN CheckMate 3

PBI-Dansensor A/S COPYRIGHT © PBI-300042-B 10/2010
CheckMate 3 EN User Guide 7
1. Introduction
Register your product
Thank you for purchasing a PBI-Dansensor product, we hope that the product will fullfill your
needs.
In order to learn more about our customers and the markets we serve, we kindly ask you to
fill out the product registration form available on-line at
www.pbi-dansensor.com/register
In return we can offer to send important product information to you.
About this Manual
Intended Use of this Manual
• This manual describes the common use and maintenance procedures of the
CheckMate 3 device.
It is intended for the daily users and should be kept with the equipment for reference at all
times.
Reservations
• This manual was written and illustrated using the best possible information available at
the time of publication.
• Any differences between this manual and the equipment reflect improvements introduced
after the publication of the manual.
• Changes, technical inaccuracies and typographic errors will be corrected in subsequent
editions.
• As a part of our policy of continuous improvement, we reserve the right to alter design and
specifications without further notice.
Important!
Safety and Use
• Prior to using the equipment it is assumed that it has been properly installed and
configured as described in this manual.
• The manufacturer cannot be held responsible for any damage caused by incorrect use of
this equipment.

PBI-300042-B 10/2010 COPYRIGHT © PBI-Dansensor A/S
8UserGuide EN CheckMate 3
Notes, cautions and warnings!
Throughout the manual notes, cautions, and warnings are indicated with various icons and
written in bold like the example below:
CAUTION! Always replace a fuse with one of the same size and rating.
Explanation
NOTE! The operator should observe and/or act according to the information in
order to obtain the best possible function of the equipment.
CAUTION! The operator must observe and/or act according to the information in
order to avoid any mechanical or electrical damage to the equipment.
WARNING! The operator must observe and/or act according to the information in
order to avoid any personnel injury.

PBI-Dansensor A/S COPYRIGHT © PBI-300042-B 10/2010
CheckMate 3 EN User Guide 9
Safety Instructions
Personnel operating and maintaining the device must be familiar with all aspects of its
operation and be proficient in maintenance.
Such personnel should review the following precautions to promote safety awareness.
General
• Always refer to the manual before operating or maintaining the equipment.
• Observe all WARNINGS, CAUTIONS and NOTES.
• Do not open the device. In case of technical problems please contact your service
provider.
• Do not cover the machine with a cloth or piece of plastic to protect it from dust, as this
prevents free air circulation around the machine and might lead to overheating.
• Do not expose the equipment to heavy moisture or heat and keep it away from direct
sunlight.
• Never short circuit or remove safety devices.
Installation
• To ensure the best installation with the least technical problems, please install equipment
as described in this manual.
• Never install the equipment in explosive environments.
• Always use correct fittings when connecting gas from the gas bottle.
• Provide adequate space around the equipment for proper ventilation.
• The units are Class 2 appliances and do not need to be connected to an earthed mains
socket-outlet.
• It is the responsibility of the owner and operator(s) of the equipment, that the installation
is made in accordance with local rules and regulations.
• When installing the equipment it is necessary to ensure proper ventilation in the room of
the installation in accordance with requirements from manufacturer.
• The manufacturer cannot be held responsible for any damage caused by incorrect
installation of this equipment.
Operation and Maintenance
• Be sure to disconnect electrical power and unplug the unit before performing any cleaning
or maintenance.
• All panels and protective guards must be in place before operating the equipment.
• When operating or maintaining the equipment always obey the relevant rules and
regulations for workers safety.
• Repair or replace damaged power cords immediately.
• Never block gas outlets or needles.
• Replace needles if they get clogged (e.g. when cutting through septa).
• Do not expose the needles to liquids.

PBI-300042-B 10/2010 COPYRIGHT © PBI-Dansensor A/S
10 User Guide EN CheckMate 3
CheckMate 3 Overview
CheckMate 3 is based on an all-in-one concept which together with state-of-the-art sensor
technology ensures fail-safe tests and documentation. With full self-diagnostics, CheckMate
3 detects most common operator faults and offers an efficient automatic report function.
The arrow keys (navigation keys) are used to select menus and functions.
select previous item/scroll up (Contrast adjustment in measuring screen)
select next item/scroll down (Contrast adjustment in measuring screen)
go to previous menu or undo a change/selection
go to next menu level (select)
select menu or select/confirm a value
(formfeed) feeding printer paper (version with built-in printer only)
print current screen contents for built-in printer (version with built-in printer only)
undo a selection or a change. If you hold down the key you will automatically
return to the measuring screen or the warm-up screen
(measuring key) starts or stops a measurement
measuring gas inlet for connection of filter and needle set/Smart Pen
7
6
11
3
2
4
5

PBI-Dansensor A/S COPYRIGHT © PBI-300042-B 10/2010
CheckMate 3 EN User Guide 11
Main switch
Gas outlet
24VDC Power supply connection
USB A port for connection of barcode reader, memory key and keyboard
USB B port for PC communication (for future use)
Serial COM port for dump of data for external data collection
Connection to local computer network (LAN) for external data collection
9
10 11 12 13 148

PBI-300042-B 10/2010 COPYRIGHT © PBI-Dansensor A/S
12 User Guide EN CheckMate 3
Setting up
1. Place the device on a level and stable surface.
2. Connect the supplied needle set to the measuring gas inlet (labelled) on the
right side of the device as shown below, then place the needle in the holder .
NOTE! It is not possible to fit the needle set without a filter on the measuring
gas inlet. Make sure that all connections are pressed firmly and carefully
together, as leaks will compromise the measurement results.
3. Connect the power supply between the main power supply outlet and the 24 VDC
connection at the back of the device (labelled ).
4. Starting up and use of the device is described in Se afsnit 2 "Operation and
Maintenance" på side 15.
2
1
3
5
4

PBI-Dansensor A/S COPYRIGHT © PBI-300042-B 10/2010
CheckMate 3 EN User Guide 13
Connection of additional equipment
Barcode reader
It is possible to connect a barcode scanner to CheckMate 3. The barcode scanner must
be a USB type and we recommend using a “Datalogic Heron D130” barcode scanner.
The barcode scanner must be connected to the USB A connector (labelled ) at the
back of the device.
The barcode scanner is avaliable as an option - see "Options" on page 54.
USB Memory Key
When importing and exporting data you may use a USB memory key . The memory key
must be connected to the USB A connector (labelled ) at the back of the device.
USB Keyboard
A keyboard can be connected to the device for keying in various data. The keyboard must
be a USB type and it can be connected to the USB A connector (labelled ) at the back
of the device.
SmartPen
SmartPen is an optional needle retainer/measuring gas extractor with built-in protection and
lock. The SmartPen replaces the standard needle set and must be connected to the
measuring gas inlet (labelled ) on the right side of the device.
2
1
34

PBI-300042-B 10/2010 COPYRIGHT © PBI-Dansensor A/S
14 User Guide EN CheckMate 3

PBI-Dansensor A/S COPYRIGHT © PBI-300042-B 10/2010
CheckMate 3 EN User Guide 15
2. Operation and Maintenance
Modes
The device can be in one of 5 modes:
Switched off Power supply disconnected.
Standby mode Display shows the Standby screen.
User has been logged off (if login is
required).
Sensor temperature is maintained.
Standby mode settings are set in chapter
"General setup" on page 37 - see side 37
for details.
Sleep mode Display shows the Sleep screen.
User has been logged off (if login is
required).
Sensor temperature is not maintained.
Sleep mode settings are set in chapter
"General setup" on page 37 - see side 37
for details.
Ready mode Display will normally show the measuring
screen.
Sensor has correct temperature.
Measuring mode Display will normally show the measuring
screen.
Measuring has been started on the key.
While measuring the display will
continuously show measurement values.
When in “Manual spot” measuring mode a
progress bar is displayed in the bottom of
the screen.
Standby
13:46
08/17/06
Sleep
13:46
08/17/06
Product: 47
Meat 400 gr.
Measuring mode: Manual spot
Product Menu
08/17/06 13:46
%
O
2
Bal
%
CO
2
Press to measure
0,482 29,5
70,0
Product: 47
Meat 400 gr.
Measuring mode: Manual spot
Product Menu
08/17/06 13:46
%
O
2
Bal
%
CO
2
0,482
29,5
70,0

PBI-300042-B 10/2010 COPYRIGHT © PBI-Dansensor A/S
16 User Guide EN CheckMate 3
Login
Different levels of login can be set up:
No login At start-up the device will automatically run the self-test and warm-
up period and when finished it changes to show the measuring
screen and will be ready for measuring.
User login At start-up the display will show the list of users.
Use and keys to select user and press key to confirm.
Now the device will run the self-test and warm-up period and when
finished it changes to show the measuring screen and will be ready
for measuring.
Login with User ID At start-up the display will look like this:
Either use barcode scanner (option) to scan User ID or press to
bring up the touch screen keyboard.
NOTE! If you forget your User ID you can always log in using
57670124 as your User ID.
Enter the User ID by means of the touch screen keyboard or the
external keyboard (option). Confirm by pressing the OK key.
Now the device will run the self-test and warm-up period and when
finished it changes to show the measuring screen and will be ready
for measuring.
See Se afsnit "User setup ..." på side 42 for details about user and login settings.
Log in
USER1
USER2
USER3
13:46
08/17/06
Log in
Scan user barcode or press
13:46
08/17/06
Enter user id
AB
CDEFG
HI
JKLMN
OP
QRSTU
VW
X
YZ .
Ins Del
OK

PBI-Dansensor A/S COPYRIGHT © PBI-300042-B 10/2010
CheckMate 3 EN User Guide 17
Logging off
To log off press the key from the measuring screen.
When device is switched into Standby or Sleep mode either automatically or when manually
selected from the “Main menu”, current user will be logged off.
Daily Start-Up
At the start of the working day the device will normally be in one of the following modes:
•SwitchedOff
• Standby mode
• Sleep mode
Starting the device from the either of the three modes is described in the following:
1. If device is switched off apply power to it.
If device is in either Standby or Sleep mode simply touch the screen.
2. If no login is required the device will start up and automatically run a self-test and warm-
up period of approx. 10 min.
If device is started from Standby mode the sensor temperature has been maintained and
the device will be ready after max. 1 min.
3. If User login or login with User ID is required, login as described in "Login" on page 16.
4. After a successful login the device runs the self-test and warm-up period and when
finished the display changes to show the measuring screen.
5. Now the device is ready to begin measuring.
Heating
Time left XX min
Product: 47
Meat 400 gr.
Measuring mode: Manual spot
Product Menu
08/17/06 13:46
Product: 47
Meat 400 gr.
Measuring mode: Manual spot
Product Menu
08/17/06 13:46
%
O
2
Bal
%
CO
2
Press to measure
0,482 29,5
70,0

PBI-300042-B 10/2010 COPYRIGHT © PBI-Dansensor A/S
18 User Guide EN CheckMate 3
Measuring
Getting the best measurement performance
There are a number of factors to take into consideration when measuring O2and CO2
gasses.
The following guidelines should help you to obtain the best possible measurement accuracy
and performance from the CheckMate 3 device.
The device uses either a Zirconia (Zr) based O2sensor or an electrochemical (EC) O2sensor.
The electrochemical (EC) sensor has some limitations compared to the Zirconia based
sensor with regards to response time and cross sensitivity for CO2gasses. Due to this fact
the CheckMate 3 provides advanced Speed-Up functions in software allowing measurement
times down to 7 secs. For devices with built-in CO2sensors we also incorporate a scheme for
reducing the effects of cross sensitivity to CO2.
The CO2sensor (if installed) is of the Non Dispersive Infrared (NDIR) type.
Both sensors are temperature- and pressure compensated in software. However
temperature compensation requires stabilizing internally for some time.
In spite of the above efforts there are still limitations to what can be physically achieved.
To get the most out of your device, we strongly recommend that you read these next pages to
familiarize yourself with the various conditions, which may have impact on the
measurements.

PBI-Dansensor A/S COPYRIGHT © PBI-300042-B 10/2010
CheckMate 3 EN User Guide 19
Explanation of the “Response time (T95)”
NOTE! Only valid for devices with an Electro-chemical (EC) O2sensor.
According to the specifications the Electro-chemical (EC) O2sensor has a Response time
(T95)of 7 sec.
This means that when performing consecutive measurements in areas with large
differences in the O2concentrations, the device will as a minimum reach 95% of the “true”
value during the first measurement (7 sec.).
Example:
(See illustration below):
• Last measurement was performed in i.e. 20.9% O2
• The following value to be measured is 1.0% O2
• Difference is:
20.9 - 1.0 = 19.9% O2
• The expected read-out value after first measuring is:
20.9 - (0.95 * 19.9) = 2.0% O2
Consequently this means that if there is a large difference in the O2concentrations between
two consecutive measurements, multiple measurements must be performed to obtain a
more accurate result.
O reading
[%]
2
time [sec]
T=0
Start value
Difference = Start value "True" value
T valu
95
e = Start value (0.95*Difference)
T value
95
"True" value
T=7
(1. measurement) (2. measurement)
T=14
Difference
Table of contents
Other PBI Measuring Instrument manuals
