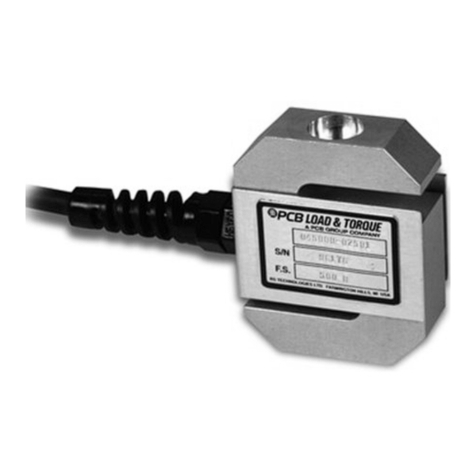
PCB 1404-03ADB User manual

Model 1404-03ADB
FATIGUE RATED LOW PROFILE LOAD CELL, DUAL BRIDGE
Installation and Operating Manual
For assistance with the operation of this product,contact:
PCB Load & Torque, Inc.
Toll-free: 866-684-7107
24-hour SensorLine™: 716-684-0001
Fax: 248-888-8266
Web: www.pcbLoadTorque.com

Manual 21354 Rev E
ECN 50523
Repair and Maintenance
PCB guarantees Total Customer Satisfaction through its
“Lifetime Warranty Plus” on all Platinum Stock Products
sold by PCB and through its limited warranties on all other
PCB Stock, Standard and Special products. Due to the
sophisticated nature of our sensors and associated
instrumentation, field servicing and repair is not
recommended and, if attempted, will void the factory
warranty.
Beyond routine calibration and battery replacements
where applicable, our products require no user
maintenance. Clean electrical connectors, housings, and
mounting surfaces with solutions and techniques that will
not harm the material of construction. Observe caution
when using liquids near devices that are not hermetically
sealed. Such devices should only be wiped with a
dampened cloth—never saturated or submerged.
In the event that equipment becomes damaged or ceases
to operate, our Application Engineers are here to support
your troubleshooting efforts 24 hours a day, 7 days a
week. Call or email with model and serial number as well
as a brief description of the problem.
Calibration
Routine calibration of sensors and associated
instrumentation is necessary to maintain measurement
accuracy. We recommend calibrating on an annual basis,
after exposure to any extreme environmental influence,
or prior to any critical test.
PCB Piezotronics is an ISO-9001 certified company whose
calibration services are accredited by A2LA to ISO/IEC
17025, with full traceability to SI through N.I.S.T. In
addition to our standard calibration services, we also offer
specialized tests, including: sensitivity at elevated or
cryogenic temperatures, phase response, extended high
or low frequency response, extended range, leak testing,
hydrostatic pressure testing, and others. For more
information, contact your local PCB Piezotronics
distributor, sales representative, or factory customer
service representative.
Returning Equipment
If factory repair is required, our representatives will
provide you with a Return Material Authorization (RMA)
number, which we use to reference any information you
have already provided and expedite the repair process.
This number should be clearly marked on the outside of
all returned package(s) and on any packing list(s)
accompanying the shipment.
Contact Information
PCB Piezotronics, Inc.
3425 Walden Ave.
Depew, NY14043 USA
Toll-free: (800) 828-8840
24-hour SensorLine: (716) 684-0001
Repair inquiries: rma@pcb.com
For a complete list of distributors, global offices and sales
representatives, visit our website, www.pcb.com.
Safety Considerations
This product is intended for use by qualified personnel
who recognize shock hazards and are familiar with the
precautions required to avoid injury. While our equipment
is designed with user safety in mind, the protection
provided by the equipment may be impaired if equipment
is used in a manner not specified by this manual.
Discontinue use and contact our 24-Hour Sensorline if:
Assistance is needed to safely operate equipment
Damage is visible or suspected
Equipment fails or malfunctions
For complete equipment ratings, refer to the enclosed
specification sheet for your product.
Definition of Terms and Symbols
The following symbols may be used in this manual:
DANGER
Indicates an immediate hazardous
situation, which, if not avoided, may
result in death or serious injury.

Manual 21354 Rev E
ECN 50523
CAUTION
Refers to hazards that could damage
the instrument.
NOTE
Indicates tips, recommendations and
important information. The notes
simplify processes and contain
additional information on particular
operating steps.
The following symbols may be found on the equipment
described in this manual:
This symbol on the unit indicates that
high voltage may be present. Use
standard safety precautions to avoid
personal contact with this voltage.
This symbol on the unit indicates that
the user should refer to the operating
instructions located in the manual.
This symbol indicates safety, earth
ground.

Manual 21354 Rev E
ECN 50523
PCB工业监视和测量设备 - 中国RoHS2公布表
PCB Industrial Monitoring and Measuring Equipment - China RoHS 2 Disclosure Table
部件名称
有害物质
铅(Pb)
汞
(Hg)
镉
(Cd)
六价铬(Cr(VI))
多溴联苯 (PBB)
多溴二苯醚(PBDE)
住房
O
O
O
O
O
O
PCB板
X
O
O
O
O
O
电气连接器
O
O
O
O
O
O
压电晶体
X
O
O
O
O
O
环氧
O
O
O
O
O
O
铁氟龙
O
O
O
O
O
O
电子
O
O
O
O
O
O
厚膜基板
O
O
X
O
O
O
电线
O
O
O
O
O
O
电缆
X
O
O
O
O
O
塑料
O
O
O
O
O
O
焊接
X
O
O
O
O
O
铜合金/黄铜
X
O
O
O
O
O
本表格依据 SJ/T 11364 的规定编制。
O:表示该有害物质在该部件所有均质材料中的含量均在 GB/T 26572 规定的限量要求以下。
X:表示该有害物质至少在该部件的某一均质材料中的含量超出 GB/T 26572 规定的限量要求。
铅是欧洲RoHS指令2011/65/ EU附件三和附件四目前由于允许的豁免。
CHINA RoHS COMPLIANCE

Manual 21354 Rev E
ECN 50523
Component Name
Hazardous Substances
Lead (Pb)
Mercury (Hg)
Cadmium (Cd)
Chromium VI
Compounds
(Cr(VI))
Polybrominated
Biphenyls (PBB)
Polybrominated
Diphenyl Ethers
(PBDE)
Housing
O
O
O
O
O
O
PCB Board
X
O
O
O
O
O
Electrical Connectors
O
O
O
O
O
O
Piezoelectric Crystals
X
O
O
O
O
O
Epoxy
O
O
O
O
O
O
Teflon
O
O
O
O
O
O
Electronics
O
O
O
O
O
O
Thick Film Substrate
O
O
X
O
O
O
Wires
O
O
O
O
O
O
Cables
X
O
O
O
O
O
Plastic
O
O
O
O
O
O
Solder
X
O
O
O
O
O
Copper Alloy/Brass
X
O
O
O
O
O
This table is prepared in accordance with the provisions of SJ/T 11364.
O: Indicates that said hazardous substance contained in all of the homogeneous materials for this part is below the limit
requirement of GB/T 26572.
X: Indicates that said hazardous substance contained in at least one of the homogeneous materials for this part is above the limit
requirement of GB/T 26572.
Lead is present due to allowed exemption in Annex III or Annex IV of the European RoHS Directive 2011/65/EU.

PCB Load & Torque, Inc. Toll-Free in USA 866-684-7107 716-684-0001 www.pcbloadtorque.com
DUAL BRIDGE LOAD CELL OPERATION MANUAL
1
TABLE OF CONTENTS
1.0 INTRODUCTION..................................................................................................................2
2.0 SAFETY PRECAUTIONS....................................................................................................2
3.0 OVERVIEW..........................................................................................................................2
3.1 Dimensions .......................................................................................................................................2
3.2 Standard Components......................................................................................................................3
3.3 Optional Components .......................................................................................................................3
4.0 MECHANICAL INSTALLATION..........................................................................................3
4.1 Mounting Bases ................................................................................................................................3
4.2 Mounting Load Cell to a Standard Base or Custom Fixture .............................................................3
4.3 Threaded Tension Rods....................................................................................................................4
4.4 Mounting Optional Connector Protectors..........................................................................................4
4.4.1 Included Components in Kit (084A90)...................................................................................4
4.4.2 Required Tools........................................................................................................................4
4.4.3 Installation of Connector Protector.........................................................................................4
5.0 ELECTRICAL INSTALLATION ...........................................................................................5
5.1 Electrical Drawing / Western Regional Std.......................................................................................5
5.2 Cable & Grounding Considerations ..................................................................................................5
6.0 CALIBRATION.....................................................................................................................5
6.1 Calibration Certificate Description.....................................................................................................5
6.1.1 Measured Output.....................................................................................................................6
6.1.2 Hysteresis................................................................................................................................6
6.1.3 Best Fit Output........................................................................................................................6
6.1.4 Strain Gage Measurements .....................................................................................................6
6.1.5 Shunt Calibration Standard Resistor.......................................................................................6
6.1.6 Static Error Band (SEB)..........................................................................................................6
7.0 MOMENT COMPENSATION...............................................................................................6
8.0 FATIGUE & OVERLOAD.....................................................................................................6
9.0 SHUNT CALIBRATION DESCRIPTION..............................................................................7
9.1 Resistor Value...................................................................................................................................7
9.2 Shunt Calibration Process.................................................................................................................7
9.3 Estimating Shunt Resistor for a Given Load.....................................................................................7
10.0 MAINTENANCE.................................................................................................................7
11.0 TROUBLE SHOOTING......................................................................................................8
11.1 Mechanical Trouble Shooting .........................................................................................................8
11.2 Electrical Trouble Shooting.............................................................................................................8
11.2.1 Estimating Bridge Balance using an Ohm Meter..................................................................8
12.0 CALIBRATION / REPAIR SERVICES...............................................................................8
12.1 RMA / Purchase Order....................................................................................................................9
13.0 WARRANTY ......................................................................................................................9

PCB Load & Torque, Inc. Toll-Free in USA 866-684-7107 716-684-0001 www.pcbloadtorque.com
DUAL BRIDGE LOAD CELL OPERATION MANUAL
2
1.0 INTRODUCTION
Dual bridge fatigue-rated load cells manufactured by PCB
Load and Torque, Inc. are guaranteed to last 100 million fully
reversed cycles (full tension through full compression). These
load cells feature high accuracy with resistance to off-center
loading, extraneous bending and side-loading forces. The load
cells are manufactured using premium fatigue resistant steel or
aluminum, and are carefully processed to ensure mechanical
and electrical integrity, as well as accuracy. The nominal full
scale output of the fatigue rated load cells is 2.0 mV/V.
The following document explains how to properly install the
dual bridge load cell, including detailed procedures on
specified torques installation, adapter thread class 3 and
tension pre-load specifications.
2.0 SAFETY PRECAUTIONS
Fatigue rated load cells are designed with very high safety
factors for overload, and of course, cyclic fatigue loads when
used in testing programs. However, failure of the load cell
structure or fasteners used in the load cell installation may
cause personal injury and equipment damage.
It is important to provide adequate clearances and safety
guards or shields properly surrounding test fixtures where
fatigue rated load cells are used.
It is important to review the manufactured data when selecting
rod ends and fasteners for load cell installation. Failure might
occur due to combine measurement axis and extraneous loads
if installation specifications are not followed. All test fixtures
designed for use with fatigue rated load cells should be
carefully evaluated for potential failure modes of the fixtures.
It is important to use threaded fasteners properly when
assembling test fixtures used with the load cells. Fixtures with
inadequately designed bolted joints, or improperly tightened
threaded fasteners can fail before the parts under test have
completed the planned fatigue test cycles.
3.0 OVERVIEW
Dual bridge fatigue-rated load cells are specifically designed
for repetitive testing. Applications include material testing,
component life cycle testing, and structural testing. The load
cells contain an extra bridge to be used either as a back-up
incase the primary bridge fails during a test, or just for
confirmation of the primary bridge readings. As an added
benefit, these load cells are extremely resistant to extraneous
bending and side loading forces
3.1 Dimensions
The following figure and table give the general outline
dimensions of the dual bridge fatigue-rated load cells.
1
2
3
4
11
∅
∅∅
∅
5
12
∅
∅∅
∅
9
15
1
0
R
6
1
3
1
4
∅
∅∅
∅
7
∅
∅∅
∅
8
Model Series
1403 1404 1408 1411
Capacity (Lbf)
5k 12.5k, 25k 50k 100k
Dimensions
(see Figure 1)
(in) (mm) (in) (mm) (in) (mm) (in) (mm)
1
2.50 63.5 3.50 88.9 4.50 114.3 6.50 165.1
2
1.37 34.8 1.75 44.5 2.50 63.5 3.50 88.9
3
1.13 28.7 1.75 44.5 2.00 50.8 3.00 76.2
4
1.25 31.8 1.63 41.4 2.25 57.2 3.25 82.6
∅
∅∅
∅
5
4.12 104.6 6.06 153.9 8.00 203.2 11.00
279.4
R
6
2.54 64.6 3.53 89.7 4.85* 123.2* 6.10* 154.9*
∅
∅∅
∅
7
3.50 88.9 5.13 130.2 6.50 165.1 9.00 228.6
∅
∅∅
∅
8
1.25 31.8 2.42 61.4 3.50 88.9 5.38 136.5
∅
∅∅
∅
9
1.25 31.8 2.25 57.2 3.50 88.9 4.50 114.3
10
45º 30º 22.5º 22.5º
11
0.25 6.4 0.37 9.4 0.48 12.2 0.75 19.1
12
0.03 0.76 0.03 0.76 0.03 0.76 0.03 0.76
13
1/4-28x1 3/4
screw 12 pt.
Qty. 8
3/8-24x2 1/4
screw 12 pt.
Qty. 12
1/2-20x3 1/2
screw 12 pt.
Qty. 16
3/4-16x4 1/2
screw 12 pt.
Qty. 16
14
5/8-18 1 1/4-12 1 3/4-12 2 3/4-8
Thread Depth 0.88 22.4 1.37 34.8 2.12 53.8 2.56 65.0
15
5/8-18 1 1/4-12 1 3/4-12 2 3/4-8
Thread Depth 0.88 22.4 1.37 34.8 1.71 43.4 3.15 80.0
*Indicates dimension with connector protector.
Figure 1 - Dimensions
Table 2 – Dimension Values
Dim. Description
1
Total Height
2
Load Cell Height
3
Tension Base Height
4
Load Cell Body
Height
∅
∅∅
∅
5
Load Cell Diameter
R
6
Max. Clearance
Radius
∅
∅∅
∅
7
Bolt Circle Diameter
∅
∅∅
∅
8
Top Loading Surface
Diameter
∅
∅∅
∅
9
Bottom Loading
Surface Diameter
10
Angle Between
Screws
11
Screw Head Height
12
Bottom Loading
Surface Height
13
Screw for Tension
Base
14
Load Cell Mounting
Thread
15
Tension Base
Mounting Thread
Table 1 – Dimension
Descriptions

PCB Load & Torque, Inc. Toll-Free in USA 866-684-7107 716-684-0001 www.pcbloadtorque.com
DUAL BRIDGE LOAD CELL OPERATION MANUAL
3
3.2 Standard Components
The following figure describes the standard components of the
dual bridge fatigue-rated load cells.
3.3 Optional Components
The following figure describes the optional components of the
dual bridge fatigue-rated load cells.
NOTE: Connector protectors are standard on 8” and 11”
models.
Table 3 describes the available optional components
NOTE: Pre-tension studs include the threaded stud and the
jam nut.
4.0 MECHANICAL INSTALLATION
Standard components of the dual bridge fatigue-rated load
cells have all been installed to factory specified values for
optimum performance. The following mechanical installation
instructions should be observed if optional components are to
be used.
4.1 Mounting Bases
All low-profile load cells are calibrated and supplied with a
factory installed standard mounting base. An optional
custom (customer supplied) mounting base can, with special
arrangements, be installed and used for calibration.
However, there will be an extra charge for removal of the
standard base, and installation of the load cell on the
customer’s base / fixture.
NOTE: To insure catalog performance specifications are met
the customer’s supplied fixture or base must be flat to
within 0.0002 inch and provide similar stiffness and
hardness to a factory base.
Unless otherwise specified/requested, the base and load cell
are calibrated as a unit. It is important to note that the
performance of the load cell may be affected if the factory-
installed mounting base is removed or modified.
4.2 Mounting Load Cell to a Standard Base or
Custom Fixture
If the load cell is to be mounted to a custom base or fixture, it
is necessary to consider the following:
1. The thickness of the new base or fixture must not be
any thinner than the original base supplied with the
load cell. Materials used must have the same
temperature coefficient of expansion (for example,
4140 Steel or 2024-T4 Aluminum for 250,500 and
1,000 capacity aluminum cells).
2. The mounting surface must be flat (within 0.0002
inches), and steel fixtures must have a hardness of
Rockwell C 33 to 37.
3. The threaded holes and under-head of the fasteners
must be lightly lubricated with 30 weight oil or
equivalent prior to tightening the mounting bolts.
4. Refer to Table 4 for the final tightening torque
required for each bolt size.
5. Tighten the bolts in an incremental cross pattern with
the following sequence: start with all bolts finger
tight followed by 25%, 50% and finally 100% of the
required torque being applied.
Load Cell
Tension
Base
Connector A
Connector B
Connector
Protector
Pre
-
Tension
Stud
Pre
-
Tension
Stud
Jam Nut
Jam Nut
Figure 2 – Standard Components
Figure 3 – Optional Components
Item Number Item Description
084A40 Lifting Rings (side), 1411 Series
084A41 Lifting Plug (top), 1411 Series
084A55 Pre-Tension Stud (5/8”-18 Thread), 1403 Series
084A56 Pre-Tension Stud (1 ¼”-12 Thread), 1404 Series
084A57 Pre-Tension Stud (1 ¾”-12 Thread), 1408 Series
084A58 Pre-Tension Stud (2 ¾”-8 Thread), 1411 Series
084A59 Pre-Tension Stud (2 ¾”-8 to 1 ¾”-12 Thread) 1411 Series
084A90 Connector Protector, 1403 and 1404 Series
Table 3 – Optional Components

PCB Load & Torque, Inc. Toll-Free in USA 866-684-7107 716-684-0001 www.pcbloadtorque.com
DUAL BRIDGE LOAD CELL OPERATION MANUAL
4
4.3 Threaded Tension Rods
NOTE: Threaded tension rods are an optional feature on the
dual bridge fatigue-rated load cell.
Installation of the load cell
starts with tension pre-loading
the load cell to 120-150% of
full scale capacity and lightly
tightening a jam nut to lock in
the preload on both the load cell
and base tension rods. Once the
preload tension is released, the
threads will be securely
engaged.
Failure to pre-load the
attachment rods/ fixtures can
result in damage to the threads
on the load cell and base during
cyclic load tests.
Threaded rods engaging the load cell should have Class 3
threads to ensure thread-to-thread close contact forces.
NOTE: It is important that the tension rods installed in the
load cell and base use full thread engagement, but are
not jammed, or torqued. They should be ½-1 turn
from the bottom of the threads in both the base and
load cell.
4.4 Mounting Optional Connector Protectors
Models 1403 and 1404 dual bridge fatigue-rated load cells do
not come standard with connector protectors. If optional
connector protectors are to be mounted, it is necessary to
consider the following:
4.4.1 Included Components in Kit (084A90)
4.4.2 Required Tools
4.4.3 Installation of Connector Protector
1. Remove the #4-40 x 1/4” button head cap screws
from the connector using a 1/16” hex wrench as
shown in Figure 7.
2. Carefully pull the connector from the load cell. Take
care to not break or loosen any wire connections.
3. Slide the connector protector (54823-02) behind the
connector as shown in Figure 8.
4. Apply a drop Loctite® Threadlocker Blue 242® to
the threads of the #4-40 x 3/8” socket head cap
screws.
NOTE: Please refer to the Loctite® Threadlocker Blue 242®
technical data sheet for directions of use.
5. Attach the connector protector (54823-02) to the load
cell with the #4-40 x 3/8” socket head cap screws
using a 3/32” hex wrench as shown in Figures 9 and
10.
Bolt Size Part Number Installation Torque
1/4-28x1 3/4
100-8011-10 15-17 LbFt (180-204 LbIn)
3/8-24x2 1/4
100-8082-20 75-80 LbFt (900-960 LbIn)
1/2-20x3 1/2
100-8011-30 120-130 LbFt (1440-1560 LbIn)
3/4-16x4 1/2
100-10026-40 370-400 LbFt (4440-4800 LbIn)
Table 4 – Tension Base Installation Torque Values
Jam Nut
Preload (120
-
150% FS)
Pre
-
Tension
Stud w/3B
Threads
Jam Nut
Pre
-
Tensio
n
Stud w/3B
Threads
Preload (120
-
150% FS)
Figure 4 – Installation of Pre-
Tension Studs
Table 5 - Kit Components
Component Quantity
Connector Protector (54823-02) 2
#4-40 x 3/8” Socket Head Cap Screw 8
Figure 5 - Connector
Protector (54823-02) Figure 6 - #4-40 x 3/8”
Socket Head Cap Screw
Table 6—Required Tools (Not Included)
1/16” Hex Wrench
3/32” Hex Wrench
Loctite® Threadlocker Blue 242®
Figure 7 - Remove the #4-40 x 1/4”
Button Head Cap Screws Figure 8 - Slide the Connector
Protector (54823-02) Behind the
Connector

PCB Load & Torque, Inc. Toll-Free in USA 866-684-7107 716-684-0001 www.pcbloadtorque.com
DUAL BRIDGE LOAD CELL OPERATION MANUAL
5
5.0 ELECTRICAL INSTALLATION
5.1 Electrical Drawing / Western Regional Std.
All load cells are wired following the Western Region
Standard. All models utilize strain gages configured into a
Wheatstone Bridge Circuit to produce the primary sensing
element. The four-arm Wheatstone bridge configuration is
shown below in Figure 11.
The gages are bonded to the load cell's structure.
Typically, a regulated DC or AC excitation is applied
between A and D of the bridge. When a force is applied to
the load cell, the Wheatstone bridge becomes unbalanced,
causing an output voltage between B and C, which is
proportional to the applied load. This configuration allows
for temperature and pressure compensation, as well as
cancellation of signals caused by forces not directly
applied to the axis of the applied load. Output is typically
expressed in units of mV/V of excitation.
5.2 Cable & Grounding Considerations
Proper grounding and shielding is required to prevent
electrical noise in strain gage load cell measuring systems.
The cable must be shielded twisted pairs with a drain wire.
Cable shields must be grounded only at one end, for example,
on the instrument or control system ground. The load cell
case is grounded by mechanical attachment to the structure to
which it is mounted.
The instrument or control system is grounded through its
power cord. Ground loops and measuring system wiring may
result in unstable or noisy signals.
A simple test with a voltmeter connected between the power
cord ground and the structure on which the load cell is
mounted can confirm that the structure has been properly
grounded. If the power cord ground and structure ground are
not at the same potential, it may be necessary to provide a
secure structure ground, perhaps by driving a copper rod and
attaching a ground strap.
6.0 CALIBRATION
Every dual bridge fatigue-rated load cell purchased from PCB
Load & Torque, Inc. has been fully calibrated per ISO/IEC
17025 procedures, and meets all published specifications.
Each load cell will come with a calibration certificate
designated with matching model and serial numbers. PCB
Load & Torque also offers calibration services on an on-going
basis.
6.1 Calibration Certificate Description
Calibration reports supplied with PCB Load & Torque dual
bridge load cells contain valuable information to assist the
customer in use of the equipment. A separate calibration
report is provided for tension and compression calibrations on
each bridge. Calibration procedures, equipment, and reports
comply with ISO/IEC 17025.
Table 6 – Electrical Connections
Figure 12 - Grounding
Test Rig Ground
Power Supply
Instrument Ground
Cable Shielding
Load Cell
C
A
D
B
- Signal White
- Excitation Black
+ Excitation Red
+ Signal Green
Figure 11 - Western Regional Strain Gage Committee Wiring Code
Figure 9 - Attach the Connector
Protector (54823-02) using #4-40 x
3/8” Socket Head Cap Screws
Figure 10 - Fully Assembled
Load Cell Receptacle “A-Type”: PT02E-10-6P
Mating Connector: PT06A-10-6S PCB Item No: 181-012A
Load Cell Receptacle “B-Type”: PC04E-10-6P
Mating Connector: PC06A-10-6S PCB Item No: 182-025A

PCB Load & Torque, Inc. Toll-Free in USA 866-684-7107 716-684-0001 www.pcbloadtorque.com
DUAL BRIDGE LOAD CELL OPERATION MANUAL
6
6.1.1 Measured Output
The applied load starting at zero is measured in five
increments to full scale. Output (mV/V) is measured at each
increment. The straight-line from zero to the full scale
measurement is compared to the measured readings at each
increment to calculate the error at each load increment. The
deviations (% Full Scale) corresponding to non-linearity at
each measurement increment are then calculated.
6.1.2 Hysteresis
The difference between the ascending and descending
measured readings at 40% of full scale is used to calculate the
hysteresis value.
6.1.3 Best Fit Output
The best fit calibration second-order equation has been
calculated from the calibration data by the method of least
squares. Deviation between measured output and best-fit
output is calculated and displayed in the column next to the
best-fit output for each measurement increment. The
deviations (% Full Scale) of measured outputs from the
calculated best fit are tabulated for each measured reading.
6.1.4 Strain Gage Measurements
6.1.5 Shunt Calibration Standard Resistor
All dual bridge load cell calibrations use a 60K Ohm (0.01%)
precision resistor shunt calibration value that is supplied into
the calibration report.
6.1.6 Static Error Band (SEB)
The static error band (SEB) is determined by the maximum
deviations of the ascending and descending calibration points
from the best fit straight line through zero output. The SEB
includes the effects of nonlinearity, hysteresis, and non-return
to minimum load.
7.0 MOMENT COMPENSATION
When an eccentric axial load is
applied to a load cell that is not
coincident exactly with the
centerline of the load cell, it
introduces bending moments
into the load cell structure. The
strain gage bridges on dual
bridge fatigue rated load cells
are adjusted such that the error
due to eccentric loading is less
than ±0.1% per inch of offset.
Side loads, moments and torque must be limited to avoid
electrical or mechanical damage to the load cell. The
allowable extraneous loads are directly related to the rated
capacity of the load cell.
•Maximum side force allowed is 100% of the rated
capacity for the load cell.
•Maximum moment allowed is 100% of the rated
capacity times 1 inch.
•Maximum torque allowed about the measurement
axis is rated capacity times 1 inch.
Maximum error due to side loading or moment loading is
0.1% per inch of the rated capacity. Each dual bridge load cell
is carefully tested and adjusted according to our specifications
ensuring that crosstalk due to off-center loading, moments and
side load is less than 0.1% of applied load.
8.0 FATIGUE & OVERLOAD
Dual bridge load cells are designed and manufactured to
perform accurately and reliably for 100 million fully reversed
full scale load cycles. They have been specifically designed
for applications involving high cycle fatigue loading on
products and structures. The designs are based on more than
four decades (since 1970) of experience in the design and
manufacture of precision low-height load cells.
The load cell structure is machined from aircraft quality alloy
steel, heat treated, and finished with attention to details critical
for maximum fatigue life. For maximum stiffness and low
stresses throughout the load cell structure, the maximum
stresses are concentrated precisely under the strain gages.
The load cell structural safety factor against fatigue failure is
in excess of 2.5 for alloy steel and 2 for aluminum. See Figure
14. The maximum shear stress measured by the bonded strain
gages is less than 40% of the endurance limit shear stress for
alloy steel and 48% for aluminum.
Bridge Resistance: 350 Ohm Nominal
Excitation: +P(A) to –P(D) Ohms
Signals: +S(B) to –S(C) Ohms
Leakage to Ground: > 5k GOhm
Bridge Unbalance: ±1.0% Full Scale
Output: 2.0 mV/V Nominal
Maximum Voltage: 20 VDC
Table 7 – Strain Gage Measurements
T
M
X
M
Y
S
Primary
Axis
Figure 13 - Extraneous Loads

PCB Load & Torque, Inc. Toll-Free in USA 866-684-7107 716-684-0001 www.pcbloadtorque.com
DUAL BRIDGE LOAD CELL OPERATION MANUAL
7
The strain gages used are made with Modulus Compensated
Modified Karma Alloy. The alloy steel gages have a safety
factor against fatigue of approximately 2, and the aluminum
gages’ is approximately 4 as shown in Figure 15.
Dual bridge fatigue-rated load cells are capable of surviving
exceptionally high overloads. Occasional loads up to 300% of
the rated capacity (due to accidental overload) have a safety
factor against yield of the strain gage sections of
approximately 1.5 for both alloy steel and aluminum as shown
in Figure 16.
9.0 SHUNT CALIBRATION DESCRIPTION
Shunt calibration is used to simulate a known tension or
compression load on a load cell. The calibration certificate
will indicate which leg of the bridge to apply the shunt resistor
to for both tension and compression load simulation. Typically
tension is simulated by inserting the shunt resistor between the
+P and +S connector leads. Compression loading is simulated
by inserting the shunt resistor between the +S and –P
connector leads.
9.1 Resistor Value
Dual bridge load cells have a nominal 2.0 mV/V full scale
output. For a 350 ohm strain gage bridge the precision shunt
resistor is, 60,000 ohms ±0.01%, simulates an output of
approximately 73% of the full scale output for the load cell.
The calibration values for each bridge are found on the
calibration certificates supplied with each load cell.
9.2 Shunt Calibration Process
To perform the shunt calibration, use the following procedure:
1. Stabilize all forces on the load cell. If possible,
remove all loads.
2. Set the load indicator display to read exactly 00.000.
3. Connect the shunt resistor to the terminals specified
in the calibration certificate, and adjust the span or
gain until the display reads the force value stated on
the certificate.
4. Repeat steps 1-3 to verify that a valid calibration
setting has been obtained.
5. If possible, apply a known load to the measurement
system to further verify that the calibration has been
accurately set up.
9.3 Estimating Shunt Resistor for a Given Load
The following formula can be used to estimate the
approximate value of shunt resistor required to simulate a
mechanical load.
R
cal
= (25 * R
b
) / (Output
FS
* L
cal
)
Where: R
cal
= Shunt Resistor (K ohms)
R
b
= Bridge Resistance (ohms)
Output
FS
= Full Scale output of the load cell (mV/V)
L
cal
= Load to be simulated, % of Load Cell Capacity
10.0 MAINTENANCE
Routine maintenance of the dual bridge load cell should
include cleaning the electrical connectors, housings, and
mounting surfaces with solutions and techniques that will not
harm the physical material of construction. Make sure liquids
are not allowed to migrate into devices that are not
hermetically sealed. Such devices should only be wiped with
a damp cloth, and never be submerged or have liquids poured
on them. Never use a pressure washer on the load cells.
Steel Safety Factor > 2.5
Aluminum Safety Factor ≈2
Note:
Aluminum alloy does
not have an endurance limit.
Figure 14 - S-N Curve (Load Cell)
Figure 15 - Strain-N Curve (Strain Gages)
Figure 16 - Shear Stress/Strain Curves (Load Cell)
10
2
10
3
10
4
10
5
10
6
10
7
10
8
10
9
Endurance Limit
Number of Load Cycles (Fully Reversed)
Shear
Stress
(ksi)
120
100
80
60
40
20
S.F. Steel
S.F. Alum.
Aircraft Quality Steel Alloy
Aluminum Alloy
10
2
10
3
10
4
10
5
10
6
10
7
10
8
10
9
5000
4000
3000
2000
1000
Number of Load Cycles (Fully Reversed)
Steel (2 mV/V)
Microstrain
Aluminum (4 mV/V)
Modulus Compensated
Modified Karma Alloy
Strain Gages Strain Gage Safety Factors
Steel S.F. ≈2
Aluminum S.F. ≈4
Design Stress
Steel = 25 psi
Aluminum = 8 psi
25
125
100
75
50
150
Strain
Shear
Stress
(psi)
Yield Alloy Aluminum
Yield Alloy Steel
Safety Factor
≈
1.5 @ 300% Overload
300% Overload Steel

PCB Load & Torque, Inc. Toll-Free in USA 866-684-7107 716-684-0001 www.pcbloadtorque.com
DUAL BRIDGE LOAD CELL OPERATION MANUAL
8
Dual bridge fatigue rated load cells, when mounted on the
factory supplied base, are barometric compensated through a
small port located in one of the spanner wrench holes on the
base.
The bolts used to install bases at the factory have been
tightened to specifications to prevent loosening under normal
usage. However, if the base has been removed for any reason,
or the load cell has been mounted on a custom fixture without
the base, it is a good idea to periodically test the mounting bolt
tightness using a calibrated torque or click wrench.
11.0 TROUBLE SHOOTING
Proper performance of a load cell requires careful attention to
both electrical and mechanical aspects of the measurement
system. A basic understanding of the electrical and
mechanical installation requirements is recommended.
11.1 Mechanical Trouble Shooting
A mechanical checklist includes:
1. Check for proper installation of load cell.
2. Check for properly tightened bolts.
11.2 Electrical Trouble Shooting
An electrical checklist should start with:
1. Check cables for proper wiring.
2. Inspect for loose or dirty electrical connections.
3. Check for improper shield grounds.
4. Check for proper grounding of the structure that the
load cell is mounted on.
5. Check the signal conditioning electronics for proper
setup.
6. Check the insulation resistance of shielded
conductors for short circuits.
7. Check isolation resistance, load cell flexure to
conductors.
8. Check load cell bridge resistances, (A-D) excitation
and (B-C) the signal leads.
9. Check bridge balance.
10. Keep a record of your observations, correct problems,
or contact PCB factory for assistance.
11.2.1 Estimating Bridge Balance using an Ohm Meter
A load cell that has been severely overloaded will exhibit a
significant zero offset in the Wheatstone bridge. It can be
useful to estimate the bridge unbalance using a digital ohm
meter with resolution of at least 0.1 ohm.
Following the Western Region wiring diagram measure the
resistances for each leg of the bridge, i.e.: R
AB
, R
AC
, R
DB
, and
R
DC
.
1. Estimate the Zero Offset (mV/V):
Zero Offset = 1.4 x (R
AC
- R
AB
+ R
DB
- R
CD
)
2. Estimate the Bridge Unbalance (% Full Scale):
Bridge Unbalance = 100 x (Zero Offset / Output
FS
)
Where: Output
FS
= Full Scale output of the load cell (mV/V)
A Zero Offset of greater than 10% indicates probable overload
or possible fatigue damage. A load cell that has been
significantly overloaded enough to create a large zero offset is
not repairable. In some instances it may be possible to
temporarily continue to use the load cell by attempting to
balance the bridge through use of external resistors. However,
the user should expect that such a load cell no longer will meet
the performance parameters related to its original
specifications. (User beware!!)
12.0 CALIBRATION / REPAIR SERVICES
PCB Load & Torque offers calibration and repair services.
The PCB Calibration Laboratory in Farmington Hills,
Michigan is A2LA Accredited per ISO/IEC 17025.
Standard calibration certificates list five force points
ascending and one point descending. Additional data points
are available at extra cost upon request. A 60 K ohm (±0.01%)
shunt calibration resistor is supplied with each load cell
calibration.
D
B
C
A
R
DB
R
CD
R
A
B
R
AC
Figure 17 – Wheatstone Bridge

PCB Load & Torque, Inc. Toll-Free in USA 866-684-7107 716-684-0001 www.pcbloadtorque.com
DUAL BRIDGE LOAD CELL OPERATION MANUAL
9
Certificate information includes tabulated measurement
variable data zero balance, bridge input/output resistance,
computer nonlinearity and hysteresis, static error band (SEB)
calculations and entries abilities and traceability statements.
If an initial evaluation shows that a transducer requires repair,
PCB will provide the customer with an estimate prior to taking
any corrective action.
12.1 RMA / Purchase Order
Please request a return material authorization (RMA) before
sending a load cell back to the factory for any reason. For
calibration services, if possible, a copy of the purchase order
covering the requested services should be included with the
returned load cell.
13.0 WARRANTY
Standard warranty on dual bridge load cells covers parts and
workmanship. For full details, refer to the Warranty
Statement supplied with each load cell.
If the load cell is defective for reasons other than overloads,
return it to the factory for detailed evaluation. Factory
evaluation may show that the load cell is repairable or non-
repairable and if repair or replacement will be under warranty.
If not under warranty, the customer will be contacted with the
cost of repairs and recalibration. Once authorization to
proceed is received, a delivery date will be provided.
Manual Number: 54811
Manual Revision: A
Revision Date: 6/6/13
ECO Number: 41606

Model Number
1404-03ADB FATIGUE RATED LOW PROFILE LOAD CELL, DUAL BRIDGE Revision: F
ECN #: 43840
Performance ENGLISH SI
Measurement Range(100 x 10 6 cycles) 25 klb 111 kN [5][6]
Sensitivity(± 10 %) 2.0 mV/V 2.0 mV/V [7][1]
Non-Linearity ≤ 0.05 % FS ≤ 0.05 % FS
Hysteresis ≤ 0.05 % FS ≤ 0.05 % FS
Non-Repeatability ≤ 0.02 %RO ≤ 0.02 %RO
Eccentric Load Sensitivity 0.1 %/in 0.1 %/25.4mm
Resonant Frequency 15 kHz 15 kHz
Side Load Sensitivity 0.1 %/in 0.1 %/25.4mm
Creep(in 20 minutes) 0.025 % 0.025 %
Static Error Band ≤ 0.05 % FS ≤ 0.05 % FS [5]
Environmenta
Overload Limit 75 klb 334 kN
Load Limit(Side Force, FX or FY) 25 klb 111 kN [3]
Load Limit(Bending Moment, MX or MY) 25k in-lb 2825 Nm [3]
Load Limit(Axial Torque, MZ) 25k in-lb 2825 Nm [3]
Temperature Range(Operating) -65 to +200 °F -54 to +93 °C
Temperature Range(Compensated) +15 to +115 °F -9 to +46 °C
Temperature Effect on Output(Maximum) ± 0.0008 %Reading/°F ± 0.0018 %Reading/°C [4]
Temperature Effect on Zero Balance(Maximum) ± 0.0008 %FS/°F ± 0.0018 %FS/°C [4]
E ectrica
Bridge Resistance 350 Ohm 350 Ohm [1]
Excitation Voltage(Recommended) 10 VDC 10 VDC [2]
Insulation Resistance >5k GOhm >5k GOhm
Zero Balance ≤ 1 %RO ≤ 1 %RO
Output Polarity +Tension +Tension
Physica
Size (Diameter x Height) 6.06 in x 3.50 in 153.90 mm x 88.90 mm [8]
Weight 21 lb 9.53 kg
Mounting Thread 1 1/4 - 12 UNF-3B No Metric Equivalent
Sensing Element Strain Gage Strain Gage
Mounting Torque 1400 in-lb 158 Nm
Deflection at Full Scale Capacity 0.001 in 0.03 mm
Electrical Connector PT02E-10-6P (2) PT02E-10-6P (2)
All specifications are at room temperature unless otherwise specified.
In the interest of constant product improvement, we reserve the right to change specifications without notice.
NOTES:
[1]Nominal.
[2]Calibrated at 10 VDC, usable 5 to 20 VDC or VAC RMS.
[3]Singularly applied, i.e. no other extraneous loads.
[4]Over compensated operating temperature range.
[5]FS - Full Scale.
[6]Calibrated in tension and compression.
[7]RO - Rated Output.
[8]See Outline Drawing 49932 for Complete Dimensions
SUPPLIED ACCESSORIES:
Model 084A90 Connector Shroud (2)
OPTIONAL ACCESSORIES:
Model 084A56 Pre-Tension Stud
Model 181-012A PT06A-10-6S(SR)
Model 8311-01-10A CABLE
PCB Load & Torque, Inc.
24350 Indoplex C rcle
Farm ngton H lls, MI 48335
UNITED STATES
Phone: 866-684-7107
Fax: 716-684-0987
E-Ma l: lt nfo@pcbloadtorque.com
Web s te:
http://www.pcbloadtorque.com
OPTIONAL VERSIONS
Optional versions have identical specifications and accessories as listed for the standard
model except where noted below. More than one option may be used.
Entered: AP Engineer: PE Sales: RWM Approved: JSD Spec Number:
Date: 2/17/2015 Date: 2/17/2015 Date: 2/17/2015 Date: 2/17/2015 48435

1
1
2
2
3
3
4
4
5
5
6
6
7
7
8
8
A A
B B
C C
D D
DWG. NO.
SCALE: SHEET
DRAWN CHECKED ENGINEER
TITLE
UNLESS OTHERWISE SPECIFIED TOLERANCES ARE:
DIMENSIONS IN MILLIMETERS
[ IN BRACKETS ]
ANGLES
`
.5 DEGREES
24350 Indoplex Circle Farmington Hills MI 48335
(716) 684-0001 E-MAIL: ltinfo@pcbloadtorque.com
DIMENSIONS IN INCHES
ANGLES
`
.5 DEGREES
FILLETS AND RADII
.015 MAX
FILLETS AND RADII
0.38 MAX
OUTLINE DRAWING
49932
1 OF 1
3/4
1204/1404 SERIES PT CONNECTOR
LOW PROFILE LOAD CELL
PTE 11. 1.11
DECIMALS XX ±.01
XXX ±.005
DECIMALS X ± 0.3
XX ± 0.13
A
B
B
A
49932
PCB Load & Torque Inc. claims proprietary rights in
the information disclosed hereon. Neither it nor any
reproduction thereof will be disclosed to others without
the written consent of PCB Load and Torque Inc.
3.65 [92.7]
3.87 [98.3] W/CONN. PROTECTOR
n.406 [10.3]12X THRU
n5.125 [130.2] B.C.
THREAD x1.37 [34.8]
(STANDARD LOAD CELL 1 1/4"-12UNF-3B
METRIC "M" LOAD CELL M33X2.0 4H0
45°
n2.59 [65.8]
1.75 [44.5]
n6.06 [153.9]
.81 [20.6]
1.63 [41.4]
CONNECTOR "A"
PTO2E-10-6P CONNECTOR
WIRING CODE: TYPICAL
PIN A +EXC.
PIN B +SIG.
PIN C -SIG.
PIN D -EXC.
PIN E N/C
PIN F N/C
2
1204 M1204 1404 AND M1404 SERIES LOAD CELLS
INCLUDING DUAL BRIDGE
1
2
SUPPLIED WITH MATING FASTENERS
WIRING CODE FOR "T" SERIES LOAD CELLS
PIN A +EXC.
PIN B +SIG.
PIN C -SIG.
PIN D -EXC.
PIN E TEDS DATA
PIN F TEDS GROUND
1204 M1204 1404 AND M1404 SERIES BASES
n2.59 [65.8]
n5.125 [130.2] B.C. 3/8-24 UNF - 2B x .8812X
1
45°
n6.06 [153.9]
1.75 [44.5]
.94 [23.9]
.37 [9.4]
n2.25 [57.2]
.030 [0.8]
THREAD x1.37 [34.8]
(STANDARD LOAD CELL 1 1/4"-12UNF-3B
METRIC "M" LOAD CELL M33X2.0 4H0
4X Ø.313 [7.94] x.31 [7.9]
(SPANNER WRENCH)
2.56 [65.0]
.38 [9.5]
n2.25 [57.2]
n6.06 [153.9]
3.50 [88.9]
.030 [0.8]
.12 [3.0]
45°
3.65 [92.7]
3.87 [98.3] W/CONN. PROTECTOR
THREAD x1.37 [34.8]
(STANDARD LOAD CELL 1 1/4"-12UNF-3B
METRIC "M" LOAD CELL M33X2.0 4H0
THREAD x1.37 [34.8]
(STANDARD LOAD CELL 1 1/4"-12UNF-3B
METRIC "M" LOAD CELL M33X2.0 4H0
12x 3/8-24 x 2.25 [57.2] 12 POINT FLANGE BOLT
CONNECTOR "A"
PTO2E-10-6P CONNECTOR
WIRING CODE: TYPICAL
PIN A +EXC.
PIN B +SIG.
PIN C -SIG.
PIN D -EXC.
PIN E N/C
PIN F N/C
2
1204 M1204 1404 AND M1404 SERIES LOAD CELLS W/BASES
INCLUDING DUAL BRIDGE
JDM
11. 1.11
MDF 11. 1.11
REVISIONS
REV DESCRIPTION ECO
ECONNECTOR WAS PT02A - 06.06.16 PTE 45560
.22 [5.5]
3
3MODEL 084A901 CONNECTOR PROTECTOR SHOWN:
OPTIONAL ON ALL 1204/M1204 SERIES AND 1404/M1404 SERIES SINGLE BRIDGE LOAD CELLS
STANDARD ON ALL 1404/M1404 SERIES DUAL BRIDGE LOAD CELLS
CONNECTOR "B"
DUAL BRIDGE ONLY
3
CONNECTOR "B"
DUAL BRIDGE ONLY
.22 [5.5]
.94 [23.9]
45°
4X Ø.313 [7.94] x.31 [7.9]
(SPANNER WRENCH)
Table of contents
Other PCB Measuring Instrument manuals
Popular Measuring Instrument manuals by other brands
LATNEX
LATNEX MG-2000T manual
Instrutech
Instrutech Hornet CCM502 user manual

Sennheiser
Sennheiser RV 55 Bedienungsanleitung

Agilent Technologies
Agilent Technologies G6691A operating instructions
TDE Instruments
TDE Instruments Digalox DPM72-MPP instruction manual
Cooper Atkins
Cooper Atkins Blue2 20100-K Functional Overview
