PCC FTI MB-30 Operating instructions

Fatigue Technology Inc. 401 Andover Park East Seattle, WA • USA 98188-7605 Tel: (206)246-2010 Fax: (206)244-9886
358856-REV K
FTI OPERATIONS, MAINTENANCE, AND REPAIR MANUAL
Medium Brute Puller Unit
Part #2720-007, Log #01204
Revision K
December 12, 2023
401 Andover Park East
Seattle, Washington 98188-7605
USA (206) 246-2010
Original Instruction

Fatigue Technology Inc. 401 Andover Park East Seattle, WA • USA 98188-2868 Tel: (206)246-2010 Fax: (206)244-9886
358856-REV K
ABOUT FATIGUE TECHNOLOGY INC.
Fatigue Technology Inc. (FTI) is a world-leading aerospace engineering and manufacturing company.
FTI pioneered Cold Expansion (Cx™) technology (which provides solutions to fatigue problems
associated with holes in metal structures) back in 1969 and has advanced this science to develop
innovative bushing and fastener products. These proprietary products and associated tooling may be
covered by patents or agreements owned by, or exclusively licensed to, Fatigue Technology Inc. Use of
tooling procured from other than a licensed source may constitute patent infringement.
The detailed tooling information in this manual was compiled and written by FTI. The tooling was designed
specifically for use with FTI’s Cold Expansion systems. FTI cannot be held responsible for damage or injury as a
result of operating this equipment if it is used for other than the process intended, with any other tooling not provided
by FTI, or not used in accordance with the instructions contained in this manual. To avoid personal injury, please
observe all safety precautions and instructions. FTI reserves the right to change specifications or configurations of
equipment detailed in this manual as part of our ongoing technical and product improvement programs. If you have
any questions about the use or serviceability of this equipment, please contact our Sales Department.
FTI’s Cold Expansion systems and processes are the subject matter of one or more of the following patents: 4,809,420;
4,885,829; 4,934,170; 5,083,363; 5,096,349; 5,103,548; 5,127,254; 5,129,253; 5,218,854; 5,245,743; 5,305,627;
5,341,559; 5,380,136; 5,405,228; 5,433,100; 5,468,104; 6,077,010; 6,183,180; 6,487,767; 6,792,657; 6,990,722;
7,024,908; 1,061,276; 513,898; 692015124; 581,385; 69310828; 468,598; 69105390; 643,231; 69414946; 696,686;
785,366; 1032769; and other patents pending. These systems and processes are tooling critical and must be performed
in accordance with FTI’s specifications or controlling documents. To ensure proper results from FTI’s Cold
Expansion systems and to be licensed to use FTI’s patented processes, it is essential that FTI’s complete integrated
system of tooling be purchased and utilized. The use of tooling purchased from other than a licensed supplier could
jeopardize fatigue life enhancement and may constitute patent infringement.
Fatigue Technology Inc. (FTI) has provided innovative solutions to fatigue problems in metal structures since 1969.
Complete systems of tooling are used worldwide to enhance the fatigue life of holes in airframes, turbine engines,
and other critical structures.
The FTI staff of professionals provides a full range of support services including:
*Application engineering.
*Detailed project planning, implementation, and management.
*On-site assistance, including training and tool room setup.
The Sales Department is always available to assist with special fatigue enhancement requirements. Please contact
FTI with questions at any time.
This manual can be made available in other languages. Please contact the Sales Department to request a copy.

Fatigue Technology Inc. 401 Andover Park East Seattle, WA • USA 98188-7605 Tel: (206)246-2010 Fax: (206)244-9886
358856-REV K
TABLE OF CONTENTS
SECTION DESCRIPTION PAGE
1.0 Introduction......................................................................................................................................... 1
1.1 About the Medium Brute Puller Unit ...................................................................................... 1
1.2 General Specifications............................................................................................................. 1
1.3 General Description................................................................................................................. 2
2.0 Safety .................................................................................................................................................. 4
2.1 Hydraulic Hose Safety............................................................................................................. 6
3.0 Puller Unit Operating Instructions ...................................................................................................... 7
3.1 Puller Unit Setup Procedure .................................................................................................... 7
3.2 Actuation of the Puller............................................................................................................. 8
4.0 Maintenance........................................................................................................................................ 9
4.1 General Cleaning..................................................................................................................... 9
4.2 Preventative Maintenance ....................................................................................................... 9
4.3 Lubrication .............................................................................................................................. 9
4.4 Inspection ................................................................................................................................ 9
4.5 Assembly and Disassembly................................................................................................... 10
4.6 Medium Brute Seal Kit (MB-SK) ......................................................................................... 12
5.0 Troubleshooting ................................................................................................................................ 13
5.1 PowerPak Will Not Build Full Hydraulic Pressure ............................................................... 13
5.2 Puller Retracts on Trigger Actuation, But Will Not Return to Start Position ....................... 14
5.3 Mandrel Sticks in Hole When Puller Is Activated................................................................. 15
6.0 Illustrated Parts Breakdown.............................................................................................................. 16
6.1 Medium Brute Assembly Diagrams ...................................................................................... 16
6.2 Medium Brute Part Lists ....................................................................................................... 18
6.3 BMB-10 Assembly Diagram................................................................................................. 37
6.4 BMB-10 Parts List................................................................................................................. 38
Appendix A Legacy Units ..................................................................................................................................... 39
A.1 Trigger Rework (FTI-CT-RK and MB-CT-RK) ................................................................... 39
A.2 Previous Trigger Assembly ................................................................................................... 41
A.3 Handle Revisions................................................................................................................... 42
Appendix B E.C. Declaration of Conformity........................................................................................................ 43

Fatigue Technology Inc. 401 Andover Park East Seattle, WA • USA 98188-2868 Tel: (206)246-2010 Fax: (206)244-9886
358856-REV K
TABLE OF CONTENTS (Continued)
SECTION DESCRIPTION PAGE
FIGURES
Figure 1.3-1 Medium Brute Puller Unit Parts.......................................................................................................... 2
Figure 2.0-1 Safety Labels....................................................................................................................................... 4
Figure 2.0-2 Location of Air Disconnect................................................................................................................. 5
Figure 2.1-1 Strain Reliever .................................................................................................................................... 6
Figure 2.1-2 Example Hydraulic Hose Identification.............................................................................................. 6
Figure 3.1-1 PowerPak Connection Ports................................................................................................................ 7
Figure 3.1-2 Hydraulic Coupler Connection ........................................................................................................... 7
Figure 4.5-1 Transfer Tube.................................................................................................................................... 10
Figure 4.6-1 Medium Brute Seal Locations .......................................................................................................... 12
Figure 5.2-2 Enerpac CT-604 Pressure Relief Tool .............................................................................................. 14
Figure 6.1-1 Medium Brute Exploded View ......................................................................................................... 16
Figure 6.1-2 Medium Brute Section View............................................................................................................. 17
Figure 6.3-1 BMB-10 Assembly Diagram ............................................................................................................ 37
Figure A.1-1 FTI-CT-RKT Tool Kit Pieces........................................................................................................... 39
Figure A.1-2 Diagram of Cartridge Trigger Assembly .......................................................................................... 40
Figure A.2-1 Diagram of Previous Trigger Assembly ........................................................................................... 41
Figure A.3-1 Handle Revisions .............................................................................................................................. 42

Fatigue Technology Inc. 401 Andover Park East Seattle, WA • USA 98188-7605 Tel: (206)246-2010 Fax: (206)244-9886
358856-REV K
TABLE OF CONTENTS (Continued)
SECTION DESCRIPTION PAGE
TABLES
Table 1.3-1 Medium Brute Specifications ............................................................................................................. 3
Table 4.6-1 Medium Brute Seal Kit ..................................................................................................................... 12
Table 6.2-1 MB-30 Parts List............................................................................................................................... 19
Table 6.2-2 MB-30A Parts List............................................................................................................................ 20
Table 6.2-3 MB-30B Parts List ............................................................................................................................ 21
Table 6.2-4 MB-30-H25 Parts List....................................................................................................................... 22
Table 6.2-5 MB-30A-H25 Parts List.................................................................................................................... 23
Table 6.2-6 MB-30C Parts List ............................................................................................................................ 24
Table 6.2-7 MB-30-V Parts List........................................................................................................................... 25
Table 6.2-8 MB-70 Parts List............................................................................................................................... 26
Table 6.2-9 MB-70A Parts List............................................................................................................................ 27
Table 6.2-10 MB-70B Parts List ............................................................................................................................ 28
Table 6.2-11 MB-70-H25 Parts List....................................................................................................................... 29
Table 6.2-12 MB-70A-H25 Parts List.................................................................................................................... 30
Table 6.2-13 MB-70-H20 Parts List....................................................................................................................... 31
Table 6.2-14 MB-70-V Parts List........................................................................................................................... 32
Table 6.2-15 MB-70-H20-V Parts List .................................................................................................................. 33
Table 6.2-16 MB-10 Parts List............................................................................................................................... 34
Table 6.2-17 MB-10A Parts List............................................................................................................................ 35
Table 6.2-18 MB-10B Parts List ............................................................................................................................ 36
Table 6.4-1 BMB-10 Parts List ............................................................................................................................ 38
Table A.1-1 FTI-CT-RKT Trigger Assembly Replacement Tool Kit .................................................................. 39
Table A.1-2 FTI-CT-RK Trigger Rework Kit....................................................................................................... 40
Table A.1-3 MB-CT-RK Medium Brute Rework Kit........................................................................................... 40
Table A.2-1 Parts List for Previous Trigger Assembly......................................................................................... 41

Fatigue Technology Inc. 401 Andover Park East Seattle, WA • USA 98188-2868 Tel: (206)246-2010 Fax: (206)244-9886
358856-REV K
This page intentionally left blank for two-sided printing.

Fatigue Technology Inc. 401 Andover Park East Seattle, WA • USA 98188-7605 Tel: (206)246-2010 Fax: (206)244-9886
358856-REV K 1
SECTION 1.0: INTRODUCTION
This instruction manual contains information on the operation and maintenance of the Medium Brute Puller Unit. To
obtain optimum performance and many years of trouble-free service, operate the puller unit properly and carefully
follow maintenance procedures. Read this manual before operating the puller unit and retain the manual for future
reference. If requested, FTI will provide this manual in the language of the end-user.
1.1 ABOUT THE MEDIUM BRUTE PULLER UNIT
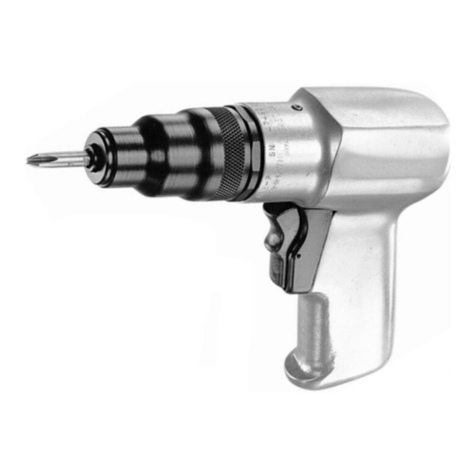
The Medium Brute hydraulic puller unit is a powerful, moderately sized, lightweight tool specifically
designed for use with Fatigue Technology Inc. (FTI) patented Split Sleeve Cold Expansion™ (SsCx™)
process. The Medium Brute is designed to pull a mandrel through a hole with the pre-lubricated stainless
steel split sleeves used in this process. The puller is also compatible with other FTI processes including
ForceMate®, FleXmate®, GromEx®, etc.
Medium Brute (MB) pullers have a maximum pull force of 24,000 pounds (1.1 x 10⁵N) at 10,000 psi (689.5
bar) pump pressure. The MB is available in sizes (models) capable of cold expanding holes up to 7 inches
(177.8 mm) deep, and 15/16-inch (23.8 mm) diameter in aluminum, and up to 3/4-inch (19.1 mm) diameter
in steel and titanium. Larger diameters may be evaluated on a case by case basis, contact FTI Sales for
application assistance.
The Medium Brute is available in various models to accommodate multiple material stack-ups, hose options,
and mandrel adapters:
MB-xx where ‘-xx’ relates to material stack (see Table 1.3-1).
MB-xx-V where ‘-V’ represents high visibility hoses.
MB-xx-Hxx where ‘-Hxx’ represents a unique hose length other than the standard 10 feet.
MB-xxA comes with a MB-CA-8 mandrel adapter.
MB-xxB comes with a MB-CA-11 mandrel adapter.
BMB-10 is a special puller with a BB barrel and BMB-CA-13 mandrel adapter.
The Medium Brute has a fail-safe air control system that causes the puller retraction cycle to be interrupted
and return the puller unit to its original position whenever the operator releases finger pressure on the trigger
or in the event of an air hose failure. All puller units operate in conjunction with either of FTI’s PowerPak
air-hydraulic power units, the standard FT-200D, FT-200C, or portable FT-20 (and are compatible with older
units FT-200B, IW100MF, and IW10MF). The MB has proven to be very reliable and requires minimal
maintenance.
Use the puller unit only with FTI tooling and accessories. Refer to the FTI Tooling Catalog for more
information or contact the FTI Sales department for assistance.
1.2 GENERAL SPECIFICATIONS
Hydraulic Fluid Requirements......................................... U.S. MIL-Spec #5606
Stackup Capacity (Grip) ................................................. Material up to 7 inches (177.8 mm)
Actuation / Operation....................................................... Pneumatic / Hydraulic
Compatible PowerPaks .................................................... FT-200D, FTI-200C or FT-20
Replacement Seal Kit....................................................... Medium Brute Seal Kit (MB-SK)
Emission sound pressure level at the work station
(according to EN ISO 11201:1995) on load ................. 83.1 dB(A)
Weighted hand-arm vibration at the handle
(according to EN 28662-1:1993) on load ..................... <2.5 m.S2

Fatigue Technology Inc. 401 Andover Park East Seattle, WA • USA 98188-2868 Tel: (206)246-2010 Fax: (206)244-9886
2358856-REV K
1.3 GENERAL DESCRIPTION
• Air actuated, hydraulic puller capable of cold expanding up to 15/16-inch (23.8 mm) diameter in aluminum and
mild steel, and up to 3/4-inch (19.1 mm) diameter in titanium and high-strength steel.
• Maximum pull force is 24,000 pounds (1.1 x 10⁵Newtons) at 10,000 psi (389.5 bar) hydraulic pressure.
• Includes a hose assembly, spanner wrench, and nosecap pin wrench. Threaded adapter(s), or chuck(s) are also
included depending on model (see Table 1.3.1). All models come packaged in a tool case with foam, except as
noted.
• Available in various lengths depending on the model, up to 7.0 inches (177.8 mm) material stackup capacity.
• Hydraulic pressure provided by the FT-200D, FTI-200C, or FT-20 PowerPak.
Figure 1.3-1
Medium Brute Puller Unit Parts
Trigger
Cylinder
Housing
Barrel
End Cap
Handle
Hose
Assemblies

Fatigue Technology Inc. 401 Andover Park East Seattle, WA • USA 98188-7605 Tel: (206)246-2010 Fax: (206)244-9886
358856-REV K 3
Table 1.3-1
Medium Brute Specifications
Model
Number
Maximum
Stackup Length Mandrel
Attachment
Weight*
(Excluding
Hoses)
Stroke Case Hose
MB-30
3.3 inch
(83.8 mm)
16.7 inch
(424.2 mm)
5/8-18 (Installed)
or 7/8-14 (Included)
13.0 lbs
(5.9 kg)
5.16 inch
(131 mm)
6575-002
Standard 10 foot
(3.0 m)
MB-30A
3.3 inch
(83.8 mm)
16.7 inch
(424.2 mm)
MB-CA-8 Chuck
13.4 lbs
(6.1 kg)
5.16 inch
(131 mm)
6575-002
Standard 10 foot
(3.0 m)
MB-30B
3.3 inch
(83.8 mm)
16.7 inch
(424.2 mm)
MB-CA-11 Chuck
13.4 lbs
(6.1 kg)
5.16 inch
(131 mm)
6575-002
Standard 10 foot
(3.0 m)
MB-30-H25
3.3 inch
(83.8 mm)
16.7 inch
(424.2 mm)
5/8-18 (Installed)
or 7/8-14 (Included)
13.0 lbs
(5.9 kg)
5.16 inch
(131 mm)
6575-002
Standard 25 foot
(7.6 m)
MB-30A-H25
3.3 inch
(83.8 mm)
16.7 inch
(424.2 mm)
MB-CA-8 Chuck
13.4 lbs
(6.1 kg)
5.16 inch
(131 mm)
6575-002
Standard 25 foot
(7.6 m)
MB-30C
3.3 inch
(83.8 mm)
16.7 inch
(424.2 mm)
5/8-18 (Installed)
or 7/8-14 (Included)
13.0 lbs
(5.9 kg)
5.16 inch
(131 mm)
N/A
Standard 10 foot
(3.0 m)
MB-30-V
3.3 inch
(83.8 mm)
16.7 inch
(424.2 mm)
5/8-18 (Installed)
or 7/8-14 (Included)
13.0 lbs
(5.9 kg)
5.16 inch
(131 mm)
6575-002
High-Vis 10 foot
(3.0 m)
MB-70
7.0 inch
(177.8 mm)
24.1 inch
(612.2 mm)
5/8-18 (Installed)
or 7/8-14 (Included)
16.1 lbs
(7.3 kg)
8.86 inch
(225 mm)
6575-003
Standard 10 foot
(3.0 m)
MB-70A
7.0 inch
(177.8 mm)
24.1 inch
(612.2 mm)
MB-CA-8 Chuck
16.5 lbs
(7.5 kg)
8.86 inch
(225 mm)
6575-003
Standard 10 foot
(3.0 m)
MB-70B
7.0 inch
(177.8 mm)
24.1 inch
(612.2 mm)
MB-CA-11 Chuck
16.5 lbs
(7.5 kg)
8.86 inch
(225 mm)
6575-003
Standard 10 foot
(3.0 m)
MB-70-H25
7.0 inch
(177.8 mm)
24.1 inch
(612.2 mm)
5/8-18 (Installed)
or 7/8-14 (Included)
16.1 lbs
(7.3 kg)
8.86 inch
(225 mm)
6575-003
Standard 25 foot
(7.6 m)
MB-70A-H25
7.0 inch
(177.8 mm)
24.1 inch
(612.2 mm)
MB-CA-8 Chuck
16.5 lbs
(7.5 kg)
8.86 inch
(225 mm)
6575-003
Standard 25 foot
(7.6 m)
MB-70-H20
7.0 inch
(177.8 mm)
24.1 inch
(612.2 mm)
5/8-18 (Installed)
or 7/8-14 (Included)
16.1 lbs
(7.3 kg)
8.86 inch
(225 mm)
6575-003
Standard 20 foot
(6.1 m)
MB-70-V
7.0 inch
(177.8 mm)
24.1 inch
(612.2 mm)
5/8-18 (Installed)
or 7/8-14 (Included)
16.1 lbs
(7.3 kg)
8.86 inch
(225 mm)
6575-003
High-Vis 10 foot
(3.0 m)
MB-70-H20-V
7.0 inch
(177.8 mm)
24.1 inch
(612.2 mm)
5/8-18 (Installed)
or 7/8-14 (Included)
16.1 lbs
(7.3 kg)
8.86 inch
(225 mm)
6575-003
High-Vis 20 foot
(6.1 m)
MB-10
1.3 inch
(33.0 mm)
12.7 inch
(322.6 mm)
5/8-18 (Installed)
or 7/8-14 (Included)
11.4 lbs
(5.2 kg)
3.16 inch
(80 mm)
6575-001
Standard 10 foot
(3.0 m)
MB-10A
1.3 inch
(33.0 mm)
12.7 inch
(322.6 mm)
MB-CA-8 Chuck
11.8 lbs
(5.4 kg)
3.16 inch
(80 mm)
6575-001
Standard 10 foot
(3.0 m)
MB-10B
1.3 inch
(33.0 mm)
12.7 inch
(322.6 mm)
MB-CA-11 Chuck
11.8 lbs
(5.4 kg)
3.16 inch
(80 mm)
6575-001
Standard 10 foot
(3.0 m)
BMB-10
1.0 inch
(25.4 mm)
15.7 inch
(398.8 mm)
BMB-CA-13 Chuck
19.2 lbs
(8.7 kg)
3.16 inch
(80 mm)
6575-002
Standard 10 foot
(3.0 m)
*A user-supplied suspension system may be required at the end use site. The requirement for a suspension system is based on
the end user’s workplace lifting and weight standards. A risk analysis for the suspension is necessary to maintain compliance to
end user’s standards or directives. All risks involved with the suspension of the Medium Brute are the responsibility of the end
user. User instructions and training regarding the suspension system are the responsibility of the end user.
Nosecap Selection: The Medium Brute Puller Unit is compatible with standard nosecaps or extension nosecaps
(Refer to Section 2.3 of the FTI Tooling Catalog for more information).
Mandrel Selection: The Medium Brute Puller Unit is directly compatible with standard Type 2 or Type 5 threaded
mandrels (Refer to Section 2.3 of the FTI Tooling Catalog for more information).

Fatigue Technology Inc. 401 Andover Park East Seattle, WA • USA 98188-2868 Tel: (206)246-2010 Fax: (206)244-9886
4358856-REV K
SECTION 2.0: SAFETY
Consult PowerPak manual for safety precautions before connecting the puller unit.
When used in accordance with these instructions, the puller unit is safe and easy to use. All general safety precautions
associated with hydraulic and pneumatically operated power tools should be observed. Many of these are noted in
this section. Ultimately, the operator is responsible for personal safety; however, the following general safety
precautions should be observed.
CAUTION: The weight of this unit may require a suspension system per the end user’s workplace lifting
standards.
1. Operators must read this manual in its entirety before using the Medium Brute. Wear eye and hearing protection
when operating the puller unit. Do not strike any part of the tool with a hammer or equivalent object. Keep hands
and fingers clear of the nosecap, as they could be crushed between the nosecap and the workpiece. Safety labels
on the tool act as a reminder to these instructions and are shown in Figure 2.0-1.
Read manual before using Always wear eye protection Always wear hearing protection
Do not strike Keep fingers away from nosecap
Figure 2.0-1
Safety Labels
2. This puller unit must be used with an FT-200D, FT-200C, or FT-20 PowerPak hydraulic pump. This manual
does not cover the use and safety precautions of these accessories. Refer to the PowerPak operator manual for the
specific pump being used.

Fatigue Technology Inc. 401 Andover Park East Seattle, WA • USA 98188-7605 Tel: (206)246-2010 Fax: (206)244-9886
358856-REV K 5
3. Disconnect the air supply from the PowerPak when:
- Maintenance is to be performed.
- Tooling (mandrels, nosecaps, etc.) is to be installed.
- Hydraulic hose is disconnected.
- PowerPak is not in use.
Figure 2.0-2
Location of Air Disconnect
4. In the event of a ruptured or leaking hydraulic hose, IMMEDIATELY RELEASE THE TRIGGER AND
DISCONNECT THE AIR LINE from the PowerPak at the air coupler (see Figure 2.0-2). Never use your hands
to grasp a leaking hose under pressure. The force of escaping hydraulic fluid could cause serious injury. If
hydraulic oil should penetrate the skin, medical attention must be sought immediately.
5. DO NOT operate the puller or connect the hoses while any component is disassembled, missing, or loose.
Injury may occur.
6. Before operating the pump, ensure all hose couplings are tightened securely by hand. Do not overtighten the
connections. Couplings need only be tightened securely and leak-free. See Figure 3.1-2.
7. DO NOT use in potentially explosive atmospheres.
FT-200D
FT-20
Air
Disconnect
Air
Disconnect
IMPORTANT: FTI completed a risk assessment on this unit at our factory. Any modifications done
by a third party, or the final user are excluded from that risk assessment. As a result, modifications done
by a third party, or the final user nullify the CE marking.

Fatigue Technology Inc. 401 Andover Park East Seattle, WA • USA 98188-2868 Tel: (206)246-2010 Fax: (206)244-9886
6358856-REV K
2.1 HYDRAULIC HOSE SAFETY
1. Inspect hydraulic hose for signs of wear (cuts, abrasions, or kinks) to the outer shell materials before each use.
Pump clean oil through the entire length. Pressurize the hose and check for leaks at the crimped connectors,
between the hose material and the fitting, and between the fitting and the coupler.
2. DO NOT attempt to disconnect the hydraulic hose while it is under pressure, without first disconnecting air
supply from pump.
3. DO NOT expose hoses to potential hazards such as extreme heat or cold, sharp surfaces, or heavy impact.
4. DO NOT allow hoses to kink, twist, curl, or bend so tightly that the oil flow within the hose is blocked or
reduced. Inspect the hose and fittings for wear or damage before use that could cause premature failure of the
hose or fittings and possibly result in injury. Damaged hoses must be replaced immediately.
5. DO NOT use the hose to move attached equipment.
6. DO NOT remove strain reliever from hoses. Hose strain relievers must be placed around hose fittings during
use. Hoses with damaged strain relievers must be replaced immediately.
Figure 2.1-1
Strain Reliever
7. Hose material and coupler seals must be compatible with hydraulic fluid that meets the requirements of U.S.
MIL-SPEC #5606.
8. Hoses must not come in contact with toxic materials such as creosote-impregnated objects and some paints.
Keep couplers and hoses clean and free of paint. Hose deterioration due to chemical degradation may cause the
hose to fail under pressure. Damaged hoses must be replaced immediately. To find specific chemical
compatibility information, first look at the hose to find the manufacturer and type. The hose manufacturer will be
able to provide a chemical compatibility chart, typically on their website. For example, the hose below is from
Parker and is type JK; the chart can be found here: https://www.mfcp.com/technical-info/chemical-compatibility-
rubber-hose
Figure 2.1-2
Example Hydraulic Hose Identification
9. Hoses can be a trip hazard. Keep hoses clear of all walkways and footpaths.
Manufacturer Information
Manufacturer

Fatigue Technology Inc. 401 Andover Park East Seattle, WA • USA 98188-7605 Tel: (206)246-2010 Fax: (206)244-9886
358856-REV K 7
10. If hoses require replacement, contact the FTI Sales Department.
SECTION 3.0: PULLER UNIT OPERATING INSTRUCTIONS
Become familiar with these instructions before operating the puller.
3.1 PULLER UNIT SETUP PROCEDURE
Refer to Section 6.0 (Illustrated Parts Breakdown) for parts identification.
1. Ensure that the PowerPak is NOT connected to the air supply. If needed, disconnect the PowerPak
from the air supply, following the appropriate operator manual for the pump model being used.
2. Uncoil the hose assembly of the puller unit, and inspect all threads, couplings, and hoses for damage and
degradation.
3. If the chuck assembly/adapter (see Figure 6.1-1, Item Number 17) needs to change, remove the front
barrel by loosening the barrel lockring (Item Number 8) with the provided spanner wrench (Item Number
30), followed by the barrel (Item Number 3). Thread on the appropriate adapter, then reattach the barrel
and lockring.
4. Identify the connection ports on the FTI PowerPak where the puller unit hoses will go. See Figure 3.1-1
below.
Figure 3.1-1
PowerPak Connection Ports
Air Pressure
Port
Hydraulic
Port
FT-200D
FT-20
Hydraulic
Port
Air Signal
Port
Air Pressure
Port
Air Signal
Port

Fatigue Technology Inc. 401 Andover Park East Seattle, WA • USA 98188-2868 Tel: (206)246-2010 Fax: (206)244-9886
8358856-REV K
5. Remove protective caps from the hydraulic fittings and thread the hydraulic hose fitting from the puller
unit (male) onto the hydraulic fitting of the FTI PowerPak (female). Wipe fittings clean prior to
connecting. Make sure to thread couplers completely together, with no gap visible. See Figure 3.1-2
below.
Figure 3.1-2
Hydraulic Coupler Connection
6. Connect the male/female air quick-disconnects from the puller unit to the FTI PowerPak.
7. Install the appropriate mandrel into the threaded adapter (hand tight).
8. Install the appropriate nosecap assembly over the mandrel and thread onto the barrel (hand tight).
9. Connect the PowerPak to the air supply, following the appropriate operator manual for the pump model
being used.
3.2 ACTUATION OF THE PULLER
1. The puller unit can be activated only when connected to an FTI PowerPak.
2. Activate the puller unit by depressing the trigger on the handle. Hydraulic pressure is transmitted through
the hose to the cylinder of the puller unit which then retracts the hydraulic piston.
3. Release the trigger once the mandrel clears the workpiece. This changes pressure at the pilot valve to stop
the pull cycle and return the puller unit to its original position.
4. If the puller unit fails to operate as detailed above, refer to Section 5.0 (Troubleshooting).
Gap
No
Gap

Fatigue Technology Inc. 401 Andover Park East Seattle, WA • USA 98188-7605 Tel: (206)246-2010 Fax: (206)244-9886
358856-REV K 9
SECTION 4.0: MAINTENANCE
The puller unit requires routine checking and periodic preventative maintenance to ensure safe, trouble-free operation.
No special maintenance is required. The following maintenance actions are suggested.
4.1 GENERAL CLEANING
1. Keep the outer surfaces of the puller unit free of dirt and grime. If hydraulic hoses require cleaning, refer
to Section 2.1 for important safety considerations.
2. Keep all hose connections free of dirt and grime. Install protective caps whenever a hose connection is
disengaged.
4.2 PREVENTATIVE MAINTENANCE
1. Whenever the puller is to be stored for longer than 2 weeks, maintain a thin coat of 10-weight oil on the
outside of black oxide surfaces to prevent rusting.
4.3 LUBRICATION
1. There is no internal lubrication requirement for the puller unit.
4.4 INSPECTION
1. Inspect the puller for cracks, leaks, or other damage before each use. Repair and replace immediately.
2. Inspect safety labels (refer to Section 2.0 for required labels) before each use. If any are missing or
illegible, replace immediately.
WARNING
Disconnect the PowerPak from the air supply before performing
any maintenance or repair procedures.

Fatigue Technology Inc. 401 Andover Park East Seattle, WA • USA 98188-2868 Tel: (206)246-2010 Fax: (206)244-9886
10 358856-REV K
4.5 ASSEMBLY AND DISASSEMBLY
The puller unit may need to be disassembled for replacement of seals. Refer to the Illustrated Parts
Breakdown, Section 6.1 for item numbers.
Disassembly
1. Unthread and remove any tooling accessories, such as nosecaps and mandrels.
2. Loosen all three lockrings (Item Numbers 8 and 9) using the spanner wrench (30).
3. Unthread and remove the end cap (5) using the spanner wrench (30).
4. Unscrew and remove the rear cylinder (2) and barrel (3) from the housing (1). If needed, a strap wrench
can be used for additional force.
5. Loosen the locknut (10), using two 1-5/16-inch wrenches.
6. Unthread and remove the threaded adapter or chuck assembly (17) from the piston rod using a 1-5/16-
inch wrench. Since it is necessary to hold the piston rod stationary, use a 3/4-inch wrench to keep the
piston rod from turning.
DO NOT scratch the piston shaft during disassembly.
7. Remove the piston rod assembly (4) by pushing on the threaded end (mandrel end) of the piston rod until
the threads engage the sleeve (7). Unthread the piston rod through the o-ring (13) and remove the piston
rod assembly.
8. Remove the handle assembly (6) by removing the four socket-head screws, using a 5/32-inch hex
driver.
9. Remove the transfer tube from the handle assembly. Remove and discard the o-rings and backup rings
on both ends of the tube.
Figure 4.5-1
Transfer Tube
10. Remove the brass sleeve (7).
11. Discard used seals.

Fatigue Technology Inc. 401 Andover Park East Seattle, WA • USA 98188-7605 Tel: (206)246-2010 Fax: (206)244-9886
358856-REV K 11
Reassembly
1. Replace all o-rings and backup rings on the inside and outside of the brass sleeve (7). Drop the brass
sleeve into the front of the housing (1). Turn the brass sleeve until the hole is aligned with the matching
hole in the bottom of the housing.
2. Install new 1046-045 o-rings and 1046-044 backup rings on the transfer tube (part of the handle sub-
assembly). Note that the o-rings go on the ends of the tube and the backup rings will be towards the
middle.
3. Place the small 1046-012 o-ring in place on the housing before installing the handle. Install the handle
assembly (6) onto the housing with four socket-head screws, using a 5/32-inch hex driver. The transfer
tube will go into the hole in the brass sleeve, which was aligned in Step 1.
4. Replace the rear cylinder (2) and tighten until snug using a strap wrench. Tighten the lockring (9) against
the housing using the spanner wrench (30).
5. Replace 1046-113 T-seal on the end of the piston assembly (4). Backup rings are included with T-seal,
these are installed on both sides of the seal.
6. Install the threaded end of the piston assembly (4) into the housing (1). Thread the piston through the
housing and push to the full forward position.
7. Replace 1046-043 U-seal on back end of threaded adapter or chuck assembly (17).
8. Wrap Teflon tape around the threads of the piston rod, then install the threaded adapter or chuck
assembly (17). Tighten the locknut (10) against the threaded adapter or chuck assembly using two
1-5/16-inch wrenches.
9. Replace 1046-058 o-ring and install the front barrel (5). Tighten with a strap wrench, then tighten the
lockring (8) against the housing using the spanner wrench (30).
10. Install the end cap (5) and tighten using the spanner wrench (30). Next, tighten the lockring (9).
11. The puller is now ready for use. Select the appropriate mandrel/nosecap combination and install.
Important: (1) Thoroughly clean all parts prior to reassembly.
(2) Install o-rings toward hydraulic pressure, with backup rings “behind.”
Reference Figure 4.6-1.

Fatigue Technology Inc. 401 Andover Park East Seattle, WA • USA 98188-2868 Tel: (206)246-2010 Fax: (206)244-9886
12 358856-REV K
4.6 MEDIUM BRUTE SEAL KIT (MB-SK)
This kit is used to replace seals in MB-xx models. It is also included as part of the Medium Brute Rework Kit (see
Appendix A.1). Table 4.6-1 is a parts list for the Medium Brute Seal Kit.
For the BMB-10, see Parts List (Table 6.4-1) for itemized seals.
Table 4.6-1
Medium Brute Seal Kit (MB-SK)
Item
Number
Quantity Part Number Description
N/A*
1
2040-001
Seal, Trigger
1
1
1046-012
O-Ring AN6227B-3
2
2
1046-045
O-Ring AN6227B-7
3
2
1046-044
Backup Ring MS28782-7
4
1
1046-043
U Seal 568804
5
1
1046-058
O-Ring MS28775-224
6
1
1046-007
O-Ring A-122-90-BUNA
7
1
1046-002
O-Ring AN6227B-17
8
1
1046-003
Backup Ring MS2878217
9
1
1046-004
O-Ring AN6227-28
10
1
1046-005
Backup Ring MS28782-28
11
1
1046-113
T-Seal 4115B085TP023
12
1
1187-622
Valve, Cartridge Trigger
*Used with legacy triggers (See Table A.2-1, Item 6)
Figure 4.6-1
Medium Brute Seal Locations

Fatigue Technology Inc. 401 Andover Park East Seattle, WA • USA 98188-7605 Tel: (206)246-2010 Fax: (206)244-9886
358856-REV K 13
SECTION 5.0: TROUBLESHOOTING
This section provides solutions to some basic trouble spots. If you cannot solve your maintenance or operational
problems with the information provided in this section, contact the nearest FTI representative.
5.1 POWERPAK WILL NOT BUILD FULL HYDRAULIC PRESSURE
PROBLEM CAUSE SOLUTION
POWERPAK WILL
NOT BUILD FULL
HYDRAULIC
PRESSURE
One or more of the key air or
hydraulic lines has not been
securely connected.
Check the following hose connections, See Figures
2.0-2, 3.1-1 and 3.1-2:
1. Male air-line quick-disconnect fitting from shop air
system to PowerPak.
2. Hydraulic quick couplings connecting the hoses to
the PowerPak manifold, and the puller to the
hydraulic hoses.
3. Two male/female air-line quick-disconnect fittings
connecting the puller to the PowerPak manifold.
4. Check that the main air supply has not been
interrupted.
Note: Should difficulties originate in the PowerPak, consult the specific PowerPak Operations,
Maintenance, and Repair Manual.
CAUTION
Hydraulic oil under extreme pressure may cause serious injuries if not handled carefully.
For technical assistance, please contact the FTI Sales Department.

Fatigue Technology Inc. 401 Andover Park East Seattle, WA • USA 98188-2868 Tel: (206)246-2010 Fax: (206)244-9886
14 358856-REV K
5.2 PULLER RETRACTS ON TRIGGER ACTUATION, BUT WILL NOT RETURN TO START POSITION
PROBLEM CAUSE SOLUTION
PULLER RETRACTS
ON TRIGGER
ACTUATION, BUT
WILL NOT RETURN
TO START POSITION
The puller unit requires
hydraulic oil to lubricate the
piston and cylinder.
Disconnect the hydraulic line and install the CT-604
Pressure Relief Tool onto the end of the hose.
Disconnect the air signal line (see Figure 3.1-1) but
leave the air pressure line connected. Leave the pump
connected to the air supply. Remove the back end cap
on the Medium Brute. Use a screwdriver and the
screwdriver slot in the piston to push the piston rod all
the way forward. This will cause hydraulic fluid to
pour out of the line, so be prepared with a suitable
container. Reinstall the back end cap. Once forward,
cycle the trigger several times – DO NOT bottom it out
– to introduce hydraulic fluid into the cylinder (20+
short cycles).
As above, AND the
hydraulic hose is
difficult to bend or coil
(indicating unrelieved
pressure built up in the
hose).
The hydraulic quick coupler
line has not been completely
tightened at the PowerPak
manifold (there should be no
space between the PowerPak
coupler and the hose fitting
flange). See Figure 3.1-2.
Once hydraulic pressure has been introduced to the
hydraulic hose, the pressure must be relieved before the
coupler can be sufficiently tightened.
Procedure for relieving hydraulic pressure:
1. Disconnect the main air supply.
2. Disconnect the hydraulic hose from the PowerPak.
3. Connect Enerpac CT-604 to free end of the hose and
bleed off hydraulic oil to relieve the built-up
pressure. Figure 5.2-2 shows the Enerpac CT-604
Pressure Relief Tool.
4. Once pressure is relieved, reconnect the hydraulic
hose to the PowerPak.
5. Re-attach air lines to get the puller unit to return to
the forward position.
Figure 5.2-2
Enerpac CT-604 Pressure Relief Tool
(FTI Part Number 1187-770)
This manual suits for next models
18
Table of contents
Other PCC Tools manuals
Popular Tools manuals by other brands
Gage Bilt
Gage Bilt 2000 Series quick start guide
Cembre
Cembre HT131LN-C Operation and maintenance manual
Parkside
Parkside PDST 10 B3 Translation of the original instructions
Matco Tools
Matco Tools MST11880A manual
Makita
Makita DDG460 instruction manual
Jaxon
Jaxon XTR CARP SENSITIVE EASY 2+1 Operation manual
