PCD TXT8026 User manual
User Guide
TXT8026
090605_TXT8026PK_Pocket_EN.indd 1090605_TXT8026PK_Pocket_EN.indd 1 2009.6.5 10:57:7 AM2009.6.5 10:57:7 AM

CHAPTER 1. BEFORE USING TXT8026
BEFORE USING ................................................................................ 6
INSIDE THE PACKAGE .................................................................... 6
HANDSET DESCRIPTIONS .............................................................. 7
KEY DESCRIPTIONS ....................................................................... 8
DISPLAY INDICATORS .................................................................... 9
INSTALL BATTERY ....................................................................... 11
REMOVE BATTERY ...................................................................... 11
CHARGING YOUR BATTERY .......................................................... 12
BATTERY HANDLING INFORMATION ............................................. 12
CHAPTER 2. BASIC OPERATION
BASIC OPERATION ......................................................................... 14
TURNING THE PHONE ON/OFF ..................................................... 14
ACCESSING THE MENU ................................................................ 14
MENU SUMMARY ....................................................................... 1
MAKING A CALL ......................................................................... 17
ANSWERING CALLS .................................................................... 17
MISSED CALL NOTIFICATION ........................................................ 17
WAIT/PAUSE FEATURE ................................................................ 18
ANSWERING A CALL ................................................................... 18
3-WAY CALLING ......................................................................... 19
CALL WAITING FUNCTION ........................................................... 19
CALLING A NUMBER FROM CONTACTS .......................................... 19
ADJUSTING VOLUME ................................................................... 20
ADJUSTING THE CALL VOLUME .................................................... 20
CALLER ID FUNCTION ................................................................. 20
VIBRATE ON/OFF MODE ............................................................. 20
SPEAKERPHONE MODE .............................................................. 20
USING THE AUTO KEYPAD LOCK FUNCTION ................................... 20
AVAILABLE OPTIONS DURING A CALL ........................................... 21
MAKING AN EMERGENCY CALL .................................................... 22
MAKING A CALL WITH LETTERS (EX. 1-800-POCKET) ..................... 22
USING THE microSD CARD ........................................................... 22
CHAPTER 3. MEMORY FUNCTION
MEMORY FUNCTION ...................................................................... 26
STORING A PHONE NUMBER ....................................................... 26
ENTERING LETTERS, NUMBERS & SYMBOLS ................................. 30
ONE, TWO-TOUCH DIALING ......................................................... 31
2
Table of Contents
Contents
Contents
CHAPTER 4. MENU FUNCTION
RECENT CALLS............................................................................... 34
RECENT CALLS............................................................................ 34
MISSED CALLS ........................................................................... 34
RECEIVED CALLS ........................................................................ 3
DIALED CALLS ........................................................................... 3
BLOCKED CALLS ........................................................................ 36
ALL CALLS ................................................................................. 36
CALL TIMERS ............................................................................. 37
CONTACTS .................................................................................... 38
NEW ENTRY ............................................................................... 38
LIST ENTRIES ............................................................................. 38
MESSAGE GROUPS ...................................................................... 39
GROUPS .................................................................................... 41
SPEED DIALS .............................................................................. 42
MY NAME CARD ......................................................................... 43
CAMERA ....................................................................................... 4
CAMERA .................................................................................... 4
BROWSER .................................................................................... 47
STARTING BROWSER .................................................................. 47
MOBILE WEB MENU.................................................................... 47
GAMES & APPS ............................................................................. 49
STARTING GAMES & APPS ........................................................... 49
DOWNLOADING APPLICATIONS ................................................... 49
DOWNLOADING MELODIES/WALLPAPERS ..................................... 49
APPLYING MELODIES/WALLPAPERS ............................................. 49
CHECKING DATA FOLDER MEMORY ............................................... 0
DELETE APPLICATION ................................................................. 0
TOOLS/UTILITIES ......................................................................... 1
CALCULATOR .............................................................................. 1
CALENDAR ................................................................................. 1
ALARM CLOCK ............................................................................ 3
WORLD CLOCK ...........................................................................
NOTEPAD ................................................................................... 6
STOP WATCH .............................................................................. 7
VOICE COMMANDS ..................................................................... 7
VOICE COMMANDS SETTINGS ...................................................... 9
VOICE COMMANDS INFO ............................................................. 61
VOICE MEMO.............................................................................. 62
ME IA GALLERY ............................................................................ 63
SOUND BOX ............................................................................... 63
PICTURE BOX ............................................................................. 63
Table of Contents
3
Contents
Contents
090605_TXT8026PK_Pocket_EN.indd 2-3090605_TXT8026PK_Pocket_EN.indd 2-3 2009.6.5 10:57:8 AM2009.6.5 10:57:8 AM

BEFORE USING TXT8026
CHAPTER 1
BEFORE USING TXT8026
This chapter provides important information about using the
TXT802 including:
Inside the package
Handset descriptions
Key descriptions
Display indicators
Install battery
Remove battery
Charging your battery
Battery handling information
MP3 BOX ................................................................................... 64
SETTINGS ...................................................................................... 6
SOUND SETTINGS ....................................................................... 6
DISPLAY SETTINGS ..................................................................... 68
PHONE SETTINGS ....................................................................... 70
CALL SETTINGS .......................................................................... 73
MEMORY ................................................................................... 74
BLUETOOTH ............................................................................... 7
PHONE INFO .............................................................................. 79
CHAPTER 5. MESSAGES MENU
MESSAGES.................................................................................... 82
WHEN A NEW MESSAGE ARRIVES ................................................ 82
NEW MESSAGE ........................................................................... 82
VOICEMAIL ................................................................................ 83
INBOX ....................................................................................... 84
SENT ......................................................................................... 8
DRAFTS ..................................................................................... 86
SETTINGS .................................................................................. 86
ERASE ....................................................................................... 88
CHAPTER 6. SAFETY AN WARRANTY
SAFETY ......................................................................................... 90
SAFETY INFORMATION FOR WIRELESS HANDHELD PHONES ........... 90
SAFETY INFORMATION FOR FCC RF EXPOSURE .............................. 93
SAR INFORMATION ..................................................................... 93
HEARING AID COMPATIBILITY HAC FOR WIRELESS
TELECOMMUNICATIONS DEVICES............................................... 94
FDA CONSUMER UPDATE ............................................................. 9
AVOID POTENTIAL HEARING LOSS. ..............................................100
FCC COMPLIANCE INFORMATION ................................................101
WARRANTY ..................................................................................103
12 MONTH LIMITED WARRANTY .................................................103
Contents
Contents
4
Table of Contents
090605_TXT8026PK_Pocket_EN.indd 4-5090605_TXT8026PK_Pocket_EN.indd 4-5 2009.6.5 10:57:9 AM2009.6.5 10:57:9 AM
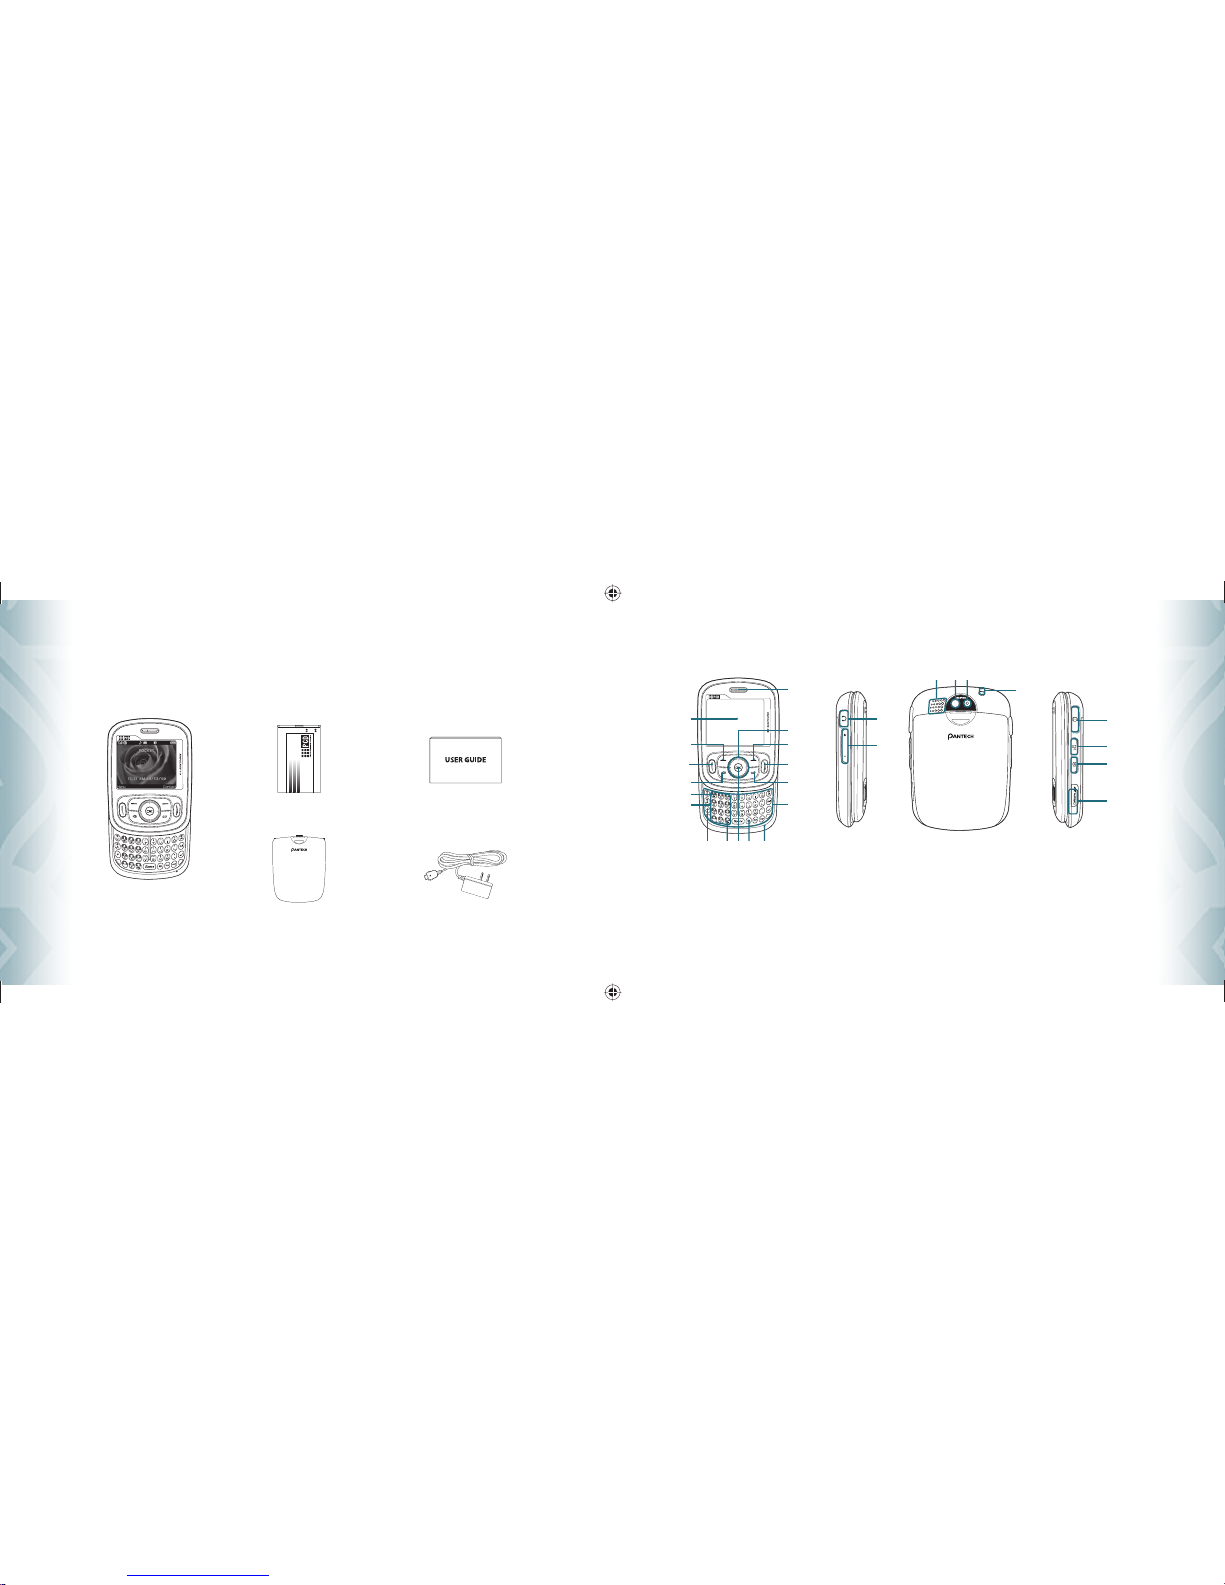
INSI E THE PACKAGE
This package should include all items pictured below. If any are missing or different, immediately contact the retailer where you purchased the
phone.
6
Chapter 1 −Before Using TXT8026
Before Using
Before Using
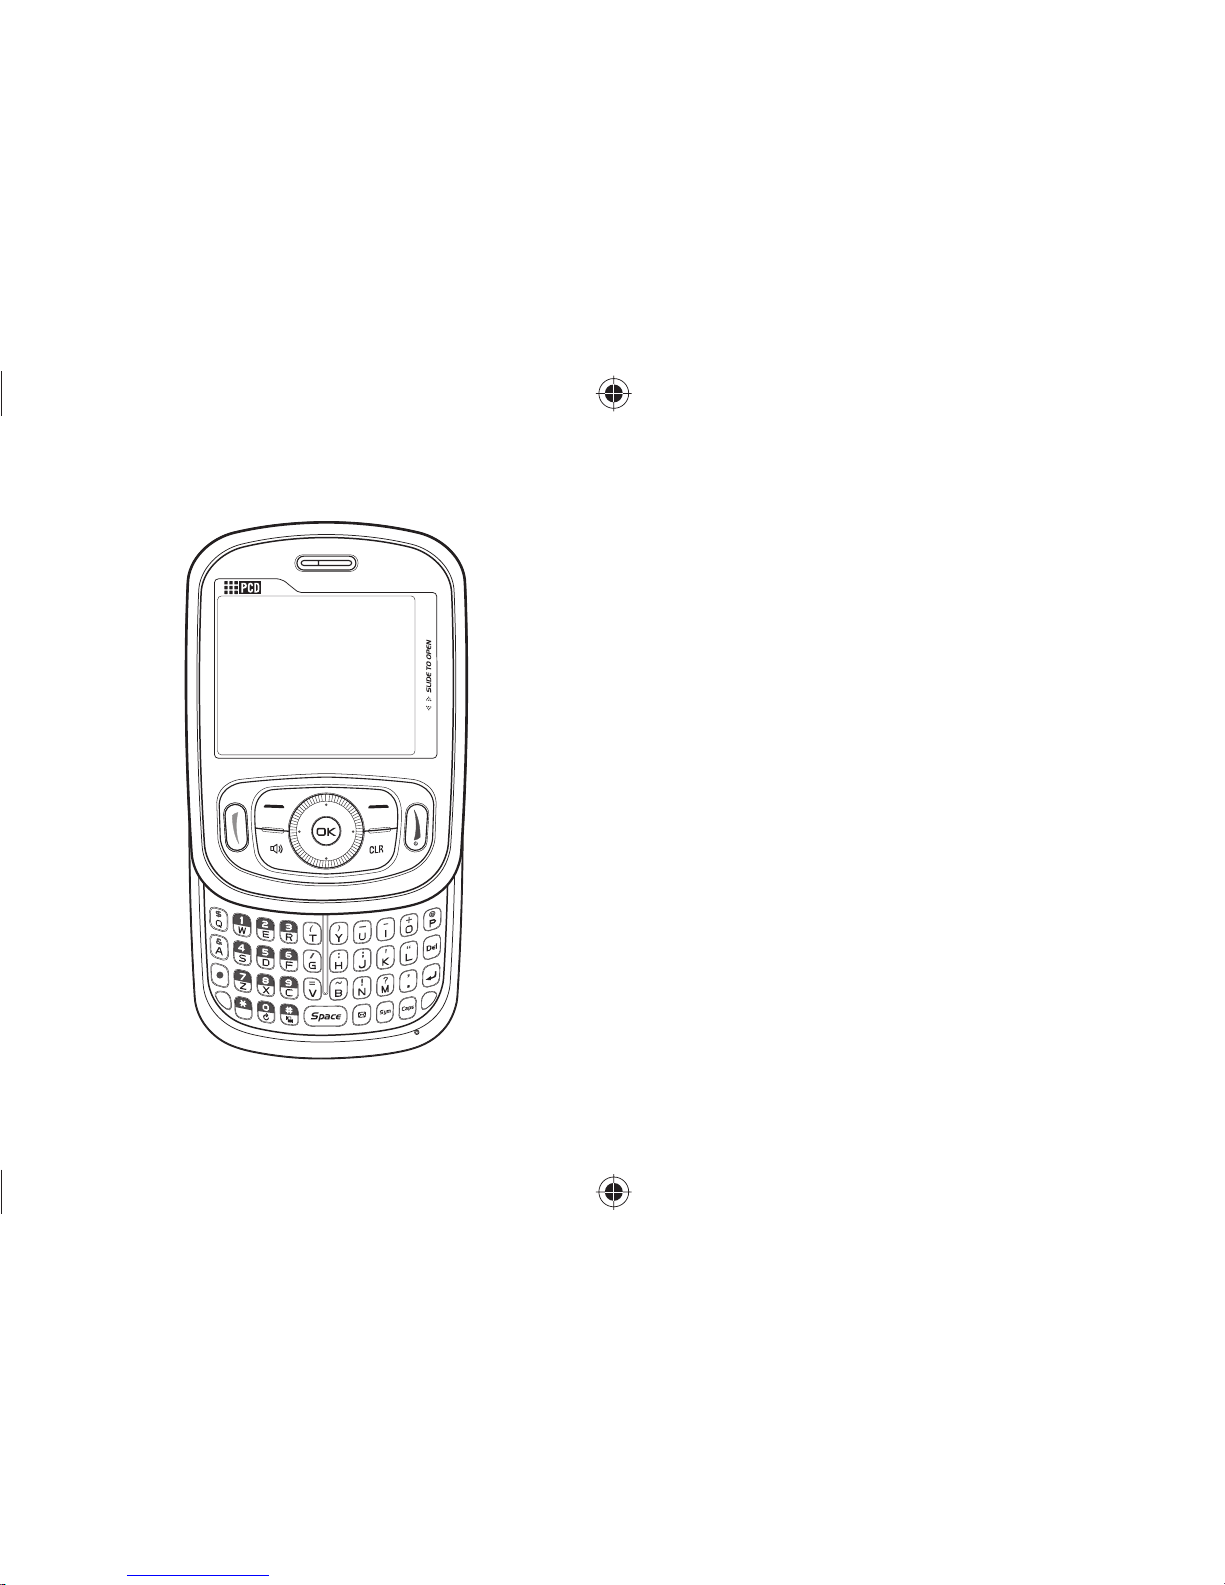
HAN SET ESCRIPTIONS
Before Using TXT8026 −Chapter 1
7
Before Using
Before Using
Handset
User Guide
1. Display Screen
2. Menu/Left Soft Key
3. SEND Key
4. Speakerphone Key
5. oicemail Key
6. Dialing Keypad
7. Mode Change Key
8. ibrate Mode Key
9. OK Key
10. My Messaging Key
11. Microphone
12. QWERTY Keyboard
13. CLR Key
14. END Key
15. Contacts/Right Soft Key
16. Directional Key
17. Earpiece
18. Headset Jack
19. olume Keys
20. External Speaker
21. Self-Portrait Mirror
22. Camera Lens
23. Wrist Strap Eyelet
24. Charging / Data Jack
25. A R Key
26. Camera Key
27. microSD Card Slot
14
15
13
3
2
4
16
12
6
118
19
24
25
26
23
222120
27
5
7891011
17
Wall Charger
Battery Cover
Standard Battery
090605_TXT8026PK_Pocket_EN.indd 6-7090605_TXT8026PK_Pocket_EN.indd 6-7 2009.6.5 10:57:10 AM2009.6.5 10:57:10 AM
8
Chapter 1 − Before Using TXT8026
Before Using
Before Using TXT8026 − Chapter 1
9
Before Using
KEY DESCRIPTIONS
The following list correlates to the previous page’s phone illustration.
1. Display Screen: This screen displays all the information
needed to operate your phone.
2. [ ] Menu/Left Soft Key: Press to display the Main
menu or access the function listed above the key.
3. [ ] SEND Key: Press to make or receive a call. From idle
mode, press to access the All Calls list.
4. [ ] Speakerphone Key: Press to turn Speakerphone
On or Off.
5. [ ] Voicemail Key: Press and hold to automatically dial
your voicemail system.
6. Dialing Keypad: In idle mode, press to enter phone
numbers.
7. [ ] Mode Change Key: Press to change between
entering numbers and letters.
8. [ ] Vibrate Mode Key: Press and hold to activate
Vibrate mode.
9. [ ] OK Key: Allows you to accept choices when navi-
gating through a menu.
10. [ ] My Messaging Key: Press to access the My
Messages Menu.
11. Microphone: Allows the other caller to hear you clearly
when you are speaking to them.
12. QWERTY Keyboard: Press to enter numbers, letters, and
characters using a full QWERTY keypad interface.
13. [ ] CLR Key: When entering a phone number or
text, press to delete a single space or character. Press and
hold to delete entire words. Press this key once in a menu
to go back one level. InWAP applications mode, press
to retrieve the last URL or press and hold to retrieve the
home page URL. During download mode, press to cancel
the download.
14. [ ] END Key: Press and hold to turn the phone on/off
or press to end a call or browsing session. Within a menu,
press to return to idle mode.
15. [ ] Contacts/Right Soft Key: Press to display
Contacts or to access the function listed above the key.
16. [ ] Directional Key: The Directional Key allows you
to scroll through phone menu options.
17. Earpiece: The earpiece allows you to hear the other
caller.
18. Headset Jack: Plug in the Headset Connector here to use
a headset.
19. [ ] Volume Keys: Allows you to adjust the master vol-
ume in idle mode or adjust the voice volume during a call.
20. External Speaker: Music, Ringtones and Sounds are
played through the speaker.
21. Self-Portrait Mirror: Displays your reflection when
taking pictures.
22. Camera Lens: The lens of your built-in camera.
23. Wrist Strap Eyelet: Accessory eyelet (optional straps
and lanyards - purchased separately).
24. Charging/Data Jack: Plug in the Wall Charger or USB
Cable* here.
25. [ ] AVR Key: In idle mode, press to activate ”Nuance
VSuite 3.2“.
26. [ ] Camera Key: Press to access Camera Viewfinder
mode.
27. microSD Card* Slot: Insert a microSD™ memory card
here to increase memory capacity.
* USB Cable and microSD card are optional accessories, sold separately.
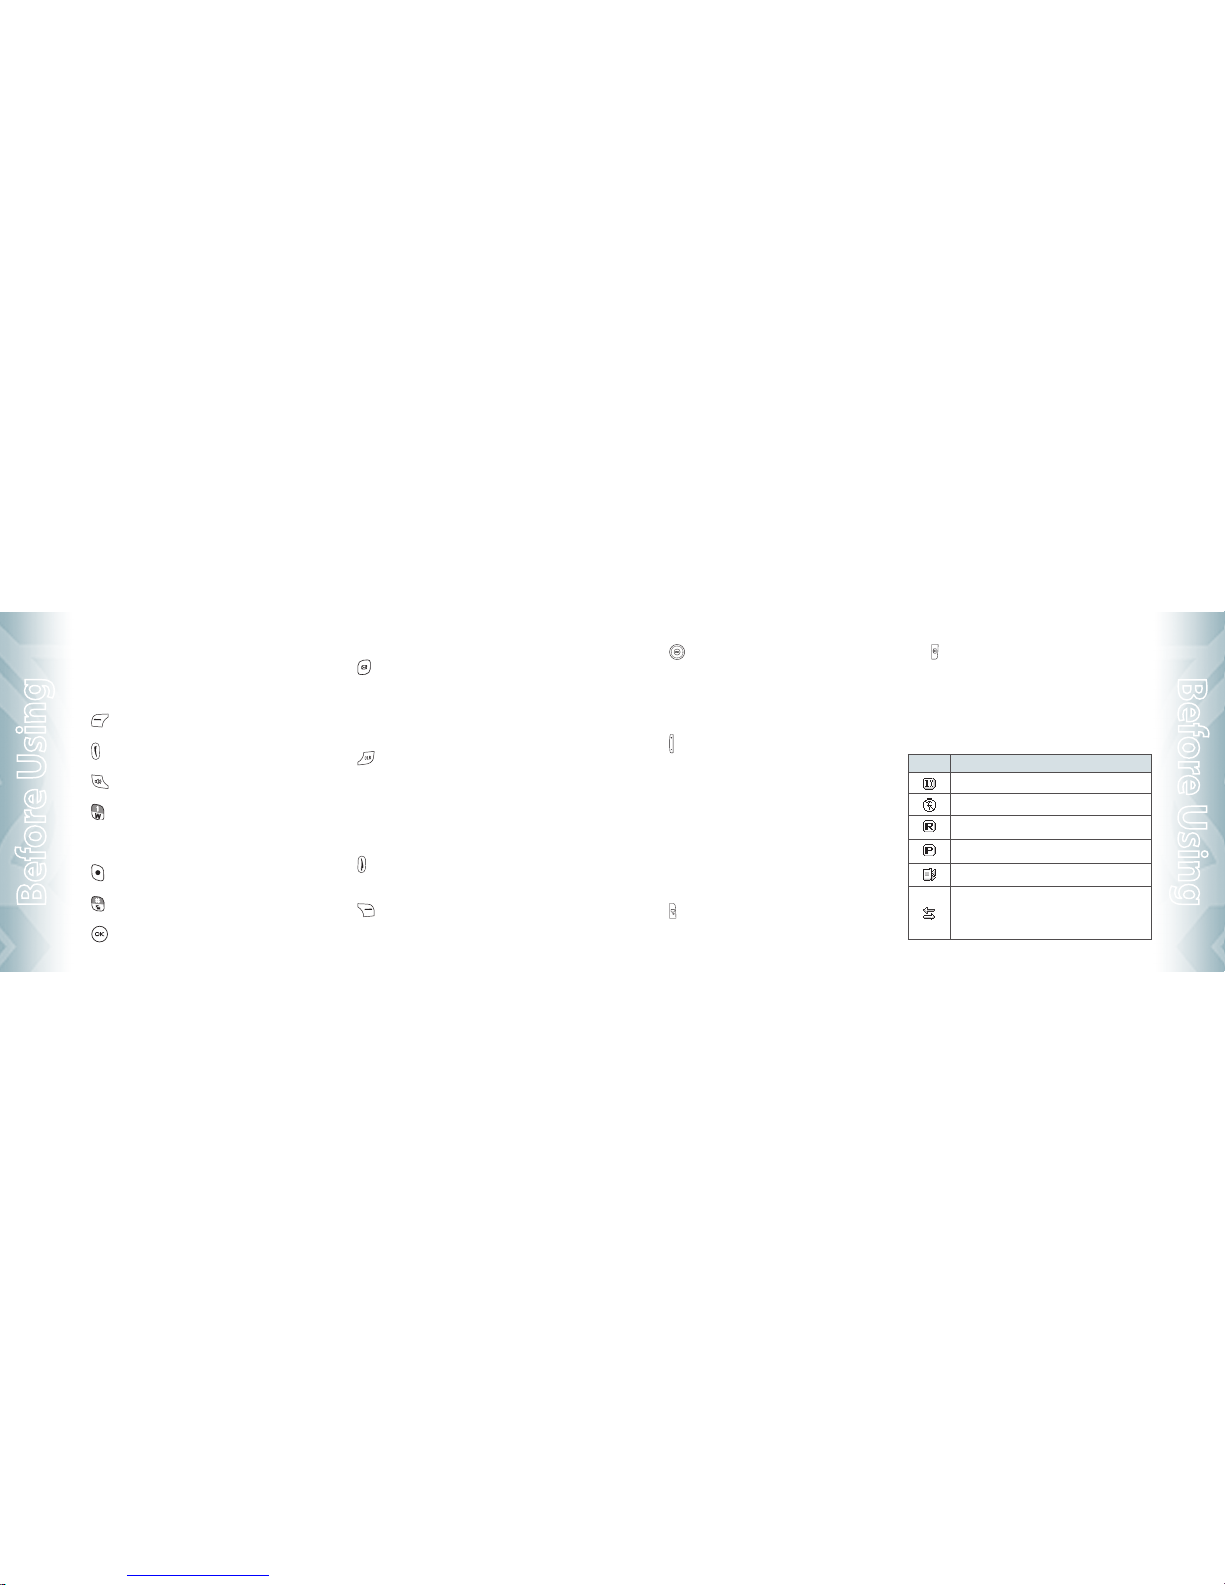
DISPLAY INDICATORS
Icon Icon Descriptions
1X Signal Strength: 1X service is available.
Airplane Mode: Transmitting and receiving information is restricted.
Roaming: The phone is outside of the home service area.
Voice Privacy: IndicatesVoice Privacy mode is active.
Data Call: Data Session in progress.
Dormant: Phone is in a dormant state during a data call. Phone
reverts to Dormant mode when there hasn’t been activity on a page
for some time — the connection is still active and you can make and
receive calls.

Icon Icon Descriptions
No Service: Phone cannot receive a signal from the system.
TTY: TTY mode is active.
Voice Call: A call is in progress.
* No icon indicates the phone is in idle mode.
GPS Icon: Location Service of your phone is On.
Bluetooth: Indicates Bluetooth power is on.
Bluetooth Active: Indicates Bluetooth is in Active mode.
Bluetooth Connected: Indicates Bluetooth Device is connected.
Bluetooth iscovery: Indicates Bluetooth Discovery Mode is on.
Battery Level: Battery charging level — the more blocks, the
stronger the charge.
AVR Active: oice Command is ready.
AVR Listening: Indicates the A R system is providing you with audible
instructions.
Icon Icon Descriptions
Silent: Indicates the ringer volume is set to Silent.
Vibrate On: Indicates the ringer is set to ibrate On.
Speakerphone: Speakerphone mode is active.
Message: Indicates you have new message(s).
Voicemail: Indicates you have voicemail message(s).
Alarm On: Appears when an alarm is set.
Numeric Entry Mode: Enter numbers by pressing the corresponding
key on the keypad.
Alphabetical Entry Mode: Enter characters by pressing the key with
the desired characters.
10
Chapter 1 −Before Using TXT8026
Before Using
Before Using
INSTALL BATTERY
1. Push down the top of the battery cover slot with your finger tip and
slide it out to remove from the unit.
2. Slide the battery into the slot located at the bottom of the unit and
press until it lays flat in the battery cavity.
3. Replace the battery cover by sliding the battery cover up until it
snaps into place.
If the battery is not correctly placed in the compartment, the handset will not turn on
and/or the battery may detach during use.
REMOVE BATTERY
1. To remove the battery cover, push down the top of the battery cover
slot with your finger tip and slide the battery cover out from the unit.
2. Push the bottom of battery to upwards while inserting your finger
into the slot (1) and remove (2) the battery.
3. Replace the battery cover by sliding the battery cover up until it
snaps into place.
Before Using TXT8026 −Chapter 1
11
Before Using
Before Using
090605_TXT8026PK_Pocket_EN.indd 10-11090605_TXT8026PK_Pocket_EN.indd 10-11 2009.6.5 10:57:13 AM2009.6.5 10:57:13 AM

BASIC OPERATION
CHAPTER 2
BASIC OPERATION
This chapter addresses and explains the basic features of your
phone including:
CHARGING YOUR BATTERY
1. To charge the phone, open the
Charging/Data Jack cover on the
right side of the phone, and con-
nect the charger adapter. Plug the
other end into a standard outlet.
2. To remove the adapter connection,
squeeze the adapter’s side buttons
(1) and pull (2).
•
When you charge the battery with the phone power off, you will see a charging status
screen. You cannot operate the phone until it is powered on.
•
The battery is not fully charged at the time of purchase. Fully charge the battery
before use.
•
It is more efficient to charge the battery with the handset powered off.
•
Battery operating time gradually decreases over time.
•
If the battery fails to perform normally, you may need to replace the battery.
BATTERY HAN LING INFORMATION
DO’S
•
Only use the battery and charger approved for use with the TXT8026.
•
Only use the battery for its original purpose.
•
Try to keep batteries in a temperature between 41 °F (5 °C) and 95 °F (35 °C). If
the battery is stored in temperatures above or below the recommended range,
give it time to warm up or cool down before using.
•
Store the discharged battery in a cool, dark, and dry place.
•
Purchase a new battery when its operating time gradually decreases after fully
charging.
•
Properly dispose of the battery according to local laws.
DON’TS
•
Don’t attempt to disassemble the battery – it is a sealed unit with no service-
able parts.
•
Don’t accidentally short circuit the battery by carrying it in your pocket or purse
with other metallic objects such as coins, clips and pens. This may critically
damage the battery.
•
Don’t leave the battery in extremely hot or cold temperatures. Otherwise, it could
significantly reduce the capacity and lifetime of the battery.
•
Don’t dispose of the battery by placing into a fire.
12
Chapter 1 −Before Using TXT8026
Before Using
Before Using
Turning the phone on/off
Accessing the menu
Menu summary
Making a call
Answering calls
Missed call notification
Wait/Pause feature
Answering a call
3-way calling
Call waiting function
Calling a number from contacts
Adjusting volume
Adjusting the call volume
Caller ID function
Vibrate on/off mode
Speakerphone mode
Using the auto keypad lock function
Available options during a call
Making an emergency call
Making a call with letters
(EX. 1-800-POCKET)
Using the microSD card
090605_TXT8026PK_Pocket_EN.indd 12-13090605_TXT8026PK_Pocket_EN.indd 12-13 2009.6.5 10:57:14 AM2009.6.5 10:57:14 AM

TURNING THE PHONE ON/OFF
TURNING THE PHONE ON
1. Press and hold the END Key
until your display turns on and the
tone sounds.
•
If “Enter Lock Code” appears on the display, enter your 4-digit lock code to unlock
your phone.
•
The default lock code is the last 4 digits of your mobile number.
TURNING THE PHONE OFF
1. Press the OK Key
[OK] to unlock the keypad, then press and hold
the END Key
until your display turns off.
•
Immediately change or recharge the battery when “BATTERY LOW” appears on the
display. Memory may possibly be damaged if the phone turns off due to the battery
completely draining.
•
Turn the phone off before removing or replacing the battery. If the phone is on,
unsaved data may be lost.
ACCESSING THE MENU
Your phone can be customized via the menu. Each function can be accessed by
scrolling with the Directional Key
or by pressing the number that
corresponds with the menu item.
1. To access the menu in idle mode, press the OK Key
[OK] to unlock
the keypad, then press the Left Soft Key
[Menu].
2. To scroll through the menu, press the Directional Key
up, down,
left or right.
3. To return to the previous page, press the CLR Key
. To exit the
current menu and return to the idle mode, press the END Key
.
14
Chapter 2 −Basic Operation
Basic O eration
Basic O eration
MENU SUMMARY
Main Menu 2ND DEPTH 3RD DEPTH
1. Recent Calls 1. Missed Calls
2. Received Calls
3. Dialed Calls
4. Blocked Calls
(“Blocked Calls”
appears only when
the restriction for
Incoming Calls is set.)
5. All Calls
6. Call Timers
2. Messages 1. New Message
2. oicemail
3. Inbox
4. Sent
5. Drafts
6. Settings
1. Text Message
2. Picture Message
1. Notification
2. Entry Mode
3. Auto Save
4. Auto Erase
Main Menu 2ND DEPTH 3RD DEPTH
2. Messages
7. Erase
5. Auto Receive
6. Quick Text
7. oicemail #
8. Callback #
9. Signature
1. Erase Inbox
2. Erase Drafts
3. Erase Sent
4. Erase All
3. Contacts 1. New Entry
2. List Entries
3. Message Groups
4. Groups
5. Speed Dials
6. My Name Card
4. Camera 1. Take Picture
2. Picture Gallery
5. Browser
Basic Operation −Chapter 2
15
Basic O eration
Basic O eration
090605_TXT8026PK_Pocket_EN.indd 14-15090605_TXT8026PK_Pocket_EN.indd 14-15 2009.6.5 10:57:16 AM2009.6.5 10:57:16 AM

Main Menu 2ND DEPTH 3RD DEPTH
6. Games & Apps
7. Tools/Utilities 1. Calculator
2. Calendar
3. Alarm Clock
4. World Clock
5. Notepad
6. Stop Watch
7. oice Commands
8. oice Memo
8. Media Gallery 1. Sound Box
2. Picture Box
3. MP3 Box
9. Settings 1. Sound Settings 1. Ringer olume
2. Call Sounds
3. Msg Sounds
4. Service Alerts
5. Power On/Off
6. Open/Close Sound
7. Key Tone
Main Menu 2ND DEPTH 3RD DEPTH
9. Settings 2. Display Settings
3. Phone Settings
4. Call Settings
5. Memory
1. My Banner
2. Backlight Duration
3. Contrast
4. Wallpaper
5. Screensaver
6. Clock Format
7. Menu Type
1. Airplane Mode
2. Language
3. Menu Readout
4. Message Readout
5. Location
6. Security
1. Answer Options
2. Auto Retry
3. TTY Mode
4. One Touch Dial
5. oice Privacy
6. DTMF
1. Save Options
2. Internal Memory
3. External Memory
16
Chapter 2 −Basic Operation
Basic O eration
Basic O eration
Main Menu 2ND DEPTH 3RD DEPTH
9. Settings 6. Bluetooth
7. Phone Info
1. New Device
1. My Number
2. SW ersion
MAKING A CALL
1. Slide out the QWERTY keyboard and from idle mode enter the phone
number (include the area code if needed). Press the SEND Key
.
•
To erase one digit at a time press the CLR Key
.
•
To erase the entire number, press and hold the CLR Key
.
•
When you place or receive a call from phone numbers stored in your Contact list with
a entry name, the name will be displayed.
2. To end a call, press the END Key
.
•
If you activate the “Auto Retry” function, the phone will automatically re-dial the
number (Refer to page 73).
•
You can also place calls using oice-Activated Dialing. Please refer to page 57 for
more details.
ANSWERING CALLS
1. When your phone rings or vibrates, press the SEND Key
to answer
the incoming call. (Depending on your phone’s settings, you may also
answer incoming calls by opening the phone or by pressing any key.)
When you place or receive a call from phone numbers stored in your Contact list with an
entry name, the name will be displayed.
2. To ignore incoming calls, press the Right Soft Key
[Ignore].
If you want to turn off the call ringtone or vibration, press the Left
Soft Key
[Quiet].
3. To end a call, press the END Key
.
In “Auto Answer” mode, a call is automatically answered after a preset number of ring
tones (Refer to page 73).
MISSE CALL NOTIFICATION
When an incoming call is not answered, the Missed Call logo appears on the
display.
TO DISPLAY THE MISSED CALL ENTRY FROM THE
NOTIFICATION SCREEN:
1. Highlight the entry “ iew Now” and press the OK Key
. To view
the Missed Call entries later, highlight the entry “ iew Later” and
press the OK Key
.
2. To dial the phone number, press the SEND Key
.
Basic Operation −Chapter 2
17
Basic O eration
Basic O eration
090605_TXT8026PK_Pocket_EN.indd 16-17090605_TXT8026PK_Pocket_EN.indd 16-17 2009.6.5 10:57:17 AM2009.6.5 10:57:17 AM

TO DISPLAY A MISSED CALL ENTRY FROM IDLE MODE:
1. From idle mode, press the OK Key
[OK] to unlock the keypad,
then press the Left Soft Key
[Menu], then select “Recent Calls”
menu.
2. Slide out the QWERTY keyboard, then press “1. Missed Calls”.
3. Highlight the entry you wish to view, then press the OK Key
[OK].
4. To dial the phone number, press the SEND Key
.
WAIT/PAUSE FEATURE
Pauses are used for automated systems (i.e., voice mail or calling cards). Insert
a pause after a phone number and then enter another group of numbers. The
second set of numbers is dialed automatically after the pause. This feature is
useful for dialing into systems that require a code.
Hard Pause (P)
The phone stops dialing until you press the OK Key
[SEND] to advance to
the next number.
2 Sec Pause (T)
The phone waits 2 seconds before sending the next string of digits
automatically.
1. Slide out the QWERTY keyboard, and from idle mode enter the phone
number.
2. Press the Right Soft Key
[Options].
3. Press the Directional Key
up or down to select pause type, then
the OK Key
[OK]. “2 Sec Pause/Hard Pause”.
4. Enter additional number(s) (such as pin number or credit card
number).
5. Press the SEND Key
to dial or the Left Soft Key
[Save].
ANSWERING A CALL
1. If your phone is set to “Slide Open” for “Answer Options,” simply
open the phone to answer a call. If your phone is set to “Any Key” for
“Answer Options,” press any key to answer a call.
If your phone is set to “Auto Answer” for “Answer Options,” calls are
answered automatically with a 5 second delay. If your phone is set
to “Send Key” for “Answer Options,” only press the SEND Key
to
answer a call. For information on how to set your Answer Options,
18
Chapter 2 −Basic Operation
Basic O eration
Basic O eration
see page 73.
2. To end a call, press the END Key
.
3WAY CALLING
With 3-Way Calling, you can talk to two people at the same time. When using
this feature, the normal airtime rates will be applied for each of the two calls.
1. Slide out the QWERTY keyboard, enter the phone number you wish to
call, then press the SEND Key
.
2.Once you have established the connection, enter the second phone
number you wish to call, then press the SEND Key
again.
3. When you’re connected to the second party, press the SEND Key
again to begin your 3-Way call.
If one of the people you called hangs up during your call, you and the remaining caller
stay connected. If you initiated the call and are the first to hang up, all three calls are
disconnected.
CALL WAITING FUNCTION
If you are on a call and you receive another incoming call, you will hear two
beeps and the caller’s phone number will appear on the display. With Call
Waiting, you may put the active call on hold while you answer the other
incoming call. To use Call Waiting:
1. To answer another call while on the phone, press the SEND Key
.
This places the first call on hold. To switch back to the first caller,
press the SEND Key
again.
CALLING A NUMBER FROM CONTACTS
1. From idle mode, press the OK Key
[OK] to unlock the keypad,
then press the Right Soft Key
[Contacts].
2. Press the Directional Key
up or down to select the Contacts entry
then press the OK Key
[ IEW].
3. Press the Directional Key
up or down to select the phone
number.
4. Press the SEND Key
to place the call.
Pressing the Directional Key
up or down to select “LIST ENTRIES” then pressing the
SEND Key
will automatically dial the Default Number of the Contact entry.
If multiple numbers are saved in “LIST ENTRIES”, press the Directional Key
up or
down to select “LIST ENTRIES” and then press the Directional Key
left or right to
select the number you want to dial. Then, press the SEND Key
.
Basic Operation −Chapter 2
19
Basic O eration
Basic O eration
090605_TXT8026PK_Pocket_EN.indd 18-19090605_TXT8026PK_Pocket_EN.indd 18-19 2009.6.5 10:57:19 AM2009.6.5 10:57:19 AM

A JUSTING VOLUME
To adjust the master volume:
1. From idle mode, press the OK Key
[OK] to unlock the keypad,
then press the olume Keys
up or down.
2. Select one of the following options and press the OK Key
[SET]
to save it.
•
Silent
•
ibrate On
•
Level 1 ~ Level 5
A JUSTING THE CALL VOLUME
To adjust the earpiece volume during a call, press the olume Keys up
or down. Press the olume Keys up to increase the volume level and
the olume Keys down to decrease the level. In idle mode, you can also
adjust the ringer volume by following the same steps.
CALLER I FUNCTION
Caller ID displays the number of the person calling when your phone
rings. If the caller’s identity is stored in Contacts, the name appears on the
screen. The Caller ID is stored in the Recent Calls Menu.
VIBRATE ON/OFF MO E
ibrate Mode mutes key tones and activates an alert for an incoming call or
message. To activate ibrate Mode:
1. From idle mode, slide out the QWERTY keyboard, then press and hold
the # Key .
2. To disable ibrate Mode, from the idle screen press and hold the #
Key again.
SPEAKERPHONE MO E
The Speakerphone feature lets you hear audio through the speaker and talk
without holding the phone.
To activate the Speakerphone in idle mode or while on a call, press the
Speakerphone Key . Conversely, press the Speakerphone Key
again to deactivate the Speakerphone.
USING THE AUTO KEYPA LOCK FUNCTION
To lock/unlock the keypad:
When the Slide is closed, all your device keys are locked. To unlock them,
press any key, “Press ok to unlock keypad” displays, then press the OK
Key
[OK].
20
Chapter 2 −Basic Operation
Basic O eration
Basic O eration
You can also open the slide to unlock the keypad.
AVAILABLE OPTIONS URING A CALL
During a phone call, you can access the following features by pressing the
Right Soft Key
[Options]:
MUTE/UNMUTE
If you press Mute during a call, the person you are speaking with cannot hear you or
any sounds from your side of the conversation. However, you can still hear them.
1. Press the Left Soft Key
[Mute/Unmute].
TEXT MESSAGE
To send a Text Message (SMS) during a call:
1. Press the Right Soft Key
[Options], slide out the QWERTY
keyboard, and press “1. Messages”.
CONTACTS
To view your Contacts list during a call:
1. Press the Right Soft Key
[Options], slide out the QWERTY
keyboard, and press “2. Contacts”.
RECENT CALLS
To view your Recent Calls list during a call:
1. Press the Right Soft Key
[Options], slide out the QWERTY
keyboard, and press “3. Recent Calls”.
CONNECT BLUETOOTH
To access the Bluetooth menu during a call:
1. Press the Right Soft Key
[Options], slide out the QWERTY
keyboard, and press “4. Connect Bluetooth”.
If an Audio device is connected, “To Phone/To Headset” is displayed in the options menu
instead of “Connect Bluetooth”.
SPEAKER PHONE ON/OFF
To activate the Speakerphone during a call:
1. Press the Right Soft Key
[Options], slide out the QWERTY
keyboard, and press “5. Speaker Phone On/Off”.
You can also activate/deactivate the Speakerphone by pressing the Speakerphone
Key .
Basic Operation −Chapter 2
21
Basic O eration
Basic O eration
090605_TXT8026PK_Pocket_EN.indd 20-21090605_TXT8026PK_Pocket_EN.indd 20-21 2009.6.5 10:57:21 AM2009.6.5 10:57:21 AM

MAKING AN EMERGENCY CALL
The 911 feature automatically places the phone in the Emergency Call Mode
when you dial the preprogrammed emergency number, 911. It also operates
in Lock Mode and out of the service area.
911 IN LOCK MODE
To make an Emergency Call in Lock Mode:
1.Slide out the QWERTY keyboard, enter “911”, then press the SEND
Key
.
2.The call connects.
3.The phone maintains Emergency Mode for 5 minutes.When the call
ends, the phone returns to Lock Mode.
911 USING ANY AVAILABLE SYSTEM
To make an Emergency Call using any available system:
1.Slide out the QWERTY keyboard, enter “911”, then press the SEND
Key
.
2.The call connects.
3.The phone will stay in Emergency Mode for 5 minutes. While the
phone is in Emergency Mode, the phone can receive an incoming call
from any available system or you can make outgoing calls even in
Emergency Mode. In this case, making a call can automatically end
the Emergency Mode.
The 911 call does not appear in the Recent Call list.
MAKING A CALL WITH LETTERS (EX. 1-800-POCKET)
1.Slide out the QWERTY keyboard and from idle mode enter the phone
number including letters. Press the SEND Key .
While entering the phone number, press and hold the Mode Change Key to lock in
alphabetical entry mode. To change alphabetical entry mode to numeric mode, press
and hold the Mode Change Key again. If you enter the key that is not assigned to
number, it will not appear on the screen.
USING THE microSD CARD*
The microSD card stores sounds, images, photos, music, and other files.
The microSD card is sold separately and is not included with your phone.
INSTALLING THE microSD CARD*
To install a microSD card:
1.With the microSD card slot opened and the gold contacts facing
down, insert the microSD card into the slot.
22
Chapter 2 − Basic Operation
Basic Operation
2.Push the card in until it clicks into place.
“Memory card detected”will appear on the
display. Close the microSD card slot.
To prevent possible damages, please keep microSD
card slot closed at all times regardless of whether the
microSD card is inserted or not.
REMOVING THE microSD CARD*
To remove the microSD card:
1.Open the microSD card slot. Use your thumb
to press and release the microSD card. It will
pop-out allowing you to remove the card.
2.Remove the card and close the microSD
card slot.
•
When you insert the microSD card, make sure contact terminals are facing down.
•
Do not remove the microSD card while reading or writing files. Otherwise it could be
damaged.
•
Only use a microSD card with your TXT8026.
•
microSD cards with more than 4GB storage capacity may cause a decrease in the
phone performance.
HOW IS MUSIC TRANSFERRED?
Transfer from PC
to Handset via USB
Cable*
Transfer from PC to
Handset via Memory
card*
MP3 Songs Yes Yes
* USB Cable and microSD card are optional accessories, sold separately.
Basic Operation − Chapter 2
23
Basic Operation

MEMORY FUNCTION
CHAPTER 3
MEMORY FUNCTION
This chapter addresses memory functions including:
Storing a phone number
Entering letters, numbers & symbols
One, Two-touch dialing
24
Chapter 2 −Basic Operation
Note
Note
090605_TXT8026PK_Pocket_EN.indd 24-25090605_TXT8026PK_Pocket_EN.indd 24-25 2009.6.5 10:57:23 AM2009.6.5 10:57:23 AM

STORING A PHONE NUMBER
The Contact List stores up to 1,000 entries.
ADDING A NEW ENTRY
1. From idle mode, slide out the QWERTY keyboard, then enter the
phone number you want to save.
2. Press the Left Soft Key
[Save].
3. Press the Directional Key
up or down to select “New Entry”, then
press the OK Key
[OK].
4. Press the Directional Key
up or down to select the type of phone
number you want to save, then press the OK Key
[OK].
Mobile/Home/Work/Mobile 2/Fax
Use Existing Entry to add another phone number to a contact already stored in memory.
5. Enter a name for the phone number (up to 32 characters), then press
the OK Key
[SA E].
6. “ Entry saved” appears, then the phone returns to idle mode.
OPTIONS TO CUSTOMIZE YOUR CONTACTS
Once the basic phone number and name information is stored in your Contacts, you
can edit and/or customize the entries.
1. From idle mode, press the OK Key
[OK] to unlock the keypad,
press the Right Soft Key
[Contacts], then press the Directional
Key
up or down to highlight the Contacts entry you want to edit.
2. Press the Left Soft Key
[Edit] to access the Edit Entry screen.
3. Press the Directional Key
up or down to highlight the
information field you want to customize. Additional fields include:
Name/Mobile/Home/Work/E-mail 1/Group/Picture/Ringtone/
Mobile 2/Fax/E-mail 2
4. Slide out the QWERTY keyboard, change the data as necessary, then
press the OK Key
[SA E] to save.
CHANGING GROUPS
To organize your contacts into groups:
1. From idle mode, press the OK Key
[OK] to unlock the keypad,
press the Right Soft Key
[Contacts], then press the Directional
Key
up or down to highlight an entry.
26
Chapter 3 −Memory Function
Memory Function
Memory Function
2. Press the Left Soft Key
[Edit].
3. Press the Directional Key
up or down to highlight ”Group”.
4. Press the Directional Key
left or right to select the group.
No Group/Family/Friends/Colleagues/Business
5. Press the OK Key
[SA E] to save.
CHANGING THE CALL RINGTONE
To identify who is calling by setting different ringtones for different contacts in your
Contact List:
1. From idle mode, press the OK Key
[OK] to unlock the keypad,
press the Right Soft Key
[Contacts], then press the Directional
Key
up or down to highlight an entry.
2. Press the Left Soft Key
[Edit].
3. Press the Directional Key
up or down to highlight ”Ringtone”,
then press the Right Soft Key
[Add].
4. Press the Directional Key
up or down to select the new
ringtone, then press the OK Key
[OK].
Press the Left Soft Key
[Play] to listen to a highlighted ringtone before you
press the OK Key
[OK]. Press the Right Soft Key
[Options], then select
”File Info“ to display selected ringtone information or select "Rename", then enter
new ringtone name.
5. Press the OK Key
[SA E] to save.
ADDING OR CHANGING THE PICTURE ID
To select a picture or graphic to assign to a Caller ID:
1. From idle mode, press the OK Key
[OK] to unlock the keypad,
press the Right Soft Key
[Contacts], then press the Directional
Key
up or down to highlight an entry.
2. Press the Left Soft Key
[Edit].
3. Press the Directional Key
up or down to highlight ”Picture”,
then press the Right Soft Key
[Add].
4. Press the Directional Key
up, down, left or right to select a
picture, then press the OK Key
[OK].
5. When completed, press the OK Key
[SA E].
ADDING OR CHANGING AN EMAIL ADDRESS
To enter or add an E-mail address to a Contact entry:
1. From idle mode, press the OK Key
[OK] to unlock the keypad,
press the Right Soft Key
[Contacts], then press the Directional
Key
up or down to highlight an entry.
Memory Function −Chapter 3
27
Memory Function
Memory Function
090605_TXT8026PK_Pocket_EN.indd 26-27090605_TXT8026PK_Pocket_EN.indd 26-27 2009.6.5 10:57:25 AM2009.6.5 10:57:25 AM

2. Press the Left Soft Key
[Edit].
3. Press the Directional Key
up or down to highlight ”E-mail 1”
or ”E-mail 2”.
4. Slide out the QWERTY keyboard, enter an E-mail address, then
press the OK Key
[SA E] to save.
EDITING CONTACT ENTRIES
ADDING A PHONE NUMBER FROM IDLE MODE
1. From idle mode, slide out the QWERTY keyboard, and then enter
the phone number you want to save (up to 32 digits).
2. Press the Left Soft Key
[Save].
3. Press the Directional Key
up or down to highlight
”Existing Entry”, then press the OK Key
[OK].
4. Press the Directional Key
up or down to highlight the existing
Contacts entry, then press the OK Key
[OK].
5. Press the Directional Key
up or down to highlight the phone
number type, then press the OK Key
[OK].
Mobile/Home/Work/Mobile 2/Fax
6. If a phone number is already assigned to the item you selected,
press the Left Soft Key
[No] or Right Soft Key
[Yes]
when ”Entry is already assigned, Overwrite?” appears. If nothing
is currently assigned to the phone number item, press the OK Key
[OK].
7. “ Entry updated” appears, then the phone returns to idle mode.
ADDING A PHONE NUMBER FROM THE CONTACT LIST SCREEN
1. From idle mode, press the OK Key
[OK] to unlock the keypad,
press the Right Soft Key
[Contacts]. Your Contact entries
display alphabetically.
2. Press the Directional Key
up or down to highlight the Contacts
entry you want to edit, then press the Left Soft Key
[Edit].
3. Press the Directional Key
up or down to highlight the phone
number field you want to add, slide out the QWERTY keyboard,
enter the number, then press the OK Key
[SA E] to save.
A confirmation message appears.
28
Chapter 3 −Memory Function
Memory Function
Memory Function
EDITING STORED PHONE NUMBERS
1. From idle mode, press the OK Key
[OK] to unlock the keypad,
press the Right Soft Key
[Contacts]. Your Contact entries
display alphabetically.
2. Press the Directional Key
up or down to highlight the Contacts
entry you want to edit, then press the Left Soft Key
[Edit].
3. Press the Directional Key
up or down to highlight the phone
number.
4. Slide out the QWERTY keyboard, edit the phone number as
necessary, then press the OK Key
[SA E].
EDITING STORED NAMES
1. From idle mode, press the OK Key
[OK] to unlock the keypad,
press the Right Soft Key
[Contacts]. Your Contact entries
display alphabetically.
2. Press the Directional Key
up or down to highlight the Contacts
entry you want to edit, then press the Left Soft Key
[Edit].
3. Slide out the QWERTY keyboard, edit the name as necessary, then
press the OK Key
[SA E].
DELETING
DELETING A PHONE NUMBER FROM A CONTACT ENTRY
1. From idle mode, press the OK Key
[OK] to unlock the keypad,
press the Right Soft Key
[Contacts]. Your Contact entries
display alphabetically.
2. Press the Directional Key
up or down to highlight the Contact
entry, then press the Left Soft Key
[Edit].
3. Press the Directional Key
up or down to highlight the phone
number to be deleted.
4. Press and hold the Clear Key
to delete the number.
5. Press the OK Key
[SA E]. A confirmation message appears.
DELETING A CONTACTS ENTRY
1. From idle mode, press the OK Key
[OK] to unlock the
keypad, press the Right Soft Key
[Contacts].
2. Press the Directional Key
up or down to highlight the Contact
entry to be deleted.
3. Press the Right Soft Key
[Options].
Memory Function −Chapter 3
29
Memory Function
Memory Function
090605_TXT8026PK_Pocket_EN.indd 28-29090605_TXT8026PK_Pocket_EN.indd 28-29 2009.6.5 10:57:28 AM2009.6.5 10:57:28 AM

4. Slide out the QWERTY keyboard, then press ”3. Erase”.
5. Press the Right Soft Key
[Yes]. A confirmation message
appears.
ENTERING LETTERS, NUMBERS & SYMBOLS
Your device has a QWERTY keyboard that provides a superior typing
experience on a small handheld device for easy and comfortable input.
You can use all of the handset functions with the keyboard either closed
or open. When you slide out the keyboard, you have the extra benefit of a
full messaging keyboard.
30
Chapter 3 −Memory Function
Memory Function
Memory Function
1. [ ] Mode Change Key: When in a Text entry field and in entry
mode, press to change between entering numbers and letters that
appear on the same key. Press and hold to lock in numeric entry mode
or text entry mode.
2. [ ] Space Key: Press to add a space.
3. [ ] Symbols Key: Press to open symbols list.
4. [ ] Caps Key: Press to select a letter case for the standard text
[Abc] input mode. [Abc], [ABC] and [abc] indicate the standard text
input.
5. [ ] Enter Key: Press to insert a carriage return.
6. [ ] el Key: When in a Text entry field and in entry mode, press to
delete the character to the left of the cursor. Press and hold to delete
the entire word or character string that was just entered.
7. [ ] CLR Key: When in a Text entry field and in entry mode, press
to delete the character to the left of the cursor. Press and hold to
delete the entire word or character string that was just entered.
For best performance in low-light environments, your handset includes a backlight
feature that can illuminate both the display and the keyboard so you can keep reading
and typing. (Please refer to page 68 for more details on “Backlight Duration”.)
ONE, TWOTOUCH IALING
Ideal for frequently dialed numbers, this feature allows Contact entries to be
dialed via the keypad with only one or two key presses.
ONETOUCH DIALING:
1-9 : Slide out the QWERTY keyboard, and then press and hold the
number you wish to connect to for more than 1 second.
TWOTOUCH DIALING:
10-20 : Slide out the QWERTY keyboard, and then press the first digit,
then press and hold the second digit of the number to dial.
Memory Function −Chapter 3
31
Memory Function
Memory Function
1
2 3 4
5
6
7
090605_TXT8026PK_Pocket_EN.indd 30-31090605_TXT8026PK_Pocket_EN.indd 30-31 2009.6.5 10:57:30 AM2009.6.5 10:57:30 AM

MENU FUNCTIONS
CHAPTER 4
MENU FUNCTION
This chapter addresses accessing the menu and using its functions
and features to customize your phone.
32
Chapter 3 −Memory Function
Note
Note
Recent calls
Missed calls
Received calls
Dialed calls
Blocked calls
All calls
Call timers
New entry
List entries
Message groups
Groups
Speed dials
My Name Card
Camera
Starting Browser
Mobile Web menu
Starting Game & Apps
Downloading Applications
Downloading melodies/wallpapers
Applying melodies/wallpapers
Checking data folder memory
Delete Application
Calculator
Calendar
Alarm clock
World clock
Notepad
Stop Watch
Voice commands
Voice commands settings
Voice commands info
Voice memo
Sound box
Picture box
MP3 box
Sound settings
Display settings
Phone settings
Call settings
Memory
Bluetooth
Phone info
090605_TXT8026PK_Pocket_EN.indd 32-33090605_TXT8026PK_Pocket_EN.indd 32-33 2009.6.5 10:57:31 AM2009.6.5 10:57:31 AM

34
Chapter 4 −Menu Function
Recent Calls
Recent Calls
RECEIVE CALLS
Displays information about the 90 most recently received calls. Place a call to a
received call by simply pressing the SEND Key
.
1. From idle mode, press the OK Key
[OK] to unlock the keypad,
press the Left Soft Key
[Menu], the Directional Key
to
select “Recent Calls”, then slide out the QWERTY keyboard and press
2. Received Calls.
2. Press the Directional Key
up or down to highlight an entry, then:
•
Press the OK Key
[OK] to view the entry.
•
Press the SEND Key
to place a call to the number.
•
Press the Right Soft Key
[Options] to select:
Save: To store the phone number in your Contacts.
Prepend: To add a desired number before the number. For example, it is useful when
adding “1” for a long distance call. You may save it in Contacts after entering the Prepend.
Text Message: To send a Text message to the Contact.
Picture Message: To send a Picture message to the Contact.
Erase All: To erase all Received Call entries.
•
Press the Left Soft Key
[Erase] to erase a call listing.
After 90 received calls, the oldest call will automatically be erased from the history.
IALE CALLS
Displays information about the 90 most recently dialed numbers. Place a call
to a dialed call by simply pressing the SEND Key
.
1. From idle mode, press the OK Key
[OK] to unlock the keypad,
press the Left Soft Key
[Menu], the Directional Key
to
select “Recent Calls”, then slide out the QWERTY keyboard and press
3. Dialed Calls.
2. Press the Directional Key
up or down to highlight an entry, then:
•
Press the OK Key
[OK] to view the entry.
•
Press the SEND Key
to place a call to the number.
•
Press the Right Soft Key
[Options] to select:
Save: To store the phone number in your Contacts.
Prepend: To add a desired number before the number. For example, it is useful when
adding “1” for a long distance call. You may save it in Contacts after entering the Prepend.
Text Message: To send a Text message to the Contact.
Picture Message: To send a Picture message to the Contact.
Erase All: To erase all Dialed Call entries.
•
Press the Left Soft Key
[Erase] to erase a call listing.
After 90 dialed calls, the oldest call will automatically be erased from the history.
Menu Function −Chapter 4
35
Recent Calls
Recent Calls
RECENT CALLS
The Recent Calls menu is a list of the last phone numbers or Contact entries for
calls you placed, accepted or missed. It is continually updated as new numbers
are added to the beginning of the list and the oldest entries are removed from
the bottom of the list.
ACCESS AND OPTIONS
1. From idle mode, press the OK Key
[OK] to unlock the keypad,
then press the Left Soft Key
[Menu].
2. Press the Directional Key
to select the “Recent Calls” menu.
3. Select a submenu.
1. Missed Calls
2. Received Calls
3. ialed Calls
4. Blocked Calls
5. All Calls
6. Call Timers
“Blocked Calls” appears only when the restriction for Incoming Calls is set.
MISSE CALLS
Displays information about the 90 most recently missed calls. Place a call to a
missed call by simply pressing the SEND Key
.
1. From idle mode, press the OK Key
[OK] to unlock the keypad,
press the Left Soft Key
[Menu], the Directional Key
to
select “Recent Calls”, then slide out the QWERTY keyboard and press
1. Missed Calls.
2. Press the Directional Key
up or down to highlight an entry, then:
•
Press the OK Key
[OK] to view the entry.
•
Press the SEND Key
to place a call to the number.
•
Press the Right Soft Key
[Options] to select:
Save: To store the phone number in your Contacts.
Prepend: To add a desired number before the number. For example, it is useful when
adding “1” for a long distance call. You may save it in Contacts after entering the Prepend.
Text Message: To send a Text message to the Contact.
Picture Message: To send a Picture message to the Contact.
Erase All: To erase all Missed Call entries.
•
Press the Left Soft Key
[Erase] to erase a call listing.
After 90 missed calls, the oldest call will automatically be erased from the history.
090605_TXT8026PK_Pocket_EN.indd 34-35090605_TXT8026PK_Pocket_EN.indd 34-35 2009.6.5 10:57:33 AM2009.6.5 10:57:33 AM

36
Chapter 4 −Menu Function
Recent Calls
Recent Calls
CALL TIMERS
Checks the usage time and manages your calls within the limit you set. The
Call Timers includes Last Call, All Calls, Received Calls, Dialed Calls, Home Calls,
Roaming Calls, Transmit KB, Incoming KB, Total KB, Lifetime Calls, Lifetime
Data Counter.
1. From idle mode, press the OK Key
[OK] to unlock the keypad,
press the Left Soft Key
[Menu], the Directional Key
to
select “Recent Calls”, then slide out the QWERTY keyboard and press
6. Call Timers.
2. Press the Directional Key
up or down to highlight a call timer.
Call timers include:
Last Call/All Calls/Received Calls/Dialed Calls/Home Calls/Roaming
Calls/Transmit KB/Incoming KB/Total KB/Lifetime Calls/Lifetime Data
Counter
•
Press the Left Soft Key
[Reset] to reset selected timer.
•
Press the Right Soft Key
[Reset All] to reset all timers.
Menu Function −Chapter 4
37
Recent Calls
Recent Calls
BLOCKE CALLS
This menu appears only when the restriction for Incoming Calls is set.
1. From idle mode, press the OK Key
[OK] to unlock the keypad,
press the Left Soft Key
[Menu], the Directional Key
to
select “Recent Calls”, then slide out the QWERTY keyboard and press
4. Blocked Calls.
2. Press the Directional Key
up or down to highlight an entry, then:
•
Press the OK Key
[OK] to view the entry.
•
Press the SEND Key
to place a call to the number.
•
Press the Right Soft Key
[Options] to select:
Prepend: To add a desired number before the number. For example, it is useful when
adding “1” for a long distance call. You may save it in Contacts after entering the Prepend.
Text Message: To send a Text message to the Contact.
Picture Message: To send a Picture message to the Contact.
Erase All: To erase all Blocked Call entries.
•
Press the Left Soft Key
[Erase] to erase a call listing.
After 90 blocked calls, the oldest call will automatically be erased from the history.
Please refer to page 72 for more details on "Restrict".
ALL CALLS
Displays information about the most recently received, dialed and missed calls.
1. From idle mode, press the OK Key
[OK] to unlock the keypad,
press the Left Soft Key
[Menu], the Directional Key
to
select “Recent Calls”, then slide out the QWERTY keyboard and press
5. All Calls.
2. Press the Directional Key
up or down to highlight an entry, then:
•
Press the OK Key
[OK] to view the entry.
•
Press the SEND Key
to place a call to the number.
•
Press the Right Soft Key
[Options] to select:
Save: To store the phone number in your Contacts.
Prepend: To add a desired number before the number. For example, it is useful when
adding “1” for a long distance call. You may save it in Contacts after entering the Prepend.
Text Message: To send a Text message to the Contact.
Picture Message: To send a Picture message to the Contact.
Erase All: To erase all All Call entries.
•
Press the Left Soft Key
[Erase] to erase a call listing.
After the 270th received, dialed or missed calls, the oldest call will automatically be
erased from the history.
Shortcut: To view a quick list of all your calls, press the SEND Key
from idle mode.
090605_TXT8026PK_Pocket_EN.indd 36-37090605_TXT8026PK_Pocket_EN.indd 36-37 2009.6.5 10:57:35 AM2009.6.5 10:57:35 AM

38
Chapter 4 −Menu Function
Contacts
Contacts
3. Erase: To delete the entry.
4. Text Message: To create a Text Message.
5. Picture Message: To create a Picture Message.
6. Erase All: To delete all Contact entries.
4. To call the selected number, press the SEND Key
.
MESSAGE GROUPS
Allows the user to create a message group with up to 10 phone numbers. The
user can add, change, and delete Message Groups.
TO ADD NEW MESSAGE GROUP
1. From idle mode, press the OK Key
[OK] to unlock the keypad,
press the Left Soft Key
[Menu], the Directional Key
to
select “Contacts”, then slide out the QWERTY keyboard and press
3. Message Groups.
2. Press the Left Soft Key
[New].
3. Enter a new message group name, then press the OK Key
[SA E].
TO ASSIGN PHONE NUMBER TO MESSAGE GROUP
1. From idle mode, press the OK Key
[OK] to unlock the keypad,
press the Left Soft Key
[Menu], the Directional Key
to
select “Contacts”, then slide out the QWERTY keyboard and press
3. Message Groups.
2. Press the Directional Key
up or down to select the group where
you want to add the entry, and then press the Right Soft Key
[Options].
3. Select “Add”.
4. Your Contact entries will be displayed in alphabetical order. Select
the entry you want to add then press the Left Soft Key
[Mark/
Unmark].
5. Press the OK Key
[OK]. “Entry added to message group” will be
displayed.
TO CHANGE MESSAGE GROUP NAME
1. From idle mode, press the OK Key
[OK] to unlock the keypad,
press the Left Soft Key
[Menu], the Directional Key
to
select “Contacts”, then slide out the QWERTY keyboard and press
3. Message Groups.
2. Press the Directional Key
up or down to select the message
group you want to rename then press the Right Soft Key
Menu Function −Chapter 4
39
Contacts
Contacts
Entries can be retrieved by name or group.
NEW ENTRY
To add a new number to your Contact List:
Using this submenu, the number is saved as a new Contact entry. To save the number
into an existing Contact entry, edit the Contact entry.
1. From idle mode, press the OK Key
[OK] to unlock the keypad,
press the Left Soft Key
[Menu], the Directional Key
to
select “Contacts”, then slide out the QWERTY keyboard and press
1. New Entry.
2. In the Name field, enter the name to add to your Contact List. To
change the input mode, press the Left Soft Key
[Abc].
3. Press the Directional Key
down to enter information in other
fields for the entry. Fields include:
Mobile/Home/Work/E-mail 1/Group/Picture/Ringtone/Mobile 2/
Fax/E-mail 2
If entering information in a phone number field, press the Right Soft
Key
[Options] to select one of the following options:
1. Hard Pause/2. 2 Sec Pause
4. Press the OK Key
[SA E].
For additional details on how to add a new Contact entry, see page 26.
LIST ENTRIES
You can review all the entries stored in your Contact List or quickly find an
entry by entering a name or its character string.
1. From idle mode, press the OK Key
[OK] to unlock the keypad,
press the Left Soft Key
[Menu], the Directional Key
to
select “Contacts”, then slide out the QWERTY keyboard and press
2. List Entries. Or in idle mode, press the Right Soft Key
[Contacts]. The list of names in your Contact List is displayed alpha-
betically.
2. Enter a name or part of a name in the Search field at the bottom
of the screen or press the Directional Key
up or down to scroll
through your Contact List.
3. To edit the entry, press the Left Soft Key
[Edit]. To view entry
details, press the OK Key
[ IEW].
•
By pressing the Right Soft Key
[Options], you can choose from the following:
1. New Entry: To add a New Phone Number.
2. Prepend: To add a desired number before the number. For example, it is useful when
adding “1” for a long distance call. You may save it in Contacts after entering the
Prepend.
090605_TXT8026PK_Pocket_EN.indd 38-39090605_TXT8026PK_Pocket_EN.indd 38-39 2009.6.5 10:57:37 AM2009.6.5 10:57:37 AM
Table of contents
Other PCD Cell Phone manuals


