Peachtree Woodworking Supply Multi-joint spacing system User manual

Peachtree Woodworking
Fine Woodworking Accessories
P.O. Box 921487
Norcross GA, 30010 1
B
Instruction
Manual
Individuals
spacing system
™
Peachtree Woodworking
Fine Woodworking Accessories
P.O. Box 921487
Norcross GA, 30010
1/4" box joint 3/8" box joint 1/2" box joint
Create joints like these with the
spacing system
™
© Copyright Peachtree Woodworking Supply Inc. 10/2008. All images, copy, and graphics are copyrighted by law
and may not be copied, or reproduced without our express written consent.

2Peachtree Woodworking
Fine Woodworking Accessories
P.O. Box 921487
Norcross GA, 30010
spacing system
™
Instruction Manual
Introduction
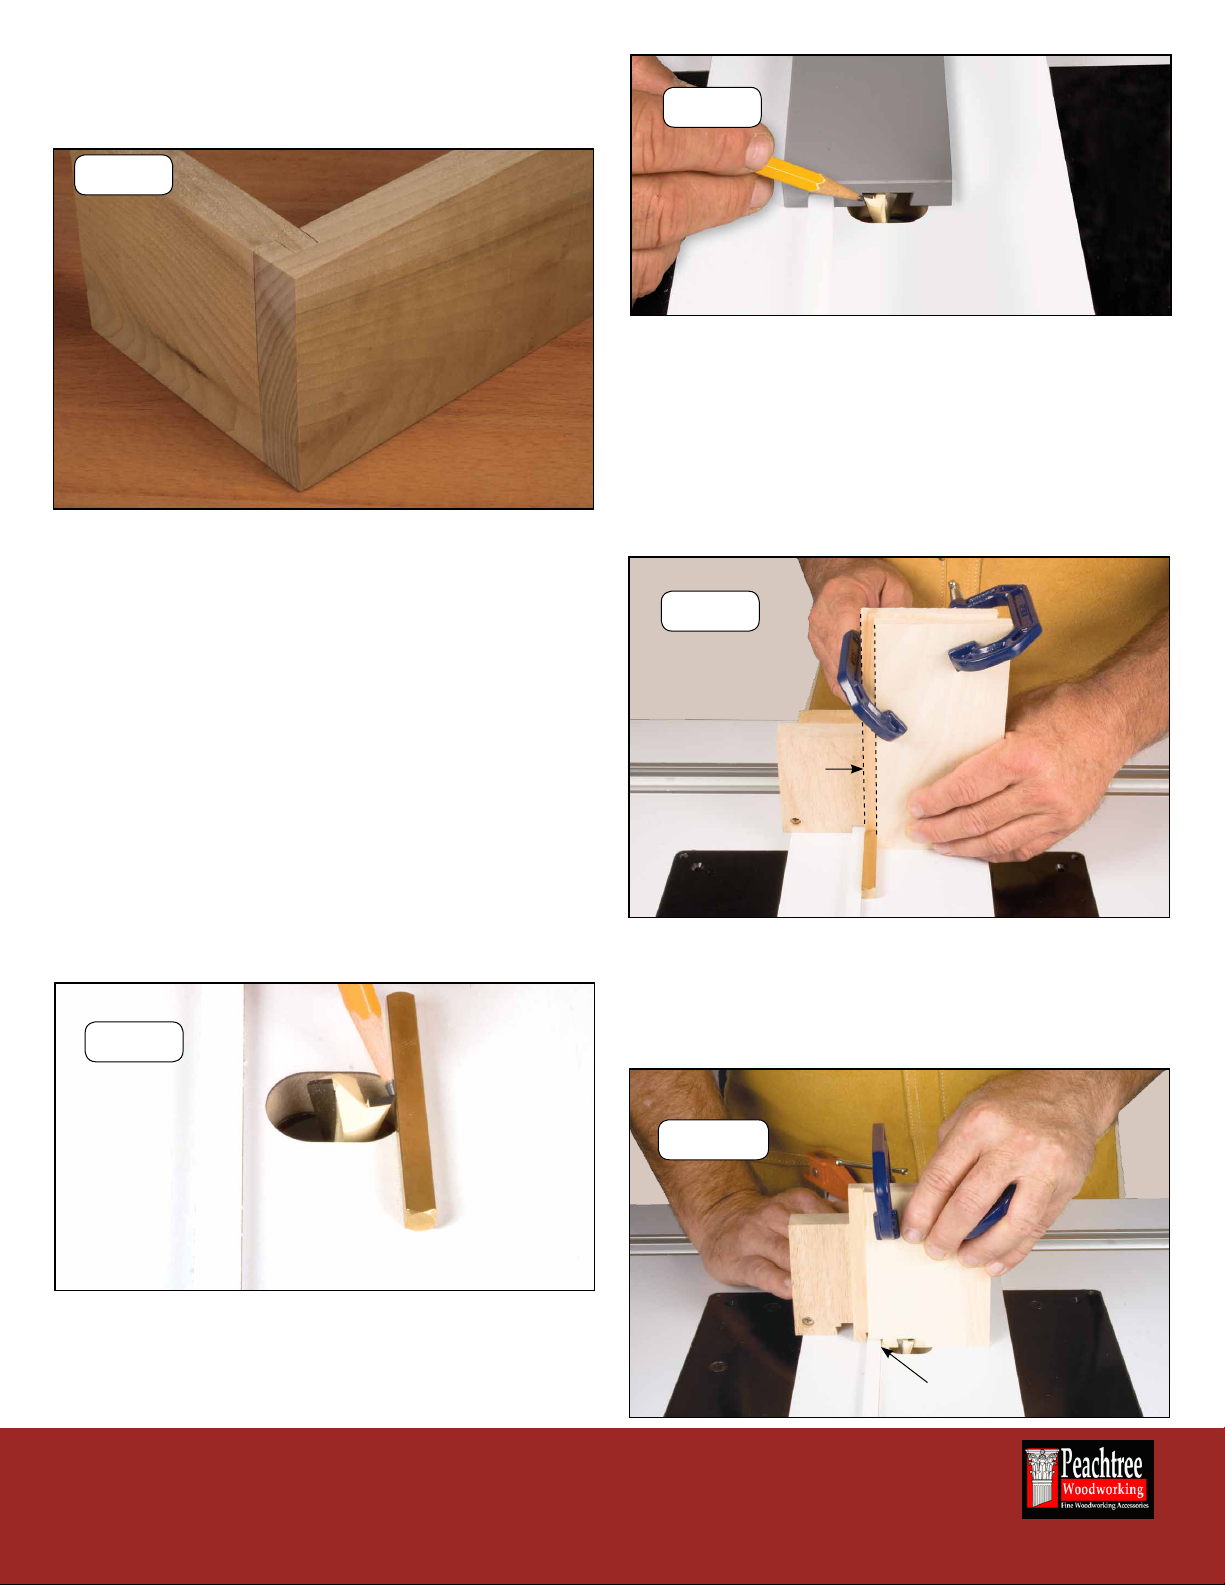
e Multi-Joint™spacing system takes a simple approach to making box joints, rabbet joints, spline joints, and sliding
dovetails. Unlike other spacer jigs, the Multi-joint™ has an MDF core base laminated on both sides so that it stays at and
does not warp. The 24” length makes it easy to clamp onto just about any router table top when making joints with the Multi-
joint system™. e hardest part about cutting these types of joints is spacing each cut exactly the same distance apart from one
another. With our Multi-joint™ fence spacing system and brass set-up bars, it will give you the exact spacing between two
cuts or fifty cuts. The bit, fence and the space between the bit and fence are all the same size. The only thing that needs to
be set up is the space between the router bit and fence. at’s what makes this system so easy to use. e Multi-Joint™system
works with precision guide bars made from U.H.M.W. for smooth operation. Instead of moving the fence for each cut, you will
move the stock on to each guide bar for endless repeatability. Unlike other template jigs you have seen, our jig will work with
two dierent thickness stock as well as two dierent widths. is means the type of projects you can create are endless. Let us
show you how your new Multi-joint™system works! Please note: all router bits required to use this system are sold separately,
due to your Multi-joint™system uses the most common type router bits that most woodworkers already own.
Read and follow all safety instructions
Caution:
Please read, understand and follow all manufacturers instructions, guidelines and owners manuals that come with
your power tools. Peachtree Woodworking Supply Inc. and its subsidiaries assume no liability for accidents or
injuries caused by improper use of this product.
Safety Tips
Creating unique joints that look like they have been hand cut will add curb appeal or distinction to any of your
projects. To get the best performance and results out of your Multi-joint™, we recommend the following tips:
1. Always wear safety glasses, hearing protection and dress properly. No loose clothing, hair, draw strings or
jewelry that might get caught in moving parts.
2. Keep work area clean. Messy work areas invite injuries.
3. Make deeper or larger cuts in multiple passes and NEVER use dull cutters. Forcing a deep cut in one pass
or using a dull cutter can result in injury. Inspect cutters for damage or chips in carbide.
4. Make sure router bit is properly installed in router and do not exceed the recommended rpm
5. Keep all safety guards in place.
6. Always unplug your tools before changing cutters
7. Secure you work. Always use at least two clamps to hold your stock. Make sure the clamps do not
interfere with the cutters.
8. Make sure the jig is clean with no build up or debris for smooth operation.
9. is system is designed for use on router tables only, do not use with a free hand router set-up.
10. Follow all manufacturer safety guidelines provided with you router.
11. Support wider stock properly so that it does not shi or change the position of the jig
spacing system
™
Package Contents
1 Ea. 1/4” spacer fence
1 Ea. 3/8” spacer fence
1 Ea. 1/2” spacer fence
1 Ea. short gray set-up block
1 Ea. long gray set-up block (sub-fence)
3 Ea. right angle fence
5 PC brass set-up bars

3
Peachtree Woodworking
Fine Woodworking Accessories
P.O. Box 921487
Norcross GA, 30010
Box Joints
This set up method is used for all three size box joints.
All you need to do when changing from a 1/4” box joint
to a 3/8” box joint, is swap out the 1/4” spacer fence and
router bit with the 3/8” spacer fence and bit. Re-align the
router bit to the fence with the brass set up bar, then set
the height for the stock thickness. You are now ready to
cut some box joints. We supply you with the brass set up
bars since it is the fastest way to get the precise distance
between the sharp router bit edge and the fence, as well
as the soft brass will not chip the carbide of your router
bits. The example we illustrate in the instruction manual
is for 3/8” box joints using 3/8” stock.
Fig.1
The reason we prefer a spiral router bit is because it pro-
duces a smoother cut with less chatter and it cleans out
the joint quicker. The up-cut spiral bit will also draw
the stock down to the table as well as giving you better
control. Once you have your bit installed in your router.
Then place your router into the router table (See Fig. 2).
Make sure that the router plate does not move side to
side in the table because this will throw off the spacing
of your joint.
Fig.2
Fig.3
We now need to set the space between the router bit and
fence to 3/8" using a ruler. You can also do this in a much
quicker fashion, which is to use a brass setup bar that is
included with your jig. Place the 3/8" brass set-up bar
between the router bit and the spacer fence, position the
router bit so the widest part or tip of the cutting edge of
the router bit is against the brass bar. Then from the end
of the spacer fence that is not clamped down, pivot the
fence so that the brass bar is touching the fence and the
Set-up router and router bit:
Make sure your router is unplugged before inserting
your bit. Place a 3/8" double ute or 3/8" up cut spiral
bit (not included) into your router with approximately
3/4" exposed and secure in place. We prefer to use an up
cut spiral bit in all of our cuts, (See Fig 1.)
Set-up the spacer fence:
Place the 3/8" spacer fence across the top of your router
table, with the router bit in the hole opening with ap-
proximately 3/8" of the bit exposed above the platform.
Adjust the fence so that the router bit is approximately
in the center of the hole. Using a c-clamp or an f-clamp
secure one end of the fence to your router table top. (See
Fig. 3)

4Peachtree Woodworking
Fine Woodworking Accessories
P.O. Box 921487
Norcross GA, 30010
widest cutting edge of the cutter. Secure the end to the
router table top using a second c-clamp or f-clamp. (See
Fig. 4)
Once you have both ends of your fence clamped to your
router top, check the space between the bit and fence by
placing the brass bar between the fence and bit. Using
your hand, reach under the table and spin the router bit
slowly. The brass bar should move ever so slightly when
the cutting edge of the router bit contacts it.
Fig.4
Caution
Always make sure router is un-plugged before check-
ing fence location to the router bit. Do not try to spin
the router bit by the cutting edge, as this may result in
injury. Always spin the by reaching under the table and
spin the bit from the router collet.
Set-up the router bit height:
Now we have to set the height of the bit. We are using
3/8" thick stock on all four sides of our project, which
means the bit needs to be set at a depth of 3/8". One of
the great features of the Multi-joint™system is, you do
not have to use the same thickness stock on all four sides.
You can make the sides out of 3/8" stock and the front
from 3/4" stock if you prefer. To do this you will need to
adjust only the bit height. For example: when you cut the
front - the bit would be set at 3/8"and when you cut the
side's - the bit would be at 3/4". The handy 3/8" brass set
up bar can help you set the height quickly. Set the 3/8"
bar next to the router bit and raise the bit until the top
cutting edge of the router bit is ush with the brass bar
then lock the height in place on your router. (See Fig. 5).
If desired you can add a 1/32" or more to be sanded ush
later. You can also use the thickness of your stock to set
the height of the bit. Place it next to the router bit and
raise the bit until it is ush with the top of your stock and
lock the router in place.
This is what your nal set-up of the Multi-joint™ should
look like for 3/8" spacer fence (See Fig. 6A). When cut-
ting different size nger joints you will use the exact
same process. Example: If you are using the 1/4" spacer
fence, you will use a 1/4" router bit and adjust the spac-
ing between the UHMW guide bar and the router bit to
1/4".
Fig.5
Fig.6A
3/8"
3/8"
3/8"
all three
measurements
should be the
same
Make sure that the UHMW guide bar is positioned so
the rotation of the router bit pushes the stock against the
fence (See Fig. 6B). This will give you better control of
the cut.
Fig.6B Feed Direction
Bit pushes
stock
against
guide bar
Cutter
Rotation

5
Peachtree Woodworking
Fine Woodworking Accessories
P.O. Box 921487
Norcross GA, 30010
Caution:
Always make a relief cut on each right angle push block
before use. When cutting stock or using the right angle
push block, keep your feed hand o-set to the non-rout-
er bit side of the guide bar as shown in Fig. 7. NEVER
position your hand on top of the stock that would be in
line with the router bit. Doing so may result in injury.
Shop Notes:
Always use a minimum of two clamps to prevent the
stock from pivoting. Not doing so may result in a sloppy
joint or even injury.
Shop Notes:
You can cut one piece of stock at a time, just remember
that the second piece of stock must be o-set the dis-
tance of the spacer fence size you are using.
Shop Notes:
If your stock is not divisible by the size of the spacer
fence your are using, the outer nger will be smaller
than the rest.
Remove Stock From Right Angle Block
Once you have your router bit height set you need to cut
into the right angle push block by a minimum of 1" (See
Fig. 7). This is done so the router bit does not grab the
right angle push block. It will also prevent the stock from
tearing on the back edge when the bit exits the cut. We
recommend that you support the back edge of any cut
made with the Multi-joint™ spacer system.
Cutting Two Boards at Once:
You must off-set one of the boards by 3/8", so when the
boards are put together they will line up ush with each
other. We start by placing one piece of stock against the
edge of the UHMW guide bar and right angle push block.
Then set the 3/8" brass bar in front of the rst piece of
stock against the edge of the UHMW guide bar -
(See Fig. 8).
Place the second piece to be cut in front of the rst piece,
aligning the side edge against the 3/8" brass bar and
clamp together using two c-clamps (See Fig. 9). Remove
the brass bar.
Stock Preparation
When cutting your joints with the Multi-joint™ spacer
system, make sure your stock is at, and that the edge
you will be milling is straight. The unique feature about
this system is, you can cut any length or any width stock.
You can even cut angle joints. We have prepared our
stock width to be divisible by 3/8", that way the joint will
be equal on either side. To insure a balanced joint, pre-
pare your stock width so that it is divisible by the width
of the spacer fence you will be using.
Fig.7 Fig.8
Fig.9

6Peachtree Woodworking
Fine Woodworking Accessories
P.O. Box 921487
Norcross GA, 30010
Fig.10
Fig.11
Fig.12
Fig.13
Making the Cut:
Be sure the cutter is not in contact with the wood surface
before turning your router on. With one edge of the stock
against the UHMW fence, hold the stock square with
the right angle push block, keeping your feed hand to
the right side of the bit to feed the stock forward slowly.
Feed until the router bit exits the back of the stock into
the cut-out we made in the right angle push block. Once
the rst cut is made, lift the stock off the platform, slide
the right angle push block back to give enough clear-
ance from the router bit and keeping your stock clamped
together place the cut you just made on to the UHMW
guide bar and make the cut. (See Fig. 10) Repeat this
process all the across the stock until it is completed.
Adjusting the Fit:
If the t is to tight, you must adjust the space to be small-
er between the UHMW guide bar and router bit. Loosen
one f-clamp just enough to allow one end of the jig to
be moved. Using a hammer or block of wood, tap the
platform toward the router bit (See Fig. 12). Once the
adjustment has been made, re-secure platform with f-
clamp and repeat the cutting process until desired t is
obtained. If the joint is protruding, lower the router bit.
If the joint is recessed, raise the router bit.
Caution:
Do not force the router bit, or cut to fast, as this may
result in tear-out, splintering of the stock, or even loss of
control. Moving the stock to slow could result in burn-
ing. Feed the stock into the bit at a smooth and control-
lable rate.
Your completed box joint should resemble the photo-
graph shown below in Fig. 11
If the t is to loose, you must adjust the space to be larger
between the UHMW guide bar and router bit. Loosen
one f-clamp just enough to allow one end of the jig to
be moved. Using a hammer or block of wood, tap the
platform away from the router bit (See Fig. 13). Once
the adjustment has been made, re-secure platform with
f-clamp and repeat the cutting process until desired t is
obtained. If the joint is protruding, lower the router bit.
If the joint is recessed, raise the router bit.

7
Peachtree Woodworking
Fine Woodworking Accessories
P.O. Box 921487
Norcross GA, 30010
Fig.14
Fig.15
Fig.17
Cutting All Four Sides at Once:
If all four sides of the box are the same thickness the
Multi-joint™spacer system will allow you to cut all four
pieces of a box at one time. To do this, you must rst
make an off-set block that will align the sides from the
front and back. Use a piece of scrap stock 3/4" thick
by at least 5" wide and 6" long. With the fence and bit
set up correctly for the stock, place the one edge of the
stock against the UHMW guide fence and make the cut
the length of the stock. Set the cut you just made on the
UHMW guide fence, and repeat two more times (See
Fig. 14).
Place the sides of the box length wise into the dadoed
cuts of the set up block. Place the front and back of the
box between the sides of the box on the set up jig (See
Fig. 16). Align all four ends of your stock pieces to be
ush and clamp together using two c-clamps. This will
give you the 3/8" off-set you need for the nger joints to
be ush when assembled.
While still clamped, remove the pieces from the set up
block and place a mark on each end of the stock that is to
be placed against UHMW guide bar. (See Fig. 17).
Caution:
Since the router bit is contacting both sides of the stock
when cutting - the stock will tend to dri away from the
fence. When making the rst cut, keep pressure against
the stock and UHMW guide fence to prevent driing.
NEVER position your hand on top of the stock that
would be in line with the router bit. Doing so may result
in injury. Always use a push block to make these type of
cuts shown above in Fig. 14.
Shop Notes:
e rst cut made on each end will be from the starting
edge you have marked. Failing to do so, will result in
un-even joints.
Your completed set up block should resemble the photo-
graph shown below in Fig. 15
Fig.16
Side
Front
Back
Side
3/8" Oset
Aligned end to be cut

8Peachtree Woodworking
Fine Woodworking Accessories
P.O. Box 921487
Norcross GA, 30010
Fig.18
Fig.19
Fig.20
Fig.21
Making the Cut:
Be sure the cutter is not in contact with the wood surface
before turning your router on. With the edge of the stock
you just marked against the UHMW guide bar, hold the
stock square with the right angle push block. Keep your
feed hand to the right side of the bit to feed the stock
forward. Slowly feed until the router bit exits the back of
the stock into the cut-out we made in the right angle push
block. Once the rst cut is made, lift the stock off the
platform, slide the right angle push block back to give
enough clearance from the router bit and keeping your
stock clamped together place the cut you just made on
to the UHMW guide bar and make the cut. (See Fig. 18)
Repeat this process all the way across the stock until it
is completed.
After completing all the cuts on one side, keep all four
pieces clamped together and ip over to the opposite end.
Placing the same edge of the stock you marked against
the UHMW guide bar, hold the stock square with the
right angle push block. Keep your feed hand to the right
side of the bit to feed the stock forward. Slowly feed un-
til the router bit exits the back of the stock, into the cut-
out we made in the right angle push block. Once the rst
cut is made, lift the stock off the platform, slide the right
angle push block back to give enough clearance from the
router bit and keeping your stock clamped together place
the cut you just made on to the UHMW guide bar and
make the cut. (See Fig. 19) Repeat this process all the
way across the stock until it is completed.
Remove c-clamps and align the edges. Your completed
pieces of stock should resemble a checker board pattern
shown below in Fig. 20
Your completed joint should resemble the photograph
shown below in Fig. 21

9
Peachtree Woodworking
Fine Woodworking Accessories
P.O. Box 921487
Norcross GA, 30010
Assemble the box:
Assemble all four sides of the box (See Fig. 22). The
joints should have a snug - sliding t. If you have to force
the joint together with a mallet, it may result in splitting
your stock, as well as forcing the glue out of the joint. To
loose of a t may produce wobbling and a week joint. If
you have the extra 1/32" or more to the joint, it can now
be cleaned up by sanding the joints ush after gluing. If
satised with the t of your joints, glue, clamp and n-
ish your project. If the joints need adjustment, follow the
steps explained earlier in this manual for adjusting the t
on page #6.
The second cut is made by rotating the rst cut you just
made 180°and placing it on the UHMW guide bar to
make the second cut. Place the second piece of stock up-
right and hold it at a 90°angle and feed into the cutter.
Feed both pieces at the same time (See Fig. 25).
Your completed box should resemble the photograph
shown below in Fig. 23
Fig.22
Fig.23
Off-Set Rabbet Joints
The set-up process for this type of joint is the same pro-
cess we use for the 3/8" nger joint. In this example, we
will be rabbeting two pieces of 3/4" stock. It is important
that your stock is exactly 3/4" thick, if not, it may not al-
low for the joint to align ush. When making this type of
cut, always use a push block to feed and hold the stock
down as shown. Since the router bit is contacting both
sides of the stock when cutting - the stock will tend to
drift away from the fence. When making the rst cut,
keep pressure against the stock and UHMW guide bar to
prevent drifting. Your rst cut is made with your stock
face down and one edge against the UHMW guide bar
(See Fig. 24).
Caution:
DO NOT place your hand over the top of the router bit
when making the cut, always use a push block to hold
the stock down and feed into the cutter - See Fig. 24.
Fig.24
Fig.25

10 Peachtree Woodworking
Fine Woodworking Accessories
P.O. Box 921487
Norcross GA, 30010
This type of joinery is excellent for drawer boxes and
other types of small projects that need a little extra
strength. We also use the rst step of this method with
the 1/4" fence for cutting the groove for the bottom of
drawer boxes.
Place the short gray set up block on to the UHMW guide
bar, adjust the un-clamped end of the fence until the
dovetail bit touches the inside edge of the set up block
and secure platform in place with clamp (See Fig. 28).
Fig.26
Your completed joint should resemble the photograph
shown below in Fig. 26. If joint is to tight, make the nec-
essary adjustment until desired t is obtained.
End To End Dovetail Joints
End to end dovetails are primarily used as a decorative
type of joint. Most woodworkers will use two different
species of wood when making this joint. Place a 1/2"- 14°
dovetail router bit (not included) into your router collet
and secure the bit in place. Set the 3/8" spacer fence on
to your router table with bit centered in the opening of
the platform and clamp one end as previously outlined
in these instructions on page #3. Set the height of the bit
using the 1/4" brass bar (See Fig. 27).
Fig.27
Fig.28
Fig.29b
Fig.29
1/2"
oset
You must off-set one of the boards by 1/2", so when the
boards are put together they will line up ush. Place one
piece of stock against the edge of the UHMW guide bar
and right angle push block. Then set the 1/2" brass bar in
front of the rst piece. Place the second piece to be cut
in front of the rst piece, aligning the side edge against
the 1/2" brass bar and clamp together using two c-clamps
(See Fig. 29). Remove the brass bar and make rst cut.
With your Stock still clamped together, place the cut you
just made on the UHMW guide bar and make the second
cut (See Fig. 29b).Repeat this process the entire width
of stock.
keep side pressure
against guide bar
(not included)

11
Peachtree Woodworking
Fine Woodworking Accessories
P.O. Box 921487
Norcross GA, 30010
Your completed joint should resemble the photograph
shown below in Fig. 30.There are two ways to adjust the
t of a this joint. First, raise the height of bit to tighten
the joint, lower the bit to loosen the joint. Second is to
adjust the platform if edges are not ush, as outlined on
page #6.
Drawer Slide Dovetails
Drawer slide dovetails are an easy way to guide any
drawer smoothly. Follow the exact same instructions
outlined in the End to End dovetail joint (previous) sec-
tion, with two exceptions: First - instead of standing your
stock up on end, you will lay your stock down at on the
table surface (See Fig. 31). Second - each piece is cut
one at a time. This type of dovetail joint is always made
from 3/4" or thicker stock
Decorative Double Dovetails
Double Dovetails are primarily used as a decorative joint.
Use them for edges on drawer boxes, joining straight
stock together, bread boards and more. When using this
decorative joint, most woodworkers will use two differ-
ent colors of wood for contrast when making this joint.
Fig.30
Fig.31
Fig.32
Place the short gray set up block on to the UHMW guide
bar, adjust the un-clamped end of the fence until the
dovetail bit touches the outside edge of the set up block
(See Fig. 33)and secure platform in place with clamp.
Remove set up block.
Fig.33
Caution:
DO NOT place your hand over the top of the router bit
when making the cut, always use a push block to hold
the stock down and feed into the cutter - (See Fig. 31).
Cutting The Center Dovetail
Place a 1/2"- 14°dovetail router bit (not included) into
your router collet and secure the bit in place. Set the 3/8"
spacer fence on to your router table with bit centered in
the opening of the platform and clamp one end as previ-
ously outlined in these instructions on page #3. Set the
height of the bit using the 1/4" brass bar (See Fig. 32).

12 Peachtree Woodworking
Fine Woodworking Accessories
P.O. Box 921487
Norcross GA, 30010
With the fence and bit set up correctly for the stock, place
one edge of the stock against the UHMW guide fence
and make the cut the length of the stock. Next, rotate the
stock 180°, place the rst cut on the UHMW guide bar
- feeding from the OPPOSITE direction and make the
relief cut (See Fig. 34). The reason we have rotated the
stock around 180°and fed from the opposite direction is
so that the stock does not pull through the cut, giving you
a more controllable cut and a smoother nish.
With the fence and router bit set up correctly for the
stock, place the edge you marked earlier against the
UHMW guide fence, then make the cut the length of the
stock (See Fig. 37).Once cut is made, turn off router and
remove the long sub fence, the wooden stop block and
re-secure platform with clamp.
Your next cut is made using the long gray off-set fence
as a sub-fence. Place the sub-fence on the UHMW guide
bar, with the at surface facing the router bit, leaving
equal distance in the front and back of the router bit. Next,
clamp a scrap piece of wood (a stop) behind the long off-
set fence to prevent it from sliding forward when making
the cut. Place a piece of masking tape length wise on the
long gray sub-fence to prevent it from lifting -
(See Fig. 36).
After making the relief cut, rotate the stock back around
180°and feeding from the same direction we made the
rst cut from, place the rst cut back onto the UHMW
guide bar and make the third cut (See Fig. 34b).Place
the cut you just made on the UHMW guide bar, repeat-
ing this last process across the entire width of the stock
until complete.
Fig.35
Shop Notes:
When cutting longer stock, you must make sure that the
clamp heads DO NOT interfere with the cutting plane,
shown above in Fig. 36. If the stock you are milling is
longer than 20", we recommend you make a longer sub-
fence for better support.
Place a mark on the edge of the stock where you made
your rst cut. Your completed stock should resemble the
photograph shown in Fig. 35
Fig.36 masking
tape
cutting
plane
feed direction
stop
Fig.34b
Fig.34
Feed Direction
Cutter
Rotation

13
Peachtree Woodworking
Fine Woodworking Accessories
P.O. Box 921487
Norcross GA, 30010
After removing the long off-set sub fence. Place the cut
you just made on the UHMW guide bar and make the
second cut (See Fig. 38).Repeat this process the entire
width of stock.
Cutting The Outside Dovetails
Now that we completed our insert piece, we need to
change the router bit and adjust the fence. Unplug your
router, remove the 1/2" - 14°dovetail bit and replace
with a 3/4" - 14° dovetail bit (not included) and secure
in router collet. Set the router bit to exactly the same
height as the 1/2" dovetail bit used to cut the center dove-
tail on page #11. Next, loosen a clamp at one end of the
platform, just enough to allow you to pivot the fence for
this adjustment. Place the short gray set up block on to
the UHMW guide bar, adjust the un-clamped end of the
fence until the dovetail bit touches both edges of the set
up block (See Fig. 40) and secure the platform in place
with clamp.
Caution:
e Long o-set fence is ONLY used to make the rst
cut, DO NOT use for any other cut. Doing so may result
in injury.
Your completed stock should resemble the photograph
shown below in Fig. 39.
Fig.37
Fig.38
Fig.39
Fig.40
keep side pressure
against guide bar
Marked
Edge
keep side
pressure
against
guide bar
First Cut - Outside Dovetail
With the fence and bit set up correctly for the stock, place
one edge of the stock against the UHMW guide fence
and right angle push block and make the cut. Next, rotate
the stock around 180°, place the rst cut on the UHMW
guide bar - feeding from the OPPOSITE direction and
make the relief cut (See Fig. 41). The reason we have
rotated the stock around 180°and fed from the opposite
direction is so that the stock does not pull through the
cut, giving you a more controllable cut and a smoother
nish.
Fig.41
Feed Direction
Cutter
Rotation

14 Peachtree Woodworking
Fine Woodworking Accessories
P.O. Box 921487
Norcross GA, 30010
Fig.41b
keep side pressure
against guide bar
After making the relief cut, rotate the stock back around
180°and feeding from the same direction we made the
rst cut from, place the rst cut back onto the UHMW
guide bar and using the right angle push block make the
third cut (See Fig. 41b).Place the cut you just made on
the UHMW guide bar, repeating this last process across
the entire width of the stock until complete.
Your completed stock should resemble the photograph
shown in Fig. 42
Fig.42
Second Cut - Outside Dovetail
Unplug your router for this set-up process. To make the
second cut of the joint, you will be using the long gray
off-set fence to set up the rst cut. Place the sub-fence on
the UHMW guide bar, with the dovetailed surface facing
the router bit. Next, place the right angle push block on
the UHMW guide bar, slide the stock to be cut against
the edge of the gray set-up block and c-clamp the stock
to the right angle push block. (See Fig. 43).
Remove the long gray off-set fence. DO NOT make this
cut with long gray off-set fence in place. Doing so may
result in injury. Plug the router back in, and slowly feed
your stock through the cutter. (See Fig. 44).
Fig.43
Remove c-clamp from stock and using the right angle
push block, position the rst cut on the UHMW guide
bar, keeping pressure to one side of the guide bar, and
make the second cut (See Fig. 45). Repeat this process
the entire width of the stock.
Fig.44
Fig.45
keep side pressure
against guide bar
Shop Notes:
When feeding from the opposite direction with the right
angle push block, be sure to make a relief cut for the
particular router bit you are using - see page #5

15
Peachtree Woodworking
Fine Woodworking Accessories
P.O. Box 921487
Norcross GA, 30010
Fig.46
Your completed stock should resemble the photograph
shown below in Fig. 46
Assemble the Double Dovetail:
The joints should have a snug - sliding t (See Fig. 47). If
you have to force the joint together with a mallet, it may
result in splitting your stock, as well as forcing the glue
out of the joint. To loose of a t may produce wobbling
and a week joint. If satised with the t of your joints,
trim, glue, clamp and nish your project. There are two
ways to adjust the t of this joint if needed. First adjust
the fence as shown on page #6. Second adjust the bit, if
the joint is too loose, you will slightly raise the dovetail
router bit. If the joint is too tight, you will slightly lower
the router bit.
Fig.47
Shop Notes:
When making this joint, the center double dovetail
will not align to the outside edge and may need to be
trimmed or sanded ush.
Sliding Double Dovetail
The most popular use for this joint is, sliding table ex-
tensions or drawer slides. When making this joint, we
recommend that the center stock is made from a differ-
ent species of wood than the outer two pieces of stock.
The reason for this; if all pieces are made from the same
species of wood, it may cause excessive wear or binding.
When using this joint to make extended table slides, the
center double dovetail stock should be at least 1" thick
for support. The thickness of the stock does not change
the bit height when making this joint. This joint can also
be used as decorative joint.
Cutting the Center of the Double Dovetail
The rst step of cutting this joint is making the center
slide double dovetail. Refer the page #11 of this manual
on Cutting The Center Dovetail. After following the in-
structions your stock should resemble the photo shown
below (See Fig. 48). This joint is exactly the same as the
decorative double dovetail.
Fig.48
Shop Notes:
When making sliding double dovetails, you will use the
same set up process shown in CUTTING DECORA-
TIVE DOUBLE DOVETAILS to set the location of the
fence and bit height. Once set, follow instructions below.

16 Peachtree Woodworking
Fine Woodworking Accessories
P.O. Box 921487
Norcross GA, 30010
Top / Bottom of Double Dovetail Cut
To nish your sliding double dovetail, you must cut a top
and bottom of the joint. To set up the bit and fence for
the this cut refer to page #13, Cutting Outside Dovetails.
With the fence and bit set up correctly, place the stock at
on the platform, with one edge against the UHMW guide
fence and using a push block, make the cut. Next, rotate
the stock around 180°, place the rst cut on the UHMW
guide bar - feeding from the OPPOSITE direction and
make the relief cut (See Fig. 49). The reason we have
rotated the stock around 180°and fed from the opposite
direction is so that the stock does not pull through the
cut, giving you a more controllable cut and a smoother
nish.
Fig.49b
keep side pressure
against guide bar
Fig.49
masking
tape
cutting
plane
feed direction
stop
Fig.51
Caution:
Since the router bit is contacting both sides of the stock
when cutting - the stock will tend to dri away from
the fence. When making any cut, keep pressure against
the stock and UHMW guide fence to prevent driing.
NEVER position your hand on top of the stock that
would be in line with the router bit. Doing so may result
in injury. Always use a push block to make these type of
cuts shown in Fig. 49.
Your second piece of stock on this joint is made using the
long gray off-set fence as a sub-fence. Place the sub-fence
on the UHMW guide bar, with the dovetailed surface
facing the router bit, leaving equal distance in the front
and back of the router bit. Next, clamp a scrap piece of
wood (a stop) behind the long off-set fence to prevent it
from sliding forward when making the cut. Place a piece
of masking tape length wise on the long gray sub-fence
to prevent it from lifting. (See Fig. 51).
Fig.50
Your completed stock should resemble the photograph
shown in Fig. 50
After making the relief cut, rotate the stock back around
180°and feeding from the same direction we made the
rst cut from, place the rst cut back onto the UHMW
guide bar and make the third cut (See Fig. 49b).Place
the cut you just made on the UHMW guide bar and make
the cut, repeating this last process across the entire width
of the stock until complete.
keep side pressure
against guide bar
Feed Direction
Cutter
Rotation

17
Peachtree Woodworking
Fine Woodworking Accessories
P.O. Box 921487
Norcross GA, 30010
With the fence and router bit set up correctly for the
stock, place the stock at on the platform with one edge
against the UHMW guide fence, then make the cut the
length of the stock (See Fig. 52).Once cut is made, turn
off router and remove the long sub fence and the wooden
stop block and re-secure platform with clamp.
Shop Notes:
When cutting longer stock, you must make sure that the
clamp heads DO NOT interfere with the cutting plane,
shown in Fig. 51. If the stock you are milling is longer
than 20", we recommend you make a longer sub-fence
for better support.
After removing the long gray off-set sub fence. Place the
cut you just made on and against the UHMW guide bar
and make the second cut keeping side pressure against
guide bar (See Fig. 53).Repeat this process the entire
width of stock.
Caution:
e Long o-set fence is ONLY used to make the rst
cut, DO NOT use for any other cut. Doing so may result
in injury.
Fig.52
Fig.53
keep side pressure
against guide bar
Your completed stock should resemble the photograph
shown below in Fig. 54
Fig.54
Assemble the Sliding Double Dovetail:
The joints should have a smooth - sliding t (See Fig.
55). If you have to force the joint together with a mal-
let, it may result in splitting your stock. To loose of a t
may produce wobbling and a week joint. There are two
ways to adjust the t of this joint if needed. First adjust
the fence as shown on page #6. Second adjust the bit, if
the joint is too loose, you will slightly raise the dovetail
router bit. If the joint is too tight, you will slightly lower
the router bit.
Fig.55

18 Peachtree Woodworking
Fine Woodworking Accessories
P.O. Box 921487
Norcross GA, 30010
Shop Notes:

19
Peachtree Woodworking
Fine Woodworking Accessories
P.O. Box 921487
Norcross GA, 30010
Project Notes:

20 Peachtree Woodworking
Fine Woodworking Accessories
P.O. Box 921487
Norcross GA, 30010
Shop Notes:
When making this joint, the center double dovetail
will not align to the outside edge and may need to be
trimmed or sanded ush. An easy rule for adjusting the
t of a dovetail joint is; heighten the bit to tighten the
joint, lower the bit to loosen the joint ( highty - tighty,
lower - loosey).
Cutting larger stock:
When cutting long, wide stock, the f-clamps we use
to use to hold our Multi-joint™to our router table will
interfere with the cut. After you have set-up the fence,
drill and counter sink through the fence and table top,
and secure the Multi-joint™platform with screws. It is
also recommended to support wider stock that is not
resting on the platform.
Dovetail Joint Not Fitting:
In most cases this is caused by the router bit not being
set at the correct height. Heighten the bit to tighten the
joint, lower the bit to loosen the joint.
Edges Not Flush:
If the edges of the joint are not ush, or the ngers /
dovetails are not lining up, this is caused by the space
between the router bit and the fence are not correct. Fol-
low the instructions on page #6to adjust the fence.
Router Bits:
Keep in mind the Multi-Joint™relies on the router bit to
match the UHMW bar of the fence. A router bit that has
been sharpened or is dull, may be slightly smaller. This
can effect the alignment of any joint.
Multi-Joint™Spacing System
The Peachtree Multi-Joint™Spacing System is one
of the most versatile jigs available. In this manual we
have outlined several different types of joints as well as
thickness stock that can be made. This manual is also
dotted with our "shop notes" to make things just a little
easier for you. The possibilities that can be applied are
virtually endless. Thank you for your purchase and we
hope you enjoy your brand new
Multi-Joint™Spacing System!
Peachtree Multi-Joint™Spacing System.
For accessory router bits, visit us online at
www.ptreeusa.com or call us toll free at:
1-888-512-9069
Multi-joint tips:
Sliding Dovetail 1/4" box joint 3/8" box joint 1/2" box joint
Create joints like these with the
spacing system
™
Table of contents
Other Peachtree Woodworking Supply Tools manuals
Popular Tools manuals by other brands

Chicago Pneumatic
Chicago Pneumatic CP 0016 Safety and operating instructions

ReelCraft
ReelCraft 30000 Series Operating instructions and parts list

Jiffy
Jiffy Ice Drill 2-Cycle operating manual

Parkside
Parkside 373204 2104 Translation of the original instructions

MG
MG TOP SP P user guide

Cabelcon
Cabelcon CX3 operating instructions