PeakTech 5160 User manual

PeakTech
® 5160
Bedienungsanleitung /
Operation Manual
Lufttemperatur & -Feuchtigkeitsmessgerät /
Air Temperature & Humidity Meter

1. Safety precautions
This product complies with the requirements of the following
directives of the European Union for CE conformity: 2014/30/EU
(electromagnetic compatibility), 2011/65/EU (RoHS).
The following safety precautions must be observed before
operation. Damages resulting from failure to observe these safety
precautions are exempt from any legal claims whatever:
* Comply with the warning labels and other info on the
equipment.
* Do not subject the equipment to direct sunlight or extreme
temperatures, humidity or dampness.
* Do not subject the equipment to shocks or strong vibrations.
* Do not operate the equipment near strong magnetic fields
(motors, transformers etc.).
* Keep hot soldering irons or guns away from the equipment.
* Allow the equipment to stabilize at room temperature before
taking up measurement (important for exact measurements).
*Replace the battery as soon as the battery indicator “ ”
appears. With a low battery, the meter might produce false
reading that can lead to electric shock and personal injury.
* Fetch out the battery when the meter will not be used for long
period.
* Periodically wipe the cabinet with a damp cloth and mid
detergent. Do not use abrasives or solvents.
* Do not operate the meter before the cabinet has been closed
and screwed safely as terminal can carry voltage.
* Do not store the meter in a place of explosive, inflammable
substances.
* Do not modify the meter in any way.
* Opening the equipment and service- and repair work must only
be performed by qualified service personnel.
* Measuring instruments don’t belong to children hands.
-10-

Cleaning the cabinet
Clean only with a damp, soft cloth and a commercially available
mild householder cleanser. Ensure that no water gets inside the
equipment to prevent possible shorts and damage to the
equipment.
Introduction
This newly developed instrument measures the current humidity,
as well as the current air temperature installed a set of sensors for
fast and accurate evaluation of the measurement results.
2. Features
►3 -digit 10mm LCD display (max. 999)
►Automatic backlight
►Humidity measurement in %R. H.
►Air temperature in °C or °F
►Fast response time of the sensor
►Rugged and compact housing design
►Data hold
-11-

3. Specifications
Display
LCD with automatic backlight
Measurement
Range
R.H.:
Temp. :
10% ~ 99%
-10°C ~ 50°C
(14°F ~ 122°F)
Resolution:
R.H.:
Temperatur:
0.1 %RH
0,1 °C
Accuracy
%R.H.:
Temperatur:
+/- 5,0%
(at 25°C; 10~30%RH)
+/- 3,0%
(at 25°C; 30~99%RH)
+/- 1°C
(+/- 2.6°F)
Measuring Rate
2 x / second
Low Battery
Indication
Symbol “ “ shown in the display, if
battery voltage is low
Auto Power Off
After 10 Minutes
DATA-HOLD
Holds measurement value in display
Power Supply
9V battery, 6F22 or equivalent
Operating
Environment
-10°C ~ 40°C; <99% RH
Storage
Environment
-10°C ~ 60°C; <70% RH
Size (WxHxD)
55 x 145 x 35mm
Weight
158g
-12-

4. Panel Description
1) Temperature / Humidity Sensor
2.) ON - Power switch
3.) Temp. / Humidity - button
4.) HOLD - button
5.) Brightness sensor
6.) Measured value display
7.) Battery compartment (rear)
8.) Thread for tripod (rear)
-13-
5
2
4
7
8
3
6
1

4.1. Display Symbols
This icon indicates the battery status. An empty
battery must be replaced as soon as possible and
affect the measurement results negatively
HOLD
Data-Hold: Keeps the current value in display
Percent (unit of Relative Humidity)
Celsius degree
Fahrenheit degree
5. Operating Instruction
1. Press the "ON" button to turn on the unit.
2. Select the desired measurement function:
Select the measurement function with the option key (3) on the
device’s side.
The three possible measurement functions are:
% R.H. (Relative Humidity)
%
°C Temperature Measurement
°F Temperature Measurement
After the desired measurement function is selected, the device
automatically switches from the selection mode to measuring mode
and you can start your measurements.
-14-

6. Performing Measurement
General:
1. Temperature measurement:
The display shows the air temperature in °C/°F.
2. Humidity measurement:
The display shows the relative humidity in %RH.
Humidity refers to the amount of water vapor at room or
ambient air.
3. To "freeze" the current reading press the "HOLD" - button.
The display stops updating the measured values and the
"HOLD" - symbol appears.
Automatic Power Off:
If the device is no longer used, it will automatically turn off after 10
minutes.
Backlight:
This unit features an automatic backlight, which activates the
backlight when the light sensor on the front panel detects low light
conditions.
-15-

7. Battery Replacement
If the sign “ ” appears on the LCD display, it indicates that the
battery should be replaced.
Remove the back cover and open the battery compartment.
Replace the exhausted battery with new battery.
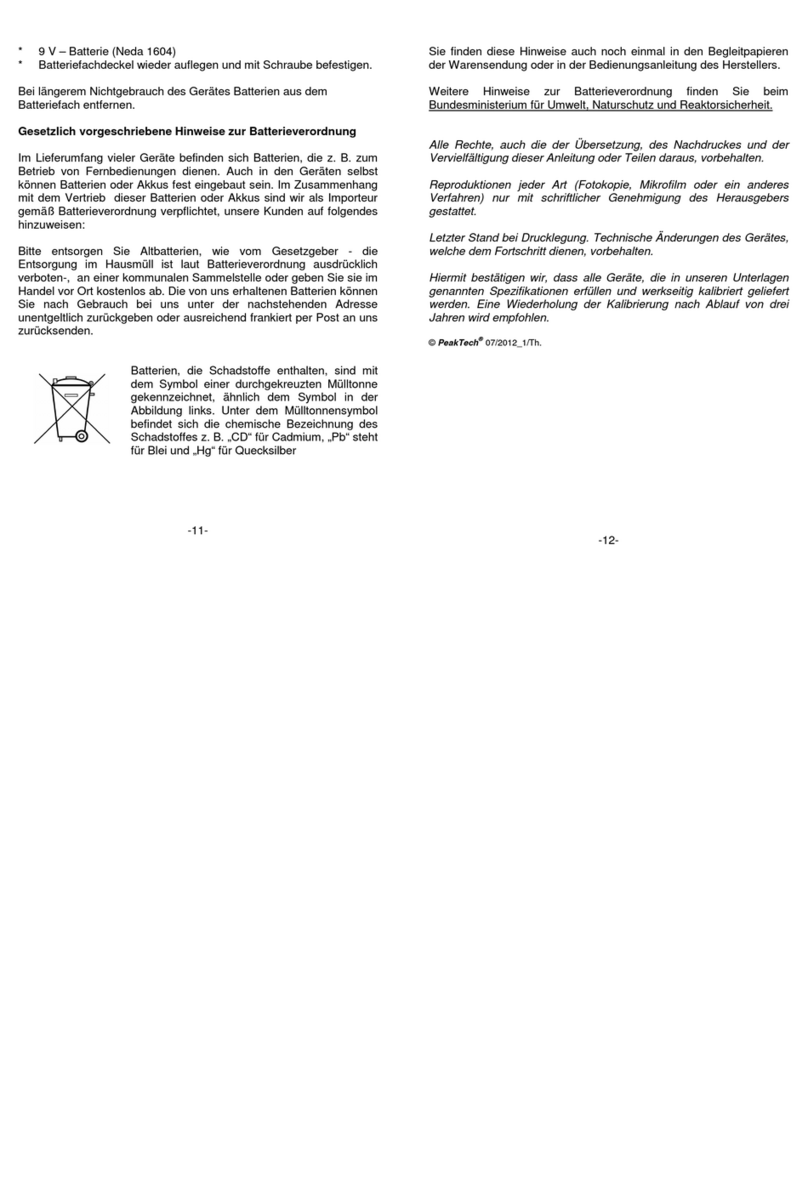
Batteries, which are used up dispose duly. Used up batteries are
hazardous and must be given in the - for this being supposed -
collective container.
NOTE
1. Keep the instrument dry.
2. Keep the probes clean.
3. Keep the instrument and battery out of reach of infant and
child.
4. When the symbol ” ” appears, the battery is low and should
be replaced immediately. When you install battery, ensure the
polarity connections are correct. If you will not use the
instrument in a long period of time, remove the battery.
-16-

7.1. Notification about the Battery Regulation
The delivery of many devices includes batteries, which for example
serve to operate the remote control. There also could be batteries
or accumulators built into the device itself. In connection with the
sale of these batteries or accumulators, we are obliged under the
Battery Regulations to notify our customers of the following:
Please dispose of oldbatteries at a council collection pointor return
them to a local shop at no cost. The disposal in domestic refuse is
strictly forbidden according to the Battery Regulations. You can
return used batteries obtained from us at no charge at the address
on the last side in this manual or by posting with sufficient stamps.
Contaminated batteries shall be marked with a symbol consisting
of a crossed-out refuse bin and thechemical symbol (Cd, Hg or Pb)
of the heavy metal which is responsible for the classification as
pollutant:
1. "Cd" means cadmium.
2. "Hg" means mercury.
3. "Pb" stands for lead.
-17-

All rights, also for translation, reprinting and copy of this manual
or parts are reserved.
Reproductions of all kinds (photocopy, microfilm or other) only by
written permission of the publisher.
This manual is according the latest technical knowing. Technical
alterations reserved.
We herewith confirm that the unit is calibrated by the factory
according to the specifications as per the technical specifications.
We recommend to calibrate the unit again, after one year.
© PeakTech®08/2021 MP/Ehr.

PeakTech
®5165
Bedienungsanleitung /
Operation Manual
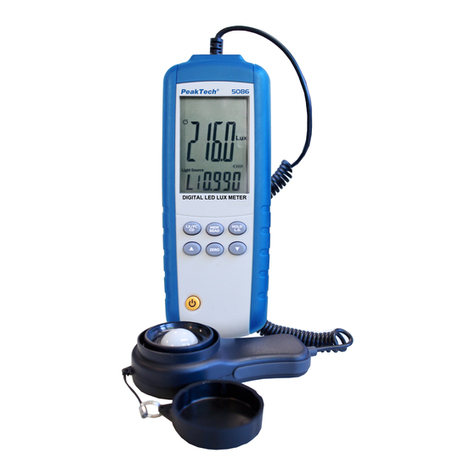
Digital Lux Meter

1. Safety precautions
This product complies with the requirements of the following
directives of the European Union for CE conformity: 2014/30/EU
(electromagnetic compatibility), 2011/65/EU (RoHS).
The following safety precautions must be observed before
operation. Damages resulting from failure to observe these safety
precautions are exempt from any legal claims whatever:
* Comply with the warning labels and other info on the
equipment.
* Do not subject the equipment to direct sunlight or extreme
temperatures, humidity or dampness.
* Do not subject the equipment to shocks or strong vibrations.
* Do not operate the equipment near strong magnetic fields
(motors, transformers etc.).
* Keep hot soldering irons or guns away from the equipment.
* Allow the equipment to stabilize at room temperature before
taking up measurement (important for exact measurements).
* Replace the battery as soon as the battery indicator “BAT”
appears. With a low battery, the meter might produce false
reading that can lead to electric shock and personal injury.
* Fetch out the battery when the meter will not be used for long
period.
* Periodically wipe the cabinet with a damp cloth and mid
detergent. Do not use abrasives or solvents.
* Do not operate the meter before the cabinet has been closed
and screwed safely as terminal can carry voltage.
* Do not store the meter in a place of explosive, inflammable
substances.
* Do not modify the meter in any way.
* Opening the equipment and service- and repair work must only
be performed by qualified service personnel.
*Measuring instruments don’t belong to children hands.
-11-

Cleaning the cabinet
Clean only with a damp, soft cloth and a commercially available
mild householder cleanser. Ensure that no water gets inside the
equipment to prevent possible shorts and damage to the
equipment.
Introduction
This newly developed instrument measures the current humidity,
as well as the current air temperature installed a set of sensors for
fast and accurate evaluation of the measurement results.
2. Features
►3 1/2-digit 10mm LCD display (max. 1999)
►Automatic backlight
►Lux measurements up to 200,000 lux
►FC (lm / ft²) measurements up to 20000 FC
►Fast measurement rate of 1.5 measurements / second
►Rugged and compact housing design
►Data hold
-12-

3. Specifications
Display
LCD with automatic backlight
Measurement
Range
2000 Lux
2000 to 20000 Lux
20000 to 200000 Lux
Resolution:
1 Lux (2000)
10 Lux (20000)
100 Lux (200000)
Sample rate
1.5 x Second, typically
Accuracy
< 10k Lux
+/- 4 % rdg.
> 10k Lux
+/- 5 % full Scale
calibrated to standard incandescent
lamp at color temperature 2.856 K
Low Battery
Indication
Symbol “ “ shown in the display
Auto Power Off
After 10 Minutes
DATA-HOLD
Holds measurement value in display
Power Supply
9V battery, 6F22 or equivalent
Operating
Environment
0°C ~ 50°C; <80% RH
Storage
Environment
-10°C ~ 50°C; <70% RH
Size (WxHxD)
55 x 155 x 35mm
Weight
120g
-13-

4. Panel Description
1) Light Sensor / Photo Diode
2.) ON - Power switch
3.) Range Switch
4.) MAX/MIN, HOLD-Switch
5.) Brightness sensor (backlight)
6.) Measured value display
7.) Battery compartment (rear)
8.) Thread for tripod (rear)
-14-
6
2
3
1
4
7
8
5

4.1. Display Symbols
This icon indicates the battery-charge status. An
empty battery must be replaced as soon as possible
and affect the measurement results negatively
HOLD
Data-Hold: Keeps the current value in display
MAX
Display keeps highest maximum value
MIN
Display keeps the lowest minimum value
200
2000
20000
200000
Selected measurement range
LUX
Measurement unit of the luminosity in Lux
FC
Measurement unit of the luminosity in Lumen /
Square Feet (lm/ft²)
5. Operating Instruction
1. Press the "ON" button once to turn on the unit.
2. Select the desired measurement range with the option key (3)
on the device’s side.
The three possible measurement ranges are:
Range
Display
resolution
0 … 2000
LUX
1 Lux
20000
x10 LUX
10 Lux
200000
x100 LUX
100 Lux
After the desired measuring range is selected, you can start your
measurements. If the indicating overflow "I" appears, the
luminosity is higher than the selected measuring range. If
necessary, switch the measuring range again until a measurement
is displayed.
-15-

5.1 Messurment in lm/ft²
1. Press and hold the "Range" button while pressing the "ON"
button once to switch the device on and changeto lm/ft² at the
same time.
2. Select the measuring range with the RANGE-key (3) on the
side of the unit
The three possible measurement ranges are:
Range
Display
Resolution
0 … 200
FC
0.1 FC
2000
x10 FC
1 FC
20000
x100 FC
10 FC
Note: 1 lm/ft² is approx. 10.764 Lux
After the desired measuring range is selected, you can start your
measurements. If the indicating overflow "I" appears, the luminosity
is higher than the selected measuring range. If necessary, switch
the measuring range again until a measurement is displayed.
To switch back to the LUX mode, turn the power off again, hold
down the RANGE button again and turn the unit back on by
simultaneously pressing the ON key.
-16-

6. Performing Measurement
General:
1. To "freeze" the current reading, press "MAX / MIN - HOLD"
button. The display stops updating the measured values and
displays the "HOLD" symbol.
2. Press the "MAX / MIN - HOLD" button again to switch to the
maximum value mode. The meter is now renewed only if the
current measuredvalue exceeds the highest previous reading.
3. Press the "MAX / MIN - HOLD" button again to switch to the
minimum value mode. The meter is now renewed only if the
current measured value is lower than the previous reading.
4. Press the button again to switch back to the normal
measurement mode.
Automatic Power Off
If the device is no longer used it automatically turns off after 10
minutes.
Backlight
This unit features an automatic backlight, which activates when the
light sensor on the front panel detects low light conditions.
-17-

7. Battery Replacement
If the sign “ ” appears on the LCD display, it indicates that the
battery should be replaced.
Remove the back cover and open the battery compartment.
Replace the exhausted battery with new battery.
Batteries, which are used up dispose duly. Used up batteries are
hazardous and must be given in the - for this being supposed -
collective container.
NOTE
1. Keep the instrument dry.
2. Keep the probes clean.
3. Keep the instrument and battery out of reach of infant and
child.
4. When the symbol ” ” appears, the battery is low and should
be replaced immediately. When you install battery, ensure the
polarity connections are correct. If you will not use the
instrument in a long period of time, remove the battery.
-18-

7.1. Notification about the Battery Regulation
The delivery of many devices includes batteries, which for example
serve to operate the remote control. There also could be batteries
or accumulators built into the device itself. In connection with the
sale of these batteries or accumulators, we are obliged under the
Battery Regulations to notify our customers of the following:
Please dispose of oldbatteries at a council collection pointor return
them to a local shop at no cost. The disposal in domestic refuse is
strictly forbidden according to the Battery Regulations. You can
return used batteries obtained from us at no charge at the address
on the last side in this manual or by posting with sufficient stamps.
Contaminated batteries shall be marked with a symbol consisting
of a crossed-out refuse bin and thechemical symbol (Cd, Hg or Pb)
of the heavy metal which is responsible for the classification as
pollutant:
1. "Cd" means cadmium.
2. "Hg" means mercury.
3. "Pb" stands for lead.
-19-
Other manuals for 5160
1
Table of contents
Other PeakTech Measuring Instrument manuals
PeakTech
PeakTech 9020 User manual

PeakTech
PeakTech 9010 User manual

PeakTech
PeakTech 5310 User manual

PeakTech
PeakTech 5035 User manual

PeakTech
PeakTech 2510 User manual

PeakTech
PeakTech 9015 User manual

PeakTech
PeakTech 5160 User manual

PeakTech
PeakTech 1235 User manual

PeakTech
PeakTech 5201 User manual

PeakTech
PeakTech 9017 User manual

PeakTech
PeakTech 2705 User manual

PeakTech
PeakTech 5185 User manual

PeakTech
PeakTech 4145 User manual

PeakTech
PeakTech 5150 User manual

PeakTech
PeakTech 5307 User manual

PeakTech
PeakTech 3432 User manual

PeakTech
PeakTech 2790 User manual
PeakTech
PeakTech 5305 A User manual

PeakTech
PeakTech 5225 User manual

PeakTech
PeakTech 9022 User manual