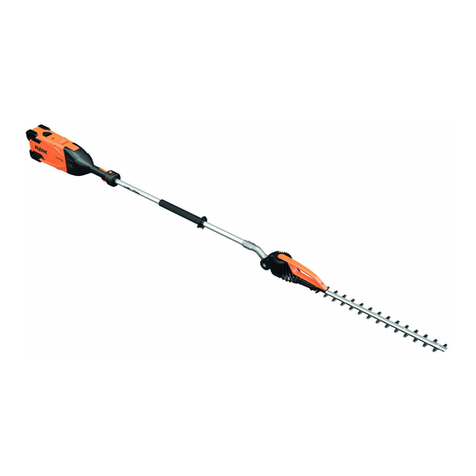
pellenc HELION POLE TELESCOPIC User manual

pellenc s.a.
Route de Cavaillon
B.P. 47
84122 PERTUIS cedex
(France)
Tel : +33(0)4 90 09 47 00 Fax : +33(0)4 90 09 64 09
www.pellenc.com
54_74976_J - 12/2014
POLE
TELESCOPIC
USER GUIDE
ENG
Translation of the
original user guide
CONTENTS:
READ THE USER GUIDE CAREFULLY BEFORE USING THE TOOL
• A hedge trimmer without blade
• A power cord for the battery
• A torx screwdriver
• A user guide
• 1 armband
• 3 spare screws (cutting head)
• The warranty card
• 2 carrying kits (Helion Telescopic only)

2
SAFETY INSTRUCTIONS .....................................................................3
GENERAL SAFETY INSTRUCTIONS FOR THE TOOL..................................................................4
SAFETY WARNING FOR THE HEDGE TRIMMER .....................................................................5
SAFETY MEASURES FOR THE CHARGER AND THE BATTERY .........................................................5
SAFETY INDICATIONS .......................................................................6
SAFETY EQUIPMENT ...........................................................................................6
SAFETY INDICATIONS ..........................................................................................6
ACCESSORIES SUPPLIED WITH THE BLADE .......................................................................6
DESCRIPTION AND TECHNICAL CHARACTERISTICS “POLE” ......................................7
TECHNICAL CHARACTERISTICS ..................................................................................7
DESCRIPTION AND TECHNICAL CHARACTERISTICS “TELESCOPIC”. . . . . . . . . . . . . . . . . . . . . . . . . . . . . . . . 8
TECHNICAL CHARACTERISTICS ..................................................................................8
PUTTING THE TOOL INTO SERVICE ............................................................9
USING THE HANDLE TRIGGERS ..................................................................................9
POSITION OF THE FRONT HANDLE ...............................................................................9
ANGLE OF THE CUTTING HEAD ..................................................................................9
ADJUSTING THE TELESCOPIC POLE .............................................................................10
STARTING ...................................................................................................11
HOLDING THE TOOL...........................................................................................11
STARTING AND USE ........................................................................12
SPEED SELECTOR ............................................................................................12
TRIMMER BLADE PROTECTION .................................................................................12
CHOICE OF TRIMMER BLADE ...................................................................................12
SERVICING................................................................................13
SERVICING SCHEDULE ........................................................................................13
CLEANING ...................................................................................................14
PELLENC TOOL MAINTENANCE RECOMMENDATIONS ..............................................................14
GREASING THE TRIMMER BLADE REDUCTION GEAR (LEVEL 1) ......................................................15
TIGHTENING THE BLADES (LEVEL 1) .............................................................................15
SHARPENING THE BLADES (LEVEL 2) ............................................................................15
LUBRICATING THE BLADES (LEVEL 1) ............................................................................16
ACCESSORIES AND CONSUMABLES .............................................................................16
STORAGE OUT OF SEASON ....................................................................................16
REPLACING THE TRIMMER BLADE...............................................................................17
INCIDENTS ................................................................................18
«PELLENC SA» TERMS OF WARRANTY AND NON-RESPONSIBILITY CLAUSE .......................20
"EC" DECLARATION OF CONFORMITY ........................................................21
Table of contents

3
INTRODUCTION
ENVIRONMENTAL PROTECTION
Your equipment comprises numerous materials which can be valorised or recycled. Entrust
these to your reseller or to an approved service centre so that they can be processed.
Comply with the regulations in force in your country as concerns environmental protection
associated with your activity.
All through this user guide you will nd advisory notes and information entitled: REMARK, CAUTION /
WARNING.
A REMARK provides additional information, claries a point or explains a step to be followed in detail.
The CAUTION and WARNING advisories are used to dene a procedure which, if neglected or incorrectly
performed, may lead to serious damage to the equipment and/or personal injury.
This advisory:
G
indicates that if the procedures or instructions are not complied with, any damage will not
be covered by the warranty and the owner will be responsible for the repair costs.
Safety indications are also given on the tool; they remind you of the safety precautions to be taken. Identify
and read these indications before using the tool. Immediately replace any indications that may become
partially illegible or deteriorated.
Refer to the «SAFETY INDICATIONS» heading in order to identify the location of the safety
indications on the tool.
No part of this manual may be reproduced without the written consent of PELLENC S.A.. The technical
characteristics and the illustrations given in this manual are for information purposes and are in no way
contractual. PELLENC S.A. reserves the right to make any modication or improvement to its products
as deemed necessary without informing customers already in possession of a similar model. This manual
forms an integral part of the tool and must accompany the tool if it changes hands.
SAFETY INSTRUCTIONS
You must read THE WHOLE of this user guide before using the tool or before carrying out
servicing operations.
Comply scrupulously with the instructions and illustrations given in this document.
KEEP THESE INSTRUCTIONS
This manual contains important information and operating instructions for the following tool
: HELION Pole & Telescopic

4
SAFETY INSTRUCTIONS
• The HELION hedge trimmer is a professional tool reserved exclusively for trimming bushes and hedges.
• PELLENC S.A. declines all responsibility in case of damage caused by improper use and use other than
for which it is intended.
• PELLENC S.A. also declines all responsibility in case of damage caused by the use of non-genuine parts
or accessories.
GENERAL SAFETY INSTRUCTIONS FOR THE TOOL
CAUTION Read all the safety measures and all the instructions.
Retain all the safety measures and instructions for later reading.
Work area safety
a. Keep the work area clean and well lit.
b. Do not use electric tools in an explosive atmosphere, for example in the presence of ammable
liquids, gases or dust.
c. Keep children and persons present away when using the tool.
Electrical safety
a. The plugs of the electric tool must be adapted to the base. Never modify the plug in any way
whatsoever. Do not use adaptors with grounded tools.
b. Avoid any body contact with grounded surfaces such as pipes, radiators, cookers and refrigerators.
c. Do not expose tools to rain or damp conditions.
d. Do not misuse the power cord. Never use the power cord to carry, pull or disconnect the tool. Keep
the power lead away from heat, lubricant, sharp edges or moving parts.
e. When using a tool outdoors, use an extension adapted to outdoor use.
f. If you must use a tool in a damp place, use power supply protected by a residual current device
(RCD).
Personal safety
a. Remain vigilant, watch what you are doing and use common sense when using the tool. Do not use a
tool if you are tired or under the inuence of drugs, alcohol or medication.
b. Wear safety equipment. Always wear eye protection.
c. Avoid any untimely starting of the device. Make sure the switch is in the off position before connecting
the tool to the mains and/or battery pack, picking it up or carrying it.
d. Remove any adjustment key before starting the tool.
e. Do not rush. Adopt a suitable position and remain balanced at all times.
f. Wear appropriate clothing. Do not wear loose clothing or jewellery.
g. Keep hair, clothing and gloves away from moving parts.
h. If systems are provided to connect dust extraction and recovery equipment, make sure these
systems are connected and properly used.
This appliance is not intended for use by persons (including children) with reduced physical,
sensory or mental capabilities, or lack of experience and knowledge, unless they have been given
supervision or preliminary instructions by a person responsible for their safety.
KEEP THESE INSTRUCTIONS

5
56_10_016A
SAFETY MEASURES FOR THE CHARGER AND THE BATTERY
Refer to the Pellenc tools battery manual.
SAFETY INSTRUCTIONS
SAFETY WARNING FOR THE HEDGE TRIMMER
1– Keep the cutting blade away from all parts of your body. Do not remove the cut material or hold the
material to be cut when the blades are moving. Make sure that the switch is closed when removing the
stuck material.
2– Carry the hedge trimmer by the handle with the cutting blade off. Always t the protective sheath on the
cutting device during transport or storage of the hedge trimmer.
3– Hold the tool by the isolated gripping areas only because the cutting blade can get in contact with the
hidden wiring or the own hedge trimmer power cord.
4– Keep the cable away from the cutting area.
WARNING:
Before working on the tool, check that the On / Off switch is in the off
position «0» and disconnect the battery power lead.
Tool usage and maintenance
a. Do not force the tool. Use a tool suited to your application.
b. Do not use the tool if the switch does not allow it to be switched on and off.
c. Disconnect the plug of the power supply source and/or battery pack from the tool prior to any
adjustment, change of accessories or before putting the tool away.
d. When not in use, keep tools out of reach of children, and do not allow persons to use the tool if they
do not know how to use it and if they have not read these instructions.
e. Comply with tool servicing instructions. Check that the moving parts are not misaligned or jammed,
that there are no broken parts or that there is no other condition which could affect the operation of
the tool. In the event of damage, have the tool repaired before using it.
f. Keep the cutting components sharp and clean.
g. Use the tool, accessories, blades etc., in accordance with these instructions, taking into account the
working conditions and the work to be performed.
Use of battery-operated tools and usage precautions.
a. Only recharge using the charger specied by the manufacturer.
b. Only use the tools with specically designated battery packs.
c. When a battery pack is not used, store it away from other metal objects such as paper clips, coins,
keys, nails, screws or other small items which can form a connection from one terminal to another.
d. In poor conditions, liquid can be ejected from the battery; avoid any contact. In the event of accidental
contact, clean with water. If the liquid gets into your eyes, seek medical help.
Maintenance and upkeep
a. Have the tool serviced by a qualied repairer using only identical spare parts.

6
1 5
2 6
37
48
54_08_038C
1
2
3
4
5
6
7
SAFETY INDICATIONS
SAFETY EQUIPMENT
Protective equipment Wearing is
1 Helmet Recommended
2 Visor Recommended
3 Hard-wearing gloves Mandatory
4 Safety footwear Recommended
5 Ear protection Mandatory
6 Safety goggles Mandatory
7 Safety jacket or over-sleeves Recommended
8 Work trousers Recommended
SAFETY INDICATIONS
1– LwA sound power level guaranteed.
2– Read the user guide.
3– Goggles and ear defenders are compulsory.
4– Gloves are compulsory.
5– Risk of burns (motor).
6– Electrically conductive materials. Stay at least 10 meters (33 ft) away from all electrical sources.
7– Do not expose to rain.
- One grease tube
- 3 x M5x30 screws
- Protective sheath
- Assembly instructions
- The blade's certicate of conformity
ACCESSORIES SUPPLIED WITH THE BLADE

7
54_10_002B
1
2
3
79
6
5
4
11
10
8
DESCRIPTION AND TECHNICAL CHARACTERISTICS “POLE”
TECHNICAL CHARACTERISTICS
1– Handle
2– Starting trigger
3– Safety trigger
4– Speed selector
5– Power ON light and speed indicator
6– Front handle
7– Motor
8– Pole
9– Blade guide and blades
10– Anti-kickback tting
11– Head orientation knob
Pole
Model HP 27 HP 51 HP 63 HP 75 HP 63 D
Power 1200 Watts
Weight 3.4 Kg (7.5 lb) 3.6 Kg (7.9 lb) 3.7 Kg (8.2 lb) 3.8 Kg (8.4 lb) 3.8 Kg (8.4 lb)
Dimensions (L x w x H) in mm 1425
*85*130
1665
*85*130
1785
*85*130
1905
*85*130
1785
*145*130
Useful cutting length / Blade guide 270 mm 510 mm 630 mm 750 mm 630 mm
Distance between teeth 33 mm
Tooth height 24 mm
Blade speed 3200 to 3800 strokes/mn
Tilting cutting head 130° (-45° / +85°)
Working capacity (time) According to use and battery type
Vibration emission value as per EN 60745-2-15 :2009
handle
ah = 5,5 m/s²
uncertainty
Kd = 1,5 m/s²
Determining the sound levels and vibration rates is based on the operating conditions at the maximum nominal rating.
Maximum A-weighted sound pressure level (ref. 20 µPa) at the position of the user LpA = 87 dB(A) K = 3 dB(A)
C-weighted peak sound pressure (ref. 20 µPa) at the position of the user LpC < 130 dB(C)
Values dened as per sound measurement standards NF EN ISO 11201 and NF EN ISO 3744.
Symbol Value Unit Reference Comment
LWAm 95,3 dB(A) 1 pW Measured sound power level
LWAg 96 dB(A) 1 pW Guaranteed sound power level
The recording of the measured sound power level and of the guaranteed sound power level has been performed according to a
procedure in accordance with directive 2000/14/CE appendix V.

8
54_14_001A
1
2
3
79
6
5
4
8
11 12
10
DESCRIPTION AND TECHNICAL CHARACTERISTICS “TELESCOPIC”
TECHNICAL CHARACTERISTICS
1– Handle
2– Starting trigger
3– Safety trigger
4– Speed selector
5– Power ON light and speed indicator
6– Front handle
7– Motor
8– Pole lock
9– Blade guide and blades
10– Anti-kickback tting
11– Pole
12– Head orientation knob
Telescopic
Model HT 27 HT 51 HT 63 HT 75 HT 63 D
Power 1200 Watts
Weight 3.8 Kg (8.4 lb) 4.2 Kg (8.8 lb) 4.3 Kg (9 lb) 4.5 Kg (9.3 lb) 4.4 Kg (9.3 lb)
Dimensions (L x w x H) in mm 1610
*85*130
1850/2300
*85*130
1970/2420
*85*130
2090/2540
*85*130
1970/2420
*145*130
Useful cutting length / Blade guide 270 mm 510 mm 630 mm 750 mm 630 mm
Distance between teeth 33 mm
Tooth height 24 mm
Blade speed 3200 to 3800 strokes/mn
Tilting cutting head 130° (-45° / +85°)
Working capacity (time) According to use and battery type
Vibration emission value as per EN 60745-2-15 :2009
handle
ah = 3,9 m/s²
uncertainty
Kd = 1,5 m/s²
Determining the sound levels and vibration rates is based on the operating conditions at the maximum nominal rating.
Maximum A-weighted sound pressure level (ref. 20 µPa) at the position of the user LpA = 83 dB(A) K = 3 dB(A)
C-weighted peak sound pressure (ref. 20 µPa) at the position of the user LpC < 130 dB(C)
Values dened as per sound measurement standards NF EN ISO 11201 and NF EN ISO 3744.
Symbol Value Unit Reference Comment
LWAm 91,5 dB(A) 1 pW Measured sound power level
LWAg 96 dB(A) 1 pW Guaranteed sound power level
The recording of the measured sound power level and of the guaranteed sound power level has been performed according to a
procedure in accordance with directive 2000/14/CE appendix V.

9
54_08_037A
1
2
1
2
3
54_08_021A
56_10_016A
G
G
G
54_13_003A
3
1
2
1
PUTTING THE TOOL INTO SERVICE
A. Press the safety trigger (1) with the palm of your hand.
B. Press the starting trigger (2).
C. Release the starting trigger (2) to stop the tool motor.
USING THE HANDLE TRIGGERS
WARNING:
Check that the safety devices operate correctly
before starting work.
POSITION OF THE FRONT HANDLE
A. Loosen the locking thumb-wheel.
B. Position the head in the desired working position.
C. Retighten the locking thumb-wheel.
ANGLE OF THE CUTTING HEAD
WARNING:
Never work without the locking thumb-wheel fully
tightened.
WARNING: Never disable the tool safety devices.
ASSEMBLY:
• Install the adjuster knob (2) and front handle (3) with the
2 delta (1).
• Lock the adjustment wheel (2) to block the position of
the front handle on the tool.
DISASSEMBLY:
• Unlock the adjuster knob (2).
• Unscrew the 2 delta (1) and remove the front handle (3)
and adjuster knob (2).

10
!
51_11_001A
ADJUSTING THE TELESCOPIC POLE
Release the locking thumb-wheel.
Adjust the pole to the desired length.
Keep the head of the hedge trimmer in line with the handle.
Fully tighten the locking thumb-wheel.
Always make sure that the switch is in the OFF
position «0» and that the battery is disconnected
before adjusting the pole.
PUTTING THE TOOL INTO SERVICE

11
54_08_013C
2
1
54_08_014A
G
G
PUTTING THE TOOL INTO SERVICE
A. Put the tool into its working position. Remove the protector
from the trimmer blade.
B. Set the Pellenc tool battery ON/OFF switch to the ON
position «I».
From this moment the tool is supplied with electrical power and
it is ready to operate.
C. Press the starting trigger (1) and the safety trigger (2).
The trimmer blade then operates as long as you keep the
starting trigger (1) pressed.
STARTING
WARNING! Never cut anything other than
vegetation.
CAUTION:
Blade run-in must be carried out for 1 minute off-load at each change-over.
Check the tightness of the trimmer blade after running in.
HOLDING THE TOOL
CAUTION:
Never disconnect the electrical lead from the battery without checking that the ON/OFF switch is
in the OFF position «0».
Your tool is equipped with a Pellenc-designed electric motor. This motor keeps the speed constant
off load and when working.
Let the hedge trimmer work without over-forcing.
Always start the motor before bringing the trimmer blade into contact with the wood.
If at least 1 light on the handle is lit, the tool is
suppied with electrical power.
1– Hold the tool by the rear and front handles and check
that nothing is touching the trimmer blade.
2– Attach the power cord to the arm using the armband
supplied.
3– The hedge trimmer is in its starting position.

12
54_08_036A
x1 x2
x3 x4
54_08_022A
56_10_016A
54_10_001B
56_10_016A
STARTING AND USE
SPEED SELECTOR
TRIMMER BLADE PROTECTION
CHOICE OF TRIMMER BLADE
Reduce the speed for a longer working capacity or when at least one light fl ashes.
The choice of trimmer blade depends on the desired
work as regards cutting quality.
H27 / H51 /
H63 / H75
Upkeep and ne trimming
H63D Increased hedge trimming cleanliness
There exist four blade lengths and a single rake blade with
baf e plate.
Fit the trimmer blade protector when transporting,
adjusting, handling and storing the tool.
Your tool is equipped with a speed selector system. The
speed selector is located on the handle and allows you to
optimize the desired quality of work.
Four lights located on the handle indicate the selected
speed level.
These lights may fl ash when the temperature of the tool
approaches the safe temperature limit.
1 light lit Speed 1 (3200 strokes / mn)
2 lights lit Speed 2 (3400 strokes / mn)
3 lights lit Speed 3 (3600 strokes / mn)
4 lights lit Speed 4 (3800 strokes / mn)

13
SERVICING
SERVICING SCHEDULE
Difculty level:
1 = Can be performed by the user
2 = Can be performed by approved distributor
Elements concerned Operations
Frequency
Difculty Notes
Prior to each
use
After each
use
Every 50
hours
When
necessary
General appearance
Visual inspection X X 1
Cleaning X 1
Blade
Cleaning X 1
Very important Directly affects consumption
(autonomy).
Use PELLENC cleaner ref. 73974
Lubrication X X 1
Screws X 1 Blade screws: 3.0 N.m
3 xing screws: 4.0 N.m (5.0 N.m max)
Sharpening X 2 45°
Adjustment X 2 Height of the posts
Reduction gear Greasing X 1 20g max. of PELLENC grease ref. 74588
(supplied with the cutter bar) or ref: 115174
Handles / Triggers Operation X 1
Hardware (excluding
blade) Tightening X 1
Battery Please refer to the battery operating instructions

14
54_08_016B
54_10_003A
56_10_016A
56_10_016A
G
G
G
SERVICING
Keep your tool clean by cleaning it frequently with a damp
cloth and compressed air. Pay particular attention to the
parts in contact with the wood (blades and guide).
CLEANING
CAUTION:
Never use solvents (Trichlorethylene, White-Spirit, gasoline, etc) to clean the tool.
CAUTION:
The trimmer blade must be cleaned with a
biodegradable PELENC spray product (P/N 73974)
before and after use.
PELLENC TOOL MAINTENANCE RECOMMENDATIONS
• Read the user guide thoroughly before any intervention.
• Disconnect the battery before any intervention.
• Use products recommended by PELLENC.
• Ask you approved PELLENC distributor in case of any
problems.
Frequently clean vegetation residue from the guide pins
REMARK:
Send the hedge trimmer for overhaul every 200 hours or at least once per year.
When the tool is stored, it must be clean and the battery must be charged.
These parts must be replaced as a precautionary measure or at least once a year:
- Protective plate ref. 71297
- Hardware kit ref. 75905
- Anti-rebound bumper, ref 108881
- Strip for cutterbar ref. 115233 (H 51), ref. 115234 (H 63 + H63D) ref. 115235 (H 75).
- Seal, ref. 71306

15
20gr
54_08_017B
54_08_020A
56_10_016A
56_10_016A
56_10_016A
SERVICING
GREASING THE TRIMMER BLADE REDUCTION GEAR (LEVEL 1)
TIGHTENING THE BLADES (LEVEL 1)
SHARPENING THE BLADES (LEVEL 2)
The trimmer blade reduction gear must be greased
after 25 hours of use and every 50 hours.
WARNING! Always disconnect the hedge trimmer
from the battery before working on the blades.
WARNING! Always disconnect the hedge trimmer
from the battery before working on the blades.
Sharpen the blades little but often.
Check the sharpness of the blades regularly during the
rst hours of work in order to determine the necessary
sharpening frequency.
Ensure an angle of 45° on the blade during sharpening.
Unscrew the screw located under the trimmer blade
reduction gear using a Torx 25 screwdriver.
Apply 20 grams of Pellenc grease (P/N 115174).
PELLENC recommends using the grease pump ref.
68518.
Check the tightness of the blades on a regular basis.
Tighten the screws to 3 Nm.
The clearance obtained between the blades must be
between 0.2 and 0.4 millimeters.

16
54_08_018B
X1
X1
X2
X2
1122
3344
5566
88
77
54_13_002B
56_10_016A
G
SERVICING
LUBRICATING THE BLADES (LEVEL 1)
STORAGE OUT OF SEASON
• Make sure the tool is clean when it is stored.
• Make sure the blade is sharp when the tool is stored.
• Make sure the reduction gear is greased when the tool is stored.
• Fit the blade protector during transport and storage.
Lubricate the cutting blades 2 times a day using an oil can.
WARNING:
Never use solvents (Trichlorethylene, White Spirit, petrol etc.) to lubricate the cutting blades.
HELION armband = ref.74338
Harness carrying kit = ref.79297
PELLENC Grease cartridge 400g = ref. 115174
Belt carrying kit = ref.74668
PELLENC biodegradable cleaner = ref. 73974
Counterweight = ref.86669
10.3 m extension = ref. 100994
grease pump = ref. 68518
ACCESSORIES AND CONSUMABLES
COMMENT:
PELLENC recommends using biodegradable chain
oil in compliance with RAL-UZ-48 norm (ref. 85920
or, by default, any oil in compliance with RAL-UZ-48
norm)

17
54_08_039A
54_08_039A
4 Nm
max.
G
SERVICING
REPLACING THE TRIMMER BLADE
WARNING:
Before working on the tool, check that the ON/OFF switch is set to the OFF position «0» and
disconnect the power supply lead from the battery.
Disconnect the power supply lead after moving the switch
to the off position.
Unscrew the 3 screws using a Torx 25 screwdriver.
Fit the desired trimmer blade.
Torque tighten the 3 retaining screws to 4 Nm.
WARNING:
Never use a trimmer blade other than the one specifi ed by PELLENC. Failure to do so will
result in a risk of personal injury.

18
Repaired by
User
Approved PELLENC
distributor
User
Approved PELLENC
distributor
Approved PELLENC
distributor
Approved PELLENC
distributor
Solutions
Press the battery
switch (9)
Change the cord
Recharge the battery
Change electronics
board if the diodes
stay off after turning
on and checking
previous points
Change the trigger or
sensor
Change the
electronics board
Checks
Battery switch (9)
Check the condition of
the cord
Check that the battery
is not completely
discharged
At approved
PELLENC distributor
premises
At approved
PELLENC distributor
premises
At approved
PELLENC distributor
premises
Probable cause
Battery off
The power cord is cut
Battery
Electronics board
A trigger no longer
works
Electronics board
Condition of diodes
Off
Off
On
Condition of battery
on/off switch
0
I
Symptoms
The tool does not start
INCIDENTS

19
Repaired by
User
Approved PELLENC
distributor
Approved PELLENC
distributor
User
User
Stop, then restart the battery and refer to the "Tool does not start" paragraph if necessary.
Solutions
Clean the guide pins
Tighten to 3.0N.m
max.
Change the casng
Reduce blade speed
or pause for a while
Allow the tool to
cool down for
approximately 5
minutes
Checks
Check the condition
of the guide pins
Tighten to 3.0N.m
max.
Check the screw
studs on the casing
Flashing diodes
The battery beeps 4
times
Probable cause
Clogged guide pins
Tightening of blade
screw
Broken casing
The tool is close to
its temperature limit
The tool has reached
its temperature limit
Condition of diodes
On
Flashes
Off
Condition of the
battery on/off
switch
I
I
I
Symptoms
The blade makes an
unusual noise and/or off-
load consumption exceeds
200Wh after 1 minute of
operation
The diodes ash during use
The tool stops during use
INCIDENTS

20
«PELLENC SA» TERMS OF WARRANTY AND NON-RESPONSIBILITY CLAUSE
MACHINE RANGE FOR OEP
In the event of failure of a mechanical part and subject to normal, rational use and maintenance in
compliance with the maintenance manual, PELLENC S.A. guarantees its products for a period of
ONE YEAR as of delivery; this time shall not exceed a period of 18 months following departure from
the factory of the equipment under warranty : on one hand in accordance with the conditions stipulated
in the warranties of PELLENC S.A. and on the other hand subject to the delivery report indicating the
commissioning date was made known to PELLENC S.A.
In the event of an accident and total or partial destruction of the product, PELLENC S.A.’s warranty can
only be granted, and their responsibility engaged, if the party claiming the warranty can provide technical
proof specifying the origin of the accident, a defect in materials or a structural defect and the product
components which are the cause of it.
This contractual warranty excludes any other responsibility of PELLENC S.A., whether implicit or explicit.
For this reason, the responsibility of PELLENC S.A. can not exceed the limits dened above and covers, to
a limited extent, repair or replacement, as chosen by PELLENC S.A., of parts recognized to be defective
and, when applicable, the labour required to perform the repair or replacement on the basis of warranty
time as dened by PELLENC S.A..
Any maintenance or repair work whatsoever carried out during the warranty period shall mandatorily be
performed by PELLENC S.A. or by a PELLENC S.A. authorized dealer, under penalty of forfeiture of the
warranty.
All costs arising from the immobilization, movement, approach and transport shall be, in all events, for the
sole account of the purchaser.
As concerns parts or equipment that are not manufactured by PELLENC S.A., in particular ball screw,
battery, etc., the warranty is limited to that of the suppliers to PELLENC S.A.. Normal wear parts worn out
as the result of use are never under warranty.
PELLENC S.A. and the authorized dealer shall not be liable in the following cases:
• Malfunctions due to faulty servicing, user inexperience or abnormal use.
• Failure to perform overhauls and checks in accordance with manufacturer’s instructions.
• Replacement of genuine parts or accessories with parts of accessories of another origin, or when the
machine sold has been transformed or modied.
This warranty is explicitly limited to the terms dened above. PELLENC S.A. shall not be liable, under
any circumstances, for payment of any indemnity for any reason whatsoever.
However, it is specied, in compliance with the provisions of decree No. 78.464 dated March 24th 1978,
that this contractual guarantee does not replace the legal guarantee which obliges the seller to guarantee
the buyer against the consequences of defects or hidden defects of the object sold.
Table of contents
Other pellenc Trimmer manuals

pellenc
pellenc EXCELION ALPHA User manual

pellenc
pellenc EXCELION ALPHA User manual

pellenc
pellenc HELION ALPHA User manual

pellenc
pellenc EXCELION ALPHA User manual

pellenc
pellenc HELION 3 User manual

pellenc
pellenc Excelion 1200 User manual
pellenc
pellenc HELION 2 COMPACT User manual
pellenc
pellenc HELION 2 COMPACT User manual