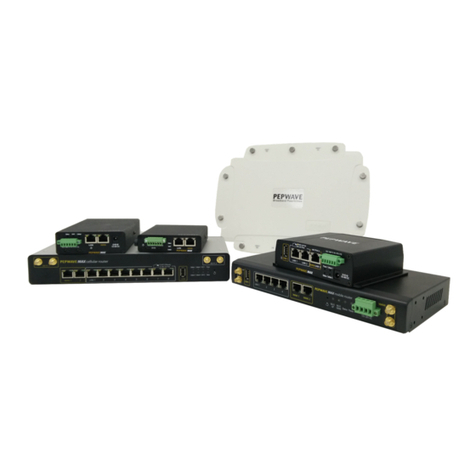
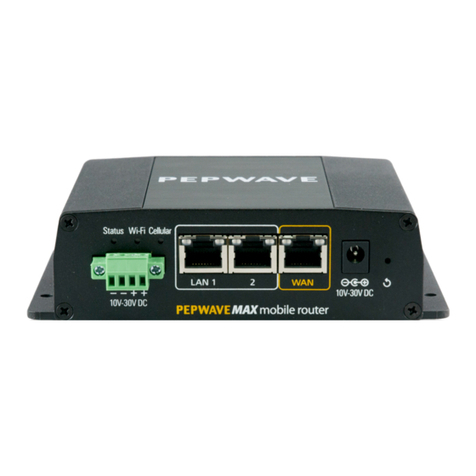
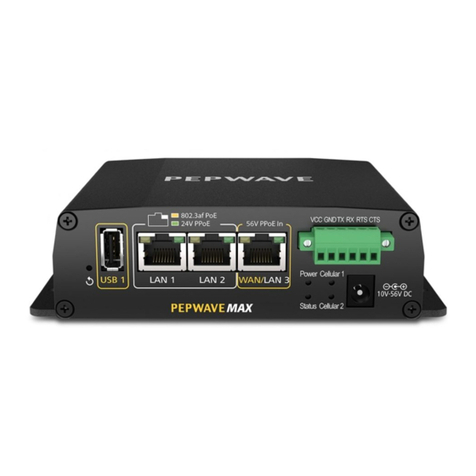
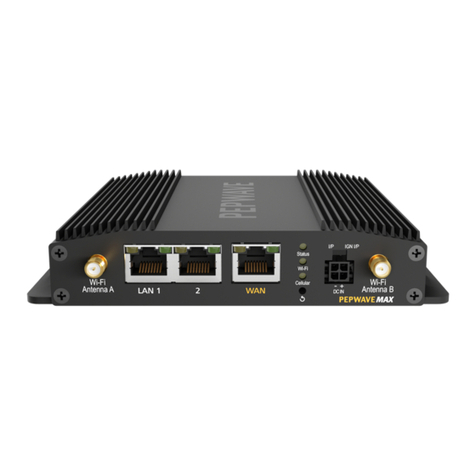
Pepwave MAX User manual

COPYRIGHT &TRADEMARKS
Specifications are subject to change without notice. Copyright © 2013 Pepwave Ltd. All Rights Reserved. Pepwave and the
Pepwave logo are trademarks of Pepwave Ltd. Other brands or products mentioned may be trademarks or registered
trademarks of their respective owners.
Pepwave MAX Series:
MAX 600 / 700 / HD2
Pepwave MAX Firmware 5.4
July 2013

http://www.pepwave.com
2
Copyright @ 2013 Pepwave
Table of Contents
1INTRODUCTION AND SCOPE.................................................................................................5
2GLOSSARY.............................................................................................................................6
3PRODUCT FEATURES.............................................................................................................7
3.1 SUPPORTED NETWORK FEATURES ............................................................................................................ 7
3.2 OTHER SUPPORTED FEATURES.................................................................................................................8
4PEPWAVE MAX MOBILE ROUTER OVERVIEW .......................................................................9
4.1 MAX 600 .........................................................................................................................................9
4.2 MAX 700 ....................................................................................................................................... 11
4.3 MAX HD2....................................................................................................................................... 13
5INSTALLATION ....................................................................................................................15
5.1 PREPARATION ................................................................................................................................... 15
5.2 CONSTRUCTING THE NETWORK.............................................................................................................. 15
5.3 CONFIGURING THE NETWORK ENVIRONMENT ........................................................................................... 16
5.4 MOUNTING THE UNIT ......................................................................................................................... 16
6CONNECTING TO WEB ADMIN INTERFACE .........................................................................18
7CONFIGURATION OF LAN INTERFACE(S) .............................................................................20
7.1 BASIC SETTINGS ................................................................................................................................. 20
7.2 WI-FI AP......................................................................................................................................... 24
8CONFIGURATION OF WAN INTERFACE(S) ...........................................................................26
8.1 ETHERNET WAN ............................................................................................................................... 27
8.2 CELLULAR 1/CELLULAR 2.................................................................................................................... 36
8.3 WI-FI WAN..................................................................................................................................... 39
8.4 WAN HEALTH CHECK ......................................................................................................................... 44
8.5 BANDWIDTH ALLOWANCE MONITOR ...................................................................................................... 48
9WI-FI SETTINGS ...................................................................................................................49
10 BANDWIDTH BONDING SPEEDFUSIONTM............................................................................52
10.1 SPEEDFUSIONTM .............................................................................................................................. 53
10.2 LINK FAILURE DETECTION ................................................................................................................... 57
10.3 PEPWAVE MAX BEHIND NAT ROUTER ................................................................................................. 58
10.4 SPEEDFUSIONTM STATUS.................................................................................................................... 59
11 IPSEC VPN ...........................................................................................................................60
11.1 IPSEC VPN SETTINGS ........................................................................................................................ 60
11.2 IPSEC STATUS ................................................................................................................................. 63
12 MANAGEMENT OF OUTBOUND TRAFFIC TO WAN .............................................................63
12.1 OUTBOUND POLICY .......................................................................................................................... 63

http://www.pepwave.com
3
Copyright @ 2013 Pepwave
12.2 CUSTOM RULES FOR OUTBOUND POLICY ............................................................................................... 64
13 PORT FORWARDING ...........................................................................................................74
13.1 PORT FORWARDING SERVICE .............................................................................................................. 74
13.2 UPNP/NAT-PMP SETTINGS............................................................................................................. 76
14 NAT MAPPINGS ..................................................................................................................77
15 QOS.....................................................................................................................................79
15.1 USER GROUPS................................................................................................................................. 79
15.2 BANDWIDTH CONTROL ...................................................................................................................... 80
15.3 APPLICATION .................................................................................................................................. 81
16 FIREWALL............................................................................................................................83
16.1 OUTBOUND AND INBOUND FIREWALL ................................................................................................... 83
16.2 INTRUSION DETECTION AND DOSPREVENTION ........................................................................................ 87
17 MISCELLANEOUS SETTINGS ................................................................................................88
17.1 PPTP SERVER ................................................................................................................................. 88
17.2 SERVICE FORWARDING ...................................................................................................................... 89
17.3 SERVICE PASSTHROUGH ..................................................................................................................... 91
18 SYSTEM SETTINGS...............................................................................................................92
18.1 ADMIN SECURITY ............................................................................................................................. 92
18.2 FIRMWARE UPGRADE........................................................................................................................ 96
18.3 TIME............................................................................................................................................. 96
18.4 EMAIL NOTIFICATION ........................................................................................................................ 97
18.5 REMOTE SYSLOG............................................................................................................................ 100
18.6 SNMP........................................................................................................................................ 101
18.7 INCONTROL .................................................................................................................................. 103
18.8 CONFIGURATION............................................................................................................................ 104
18.9 REBOOT....................................................................................................................................... 105
18.10 PING TEST .................................................................................................................................. 106
18.11 TRACEROUTE TEST........................................................................................................................ 107
18.12 SPEEDFUSIONTM TEST.................................................................................................................... 107
18.13 CLI (COMMAND LINE INTERFACE SUPPORT)........................................................................................ 108
19 STATUS .............................................................................................................................109
19.1 DEVICE ........................................................................................................................................ 109
19.2 ACTIVE SESSIONS ........................................................................................................................... 111
19.3 CLIENT LIST .................................................................................................................................. 112
19.4 WINS CLIENT ............................................................................................................................... 113
19.5 SPEEDFUSIONTM ............................................................................................................................ 113
19.6 UPNP/NAT-PMP ....................................................................................................................... 114
19.7 EVENT LOG................................................................................................................................... 115
19.8 BANDWIDTH ................................................................................................................................. 116
APPENDIX A. RESTORATION OF FACTORY DEFAULTS........................................................119
http://www.pepwave.com
4
Copyright @ 2013 Pepwave
APPENDIX B. DECLARATION..............................................................................................120

http://www.pepwave.com
5
Copyright @ 2013 Pepwave
1 Introduction and Scope
The Pepwave MAX Mobile Router provides link aggregation and load balancing across multiple WAN
connections, allowing a combination of technologies like 3G HSDPA, EVDO, 4G LTE, Wi-Fi, external
WiMAX dongle, and Satellite to be utilized to connect to the Internet.
This manual presents how to set up the Pepwave MAX Mobile Router and provides an introduction to the
features and usage of Pepwave MAX Mobile Router.
Tips
Want to know more about Pepwave MAX? Visit our YouTube Channel for a video introduction!
http://youtu.be/UCkVQThLKO4

http://www.pepwave.com
6
Copyright @ 2013 Pepwave
2 Glossary
The following terms, acronyms, and abbreviations are frequently used in this manual:
Term
Definition
3G
3rd Generation standards for wireless communications (e.g. HSDPA)
4G
4th Generation standards for wireless communications (e.g. WiMAX, LTE)
DHCP
Dynamic Host Configuration Protocol
DNS
Domain Name System
EVDO
Evolution-Data Optimized
HSDPA
High-Speed Downlink Packet Access
HTTP
Hyper-Text Transfer Protocol
ICMP
Internet Control Message Protocol
IP
Internet Protocol
LAN
Local Area Network
MAC Address
Media Access Control Address
MTU
Maximum Transmission Unit
MSS
Maximum Segment Size
NAT
Network Address Translation
PPPoE
Point to Point Protocol over Ethernet
QoS
Quality of Service
SNMP
Simple Network Management Protocol
TCP
Transmission Control Protocol
UDP
User Datagram Protocol
VPN
Virtual Private Network
VRRP
Virtual Router Redundancy Protocol
WAN
Wide Area Network
WINS
Windows Internet Name Service
WLAN
Wireless Local Area Network

http://www.pepwave.com
7
Copyright @ 2013 Pepwave
3 Product Features
Pepwave MAX enables all LAN users to share broadband Internet connections, and provide advanced
features to enhance Internet access. The following is the list of supported features on Pepwave MAX
Mobile Router:
3.1 Supported Network Features
3.1.1 WAN
Ethernet WAN Connection in Full/Half Duplex
Built-in HSPA and EVDO cellular modems (Available on Pepwave MAX HD2)
USB mobile connection(s)
PC Card WAN connection (Available on Pepwave MAX 600)
ExpressCard WAN connection (Available on Pepwave MAX 600)
Wi-Fi WAN connection
Network Address Translation (NAT)/ Port Address Translation (PAT)
Inbound and Outbound NAT mapping
IPsec NAT-T and PPTP packet passthrough
MAC address clone and passthrough
Customizable MTU and MSS values
WAN connection health check
Dynamic DNS (Supported service providers: changeip.com, dyndns.org, no-ip.org, tzo.com and
DNS-O-Matic)
Ping, DNS Lookup and HTTP based health check
3.1.2 LAN
Wi-Fi AP
Ethernet LAN ports
DHCP server on LAN
Static routing rules
3.1.3 VPN
SpeedFusionTM
VPN load balancing and failover among selected WAN connections
Bandwidth bonding & failover among selected WAN connections
IPsec VPN for Network-to-Network connection (Works with Cisco, Juniper only)
Ability to route Internet traffic to a remote VPN peer
Optional pre-shared key setting
SpeedFusionTM Throughput, Ping and Traceroute Test
PPTP server
PPTP and IPsec passthrough
3.1.4 Firewall
Outbound (LAN to WAN) firewall rules
Inbound (WAN to LAN) firewall rules per WAN connection

http://www.pepwave.com
8
Copyright @ 2013 Pepwave
Intrusion detection and prevention
Specification of NAT mappings
Outbound firewall rules can be defined by destination domain name
3.1.5 Outbound Policy
Link load distribution per TCP/UDP service
Persistent routing for specified source and/or destination IP addresses per TCP/UDP service
Traffic Prioritization and DSL optimization
Prioritize and route traffic to VPN tunnels with Priority and Enforced algorithms
3.1.6 QoS
Quality of Service for different applications and custom protocols
User Group classification for different service levels
Bandwidth usage control and monitoring on group- and user- level
Application Prioritization for custom protocols and DSL/Cable optimization
3.2 Other Supported Features
User-friendly web-based administration interface
HTTP and HTTPS support for Web Admin Interface
Configurable web administration port and administrator password
Firmware upgrades, configuration backups, Ping, and Traceroute via Web Admin Interface
Remote web based configuration (via WAN and LAN interfaces)
Time server synchronization
SNMP
Email notification
Read-only user for Web Admin
Authentication and Accounting by RADIUS server for Web Admin
Built-in WINS Servers
Syslog
SIP passthrough
PPTP packet passthrough
Event Log
Active Sessions
Client List
WINS Client List
UPnP / NAT-PMP
Real-Time, Hourly, Daily and Monthly Bandwidth Usage reports and charts
IPv6 support (Available on Pepwave MAX 700 and HD2)
Support USB tethering on Android 2.2+ phones

http://www.pepwave.com
9
Copyright @ 2013 Pepwave
4 Pepwave MAX Mobile Router Overview
4.1 MAX 600
4.1.1 Front Panel Appearance
4.1.2 LED Indicators
The statuses indicated by the Front Panel LEDs are as follows:
Power and Status Indicators
Power
OFF
Power off
Green
Power on
Status
OFF
System initializing
Red
Booting up or busy
Green
Ready state
Wi-Fi AP and Wi-Fi WAN Indicators
Wi-Fi WAN
OFF
Disabled Intermittent
Blinking
Trying to connect but not connected to any wireless network
ON
Connected to wireless network(s) without traffic
Continuous Blinking
Transferring data
Wi-Fi AP
OFF
Disabled Intermittent
Blinking
Enabled but no client connected
ON
Client(s) connected to wireless network
Continuous Blinking
Transferring data to wireless network
Wi-Fi AP LED
LAN Ports
Ethernet WAN Port
PC Card Slot
Express Card Slot
Wi-Fi WAN Connector
Wi-Fi LAN Connector
USB Ports
Status LED
Power LED
Wi-Fi WAN LED
Reset Button

http://www.pepwave.com
10
Copyright @ 2013 Pepwave
LAN and Ethernet WAN Ports
Green LED
ON
100 Mbps
OFF
10 Mbps
Orange LED
Solid
Port is connected without traffic
Blinking
Data is transferring
OFF
Port is not connected
Port Type
Auto MDI/MDI-X ports
4.1.3 Rear Panel Appearance
Power Connector
Terminal Block

http://www.pepwave.com
11
Copyright @ 2013 Pepwave
4.2 MAX 700
4.2.1 Front Panel Appearance
4.2.2 LED Indicators
The statuses indicated by the Front Panel LEDs are as follows:
Status Indicators
Status
OFF
System initializing
Red
Booting up or busy
Blinking red
Boot up error
Green
Ready
Wi-Fi AP and Wi-Fi WAN Indicators
Wi-Fi WAN
OFF
Disconnected
Blinking slowly
Connecting to network
Blinking
Connected to network with traffic
ON
Connected to network without traffic
Wi-Fi AP
OFF
Disabled
Blinking slowly
Enabled but no client connected
Blinking
Connected to network with traffic
ON
Client(s) connected to wireless network
LAN Ports
Ethernet WAN Port
Wi-Fi WAN Connector
Wi-Fi LAN Connector
USB Port
Wi-Fi AP LED
Wi-Fi WAN LED
Reset Button
Power LED
Terminal Block
Status LED

http://www.pepwave.com
12
Copyright @ 2013 Pepwave
LAN and Ethernet WAN Ports
Green LED
ON
10 / 100/ 1000 Mbps
Orange LED
Blinking
Data is transferring
OFF
No data is being transferred or port is not connected
Port Type
Auto MDI/MDI-X ports
4.2.3 Rear Panel Appearance
Power Connector
USB Ports
Kensington Lock

http://www.pepwave.com
13
Copyright @ 2013 Pepwave
4.3 MAX HD2
4.3.1 Front Panel Appearance
4.3.2 LED Indicators
The statuses indicated by the Front Panel LEDs are as follows:
Status Indicators
Status
OFF
System initializing
Red
Booting up or busy
Blinking red
Boot up error
Green
Ready
Wi-Fi AP and Wi-Fi WAN Indicators
Wi-Fi WAN /
Cellular 1 /
Cellular 2
OFF
Disabled Intermittent
Blinking slowly
Connecting to wireless network(s)
Blinking
Connected to wireless network(s) with traffic
ON
Connected to wireless network(s) without traffic
LAN and Ethernet WAN Ports
Green LED
ON
10 / 100 / 1000 Mbps
Orange LED
Blinking
Data is transferring
OFF
No data is being transferred or port is not connected
Port Type
Auto MDI/MDI-X ports
LAN Ports
Ethernet WAN Port
Wi-Fi WAN Connector
Wi-Fi AP Connector
USB Port
Status LED
Wi-Fi WAN LED
Reset Button
Cellular WAN LED
Terminal Block

http://www.pepwave.com
14
Copyright @ 2013 Pepwave
4.3.3 Rear Panel Appearance
Power Connector
Cellular SIM Slots
Kensington Lock
Cellular Antenna Connectors

http://www.pepwave.com
15
Copyright @ 2013 Pepwave
5 Installation
Connecting the Network with Pepwave MAX Mobile Router:
5.1 Preparation
Before installing Pepwave MAX Mobile Router, please prepare the following:
At least one Internet/WAN access account and/or Wi-Fi access information.
For each network connection,
Ethernet WAN: A 10/100/1000 BaseT UTP cable with RJ45 connector
USB: A USB modem
Embedded Modem: A SIM card for GSM/HSPA service
Wi-Fi WAN: Wi-Fi antennas
PC Card / Express Card WAN: A PC Card/Express Card for the corresponding card slot.
A computer with TCP/IP network protocol and a web browser installed. Supported browsers
include Microsoft Internet Explorer 8.0 or above, Mozilla Firefox 10.0 or above, Apple Safari 5.1
or above, and Google Chrome 18 or above.
5.2 Constructing the Network
At the high level, construct the network according to the following steps:
1. With an Ethernet cable, connect a computer to one of the LAN ports on the Pepwave MAX.
Repeat with different cables for up to 4 computers to be connected.
2. With another Ethernet cable or a USB modem / Wi-Fi antenna / PC Card / Express Card, connect
it to one of the WAN ports on the Pepwave MAX. Repeat the same procedure for other WAN
ports.
3. Connect the power adapter to the power connector on the rear panel of Pepwave MAX, and then
plug it into a power outlet.
The following figure schematically illustrates the configuration that results:

http://www.pepwave.com
16
Copyright @ 2013 Pepwave
5.3 Configuring the Network Environment
To ensure that Pepwave MAX works properly in the LAN environment and can access the Internet via the
WAN connections, please refer to the following setup procedures:
LAN Configuration
For basic configuration, refer to Section 6, Connecting to Web Admin Interface.
For advanced configuration, go to Section 7, Configuration of LAN Interface(s).
WAN Configuration
For basic configuration, refer to Section 6, Connecting to Web Admin Interface.
For advanced configuration, go to Section 8, Configuration of WAN Interface(s).
5.4 Mounting the Unit
5.4.1 Wall Mount
Pepwave MAX can be mounted on the wall by screwing. After adding the screw on the wall, slide the
MAX in the screw whole socket as indicated below.
Recommeneded Screw Specification: M3.5 x 20mm, Head Diameter 6mm, Head Thickness 2.4mm
Wall Mount
Screw Socket
Wall Mount
Screw Socket

http://www.pepwave.com
17
Copyright @ 2013 Pepwave
5.4.2 Car Mount
Pepwave MAX can be mounted on a flat surface using a car mounting plate (not included). Place the car
mount according the label’s direction, and screw it onto the device.
After mounting the plate on the back of the device, add screw on the plate on the flat surface.
Mounting Plate
Screw Holes

http://www.pepwave.com
18
Copyright @ 2013 Pepwave
6 Connecting to Web Admin Interface
1. Start a web browser on a computer that is connected with Pepwave MAX through LAN.
2. To connect to Web Admin Interface of Pepwave MAX, enter the following LAN IP address in the
address field of the web browser:
http://192.168.50.1
(This is the default LAN IP address of Pepwave MAX.)
3. Enter the following to access the Web
Admin Interface.
Username: admin
Password: admin
(This is the default Username and
Password of Pepwave MAX. The Admin
and Read-only User Password can be
changed at System > Admin Security
of the Web Admin Interface.)

http://www.pepwave.com
19
Copyright @ 2013 Pepwave
4. After successful login, the Dashboard of Web Admin Interface will be displayed. It looks similar
to the following:
Dashboard shows the current WAN, LAN, Wi-Fi AP settings and statuses. You can simply change
priority of WAN connections and switch on / off Wi-Fi AP in here. For further information about how-to set
up these connections, please refer to Section 7.2 and 8.
A map with real-time GPS data is shown on the Dashboard when GPS signal is received. (HD2 only)
Device Information shows the details about the device, including Model name, Firmware version and
Uptime. For further information please refer to Section 19.
Important Note
Configuration changes (e.g.WAN, LAN, Admin settings, etc.) will only take effect after clicking the Save button at
the bottom of each page. The Apply Changes button causes the changes to be saved and applied.

http://www.pepwave.com
20
Copyright @ 2013 Pepwave
7 Configuration of LAN Interface(s)
7.1 Basic Settings
The LAN Interface settings are located in Network > LAN > Basic Settings
Other manuals for MAX
1
Table of contents
Other Pepwave Network Router manuals

Pepwave
Pepwave Surf SOHO User manual

Pepwave
Pepwave HD2 LTE User manual

Pepwave
Pepwave Surf On-The-Go User manual

Pepwave
Pepwave Surf On-The-Go User manual

Pepwave
Pepwave Peplink User manual

Pepwave
Pepwave Surf SOHO User manual

Pepwave
Pepwave MAX BR1 Pro 5G User manual

Pepwave
Pepwave Peplink MAX Series User manual

Pepwave
Pepwave MAX 700 User manual

Pepwave
Pepwave HD2 mini User manual