CMD02_v2 VELLEMAN
10
c) Tester et utiliser le détecteur
Pour apprendre la réaction du détecteur sur de différents types de métaux, vous faites mieux de bien tester
l’appareil avant de l’utiliser pour la première fois. Vous pouvez tester l’appareil à l’intérieur comme à l’extérieur.
- tester et utiliser A L’INTERIEUR
REMARQUE: Ne testez jamais l’appareil sur un sol dans un bâtiment. Dans la plupart des bâtiments, il y a tel
ou tel type de métal dans le sol, ce qui peut distordre les résultats de vos objets de test.
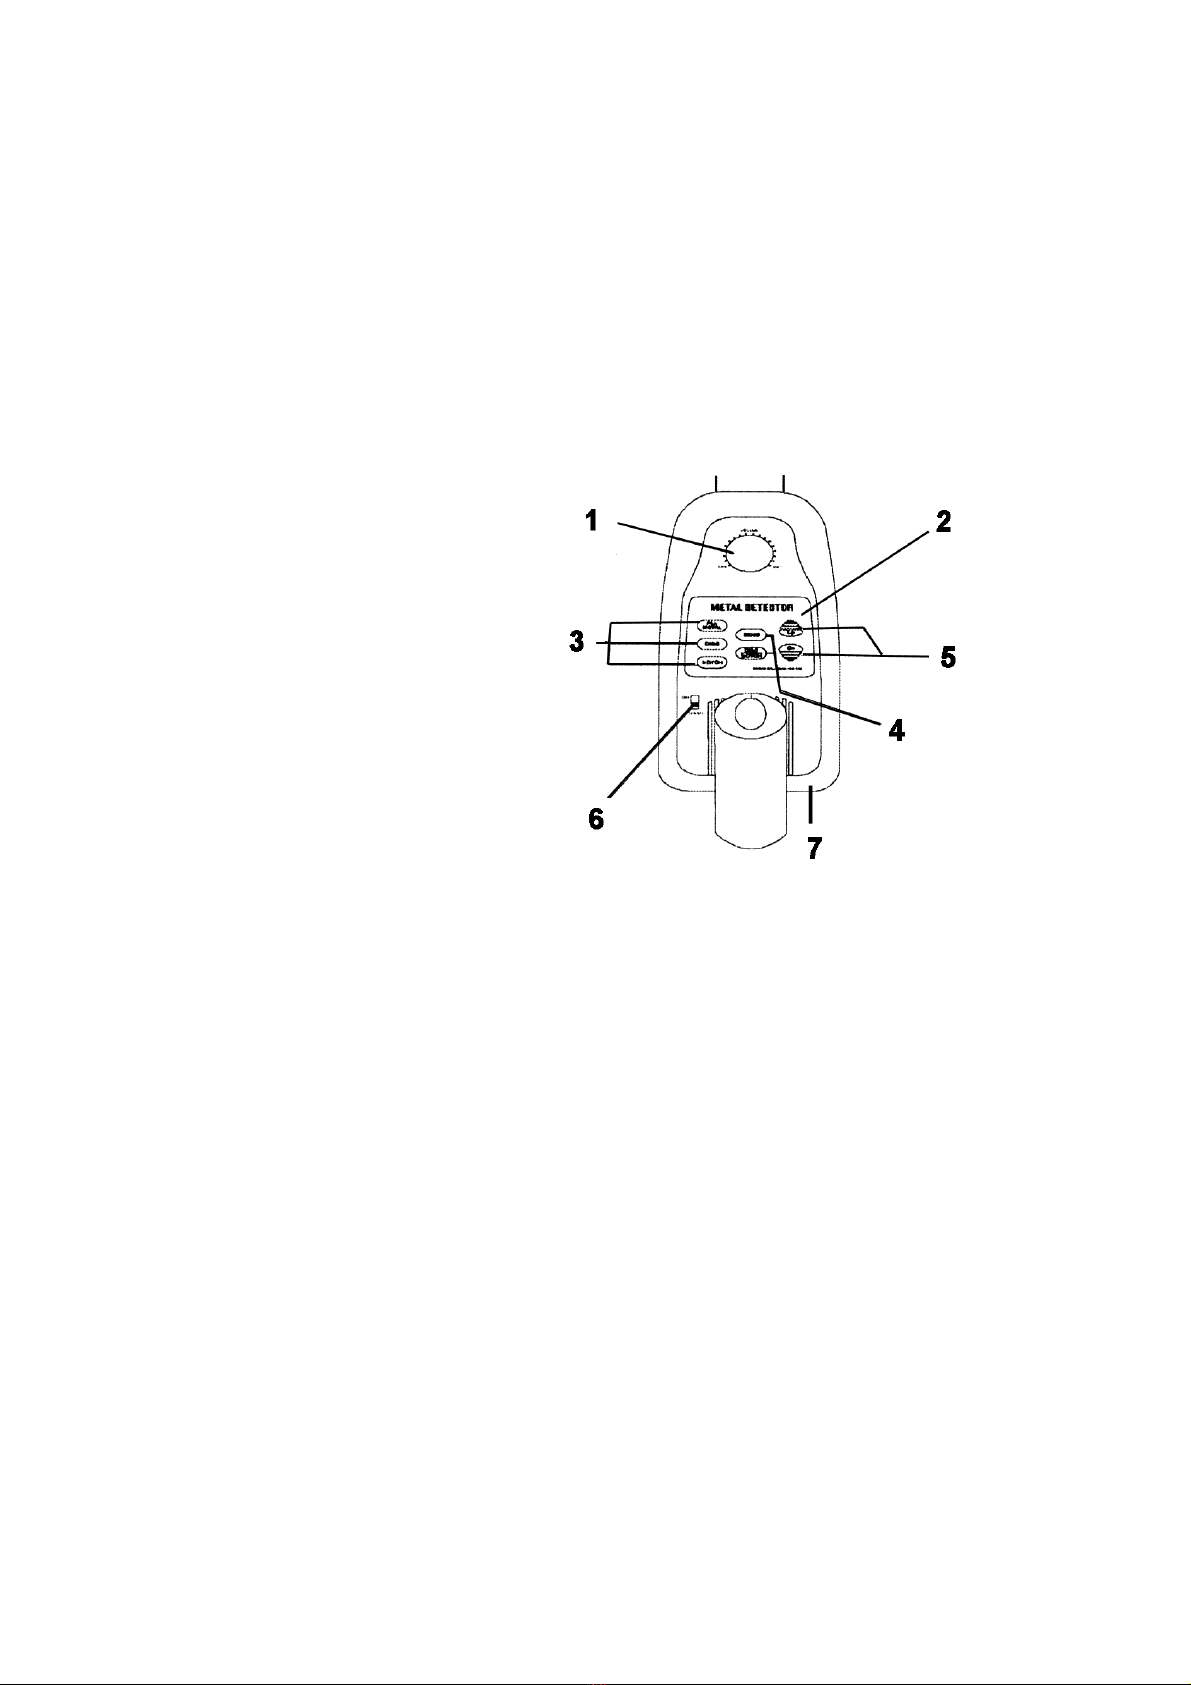
1. Mettez l’interrupteur d’alimentation (POWER) sur ON.
2. Sélectionnez le mode d’utilisation.
3. Placez le détecteur sur une table en bois ou en plastic. Mettez de côté tous bagues, montres ou autres
objets métalliques que vous portez sur vous.
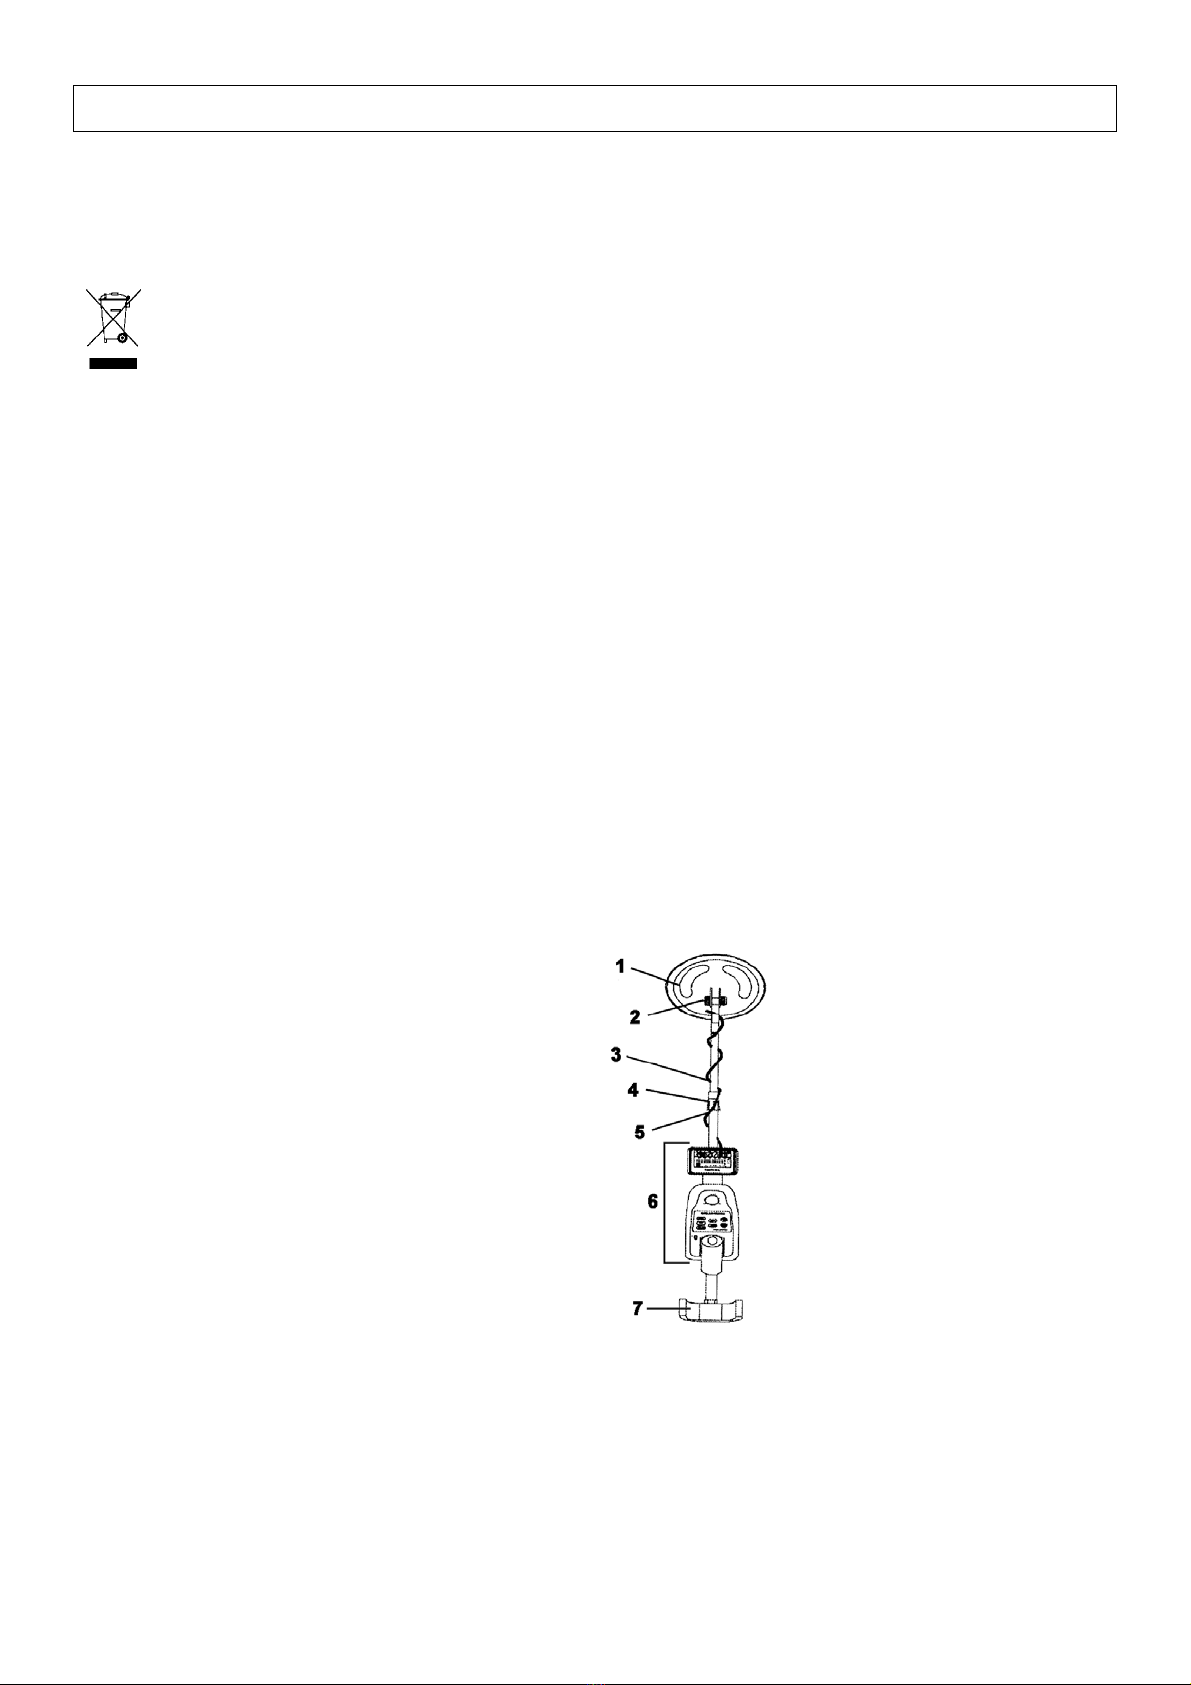
4. Réglez l'angle du disque de manière que la partie plane de la tête de détection soit dirigée vers le plafond.
5. Bougez lentement l’objet de test (par exemple une bague en or ou une pièce de monnaie) à environ cinq
centimètres au-dessus de la tête de détection. Quand le détecteur détecte un métal dans le champ
sélectionné, il émet un son, en une flèche apparaît sous l’icône applicable. Le détecteur indique également
la profondeur de l’objet.
REMARQUE: si vous utilisez une pièce de monnaie, le détecteur la détectera plus facilement quand vous
la présentez côté plat face à la tête de détection. Quand vous la tenez avec le bord vers la tête de
détection, vous risquez d’obtenir une détection fautive ou imprécise.
- tester et utiliser A L’EXTERIEUR
1. Mettez l’interrupteur d’alimentation (POWER) sur ON.
2. Sélectionnez le mode d’utilisation.
3. Cherchez un terrain où il n’y a pas de métal dans le sol.
4. Placez l’objet de test (par exemple une bague en or ou une pièce de monnaie) sur le sol.
REMARQUE : Quand vous utilisez un objet précieux (en or, par exemple), marquez clairement l’endroit
exact où vous l’avez placé. Ne le placez jamais dans d’hautes ou de mauvaises herbes.
5. Balayez lentement et latéralement la zone où vous avez placé l'échantillon, en tenant la tête de détection à
environ 2 à 5 cm au-dessus du sol.
6. Quand le détecteur détecte un métal dans le champ sélectionné, il émet un son, en une flèche apparaît
sous l’icône applicable. Le détecteur indique également la profondeur de l’objet.
7. Si le détecteur ne détecte pas l’objet de test, vérifiez si les modes d’utilisation et de réglage sont bien
adaptés au type de métal que vous voulez trouver. Vérifiez également si vous balayez correctement.
d) chercher efficacement
- Ne bougez pas la tête de détection comme une pendule. Si vous le soulevez pendant ou à la fin d'un balayage,
vous risquez d'obtenir de fausses indications.
- Ne balayez pas trop vite afin de ne pas manquer des objets.
- Le mouvement idéal de la tête de détection est latéral et en ligne droite, en maintenant la même distance du sol.
- Le détecteur émet un signal sonore lorsqu’il détecte des objets métalliques. Si un son n’est pas répété après
plusieurs passages au-dessus du même point, l’objet ou le métal est probablement sans valeur.
- Du sol contaminé, de l’interférence électrique ou beaucoup de ferraille peuvent causer de faux signaux.
- Des signaux fautifs sont souvent irréguliers ou non reproductibles.
e) régler la sensibilité (SENS)
Quand vous maîtrisez les techniques de base, il est important de bien pouvoir régler la sensibilité afin de localiser
les objets ou métaux que vous désirez. Poussez le bouton de mode de réglage SENS. Ensuite, poussez les
boutons ‘Up’ ou ‘Dn) pour modifier le niveau de sensibilité. Le niveau de sensibilité se lit en bas de l’écran LCD.
REMARQUE: afin de trouver des objets profondément enterrés, vous sélectionnez un niveau élevé de sensibilité.
Cependant, n’utilisez jamais le niveau max, car le détecteur éprouvera de la perturbation et de faux signaux
d’antennes émettrices et d’autres lignes électriques. Le détecteur produira des indications et tonalités irrégulières.