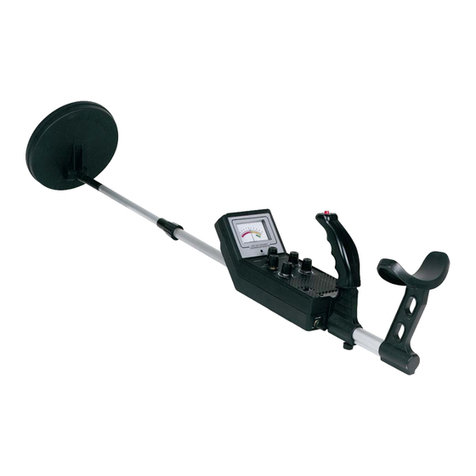
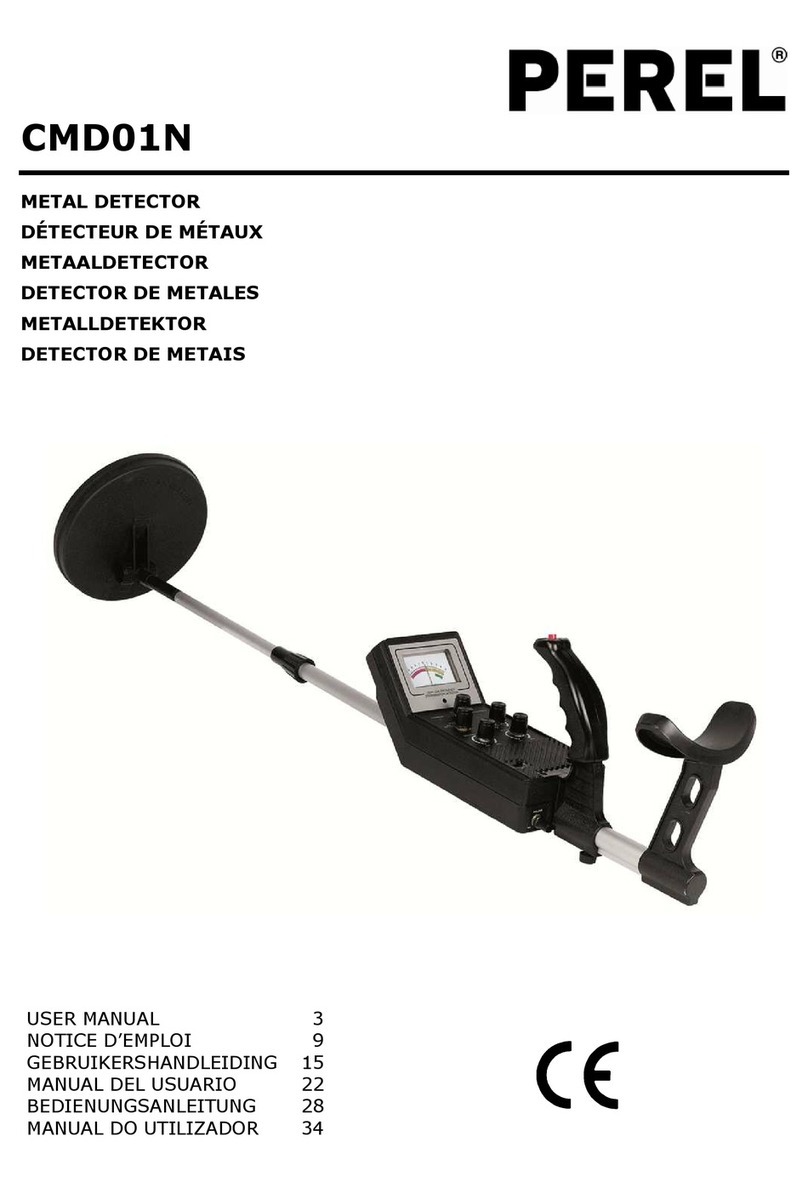
Perel CMD01N User manual

C
M
D
É
M
D
E
M
D
E
U
N
G
M
B
M
C
MD
0
ETAL D
E
É
TECTE
U
ETAALD
E
TECTO
R
ETALLD
E
E
TECTO
R
U
SER MA
N
N
OTICE D
G
EBRUIK
E
M
ANUAL
D
B
EDIENU
N
M
ANUAL
D
0
1N
E
TECTO
R
U
R DE M
É
ETECTO
R
R
DE ME
T
E
TEKTO
R
R
DE ME
T
N
UA
L
’EMPLOI
E
RSHAND
D
EL USU
A
N
GSANLE
I
D
O UTILI
Z
R
É
TAUX
R
T
ALES
R
T
AIS
LEIDING
A
RIO
I
TUNG
Z
ADOR
3
8
14
21
27
33

16
/
Table 1
/
12/2011
A
H
E
H
L
P
S
B
I
I
CMD01N
2
C
F
J
M
Q
T
N
D
G
K
© Vellema
n
G
O
R
U
n
nv

16
/
1
.
T
o
I
m
If
T
h
se
ca
d
e
W
i
T
h
T
h
E
a
V
u
A
d
W
N
o
N
o
2
.
3
.
R
e
•
•
•
•
•
•
•
•
•
/
12/2011
.
Introd
u
o
all resid
e
m
portant
e
This
lifec
y
mun
sho
u
envi
in doubt,
h
ank you fo
rvice. If th
e
used by di
s
e
aler will n
o
i
th your C
D
h
e Discrimi
n
h
e detector
'
a
rphone J
a
u
-meter –
d
justable
S
aterproof
o
te: The s
e
o
te: Your
m
.
Safety
I
Ke
e
Ca
no
i
N
E
m
a
co
n
.
Genera
e
fer to the
V
Protect thi
Protect th
e
Familiaris
e
All modifi
c
Only use t
warranty.
Damage c
a
and the d
e
The warra
Always
m
If the dev
i
serious da
Kee
p
min
e
Han
d
and
Kee
p
Use
extr
e
u
ction
e
nts of th
e
e
nvironm
e
symbol on
y
cle could
h
icipal wast
e
u
ld be retu
r
ronmental
contact y
o
r choosing
e
device w
a
s
regard of
c
o
t accept r
e
D
M01N, y
o
n
ator Metal
'
s features
a
ck - lets
y
indicates t
S
tem - let
s
Search C
o
e
arch coil i
s
m
etal detec
t
I
nstruct
e
p the dev
i
ution: we
a
i
se or audi
b
E
VER TOU
C
a
rk the fi
n
n
tact the
l
l Guideli
V
elleman
®
s device fr
o
e
device ag
e
yourself
w
c
ations of t
h
he device
f
a
used by d
e
aler will n
o
nty does n
o
m
ake sure t
i
ce is not u
mage.
p
the meta
e
rals that
c
d
le the det
e
can cause
p
the dete
c
and store
t
e
mes can
s
e
Europea
e
ntal info
r
the devic
e
h
arm the e
e
; it shoul
d
r
ned to yo
u
rules.
o
ur local
w
Perel! Plea
s
a
s damage
d
c
ertain gui
d
e
sponsibilit
y
o
u can hun
t
Detector i
include:
y
ou connec
t
he probabl
e
s
you adju
s
o
il - lets y
o
s
waterpro
o
t
or require
s
ions
i
ce away f
r
a
ring head
p
b
le warnin
g
C
H AMUN
I
n
ding loca
t
l
ocal auth
nes
®
Service
a
o
m shocks
a
ainst extre
m
w
ith the fun
h
e device a
r
f
or its inten
d
isregard of
o
t accept r
e
o
t cover d
a
o comply
w
sed for a l
o
l detector
d
c
orrode the
e
ctor gentl
the detect
o
c
tor away f
r
t
he detect
o
s
horten th
e
Us
e
n Union
r
mation a
b
e
or the pa
c
nvironmen
d
be taken
u
r distribut
o
w
aste dis
p
s
e read th
e
d
in transit,
d
elines in
t
y
for any e
t
for coins,
s versatile
t
earphone
e
type of
m
s
t the dete
c
o
u use the
o
f, but the
s
three 9V-
b
r
om childre
n
p
hones in
p
g
signals a
r
I
TION OR
t
ion – ha
v
orities at
a
nd Quali
t
a
nd abuse.
m
e heat, d
u
ctions of t
h
r
e forbidde
n
d
ed purpo
s
certain gui
e
sponsibilit
y
a
mage cau
s
w
ith local r
u
o
ng time, r
e
d
ry. If it ge
electronic
y and care
f
o
r to not w
r
om dust a
o
r only in n
o
e
life of ele
c
CMD01N
3
e
r ma
n
b
out this
p
c
kage indic
t. Do not d
to a specia
o
r or to a l
o
p
osal aut
h
e
manual th
do not ins
t
t
his manua
l
nsuing def
e
relics, jew
e
and easy t
s (not sup
p
m
etal being
c
tor's lengt
search coil
control ho
u
b
atteries (
n
n
and una
u
p
ublic plac
e
r
e subdued
.
OTHER P
O
v
e someb
o
once.
t
y Warra
n
Avoid bru
t
u
st and m
o
h
e device b
e
n
for safet
y
s
e. Using th
delines in
t
y
for any e
n
s
ed by salt
y
u
les and re
g
e
move the
ts wet, wi
p
circuits.
f
ully. Drop
p
ork proper
l
nd dirt, wh
o
rmal tem
p
c
tronic dev
i
n
ual
p
roduct
ates that d
ispose of t
h
lized comp
o
cal recycli
n
h
orities.
oroughly b
e
t
all or use i
t
l
is not cov
e
cts or pro
b
e
llery, gold
o use.
p
lied) to th
e
detected.
h for comf
o
even if yo
u
u
sing is no
t
n
ot supplie
d
u
thorised u
s
e
s may lea
d
.
O
TENTIAL
L
o
dy guard
n
ty on the l
t
e force wh
e
o
isture.
e
fore actua
y
reasons.
e device in
t
his manual
n
suing defe
c
y
environ
m
g
ulations.
batteries.
p
e it dry im
p
ing it can
l
y.
ich can ca
u
p
erature e
n
i
ces, dama
g
isposal of
t
h
e unit (or
any for re
c
n
g service.
e
fore bring
t
and cont
a
ered by th
e
b
lems.
and silver
e
detector.
o
rtable use
u
must put
t
waterpro
o
d
).
s
ers.
d
to hazard
L
Y LETHA
L
the site
w
ast pages
o
e
n operati
n
lly using it.
an unauth
is not cov
e
c
ts or prob
m
ents.
Leaking ba
mediately.
damage ci
r
u
se premat
n
vironment
g
e batterie
t
he device
a
batteries)
c
ycling. Thi
s
Respect t
h
ing this de
v
a
ct your de
a
e
warranty
just about
.
it under w
o
f.
ous situati
o
L
OBJECT
S
w
hen poss
i
o
f this ma
n
n
g the devi
c
orised way
e
red by th
e
lems.
tteries can
Liquids mi
r
cuit board
s
ure wear o
s. Temper
a
s, and dist
o
© Vellema
n
a
fter its
as unsorte
s
device
h
e local
v
ice into
a
ler. Dama
g
and the
anywhere
.
ater.
o
ns as traf
f
S
. Clearly
i
ble - and
n
ual.
c
e.
will void t
h
e
warranty
cause
ght contai
n
s
and case
s
f parts.
a
ture
o
rt or melt
n
nv
d
g
e
.
f
ic
h
e
n
s

16
/
4
.
Al
l
fo
l
•
•
•
•
•
•
•
5
.
R
e
a.
b.
C
a
c.
If
dr
•
/
12/2011
plas
t
WA
R
not
a
batt
e
reg
u
.
Treas
u
l
treasure
h
l
low:
Always ge
Respect t
h
Observe a
Never des
found, co
n
Leave the
Use your
d
Dispose o
f
to find.
.
Settin
g
e
fer to the
i
Assembli
•Loosen
search
search
•Turn th
•Length
e
search
arm rel
•Turn th
•Loosen
Installin
g
a
ution:
•Use onl
•Do not
rechar
g
1. If th
e
2. Pres
s
the
a
3. Plac
e
pola
r
4. Repl
a
5. Pres
s
arro
w
6. Plac
e
pola
r
7. Repl
a
Caution:
•Always
parts.
•If you
d
•Dispos
e
You can e
x
Testing t
h
the detect
o
ifts,test th
e
Set MOD
E
BATT TE
S
[J]. If th
e
pointer is
t
ic parts.
R
NING: m
a
ttempt to
e
ries in fir
e
u
lations. K
e
u
re Hunt
e
h
unters mi
g
t permissi
o
h
e rights a
n
ll national,
troy histor
i
n
tact a mu
s
land and
v
d
etector o
n
f
any junk
y
up the
d
i
llustration
s
ng the m
e
the knob
a
coil should
coil from r
o
e stem's l
o
e
n or short
coil is leve
l
axed at yo
e stem's l
o
the knob
a
g
the batt
e
y fresh ba
t
mix old an
g
eable batt
e
e
detector
s
the right
a
rrow [F].
e
a 9-volt
b
r
ity symbo
l
a
ce the rig
s
the left b
w
[I].
e
two 9-vol
r
ity symbo
l
a
ce the lef
t
remove ol
d
d
o not plan
e
of old bat
x
tend batt
e
h
e Batteri
o
r does no
t
e
battery p
o
E
to VLF (v
e
S
T to B1. T
o
e
pointer o
n
not in the
alfunction
recharge
n
e
as they
m
e
ep batte
r
e
r’s Cod
e
g
ht be jud
g
o
n before s
e
n
d propert
y
state, and
i
cal or arch
s
eum or hi
s
v
egetation
a
n
ly in safe
a
y
ou find, o
n
d
etector
s
on page
2
e
tal detec
t
a
t the sear
c
be paralle
l
o
tating or
w
o
ck nut clo
c
en the ste
m
l
with the
g
ur side [B
]
o
ck nut ant
i
a
t the base
e
ries
t
teries of t
h
d new batt
e
ries of dif
f
is on, turn
battery co
m
b
attery int
o
l
s (+ and -
)
ht battery
c
attery com
t batteries
l
s (+ and -
)
t
battery c
o
d
or weak
b
on using t
teries pro
m
e
ry life by
u
es
t
turn on, h
o
wer.
e
ry low fre
q
o
test the
b
n
the VU-
m
green are
a
may occur
n
on-rechar
g
m
ight explo
d
r
ies away
f
e
of Eth
i
g
ed by the
e
e
arching a
n
y
of others.
local laws
aeological
s
torical soc
a
s it was.
F
a
reas.
n
ly in appr
o
2
of this m
a
t
or
c
h coil's en
d
l
with the
g
w
obbling.
c
kwise unti
l
m
so when
g
round and
]
.
i
clockwise
t
of the han
h
e required
eries, diffe
f
erent cap
a
VOLUME
(
m
partmen
t
o
the batte
r
)
marked i
n
c
ompartm
e
partment
c
into the b
a
)
marked.
o
mpartme
n
b
atteries.
T
he detecto
r
m
ptly and
p
u
sing earp
h
as weak v
o
q
uency). T
o
b
atteries in
m
eter is be
t
a
, replace t
CMD01N
4
if the pow
e
g
eable bat
t
d
e. Dispos
e
f
rom chil
d
i
cs
e
xample y
o
n
y site.
while trea
s
treasures.
iety in you
r
F
ill in any h
o
ved areas
a
nual.
d
and adju
s
g
round). Ti
g
l
it loosens
you stand
about 1/2
t
o lock it in
dle, insert
size and r
e
rent types
a
cities).
(
on the co
n
t
cover's ta
b
r
y compart
m
n
side.
e
nt cover.
c
over's tab
a
ttery com
p
n
t cover.
T
hey can le
a
r
for a wee
p
roperly.
h
ones, whi
c
o
lume, will
o
test the
b
the right
b
t
ween 3 an
d
hem.
e
r is on wh
e
t
eries, do n
e
of batteri
e
d
ren.
o
u set. Her
e
s
ure hunti
n
If you are
r
area.
oles you di
. Do not le
a
s
t the sear
c
g
hten the
k
[A].
upright wi
t
to 2 inche
s
place.
the arm s
u
e
commend
of batterie
s
n
trol housi
n
b
and slide
m
ent on to
and slide t
p
artment o
a
k chemic
a
k or more,
c
h require l
e
not tune p
b
atteries in
b
attery co
m
d
5 (green
e
n the bat
t
ot punctur
e
e
s in accor
d
e
are a fe
w
n
g.
not sure a
b
g.
a
ve it for t
h
c
h coil to t
h
k
nob just e
n
t
h the dete
c
s
(1 to 5c
m
u
pport, and
ed type.
s
(standar
d
n
g) to OFF
the cover
p of the ri
b
he cover o
f
n top of th
e
a
ls that ca
n
remove th
e
ss power
roperly, ha
the left b
a
m
partment,
area), the
t
eries are r
e
e
or do no
t
d
ance with
w
basic rule
s
b
out an obj
h
e next tre
h
e desired
n
ough to k
e
c
tor in you
m
) above it
tighten th
e
d
, alkaline
o
(the contr
o
off in the
d
b
bon, matc
h
f
f in the di
r
e
ribbons,
n
destroy el
e batterie
s
than the s
p
a
s erratic o
p
a
ttery com
p
set BATT
T
batteries
a
© Vellema
n
e
placed. D
o
throw
local
s
you shou
ect you ha
asure hun
t
angle. (Th
e
e
ep the
r
hand, th
e
with your
e
knob [F]
o
r
o
l clicks) [
G
d
irection of
h
ing the
r
ection of t
h
matching t
ectronic
s
.
p
eaker.
p
eration or
p
artment,
s
T
EST to B2
a
re OK. If t
h
n
nv
o
ld
ve
t
er
e
e
.
G
].
h
e
he
s
et
h
e

CMD01N
16/12/2011 © Velleman nv
5
d. Adjusting the Meter
•Set MODE to OFF, use a screwdriver to adjust the pointer to line up with 0 on the scale [K, L].
e. Using Earphones
Using stereo earphones (not supplied) allows you to listen privately. It also saves battery power and
eases identifying subtle sound changes for better results.
•To connect headphones to the detector, insert the earphones' 1/8-inch plug into the HEAPHONE
jack [M].
•Control the volume with volume knob [M].
Note: The detector's internal speaker disconnects when you connect earphones.
f. Listening Safely
To protect your hearing, follow these guidelines when you use earphones.
•Set the volume to the lowest setting before you begin. Adjust the volume to a comfortable level
while listening.
•Do not listen at very high volume levels. Extended high-volume listening can lead to permanent
loss of hearing.
•Once you set the volume, do not increase it. Over time, your ears adapt to the volume level, so a
volume level that does not cause discomfort might still damage your hearing.
g. Traffic Safety
Do not wear earphones while operating your detector near high-traffic areas. Even though some
earphones are designed to let you hear outside noise when listening at normal volume levels, they
still can present a traffic hazard.
6. Operation
Your Perel metal detector distinguishes between ferrous (contain iron) and non-ferrous (do not)
metals. When the detector senses a metallic object, the meter reading changes, the NON-FERROUS
or FERROUS indicator turns on or off, and the detector sounds one of three tones. The higher the
tone pitch, the stronger the detection.
a. Preparing the detector
1. Set BATT TEST to OPERATE.
2. Hold the detector in a comfortable position, then rotate MODE to the desired position. Set it to
VLF to test battery power and adjust TUNE and GROUND. (See "Fine-tuning the detector" and
"Adjusting GROUND"). Set it to TR1 to detect extreme differences in metals, such as between in
metals, such as between iron and gold. The difference between iron and gold shows on the meter
(iron in the ferrous section, gold in the non-ferrous section). Set it to TR2 to detect finer
distinctions between metals, for example between aluminium and gold (see "Adjusting
DISCRIMINATION") [N].
Follow these steps to set TUNE [O]:
1. Rotate VOLUME to the 10 o'clock position.
2. Set MODE to VLF.
3. Set DISCRIMINATION, GROUND and SENSITIVITY to their midpoint.
4. Hold the search coil about 1 foot (30cm) away from the ground and any metal object. While
pressing the red button on the handle, slowly position TUNE until the pointer on the vu-meter
rests at 0. Release the red button.
As you search, you can fine-tune the detector using the other controls (see "Fine-Tuning the
Detector")
Note: Press the red button on the handle at any time during operation to automatically return the
pointer to 0.
b. Indoor testing
To learn how the detector reacts to different metals, you should test it before you use it the first
time. You can test the detector indoors or outdoors. You need to fine-tune the detector before every
use (see “Fine-tuning the Detector”).
1. Remove any watches, rings, or other metal jewellery you are wearing and place the detector on a
wooden or plastic table.
2. Adjust the search coil's angle so the flat part faces the ceiling [P].
Note: Never test the detector on a floor inside a building. Most buildings have metal of some kind
in the floor, which might interfere with the objects you are testing or mask the signal completely.
3. Set MODE to TR1.
4. Move a sample of the material you want the detector to find (such as a gold ring or coin) about 2
inches (±5cm) above the search coil.

CMD01N
16/12/2011 © Velleman nv
6
Notes:
•The search coil will not detect without motion. You must move the object since you are not
sweeping with the detector at this time.
•If you are using a coin, the detector detects it more easily if you hold it so a flat side (not the
edge) is parallel with the flat side of the search coil.
•If the detector detects the material, the NON-FERROUS and FERROUS indicators flash and the
pointer moves to FERROUS or NON-FERROUS while the detector determines the type of metal it is
detecting. If it detects non-ferrous metal, it also sounds a tone.
•If the detector does not detect the material, check the battery power and verify that the search
coil is properly connected.
c. Outdoor testing and use
1. Find an area on the ground outside where there is no metal.
2. Place a sample of the material you want the detector to find (such as a gold ring or a coin) on the
ground. (If you are using a valuable metal such as gold to test the detector, mark the area where
you placed the item, to help you find it later. Do not place it in tall grass or weeds).
3. Set MODE to TR1.
4. While holding the search coil level and about 1-2 inches above the ground, slowly move the search
coil over the area where you place the sample, sweeping the search coil in a side-to-side motion
[Q].
5. Try finding other metal in the area.
When you find a metal item, wait a few seconds after the tone stops before continuing, to allow
the detector time to reset (or, press the red button on the handle to return the pointer to the
centre of the vu-meter.
d. Search coil sweeping hints:
•Never sweep the search coil as if it were a pendulum. Raising the search coil while sweeping or at
the end of a sweep causes false readings [R].
•Sweep slowly - hurrying makes you miss targets.
•If the detector detects the material, it sounds a tone and the pointer moves to the type of
material if found. Set MODE to TR2 to determine the quality of the metal.
•If the detector does not detect the material, make sure you are moving the search coil correctly.
Notes:
•The detector responds with a strong signal when it detects most valuable metal objects. If a
signal does not repeat after you sweep the search coil over the target a few times, the target is
probably junk metal.
•False signals can be caused by trashy ground, electrical interference or large irregular pieces of
junk metal. False signals are usually broken or non-repeatable.
e. Fine-tuning the detector
When you become familiar with how your detector works, fine-tune it to make it more selective
in what it finds.
1) Adjusting SENSITIVITY [S]
To adjust the search coil's ability to detect objects at different depths in the soil, rotate
SENSITIVITY between MIN and MAX. For maximum detection depth, leave SENSITIVITY set
as high as possible. If the detector makes a "chattering" noise, decrease SENSITIVITY until
the "chatter" stops.
2) Adjusting GROUND [T]
Setting GROUND takes a little time, but is critical for accurate operation. GROUND tunes out
false signals from mineralised soil.
1. Set MODE to VLF and lower the search coil to 1/2 to 2 inches (1 to 4cm) above the
ground.
2. If the pointer swings to the right, turn GROUND to the left. If the pointer swings to the left,
turn GROUND to the right.
3. Raise the search coil about 1 foot (30cm) from the ground and press the red button on
the handle. The pointer returns to the centre.
4. Repeat Steps 1-3 until the pointer stays close to the centre each time you lower the
search coil to the ground.
After you set GROUND, the detector is set for the soil type of that particular site. Do not reset
it until you use the detector at a different site.

CMD01N
16/12/2011 © Velleman nv
7
3) Adjusting DISCRIMINATION
Discrimination is the detector's ability to differentiate between types of metal. The
detector's DISCRIMINATION setting determines whether the detector will distinguish
between different types of ferrous and non-ferrous metals.
If MODE is set to TR2, start with DISCRIMINATION set to mid-range. While you use the
detector, adjust DISCRIMINATION to the best position. As you set DISCRIMINATION
higher, the detector becomes more sensitive to the differences between large aluminium
and gold pieces, for example, but some small valuable pieces, such as coins and small
rings, might be overlooked. As you set DISCRIMINATION to higher levels, the detector first
does not detect small pieces of silver paper, then thick foil, and finally metal objects like
pull tabs from aluminium cans.
Note: Each time you use the detector in a different area, you must adjust
DISCRIMINATION. Each search location presents new challenges.
f. False signals
Because your detector is extremely sensitive, trash-induced signals and other sources of
interference might cause signals that seem confusing. The key to handling these types of signals is
to dig for only those targets that emit a strong, repeatable signal. As you sweep the search coil back
and forth over the ground, learn to recognise the difference between signals that occur at random
and signals that are stable and repeatable.
To reduce false signals when searching very trashy ground, only scan a small area at a time using
slow, short overlapping sweeps.
g. Detection hints
No detector is 100 percent accurate. Various conditions influence metal detection. The detector's
reaction depends on a number of things:
•The angle at which the object rests in the ground.
•The depth of the object.
•The amount of iron in the object.
•The size of the object.
h. Pinpointing a target
Accurately pinpointing a target makes digging it up easier.
Accurate pinpointing takes practice, and we suggest you practice finding and digging up small metal
objects on your own property before you search other locations.
Sometimes, targets are difficult to accurately locate due to the sweep direction. Try changing your
sweep direction to pinpoint a target.
Follow these steps to pinpoint a target.
1. When the detector detects a buried target, continue sweeping the search coil over the target in a
narrowing side-to-side motion.
2. Make a visual note of the exact spot on the ground where the detector beeps.
3. Stop the search coil directly over this spot on the ground. Then move the search coil straight
forward away from you and straight back toward you a couple of times.
Make a visual note of the exact spot on the ground where the detector beeps.
4. Repeat Steps 1-3 at a right-angle to the original search line, making an "X" pattern. The target
will be directly below the "X" at the point of the loudest response [U].
Notes:
•If trash in an area is so heavy that you get false signals, slow your sweep and use shorter
sweeps.
•Recently buried coins might not respond the same as coins buried for a long period of time
because of oxidation.
•Some nails, nuts, bolts, and other iron objects (such as old bottle caps) oxidise and create a
"halo" effect. A halo effect is caused by a mixture of natural elements in the ground and the
oxidation created by different metals. Because of the metal mixtures, target signals might not be
in a "fixed" position. This effect makes these objects very hard to detect accurately. (See "Fine-
Tuning the Detector").
7. Care and maintenance
Wipe the detector with a damp cloth occasionally to keep it looking new. Do not use harsh
chemicals, cleaning solvents or strong detergents to clean the detector.
•Modifying or tampering with the detector's internal parts can cause a malfunction and might
invalidate its warranty.

16
/
•
T
s
c
8
.
If
pr
o
T
h
so
T
h
co
d
e
d
e
o
n
a
t
9
.
U
s
th
F
o
vi
s
T
h
©
T
h
w
o
to
1
.
A
u
D
e
pr
o
E
n
/
12/2011
T
he search
s
alt water.
c
oil in salt
w
.
Troubl
e
your detec
o
blem.
PR
h
e detector
unds false
h
e display
d
rrect meta
e
tector find
s
e
tector sou
n
n
e type of t
t
arget.
.
Techni
c
power s
u
frequenc
sensitivi
t
3-tone a
u
operatin
g
dimensi
o
weight
s
e this de
v
e event o
f
o
r more in
s
it our w
e
h
e inform
a
COPYRIG
h
is manua
o
rldwide ri
g
any electr
o
.
Introd
u
u
x réside
n
e
s inform
a
Ce s
y
peut
piles
trait
e
servi
o
tection d
e
n
cas de q
u
coil suppli
e
However,
d
w
ater, rins
e
e
shootin
g
tor is not
w
OBLEM
displays o
r
signals
d
oes not sh
l type whe
n
s
a target
o
n
ds more t
h
one when i
c
al speci
f
u
pply
y
t
y
u
dio discri
m
g
temperat
o
ns (LxWx
H
v
ice with
o
f
damage
fo concer
n
e
bsite ww
w
a
tion in th
HT NOTI
C
l is copyri
g
hts reserv
e
o
nic mediu
u
ction
n
ts de l'U
n
a
tions en
v
y
mbole su
r
polluer l'e
n
éventuell
e
e
ra l’appar
e
ce de recy
c
e
l’environn
u
estions,
c
e
d with th
e
d
o not let
w
e
it with fr
e
g
w
orking as
r
Yo
u
wr
o
det
"Pi
n
Th
e
me
t
"Pi
n
the
me
t
ow the
n
the
o
r the
h
an
t finds
Th
e
Th
e
rec
o
If t
h
cor
r
f
ication
s
m
ination l
o
m
h
i
ure
H
)
o
riginal a
c
or injury
r
n
ing this
p
w
.Perel.e
u
is manua
l
C
E
ghted. Th
e
d. No par
t
m or other
w
n
ion euro
p
v
ironnem
e
r
l'appareil
o
n
vironnem
e
e
s) parmi l
e
e
il en ques
t
c
lage local.
ement.
c
ontacter
e
detector i
s
w
ater ente
r
e
sh water t
it should, f
o
u
might be
o
ng angle.
S
ector corr
e
n
pointing a
e
detector
m
t
als. Try pi
n
pointing a
same sign
t
al.
e
re might
b
e
target mi
g
o
gnise.
h
e target i
s
r
ect metal
s
o
w
m
edium
i
gh
c
cessorie
s
r
esulted f
r
p
roduct a
n
u
.
l
is subjec
e copyrig
h
t
of this m
a
w
ise witho
u
Noti
c
p
éenne
e
ntales im
p
o
u l'emball
e
nt. Ne pa
s
e
s déchets
m
t
ion. Renv
o
Il convien
t
les autor
i
CMD01N
8
s
waterpro
o
r
the detec
t
o prevent
c
o
llow thes
e
sweeping
t
S
weep the
e
ctly. See "
T
Target".
m
ight soun
npointing t
Target").
I
al each ti
m
b
e more th
a
g
ht be a ty
s
heavily o
x
type. This
3 x 9V-b
a
15KHz ±
2
16cm for
400Hz +
700Hz +
1500Hz
+
0°C ~ 40
92~121
x
±1.26kg
s
only. Vel
r
om (inco
n
d the lat
e
t to chan
g
h
t to this
m
a
nual may
b
u
t the prio
r
c
e d’e
m
p
ortantes
age indiqu
e
s
jeter un a
m
unicipau
x
o
yer les éq
u
t
de respe
c
i
tés local
e
o
f and can
t
or's contr
o
c
orrosion o
e
suggestio
SUGGE
t
he detecto
search coil
T
esting an
d
d
a false si
he target f
I
f the dete
c
m
e, the tar
g
a
n one targ
pe of meta
x
idised, th
e
is not a m
a
a
ttery (not
2
KHz
a
€
2 coin
60Hz
105Hz
+
225Hz
°C
x
20 x 18.
5
leman nv
rrect) us
e
e
st versio
n
g
e withou
t
m
anual is
b
e copied,
r
written c
o
m
ploi
concerna
e
que l’éli
m
ppareil éle
c
x
non sujet
u
ipements
c
ter la régl
e
e
s pour éli
be subme
r
o
l housing.
f the meta
l
ns to see i
f
STION
r's search
c
more slo
w
d
Using th
e
gnal if it d
e
rom sever
a
c
tor does n
g
et is prob
a
et in the a
r
l that the
d
e
detector
m
a
lfunction.
incl.)
(Ø 25mm,
5
cm
cannot b
e
e
of this d
e
n
of this u
t
prior no
t
owned b
y
reproduce
d
o
nsent of t
h
nt ce pro
d
m
ination d’
u
c
trique ou
s au tri sél
e
usagés à v
e
mentation
mination.
r
ged in eith
After usin
g
l
parts.
f
you can e
c
oil too fas
t
w
ly and hol
d
e
Detector"
e
tects hea
v
a
l different
ot display
a
a
bly heavil
y
r
ea you ar
e
d
etector do
m
ight not
d
in 'all met
a
e
held res
p
e
vice.
ser manu
a
t
ice.
y
Vellema
n
d
, translat
e
h
e copyrig
h
d
uit
u
n appareil
électroniq
u
e
cti
f
; une
otre
f
ourni
s
locale rel
a
© Vellema
n
er fresh or
g
the searc
h
liminate th
t
or at the
d
the
and
v
ily oxidise
d
angles (se
e
a
nd sound
y
oxidised
e
searching
es not
d
isplay the
a
l' mode)
p
onsible i
n
a
l, please
n
nv. All
e
d or reduc
e
h
t holder.
en fin de
v
u
e (et des
déchèterie
s
seur ou à
a
tive à la
n
nv
h
e
d
e
.
n
e
d
v
ie
un

16
/
N
o
se
co
ce
pr
o
A
v
p
a
Le
P
r
V
u
T
u
Di
N
o
N
o
2
.
3
.
S
e
•
•
•
•
•
•
•
•
•
4
.
V
o
à
s
•
•
/
12/2011
o
us vous r
e
rvice de l’
a
nsulter vo
t
rtaines dir
e
o
blèmes e
t
v
ec votre C
a
rtout. Le d
détecteur
r
ise écout
e
u
mètre - i
n
u
be régla
b
sque che
r
o
te: Le dis
q
o
te: Votre
.
Consi
gn
Gar
d
Att
e
Veill
NE
J
DA
N
au
p
.
Directi
v
e
référer à l
Protéger l
e
l’opératio
n
Tenir le th
Se familia
r
Toute mo
d
N’utiliser l
circuits, d
e
Les dom
m
garantie.
La garanti
Respecter
Retirer le
s
intérieur.
Gar
d
liqui
Man
boîti
Gar
d
pré
m
N'ut
extr
ê
et d
é
AT
T
s’ef
f
Ne j
a
.
Code
d
o
tre condui
t
s
uivre/
Demande
z
Respectez
e
mercions
d
a
ppareil. Si
t
re revend
e
e
ctives de
c
t
les défaut
DM01N, v
o
étecteur d
e
possède l
e
e
ur - perm
n
dique le t
y
b
le - perm
e
r
cheur ét
a
q
ue cherch
détecteur
d
n
es de s
é
d
er le déte
c
e
ntion : L’
u
er à être a
t
J
AMAIS T
O
N
GEREUX.
p
lus vite.
v
es
g
én
é
a garanti
e
e
thermom
n
.
ermomètr
e
r
iser avec l
d
ification d
e
e thermo
m
e
s brûlure
s
m
ages occa
s
e ne s’appl
les lois et
s
piles du d
é
d
ez le déte
c
des peuve
n
iez le déte
c
ers et pro
v
d
ez le déte
c
m
aturée de
ilisez et ne
ê
mes peuv
é
former ou
T
ENTION :
f
ectue tand
a
mais per
c
d
e Bonn
e
t
e influenc
e
z
toujours l
les droits
e
d
e votre ac
h
l’appareil
a
e
ur. La gar
a
c
ette notic
e
s qui en ré
o
us pouve
z
e
métaux s
e
s caractéri
s
et la conn
e
y
pe probab
e
t d'adapte
r
a
nche - pe
r
eur est ét
a
d
e métaux
é
curité
c
teur hors
d
u
tilisation
d
t
tentif au t
O
UCHER
N
Marquer
s
é
rales
e
de servi
c
ètre contr
e
e
à l’écart
d
e fonction
n
e
l’appareil
m
ètre qu’à
s
s
, des élect
r
s
ionnés pa
r
ique pas e
n
la régleme
é
tecteur s’
i
c
teur de m
é
n
t contenir
c
teur avec
v
oquer un
d
c
teur à l'a
b
s pièces.
rangez le
d
ent diminu
faire fond
r
Des affich
a
is que le d
é
c
er des pile
s
e
Condui
t
e
la réputa
t
a permissi
o
e
t la propri
h
at ! Lire l
a
a
été endo
m
a
ntie ne s’
a
e
et votre
r
sultent.
z
recherch
e
électif est
m
s
tiques sui
v
e
xion d'éco
le de méta
r
la longue
u
r
met l'utilis
a
nche, mai
s
nécessite
3
d
e la porté
e
d
’un casqu
e
rafic et au
x
N
I MUNIT
I
s
oigneus
e
c
e et de q
u
e
les chocs
d
e la pouss
n
ement de
est interdi
s
a fonction
r
ochocs, e
t
r
des modi
f
n
cas de d
o
ntation en
i
l n’est pas
é
taux au s
e
des minér
a
douceur et
d
ysfonction
b
ri de la po
u
d
étecteur
q
er la duré
e
r
e les parti
e
a
ges erron
é
é
tecteur es
s
et ne pa
s
t
e de Ch
t
ion de tou
s
o
n avant d'
été d'autr
u
CMD01N
9
a
présente
m
magé pe
n
a
pplique pa
r
evendeur
d
e
r les pièce
s
m
ultifoncti
o
v
antes:
uteurs (no
n
l détecté.
u
r du déte
c
ation du d
é
s
pas le bo
î
3
piles 9V
(
e
des enfa
n
e
d’écoute
d
x
signaux d
I
ON NI A
U
e
ment l’en
u
alité Vell
et le traite
r
ière, l’hum
l’appareil
a
te pour de
s
prévue. T
o
t
c. Un usag
f
ications à l
o
mmages
o
vigueur.
utilisé. L’a
e
c. S'il est
a
ux provoq
précautio
n
nement d
e
u
ssière et
d
q
u'à des te
m
e
de vie de
s
e
s en plast
é
s peuvent
t encore al
s
les jeter
a
asseur
d
s
les chass
e
effectuer
v
u
i.
notice atte
n
dant le tr
a
s aux dom
m
d
éclinera t
o
s
, reliques,
o
ns et facil
e
n
fournis)
a
c
teur pour
é
tecteur so
î
tier de co
m
(
non fourni
e
n
ts et des
p
d
ans un en
d
’avertisse
m
U
TRES OB
J
droit de
d
eman®à l
a
r
avec circ
o
idité et de
s
a
vant de l’
u
s
raisons d
e
o
ut autre u
s
e impropr
e
’appareil p
a
o
ccasionné
s
cide des pi
mouillé, s
é
uant la co
r
n
. Le jeter
p
e
l'appareil.
d
e la salet
é
m
pérature
s
s
pièces él
e
ique.
apparaîtr
e
lumé. Ne
p
u feu. Ten
d
e Tréso
e
urs de tr
é
v
os recherc
ntivement
a
nsport, ne
m
ages sur
v
o
ute respo
n
bijoux, or
e
à utiliser
.
a
u détecte
u
le confort
d
us l'eau.
m
mande.
e
s).
p
ersonnes
n
d
roit publi
c
m
ents.
J
ETS POT
E
d
écouvert
e
a
fin de ce
t
o
nspection
s
températ
u
u
tiliser.
e
sécurité.
s
age peut
c
e
annule d'
o
a
r le client
s
par un us
a
les peut e
n
é
chez-le im
m
r
rosion des
p
eut endo
m
é
, pouvant
p
s
normales
.
e
ctroniques
e
lorsque le
p
as recharg
ir la pile
à
rs
é
sor. Voici
q
hes sur un
avant la m
pas l’insta
v
enus en n
é
n
sabilité po
et argent
à
.
u
r.
d
'utilisation
n
on autori
s
c
peut être
E
NTIELLE
M
e
et notifi
e
t
te notice.
pendant l’i
u
res extrê
m
c
auser des
o
ffice la ga
r
ne tombe
n
a
ge en mili
n
dommage
r
médiatem
e
circuits él
e
m
mager le
s
p
rovoquer
.
Des temp
, endomm
a
remplace
m
er des pile
s
à
l’écart d
e
q
uelques r
è
site.
© Vellema
n
ise en
ller et
é
gligeant
ur les
à
peu près
.
s
ées.
dangereus
M
ENT
e
r la polic
e
nstallation
m
es.
courts-
r
antie.
n
t pas sous
eu salé.
r
le circuit
e
nt. Les
e
ctronique
s
s
circuits et
une usure
ératures
a
ger les pil
e
m
ent
s
alcalines.
e
s enfant
s
è
gles de ba
s
n
nv
e.
e
et
la
s
.
e
s
s
.
s
e

CMD01N
16/12/2011 © Velleman nv
10
•Respectez les lois nationales, fédérales et locales durant votre chasse au trésor.
•Ne détruisez jamais des trésors historiques ou archéologiques. Si vous n'êtes pas certain de
l'objet que vous avez trouvé, contactez un musée ou une société d'histoire dans votre région.
•Laissez la campagne et la flore dans l'état où elle était. Rebouchez tout trou que vous creusez.
•Utilisez votre détecteur uniquement dans des endroits sûrs.
•Ne jetez tout déchet que dans des endroits prévus à cet effet. Ne le laissez pas au chasseur de
trésors suivant.
5. Préparation
Se référer à l’illustration à la page 2de cette notice.
a. Assemblage
•Desserrez les boutons à l'extrémité du disque chercheur, puis réglez le disque chercheur à
l'angle souhaité. (Le disque chercheur doit être parallèle au sol). Resserrez les boutons, juste
assez pour empêcher le disque chercheur de pivoter ou de branler.
•Tournez l'écrou de fixation du tube dans le sens des aiguilles d'une montre jusqu'à ce qu'il se
desserre [A].
•Allongez ou raccourcissez le tube de façon à ce que lorsque vous vous tenez debout muni de
votre détecteur, le disque chercheur se trouve à une distance d'environ 1 à 5 cm (1/2 à 2
pouces) au-dessus du niveau du sol lorsque votre bras est détendu le long du corps [B].
•Tournez l'écrou de fixation du tube dans le sens inverse à celui des aiguilles d'une montre pour
le fixer en place.
•Desserrez le bouton de la base de la poignée, insérez le support pour bras et resserrez le
bouton [F].
b. Installer les piles
Attention:
•N'utilisez que des piles neuves aux dimensions requises et du type recommandé.
•Ne mélangez pas de batteries neuves et usagées, ni de types différents de batteries (batteries
standard, alcalines ou rechargeables de différentes capacités).
1. Si le détecteur est allumé, placez-le en MODE OFF. (éteint) [G].
2. Enfoncez le couvercle du compartiment batteries de droite et retirez-le en le glissant dans la
direction de la flèche [H].
3. Placez une batterie 9 volt dans le compartiment des batteries au-dessus du ruban, en respectant
les symboles de polarité (+ et -) indiqués à l'intérieur.
4. Replacez le couvercle du compartiment batteries de droite.
5. Enfoncez le couvercle du compartiment batteries de gauche et retirez-le en le glissant dans la
direction de la flèche [I].
6. Placez deux batteries 9 volt dans le compartiment des batteries au-dessus des rubans, en
respectant les symboles de polarité (+ et -) indiqués à l'intérieur.
7. Replacez le couvercle du compartiment batteries de gauche.
Précautions:
• Retirez toujours les piles plates ou presque plates; les piles peuvent faire couler des agents
chimiques pouvant détruire les pièces électroniques.
• Si vous n'avez pas l'intention d'utiliser votre détecteur pendant plus d'une semaine, retirez les
piles.
• Débarrassez-vous rapidement et correctement des piles usagées.
Vous allongerez la vie des piles en utilisant des écouteurs, qui consomment moins que l’haut-parleur
intégré.
c. Test des Piles
Si le détecteur ne s'allume pas, émet un volume faible,ne se règle pas correctement, fonctionne de
manière irrégulière ou se décale, testez les piles.
•Positionnez l'appareil en MODE VLF (very low frequency: très basse fréquence). Pour tester les
piles du compartiment gauche, mettez BATT TEST sur B1. Pour tester les piles du compartiment
droit, sélectionnez B2 [J]. Si le pointeur se met entre 3 et 5 (zone verte), les piles sont
suffisamment puissantes. Sinon, remplacez-les.
d. Réglage du VUmètre
•En MODE OFF, utilisez un tournevis pour aligner le pointeur au 0 de l'échelle [K, L].
e. Utiliser un casque
Connectez des écouteurs stéréo (non fournis) au détecteur pour l'écouter en privé. L'utilisation
d'écouteurs économise également les piles et facilite l'identification de changements sonores subtils,
donnant ainsi de meilleurs résultats de détection.

CMD01N
16/12/2011 © Velleman nv
11
•Pour connecter des écouteurs au détecteur, insérez la fiche écouteurs 1/8 de pouce dans la prise
HEADPHONE [M].
•Réglez le niveau de volume avec le réglage de volume [M].
Note: Le microphone intégré du détecteur se déconnecte lorsque vous connectez des écouteurs.
f. Ecouter en sécurité
Pour protéger votre écoute, suivez les directives ci-dessous lorsque vous utilisez des écouteurs:
•Instaurez le volume au plus bas avant de commencer l'écoute et réglez-le ensuite à un niveau
confortable.
•N'instaurez pas de niveaux de volume trop élevés. Une écoute prolongée à haut niveau sonore
risque de provoquer des lésions auditives irréversibles.
•Une fois le volume réglé, ne l'augmentez plus. Vos oreilles s'adaptent au niveau du volume de
sorte qu'une augmentation du volume ne provoque pas d'inconfort mais endommage cependant
votre capacité auditive.
g. Sécurité routière
N'utilisez pas vos écouteurs lorsque vous procédez à des recherches à proximité de zones de trafic
intense. Bien que certains écouteurs aient été conçus pour laisser passer certains sons extérieurs
lorsque des niveaux de volume normaux sont instaurés, le danger du trafic subsiste toujours.
6. Fonctionnement
Votre CDM01N fait la distinction entre les métaux ferreux et non ferreux. Lorsque le détecteur capte
un objet métallique, l'affichage du vumètre est modifié, l'indicateur NON FERREUX ou FERREUX
s'allume ou s'éteint, et une des trois tonalités est produite. La réponse dépend du type de métal
détecté. Plus la tonalité est aiguë, plus la détection est forte.
a. Préparer le détecteur
1. Mettez OPERATE/BATT TEST sur OPERATE.
2. Tenez le détecteur confortablement et puis mettez le bouton MODE dans la position souhaitée.
Sélectionnez VLF pour tester l'état des batteries et réglez TUNE et GROUND. (Voir "Affinage du
réglage" et "Réglage du terrain"). Sélectionnez TR1 pour détecter des différences extrêmes dans
les métaux, comme entre le fer et l'or. La différence entre le fer et l'or est indiquée sur le
vumètre (fer dans la section ferreux, or dans la section non ferreux). Sélectionnez TR2 pour
détecter des différences plus subtiles entre les métaux, comme par exemple entre l'aluminium et
l'or (voir "Réglage de la DISCRIMINATION") [N].
Suivez la procédure ci-dessous pour le réglage du détecteur (TUNE) [O].
1. Tournez le VOLUME en position 10 heures.
2. Mettez DISCRIMINATION en position moyenne.
3. Maintenez le disque chercheur à environ 30 cm (1 pied) du sol et de tout objet métallique,
maintenez le bouton rouge de la poignée enfoncé et tournez lentement le bouton TUNE de gauche
à droite jusqu'à ce que le pointeur du vumètre reste sur ou proche de 0, puis relâchez le bouton.
Pendant la recherche, vous pouvez affiner le réglage du détecteur au moyen des autres boutons.
Note: Enfoncez le bouton rouge de la poignée à n'importe quel moment pour remettre le pointeur à
0.
b. Tester et utiliser le détecteur
Pour vous familiariser aux réactions du détecteur en présence de métaux différents, il est conseillé
de le tester avant de l'utiliser pour la première fois. Vous pouvez effectuer ce test soit à l'intérieur,
soit à l'extérieur. Il faudra cependant affiner le réglage du détecteur avant chaque usage (voir
“Affinage dur réglage”).
1. Otez tous objets métalliques (montres, bagues…) et mettez le détecteur sur une table en bois ou
en plastique.
2. Réglez l'angle du disque chercheur de façon à ce que la partie plane soit dirigée vers le plafond
[P].
Note: Ne testez jamais le détecteur sur un plancher à l'intérieur d'un bâtiment à étages
multiples. La plupart de ces bâtiments comportent une armature métallique dans le plancher, qui
peut interférer avec les objets que vous testez ou masquer complètement le signal.
3. Placez le bouton MODE sur TR1.
4. Secouez un échantillon du matériau que vous souhaitez trouver au moyen du détecteur (par
exemple une bague en or ou une pièce) à environ 5 cm (2 pouces) au-dessus du disque
chercheur.
Notes:
•Le disque chercheur ne détecte rien sans mouvement. Vous devez bouger l'objet, puisque vous
n'effectuez pour l'instant aucun balayage avec le détecteur.

CMD01N
16/12/2011 © Velleman nv
12
•Si vous utilisez une pièce, le détecteur la détectera plus facilement si vous la présentez côté plat
(pas le bord) parallèle au côté plat du disque chercheur.
•Si le détecteur détecte le matériau, les indicateurs NON FERREUX et FERREUX clignotent et le
pointeur se positionne sur FERREUX ou NON FERREUX tandis que le détecteur détermine le type
de métal détecté. S'il détecte un métal non ferreux, il émet également une tonalité.
•Si le détecteur ne détecte pas le matériau, vérifiez l'état des piles et la connexion du disque
chercheur.
c. Test à l’extérieur et Utilisation
1. Trouvez un endroit à l'extérieur où le sol est dépourvu de métal.
2. Placez un échantillon du matériau que vous souhaitez trouver au moyen du détecteur (par
exemple une bague en or ou une pièce) sur le sol. (Si vous utilisez un objet de valeur, marquez
l'endroit où vous le placez de façon à pouvoir le retrouver par la suite. Ne le placez pas dans les
hautes ou mauvaises herbes).
3. Mettez MODE sur TR1.
4. En maintenant le disque chercheur à environ 2 à 5 cm (1-2 pouces) au-dessus du sol, déplacez
lentement le disque chercheur dans la zone où vous avez placé l'échantillon, en effectuant un
mouvement de balayage latéral [Q].
5. Essayez de trouver d'autres métaux dans la zone.
Lorsque vous trouvez un objet métallique, attendez quelques secondes après l'arrêt de la tonalité
avant de continuer, afin de permettre la remise à zéro du détecteur (ou enfoncez le bouton rouge
de la poignée pour repositionner le pointeur au centre du vumètre).
d. Astuces concernant le balayage avec le disque chercheur:
•N'utilisez jamais le disque chercheur comme un pendule. Si vous le soulevez pendant ou à la fin
d'un balayage, des indications fausses sont possibles [R].
•Procédez lentement - si vous vous dépêchez, vous manquerez des cibles.
•Si le détecteur détecte l'objet, il émet une tonalité et le pointeur indique le type de métal trouvé.
Passez en MODE TR1 ou TR2 pour déterminer la qualité du métal.
•Si le détecteur ne détecte pas le matériau, assurez-vous que vous effectuez un mouvement
correct avec le disque chercheur.
Notes:
•Le détecteur répond par un signal intense lorsqu'il détecte des objets métalliques de très grande
valeur. Si le signal n'est pas répété lorsque vous passez plusieurs fois au-dessus de la cible, il s'agit
probablement d'un objet sans valeur.
•Des signaux erronés peuvent être provoqués par des terrains pleins de déchets, des interférences
électriques ou des objets métalliques volumineux, irréguliers et sans valeur. Ces signaux erronés
sont généralement des signaux intermittents ou non répétés.
e. Affinage du réglage
Quand vous avez compris le fonctionnement de votre détecteur, affinez le réglage pour améliorer
vos trouvailles.
1) Réglage de la sensibilité (SENSITIVITY) [S]
Pour régler la capacité du disque chercheur à détecter des objets à différentes profondeurs
dans le sol, positionnez le bouton SENSITIVITY entre MIN ET MAX. Pour une profondeur de
détection maximum, mettez le bouton. Si le détecteur émet un bruit de "bavardage", réduisez
la sensibilité jusqu'à ce que ce "bavardage" s'arrête.
2) Réglage du terrain (GROUND) [T]
Le réglage du terrain (GROUND) prend un certain temps, mais il est primordial pour un
fonctionnement exact. GROUND évite les signaux erronés provenant de terrains minéralisés.
1. Mettez MODE sur VLF et abaissez le disque chercheur à 1 à 4 cm (1/2 à 2 pouces) au-dessus
du niveau du sol.
2. Si le pointeur va vers la droite, tournez GROUND vers la gauche et vice versa.
3. Relevez le disque chercheur à environ 30 cm (1 pied) du sol et enfoncez le bouton rouge de
la poignée. Le pointeur se remet au centre.
4. Répétez les points 1 à 3 jusqu'à ce que le pointeur reste au milieu quand vous baissez le
disque chercheur.
Une fois GROUND réglé, le détecteur est adapté au type de sol du site spécifique. Ne modifiez
le réglage que si vous vous rendez sur un site différent.
3) Réglage de DISCRIMINATION
La discrimination est la capacité du détecteur de différencier les types de métaux. Le réglage
de DISCRIMINATION du détecteur détermine si le détecteur fait la différence entre différents
types de métaux ferreux et non ferreux.

CMD01N
16/12/2011 © Velleman nv
13
Vous pouvez régler DISCRIMINATION au minimum (à fond dans le sens inverse à celui des
aiguilles d'une montre), au maximum (à fond dans le sens des aiguilles d'une montre), ou à
un niveau intermédiaire. Au fur et à mesure que vous augmentez le niveau, le détecteur
commence par ne pas détecter les petits objets en papier aluminium, ensuite les films épais,
et finalement les objets métalliques comme les ouvertures de canettes en aluminium.
Note: Chaque fois que vous utilisez le détecteur dans une zone différente, vous devez refaire
un réglage de la DISCRIMINATION. Chaque site de recherche présente de nouveaux
challenges.
f. Signaux erronés
Etant donné que votre détecteur est extrêmement sensible, des déchets et autres sources
d'interférence peuvent provoquer des signaux confus. La solution pour ce type de signaux est de ne
creuser qu'en cas de cibles émettant un signal fort, répétitif. Lorsque vous déplacez le disque
chercheur d'avant en arrière au-dessus du sol, apprenez à reconnaître la différence entre les signaux
émis au hasard et les signaux stables et répétitifs.
Pour réduire les signaux erronés lorsque vous cherchez sur des terrains munis de nombreux
déchets, ne parcourez que des petites zones à la fois en effectuant un balayage lent, avec de brefs
chevauchements.
g. Astuces pour la détection
Aucun détecteur n'est sûr à 100%. Différentes situations influencent la détection de métaux. La
réaction du détecteur dépend d'un nombre de choses:
• L'angle de l'objet dans le sol.
• La profondeur de l'objet.
• La quantité de fer dans l'objet.
• La taille de l'objet.
h. Localiser une cible
La localisation précise d'une cible facilite le creusage. La localisation précise requiert de
l'entraînement, nous vous suggérons de vous entraîner à rechercher et déterrer de petits objets
métalliques vous appartenant avant d'entamer des recherches en d'autres endroits. Certaines cibles
sont difficiles à localiser avec précision en raison de la direction du balayage. Essayez de changer la
direction du balayage pour localiser une cible.
Suivez la procédure ci-dessous pour localiser une cible.
1. Lorsque le détecteur détecte une cible enterrée, poursuivez le balayage au moyen du disque
chercheur au-dessus de la cible suivant un mouvement latéral rétrécissant.
2. Notez visuellement l'endroit exact du terrain où le détecteur émet un signal sonore.
3. Arrêtez le disque chercheur directement au-dessus de cet endroit. Eloignez-le ensuite de vous
vers l'avant, puis ramenez-le vers vous et répétez ce mouvement un certain nombre de fois.
Notez visuellement l'endroit exact du terrain où le détecteur émet un signal sonore.
4. Répétez les points 1 à 3 à angle droit par rapport à la ligne de recherche initiale, en formant un
"X". La cible se situera directement sous le "X" au point où la réponse est la plus forte [U].
Remarque:
• Si la zone recherchée comporte tellement de déchets que vous obtenez des signaux erronés,
effectuez un balayage plus lent et plus court.
• Il se peut que les pièces enterrées récemment ne produisent pas la même réponse que celles
enterrées depuis longtemps en raison du phénomène d'oxydation.
• Certains clous, écrous, boulons et autres objets en fer (comme les anciennes capsules de
bouteilles) s'oxydent et créent un effet "halo". Un effet halo est provoqué par un mélange
d'éléments naturels présents dans le sol et l'oxydation causée par différents métaux. En raison de
ces mélanges de métaux, les signaux cibles peuvent ne pas avoir une position "fixe". Cet effet
rend ces objets très difficiles à détecter avec précision. (Voir "Affinage du réglage du détecteur").
7. Soin et entretien
Nettoyez de temps en temps le détecteur au moyen d'un chiffon humide pour qu'il garde un
aspect neuf. N'utilisez pas d'agents chimiques agressifs, de solvants ni de détergents
puissants pour nettoyer le détecteur.
•Si vous modifiez ou touchez les parties internes du détecteur, vous risquez de provoquer un
mauvais fonctionnement de celui-ci et d'annuler la garantie.
•Le disque chercheur fourni avec le détecteur est étanche et peut être immergé dans l'eau douce
ou salée. Cependant, ne laissez pas d'eau pénétrer dans le boîtier de commande du détecteur.
Après avoir utilisé le disque chercheur dans l'eau salée, rincez-le à l'eau douce pour empêcher la
corrosion des parties métalliques.

16
/
8
.
Si
ré
s
Le
si
g
L’
é
co
ci
b
d’
u
u
n
9
.
ali
fr
é
se
di
s
te
m
di
m
p
o
N
’
a
u
a
p
P
o
vi
s
T
o
n
o
©
S
A
T
o
p
a
so
1
.
A
a
B
e
/
12/2011
.
Problè
m
votre déte
s
oudre le
p
détecteur
g
naux erro
n
é
cran n’ind
i
rrect lorsq
u
b
le. Ou bie
n
u
n type de
n
e cible.
.
Spécifi
c
mentation
é
quence
nsibilité
s
criminatio
n
m
pérature
m
ensions (
o
ids
’
employer
u
cunemen
p
pareil.
o
ur plus d
’
s
itez notr
e
o
utes les i
o
tification
DROITS
D
A
Vellema
n
o
us droits
m
a
rtielle, du
c
it est inter
d
.
Inleidi
n
a
n alle in
g
e
langrijke
Dit
s
wor
d
eve
n
ges
p
naa
r
m
es et s
o
cteur ne f
o
p
roblème.
PROBLE
affiche ou
n
és
i
que pas le
u
e le détec
t
n
le détect
e
tonalité lo
r
c
ations t
n
audible (
de travail
Lo x La x
H
cet appa
r
t respons
a
’
informati
e
site we
b
nformati
o
préalabl
e
D
’AUTEUR
n
est l’ay
a
m
ondiaux r
é
c
ontenu d
e
d
ite sans l’
a
ng
g
ezetenen
milieu-in
f
s
ymbool op
d
t weggew
o
n
tuele batt
e
p
ecialiseerd
r
een lokaa
l
o
lutions
o
nctionne p
M
émet des
type de m
t
eur trouv
e
e
ur émet p
l
r
squ’il trou
v
echniqu
e
3 tons) b
a
m
él
H
)
r
eil qu’av
e
a
ble de d
o
on conce
r
b
www.Pe
r
o
ns prése
n
e
.
a
nt droit
d
é
servés. T
o
e
cette noti
c
a
ccord pré
a
G
e
van de E
u
f
ormatie
b
het toeste
o
rpen, dit t
e
rijen) niet
bedrijf te
r
l
recyclage
p
as correct
e
Il
s
dé
t
Eff
e
co
r
"L
o
Il
s
dé
t
loc
(v
o
pa
s
pr
o
étal
e
une
l
us
v
e
La
La
re
c
La
n'
a
m
a
e
s
3
1
1
m
a
s 4
m
oyen 7
evé 1
0
9
±
e
c des acc
e
o
mmages
r
nant cet
a
r
el.eu.
n
tées dan
s
d
es droits
d
o
ute reprod
c
e par quel
a
lable écrit
e
bruik
e
u
ropese U
n
b
etreffen
d
l of de ver
p
oestel sch
a
bij het ge
w
r
echtkome
n
p
unt breng
CMD01N
14
e
ment, lise
z
s
e peut qu
e
t
ecteur tro
p
e
ctuez un
b
r
rectement
o
calisation
d
s
e peut qu
e
t
ecte des
m
aliser la ci
b
o
ir "Localis
a
s
et n'éme
t
o
bablemen
t
zone de re
cible peut
c
onnu par l
e
cible est f
o
a
ffiche pas
l
a
uvais fonc
t
x pile de
9
5KHz ±2K
H
6cm pour
u
m
ode 'all m
e
00Hz + 60
00Hz + 10
500Hz + 2
°C ~ 40°C
2~121 x 2
0
±
1.26kg
e
ssoires
d
ou lésion
s
a
rticle et l
s
cette no
t
d
’auteur
p
uction, tra
d
que procé
d
de l’ayant
e
rsha
n
n
ie
d
e dit pro
d
p
akking ge
e
a
de kan to
e
w
one huish
n
voor recy
c
en. Respe
c
z
les sugge
S
U
e
vous dépl
p
rapidem
e
b
alayage p
l
. Voir "Tes
t
d
'une cible
"
e
le détect
e
m
étaux fort
e
b
le à partir
a
tion d'une
t
pas le mê
t
d'un mét
a
cherche p
e
être consti
t
e
détecteu
r
o
rtement o
x
l
e type de
m
t
ionnemen
t
9
V (non inc
H
z
u
ne pièce
d
e
tal')
Hz
5Hz
25Hz
0
x 18.5c
m
d
’origine.
S
s
survenu
s
a version
t
ice peuv
e
p
our cette
d
uction, c
o
d
é ou sur t
o
droit.
n
dleidi
d
uct
e
ft aan dat
e
brengen a
a
o
udelijke a
c
lage. U m
o
c
teer de pl
a
stions ci-d
e
U
GGESTI
O
aciez le di
s
e
nt ou à un
l
us lent et
t
t
et utilisat
i
"
.
e
ur émette
e
ment oxy
d
de plusieu
cible"). Si
me signal
à
a
l fortemen
e
ut conteni
r
t
uée d'un t
r
.
x
ydée, il s
e
m
étal corr
e
t
.
l.)
d
e monnaie
m
S
A Velle
m
s
à un us
a
la plus ré
c
e
nt être m
o
notice.
o
pie ou diff
u
o
ut suppor
t
ng
, als het n
a
a
n het mili
e
fval; het
m
o
et dit toe
s
a
atselijke
m
e
ssous pou
O
N
s
que cherc
h
mauvais a
t
enez le d
é
i
on du dét
e
un signal
e
d
és. Essay
e
rs angles
d
le détecte
u
à
chaque f
o
t oxydé.
r
plus d'un
e
ype de mé
t
e
peut que
e
ct. Il ne s'
a
de € 2 (Ø
m
an ne ser
a
a
ge (incor
r
c
ente de
c
o
difiées s
a
u
sion, inté
g
t
électroni
q
a
zijn leve
n
e
u. Gooi di
t
m
oet bij ee
n
s
tel naar u
w
m
ilieuwetge
© Vellema
n
r essayer
d
h
eur du
ngle.
é
tecteur
e
cteur" et
e
rroné s'il
e
z de
d
ifférents
u
r n'affiche
o
is, il s'agit
e
cible.
t
al non
le détecte
u
a
git pas d'
u
25mm, en
a
r
ect) de c
e
c
ette noti
c
a
ns
g
rale ou
q
ue que se
n
scyclus
t
toestel (
e
n
w
verdeler
ving.
n
nv
d
e
u
r
u
n
e
t
c
e,
e
n
of

16
/
H
e
D
a
h
e
g
a
d
e
v
e
M
e
D
e
Ei
g
H
o
V
u
R
e
W
O
p
O
p
2
.
3
.
R
a
•
•
•
•
•
•
•
•
•
4
.
D
e
b
a
•
•
/
12/2011
e
bt u vrag
a
nk u voor
e
t toestel b
e
a
rantie gel
d
e
aler zal de
e
rband me
e
e
t uw CDM
e
ze metaal
d
g
enschapp
e
o
ofdtelef
o
u
-meter -
e
gelbare
s
aterdicht
e
p
merking:
p
merking:
.
Veili
g
h
e
Hou
d
Let
erv
o
RA
A
loc
a
on
m
.
Al
g
em
e
a
adpleeg d
e
Bescherm
Bescherm
Leer eerst
Om veilig
h
Gebruik h
e
garantie.
Schade d
o
garantie.
De garant
Leef de l
o
Verwijder
kunnen g
a
Hou
d
kun
n
Sch
u
Bes
c
Geb
r
tem
p
LET
stor
i
ze n
.
Ethisc
h
e
nk eraan
d
a
sisregels:
Vraag altij
d
Houd hier
b
en, conta
c
uw aanko
o
e
schadigd
t
d
t niet voor
verantwo
o
e
houden.
01N kunt
u
d
etector is
e
n van de
C
o
onaanslu
i
om aan te
s
teel: de i
n
e
zoekspo
e
alleen de
uw meta
a
e
idsinst
r
d
buiten h
e
op: Het dr
a
o
or dat u al
A
K NOOIT
a
tie af – l
a
m
iddellijk
d
e
ne richt
e
Vellema
n
dit toestel t
dit toestel
de functie
s
h
eidsredene
e
t toestel
e
o
or wijzigin
g
ie geldt ni
e
o
cale wet
g
de batterij
e
a
an lekken
d
de meta
a
n
en miner
a
u
d het toe
s
c
herm de
m
r
uik en be
w
p
eraturen
k
OP: Bij h
e
i
ngen voor
d
iet in het
v
h
e code
v
d
at u in uw
d
om toest
e
b
ij altijd re
c
teer dan
o
p! Lees de
z
t
ijdens het
schade do
o
rdelijkheid
u
haast ov
e
veelzijdig
e
C
DM01N:
i
ting - om
geven wel
k
n
stelbare le
e
l- om oo
k
zoekspoel
a
ldetector
w
r
ucties
e
t bereik v
a
a
gen van
e
le waarsch
MUNITIE
a
at eventu
d
e plaats
e
li
j
nen
n
®service
egen schok
tegen extr
e
s
van het t
n mag de
g
e
nkel waar
v
g
en die de
e
t voor sch
a
g
eving zo
r
e
n uit de
m
en het int
e
a
ldetector
d
a
len bevatt
e
s
tel niet do
o
m
etaaldete
c
w
aar de m
e
k
unnen he
t
e
t vervang
e
d
oen. Herl
a
v
uur. Houd
v
oor sch
a
gedrag all
e
e
mming vo
o
kening me
t
de plaats
e
z
e handlei
d
transport,
or het neg
e
afwijzen
v
e
ral munts
t
e
n eenvou
d
een hoofd
t
k
e metaals
o
ngte van d
k
onder w
a
is waterdic
w
erkt uitslu
a
n kindere
n
e
en hoofdt
e
uwingsgel
u
OF ANDE
R
eel iema
n
e
lijke ove
r
- en kwal
i
ken. Vermi
j
e
me tempe
oestel ken
n
g
ebruiker g
e
v
oor het ge
gebruiker
a
de wegen
s
r
gvuldig n
m
etaaldete
c
e
rne circuit
d
roog of dr
o
e
n die het i
o
reen en v
e
c
tor tegen
s
e
taaldetect
o
t
interne ci
r
e
n van de
b
a
ad geen a
l
de batte
r
a
tten
j
a
g
e
schatenj
a
o
r u een pl
a
t
anderma
n
CMD01N
15
e
lijke aut
o
d
ing grondi
installeer
h
e
ren van b
e
v
oor defect
e
t
ukken, rel
i
d
ig in gebr
u
t
elefoon (ni
o
ort verm
o
e steel zor
g
a
ter metale
ht; de rest
itend met
3
n
en onbev
o
e
lefoon op
d
u
iden en h
e
R
E LEVEN
S
n
d de loca
t
r
heid.
i
teitsgara
n
j
d brute kra
raturen, st
o
n
en voor u
e
en wijzigin
maakt is.
B
heeft aang
s
gebruik i
n
a.
c
tor indien
ernstig be
s
o
og hem o
n
nterne cir
c
e
rmijd bru
t
s
tof en vuil
o
r onder n
o
r
cuit, de b
a
b
atterij van
l
kalinebatt
e
r
ij uit de
b
g
ers
a
gers vert
e
a
ats doorzo
e
n
s rechten
e
o
riteiten
b
g voor u h
e
h
et dan nie
e
paalde ric
e
n of probl
e
i
kwieën, ju
w
u
ik.
et meegel
e
o
edelijk ge
v
g
t voor gr
o
n voorwer
p
van de be
h
3
9V-batte
r
o
egden.
d
e openba
r
e
t verkeer
g
S
GEVAAR
L
t
ie bewak
e
n
tie achte
r
cht tijdens
d
o
f en vocht
het gaat g
gen aanbr
e
B
ij onoord
e
ebracht aa
n
zoute om
u hem een
s
chadigen.
n
middellijk
c
uit kunnen
t
e kracht ti
j
.
o
rmale om
g
a
tterijen of
een nog i
n
e
rijen. Doo
b
uurt van
k
e
genwoordi
g
e
kt met u
w
e
n eigend
o
b
etreffen
d
e
t toestel i
n
t en raadpl
htlijnen in
e
men die
h
w
elen, gou
e
verd) aan
v
onden is..
o
ot gebruik
s
p
en op te s
p
h
uizing nie
t
r
ijen (niet
m
r
e weg kan
g
oed kunt
h
L
IJKE OBJ
e
n – en w
r
aan deze
h
d
e bedienin
igheid.
ebruiken.
e
ngen aan
h
e
elkundig g
e
n het toest
gevingen.
lange tijd
af indien
h
aantasten
j
dens de b
e
g
evingste
m
de behuizi
n
n
geschakel
d
rboor de b
a
k
inderen.
g
t. Respec
t
w
detector.
o
m.
d
e de ver
w
n
gebruik
n
l
eeg uw de
a
deze hand
l
h
ier rechtst
d en zilver
te sluiten.
s
gemak.
p
oren.
t
.
m
eegeleve
r
gevaarlijk
h
oren.
ECTEN A
A
aarschu
w
h
andleiding
g van dit t
o
h
et toestel.
e
bruik ver
v
el vallen n
i
niet gebrui
h
ij nat is. V
.
e
diening v
a
m
peraturen.
n
g bescha
d
d
toestel k
u
a
tterijen n
o
t
eer daaro
m
© Vellema
n
w
ijdering.
n
eemt. We
r
a
ler. De
l
eiding en
u
reeks
opsporen.
r
d).
zijn. Zorg
A
N. Baken
w
.
o
estel.
v
alt de
i
et onder d
e
kt. Batterij
loeistoffen
a
n dit toest
e
Extreme
d
igen.
u
nnen zich
o
oit en goo
m
deze
n
nv
r
d
u
w
de
e
en
e
l.
i

CMD01N
16/12/2011 © Velleman nv
16
•Houd ook rekening met mogelijke nationale, regionale en plaatselijke wetsbepalingen met betrekking
tot het schatgraven.
•Vernietig geen voorwerpen van historische of archeologische waarde. Als u twijfels heeft over de
oorsprong van een gevonden voorwerp, neem dan contact op met een museum of een historische
vereniging bij u in de buurt.
•Laat de doorzochte grond en de begroeiing achter in hun oorspronkelijke staat. Vul een kuil
steeds weer op.
•Gebruik uw detector slechts op veilige plaatsen.
•Laat gevonden afval uitsluitend achter op daartoe voorziene afvalbelten. Laat het niet achter voor
de eerstvolgende schatgraver.
5. Voorbereiding
Raadpleeg de figuren op pagina 2 van deze handleiding.
a. Montage van de detector
•Draai de knop aan het uiteinde van de zoekspoel los om de gewenste hoek in te stellen. (zorg
ervoor dat de zoekspoel evenwijdig loopt met de grond). Draai de knop net hard genoeg aan
dat de spoel niet gaat kantelen of wiebelen.
•Draai de grendelknop van de steel los (in wijzerzin) [A].
•Regel de lengte van de staaf zo dat als u recht staat en de detector in uw hand vasthoudt
terwijl u uw arm ontspannen langs uw zijde laat hangen, de zoekspoel ongeveer 1 tot 5 cm
boven de grond hangt [B].
•Draai de grendelknop dicht (tegenwijzerzin) zodra de gewenste lengte bereikt is.
•Draai de knop aan de onderkant van het handvat los, steek de armsteun in de opening en
draai de knop vervolgens weer vast [F].
b. Batterijen plaatsen
•Let op:
•Gebruik slechts ongebruikte batterijen van de aanbevolen grootte en type.
•Meng geen nieuwe en oude batterijen, oplaadbare en niet-oplaadbare of batterijen met
verschillende capaciteit.
1. Als de detector nog aan staat, zet u de MODE-knop op OFF [G].
2. Druk op het deksel van het rechterbatterijvakje en schuif het deksel open in de richting van de
pijl [H].
3. Plaats een 9-volt batterij op het lint. Let hierbij op de polariteitsymbolen (+ en -).
4. Schuif het deksel van het rechterbatterijvakje terug op zijn plaats.
5. Druk op het deksel van het linkerbatterijvakje en schuif het deksel open in de richting van de pijl
[I].
6. Plaats de twee resterende 9-volt batterijen op de linten. Let hierbij op de polariteitsymbolen (+
en -).
7. Schuif het deksel van het linkerbatterijvakje terug op zijn plaats.
Let op:
•Verwijder altijd oude of zwakke batterijen; deze kunnen chemicaliën lekken die de elektronica
beschadigen.
•Haal de batterijen uit de detector indien u denkt deze een week of langer niet te gebruiken.
•Gooi oude batterijen onmiddellijk weg op een daartoe voorziene plek.
U kunt uw batterijen langer doen meegaan door een hoofdtelefoon te gebruiken ipv de ingebouwde
luidspreker.
c. Batterijen testen
De detector doet het niet of het volume is te zwak of valt moeilijk te regelen, of het apparaat werkt
niet goed of wijkt af: ga in dit geval eerst na of de batterijen niet ontladen zijn.
•Zet de MODE-knop op VLF (very low frequency). Zet BATT TEST op B1 om de batterijen in het
linkervak te testen; voor de batterijen in het rechtervak zet u BATT TEST op B2 [J].
•Zolang de wijzer van de vu-meter zich in de groene cijfers van de BATT-meter bevindt, zijn de
batterijen nog voldoende geladen. Zodra de wijzer zich buiten de groene cijfers bevindt, dient u
de batterijen te vervangen.
d. De meter bijregelen
•Zet de MODE-knop op OFF. Met een schroevendraaier kunt u nu de meter zodanig instellen dat
de wijzer op de schaalverdeling op 0 wijst [K, L].
e. Een hoofdtelefoon gebruiken
Met een stereo hoofdtelefoon (niet meegeleverd) kunt u ongestoord zoeken. Zo spaart u de
batterijen en hoort u ook beter kleine geluidsverschillen, wat leidt tot betere resultaten.
•Sluit de hoofdtelefoon (3,5 mm-stekker) aan op de daarvoor voorziene HEADPHONE-jack [M].

CMD01N
16/12/2011 © Velleman nv
17
•Regel het volume met de volumeknop [M].
Opmerking: Bij gebruik van een hoofdtelefoon, wordt de interne luidspreker uitgeschakeld.
f. Luisterveiligheid
Om uw gehoor te sparen, raden we u aan de volgende regels na te leven:
•Stel het volume in op een minimum voordat u begint te luisteren ; regel daarna het volume op
een voor u comfortabel niveau nadat u de hoofdtelefoon op uw oren geplaatst heeft.
•Vermijd extreem hoge volumeniveaus: deze kunnen blijvende gehoorstoornissen veroorzaken.
•Verhoog het volume niet meer na de initiële regeling. Het oor went aan het gekozen
volumeniveau, met als gevolg dat een voor het oor aanvaardbaar volumeniveau alsnog
schadelijk kan zijn.
g. Verkeersveiligheid
Draag geen hoofdtelefoon terwijl u zich in de verkeersdrukte bevindt. Hoewel sommige modellen
van hoofdtelefoons u tot in zekere mate ook het externe geluid laten horen (als u het volume op een
normaal niveau houdt), blijft het gevaarlijk om ze in het verkeer te gebruiken.
6. Werking
Uw CDM01N maakt het onderscheid tussen ijzerhoudende en niet-ijzerhoudende metalen.
Voorbeelden van niet-ijzerhoudende metalen zijn goud, zilver, koper, platina, aluminium, lood en
zink.
Zodra de detector een metalen voorwerp opspoort, verandert de meterverwijzing, de NON-FERROUS
(non-ferro) of FERROUS (ferro) indicator gaat aan of uit, terwijl één van de drie tonen afgaat. De
detector reageert telkens anders afhankelijk van het soort metaal dat gevonden is. Hoe hoger de
toon klinkt, hoe sterker de detectie.
a. De detector klaarmaken
1. Zet OPERATE/BATT TEST op OPERATE.
2. Houd de detector in een comfortabele positie en zet de MODE-knop in de gewenste stand:
Selecteer VLF om de batterijstroomtoevoer te testen en regel vervolgens TUNE en GROUND. (Zie
ook “De detector fijn afstellen” en “De GROUND regelen”). Zet nu de knop op stand TR1 om
extreme verschillen tussen metalen, zoals tussen ijzer en goud, op te sporen. Het verschil tussen
ijzer en goud is duidelijk zichtbaar op de meter (de wijzer wijst op “ferrous” i.g.v. ijzer en op
“non-ferrous” i.g.v. goud). Schakel vervolgens over naar TR2 voor een fijnere analyse zodat het
verschil tussen aluminium en goud bijvoorbeeld duidelijk hoorbaar wordt. (Zie ook
“DISCRIMINATIE regelen”) [N].
Volg de hieronder omschreven stappen om TUNE te regelen [O]:
1. Draai de VOLUME-regelaar in de “10 uur”- positie.
2. Zet de MODEknop op VLF.
3. Zet DISCRIMINATION, GROUND en SENSITIVITY in de middenstand.
4. Houd de zoekspoel op ongeveer 30 cm van het grondoppervlak en het metalen voorwerp
vandaan, terwijl u de rode knop op het handvat ingedrukt houdt en de TUNE-knop langzaam naar
links en naar rechts draait totdat de vu-wijzer (ongeveer) de nulstand bereikt. Laat dan de rode
knop los.
Tijdens het zoeken kunt u de detector fijnafstellen met de DISCRIMINATION-knop (zie “De detector
fijn afstellen”).
Opmerking: U kunt tijdens het zoeken altijd op de rode knop drukken om de wijzer terug op 0 te
zetten.
b. De detector testen en gebruiken
We raden u aan de detector vooraf uit te proberen op verschillende metaalsoorten om te leren hoe
de detector erop reageert. U kunt de detector zowel binnen als buiten uitproberen. Bij elk gebruik
dient de detector afgesteld te worden (zie “De detector fijn afstellen”).
1. Verwijder alle mogelijke metalen juwelen die u draagt zoals horloges, ringen enz. en plaats de
detector op een houten of plastic tafel.
2. Let de zoekspoel met de vlakke kant naar het plafond.
Opmerking: Test de detector binnenshuis nooit op een vloer, aangezien die in de meeste
gebouwen metaal bevat, wat het signaal van de geteste voorwerpen kan storen of overstemmen.
3. Zet MODE op TR1.
4. Beweeg een staal van het materiaal (zoals een gouden ring of een muntstuk) dat u met de
detector wilt opsporen op ongeveer 5 cm hoogte boven de zoekspoel heen en weer.
Opmerkingen:
• Zonder beweging vindt de zoekspoel niets. Beweeg dus het voorwerp aangezien de detector hier
stil ligt.

CMD01N
16/12/2011 © Velleman nv
18
• Indien u de test met behulp van een muntstuk uitvoert, zal het gemakkelijker gevonden worden
indien u het met de vlakke kant evenwijdig aan de zoekspoel houdt.
• Zodra de detector het voorwerp gevonden heeft, lichten de NON-FERROUS en FERROUS
indicatoren op en beweegt de wijzer richting FERROUS of NON-FERROUS afhankelijk van de
opgespoorde metaalsoort. Ook bij niet-ijzerhoudende metalen klinkt een toon.
• Indien de detector geen metaal vindt, ga dan eerst even na of de batterijen opgeladen zijn en of
de zoekspoel behoorlijk is aangesloten.
c. Buiten testen en zoeken
1. Probeer buiten op de grond een plek vrij van metaal te vinden.
2. Plaats een staal van het testmateriaal (bv. gouden ring, muntstuk) op de grond. (Als u van plan
bent waardevol metaal zoals goud voor de test te gebruiken, markeer dan de plek waar u het
voorwerp legt op de een of andere manier, zodat u het later gemakkelijk terugvindt. Vermijd dan
ook plaatsen met hoog gras of onkruid).
3. Zet de MODE-knop op TR1.
4. Houd de zoekspoel in de horizontale stand op ongeveer 2 à 5 cm afstand van de grond en
onderzoek langzaam de plek waar u het metalen voorwerp heeft achtergelaten dmv een
zijdelingse, slingerende beweging [Q].
5. Dezelfde plek op meerdere metalen voorwerpen doorzoeken.
Heeft u metaal gevonden, wacht dan enkele seconden na het signaal vooraleer verder te zoeken
om de detector toe te laten terug te keren naar de nulstand. (Of druk op de rode knop van het
handvat om de wijzer weer naar het midden van de vu-meter te brengen).
d. Slingertips:
• Hou de zoekspoel evenwijdig met de bodem en zwaai hem niet als een slinger: dit kan aanleiding
geven tot foutieve interpretaties [R].
• Maak een langzame slingerbeweging - haast doet u voorwerpen missen.
• Bij een detectie klinkt een toon en de wijzer geeft het soort metaal aan.
Als de detector metaal gevonden heeft, schakel MODE TR1 over naar TR2 om de kwaliteit van
het gevonden metaal nader te kunnen bepalen.
• Het lukt de detector niet het staaltje te identificeren: u houdt de zoekspoel waarschijnlijk niet in
de juiste positie.
Opmerkingen:
• Wanneer u waardevolle metalen voorwerpen vindt, klinkt een intens signaal. Wordt het signaal
niet herhaald, ook niet nadat u de zoekspoel enkele keren over en weer boven het doel heeft
laten gaan, dan is de vondst waarschijnlijk waardeloos.
• Vervuilde grond, elektrische interferenties of grote, grove stukken afvalmetaal kunnen
misleidende signalen veroorzaken. Deze herkent u meestal aan de gebroken of niet
reproduceerbare signalen die vanuit de detector afgaan.
e. De detector fijn afstellen
Wanneer u met uw detector vertrouwd bent geraakt, kunt u hem fijnregelen om selectiever te gaan
zoeken.
1) SENSITIVITY regelen [S]
Door de SENSITIVITY (gevoeligheid) op MIN. of MAX. of er tussenin te regelen, zorgt u ervoor
dat de zoekspoel ook voorwerpen kan opsporen die op verschillende dieptes in de grond liggen.
Zet SENSITIVITY op het maximum om de grond zo diep mogelijk te kunnen doorzoeken. Begint
de detector te “ratelen”, dan kunt u dit geluid stoppen door de gevoeligheid (SENSITIVITY) een
eind terug te draaien.
2) GROUND regelen [T]
Het zal even duren voor u de regeling van de GROUND-regelaar onder de knie hebt, maar het is
voor de precisie wel heel belangrijk.De GROUND-regelaar schakelt immers valse signalen door
ertshoudende grond uit.
1. Schakel over naar MODE VLF en breng de zoekspoel tot op ongeveer 1 à 4 cm van de
grond.
2. Wijkt de wijzer naar rechts uit, draai dan GROUND naar links. Gaat de wijzer naar links,
draai GROUND naar rechts.
3. Breng de zoekspoel tot op 30 cm van de grond en druk op de rode knop op het handvat.
De wijzer komt weer in het midden te staan.
4. Herhaal stappen 1 - 3 tot de wijzer in het midden blijft telkens als u de zoekspoel dichter
bij de grond brengt.
Als GROUND eenmaal is afgesteld, is de detector afgestemd op de grondeigenschappen van deze
locatie. U hoeft dit niet meer te regelen, tenzij u besluit een andere plek te onderzoeken.

CMD01N
16/12/2011 © Velleman nv
19
3) DISCRIMINTATIE regelen
Discriminatie slaat op het vermogen om verschillende soorten metaal te onderscheiden. Met de
DISCRIMINATION-knop bepaalt u in hoeverre de detector het onderscheid maakt tussen soorten
ijzer- en niet-ijzerhoudende metalen.
Als de MODE-knop op stand TR2 staat, begin dan met de DISCRIMINATION-knop in het midden.
Pas de positie van de knop aan terwijl u zoekt. Hoe hoger de DISCRIMINATION, hoe beter het
onderscheid tussen bijvoorbeeld grote stukken aluminium en goud. Maar kleinere, waardevolle
voorwerpen, zoals muntstukken of ringen, zouden wel eens overzien kunnen worden. Naarmate
u DISCRIMINATION hoger zet zal de detector - in deze volgorde - stukjes zilverpapier, dikkere
folio’s en metalen voorwerpen zoals treklipjes afkomstig van aluminium blikjes negeren.
Opmerking: U dient DISCRIMINATION wel telkens opnieuw af te stellen als u van plaats
verandert, want elke locatie biedt nieuwe uitdagingen.
f. Misleidende signalen
De grote gevoeligheid van uw detector kan soms aanleiding geven tot misleidende interferenties met
afvalmateriaal en andere bronnen. De beste manier om aan dit soort misleidende signalen het hoofd
te bieden, is alleen te graven naar doelwitten die een sterk, herhaald signaal uitzenden terwijl u de
zoekspoel heen en weer zwaait boven de grond. De ervaring zal u leren hoe u toevallige signalen
van vaste, reproduceerbare signalen kunt onderscheiden.
U kunt dit soort problemen sterk reduceren door slechts kleine oppervlakten tegelijkertijd te
onderzoeken. Voer hierbij trage en korte, elkaar overlappende zwaaibewegingen uit.
g. Zoektips
Geen enkele metaaldetector is 100% betrouwbaar. Talrijke factoren kunnen de reacties van de
detector bij het opsporen van metaal beïnvloeden, zoals:
• De hoek waarin het voorwerp zich in de grond bevindt.
• De diepte waarop het voorwerp zich bevindt.
• Het aandeel aan ijzer dat het voorwerp bevat.
• De omvang van het voorwerp.
h. Een doelwit bepalen
Door uw doelwit zo precies mogelijk te bepalen, maakt u het opgraven makkelijker.
Een precieze bepaling vergt enige ervaring. We raden dan ook deze praktijkervaring op te doen door
te zoeken en opgravingen te doen op uw eigendom voor u andere plekken gaat ontdekken.
Soms wordt de precieze bepaling van het doelwit bemoeilijkt door de slingerrichting. Om het doelwit
preciezer te kunnen bepalen, kunt u proberen de richting van de slingerbeweging te veranderen.
Volg de volgende stappen om het doelwit te bepalen.
1. Wanneer de detector een begraven doelwit ontdekt, blijf de zoekspoel dan over het doel
bewegen met steeds kleinere zijdelingse slingerbewegingen.
2. Markeer de exacte plek op de grond waar de detector een geluidssignaal geeft.
3. Houd de zoekspoel onmiddellijk stil boven deze plek. Beweeg de zoekspoel vervolgens in een
voorwaartse beweging van u vandaan en keer dan terug. Herhaal dit een aantal keren.
Markeer terug de exacte plek waar de detector een geluidssignaal laat horen.
4. Herhaal stappen 1 tot en met 3 nu in een hoek van 90° ten opzichte van de oorspronkelijke
zoekrichting, waardoor u een patroon in de vorm van een X beschrijft. Het doelwit zal zich
onmiddellijk onder de X bevinden daar waar het signaal het luidst klinkt [U].
Opmerkingen:
• Indien een plek zoveel afval bevat dat dit aanleiding geeft tot misleidende signalen, vertraag en
verkort dan de slingerbewegingen.
• Recent begraven muntstukken kunnen anders reageren dan reeds langer begraven muntstukken
omwille van de oxidatie bij deze laatste.
• Bepaalde soorten spijkers, schroeven, bouten en andere ijzeren voorwerpen (zoals oude
flesdoppen) oxideren en creëren een “kringlicht”-effect. Dit “kringlicht”-effect wordt veroorzaakt
door een mengeling van natuurlijke stoffen in de grond en van de oxidatie van verschillende
metalen. Door deze mengeling van metalen kan het voorkomen dat signalen niet op een ‘vaste’
plaats weerklinken. Dit effect maakt het dan ook bijzonder moeilijk om dergelijke voorwerpen
precies te situeren. (Zie “De detector fijnafstellen”).
7. Zorg en onderhoud
Maak de detector af en toe schoon met een vochtige doek zodat hij er nieuw blijft uitzien.
Gebruik geen bijtende chemische producten, reinigingsoplossingen of sterke detergenten
om de detector te reinigen.
•Wijziging van of geknoei met interne onderdelen van de detector kunnen een slechte werking
van de detector veroorzaken en het recht op garantie doen vervallen.

CMD01N
16/12/2011 © Velleman nv
20
•De meegeleverde zoekspoel is waterdicht en kan gedompeld worden in zowel zoet als zout
water. Zorg ervoor dat er geen water in de behuizing van de detector komt. Indien u de
zoekspoel gebruikt in zout water, dient u de zoekspoel achteraf te reinigen met zoet water om
corrosie van de metalen onderdelen tegen te gaan.
8. Storingen verhelpen
Indien uw detector niet naar behoren functioneert, volg dan onderstaande suggesties om de
problemen te verhelpen.
PROBLEEM SUGGESTIE
De detector toont of laat een
verkeerd signaal horen Misschien beweegt u de zoekspoel te snel of niet in de juiste positie.
Maak tragere slingerbewegingen en houd de zoekspoel in de juiste
positie. Zie “De detector testen en gebruiken” en “Het doelwit
bepalen”.
De detector kan valse signalen geven als hij geoxideerde metalen
vindt. Probeer het doelwit vanuit verschillende zoekhoeken (zie “Het
doelwit bepalen”) nader te bepalen. Indien de detector niet elke keer
hetzelfde signaal toont en laat horen, dan bestaat het doelwit
waarschijnlijk uit zeer zwaar geoxideerd metaal.
Wanneer de detector het
doelwit ontdekt, toont de
detector niet de juiste
metaalsoort op het scherm,
of laat hij meer dan een
soort toon horen.
Er kunnen zich meerdere doelwitten bevinden op de plek die u
doorzoekt.
Het doelwit kan gemaakt zijn uit een metaal dat de detector niet
kent.
Indien het doelwit erg geoxideerd is, kan het gebeuren dat de
detector niet de juiste metaalsoort weergeeft. Dit is geen foutieve
werking van de detector.
9. Technische specificaties
voeding 3 x 9V-batterij (niet meegelev.)
frequentie 15KHz ±2KHz
gevoeligheid 16cm voor een muntstuk van € 2 (Ø
25mm, in 'all metal'-modus)
hoorbare discriminatie
(3 tonen)
laag 400Hz + 60Hz
gemiddeld 700Hz + 105Hz
hoog 1500Hz + 225Hz
werktemperatuur 0°C ~ 40°C
afmetingen (L x B x H) 92~121 x 20 x 18.5cm
gewicht ±1.26kg
Gebruik dit toestel enkel met originele accessoires. Velleman nv is niet aansprakelijk voor
schade of kwetsuren bij (verkeerd) gebruik van dit toestel.
Voor meer informatie omtrent dit product en de meest recente versie van deze
handleiding, zie www.Perel.eu.
De informatie in deze handleiding kan te allen tijde worden gewijzigd zonder
voorafgaande kennisgeving.
© AUTEURSRECHT
Velleman nv heeft het auteursrecht voor deze handleiding.
Alle wereldwijde rechten voorbehouden. Het is niet toegestaan om deze handleiding of gedeelten
ervan over te nemen, te kopiëren, te vertalen, te bewerken en op te slaan op een elektronisch
medium zonder voorafgaande schriftelijke toestemming van de rechthebbende.
Other manuals for CMD01N
1
This manual suits for next models
1
Table of contents
Languages:
Other Perel Metal Detector manuals