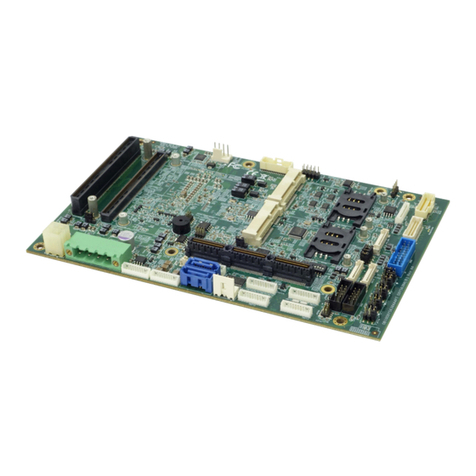
PerfecTron OXY5737A User manual

Version 1.1
Revision Date: October 15, 2014
www.perfectron.com
OXY5737A
Intel® QM87 EBX SBC
User’s Manual
User’s Manual
Intel® QM87 EBX SBC
User’s Manual

OXY5737A User’s Manual V1.1
www.perfectron.com
Safety Information
1. Electrical safety
•To prevent electrical shock hazard, disconnect the power cable from the electrical outlet before
relocating the system.
•When adding or removing devices to or from the system, ensure that the power cables for the devices
are unplugged before the signal cables are connected. If possible, disconnect all power cables from the
existing system before you add a device.
•Before connecting or removing signal cables from the motherboard, ensure that all power cables are
unplugged.
•Seek professional assistance before using an adapter or extension cord. These devices could interrupt
the grounding circuit.
•Make sure that your power supply is set to the correct voltage in your area.
•If you are not sure about the voltage of the electrical outlet you are using, contact your local power
company.
•If the power supply is broken, do not try to fix it by yourself. Contact a qualified service technician or
your local distributor.
2. Operation safety
•Before installing the motherboard and adding devices on it, carefully read all the manuals that came
with the package.
•Before using the product, make sure all cables are correctly connected and the power cables are not
damaged. If you detect any damage, contact your dealer immediately.
•To avoid short circuits, keep paper clips, screws, and staples away from connectors, slots, sockets and
circuitry.
•Avoid dust, humidity, and temperature extremes. Do not place the product in any area where it may
become wet.
•Place the product on a stable surface.
•If you encounter any technical problems with the product, contact your local distributor
Statement
•All rights reserved. No part of this publication may be reproduced in any form or by any means, without
prior written permission from the publisher.
•All trademarks are the properties of the respective owners.
•All product specifications are subject to change without prior notice
1

OXY5737A User’s Manual V1.1
www.perfectron.com
Revision History
Revision Date (yyyy/mm/dd) Changes
Version 1.0
2014/09/30
Initial release
Version 1.1 2014/10/15 BIOS function PCH IO configuration
Packing list
□OXY5737A EBX
□CD (Driver + user's manual)
Optional Accessories
•1 x Terminal block
•Cable kit for OXY5737A: 1 x SATA, 1 x SATA power, 2 x COM
If any of the above items is damaged or missing, please contact your local
distributor.
2

OXY5737A User’s Manual V1.1
www.perfectron.com
Table of Contents
Safety Information ............................................................................................................................................. 1
1. Electrical safety ......................................................................................................................................1
2. Operation safety.....................................................................................................................................1
Statement........................................................................................................................................................... 1
Revision History.................................................................................................................................................. 2
Packing list.......................................................................................................................................................... 2
Optional Accessories.......................................................................................................................................... 2
Table of Contents ............................................................................................................................................... 3
Chapter 1: Product Information......................................................................................................................... 7
1.1 Block Diagram ......................................................................................................................................7
1.2 Key Features.........................................................................................................................................8
1.3 Board Placement................................................................................................................................10
1.4 Mechanical Drawings .........................................................................................................................11
Chapter 2: Jumpers and Connectors................................................................................................................ 12
2.1 Jumpers and connectors list...............................................................................................................12
2.2 Jumper Settings..................................................................................................................................13
DIMMA1: DDR3 SO DIMM Socket....................................................................................................13
LVDS1: LVDS CONNECTOR ................................................................................................................14
MCARD1: Mini PCIE Card Slot<COLAY M SATA>...............................................................................14
MCARD_SEL1: mSATA and mPCIE selection.....................................................................................15
MINI MPCIE: Mini PCIE Card Slot .....................................................................................................15
SATA-CON CN3: Serial ATA Connectors ............................................................................................16
SATA-CON CN5: Serial ATA Connectors ............................................................................................16
PWR_S4P_H CN4: SATA POWER.......................................................................................................16
PWR_S4P_H CN6: SATA POWER.......................................................................................................16
LAN1: Intel I218LM...........................................................................................................................16
LAN2: Intel I210IT.............................................................................................................................16
LAN_SEL3: StackPC/I218 selection...................................................................................................16
LAN_SEL2: StackPC/I210 selection...................................................................................................17
F_USB1: USB.....................................................................................................................................17
USB3.0 CN18: USB*2........................................................................................................................17
USB3.0 CN19: USB*2........................................................................................................................17
MIC 1: Audio Jacks Connector..........................................................................................................18
LOUT 1: Audio Jacks Connector .......................................................................................................18
DIO1: Digital I/O Box Head...............................................................................................................18
SW2: POWER On/Off Switch............................................................................................................18
3

OXY5737A User’s Manual V1.1
www.perfectron.com
SW2: switch setting..........................................................................................................................18
PWRIN1: DC Adapter Power Input...................................................................................................19
CN11: Update BIOS ..........................................................................................................................19
DP1: DISPLAY PORT ..........................................................................................................................19
DP2: DISPLAY PORT ..........................................................................................................................20
DVI: DVI-I..........................................................................................................................................20
SIM_CARD1: SIM card socket...........................................................................................................20
COM1: RS232/422/485 with 5V/12V selectable..............................................................................20
JV2,3: COM1 RS232/422/485 jumper setting..................................................................................21
JV4: COM1 RS485 autoflow setting .................................................................................................21
JP12: COM1 5V/12V selection..........................................................................................................21
JV2,3,4 and JP12 location:................................................................................................................22
COM2: RS232/422/485 with 5V/12V selectable..............................................................................22
JV6,7: COM2 RS232/422/485 jumper setting ..................................................................................22
JV5: COM2 RS485 autoflow setting .................................................................................................23
JP13: COM2 5V/12V selection..........................................................................................................23
JV5,6,7 and JP13 location.................................................................................................................23
COM3: RS232 with 5V/12V selectable.............................................................................................24
JP7: COM3 +12V/+5V selection........................................................................................................24
COM4: RS232 with 5V/12V selectable.............................................................................................24
JP14: COM4 +12V/+5V selection......................................................................................................25
COM5: RS232 with 5V/12V selectable.............................................................................................25
JP15: COM5 +12V/+5V selection......................................................................................................25
COM6: RS232 with 5V/12V selectable.............................................................................................26
JP16: COM6 +12V/+5V selection......................................................................................................26
DC Jack .............................................................................................................................................26
CON A1: CONNECTOR A TOP............................................................................................................27
CPU FAN: CPU FAN CONNECTOR......................................................................................................27
SYSFAN1: SYSTEM FAN CONNECTOR................................................................................................27
JV8,9,10,11: LVDS Panel selection jumper setting...........................................................................28
JV12: LVDS_VDD power select .........................................................................................................29
JV8,9,10,11,12 location:...................................................................................................................29
FPE1: StackPC FPE Top Connector....................................................................................................30
LED1: LAN1 LED STATUS ...................................................................................................................31
LED2: LAN2 LED STATUS ...................................................................................................................31
LED3: POWER/HDD LED ...................................................................................................................31
SW1: POWER BUTTON .....................................................................................................................31
JBKL1: JBKL1: Inverter connector.....................................................................................................31
4

OXY5737A User’s Manual V1.1
www.perfectron.com
FP1: Front Panel ...............................................................................................................................32
FP3: LAN LED....................................................................................................................................32
Plug LED cable to FP3 pin header ....................................................................................................32
Chapter 3: Getting Started............................................................................................................................... 33
3.1 Installing System Memory..................................................................................................................33
Chapter 4: AMI BIOS UTILITY ........................................................................................................................... 35
4.1 Starting...............................................................................................................................................35
4.2 Navigation Keys..................................................................................................................................35
4.3 Main Menu.........................................................................................................................................36
4.4 Advanced Menu .................................................................................................................................37
4.4.1 PCI Subsystem Settings ...........................................................................................................38
PCI Express Settings .................................................................................................................39
4.4.2 ACPI Settings ...........................................................................................................................40
4.4.3 CPU configuration ...................................................................................................................41
4.4.4 SATA Configuration..................................................................................................................46
Software Feature Mask Configuration.....................................................................................48
4.4.5 Intel Rapid Start Technology ...................................................................................................50
4.4.6 PCH-FW Configuration ............................................................................................................50
Firmware Update Configuration ..............................................................................................51
4.4.7 Intel Anti-Theft Technology Configuration..............................................................................51
4.4.8 AMT Configuration..................................................................................................................52
4.4.9 USB Configuration...................................................................................................................54
4.4.10 IT8786 Super IO Configuration..............................................................................................55
Serial Port 1 Configuration.......................................................................................................55
Serial Port 2 Configuration.......................................................................................................56
Serial Port 3 Configuration.......................................................................................................56
Serial Port 4 Configuration.......................................................................................................56
Serial Port 5 Configuration.......................................................................................................56
Serial Port 6 Configuration.......................................................................................................56
4.4.11 IT8786 HW Monitor ..............................................................................................................57
4.4.12 Serial Port Console Redirection ............................................................................................57
Console Redirection Setting.....................................................................................................58
4.4.13 Network Stack.......................................................................................................................58
4.4.14 Intel I210 Gigabit Network Connection ................................................................................59
4.5 Chipset ...............................................................................................................................................60
4.5.1 PCH IO configuration...............................................................................................................60
PCI Express Configuration ........................................................................................................61
PCI Express Root Port1.....................................................................................................61
5

OXY5737A User’s Manual V1.1
www.perfectron.com
PCI Express Root Port2.....................................................................................................62
PCI Express Root Port3.....................................................................................................63
PCI Port 4 is assigned to LAN............................................................................................63
PCI Express Root Port5:....................................................................................................64
PCI Express Root Port6.....................................................................................................65
PCI Express Root Port7.....................................................................................................66
PCI Express Root Port8.....................................................................................................67
USB Configuration....................................................................................................................67
PCH Azalia Configuration. ........................................................................................................67
4.5.2 System AGENT SA....................................................................................................................69
Graphics Configuration ............................................................................................................69
LCD Control ......................................................................................................................70
Memory Configuration.............................................................................................................70
GT- Power Management Control .............................................................................................70
4.6 Boot....................................................................................................................................................71
CSM16 Parameters...................................................................................................................72
4.7 Security ..............................................................................................................................................72
4.8 Save and Exit ......................................................................................................................................73
6

OXY5737A User’s Manual V1.1
www.perfectron.com
Chapter 1: Product Information
1.1 Block Diagram
7

OXY5737A User’s Manual V1.1
www.perfectron.com
1.2 Key Features
System
CPU Type
Intel® Haswell Core™ i7/i3, BGA type
Core i7-4700EQ (4C x 2.4/1.7GHz), 6M Cache, (47W/37W)
Core i3-4102E (2C x 1.6 GHz), 3M Cache (25W)
Celeron 2000E (2C x 2.2 GHz), 2M Cache (37W)
Chipset
Intel® Haswell QM87 PCH
Memory Type
1 x DDR3 1600 Swissbit XR-DIMM up to 8 GB with ECC
BIOS
AMI® UEFI BIOS
Supoer I/O
ITE8786
Watchdog
1-255 sec. or 1-255 min. software programmable
can generate system reset
Expansion Slot
2 x mPCIe (1 x SIM card, 1 x colay with mSATA)
Display
Chipset
Integrated GFX in Haswell processor
DVI-I
Yes (Max. resolution 2048 x 1536)
LVDS
Dual channel 24-bit LVDS
Display Type
2 x DP, LVDS, DVI-I (DVI-D+VGA)
Audio
Codec
Realtek ALC887 High Definition Audio Codec
Ethernet
Chipset
Intel® I210IT & i218-LM GbE
WOL
Yes
Boot from LAN
Yes for PXE
Rear I/O
DP
1
DVI-D
1
Ethernet
2 x RJ45
COM Port
1 x RS232/422/485 with 5V/12V selectable
USB
2 x USB 3.0
Audio
1 x MIC, 1 x Line out
Power Connector
1 (Terminal Block)
Internal I/O
Touch Panel
1 x 5-pin
Front Panel
1 (2 x 5-pin)
Smart Fan
1 x CPU Fan, 1 x System Fan
Power Connector
2 (1 x 4-pin/ 2 x 2-pin)
SATA
2 x SATAIII (6 Gb/s)
USB
2 x USB 2.0 by pin header
COM
5 x COM ports: 4 x RS232, 1 x RS232/422/485, all with 5V/12V
selectable
LVDS
2 x 15-pin
DIO
2 x 10-pin, 8 in/8 out with isolation
SIM card holder
1
8

OXY5737A User’s Manual V1.1
www.perfectron.com
Power Requirements
Input Voltage
9 to 36 VDC (4-pin terminal block for V+, V+, V-, V-)
Power Consumption
without LVDS output
With No Load on 4
USB ports
4A@9VDC, 45W
1.6A@24VDC, 45W
1.1A@36VDC, 45W
With Full Load on 4
USB Ports
5A@9VDC, 45W
1.875A@24VDC, 45W
1.25A@36VDC, 45W
Mechanical and Environment
Form Factor
EBX
Power Type
9V to 36V DC-in, AT/ATX mode supports with power delay on/off
Dimension
203 x 146 mm (5.75" x 8")
Operating Temp.
-40 to 85°C
Storage Temp.
-40 to 85°C
Relative Humidity
10% to 90%, non-condensing
*All specifications and photos are subject to change without notice.
9

OXY5737A User’s Manual V1.1
www.perfectron.com
1.3 Board Placement
10

OXY5737A User’s Manual V1.1
www.perfectron.com
1.4 Mechanical Drawings
11

OXY5737A User’s Manual V1.1
www.perfectron.com
Chapter 2: Jumpers and Connectors
2.1 Jumpers and connectors list
Label
Function
BAT1
BATTERY connector
DIMMA1
DDR3 SO DIMM Socket
LVDS1
LVDS CONNECTOR
MCARD1
Mini PCIE Card Slot<COLAY M SATA>
MINI MPCIE
Mini PCIE Card Slot
SATA-CON CN3
Serial ATA Connectors
SATA-CON CN5
Serial ATA Connectors
PWR_S4P_H CN4
SATA POWER
PWR_S4P_H CN6
SATA POWER
LAN1
INTEL I218LM
LAN2
INTEL I210IT
F_USB1
USB2.0
CN18
USB3.0 X2
CN19
USB3.0 X2
MIC 1
Audio Jacks Connector
LOUT1
Audio Jacks Connector
DIO1
Digital I/O Box Head
SW2
POWER On/Off Switch
PWRIN1
DC Adapter Power Input
CN11
UPDATE BIOS
DP1
DISPLAY PORT
DP2
DISPLAY PORT
DVI
DVI-I
SIM_CARD_1
SIM card socket
JP7
COM3 +12/+5V selection
JP14
COM4 +12/+5V selection
JP15
COM5 +12/+5V selection
JP16
COM6 +12/+5V selection
COM1
RS232/422/485 with 5V/12V selectable
COM2
RS232/422/485 with 5V/12V selectable
COM3
RS232 with 5V/12V selectable
COM4
RS232 with 5V/12V selectable
COM5
RS232 with 5V/12V selectable
COM6
RS232 with 5V/12V selectable
DC JACK
DC connector
CON A1
CONNECTOE A TOP
CPU FAN
CPU FAN CONNECTOR
SYSFAN1
SYSTEM FAN CONNECTOR
JV8, JV9, JV10, JV11
LVDS Panel selection jumper setting
JV12
LVDS_VDD power select
LAN_SEL3
StackPC/I218 selection
LAN_SEL2
StackPC/I210 selection
MCARD_SEL1
mSATA and mPCIE selection
JV2, JV3
COM1 RS232/422/485 jumper setting
JV4
COM1 RS485 autoflow setting
JP12
COM1 5V/12V selection
JV7.JV6
COM2 RS232/422/485 jumper setting
JV5
COM2 RS485 autoflow setting
JP13
COM2 5V/12V selection
FPE1
StackPC FPE Top Connector
12

OXY5737A User’s Manual V1.1
www.perfectron.com
LED1
LAN1 LED STATUS
LED2
LAN2 LED STATUS
LED3
POWER/HDD LED
SW1
POWER BUTTON
FPR5
RESET POWER BUTTON
JBKL1
LVDA POWER BOX HEADER
FP1
Front Panel
FP3
LAN LED
2.2 Jumper Settings
DIMMA1: DDR3 SO DIMM Socket
PIN
DEFINITION
PIN
DEFINITION
PIN
DEFINITION
PIN
DEFINITION
PIN
DEFINITION
PIN
DEFINITION
1
VSS
41
DQ16
81
VSS
121
CK1
161
DQS4#
201
VSS
2
VSS
42
VSS
82
DM8
122
A1
162
VSS
202
DQ55
3
VSS
43
DQ17
83
DQS8#
123
CK1#
163
DQS4
203
DQ50
4
VSS
44
VREFDQ
84
VSS
124
VDD
164
DM4
204
VSS
5
DQ0
45
VSS
85
DQS8
125
VDD
165
VSS
205
DQ51
6
DQ4
46
NC(TEST)
86
CB6
126
CK0
166
VSS
206
DQ60
7
DQ1
47
DQS2#
87
VSS
127
VREFCA
167
DQ34
207
VSS
8
DQ5
48
VSS
88
CB7
128
CK0#
168
DQ38
208
DQ61
9
VSS
49
DQS2
89
CB2
129
PAR_IN
169
DQ35
209
DQ56
10
VSS
50
DM2
90
VSS
130
VDD
170
DQ39
210
VSS
11
DQS0#
51
VSS
91
CB3
131
VDD
171
VSS
211
DQ57
12
DM0
52
VSS
92
RESET#
132
EVENT#
172
VSS
212
DM7
13
DQS0
53
DQ18
93
VSS
133
A10
173
DQ40
213
VSS
14
VSS
54
DQ22
94
ERR_OUT#
134
A0
174
DQ44
214
VSS
15
VSS
55
DQ19
95
VTT
135
BA0
175
DQ41
215
DQS7#
16
DQ6
56
DQ23
96
VTT
136
VDD
176
DQ45
216
DQ62
17
DQ2
57
VSS
97
CKE0
137
VDD
177
VSS
217
DQS7
18
DQ7
58
VSS
98
CKE1
138
BA1
178
VSS
218
DQ63
19
DQ3
59
DQ24
99
VDD
139
WE#
179
DQS5#
219
VSS
20
VSS
60
DQ28
100
VDD
140
VDD
180
DM5
220
VSS
21
VSS
61
DQ25
101
BA2
141
CAS#
181
DQS5
221
DQ58
22
DQ12
62
DQ29
102
A15
142
RAS#
182
VSS
222
VDD_SPD
23
DQ8
63
VSS
103
VDD
143
VDD
183
VSS
223
DQ59
24
DQ13
64
VSS
104
A14
144
S0#
184
DQ46
224
SA0
25
DQ9
65
DQS3#
105
A11
145
S1#
185
DQ42
225
VSS
26
VSS
66
DM3
106
VDD
146
VDD
186
DQ47
226
SA1
27
VSS
67
DQS3
107
A7
147
ODT1
187
DQ43
227
SA2
28
DM1
68
VSS
108
A12
148
ODT0
188
VSS
228
SCL
29
DQS1#
69
VSS
109
VDD
149
VDD
189
VSS
229
VSS
30
VSS
70
DQ30
110
A9
150
A13
190
DQ52
230
SDA
31
DQS1
71
DQ26
111
A5
151
S3#
191
DQ48
231
SATA_TX0
32
DQ14
72
DQ31
112
VDD
152
VDD
192
DQ53
232
VSS
33
VSS
73
DQ27
113
A4
153
VSS
193
DQ49
233
SATA_TX0#
34
DQ15
74
VSS
114
A8
154
S2#
194
VSS
234
SATA_TX1#
35
DQ10
75
VSS
115
VDD
155
DQ32
195
VSS
235
VSS
36
VSS
76
CB4
116
A6
156
VSS
196
DM6
236
SATA_TX1
37
DQ11
77
CB0
117
A2
157
DQ33
197
DQS6#
237
VTT
38
DQ20
78
CB5
118
VDD
158
DQ36
198
VSS
238
VSS
39
VSS
79
CB1
119
VDD
159
VSS
199
DQS6
239
VTT
40
DQ21
80
VSS
120
A3
160
DQ37
200
DQ54
240
VTT
13

OXY5737A User’s Manual V1.1
www.perfectron.com
LVDS1: LVDS CONNECTOR
PIN
DEFINITION
PIN
DEFINITION
1
LVDS_BCLK
2
GND
3
LVDS_BCLK#
4
LVDS_A3
5
GND
6
LVDS_A3#
7
LVDS_B3
8
GND
9
LVDS_B3#
10
LVDS_ACLK
11
LVDS_B2
12
LVDS_ ACLK #
13
LVDS_B2#
14
GND
15
LVDS_B1
16
LVDS_A2
17
LVDS_B1#
18
LVDS_A2#
19
LVDS_B0
20
LVDS_A1
21
LVDS_B0#
22
LVDS_A1#
23
GND
24
LVDS_A0
25
LVDS_DCC_SC
26
LVDS_A0#
27
LVDS_DCC_SD
28
GND
29
LVDS_VDD
(define by JV12)
30
LVDS_VDD
(define by JV12)
MCARD1: Mini PCIE Card Slot<COLAY M SATA>
PIN
DEFINITION
PIN
DEFINITION
1
WAKE#
2
3.3VAUX
3
COEX1
4
GND
5
COEX2
6
1.5V
7
CLKREQ#
8
UIM_PWR
9
GND
10
UIM_DATA
11
REFCLK-
12
UIM_CLK
13
REFCLK+
14
UIM_RESET
15
GND
16
UIM_VPP
17
Reserved
18
GND
19
Reserved
20
W_Disable#
21
GND
22
PERST#
23
PERn0
24
+3.3Vaux
25
PERp0
26
GND
27
GND
28
1.5V
29
GND
30
SMB_CLK
31
PETn0
32
SMB_DATA
33
PETp0
34
GND
35
GND
36
USB_D-
37
GND
38
USB_D+
39
+3.3VAUX
40
GND
41
+3.3VAUX
42
LED_WWAN#
43
GND
44
LED_WLAN#
45
Reserved
46
LED_WPAN#
47
Reserved
48
1.5V
49
Reserved
50
GND
51
Reserved
52
3.3VAUX
14

OXY5737A User’s Manual V1.1
www.perfectron.com
MCARD_SEL1: mSATA and mPCIE selection
Jumper
Function description
Setting
1-2
mPCIE
2-3
mSATA
Default setting: 2-3
MINI MPCIE: Mini PCIE Card Slot
PIN
DEFINITION
PIN
DEFINITION
1
WAKE#
2
3.3V
3
Reserved
4
GND
5
Reserved
6
1.5V
7
CLKREQ#
8
UIM_PWR
9
GND
10
UIM_DATA
11
REFCLK-
12
UIM_CLK
13
REFCLK+
14
UIM_RESET
15
GND
16
UIM_VPP
17
Reserved
18
GND
19
Reserved
20
W_Disable#
21
GND
22
PERST#
23
PERn0
24
3.3Vaux
25
PERp0
26
GND
27
GND
28
1.5V
29
GND
30
SMB_CLK
31
PETn0
32
SMB_DATA
33
PETp0
34
GND
35
GND
36
USB_D-
37
Reserved
38
USB_D+
39
Reserved
40
GND
41
Reserved
42
LED_WWAN#
43
Reserved
44
LED_WLAN#
45
Reserved
46
LED_WPAN#
47
Reserved
48
1.5V
49
Reserved
50
GND
51
Reserved
52
3.3V
15

OXY5737A User’s Manual V1.1
www.perfectron.com
SATA-CON CN3: Serial ATA Connectors
SATA-CON CN5: Serial ATA Connectors
PIN
DEFINITION
1
GND
2
TXP
3
TXN
4
GND
5
RXN
6
RXP
7
GND
PWR_S4P_H CN4: SATA POWER
PWR_S4P_H CN6: SATA POWER
PIN
DEFINITION
1
12V
2
GND
3
GND
4
5VS
LAN1: Intel I218LM
LAN2: Intel I210IT
LAN1
LAN2
PIN
DEFINITION
PIN
DEFINITION
A1
I218_LAN1_MDI0_DP
B1
LAN2_MDIP0
A2
I218_LAN1_MDI0_DN
B2
LAN2_MDIN0
A3
I218_LAN1_MDI1_DP
B3
LAN2_MDIP1
A4
I218_LAN1_MDI1_DN
B4
LAN2_MDIN1
A7
I218_LAN1_MDI2_DP
B7
LAN2_MDIP2
A8
I218_LAN1_MDI2_DN
B8
LAN2_MDIN2
A9
I218_LAN1_MDI3_DP
B9
LAN2_MDIP3
A10
I218_LAN1_MDI3_DN
B10
LAN2_MDIN3
LAN_SEL3: StackPC/I218 selection
Jumper
Function description
Setting
1-2
STACK PC
2-3
I218
Default setting: 2-3
16

OXY5737A User’s Manual V1.1
www.perfectron.com
LAN_SEL2: StackPC/I210 selection
Jumper
Function description
Setting
1-2
STACK PC
2-3
I210
Default setting: 2-3
F_USB1: USB
PIN
DEFINITION
PIN
DEFINITION
1
USBV4
2
USBV5
3
USBD4-
4
USBD5-
5
USBD4+
6
USBD5+
7
GND
8
GND
9
NC
10
GND
USB3.0 CN18: USB*2
LOWER USB
UPPER USB
PIN
DEFINITION
PIN
DEFINITION
1
USB_VCC0
10
USB_VCC1
2
USBD2-
11
USBD3-
3
USBD2+
12
USBD3+
4
GND
13
GND
5
USB_SSRX1N_C
14
USB_SSRX2N_C
6
USB_SSRX1P_C
15
USB_SSRX2P_C
7
GND
16
GND
8
USB3TN1
17
USB3TN2
9
USB3TP1
18
USB3TP2
USB3.0 CN19: USB*2
LOWER USB
UPPER USB
PIN
DEFINITION
PIN
DEFINITION
1
USB_VCC2
10
USB_VCC3
2
USBD0-
11
USBD1-
3
USBD0+
12
USBD1+
4
GND
13
GND
5
USB_SSRX3N_C
14
USB_SSRX4N_C
6
USB_SSRX3P_C
15
USB_SSRX4P_C
7
GND
16
GND
8
USB3TN3
17
USB3TN4
9
USB3TP3
18
USB3TP4
17

OXY5737A User’s Manual V1.1
www.perfectron.com
MIC 1: Audio Jacks Connector
PIN
DEFINITION
5
MIC_L
4
GND
3
NC
2
MIC1_R
1
GND
LOUT 1: Audio Jacks Connector
PIN
DEFINITION
5
FRONT_L
4
GND
3
NC
2
FRONT_R
1
GND
DIO1: Digital I/O Box Head
PIN
DEFINITION
PIN
DEFINITION
1
DIO0
2
DIO1
3
DIO2
4
DIO3
5
DIO4
6
DIO5
7
DIO6
8
DIO7
9
DIO8
10
DIO9
11
DIO10
12
DIO11
13
DIO12
14
DIO13
15
DIO14
16
DIO15
17
5VS
18
GND
19
5VS
20
GND
SW2: POWER On/Off Switch
PIN
DEFINITION
PIN
DEFINITION
1
AT/ATX
16
GND
2
DELAY_SETUP
15
GND
3
ON_TIME_0
14
GND
4
ON_TIME_1
13
GND
5
OFF_TIME_0
12
GND
6
OFF_TIME_1
11
GND
7
STACK0
10
GND
8
STACK1
9
GND
SW2: switch setting
Power on mode
PIN1
AT
switch to left
ATX
switch to right
PIN2
Delay on/off (AT mode)
switch to right: enable
switch to left: disable
18

OXY5737A User’s Manual V1.1
www.perfectron.com
ON TIME
PIN3
PIN4
4 S
0
0
8 S
0
1
12 S
1
0
16 S
1
1
0= switch to right
1= switch to left
OFF TIME
PIN5
PIN6
30 S
0
0
45 S
0
1
60 S
1
0
90 S
1
1
0= switch to right
1= switch to left
PWRIN1: DC Adapter Power Input
PIN
DEFINITION
1
+VIN
2
+VIN
3
GND
4
GND
CN11: Update BIOS
DP1: DISPLAY PORT
PIN
DEFINITION
PIN
DEFINITION
1
DPC_LANEP0
2
GND
3
DPC_LANEN0
4
DPC_LANEP1
5
GND
6
DPC_LANEN1
7
DPC_LANEP2
8
GND
9
DPC_LANEN2
10
DPC_LANEP3
11
GND
12
DPC_LANEN3
13
DDIC_DDC_AUX_SEL
14
GND
15
DPC_AUXP
16
GND
17
DPC_AUXN
18
DPC_DET
19
GND
20
DPC_PWR
PIN
DEFINITION
PIN
DEFINITION
1
SPI_CE0#_F
2
VCC
3
SPI_SI_F
4
-SPI_HOLD
5
SPI_WP#
6
SPI_CLK_F
7
GND
8
SPI_SO_F
19
Table of contents
Other PerfecTron Motherboard manuals

PerfecTron
PerfecTron INS8143A User manual

PerfecTron
PerfecTron OXY5320A User manual

PerfecTron
PerfecTron INS8370A User manual

PerfecTron
PerfecTron INS8145A User manual

PerfecTron
PerfecTron OXY5740C User manual

PerfecTron
PerfecTron OXY5313A User manual

PerfecTron
PerfecTron OXY5316A User manual

PerfecTron
PerfecTron INS8335C User manual

PerfecTron
PerfecTron OXY5638B User manual

PerfecTron
PerfecTron INS8365B User manual