PestWest Nemesis Ultima 80 User manual

Nemesis Ultima Electronic Fly Killer -
Instructions for Use
Das Nemesis Ultima -
Fluginsektenfanggerät - Gebrauchsanweisung
El Nemesis Ultima De PestWest - Instrucciones
Nemesis Ultima Elektrische Vliegenvanger -
Gebruiksaanwijzing PestWest
Nemesis Ultima Elettroinsetticida - Istruzioni per L’Uso
Désinsectiseur électronique Nemesis Ultima -
Notice d’Instructions

2
SPECIFICATIONS
Grid Short Circuit Current 10mA Max peak.
Grid Voltage 4500v AC (Nominal) peak.
Tube Emission 365 Nanometres, Quantum
BL Shatterproof UV tubes.
Please read these instructions carefully
and keep them for future reference.
The Nemesis Ultima fly killer has been
designed and constructed using top
quality materials and if installed correctly
and kept clean, it will operate reliably and
safely for many years. All models may
be operated as ceiling suspended,
freestanding or wall-mounted. A bracket is
supplied if the unit is required wall-
mounted.
All PestWest units are fitted with
Quantum BL tubes as standard, it is
recommended that only Quantum BL are
used as replacements.
SITING THE UNIT
Fly control units operate on the principle
whereby flying insects are attracted to light,
particularly in the ultraviolet (UV-A) range.
The efficiency of a fly control unit can be
affected by the intensity of other light sources,
whether artificial or daylight. It is therefore
sensible to mount the unit where competition
from other light is minimised.
As a general rule:
•If possible, mount units as ceiling
suspended then they will attract insects
from all directions.
•Do not mount adjacent to windows.
•The unit should be sited, if possible, at
90° to the major light source, e.g.: the
sunniest window.
•Do not mount directly over, exposed food
or preparation surfaces.
•Mount units where they can be easily
accessed for servicing.
•Mount the unit above head height - in the
case of suspended mounting, clear of any
traffic e.g. forklift trucks.
•Avoid mounting the unit in draughts.
•Site units near where flies are likely to
gain access, i.e.: outside doors, especially
refuse areas.
For maximum effectiveness, the unit should
be kept switched on 24 hours a day.
WARNINGS
Do not install where dangerous
concentrations of flammable gases or
dusts are likely to occur.
Ensure each unit is properly earthed.
Do not install outdoors.
Do not install in damp or corrosive
environments, unless the unit is specified
as suitable.
UNPACKING THE UNIT
Each unit is carefully inspected and
packed before leaving the factory.
Before discarding the outer carton, examine
for obvious evidence of transport damage.
Pay particular attention to the removal
of all packing materials including the plastic
transit packing on the "Plug In" grid
and any additional packing around the
fluorescent tubes.
INSTALLATION
All European versions are designed to
operate from 220-240v 50 Hz. UK models,
powered from 13 amp ring main systems, are
supplied with a cord set, terminated in a 13
amp plug, fitted with a 3 amp fuse. Continental
models are supplied with a cord set,
terminated with a schuco plug. Ensure the
branch fuse is 16 amps maximum.
US models are designed to operate from
110-120v 60Hz input. The cord set is
terminated in a Nema 15-5 3-pin plug.
The units are supplied with 2 metres of input
cable as standard (8 ft on some US models).
If it is necessary to extend this lead, a
competent electrician must do this. Should a
moulded-on plug be removed from the lead
supplied, this must be safely disposed of.
Ensure that once installed, the power lead is
adequately secured.
SAFETY
PestWest fly control units have been designed
to meet European safety standards and
are manufactured from quality materials.
All European models have been tested and
certified for compliance with the Safety
Standard IEC 335-2-59. This standard is
specifically for electrocuting flying insect
control equipment. Additionally all models are
CE marked and certified for compliance with
current EMC legislation. Models destined for
US markets are UL listed.
MAINTENANCE INSTRUCTIONS
For peak efficiency the following operations
should be carried out on a regular basis,this is
most easily achieved when the equipment
is serviced as part of a maintenance
programme by a recognised Pest Control
organisation to a defined schedule.
MODELS
All units in the range are available in
either brushed stainless steel or white UV
resistant polyester coated Zintec steel.
CLEANING
Apart from tube and starter replacement, the
only maintenance is to keep the unit clean.
Always disconnect from the supply before
handling the unit. Empty any dead insects
from the catch tray and use a soft brush to
remove any insect parts.
Wipe down with a damp cloth and mild
detergent, taking care not to allow water
to enter the machine. To avoid unsightly
watermarks on stainless steel models, these
may be wiped over with a proprietry stainless
steel cleaning solution, once dry.
SUSPENDED MODE
The Nemesis Ultima unit is supplied ready for
suspended mounting, from the two metal lugs
located at either end of the unit lid. For safety
reasons PestWest recommend that when
suspended, each of the hanging chains
(which are not supplied) should be of
non-corroding material that is capable
of taking at least 15 kg (30 lbs.) each.
Only welded link chains should be used.
For ease of service and re-hanging, it is
recommended that the chain is fitted with a
spring release clip at the end connected to the
fly killer, ensuring that they also are capable of
supporting 15 kg each.
WALL MOUNTED MODE
A wall bracket is available, supplied for
mounting the unit on the wall, with the screws
provided. The unit simply hooks over this
bracket and is easily removed for servicing
and cleaning. Using the bracket as a template,
select where to mount the unit. Mark the wall
through the fixing holes, ensuring that the
holes are level. Use a 6mm-drill bit to drill
holes to a depth of 35mm. Using the
rawlplugs and screws provided, screw the
bracket to the wall ensuring a strong firm
fixing. Ensure the wall is adequate for the
fixing supplied.
TO OPEN THE UNIT
FOR SERVICING
1. Unplug the unit
2. Withdraw the insect catch tray, and safely
dispose of contents, the unit catch tray is
designed so that complete removal is not
required for access to inside of unit.
3. On all models, to protect the integrity of the
unit, only the front guard is designed to
open. This guard is the one in front when
looking at the indicator lights in the lid of
the unit.
4. On each of the end grey walls of the
unit, towards the bottom, there is a
blue coloured snap catch. Using your
thumbs, push outwards away from the
body of the unit. Once opened the guard
will swing free.
5. Open the guard upward to gain access to the
interior. To help with servicing the guard may
be temporarily locked in the open position by
raising it to the horizontal, and pushing the
hinged pivot back into the recesses in the
sidewalls of the unit, locking it in place.
Nemesis Ultima Electronic Fly Killer - Installation and maintenance
PLEASE SWITCH OFF MACHINE BEFORE SERVICING

UNIT TUBES/PART CODES COVERAGE STARTERS
Nemesis 2 x 40-watt Shatterproof - Suspended - 320m2/ 3400ft22x Series starter - FS22/S2
Ultima 80 QPW40WST24SHG Wall Mounted - 160m2/ 1700ft2
Nemesis 3 x 15-watt Shatterproof - Suspended - 200m2/ 2100ft23x Series starter - FS22/S2
Ultima 45 QPW15WST18SHG Wall Mounted - 100m2/ 1100ft2
Nemesis 1 x 22-watt circline Suspended - 100m2/ 1100ft21x Series starter - FS22/S2
Ultima 22 Shatterproof - Q22WCISH Wall Mounted - 50m2/ 550ft2
FAULT-FINDING CHART
NEON INDICATOR LIGHTS WORKING (ALIGHT) X = NEON INDICATOR LIGHT NOT WORKING (EXTINGUISHED)
3
X X X No power to unit.
Check power supply cord / fuses.
X X Safety microswitch not working.
Check guard is closed properly.
X Lighting circuit faulty.
Check UV tubes.
Check starters.
XTransformer faulty or killing grid
shorted out.
Check for cleanliness/spark
damage to insulation.
Unit working.
AMBER NEON
LIGHT (right)
FLUORESCENT
UV TUBES
RED NEON
LIGHT (left)
PROBABLE
FAULT
TO REMOVE THE INSECT GRID
For ease of service all Nemesis Ultima
models feature a removable insect grid.
This is plugged into two spring loaded
connectors in the body of the unit, and locates
in two holes in the insect deflector at
the bottom.
To remove, push gently upwards to enable the
white insulators at the lower end of the grid to
come free of the deflector panel. The grid may
now be removed from the unit.
Once removed the grid may be cleaned with
soapy water or detergent, followed by a
rinse in clean water. Take care not to
move or dislodge any of the white insulator
components attached to the grid. Ensure the
grid is thoroughly dry before attempting to
refit. When refitting take care to ensure that
the chamfered insulators on the bottom of the
grid have the sloping edge facing to the rear of
the fly machine.
TUBE REPLACEMENT
Insects are attracted to the unit by the
UV light which is emitted from the tubes.
This light is invisible to humans, and degrades
with time. To maintain peak insect attraction it
is recommended that tubes are replaced
annually, or more frequently in sensitive food
production areas.
All Nemesis Ultima units are fitted with
Quantum BL shatter-proof UV tubes, as
standard.
NEMESIS ULTIMA 45 AND 80
Using fly control products which are fitted with
Quantum BL shatter resistant tubes with
Teflon®G fluoropolymer coating as standard,
or as replacements provides the easiest and
safest solution for significantly reducing the
risks of contamination from glass breakages.
Switch off the unit, withdraw the insect catch-
tray, open the front guard and remove the
insect grid as identified above.
The starters are located above each of their
associated tube to the left-hand side of the
unit, and may be removed by twisting the
starter body anticlockwise approximately
quarter of a turn and removing from the
holder. Replacement is the reverse of the
above procedure.
It is recommended that starters are replaced
whenever new tubes are fitted.
To remove the tubes twist clockwise, away
from you. Two distinct "clicks" from the lamp
holder will be heard. The tubes may then be
removed from the lamp holders, by pushing
towards the rear of the unit. Replacement is
the reverse of the above procedure.
NEMESIS ULTIMA 22
Switch off the unit, withdraw the insect catch-
tray, open the front guard and remove the
insect grid as identified above.
The starter of the unit is located in the roof of
the unit in front of the tube. Remove by
twisting approx. one quarter of a turn
anticlockwise. Replacement is the reverse of
the above procedure.
The 22-watt circline tube is retained in
position by two clips, one at the top and the
other at the bottom of the tube. Open each
clip, which allows the tube to be removed from
its connector holder. To refit the tube, reverse
the above procedure.
NOTE: ON UNITS WITH 2 OR MORE LAMPS THE TUBE / STARTER CIRCUIT IS SERIES-CONNECTED,
ie: failure of either one starter or one tube will prevent both tubes working.

4
SPECIFICATIE
Hoogspannings-rooster 10mA Max.
Voltage hoogspanningsrooster 4500V AC
(nominaal).
Quantum BL Shatterproof UVA emissie
365 Nanometer.
Alle toestellen in deze range zijn
verkrijgbaar in r.v.s. of UV bestendig wit
polyester gelakt Zintec staal.
Neem eerst de gebruiksaanwijzing goed
door en bewaar deze als referentie.
Uw PestWest Nemesis Ultima elektrische
vliegenvanger is ontwikkeld en
geproduceerd met behulp van kwalitatief
hoogwaardige materialen. Bij een juiste
installatie en onderhoud zal het toestel
vele jaren veilig en betrouwbaar
functioneren. Alle toestellen kunnen zowel
vrijstaand als hangend aan wand of
plafond geïnstalleerd worden.
Een wandbevestigingsbeugel is leverbaar.
DE BESTE PLAATS VOOR
HET TOESTEL
Elektrische vliegenvangers (EFK's) werken op
basis van het principe dat vliegende insecten
aangetrokken worden door licht, m.n.
ultraviolet (UV-A) licht. De doeltreffendheid
van de werking van het toestel kan beïnvloed
worden door de aanwezigheid van andere
lichtbronnen b.v. daglicht. Voor een juiste
plaatsing dient U rekening te houden met de
volgende punten;
•toestellen bij voorkeur als plafondmodel
installeren zodat vliegende insecten vanuit
alle hoeken zullen worden aangetrokken.
•niet installeren in de nabijheid van ramen,
maar bij voorkeur in een hoek van 900t.o.v.
de belangrijkste concurrerende lichtbron.
•in ruimten waar voedselverwerking
geschied, dichtbij maar niet direct boven
voedingsmiddelen welke niet zijn afgedekt
of oppervlakken waar voedingsmiddelen
worden bereid of opgeslagen.
•installeer het toestel zodanig dat het
makkelijk bereikbaar blijft voor de
onderhoudstechnicus.
•installeer het toestel boven hoofdhoogte
en buiten bereik van rollend materieel
(b.v. heftruck).
•installeer het toestel niet op een tochtige,
windgevoelige plaats.
•installeer het toestel nabij locaties waar
vliegen naar binnen kunnen komen.
Voor maximale effectiviteit dient de EFK 24
uur per dag te werken.
WAARSCHUWING
Vermijdt installatie in de nabijheid van
ontvlambare gassen en poeders.
zorg voor een juiste aarding van
het toestel.
toestel niet buitenshuis installeren.
niet toepassen in vochtige omstandig
heden, tenzij de specificatie van de EFK
anders vermeld.
UITPAKKEN VAN HET TOESTEL
Elk toestel wordt zorgvuldig geïnspecteerd
en verpakt vóór vertrek uit de fabriek.
Controleer, vóór het uitpakken, de
verpakking op eventuele transportschade.
Verwijder vervolgens zorgvuldig alle
verpakkingsmaterialen, welke noodzakelijk
zijn voor een schadevrij transport, van en uit
het toestel.
INSTALLATIE
Alle Europese versies worden geleverd met
een netsnoer van 2 meter voorzien van een
randaarde stekker en werken op 220-240
V 50 Hz (max. 16 Amp.). Het is raadzaam een
erkend elektricien te raadplegen indien een
wijziging nodig is aan de elektrische
aansluiting van het toestel.
PLAFONDMODEL
De Nemesis Ultima kan zonder modificatie
als plafondmodel ingezet worden. Voor het
plafondmodel adviseren wij roestvast
bevestigingsmateriaal met een capaciteit van
minimaal 15 kg. per ophangpunt. I.v.m. het
onderhoud is het aan te raden de kettingen
aan het toestel te bevestigen m.b.v.
een veerclip.
WANDMODEL
Een wandbevestigingsbeugel inclusief
schroeven en pluggen om het toestel als
wandmodel te gebruiken is leverbaar.
Uw haakt de Nemesis Ultima aan deze beugel
waardoor het toestel voor service en
onderhoud steeds eenvoudig bereikbaar blijft.
Na de juiste plaatsbepaling kunt U de beugel
als mal gebruiken om de beugel waterpas af
te tekenen. Met behulp van een 6 mm.
steenboor kunt U vervolgens gaten boren van
35 mm. diep. Zorg er steeds voor dat de muur
voldoende draagvermogen heeft.
VEILIGHEID
Uw Nemesis Ultima is ontwikkeld en
geproduceerd met behulp van kwalitatief
hoogwaardige materialen. Alle Europese
modellen zijn getest en gecertificeerd
conform de norm IEC 335-2-59. Deze norm is
speciaal voor elektrische vliegenvangers o.b.v
elektrocutie. Daarnaast voldoen de PestWest
toestellen ook aan de norm EN55014
en EN50082/2.
ONDERHOUD
Het enige onderhoud buiten het periodiek
vervangen van de lampbuizen en starters is
het reinigen van het toestel. Onderbreek altijd
eerst de stroomtoevoer naar het toestel.
Verwijder alle dode insecten uit de opvangbak
en reinig het toestel, de opvangbak en het
hoogspanningsrooster met warm water en
een niet agressief schoonmaakmiddel (nooit
schuurmiddelen). Voor RVS modellen een
geschikt schoonmaakmiddel gebruiken.
OPENEN VAN HET TOESTEL
1) onderbreek de stroomvoorziening naar
het toestel.
2) Verwijder en ledig de opvangbak.
3) Alleen het veiligheidsrooster aan de
voorzijde van het toestel kan worden
geopend. De voorzijde is te herkennen aan
de waarschuwingslampjes in de bovenzijde
van het toestel.
4) Aan de onderzijde van de grijs gekleurde
zijkanten van het toestel bevinden zich
blauwe vergrendelingen. Als U deze
ontgrendeld, kan het veiligheidsrooster
worden geopend.
5) Het veiligheidsrooster kantelt naar boven
toe open, en kan vastgezet worden in de
zijkanten van het toestel zodat U de
Nemesis Ultima eenvoudig kunt servicen.
VERWIJDEREN
HOOGSPANNINGSROOSTER
Het hoogspanningsrooster van de Nemesis
Ultima kan worden verwijderd voor reiniging.
Hiertoe dient U het hoogspanningsrooster
met beide handen rustig omhoog te duwen,
zodat de witte isolaties aan de onderzijde uit
het bodempaneel komen. Haal het rooster
vervolgens uit het toestel voor reiniging.
Zorg dat het hoogspanningsrooster goed
droog is voordat deze op dezelfde wijze wordt
teruggeplaatst in het toestel. Haal het
hoogspanningsrooster nooit uit elkaar.
VERVANGEN VAN LAMPEN
Vliegende insecten worden aangetrokken
door het door de lampen uitgestraalde
ultraviolet (UV-A) licht. De intensiteit van
dit licht, onzichtbaar voor het menselijk
oog, vermindert bij gebruik. Het toestel
functioneert alleen optimaal indien de
lampbuizen (en starters) minimaal één maal
per jaar worden vervangen.
NEMESIS ULTIMA 45 EN 80
Door het gebruik van vliegenvangers
standaard uitgerust met Quantum BL
breukvrije lampbuizen voorzien van een
Teflon®G fluorpolymeer coating, of deze
kwaliteit bij vervanging in te zetten, kan een
eenvoudige en veilige oplossing worden
geboden voor onaanvaardbare risico’s als
gevolg van glasbreuk.
Installatie en onderhoud elektrische vliegenvanger Nemesis Ultima
GEBRUIKSAANWIJZING ELEKTROCUTIE TOESTELLEN, SCHAKEL HET TOESTEL BIJ
ONDERHOUDSWERKZAAMHEDEN EERST UIT

5
UVA LAMPBUIZEN VANGBEREIK STARTERS
Nemesis 2 x 40-Watt Shatterproof - Plafondmodel - 320m2/ 3400ft22x Series starter - FS22/S2
Ultima 80 QPW40WST24SHG Wandmodel - 160m2/ 1700ft2
Nemesis 3 x 15-Watt Shatterproof - Plafondmodel - 200m2/ 2100ft23x Series starter - FS22/S2
Ultima 45 QPW15WST18SHG Wandmodel - 100m2 / 1100ft2
Nemesis 1 x 22-Watt circline Plafondmodel - 100m2/ 1100ft21x Series starter - FS22/S2
Ultima 22 Shatterproof - Q22WCISH Wandmodel - 50m2/ 550ft2
X X X Geen stroom op het toestel,
controleer stekker en snoer.
X X Microswitch werkt niet, controleer of
het beschermrooster zich goed sluit.
X Fout in het lichtcircuit,
controleer, lampen en starters.
XFout in hoogspanningscircuit,
controleer transformator, rooster
en isolatie op vuil en vlekken.
Toestel werkt.
ORANJE ROOD LAMPEN MOGELIJKE FOUT EN AKTIE
MODELLEN
= NEON INDICATOR BRANDT X = NEON INDICATOR BRANDT NIET
De producent behoudt het recht veranderingen aan het toestel, zonder voorafgaande aankondiging, aan te brengen.
Onderbreek de stroomvoorziening naar
het toestel, verwijder de opvangbak, open
het veiligheidsrooster en verwijder het
hoogspanningsrooster zoals eerder
beschreven.
De starters bevinden zich aan de
linkerzijde ter hoogte van de lampbuizen.
Draai de starter een kwartslag tegen de klok
in en vervang deze door een nieuwe starter.
De lampbuizen worden verwijderd door deze
met twee handen ongeveer 90° te draaien
(van U af) en vervolgens uit de lamphouders
te schuiven. De nieuwe lampbuizen worden
vervolgens in omgekeerde volgorde in het
toestel geplaatst.
NEMESIS ULTIMA 22
Onderbreek de stroomvoorziening naar het
toestel, verwijder de opvangbak, open
het veiligheidsrooster en verwijder het
hoogspanningsrooster zoals eerder
beschreven.
De starter bevindt zich in de bovenzijde van
het toestel. Draai de starter een kwartslag
tegen de klok in en vervang deze door een
nieuwe starter.
Maak de twee beugels van de ronde
22W Circline lamp los, verwijder de lamp
uit de connector en vervang deze door een
nieuwe lamp.
STORINGSTABEL
MET BEHULP VAN DE INDICATIE-LAMPJES WELKE STANDAARD OP DE DE TOESTELLEN UIT DE NEMESIS - REEKS AANWEZIG ZIJN,
KUNNEN EVENTUELE STORINGEN WORDEN VASTGESTELD. ONDERSTAAND EEN TABEL WAARMEE U SNEL DE OORZAAK VAN EEN
STORING KUNT VASTSTELLEN.

6
GITTERKURZSCHLUßSTROM
10mA max.
Gitterspannung: 4500 V AC (Nominal)
Hauptwellenlänge der Röhren:
365 Nanometer.
Bitte lesen Sie diese Anleitung sorgfältig
durch und bewahren Sie sie auf. Für den
von Ihnen erworbenen PestWest
Fliegenvernichter wurde nur erstklassiges
Material verwendet. Bei sachgemäßem
Einbau und regelmäßiger Reinigung wird
dieses Gerät viele Jahre sicher und
zuverlässig arbeiten.
Alle Kombi-Modelle sind als freistehende
Geräte einsetzbar oder können alternativ
wandmontiert oder freihängend befestigt
werden. Alle notwendigen Teile für den
jeweiligen Befestigungsmodus werden
mitgeliefert.
AUSPACKEN DES GERÄTES
Jedes Gerät wurde vor dem Verlassen
unserer Fabrik sorgfältig überprüft und
verpackt. Untersuchen Sie zunächst
den äußeren Karton auf offensichtliche
Transportschäden. Entnehmen Sie nun das
Gerät und achten Sie insbesondere darauf,
daß alle Verpackungsmaterialien entfernt
werden, vor allem die Transporthalterungen
aus Plastik am Einsteckgitter sowie alle
Schutzverpackungen der Leuchtstoffröhren.
AUSWAHL DES MONTAGEORTES
Das Prinzip der elektrischen Fliegenvernichter
beruht auf der Anziehung von fliegenden
Insekten durch Licht, insbesondere
des ultravioletten (UV) Bereichs. Allerdings
kann die Wirksamkeit des elektrischen
Fliegenvernichters durch andere Lichtquellen
beeinträchtigt werden, gleich ob
künstlich oder natürlich. Es sollte deshalb
darauf geachtet werden, elektrische
Fliegenvernichter an Stellen zu montieren,
an denen solche Einflüsse so gering wie
möglich sind.
Diese Allgemeinen Regeln sollten bei der
Montage beachtet werden:
•Wo es auch immer möglich ist, setzen Sie
die Kombi-Geräte freihängend ein, denn
dann werden sie Insekten aus allen
Richtungen anziehen.
•Nicht in der Nähe von Fenstern
anbringen.
•Wenn möglich, sollte das Gerät zur
Hauptlichtquelle in einem 90° Winkel
installiert werden, z.B. das hellste Fenster.
•In Nahrungsmittelbereichen sollten
Fliegenvernichter in der Nähe der
Nahrungsmittelzubereitung installiert
werden, auf keinen Fall direkt über diesen
Flächen.
•Montieren Sie die Geräte so, daß sie für
die Reinigung und Wartung leicht zu
erreichen sind.
•Das Gerät muß über Kopfhöhe
angebracht werden; bei hängender
Montage darauf achten, daß sie nicht
in Verkehrswegen (z.B. Gabelstapler)
hängen.
•Vermeiden Sie die Montage der
Fliegenvernichter, wo Zugluft herrscht.
•Plazieren Sie die Fliegenvernichter in der
Nähe von wahrscheinlichen Einflugstellen,
z.B. an Türen, die nach außen zu öffnen
sind; insbesondere in der Nähe von
Müllcontainern.
Um maximale Fangergebnisse zu erzielen,
sollten Fliegenvernichter 24 Stunden
eingeschaltet bleiben.
WARNHINWEIS!
Nicht in Bereichen einsetzen, in
denen möglicherweise gefährliche
Konzentrationen von entzündlichen Gasen
oder Stäuben auftreten.
KORREKTE ERDUNG
SICHERSTELLEN
Nicht außerhalb von Gebäuden anbringen.
Nicht in feuchten oder korrosiven
Umgebungen installieren, außer das Gerät ist
dafür ausdrücklich geeignet.
MONTAGE
Alle europäischen Modelle sind für 220 - 250
V, 50 Hz ausgelegt. Britische Geräte arbeiten
mit einem 13A Ringsystem, das mit einem
Kabel ausgestattet ist, an dessen Ende sich
ein 13A Stecker befindet, der mit einer 3A
Sicherung abgesichert ist. Europäische
Modelle werden mit einem Kabelsystem
geliefert an dessen Ende sich ein
Schuckostecker befindet. Überprüfen Sie, ob
die Leitung mit max. 16 A abgesichert ist.
PestWest Geräte, die für den US-Markt
bestimmt sind, sind für den Einsatz bei
110 - 120 Volt 60 Hz ausgelegt.
Das Kabelset ist mit einem NEMA 15-5
3-Wegestecker ausgestattet.
Die Geräte sind standardmäßig mit einem 2m
langen Anschlußkabel ausgerüstet (die
Kabellänge der US-Geräte beträgt ca. 2,50
m). Sollte eine Verlängerung notwendig
werden, so ist dies durch einen Elektriker
auszuführen. Falls Sie den, mit dem
Anschlußkabel verschweißten Stecker
entfernen, stellen Sie sicher, daß dieser
gefahrlos entsorgt wird. Stellen Sie
ebenfalls sicher, daß die Stromzufuhr
entsprechend abgesichert ist.
HÄNGENDE MONTAGE
Kombi-Modelle sind für die hängende
Montage fertig vorbereitet. Es sind keine
Änderungen notwendig, wenn das Gerät auf
diese Weise montiert werden soll.
Aus Sicherheitsgründen empfiehlt PestWest
bei der hängenden Montage, das jede Kette
(werden nicht mitgeliefert) aus rostfreiem
Material besteht und jeweils eine Tragfähigkeit
von 15 kg hat. Nur geschweißte Gelenkketten
sollten in ätzenden/feuchten Umgebungen
eingesetzt werden. Für das einfache Reinigen
und der Wiederabnahme des Gerätes, wird
die Anbringung eines Karabinerhakens an
den Ketten, die am Fliegenvernichter befestigt
werden, empfohlen. Stellen Sie sicher, das
auch die Karabinerhaken die entsprechende
Stabilität besitzen.
WIRKUNGSBEREICH
Für eine vorgegebene Fläche gilt im
Allgemeinen: Je heller die umgebende
Beleuchtung, desto mehr Geräte bzw. desto
höhere Leistungsstärken müssen zum
Einsatz kommen. Für die übliche
Innenbeleuchtung konnten folgende
Richtlinien ermittelt werden: (siche Tabelle
Seite 7)
WANDMONTAGE
Der Fliegenvernichter wird durch eine
Laschenhalterung, die Sie mit den
mitgelieferten Schrauben an der Wand
befestigen können, angebracht. Das Gerät
wird einfach auf diese Halterung gesteckt.
Für die Reinigung und Wartung kann es auf
diese Weise einfach entfernt werden.
Wählen Sie die Stelle, wo das Gerät montiert
werden soll aus und verwenden Sie die
Halterung als Schablone. Markieren Sie die
Position der Bohrlöcher an der Wand unter
Verwendung einer Wasserwaage. Bohren Sie
die Löcher unter Verwendung eines 6mm
Bohrers bis zu einer Tiefe von 35mm.
Schrauben Sie die Halterung unter
Verwendung der mitgelieferten Dübel und
Schrauben fest an die Wand an.
Umrüstung der Modelle für die Wandmontage
1. Lösen Sie die Schrauben, die die
Rückwand des Gehäuses sichern
(1 Blechschraube und 4xM4x12
Schrauben).
2. Entfernen Sie die Rückwand
3. Schrauben Sie nun die mitgelieferte
Rückwand mit den Halterungen auf gleiche
Weise wieder an das Gehäuse an.
Beachten Sie, daß die Aufhängeösen nach
außen zeigen.
Unter Verwendung der Wandhalterung kann
das Gerät wie zuvor beschrieben an der
Wand befestigt werden.
AUSWECHSELN DER RÖHREN
Die Insekten werden durch das von den
Röhren produzierte UV-Licht angelockt.
Dieses für das menschliche Auge unsichtbare
Licht nimmt mit der Zeit ab, auch wenn bei der
Röhre keine Veränderung feststellbar ist. Es
ist deshalb wichtig, daß die Röhren einmal im
Jahr ausgewechselt werden.
Nemesis Ultima elektrischer Fliegenvernichter - Einbau und Wartungsanleitung
BITTE SCHALTEN SIE DAS GERÄT VOR DER WARTUNG AUS
7
Zum Auswechseln der Röhren gehen Sie
folgendermaßen vor:
1. Stromzufuhr unterbrechen
2. Fangschublade herausziehen
3. Öffnen Sie das hochklappbare Schutzgitter
4. Abtötungsgitter entfernen. Das Gitter ist
federnd gelagert. Heben Sie das Gitter
leicht an und ziehen es auf sich zu.
5. Verwenden Sie unbedingt den richtigen
Röhrentyp. Keimabtötende Schwarzlicht-
röhren sind in keinem Fall geeignet, da
diese bei einer anderen Wellenlänge
arbeiten und für Augen und Haut gefährlich
werden können.
NEMESIS ULTIMA 45 UND 80
Die Benutzung von Fluginsektenkontrollgeräten,
welche Quantum BL Bruchgeschützte
Röhen mit Teflon®G Ummantelung nutzen,
oder nach Röhrentausch nutzen, bietet
die einfachste und sicherste Lösung um
die Verschmutzungsgefahr durch Glasbruch
zu verringern.
Drehen Sie den Starter gegen den
Uhrzeigersinn um 90° und ziehen Sie ihn vom
Gerät ab. Einbau in umgekehrter Reihenfolge.
Um die Röhren zu wechseln, drehen Sie sie im
Uhrzeigersinn von Ihnen weg. Nachdem es
zweimal geklickt hat, können Sie die Röhre
nach hinten aus der Halterung drücken. Einbau
in umgekehrter Reihenfolge.
NEMESIS ULTIMA 22
Starterausbau wie oben beschrieben. Die
Rundröhre wird durch zwei Clipse fixiert, einer
oben, einer unten an der Röhre. Nachdem Sie
die beiden Clipse geöffnet haben, können Sie
die Rundröhre aus der Halterung lösen.
Einbau in umgekehrter Reihenfolge.
REINIGUNG UND
INSTANDHALTUNG
Die einzige notwendige Wartung, außer
dem jährlichen Röhrenwechsel und
einem gelegentlichen Austausch des Starters,
ist die regelmäßige Reinigung des
Fliegenvernichters. Unterbrechen Sie immer
die Stromzufuhr, bevor Sie an dem Gerät
arbeiten. Entfernen Sie alle toten Insekten
aus der Fangschublade und beseitigen Sie
auch evtl. solche, die auf den Boden des
Gerätes gefallen sind.
Reinigen Sie das Gitter. Die Reinigung
des Gitters ist leicht möglich, wenn Sie es
vom Gerät entfernen und bei starker
Verschmutzung mit einer Bürste oder
einem entsprechenden Reinigungsschwamm
bearbeiten. Ein kurzes Einweichen in heißem
Wasser mit mildem Spülmittel, wird die
meisten Flecken entfernen. Achten Sie
darauf, daß das Gitter vollständig getrocknet
ist, bevor es wieder in das Gerät eingesetzt
wird. Die beiden Gitterhälften sollten bei der
Reinigung nicht verbogen oder auseinander-
gezogen werden, da sonst der Wiedereinbau
erschwert wird. Wischen Sie das Gehäuse
mit einem in warmen Spülwasser oder
verdünntem Brennspiritus getauchten Lappen
vorsichtig ab. Verwenden Sie keine
Scheuermittel, wie z.B. Stahlwolle oder
Metallreinigungsschwämme.
Sollten Sie selbst nicht in der Lage sein, die
Wartung des Gerätes mit der gebotenen
Sorgfalt durchzuführen, empfehlen wir Ihnen
den Abschluß eines regelmäßigen
Wartungsvertrages. In jedem Fall ist dies der
einfachste Weg, um eine lange und
zuverlässige Standzeit Ihres Gerätes
sicherzustellen.
SICHERHEIT
PestWest Elektronische Fliegenvernichter
werden nach den höchsten europäischen
Standards entworfen und nur aus
erstklassigem Qualitätsmaterial hergestellt.
Alle europäischen Modelle wurden getestet
und zertifiziert nach den IEC 335-2-59
Sicherheitsstandard. Dieser Standard wurde
extra für elektrische Fliegenvernichter und
deren Zubehör aufgestellt. Zusätzlich wurden
die Geräte den Tests gemäß EN 55014 und
EN 50082/2 unterzogen. Diese Tests
geben Auskunft darüber, inwieweit
elektromagnetische Störungen auf andere
Geräte ausgeübt werden.
MODELLE UND VARIATIONEN
Nemesis Ultima wird in drei Modellen
hergestelt.
Alle Geräte sind sowohl in gebürstetem
Edelstahl oder in weißem UV-beständigen
polyester beschichtetem Zintecstahl
erhältlich.
GERÄT RÖHREN/KENN-NR. WIRKUNGSSBERIECH STARTER
Nemesis 2 x 40-Watt bruchgeschützt - freihängend - 320m22x Starter - FS22/S2
Ultima 80 QPW40WST24SHG wandmontiert - 160m2
Nemesis 3 x 15-Watt bruchgeschützt - freihängend - 200m23x Starter - FS22/S2
Ultima 45 QPW15WST18SHG wandmontiert - 100m2
Nemesis 1 x 22-Watt Rundröhre freihängend - 100m21x Starter - FS22/S2
Ultima 22 bruchgeschützt - Q22WCISH wandmontiert - 50m2
XXXKein Strom -
Stromversorgung, Kabel und Sicherungen prüfen
X X Sicherheits - Mikro-Schalter arbeitet nicht.
Prufen, ob Sicherheitsgitter richtig geschlossen ist.
X Röhrenstromkreis defekt. UV-Röhren und Starter prüfen.
XTransformer defekt oder Kurzschluß am Abtötungsgitter-
Gitter auf Sauberkeit und evtl. Schäden an der Isolierung prüfen
Gerät arbeitet
ORANGE LAMPE ROTELAMPE ROHREN MOGLICHER FEHLER
FEHLERDIAGNOSE-TABELLE
= LEUCHTET X = LEUCHTET NICHT
Anmerkung: Der UV Röhren/Starterstromkreis ist seriengeschaltet, d.h. Ausfall eines Starters oder einer Röhre führt zum Ausfall beider Röhren.

8
CARACTÉRISTIQUES
TECHNIQUES
Intensité du courant de court-circuit de la
grille : 10 mA max.
Tension de la grille - 4500 V C.A.
(nominale).
Pic d'émission des tubes : 365 nanomètres.
Tubes UV gainés Quantum BL
Veuillez consulter ces instructions avec
attention et les conserver pour de futures
références.
Votre désinsectiseur Nemesis Ultima a été
conçu et produit avec des matériaux de
première qualité pour un fonctionnement
fiable, en toute sécurité, durant de
nombreuses années, à condition de
l'installer convenablement et de le
maintenir en bon état.
Tous les modèles offrent trois types de
positionnement : fixé au mur, suspendu ou
simplement posé. Les éléments
nécessaires à la conversion en version
murale sont fournis.
RETRAIT DE L'EMBALLAGE
Chaque modèle est inspecté et emballé avec
soin avant de quitter nos locaux.
A la réception de la marchandise, vérifier que
le carton d'emballage extérieur ne porte pas
de traces évidentes de dégradation dues au
transport. Extraire l'appareil en prenant soin
de retirer tous les éléments d'emballage,
notamment aux destinés à maintenir la grille
d'électrocution lors du transport.
CHOIX DE L'EMPLACEMENT
DE L'APPAREIL
Le principe de fonctionnement des désin-
sectiseurs UV repose sur l'attraction exercée
par la lumière et plus particulièrement les
rayonnements ultraviolets (UVA) sur les
insectes volants. Cependant, l'efficacité des
appareils peut être diminuée par l'intensité
d'autres sources lumineuses, qu'elles soient
naturelles ou artificielles. Il est donc
recommandé de placer le désinsectiseur à
l’écart de ces autres sources. D'une manière
générale, il faut respecter les principes
suivants :
•Un désinsectiseur est plus efficace lorsqu'il
est suspendu, il attire alors les insectes de
toutes les directions.
•Ne pas installer l'appareil près des
fenêtres.
•Installer l'appareil à 90° de la principale
source de lumière naturelle (qui est
souvent la fenêtre la plus ensoleillée).
•Placer le désinsectiseur près de zones de
préparation des aliments mais pas
directement au-dessus de celles-ci.
•L'appareil doit être facilement accessible
aux opérations de maintenance.
•Installer l'appareil à une hauteur supérieure
ou égale à deux mètres. En cas d'emploi du
mode suspendu, placer l'appareil hors
d'atteinte de possibles trafics (chariots
élévateurs par exemple).
•Eviter les courants d'air.
•Placer le désinsectiseur en position
d'interception entre les zones où se
trouvent les aliments et celles où les
mouches sont susceptibles de pénétrer,
c'est à dire près des portes ouvertes sur
l'extérieur, notamment en cas de présence
de conteneurs à déchets.
Pour un maximum d'efficacité, l'appareil
doit rester continuellement branché 24
heures par jour.
INSTALLATION
Toutes les versions européennes
fonctionnent sur secteur 220-240 V - 50 Hz.
Ces modèles sont livrés avec un cordon
d'alimentation muni d'une fiche de type
"schuco". S'assurer que la connexion secteur
utilise un fusible de 16 ampères maximum.
Les appareils sont livrés avec un cordon
d'alimentation de 2 mètres. S'il s'avère
nécessaire de rallonger ce cordon, il
convient de faire appel à un électricien
compétent. S'assurer qu'une fois l'appareil
installé, le cordon d'alimentation soit bien en
place et que toutes les précautions
soient respectées.
ATTENTION
Ne pas installer à proximité d’une zone
pouvant présenter une dangereuse
concentration de gaz inflammable ou de
poussière.
S’assurer que l’appareil est correctement
relié à la terre.
Ne pas installer à l’extérieur.
Ne pas installer en ambiance humide ou
corrosive, sauf si le fabricant indique
clairement cette possibilité.
SECURITE
Les désinsectiseurs PestWest sont conçus à
partir de matériaux de haute qualité et sont
conformes aux normes européennes les plus
exigeantes. Tous les modèles ont été testés et
certifiés comme étant en conformité avec la
norme de sécurité IEC 335-2-59. Cette norme
a été spécialement mise en place pour les
désinsectiseurs UV à grille d'électrocution. En
outre, tous les modèles possèdent l'estampille
CE (normes NE 55014 et
50082/2 relatives à la compatibilité
électromagnétique).
MAINTENANCE
Pour un maximum d'efficacité, la
maintenance doit être effectuée de manière
régulière, de préférence par une société de
professionnels de l'hygiène antiparasitaire, dans
le cadre d'un programme d'inspection bien défini.
NETTOYAGE
En dehors des tubes et du remplacement
occasionnel des starters, la seule
maintenance nécessaire consiste à
conserver le désinsectiseur dans un bon état
de propreté. Toujours débrancher l'appareil
avant sa maintenance. Vider le plateau
collecteur des insectes morts et prendre soin
d'utiliser une brosse souple pour nettoyer le
châssis de l'appareil.
Essuyer le châssis de l'appareil avec un
chiffon humidifié dans un mélange d'eau tiède
et de détergent, en prenant soin de ne
pas laisser l'eau pénétrer dans l'appareil.
Pour éviter toute trace d'eau sur les modèles
en acier inoxydable, il est recommandé
d'essuyer l'appareil, par la suite, à l'aide de
produits nettoyants spécifiques à ce matériau.
MODE SUSPENDU
Le Nemesis Ultima est livré pour être
suspendu, à l'aide des deux anneaux de
suspension situés à chaque extrémité du
couvercle de l'appareil. Pour des raisons de
sécurité, PestWest recommande l'emploi de
chaînes de suspension (non fournies) en
matériau non corrosif et capable chacune de
supporter un poids d'au moins 15 kg.
En ambiance humide, n'employer que des
chaînes à maillons soudés. Afin de faciliter la
maintenance, il est conseillé d'utiliser des
mousquetons pour relier les chaînes aux
anneaux de suspension de l'appareil.
Chaque mousqueton devant pouvoir
supporter un poids d'au moins 15 kg.
MODE MURAL
Un support de montage livré avec les
vis et chevilles de fixation est disponible
sur demande. L'appareil s'accroche
simplement sur le support, ce qui permet un
délogement aisé facilitant l'entretien et la
maintenance. Lorsque l'emplacement idéal a
été défini, utiliser le support comme gabarit
pour marquer le mur en s'assurant qu'il soit
rectiligne. Employer une mèche de 6 mm et
percer à une profondeur de 35 mm. Utiliser
les vis et chevilles fournies pour visser le
support au mur en s'assurant d'une fixation
ferme et solide.
MANIPULATION DE L'APPAREIL
1. Débrancher l'appareil
2. Retirer le plateau collecteur des insectes
morts et le vider de son contenu avec
précaution. L'accès à l'intérieur de
l'appareil ne nécessite pas le retrait du
plateau collecteur.
3. Sur tous les modèles, pour plus de
sécurité, cette opération peut se faire
uniquement en ouvrant la grille de
protection avant (située en-dessous
des témoins lumineux se trouvant sur
le couvercle).
VEUILLEZ DÉBRANCHER L’APPAREIL AVANT LA MAINTENANCE
Désinsectiseurs électronique Nemesis Ultima - Notice d’instructions

9
Nemesis 2 x 40-Watt tubes gainés Suspendu - 320m22 x starter - montage en
Ultima 80 QPW40WST24SHG Mural - 160m2série FS22 ou S2
Nemesis 3 x 15-Watt tubes gainés Suspendu - 200m23 x starter - montage en
Ultima 45 QPW15WST18SHG Mural - 100m2série FS22 ou S2
Nemesis 1 x 22-Watt tube circulaire Suspendu - 100m21 x starter - montage en
Ultima 22 gainé Q22WCISH Mural - 50m2série FS22 ou S2
Référence
du modèle Puissance et référence
des tubes UV Type et référence
des starters
Zone d’attraction
X X X L’appareil n’est pas sous tension. Vérifier les différents branchements.
Mettre l’appareil sous tension.
X X L’interrupteur de sécurité coupe l’arrive du courant.
Vérifier que la grille de protection est bien fermée.
X Le circuit d’éclairage est défaillant.
Vérifier les tubes UV et les starters
XLe transformateur est défaillant ou la grille d’électrocution est
courtcircuitée.
L’appareil fonctionne normalement
TEMOIN
ORANGE TUBES UV
TEMOIN
ROUGE REMARQUES
TABLEAU DE VÉRIFICATION DU BON FONCTIONEMENT DE L’APPAREIL
= ALLUME X = ÉTEINT
4. Ouverture de la grille de protection. Retirer
partiellement le plateau collecteur.
Sur chacune des parois latérales grises de
l'appareil, vers le bas, se trouve des clips
de couleur bleue. Poussez-les vers
l'extérieur du corps de l'appareil. La grille
de protection peut alors s'ouvrir librement.
5. Soulever la grille de protection pour
accèder à l'intérieur de l'appareil. Pour
faciliter les manipulations, la grille peut se
bloquer en position ouverte, à l'horizontal :
pousser simplement les pivots de la grille
dans les creux des parois latérales de
l'appareil pour la stabiliser.
RETRAIT DE LA GRILLE
D'ELECTROCUTION
Afin de faciliter l'entretien, tous les modèles
de type Nemesis Ultima sont équipés d'une
grille d'électrocution extractible. Cette grille
est maintenue en position grâce aux deux
isolateurs supérieurs et repose sur la base du
châssis (déflecteur). Pour extraire la grille
d'électrocution, pousser délicatement celle-ci
vers le haut pour permettre à la partie
inférieure de se désolidariser du corps de
l'appareil. La grille peut maintenant être
retirée hors de l'appareil.
Lorsque la grille est extraite hors de l'appareil,
il est conseillé de la nettoyer avec du savon ou
du détergent puis rincer à l'eau pure. Prendre
soin de ne pas déplacer ou décrocher les
isolateurs blancs insérés dans la grille.
S'assurer que la grille soit sèche avant de la
réinstaller. En la réinstallant, s'assurer que les
isolateurs inférieurs blancs aient bien le côté
incliné faisant face à l'arrière de la machine.
CHANGEMENT DES TUBES
UV ET STARTERS
La lumière UVA des tubes, qui attire les
insectes volants, n'est pas visible par l'homme
et se dégrade avec le temps. Pour maintenir
une attraction optimale des insectes, il est
recommandé de remplacer les tubes une fois
par an, ou plus fréquemment pour les
zones sensibles.
Tous les désinsectiseurs Nemesis Ultima
sont équipés de tubes UV gainés Quantum
BL en série.
NEMESIS ULTIMA 45 ET 80
L’emploi de désinsectiseurs UV équipés
de tubes Quantum BL gainés avec un
revêtement en fluoropolymère Téflon®G offre
une solution simple et sûre aux problèmes de
contamination dus aux débris de verre
réduisant les risques de propagation de
manière très significative.
Débrancher l'appareil, retirer les insectes
morts du plateau collecteur, soulever la
grille de protection et extraire la grille
d'électrocution comme décrit précédemment.
Les starters sont situés à proximité des tubes
UV, sur la gauche de l'appareil. Leur retrait
s'effectue en tournant le corps du starter
d'environ un quart de tour.
Mettre en place les nouveaux starters en
effectuant la procédure inverse.
Il est recommandé de remplacer les starters
chaque fois que les tubes sont changés.
Pour retirer les tubes, les tourner dans un
sens ou dans l'autre (deux déclics seront
alors entendus). Les extraire d'abord vers
l'arrière de l'appareil puis les ramener
vers soi.
Mettre en place les nouveaux tubes en
effectuant l'opération inverse.
NEMESIS ULTIMA 22
Débrancher l'appareil, retirer les insectes
morts du plateau collecteur, soulever
la grille de protection et extraire
la grille d'électro-cution comme décrit
précédemment.
Le starter est situé sous la paroi supérieure
interne du châssis de l'appareil, juste devant
tube. Retirer le starter en le tournant d'environ
un quart de tour. Remplacer ce dernier en
effectuant la procédure inverse.
Le tube circulaire d'une puissance de 22 Watt
est maintenu en position par deux clips, l'un
au-dessus et l'autre au bas du tube. Ouvrir
chaque clip pour extraire le tube et le
remplacer en effectuant la procédure inverse.

10
ESPECIFICACIONES
Pico máximo de corriente de corto
circuito de parrilla 10mA.
Voltaje parrilla 4500 voltios CA (nominal).
Emisión de tubos 365 nanómetros, Tubos
de luz ultravioleta Quantum BL protegidos
inastillables
Por favor lea estas instrucciones con
cuidado y guárdelas para su referencia
futura. Su mata-insectos Nemesis Ultima
ha sido diseñado y construido con
materiales de alta calidad y si se instala
correctamente y se mantiene limpio
funcionar sin problemas durante años.
Todos los modelos Combi se pueden
usar puestos sobre cualquier superficie
plana, colocados en la pared o colgados.
Se incluye un soporte para poder instalar
el aparato en la pared si se desea.
DESEMBALAJE DE LA UNIDAD
Antes de abandonar la fábrica, cada
unidad es inspeccionada y empaquetada
cuidadosamente. Antes de desechar el
embalaje, verifique que la unidad no haya
sufrido ningún daño evidente en su
transporte. Preste una atención especial a la
extracción de todos los materiales de
embalaje, incluyendo el embalaje (bridas de
plástico) de tránsito de la rejilla eléctrica y
cualquier protección adicional alrededor de
los tubos fluorescentes.
UBICACIÓN
Los mata-insectos electrónicos (MIEs) operan
bajo el principio de que los insectos voladores
son atraídos por la luz, especialmente la luz
ultravioleta. Sin embargo la efectividad de los
MIEs se puede ver afectada por la intensidad
de otras fuentes de luz ya sea natural o
artificial. Es de sentido común por lo tanto
colocar el aparato donde la competencia de
otras fuentes es mínima.
Como norma general:
•Donde sea posible poner los aparatos
colgados del techo, puesto que así atraen a
los insectos en todas las direcciones.
•No sitúe los MIEs en posición adyacente
a ventanas.
•Coloque los aparatos cuando sea posible a
un ángulo de 90% de la principal fuente
luminosa, por ejemplo de la ventana
más soleada.
•En áreas con alimentos no lo coloque
encima de los alimentos expuestos o las
superficies de preparación.
•Coloque los aparatos de manera que sean
accesibles para su mantenimiento.
•Poner los aparatos por encima de la
altura de la cabeza, y en el caso de que
estén colgados fuera del alcance de
carretillas elevadoras y otros vehículos.
•No coloque los MIEs en lugares donde haya
corrientes de aire.
•Coloque los MIEs de manera que
intercepten la principal entrada de moscas,
por ejemplo cerca de puertas que den al
exterior, especialmente si dan a donde se
guarda la basura.
Para mayor efectividad los aparatos deben
permanecer encendidos las 24 horas del día.
INSTALACIÓN
Todos los aparatos para el mercado europeo
están diseñados para funcionar a 220-240 V
50Hz. Los modelos para la Europa
continental llevan un cable con un enchufe de
dos patas y toma de tierra. Asegúrese que el
fusible del ramal sea de un máximo de 16
amperios.
Los modelos para el mercado de los Estados
Unidos están diseñados para funcionar con
110-120V 60 Hz. El cable viene con un
enchufe Nema 15-5 de tres patas.
Los aparatos vienen con un cable de 2 metros
(8 pies en algunos modelos americanos).
Si es necesario alargar el cable esto lo debe
hacer un electricista competente. Si se quita
el enchufe, este se debe eliminar en un lugar
seguro. Asegurarse de que una vez instalado,
el cable quede correctamente asegurado.
AVISO
No instalar donde puedan haber
concentraciones peligrosas de gases
inflamables o polvos.
Asegurarse de que todos los aparatos
estén correctamente conectados a tierra.
No instalar en exteriores.
No instalar en ambitos corrosivos o
húmedos a menos que la especificación
del aparato lo permita.
SEGURIDAD
Los mata-insectos electrónicos de PestWest
han sido diseñados según los más altos
estándares europeos y están fabricados con
materiales de calidad. Todos los modelos
europeos han sido probados y tienen la
certificación de cumplimiento de la normativa
de seguridad IEC 33-2-59. Esta norma es
específica para equipos de electrocución de
insectos voladores. Adicionalmente son
también aplicables las pruebas EN 55014 y
EN 5008/2 de conductividad y de inmunidad
de compatibilidad. Los modelos para Estados
Unidos están en el listado UL.
INSTRUCCIONES DE
MANTENIMIENTO
Para el mejor funcionamiento del aparato
se deben llevar a cabo las siguientes
operaciones periódicamente, y esto se realiza
con mayor seguridad cuando se hace como
parte de un Programa de Mantenimiento
llevado a cabo por parte de una empresa de
control de plagas reconocida.
MODELOS
Todos los aparatos de la gama están
disponibles en acero inoxidable o en acero
galvanizado pintado con pintura de
poliester resistente a la luz ultravioleta.
Las tapas laterales, para dar al aparato
rigidez adicional, están hechas de un
compuesto resistente a la luz ultravioleta de
policarbonato y ABS.
LIMPIEZA
Aparte de cambiar los tubos y
ocasionalmente los cebadores, el único
mantenimiento necesario es mantener limpio
el aparato. Siempre desconectar el aparato
de la corriente antes de tocarlo. Vaciar los
insectos muertos de la bandeja y emplear un
pincel para sacar cualquier resto adicional.
Limpiar con un trapo húmedo con detergente
suave teniendo cuidado de que no le entre
agua al aparato. Para evitar manchas de agua
en los aparatos de acero inoxidable, una vez
secos, estos se pueden limpiar con un
limpiador especial para este metal.
COLGADO DEL TECHO
Los Nemesis Ultima vienen listos para ser
colgados de dos orejuelas de metal
colocadas una en cada punta de la tapa.
Por razones de seguridad PestWest
recomienda que cuando se cuelgue, cada
una de las cadenas (estas no se suministran
con el aparato) sea de un material no
susceptible a la corrosión y que cada una sea
capaz de aguantar 15kg (30lbs). Sólo se debe
utilizar cadenas de eslabones soldados
en ambientes húmedos o corrosivos.
Para facilitar el colgado y el mantenimiento se
recomienda que cada cadena lleve un clip
capaz de soportar 15kg conectado al aparato.
PUESTO EN LA PARED
Se suministra un soporte con tornillos
incluidos para colgar el aparato en la pared.
El aparato se engancha en este soporte y de
esta manera se facilita el mantenimiento y
limpieza. Utilizando el soporte como plantilla,
seleccione el lugar donde vaya a montar el
aparato. Marque la pared a través de los
agujeros asegurándose de que están a nivel.
Taladre los agujeros a una profundidad de
35mm empleando una broca de 6mm.
Empleando los tacos y tornillos
suministrados fijar el soporte a la pared
asegurándose que quede fuerte y
firmemente fijado. Asegúrese de que la pared
es adecuada para la fijación que se
suministra.
PARA ABRIR EL APARATO
PARA SU MANTENIMIENTO
1. Desenchufe el aparato
2. Saque la bandeja recolectora de insectos y
deshágase de su contenido de manera
Mata-insectos eléctricos Nemesis Ultima - Instrucciones de uso
POR FAVOR APAGUE EL APARATO ANTES DE HACERLE MANTENIMIENTO

segura. La bandeja está diseñada para
que no se tenga que sacar del todo para
acceder al interior del aparato.
3. Para proteger la integridad del aparato, en
todos los modelos únicamente se abre la
reja protectora anterior. Esta reja es la
que se tiene delante cuando se mira hacia
los pilotos que se encuentran en la
tapa del aparato.
4. En la parte de abajo de las tapas
laterales de color gris hay un retén de color
azul. Con los pulgares empuje hacia fuera.
Una vez abierta la reja basculará
libremente.
5. Abrir la reja hacia arriba para acceder al
interior del aparato. Para facilitar las
operaciones de mantenimiento se puede
fijar la reja en la posición abierta
levantándola hasta que quede horizontal, y
a continuación empujándola hacia atrás
hasta que queda fija en las ranuras que
se encuentran en las paredes laterales
del aparato.
PARA SACAR LA REJILLA
ELECTRICA
Para facilitar el mantenimiento todos los
modelos Nemesis Ultima tienen la rejilla
eléctrica extraíble. Esta rejilla está metida en
dos conectores con muelle que se encuentran
en la parte superior del aparato y en dos
agujeros que se encuentran en el deflector de
insectos que están en la parte de abajo.
Para sacar la rejilla empujar suavemente
hacia arriba hasta que los dos aislantes
blancos en su parte inferior salen del panel
deflector. Ahora se puede sacar la rejilla
del aparato.
Una vez que se ha sacado la rejilla del
aparato se puede limpiar con agua
enjabonada o detergente y a continuación se
debe enjuagar con agua limpia. Tenga
cuidado de no mover o sacar de su sitio
ninguno de los elementos aislantes blancos
que lleva la rejilla. Asegúrese de que la rejilla
esté completamente seca antes de volver a
colocarla. Cuando se vuelve a colocar la
rejilla asegúrese de que los aislantes
biselados en la parte inferior queden con la
cara inclinada hacia la parte posterior del
aparato.
CAMBIO DE TUBOS
Y CEBADORES
La luz ultravioleta de los tubos que atrae a los
insectos es invisible para los humanos y su
intensidad disminuye a medida que pasa el
tiempo. Para mantener la máxima atracción
para los insectos se recomienda cambiar los
tubos cada año o con mayor frecuencia en
áreas sensibles de producción de alimentos.
Todos los aparatos Nemesis Ultima llevan
de fabrica tubos de luz ultravioleta
Quantum BL protegidos inastillables.
NEMESIS ULTIMA 45 Y 80
El empleo de aparatos con tubos Quantum
BL protegidos con el fluoropolímero Teflon®G
es la solucióm más fácil y segura para reducir
de manera significativa el riesgo de
contaminación mediante vidrios rotos.
Apague el aparato, saque la bandeja
recolectora de insectos, abra la reja delantera
y quite la rejilla eléctrica como se especifica
arriba.
Los cebadores se encuentran encima de sus
respectivos tubos en la parte izquierda del
aparato, y se pueden quitar girando el
cuerpo del cebador en dirección contraria a
las manecillas del reloj un cuarto de vuelta y
sacándolos. Se vuelven a colocar siguiendo el
procedimiento inverso.
Se recomienda cambiar los cebadores
siempre que se cambien los tubos.
Para sacar los tubos, girarlos en la dirección
de las manecillas del reloj. Se oirán dos
“clicks” de los portalámparas. A continuación
se pueden sacar los tubos de los
portalámparas empujándoles hacia la parte
posterior del aparato. Se vuelven a colocar
siguiendo el procedimiento inverso.
NEMESIS ULTIMA 22
Apagar el aparato, sacar la bandeja de
captura de insectos, abrir la reja anterior y
sacar la rejilla eléctrica tal y como se ha
indicado arriba.
El cebador de este aparato está situado en la
parte superior del aparato delante del tubo.
Sacarlo girando aproximadamente un cuarto
de vuelta en dirección contraria a las
manecillas del reloj. Se vuelve a colocar
siguiendo el procedimiento inverso.
El tubo circular de 22 vatios está retenido por
dos clips, una en la parte superior y otro en la
parte inferior del tubo. Abrir los dos, lo que
permite sacar el tubo del conector. Para volver
a colocar el tubo seguir el procedimiento
inverso.
UNIT TUBOS/CÓDIGOS COBERTURA CEBADORES
Nemesis 2 x 40-vatios inastillables - Colgado - 320m22x cebadores - FS22/S2
Ultima 80 QPW40WST24SHG Montado en pared - 160m2
Nemesis 3 x 15-vatios inastillables - Colgado - 200m23x cebadores - FS22/S2
Ultima 45 QPW15WST18SHG Montado en pared - 100m2
Nemesis 1 x 22-vatios circular Colgado - 100m21x cebador - FS22/S2
Ultima 22 inastillable - Q22WCISH Montado en pared - 50m2
X X X No llega corriente. Verificar el cable o fusibles.
X X No funciona el microswitch de seguridad.
Asegurarse de que está cerrada la reja protectora.
XEl circuito de luz no funciona. Revisar los tubos.
Revisar cebadores.
XEl transformador no funciona o la rejilla electrificada hace corto
circuito. Limpiar el aislamiento y revisar que no haya sido dañado.
El aparato funciona correctamente.
LUZ AMBAR LUZ ROJA TUBOS
ULTRAVIOLETA AVERÍA PROBABLE
NOTA: El CIRCUITO DEL CEBADOR Y DE LOS TUBOS ESTÁ CONECTADO EN SERIE, es decir, si falla un cebador o un tubo, no funcionará
ninguno de los dos.
TABLA DE DIAGNÓSTICO DE AVERÍAS
= EN FUNCIONAMIENTO (ENCENDIDA) X = NO FUNCIONA (APAGADA)
11

12
Elettroinsetticidi serie Nemesis Ultima - Istrusioni per l’uso
SCOLLEGARE L’UNITÀ DALLA CORRENTE PRIMA DI QUALSIASI OPERAZIONE DI MANUTENZIONE O PULIZIA
SPECIFICHE
Picco Massimo Di Corrente Di Corto
Circuito Sulla Griglia10mA.
Voltaggio della Griglia 4500v AC
(Nominale).
Emissione dei Tubi 365 Nanometri, Tubi UV
Quantum BL Shatterproof.
Si prega di leggere queste istruzioni
attentamente e di conservarle per
future consultazioni. La vostra Nemesis
Ultima della PestWest è stata
disegnata e costruita utilizzando
tecnologie e materiali di prima qualità. Se
installata correttamente e sottoposta a
manutenzione questa opererà in sicurezza
ed efficacemente per molti anni. Tutti i
modelli possono essere utilizzati montati a
parete, sospesi al soffitto o appoggiati a
superfici orizzontali. È'disponibile un
supporto per il montaggio a parete.
APERTURA DELLA CONFEZIONE
Ogni unità è attentamente ispezionata ed
imballata prima di uscire dalla fabbrica. Prima
di disfarsi del cartone esterno, controllare la
presenza di segni di danni derivanti dal
trasporto. Rimuovere l'unità dall'involucro
esterno, prestando particolare attenzione ad
eliminare ogni materiale di protezione per il
trasporto, compresi quelli attorno ai tubi
fluorescenti e alla griglia elettrificata.
POSIZIONARE L'UNITÀ
Gli elettroinsetticidi (EFK) operano sul
principio che gli insetti volanti sono attratti
dalla luce, specialmente da quella nel campo
dell'Ultravioletto (UV-A). Per questa ragione
l'efficienza di un elettroinsetticida può essere
influenzata negativamente dall'intensità di
altre sorgenti luminose, sia naturali che
artificiali. È perciò importante posizionare le
unità dove la competizione con queste altre
sorgenti luminose sia minima.
Come regola generale:
•se possibile, montare le unità sospese dal
soffitto in modo che possano esercitare
attrazione in tutte le direzioni;
•non montare le unità adiacenti alle finestre;
•l'unità dovrebbe essere montata, se
possibile, a 90° rispetto alle maggiori
sorgenti di luce, come per esempio le
finestre più assolate;
•nelle industrie alimentari, montare le unità in
prossimità, ma non direttamente sopra gli
alimenti o sulle aree dove vengono
preparati;
•montare le unità dove siano facilmente
accessibili per la manutenzione;
•montare le unità ad un'altezza tale da non
ingombrare i normali movimenti delle
persone, e non lungo le direttrici di
movimento dei carrelli elevatori;
•evitare di posizionare le unità in
corrente d'aria;
•posizionare l'elettroinsetticida dove gli
insetti volanti guadagnano accesso alle
strutture, per esempio vicino alle
porte esterne.
Per ottenere la massima efficacia gli
elettroinsetticidi devono rimanere in
funzione 24 ore al giorno.
ATTENZIONE
Non installare dove e’ possibile la
presenza di concentrazioni pericolose di
gas o polveri infiammabili.
Assicurarsi che ogni unita’ sia
adeguatamente messa a terra.
Non installare all’aperto.
Non installare in atmosfere troppo umide o
corrosive, a meno che l’unita’ sia di tipo
adatto.
INSTALLAZIONE
Tutte le versioni per il mercato Europeo
operano a 220-250 V 50 Hz. Assicurarsi che il
fusibile di linea sia 16 A massimo.
Le unità sono fornite con un cavo che
termina con una spina di tipo Schuco. Se è
necessario aumentarne la lunghezza, occorre
consultare un elettricista. Assicurarsi che una
volta installata l'unità, il cavo di corrente sia
adeguatamente fissato.
SICUREZZA
Le unità PestWest sono state progettate
secondo I più alti standard Europei e sono
costruite con materiali di qualità. Tutti i modelli
Europei sono stati testati e certificati in
conformità con gli Standard di Sicurezza IEC
335-2-59. Questo standard è specifico per gli
elettroinsetticidi a griglia elettrificata. Inoltre,
sono stati effettuati i test di compatibilità ed
immunità elettromagnetica EN 55014 ed
EN 50082/2.
ISTRUZIONI DI
MANUTENZIONE
Per mantenere una perfetta efficienza,
le seguenti operazioni devono essere
effettuate regolarmente e questo è ottenuto
più facilmente se effettuato come parte di un
Programma di Manutenzione fornito da un
Disinfestatore Professionista.
PULIZIA
A parte la sostituzione dei tubi e,
occasionalmente, degli starter, l'unica
manutenzione necessaria è la pulizia
dell'unità. Isolare sempre l'unità dalla linea
elettrica prima di effettuare qualsiasi
operazione sull'apparecchiatura. Svuotare il
vassoio di raccolta dagli insetti morti e
rimuovere ogni frammento di insetto
utilizzando un pennello soffice.
Pulire con un panno umido e un detergente
neutro, avendo cura di non fare entrare acqua
nella macchina. Per evitare che rimangano
macchie di acqua sulle unità in acciaio inox,
utilizzare un detergente per acciaio inox dopo
aver asciugato l'unità.
MONTAGGIO A SOSPENSIONE
Le unità Nemesis Ultima sono fornite pronte
per essere montate a sospensione tramite i
due anelli metallici presenti sui due lati del
coperchio. Per ragioni di sicurezza, PestWest
raccomanda che siano utilizzate due catene
(non fornite) di materiale resistente alla
corrosione e capaci di sostenere almeno 15
kg di peso ciascuna. In ambienti con
atmosfera corrosiva o umida, devono essere
utilizzate solo catene saldate. Per facilitare la
manutenzione ed il riaggancio, si raccomanda
di utilizzare un moschettone a molla al
termine di ogni catena dal lato dell'unità,
accertandosi che anch'essi possano
sopportare un peso di 15 kg ciascuno.
MONTAGGIO A PARETE
L'unità è fornita con un braccetto per il
montaggio a parete, viti e tasselli adatti al
fissaggio dell'unità a parete. L'unità si
aggancia semplicemente al braccetto per
facilitare le operazioni di pulizia e
manutenzione. Utilizzare i fori sul braccetto di
montaggio per segnare i centri dei fori sul
muro, utilizzando una livella per assicurarsi
che il braccetto sia orizzontale.
Utilizzare una punta da trapano da 6 mm e
praticare un foro profondo 35mm. Utilizzando
i tasselli e le viti fornite con l'unità, avvitare
fermamente la piastra al muro. Assicurarsi
che i fissaggi siano adeguati al tipo di muro.
APERTURA DELL'UNITÀ PER
LA MANUTENZIONE
1. Sconnettere l'unità dalla corrente.
2. Rimuovere il vassoio di raccolta e
svuotarne il contenuto. L'unità è costruita in
modo che non sia necessario rimuovere
completamente il vassoio per accedere
all'interno dell'unità.
3. Su tutti i modelli, per proteggere
l'integrità dell'unità, solo la grata anteriore
può essere aperta. Questa grata è quella
che risulta anteriore guardando i led di
funzionamento sul coperchio dell'unità.
4. In ogni parte terminale dei lati delle unità,
vicino al fondo, c'e' un "fermo" blu. Usando
il pollice spingerlo via dal corpo della
macchina. Una volta aperto, la grata si
muoverà liberamente.
5. Per avere accesso all'interno della
macchina alzare la grata. Perché sia di
maggiore aiuto, fissare la grata
temporaneamente in posizione aperta
alzandola orizzontalmente e spingendo il
perno provvisto di cardini all'interno dei lati
dell'unità, fissandolo in sede.

13
UNITA TUBI/PART CODICE COPERTURA STARTERS
Nemesis 2 x 40-Watt Shatterproof - Sospesa - 320m2/ 3400ft22x Serie di 2 starter - FS22/S2
Ultima 80 QPW40WST24SHG A parete - 160m2/ 1700ft2
Nemesis 3 x 15-watt Shatterproof - Sospesa - 200m2/ 2100ft23x Serie di 3 starter - FS22/S2
Ultima 45 QPW15WST18SHG A parete - 100m2/ 1100ft2
Nemesis 1 x 22-watt circolare Sospesa - 100m2/ 1100ft21x Starter singolo - FS22/S2
Ultima 22 Shatterproof - Q22WCISH A parete - 50m2/ 550ft2
TABELLA DI MALFUNZIONAMIENTO
= ACCESA X = SPENTA
X X X Assenza di corrente elettrica. Controllare il
cavo di tensione e i fusibili.
X X Il microinterrutore di sicurezza non funziona.
Controllare che la grata di protezione sia
chiusa correttamente.
X Il circuito dei tubi non funziona. Controllare i
tubi e gli starter.
XDifetto del transformatore o griglia
cortocircuitata. Controllare la pulizia della
griglia o carenza di isolamento.
L’unità funziona correttamente.
LUCE AMBRA TUBI
FLUORESCENTI
LUCE ROSSA PROBABILE DIFETTO
NOTA: Il circuito dei tubi UV degli starter e’connesso in serie,perciò un difetto di funzionamento di un tubo o di uno starter provoca
il non funzionamento di entrambi i tubi.
RIMOZIONE DELLA GRIGLIA
ELETTRIFICATA
Per facilitare le operazioni di manutenzione,
tutti i modelli Nemesis Ultima dispongono di
una griglia amovibile. Essa è montata su due
connettori a molla sul corpo dell'unità e
posizionati in due fori sul deflettore degli insetti
alla base dell'unità. Per rimuoverla, spingerla
dolcemente verso l'alto per permettere ai due
isolanti nella parte bassa della griglia di
liberarsi dal pannello deflettore.
Una volta rimossa, la griglia può essere pulita
con acqua insaponata o detergente, seguita da
un risciacquo con acqua pulita. Assicurarsi di
non spostare o rimuovere nessuno degli
isolanti bianchi attaccati alla griglia. Assicurarsi
che la griglia sia completamente asciutta prima
di tentare di rimontarla. Al momento del
montaggio bisogna aver cura che gli isolanti
smussati alla base della griglia abbiano il lato
piegato rivolto verso il retro dell'unità.
SOSTITUZIONE DEI TUBI E
DEGLI STARTER
La luce UV dei tubi, che attira gli insetti volanti,
è invisibile agli esseri umani e si degrada col
tempo. Per mantenere la massima efficienza di
attrazione è raccomandato sostituire i tubi
annualmente, o più frequentemente in aree
sensibili di preparazione di alimenti.
Tutte le unita’ Nemesis Ultima sono
fornite con tubi UV Quantum Shatterproof,
come standard.
NEMESIS ULTIMA 45 E
NEMESIS ULTIMA 80
La soluzione più facile e sicura per ridurre
efficaciemente il rischio di potenziale
contaminazione causata dai vetri dei tubi
fluorescenti rotti è quella di utilizzare i tubi
Shatterproof Quantum BL. Per questo è bene
verificare che le attrezature di controllo delle
mosche siano fornite sempre di tubi Quantum
BL con protezione in Teflon® G, polimero di
resina fluorurata. La stessa caratteristica deve
essere richiesta ogni anno, nel momento in cui
i tubi devono essere sostuiti.
Spegnere l'unità, rimuovere il vassoio di
raccolta, aprire la grata frontale e rimuovere la
griglia elettrificata come illustrato sopra.
Gli starter sono posizionati ognuno sopra il
tubo ad esso associato sulla parte sinistra
dell'unità e possono essere rimossi girando il
corpo dello starter di un quarto di giro in senso
antiorario e rimuovendolo dal portastarter.
Il montaggio avviene con procedura opposta.
Si raccomanda di sostituire gli starter ogni
volta che si montano nuovi tubi.
Per rimuovere i tubi, girarli in senso orario, in
direzione opposta a voi. Si devono udire due
distinti scatti dal supporto del tubo. I tubi
possono così essere rimossi dai loro supporti
spingendoli verso il retro dell'unità.
Il montaggio avviene con procedura opposta.
NEMESIS ULTIMA 22
Spegnere l'unità, rimuovere il vassoio di
raccolta, aprire la grata frontale e rimuovere la
griglia elettrificata come illustrato sopra.
Lo starter è posizionato sul tetto dell’unità di
fronte al tubo. Rimuoverlo girandolo
all'incirca di un quarto di giro antiorario. Il
montaggio avviene con procedura opposta.

1 End Moulding P38ENDMLD 2 2 2
2 End Moulding Cap P38ENDCAP 2 2 2
3 Guard Pivot Pin P38PVTPIN 2 2 2
4 Guard Lock Fixed P38GUAFIX 2 2 2
5 Guard Lock Moving P38GUAMOV 2 2 2
6 Standard Tray End Cap P38TRAOUT 2 2 2
7/1 High Voltage Spring Loaded Connector ASPRCO 2 2 2
7/2 High Voltage Nylon Nut FNTNYLM16 2 2 2
8 Insulated Grid Standoff PSTOPT38 2 2 2
9 End Mould Blanking Plug P38NDPLUG 1 1 1
10 Catch Tray M380PCZTRA 1
10B Catch Tray M345PCZTRA 1
10C Catch Tray M322PCZTRA 1
11 Deflector M380PCZDFT 1
11B Deflector M345PCZDFT 1
11C Deflector M322PCZDFT 1
12 Chassis Tray M380PCZCHA 1
12B Chassis Tray M345PCZCHA 1
12C Chassis Tray M322PCZCHA 1
13 Outer Guard (Chrome) M380GUAMSC 2
13B Outer Guard (Chrome) M345GUAMSC 2
13C Outer Guard (Chrome) M322GUAMSC 2
14 Back Plate M380PCZBPL 1
14B Back Plate M345PCZBPL 1
14
SPARE PARTS LIST FOR NEMESIS ULTIMA RANGE
Item Description Part No. Qty. NU80 Qty. NU45 Qty. NU22

14C Back Plate M322PCZBPL 1
15 Lid M380PCZLID 1
15B Lid M345PCZLID 1
15C Lid M322PCZLID 1
16 Lamp Channel M380PCZLCH 2
16B Lamp Channel M345PCZLCH 2
16C Lamp Channel M322PCZLCH 1
16D Lamp Channel Cover M322PCZLCV 1
17 40-Watt Quantum Tube QPW40WST24SHG 2
17B 15-Watt Quantum Tube QPW15WST18SHG 3
17C 22-Watt Quantum Tube Q22WCISH 1
18 FS22/S2 Series Starter ESTSER151 2 3 1
19 Lamp/Starter Holder ESHMA 2 3
19C Lamp Support Clip ELH22BTM 1
20 Lamp Holder ELHMA 2 3
20C Lamp Holder ELH22TOP 1
21 High Voltage Transformer ETFMAINPC2 1 1
21C High Voltage Transformer ETFMAIPC 1
22 Ballast (230v) ECKMAI75 1
22B Ballast (230v) ECKMAI15 1
22B&C Ballast (230v) ECKMAI22 1 1
23 Suspension Tab M345SSTTAB 2 2 2
24 Microswitch ESW1PM2 1 1 1
25 Kill Grid Assembly (Chrome) M380GRIMSC 1
25B Kill Grid Assembly (Chrome) M345GRIMSC 1
25C Kill Grid Assembly (Chrome) M322GRIMSC 1
26 Red “HV On” Neon EINMAIRED 1 1 1
27 Orange “Power On” Neon EINMAIORG 1 1 1
28 IEC Power Inlet ETEMAI1A 1 1 1
29 Suppressor Capacitor ECAMAI 1
30 M4 x 10 Ejot Torx Head Screws FEJPT4x10 18 18 18
31 Phosphor Bronze Earth Clip M38CLPPHB 2 2 2
32 11/2” x No 8 Wood Screw FSC801 3 3 3
33 Rawlplug FRPNYL01 3 3 3
Item Description Part No. Qty. NU80 Qty. NU45 Qty. NU22
}
15

PestWest Electronics Ltd
Denholme Drive
Ossett
West Yorkshire
WF5 9NB
United Kingdom
Tel: +44 (0)1924 268500
Fax: +44 (0)1924 273591
Email: info@pestwest.com
website: www.pestwest.com August 2004
This manual suits for next models
2
Table of contents
Languages:
Other PestWest Lawn And Garden Equipment manuals

PestWest
PestWest TITAN 300 User manual

PestWest
PestWest CHAMELEON 1 X 2 IP User manual

PestWest
PestWest ON-TOP PRO2 User manual

PestWest
PestWest Mantis Uplight MAX 36 User manual

PestWest
PestWest Mantis 1x2 MAX50 User manual

PestWest
PestWest Chameleon EXG User manual

PestWest
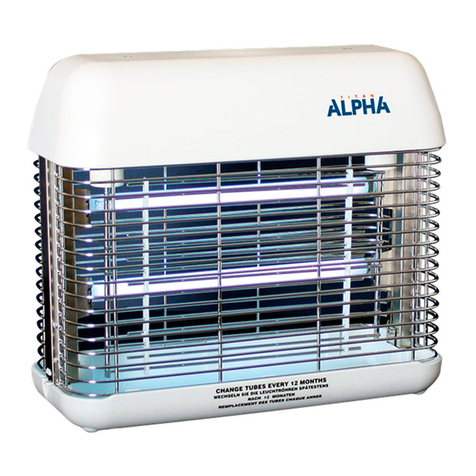
PestWest TITAN ALPHA User manual