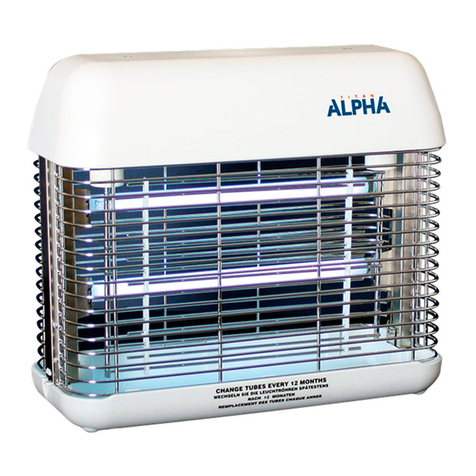
MANTIS 1x2 MAX 50 INSTRUCTIONS FOR USE
INNOVATION, QUALITY & POWER
DECEMBER 2015
Figure 1 – Grounding Methods
This appliance is for use on a nominal 120V circuit, and has a grounding
plug that looks like the adaptor illustrated in sketch A Figure 1. A temporary
adaptor, which looks like the adaptor illustrated in sketches B and C, may be
used to connect this plug to a 2-pole receptacle a shown in sketch B if a
properly grounded outlet is not available. The temporary adaptor should be
used only until a properly grounded outlet can be installed by a qualified
electrician. The green colored rigid ear, lug, and the like, extending from the
adaptor must be connected to a permanent ground such as a properly
grounded outlet box cover. Whenever the adaptor is used, it must be held in
place by the metal screw.
ALWAYS TURN OFF POWER TO THE SYSTEM BEFORE
SERVICING.
Due to insect contamination the glue board must be changed when full or at
least every eight weeks. PestWest Mantis range systems use the same size
glue board.
Use ONLY PestWest glue boards to ensure peak efficiency. Remove the
backing paper from the new glue board in a single swift motion (otherwise it
will tend to remain firmly attached). Should this occur, re-apply the peeled
back section and repeat.
To remove the glue board first remove the catch tray by pulling the spring
catch on the right hand side of the tray then pull the tray away from the
system. Remove the used glue board from the system by pulling it
downwards and out. Remove the backing paper and insert the new glue
board edges under the guides with the sticky side facing the lamps.
UV LAMP REPLACEMENT
ALWAYS TURN OFF POWER TO THE SYSTEM BEFORE
SERVICING.
Lamps are most attractive to target flying insects when less than one year
old. The UV light emitted by the lamps at a wavelength of 350-375 nm
diminishes with use. Daily switching on and off of the lamps results in an
even faster loss of the effective UV emission.
LEAVE THE SYSTEM POWERED ON CONTINUOUSLY AND CHANGE
THE LAMPS AT LEAST ONCE PER YEAR (PREFERABLY AT THE
ONSET OF INCREASED FLIGHT ACTIVITY AFTER THE WINTER).
FOR INTERIM LAMP MAINTENANCE, USE THE PESTWEST UV-
AMETER.
PestWest offers both standard and shatter-resistant (FEP coated) lamps.
The shatter-resistant lamp is intended for use in glass exclusion zones. The
FEP coating on PestWest lamps (supplied with the system) is of the highest
quality available. FEP coating uses a material that is both UV and operating
temperature tolerant while allowing optimum 365 nm UV light emission. Use
ONLY PestWest Quantum 25W replacement lamps.
Access to the UV lamps may be gained by opening the chromium
guard on the front of the system. This pivots from its lower edge in the
slots located on each end of the body. To open the guard, remove the
catch tray as detailed under GLUE BOARD REPLACEMENT. Support
the system and while holding the center section of the guard, push it
upwards towards the top of the chassis slots. The upper chassis slots
have cut outs to permit the top of the guard to pull free from the system
and pivot downwards sufficient to access the lamps. Grasp the lamp
and rotate in either direction (90°). After 2 clicks are heard, the lamp
may be removed by sliding out of the lamp holder. Fitting the new lamp
is a reversal of the above procedure.
TO FIT THE REFLECTOBAKT® SLEEVE
Remove the old lamp(s) from the machine. Carefully pull off the
Reflectobakt® sleeve from the lamp. (It clips around the
circumference of the lamp). Take your new lamp and line up the
two leading edges of the Reflectobakt® sleeve with the pairs of
pins at either end of the lamp (see Fig 1). Ensure that the sleeve
is fitted centrally to the lamp so that the small gap between the
end of the sleeve and the metal end of the lamp is the same at
both ends. Carefully push the sleeve so it is in contact along the
length of the lamp surface. It should grip and stay in position.
Re-fit the lamp into the lamp holders then turn the lamp through
90o (a quarter turn or two clicks on the lamp holder). This
should position the sleeve at the back of the tube, keeping the
light off the glue board.
METHOD OF ASSEMBLING REFLECTOBAKT®SHOWING
ALIGNMENT IN RELATION TO PINS:
All PestWest systems are warranted for 3 years (excluding lamps and
glue boards).
Warranty information must be received and on le with PestWest USA
LLC for proper coverage.
For additional quality products contact PestWest USA LLC at
941.358.1983 or click to www.pestwest.com
*PestWest reserves the right to vary model specifications without
notice.
LAMP: QUANTUM BL TUB25W490
GLUE BOARD: BOAMAN851.
Insert 3 year warranty logo where
appropriate.
MANTIS 1x2 MAX 50 INSTRUCTIONS FOR USE
INNOVATION, QUALITY & POWER
DECEMBER 2015
Figure 1 –Grounding Methods
This appliance is for use on a nominal 120V circuit, and has a grounding
plug that looks like the adaptor illustrated in sketch A Figure 1. A temporary
adaptor, which looks like the adaptor illustrated in sketches B and C, may be
used to connect this plug to a 2-pole receptacle a shown in sketch B if a
properly grounded outlet is not available. The temporary adaptor should be
used only until a properly grounded outlet can be installed by a qualified
electrician. The green colored rigid ear, lug, and the like, extending from the
adaptor must be connected to a permanent ground such as a properly
grounded outlet box cover. Whenever the adaptor is used, it must be held in
place by the metal screw.
GLUE BOARD REPLACEMENT
ALWAYS TURN OFF POWER TO THE SYSTEM BEFORE
SERVICING.
Due to insect contamination the glue board must be changed when full or at
least every eight weeks. PestWest Mantis range systems use the same size
glue board.
Use ONLY PestWest glue boards to ensure peak efficiency. Remove the
backing paper from the new glue board in a single swift motion (otherwise it
will tend to remain firmly attached). Should this occur, re-apply the peeled
back section and repeat.
To remove the glue board first remove the catch tray by pulling the spring
catch on the right hand side of the tray then pull the tray away from the
system. Remove the used glue board from the system by pulling it
downwards and out. Remove the backing paper and insert the new glue
board edges under the guides with the sticky side facing the lamps.
ALWAYS TURN OFF POWER TO THE SYSTEM BEFORE
SERVICING.
Lamps are most attractive to target flying insects when less than one year
old. The UV light emitted by the lamps at a wavelength of 350-375 nm
diminishes with use. Daily switching on and off of the lamps results in an
even faster loss of the effective UV emission.
LEAVE THE SYSTEM POWERED ON CONTINUOUSLY AND CHANGE
THE LAMPS AT LEAST ONCE PER YEAR (PREFERABLY AT THE
ONSET OF INCREASED FLIGHT ACTIVITY AFTER THE WINTER).
FOR INTERIM LAMP MAINTENANCE, USE THE PESTWEST UV-
AMETER.
PestWest offers both standard and shatter-resistant (FEP coated) lamps.
The shatter-resistant lamp is intended for use in glass exclusion zones. The
FEP coating on PestWest lamps (supplied with the system) is of the highest
quality available. FEP coating uses a material that is both UV and operating
temperature tolerant while allowing optimum 365 nm UV light emission. Use
ONLY PestWest Quantum 25W replacement lamps.
Access to the UV lamps may be gained by opening the chromium
guard on the front of the system. This pivots from its lower edge in the
slots located on each end of the body. To open the guard, remove the
catch tray as detailed under GLUE BOARD REPLACEMENT. Support
the system and while holding the center section of the guard, push it
upwards towards the top of the chassis slots. The upper chassis slots
have cut outs to permit the top of the guard to pull free from the system
and pivot downwards sufficient to access the lamps. Grasp the lamp
and rotate in either direction (90°). After 2 clicks are heard, the lamp
may be removed by sliding out of the lamp holder. Fitting the new lamp
is a reversal of the above procedure.
TO FIT THE REFLECTOBAKT® SLEEVE
Remove the old lamp(s) from the machine. Carefully pull off the
Reflectobakt® sleeve from the lamp. (It clips around the
circumference of the lamp). Take your new lamp and line up the
two leading edges of the Reflectobakt® sleeve with the pairs of
pins at either end of the lamp (see Fig 1). Ensure that the sleeve
is fitted centrally to the lamp so that the small gap between the
end of the sleeve and the metal end of the lamp is the same at
both ends. Carefully push the sleeve so it is in contact along the
length of the lamp surface. It should grip and stay in position.
Re-fit the lamp into the lamp holders then turn the lamp through
90o (a quarter turn or two clicks on the lamp holder). This
should position the sleeve at the back of the tube, keeping the
light off the glue board.
METHOD OF ASSEMBLING REFLECTOBAKT®SHOWING
ALIGNMENT IN RELATION TO PINS:
All PestWest systems are warranted for 3 years (excluding lamps and
glue boards).
Warranty information must be received and on le with PestWest USA
LLC for proper coverage.
For additional quality products contact PestWest USA LLC at
941.358.1983 or click to www.pestwest.com
*PestWest reserves the right to vary model specifications without
notice.
REPLACEMENT PARTS
LAMP: QUANTUM BL TUB25W490
GLUE BOARD: BOAMAN851.
Insert 3 year warranty logo where
appropriate.
Figure 1 – Grounding Methods
This appliance is for use on a nominal 110-277V
circuit, and has a grounding plug that looks like
the adaptor illustrated in sketch A Figure 1. A
temporary adaptor, which looks like the adaptor
illustrated in sketches B and C, may be used to
connect this plug to a 2-pole receptacle as
shown in sketch B if a properly grounded outlet
is not available. The temporary adaptor should
be UL listed and used only until a properly
grounded outlet can be installed by a licensed
electrician. The green colored rigid ear, lug, and
the like, extending from the adaptor must be
connected to a permanent ground such as a
properly grounded outlet box cover. Whenever
the adaptor is used, it must be held in place by
the metal screw.
GLUE BOARD REPLACEMENT
ALWAYS TURN OFF POWER TO THE SYSTEM
BEFORE SERVICING.
Due to insect contamination the glue board
must be changed when full or at least every
eight weeks. PestWest Mantis range systems use
the same size glue board in a variety of colors
and card materials to suit any application.
Use ONLY PestWest glue boards to ensure peak
efficacy. Remove the backing paper from the
new glue board in a single swift motion
(otherwise it will tend to remain firmly attached).
Should this occur, re-apply the peeled back
section and repeat. If the glue board sticks to an
unintended surface, vegetable oil will release
the glue.
To remove the glue board first remove the catch
tray by pulling the spring catch on the right
hand side of the tray then pull the tray away
from the system. Remove the used glue board
from the system by pulling it downwards and
out. Remove the backing paper and insert the
new glue board edges under the guides with
the sticky side facing the lamps.
UV LAMP REPLACEMENT
ALWAYS TURN OFF POWER TO THE SYSTEM
BEFORE SERVICING.
Lamps are most attractive to target flying insects
when greater than 100 hours (burn in) and less
than 1-year old. The UV light emitted by lamps
at a wavelength of 365 nm diminishes
with use. Daily switching on and off of the lamps
results in an even faster loss of UV emission.
LEAVE THE SYSTEM POWERED ON
CONTINUOUSLY AND CHANGE THE LAMPS AT
LEAST ONCE PER YEAR (PREFERABLY AT THE
ONSET OF INCREASED FLIGHT ACTIVITY
AFTER THE WINTER).
FOR INTERIM LAMP MAINTENANCE, USE THE
PESTWEST UV-AMETER.
PestWest offers both standard and shatter-
resistant (FEP coated) lamps. The shatter-
resistant lamp is intended for use in glass
exclusion zones and come as standard with this
system. The FEP coating on PestWest lamps
(supplied with the system) is of the highest
quality available. FEP coating uses a material
that is both UV and operating temperature
tolerant while allowing optimum 365 nm UV
light emission. Use ONLY PestWest Quantum
25W lead-free replacement lamps.
Access to the UV lamps may be gained by
opening the chromium guard on the front of
the system. This pivots from its lower edge in
the slots located on each end of the body. To
open the guard, remove the catch tray as
detailed under GLUE BOARD REPLACEMENT.
Support the system and while holding the
center section of the guard, push it upwards
towards the top of the chassis slots. The upper
chassis slots have cut outs to permit the top of
the guard to pull free from the system and pivot
downwards sufficient to access the lamps. Grasp
the lamp and rotate in either direction (90°).
After 2 clicks are heard, the lamp may be
removed by sliding out of the lamp holder.
Installing the new lamp is a reversal of the
above procedure.
TO REPLACE THE REUSABLE
REFLECTOBAKT® SLEEVE
Remove the old lamp(s) from the system.
Carefully pull o the Reectobakt® sleeve from
the lamp. It clips around the circumference of
the lamp. Take your new lamp and line up the
two leading edges of the Reectobakt® sleeve
with the pairs of pins at either end of the lamp
(see Fig 1). Center the sleeve to the lamp so
that the small gap between the end of the
sleeve and the metal end cap of the lamp is
the same at both ends. Carefully push the
sleeve so it is in contact along the length of
the lamp surface. It should grip and stay in
position. Insert the lamp into the lamp holders
then turn the lamp 90o(a quarter turn or two
clicks on the lamp holder).
Be sure to position the sleeve to the BACK of
the lamp. This shields the glue board from UVA
light, which extends glue board life.
METHOD OF ASSEMBLING REFLECTOBAKT®
SHOWING ALIGNMENT IN RELATION TO PINS:
Warranty information must be received and on
file with PestWest USA LLC for proper warranty
coverage. Warranty excludes lamps and glue
boards
For additional quality products contact PestWest
USA LLC at941.358.1983 or click to:
www.pestwest.com
*PestWest reserves the right to
vary model specifications
without notice.
REPLACEMENT PARTS
Gray matrix glue board - Prod code: 135-000063
Classic Black premium glue board -
Prod code: 135-000047
Universal WHITE glue board - Prod code: 135-000064
Universal BLACK glue board - Prod Code: 135-000070
Premium PLASTIC glue board -
Prod code: 135-000048
Quantum BL 25W X 18”T8 standard lamp Product
code: 130-000155
Quantum BL 25W X 18”T8 shatter resistant lamp
Product code: 130-000173
IMPORTANT SAFETY INSTRUCTIONS – READ AND
SAVE THESE INSTRUCTIONS
Lamps contains Mercury (Hg), dispose or
recycle in accordance with applicable
laws. In U.S., consult www.lamprecycle.org
or 1-800-922-6693 for measures to be
taken in case of breakage; safe handling
procedures; and recycling and disposal
options. Outside of U.S., please contact
your local authorities.
Scan the QR code to register your 3-year warranty
or visit
https://support.pestwest.com/pestwest-warranty/
