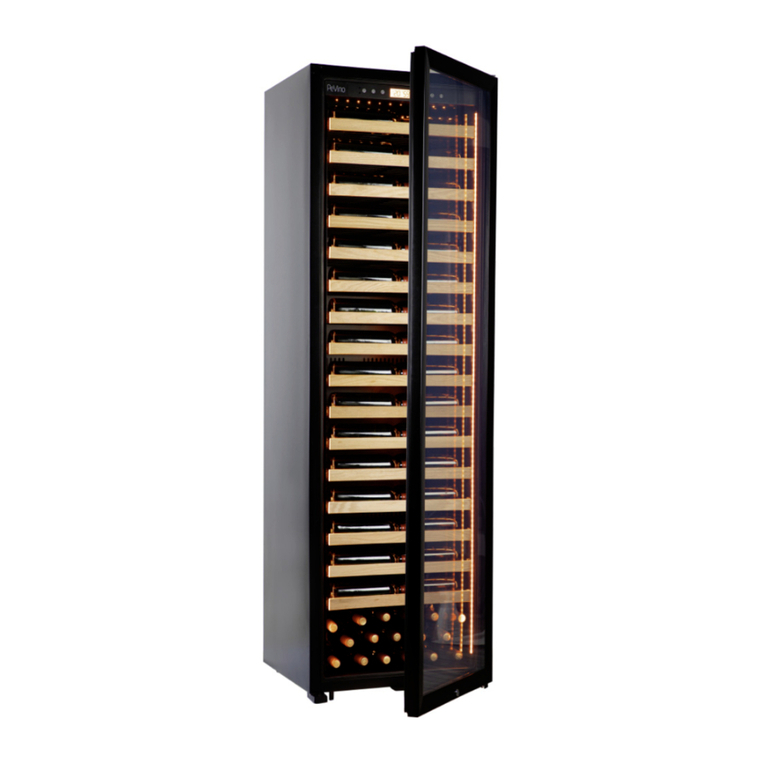
Pevino PI106SK User manual

1
BEFORE USE, PLEASE READ AND FOLLOW ALL SAFETY RULES AND OPERATING
INSTRUCTIONS.
WARNING
The information in this document is subject to modification without
any prior notice.
Some models are available in dedicated countries only.
IMPORTANT SAFETY INSTRUCTIONS
To reduce the risk of fire, electrical shock or damage when using your appliance, please follow
these basic precautions.
To avoid damaging the door seal, ensure that the door is fully open when the shelves are pulled
out onto the rails. The appliance must be positioned in such a way that the plug is accessible.
Release the cord. Move your wine cooler to its final location. Don't move your wine cooler while
it's full of wine.
If the cord is damaged, it must be replaced by the manufacturer or an authorized electrician.
This wine cooler is only intended for storing wine.
WARNING
NOT child friendly! Discarded or abandoned appliances may be dangerous for children and you
should therefore dispose it safely after use.
Before you throw away your old wine cooler: Take the door off so children can't easily climb
inside it. Never allow children to operate, play with, or climb into the appliance.
Never clean parts of the appliance with flammable liquids. The fumes may pose a risk of fire or
explosion. Do not store or use flammable liquids in the vicinity of this or other appliances. The
fumes may pose a risk of fire or explosion.
SAVE THIS MANUAL FOR ANY LATER USE
BEFORE CONNECTING AND FILLING THE WINE COOLER

2
Before using your wine cooler
• Remove the outer and inner packaging.
• Before connecting the wine cooler to the power source, leave it vertically for approximately 6 hours. This will
reduce the possibility of a malfunction in the cooling system.
• Clean the internal surfaces with a soft cloth and lukewarm water.
• When replacing the light source, select a light source that fits with the same socket, wattage and rated voltage
as the existing light source. Turn off the power supply before changing the light source.
Installing your wine cooler
• Place your wine cooler on a floor or surface strong enough to carry it when fully loaded. Make sure that the
wine cooler is fully in level by adjusting the legs below the bottom.
• Place the wine cooler away from direct sunlight and heat sources (wood burning stove, heater, radiator, etc.).
Direct sunlight can affect the acrylic cover, and heat sources can increase electrical consumption.
• Extremely cold surrounding temperatures may also cause the device to not work properly.
• Do not place the unit in damp areas.
• Connect the wine cooler to a grounded outlet. Any question regarding electricity should be directed to a
qualified electrician.
Be aware of the following:
• Store wine in closed bottles.
• Do not overload the cabinet.
• Do not open the door unless necessary.
• Do not cover shelves with aluminum foil or other shelf materials that may prevent air circulation.
• Should the wine cooler remain unused for extended periods of time, it is suggested, after careful cleaning, to
leave the door ajar to allow the air to circulate inside the cabinet to avoid possible formations of dew, mold or
odor.
• The included filter with activated charcoal (removes mould and odour strains) should be removed at least once
a year and added for drying / venting and preferably in the sun.

3
WARNINGS:
For your safety observe the following recommendations.
•This appliance contains a small quantity of R600a refrigerant which is environmentally friendly, but
flammable. It does not damage the ozone layer, nor does it increase the greenhouse effect.
•During transportation and installation, ensure that the tubing of the refrigerant circuit is not damaged.
•Avoid using or manipulating sharp objects near by the appliances.
•Leaking refrigerant can ignite and may damage the eyes.
•In the event any damage does occur, avoid exposure to open fires and any device which creates a
spark. Disconnect the appliance from the mains power.
•Thoroughly ventilate the room in which the appliance is located for several minutes.
•Notify Customer Service for necessary action and advice.
•The room for installing the appliance must be at least 1 cubic metre per 8 grams of refrigerant. The
refrigerant quantity contained in this appliance is listed above in grams; it is also noted on the Rating
Plate of the appliance.
•To avoid a hazard due to instability of the appliance, it must be fixed in accordance with the instructions.
•The symbol is a warning and indicates the refrigerant and insulation blowing gas are flammable.
•Risk of fire / flammable materials
•Do not store explosive substances such as aerosol cans with a flammable propellant in this appliance.
•When positioning the appliance, ensure the supply cord is not trapped or damaged.
•Do not locate multiple portable socket-outlets or portable power supplies at the rear of the appliance.
•The refrigerant and insulation blowing gas are flammable. When disposing of the appliance, do so only at
an authorized waste disposal centre. Do not expose to flame.
It is hazardous for anyone other than an Authorised Service Person to carry out
servicing or repairs to this appliance.
•Keep ventilation openings in the appliance enclosure or in the built-in structure clear of obstruction.
•Do not use mechanical devices or other means to accelerate the defrosting process, other than those
recommended by the manufacturer.
•Do not damage the refrigerant circuit.
•Do not use electrical appliances inside the food storage compartments of the appliance, unless they are
of the type recommended by the manufacturer.
•If you do not use the machine for a long time, please unplug the power plug from the socket or switch off
the power supply.
•This appliance is not intended for use by persons (including children) with reduced
Physical, sensory or mental capabilities, or lack of experience and knowledge, unless they have
been given supervision or instruction concerning use of the appliance by a person responsible
for their safety;
•Children should be supervised to ensure that they do not play with the appliance;
•Do not use extension cords or ungrounded (two prong) adapters;
•If the supply cord is damaged, it must be replaced by the manufacturer.
INSTRUCTIONS FOR INSTALLING INTEGRATABLE WINE COOLERS:
ONLY FRONT-VENTILATED WINE COOLERS.
1. Integrable wine coolers are front ventilated and NOT built to be fully integrated behind a fixed external door (e.g.
a cabinet door in a kitchen)
2. Follow the installation diagram when installing the wine cooler. Never go below the minimum dimension
requirements.
4
3. The wine cooler draws air into the right side of the ventilation grate under the door and inflates on the left side
in the same place.
4. The wine cooler has an power on/off control panel.
5. The wine cooler must be connected to standard 240 volts/10 A.
6. The cord is 200 cm long and connected on the right side at the back.
7. In hot climate zones, a ventilation duct or grill with a minimum ventilation size of 200 mm x 50 mm shall be cut
out on the back of the housing or at the top of each side of the enclosure. This ensures the entry of fresh air into
the 30 mm deep space at the back of the enclosure. This air vent or grille must not be open to the same side as
other appliances such as ovens or the like. Also, do not open against an area that is without access to fresh, cool
air.
REMEMBER: The wine cooler must be placed so that there is access to power
outlets after installation.

5
INSTALLATION DRAWINGS
This is an integrated wine cooler that must be installed in a cabinet/cabinet. The enclosure must be with good
ventilation conditions and without a back plate, otherwise it will affect the wine coolers ability to function normally.
Follow the installation diagram.
PI106S-B, PI106D-B models

6
PI106SK, PI106DK models with kitchen door panel

7
Fixing bracket installation
1. Level the wine cellar, take 2pcs fixing brackets (①) and 4pcs 5*12 flat head screws(②) and 4pcs screw
covers(③) from the polybag.
2. Remove 4pcs trunk-nails on the opposite side of the door hinge ,and then fix the bracket (①) on the wine
cellar with 4pcs 5*12 flat head screws (②),then cover the screw covers(③) on flat head screws.
3. Take 4pcs 4*12 self-tapping screws(④) from the polybag. Use these 4pcs self-tapping screws to fix the
bracket(①) on the kitchen cabinet.
4. And then take another 4pcs 4*12 self-tapping screws(④) from polybag,use these 4pcs self-tapping screws to
fix the right side door hinges to the kitchen cabinet.

8
Kitchen Door Panel Installation method
1. Take out the bracket(⑦), 2pcs M5*35 large flat screws(⑤), 2pcs M5*25 large flat screws(⑥) and 6pcs
ST4*12 self-tapping screws (④) from the accessory polybag.
2. Use the 6pcs ST4*12 self-tapping screws (④) to fix the bracket on the upper and lower side of the door
panel.The bracket fixed position is the distance 37mm from the door panel edge.
3. Insert the 2pcs M5*35 large flat screws(⑤) on upper bracket(⑦),and then use the upper bracket to hang
the door panel on glass door
4. There is oval groove in the glass door frame.The function is to adjust the door panel left / right or up / down
to suitable location
5. Adjust the door panel left and right into position with the M5*35 large flat screw(⑤) in the oval groove
6. Use a screwdriver to tighten or loosen the M5*35screws(⑤) to fine-tune the up and down distances
7. After the suitable location of door panel is adjusted,insert the M5*25 large flat screws(⑥) through the upper
and lower braket middle hole,and then tighten the screws(⑥) to fix the door panel on glass door. (Figure 1 &
2)
8. After the door panel is fully adjusted, take out 6pcs ST4*45(⑧) long self-tapping screws from the accessory
polybag
9. Uncover the door gasket, drill the ST4*45 screws(⑧) through the screw holes at the left and right side of
door frame, and then tighten the screws ot fix the door panel ( Figure 3)
10. Finally, use the 2pcs ST4*12 self-tapping screws(④) to pass through the holes on the upper and lower door
hinges and fix the door hinges on the door panel (Figure 4).
And then , the panel ready door installation is completed.
Remarks : Door panel size and color , consumers can choose according to their own kitchen cabinet and
hobbies.It is recommended to choose moisture-proof wood panels.
Note: If you want to install a handle on the door panel, open the door seal according to Figure 3, and use a drill bit
to pass through the reserved handle hole in the door seal groove, drilling through the wooden panel Then find a
suitable handle screw, pass it through the hole position, and fix the handle on the door panel. You can also freely
drill holes according to your own handle hole spacing, using the same method as above. Just use a drill bit to drill
through the door frame in the door sealing groove first, and then drill through the wooden panel.

9
51 mm
51 mm
4
4
6
8
7
4
567
图1
图2
图3
图4

10
OPEN ANGLE SIZE DRAWINGS:
PI106S-B, PI106D-B, PI106SK & PI106DK models
TURNING ON YOUR WINE COOLER
Plug in and switch on the wine cooler by pressing on the power button for a few seconds.
When you use the wine cooler for the first time (or restart the wine cooler after having it shut off for a long time),
there will be a few degrees variance between the temperature you have selected and the one indicated on the LED
readout. This is normal and it is due to the length of the activation time. Once the wine cooler is running for a few
hours everything will stabilize.
Important: If the unit is unplugged, power is lost, or turned off, wait 3 to 5 minutes before restarting the unit.
The wine cooler will not start if you attempt to restart before this time delay.

11
OPERATING NOISES
To reach the desired temperature settings, our wine coolers, like all wine coolers operating with compressors and
fans, may produce the following types of noises. These noises are normal and may occur as follows:
● Gurgling sound - caused by the refrigerant flowing through the appliances coils.
● Cracking/popping sounds - resulting from the contraction and expansion of the refrigerant gas to produce
cold.
● Fan operating sound - to circulate the air within the wine cooler
FILLING THE WINE COOLER
You can pack your wine bottles in single or double rows, taking into account the following: if you don't have
enough bottles to fill the wine cooler completely, it's better to distribute the bottles evenly throughout the wine
cooler. You can remove or move the adjustable wooden shelves so that the cabinet can accommodate larger
bottles or increase cabinet capacity by stacking the bottles if necessary. (See: Removing shelves)
Keep small spaces between the interior walls and the bottles for the air to circulate. Like an underground (wine)
cellar, air circulation is important to prevent mold and to ensure a more homogeneous temperature distribution
throughout the basement.
Don't overload your wine cooler.
Avoid blocking the fans (located in the back of the wine cooler).
Do not pull the shelves out further than the fixed position due to the risk of losing the bottles.
Do not pull more than one fully loaded shelf at a time, as this may cause the wine cooler to tilt in the future.
Do not cover the shelves with aluminum foil or other materials as this will prevent air circulation.
Do not move your wine cooler while it is filled with bottles. This may distort the cabinet of the wine cooler.
AFTER THE FIRST REPLENISHMENT
Note that depending on the filling and selected settings, it takes about 24 hours for the temperature to stabilize
in the wine cooler During this time, the LED temperature display will appear to move irregularly. This is normal
and occurs when the setting changes and/or when a large number of bottles are filled in the wine cooler.

12
TEMPERATURE SET-UP
Important: By default, the LED display indicates the actual air temperature inside the cabinet.
The circuit board on all models comes with memory function. All settings return to the preset temperature when
the power is restored.
NOTE!
It is important to understand that there is a difference between the air temperature inside the wine cooler and
the actual temperature of the wine.
When the temperature is set, it is strongly recommended to allow it to establish itself and not adjust it often.
Expect to wait about 24 hours before noticing the effect of temperature adjustment due to the mass, volume
and density of a full wine cooler.
The thermostat keeps the temperature inside the wine cooler within a range of +/- 2.5ºC

13
SINGLE TEMPERATURE DISPLAY BOARD OPERATING INSTRUCTION:
From left to right:
➢① Energy Saving Mode
Press the button for 3 seconds into the energy-saving mode, press ⑥⑦ out of energy-saving mode
➢② ON/OFF the power button:
In the standby mode: press 3 seconds, the power is turned on, the whole machine starts
In the power-on state: press the power button, window 4 shows the countdown 3 2 1, the power is turned off,
the machine is turned off (show 3 2 1 process, the hand cannot leave the button)
➢③ Lamp button:
Press the button, lights on / off switch
➢④ Display Window:
Displays the setting temperature
➢⑤ Window:
Displays the actual temperature
➢⑥ Temperature setting up button:
Press one time, window ④ the set value will increase 1 degree Celsius in the original setting temperature, the
setting range according to customer requirements.
➢⑦ Temperature setting down button:
Press one time, window ④ the set value will reduce 1 degree Celsius in the original setting temperature, the setting
range according to customer requirements
➢⑧ C/F display conversion function keys:
Set the conversion degrees Celsius / Fahrenheit display, each press this button, the display window will be into
degrees Celsius or Fahrenheit.

14
DUAL TEMPERTURE DISPLAY BOARD OPERATING INSTRUCTION:
From left to right:
➢① “ON/OFF” the power button:
Press the button 3 seconds to power off (Window ④digital countdown displays 3, 2, 1,). Press again (without
delay), the power turns on.
➢② Upper zone temperature setting up button:
Press one time, window ④ the set value will increase 1 degree Celsius in the original setting temperature, the
setting range according to customer requirements.
➢③ Upper zone temperature setting down button:
Press one time, window ④the set value will reduce 1 degree Celsius in the original setting temperature, the
setting range according to customer requirements.

➢④Window:
Display upper zone temperature.
➢⑤Window:
Display lower zone temperature
➢⑥ Lower zone temperature setting up button:
press one time, window ⑤ the set value will increase 1 degree Celsius in the original setting temperature, the
setting range accordingly to customer requirements.
➢⑦ Lower zone temperature setting down button:
press one time, window ⑤ the set value will reduce 1 degree Celsius inthe originalsettingtemperature, thesetting
range accordingly to customer requirements.
➢⑧ Lamp button:
Press the button and the lamp turns on, the lamp will turn off once press again.

15
➢⑧ C/F display conversion function keys:
Set the conversion degrees Celsius / Fahrenheit display, each press this button, the display
window will be into degrees Celsius or Fahrenheit
IMPORTANT FOR STORAGE TEMPERATURE FOR WINE
Your wine cooler is designed to provide optimal conditions for storing and/or serving your wines. Good wines
require long and stable development and need special conditions to reach their full potential.
All wines mature optimally at the same ideal temperature, which is a constant temperature between 12ºC and
14ºC. In other words, as long as the temperature of your wine cooler is constant (12ºC - 14ºC), your wines will be
stored in perfect conditions.
Not all wines will improve over the years. Some should be enjoyed young (2 to 3 years), while others have
enormous storage potential (50 years and longer). All wines have a optimal stage of maturity. Talk to your wine
merchant for the best guide.
DEFROSTING/CONDENSATION/ HYGROMETRY/ VENTILATION
This wine cooler is designed with an "Auto-cycle" defrosting system. During "Off-cycle", the cooling surfaces of the
wine cooler are automatically defrosted.
Defrosting/condensation from the storage compartment runs automatically and part of it goes into a drainage
container located at the back of the wine cooler next to the compressor. The heat is transferred from the
compressor and evaporates any condensation collected in the container.
The wine cooler is equipped with a double glass door that has a third inner acrylic layer to minimize condensation
on the glass door. The wine cooler is not completely sealed; fresh air access is done through the drain pipe. Air is
circulated through the cabinet using a fan and the slats of the shelves.
Note: During the cooling cycle, heat is emitted through the outer surfaces of the wine cooler. Avoid touching the
surfaces during these cycles.
ADJUSTABLE WOODEN SHELVES
For easy access to the stored bottles, pull the shelves about 1/3 of the depth out of the rail. However, these wine
coolers are designed with a notch on each side of the shelf rails to prevent bottles from tipping off.
When removing a shelf from the rail, tilt the shelf as shown in the diagram and simply pull out or put the shelves
back in until it sits securely on the support brackets. To avoid damage to the door pack, make sure that the door
is fully open when you pull out the shelves.
Application and removal of shelf:
Shelf disassembly: i.h. the drawing below, pull out the shelf ①press both sides of the slides simultaneously and
pull out the shelf as with the arrows ②.
Shelf installation: in the following drawing place the shelf between the sliding bars and follow the arrows ③.

16
REVERSIBILITY OF THE DOOR
Warning: to avoid accidents when the door is turned, we suggest that 2 people be helped along,
as the door may be heavy.
1. Open the door up to maximum
2. Use a small knife (2) to remove the decorative nail (1) from the left side of cabinet (Drawing 1)
3. Use a Phillips screwdriver (4) to remove the M5 screws (3) from the door hinge, and then discharge the glass door
(Drawing 2)
4. Use a cross screwdriver to remove the magnet (5) at the bottom and install it at the top; Remove the decorative
nail (6) at the top of the door, install it at the bottom, and rotate the door 180 degrees. and then install the door
on the other side of cabinet (Drawing 3 and 4)
5. At last, install the decorative nail (1) on the other side of cabinet (Drawing 5)
1. Decorative Nail 2. Knife
3. M5 Screws 4. Phillips Screwdriver

17
Handle Installation Method
1. Take out handle from cabinet, then take out 2pcs screws from accessory bag
2. Pull open door seal from the side of door, then insert screws into the 2 handle holes on side of door, then put
the screws alignment the hole of handle, tighten the screws with a screwdriver, then compress the door seal

18
If the screws holes of the handle don't match perfectly with the holes of the door, please use an
electric drill to drill the holes of the door a bit big (in surface side), in order to install the handle perfectly.
OPERATION ANOMALIES
Make sure that the power outlet is powered by connecting another electrical appliance. If possible, check the fuse.
Make sure the door is closed correctly.
If your wine cooler appears to be defective, remove it from the plug and contact your point of sale. Any work on
the cold circuit must be carried out by an authorized refrigeration professional who must carry out an inspection
of the circuit seal. Similarly, any work on the electrical system must be carried out by a licensed electrician.
Note: All work performed by unauthorized persons may result in the warranty being voided.

19
POWER FAILURES
In the event of a power interruption, all previous temperature settings are automatically preservation and it will
revert to a preset temperature setting. (See preset chart)
Most power failures are corrected within a short period of time. An hour or two’s loss of power will not affect wine
coolers temperatures. To avoid sudden change of temperature while the power is off, you should avoid opening
the door. For longer period of power failure, do take steps to protect your wine.
Irrespective of the cause, if you notice either abnormal temperature or humidity levels inside your wine coolerr,
be reassured that only long and frequent exposure to these abnormal conditions can cause a detrimental effect
on your wines.
TROUBLESHOOTING GUIDE
Common problems may easily be solved, saving you the cost of a possible service call. Please read carefully the
instruction manual and revert to troubleshooting guide chart.
PROBLEM
POSSIBLE CAUSE
Wine cooler does
not operate.
Not plugged in.
The appliance is turned off.
The circuit breaker tripped or the fuse is broken.
Wine cooler is
not cold enough.
Check the temperature control setting.
External environment may require a higher setting.
The door is opened too often.
The door is not closed completely.
The door gasket does not seal properly.
Turns on and off
frequently.
The room temperature is hotter than normal.
A large amount of contents has been added to the wine cooler.
The door is opened too often.
The door is not closed completely.
The temperature control is not set correctly.
The door gasket does not seal properly.
The light does
not work.
Not plugged in.
The circuit breaker tripped or a blown fuse.
The bulb is out of order.
The light button is “OFF”.
Vibrations.
Check to assure that the wine cooler is level.
The wine cooler
seems to make
too much noise.
The rattling noise may come from the flow of the refrigerant, which is normal.
As each cycle ends, you may hear gurgling sounds caused by the flow of refrigerant in your
wine cooler.
Contraction and expansion of the inside walls may cause popping and crackling noises.
The wine cooler is not level.
The door will not
close properly.
The wine cooler is not level.
The door was reversed and not properly installed.
The gasket is faulty. (magnet or rubber is spoiled)
The shelves are out of position.
This manual suits for next models
3
Table of contents
Languages:
Other Pevino Wine Cooler manuals

Pevino
Pevino PM248S-HHB-1 User manual

Pevino
Pevino P22S User manual

Pevino
Pevino PBI58S-EE User manual

Pevino
Pevino PM248D-HHB Operating and maintenance manual

Pevino
Pevino P80S User manual

Pevino
Pevino PG300S-B User manual

Pevino
Pevino P168S User manual

Pevino
Pevino EVO PE46S User manual

Pevino
Pevino PN7S User manual

Pevino
Pevino P168S User manual
Popular Wine Cooler manuals by other brands

NODOR
NODOR NorCare V36BK Installation, use and maintenance instructions

Hauster
Hauster HT-MOSEL-165S user manual

Caple
Caple WI3125 instruction manual

Kucht
Kucht K430D Installation guide and user's manual

Avintage
Avintage AVI60CDZA use instructions

Viking
Viking Designer DFWB300 Dimensions and specifications