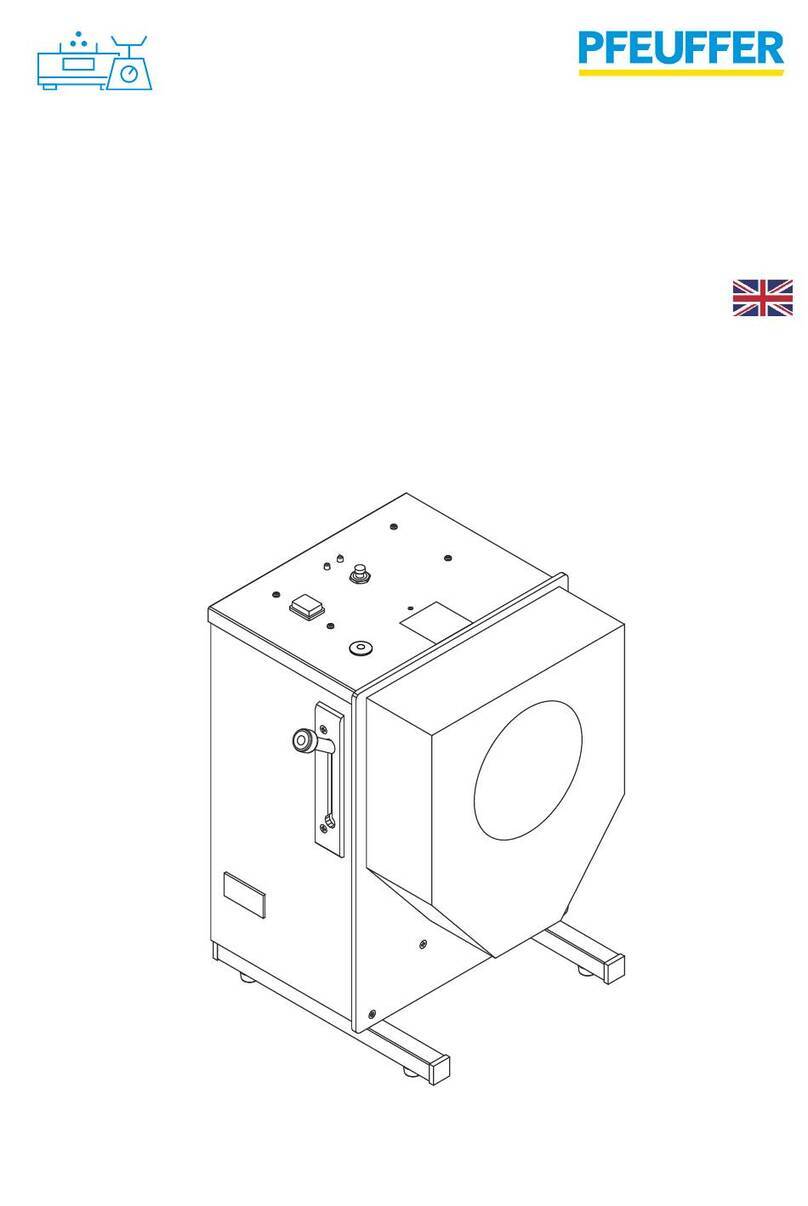
Pfeuffer Friabilimeter User manual

Artikelnummer/Article no. 1810 0091
Pfeuffer GmbH
Flugplatzstraße 70
97318 Kitzingen
GERMANY
Phone: +49 9321 9369-0
Fax: +49 9321 9369-50
Email: [email protected] Revision 7/14.09.2016
Internet: http://www.pfeuffer.com Translation of the original operating instructions
Operating instructions
Malt friability measuring instrument
Friabilimeter

Betriebsanleitung Friabilimeter
Translation
In the event of delivery of subsequent sale to the countries of the European Economic Area (EEA), the operating
instructions must be translated into the corresponding language of the country of use.
In the event of discrepancies in the translated text, the original operating instructions (German) must be used for
clarification, or the manufacturer must be contacted.
Operating instructions in electronic format
The original operating instructions (German) and translations of the original operating instructions can be
requested as PDF files by e-mail: doku@pfeuffer.com
Specifying the correct type designation and serial number is important for further processing!
Copyright
This document is not allowed to be communicated or duplicated, utilized without express permission, which also
applies to communicating its content. Offenders are liable to the payment of damages. All rights reserved with
regard to patent claims or submission of design or utility patent.
(DIN ISO 16016)
Page 2 of 48 Revision 7 © 2016 – Pfeuffer GmbH
These Operating Instructions are a constituent part of the FRIABILIMETER and must be available
to all operating personnel at all times. They are intended for the operating company of the
system, the operating personnel and the specialists who
are responsible for the transport,
assembly, installation, operation, maintenance, cleaning, disassembly and disposal.
The Pfeuffer
GmbH has prepared and reviewed these Operating Instructions with the greatest
care. However, no guarantee is made for its completeness or accuracy.
Subject to technical modifications.

Friabilimeter operating instructions
© 2016 – Pfeuffer GmbH Revision 7 Page 3 of 48
Contents
1Introduction............................................................................................................................... 5
Designated use ........................................................................................................................... 51.1
EC/EU Declaration of Conformity............................................................................................... 61.2
Structural features of the danger notes..................................................................................... 71.3
Pictograms in the operating instructions................................................................................... 71.4
Abbreviations in electrical engineering...................................................................................... 81.5
Identification .............................................................................................................................. 81.6
2Safety ........................................................................................................................................ 9
Built-in safety systems................................................................................................................ 92.1
2.1.1 Mains disconnector in a portable device .......................................................................9
2.1.2 Protective covers......................................................................................................... 10
Operating and danger areas on the FRIABILIMETER................................................................ 112.2
Operating and maintenance personnel ................................................................................... 122.3
Safety measures (to be carried out by the owner) .................................................................. 122.4
General safety notes ................................................................................................................ 132.5
Safety tests ............................................................................................................................... 142.6
Residual dangers in connection with the FRIABILIMETER........................................................ 142.7
Switch-off procedure................................................................................................................ 142.8
3Technical data.......................................................................................................................... 15
Dimensions and weight ............................................................................................................ 153.1
Power supply ............................................................................................................................ 153.2
General data............................................................................................................................. 153.3
4Delivery, transport and storage ................................................................................................ 16
Scope of delivery ...................................................................................................................... 164.1
Transport and packaging.......................................................................................................... 164.2
Intermediate storage................................................................................................................ 164.3
Transport to the installation site (by the customer)................................................................ 174.4
5Installation and commissioning ................................................................................................ 18
Installation................................................................................................................................ 185.1
6Function .................................................................................................................................. 19
Overview .................................................................................................................................. 196.1
Sequence of functions.............................................................................................................. 196.2
7Operation ................................................................................................................................ 20
Control elements...................................................................................................................... 207.1
7.1.1 Main switch ON/OFF ................................................................................................... 20
7.1.2 Pull handle ................................................................................................................... 20
7.1.3 Setscrew ...................................................................................................................... 20


Friabilimeter operating instructions
Page 4 of 48 Revision 7 © 2016 – Pfeuffer GmbH
7.1.4 Start key....................................................................................................................... 20

7.1.5 Operating hours counter ............................................................................................. 20
Sample preparation measures ................................................................................................. 217.2
Weighing out the sample ......................................................................................................... 227.3
Filling the sample...................................................................................................................... 227.4
Switching on the FRIABILIMETER.............................................................................................. 227.5
Emptying the sample................................................................................................................ 247.6
Evaluation................................................................................................................................. 257.7
7.7.1 Friability M................................................................................................................... 25
7.7.2 Whole hyaline (whole grains) WH ............................................................................... 25
7.7.3 Part hyaline (partially non-comminuted grains) PH .................................................... 26
Switching off the FRIABILIMETER ............................................................................................. 267.8
8Checking the device settings..................................................................................................... 27
Timer runtime........................................................................................................................... 278.1
Abrasion on the pressure roll ................................................................................................... 278.2
Abrasion on the drive rolls ....................................................................................................... 288.3
Sieve drum................................................................................................................................ 288.4
Precise adjustment using the setscrew.................................................................................... 298.5
Adjustment by moving the detent plate .................................................................................. 308.6
9Maintenance and cleaning ....................................................................................................... 31
Cleaning .................................................................................................................................... 329.1
Inspection interval and function test ....................................................................................... 329.2
Maintenance............................................................................................................................. 329.3
9.3.1 Tool .............................................................................................................................. 32
Renewing the pressure roll....................................................................................................... 339.4
Working inside the housing...................................................................................................... 349.5
9.5.1 Renewing drive rolls .................................................................................................... 35
9.5.2 Renewing the timer ..................................................................................................... 38
9.5.3 Renewing the motor.................................................................................................... 41
Checks....................................................................................................................................... 429.6
10 Malfunctions – causes and rectification .................................................................................... 43
Renewing the internal fuse ...................................................................................................... 4510.1
11 Spare parts and accessories...................................................................................................... 46
12 Emergency............................................................................................................................... 47
13 Dismantling and disposal ......................................................................................................... 47
14 Literature ................................................................................................................................ 47
Test log........................................................................................................................................... 48

Friabilimeter operating instructions
© 2016 – Pfeuffer GmbH Revision 7 Page 5 of 48
1Introduction
Designated use1.1
The FRIABILIMETER is used for determining the friability and whole hyaline of barley malt grains directly
after kilning. It mechanically separates a malt sample into hard (glassy) and friable (easily crushed)
constituents. The FRIABILIMETER consists of a mechanical abrading device with an electric motor and an
electronic timer.
The internationally recognized method is based on the research results of Prof. Lucien Chapon. This
method detects differing malt qualities. The brewery can measure the malt quality immediately on
delivery and use the information to achieve consistent malt blends.
The friability is determined according to international methods, e.g. EBC1method 4.15, MEBAK24.1.3.6
and ASBC3Malt-12. Pfeuffer GmbH has cooperated with the EBC analysis committee to establish a
FRIABILIMETER network which determines a binding reference friability value.
The FRIABILIMETER is configured as a portable device with a mains plug.
Private use of the FRIABILIMETER is not allowed.
NOTE The FRIABILIMETER is exclusively intended for the indicated purpose.
Any other use beyond this definition, or conversion of the FRIABILIMETER without
written consultation with Pfeuffer GmbH, is regarded as not in accordance with the
designated use.
Pfeuffer GmbH will not be liable for any damage resulting from this! The risk is the
responsibility of the owner alone.
The FRIABILIMETER is only allowed to be taken into operation if it can be ensured
that all safety devices are functioning.
The following are prohibited
crushing firm, solid objects made of metal, stone, concrete or other foreign
bodies!
filling liquid and sticky products!
Experience to date shows that the FRIABILIMETER is unsuitable for wheat malts!
The samples to be used in accordance with the designated use of the FRIABILIMETER
are obtained by the owner.
Correct treatment of these materials and the associated risks are exclusively the
responsibility of the owner.
The owner must provide information about dangers and disposal.
The designated use also includes complying with the operating instructions as well as the maintenance
and servicing conditions as defined in these operating instructions.
These operating instructions do not release the owner from its responsibility to develop and apply, or
have applied, health and/or safety regulations appropriate for the requirements of the overall system,
and to monitor compliance with the same.
1European Brewers' Convention
2Central European Brewing Analysis Commission
3American Society of Brewing Chemists

Friabilimeter operating instructions
Page 6 of 48 Revision 7 © 2016 – Pfeuffer GmbH
EC/EU Declaration of Conformity1.2
EC/EU Declaration of Conformity
In accordance with the EC/EU Directives
Machinery 2006/42/EC and Electromagnetic Compatibility (EMC) 2014/30/EU
Manufacturer: Pfeuffer GmbH
Flugplatzstraße 70
97318 Kitzingen
GERMANY
Person authorized to compile the technical documents: Lothar Pfeuffer, general manager
Product: Friabilimeter malt friability measuring instrument
Serial number: ______________________________
The aforementioned product complies with the requirements of the following relevant directives and
harmonized standards:
Directives / standard
Title
2006/42/EC
EC Directive: Machinery
DIN EN ISO 12100:2010
Safety of machinery – General principles for design – Risk assessment and
risk reduction
DIN EN 60204-1:2006
Safety of machinery – Electrical equipment of machines;
Part 1: General requirements
DIN EN 61010-1:2011
Safety requirements for electrical equipment for measurement, control
and laboratory use; Part 1: General requirements
2014/30/EU
EU Directive: Electromagnetic compatibility
DIN EN 61000-6-2:2006
Electromagnetic compatibility – Part 6-2: Generic standards – Imission for
industrial environments
DIN EN 61000-6-3:2007
Electromagnetic compatibility – Part 6-3: Generic standards – interference
transmission for residential areas, business and industrial premises as well
as small-scale companies
DIN EN 61326-1:2013
Electrical equipment for measurements, control and laboratory use –
EMC requirements – Part 1: General requirements
Any modification to the FRIABILIMETER not agreed with us shall result in this declaration becoming null
and void.
Kitzingen, __________________________ ___________________________________
Lothar Pfeuffer, general manager

Friabilimeter operating instructions
© 2016 – Pfeuffer GmbH Revision 7 Page 7 of 48
Structural features of the danger notes1.3
The operating instructions from Pfeuffer GmbH contain instructions that you must comply with for your
personal safety as well as to avoid damage to property. The instructions for your personal safety are
highlighted by a warning triangle.
Comply with the following categories of danger notes and explanations of symbols:
Pictogram
SIGNAL WORD
Type of danger and its source
Possible consequence of failure to comply.
Measure to guard against the danger.
DANGER
This is a warning about a highly dangerous situation that will lead to serious or fatal
injuries.
WARNING
This is a warning about a dangerous situation that may result in serious or fatal
injuries.
CAUTION
This is a warning of a possibly dangerous situation that will lead to slight or moderate
injuries.
NOTE This is a warning about harmful situations for the product and/or environment.
Pictograms in the operating instructions1.4
Notes of particular
importance and/or
additional information
Do not reach in
Comply with the operating
instructions
Warning
Pull out mains plug
Warning of electrical voltage
Protective earth connection
Warning of hand injuries

Friabilimeter operating instructions
Page 8 of 48 Revision 7 © 2016 – Pfeuffer GmbH
Abbreviations in electrical engineering1.5
Color abbreviations for the individual strands (conductors) of a cable according to DIN IEC 60757:
Color
Color abbreviations
Color
Color abbreviations
Black
BK
Violet
VT
Brown
BN
Gray
GY
Red
RD
White
WH
Orange
OG
Pink
PK
Yellow
YE
Turquoise
TQ
Green
GN
Green-yellow
GNYE
Blue
BU
Conductor designations according to DIN VDE 0293-308:
L
Live conductor, phase (outer conductor)
Color abbreviations
L1
Outer conductor 1
BN
L2
Outer conductor 2
BK
L3
Outer conductor 3
GY
N
Neutral conductor
BU
PE
Protective earth conductor
GNYE
Identification1.6
The information in these operating instructions applies exclusively to the device with the type
designation indicated on the title sheet.
The type plate with the type designation can be found on the side of the machine housing (rear right).
It is important for all questions to specify the correct type designation, serial number and year of
manufacture. Only in this way will rapid processing be possible.
Sample Pfeuffer GmbH type plate:
Pfeuffer GmbH Tel. +49 9321 969-0
Flugplatzstraße 70 Fax +49 9321 969-50
97318 Kitzingen www.pfeuffer.com
Friabilimeter
S/N 00000000
Baujahr/YOM 0000
Spannung/Voltage 0000
Leistung/Power 0000
Sicherung/Fuse 0000 Made in Germany

Friabilimeter operating instructions
© 2016 – Pfeuffer GmbH Revision 7 Page 9 of 48
2Safety
NOTE It is strictly prohibited to deactivate the safety devices or modify their mode of
effect.
Built-in safety systems2.1
The built-in safety systems must be checked at regular intervals with the corresponding test methods,
see the following table:
Test intervals
Test methods
d= Daily
w= Weekly
m= Monthly
¼ y = Every three months
½ y = Every six months
y= Yearly
V= Visual check
F= Function check
M= Measurement
2.1.1 Mains disconnector in a portable device
The main switch ON/OFF is the mains disconnector, and also serves as the EMERGENCY OFF function. It
is located on the top of the device.
Figure 1: Main switch ON/OFF
Item
Designation
1
Main switch ON/OFF
The connection for the mains cable (C19/C20 coupler) is located at the rear.
In an emergency, switch off the FRIABILIMETER using the main switch, position
OFF.
Disconnect the mains cable from the electrical power supply, or pull out the
coupler.
Secure the mains cable appropriately against unauthorized reconnection by placing
it where it can be monitored continuously.
1
Test
Interval
Method
y
F

Friabilimeter operating instructions
Page 10 of 48 Revision 7 © 2016 – Pfeuffer GmbH
Arrange the plug/socket combination at the place of installation so that it can be
observed clearly and reached quickly in an emergency.
2.1.2 Protective covers
The FRIABILIMETER is protected during operation by its complete housing and the front hood to prevent
reaching into the machine.
CAUTION
Danger of crushing! Finger injuries!
During operation, do not place your fingers
into the filling funnel.
into the working area of the sieve drum from below.
NOTE To avoid damage:
Make sure that no objects are lying on the device which could drop into the filling
funnel!
Do not insert any long, pointed objects into the filling funnel or into the working
area of the sieve drum from below!
Figure 2: Protective covers
Item
Designation
1
Front hood
2
Housing, complete
2
1
Test
Interval
Method
m
V

Friabilimeter operating instructions
© 2016 – Pfeuffer GmbH Revision 7 Page 11 of 48
In the front hood, there is a blue magnet (see Figure 3) which interacts with the reed switch inside the
housing.
NOTE The FRIABILIMETER cannot be taken into operation without the front hood!
The motor will stop immediately if the front hood is removed during operation!
Figure 3: Safety device (blue magnet) for front hood
Test
Interval
Method
m
V
Operating and danger areas on the FRIABILIMETER2.2
Operating area
Make sure the installation height is sufficient (according to the stature of the operating personnel). A
suitable base (e.g. table) is required for this.
Danger area
The entire area one meter around the FRIABILIMETER is a danger area during maintenance and repair
work. Keep the area around the FRIABILIMETER clear of objects.

Friabilimeter operating instructions
Page 12 of 48 Revision 7 © 2016 – Pfeuffer GmbH
Operating and maintenance personnel2.3
Operating and maintenance personnel are people who are responsible for transport, installation, setup,
operation and cleaning of the FRIABILIMETER, and for eliminating malfunctions.
1. The FRIABILIMETER is only allowed to be operated by authorized and instructed people.
2. The responsibilities for operating the FRIABILIMETER must be clearly defined and complied with so
that no unclear competencies arise with regard to the aspect of safety.
3. The switch-off procedures specified in the operating instructions must be complied with during all
work (operation, maintenance, repair, etc.), see chapter 2.8.
4. The operator must refrain from any working method that impairs safety on the FRIABILIMETER.
5. The operator must ensure that only authorized people work on the FRIABILIMETER.
6. The owner is obliged to report immediately to the owner any changes that take place on the
FRIABILIMETER which impair safety.
7. The operating personnel must be provided by the owner with appropriate protective equipment in
accordance with legal requirements and the material to be processed.
8. The owner must issue regular instructions regarding the use of personal protective equipment, and
must check such equipment is being used.
Safety measures (to be carried out by the owner)2.4
It should be noted that the owner is responsible for the following aspects with regard to the operating
and maintenance personnel
Providing instruction in the protective devices for the FRIABILIMETER
Monitoring compliance with the safety measures.
The frequency of the function tests described in chapter 9.2 must be complied with.
The work described in these operating instructions is configured in such a way that
it is explained in the chapters Function and Operation for the operating personnel
it is explained in the chapters Delivery, Transport and storage, Installation and commissioning,
Maintenance and cleaning, Malfunctions – causes and rectification and Dismantling and disposal
for a specialist operator.
The chapters Delivery, Transport and storage, Installation and commissioning, Maintenance and
cleaning, Malfunctions – causes and rectification and Dismantling and disposal are only intended for
specialist operators. Work described in this chapter is only to be carried out by specialist operators.
Instructed person
A person who has been instructed and, if necessary, trained by a specialist operator regarding the tasks
assigned to him/her and the possible dangers in the event of incorrect conduct, and who has also been
instructed regarding the necessary protective devices and protective measures.
Specialist operator
An individual who, due to his/her relevant specialist training and/or experience, is capable of
recognizing risks and avoiding dangers that may occur during use of the product. (Definition according to DIN
EN 82079-1:2013-06)

Friabilimeter operating instructions
© 2016 – Pfeuffer GmbH Revision 7 Page 13 of 48
Obligations on the owner
In the European Economic Area (EEA), national implementation of the framework
directive 89/391/EEC and corresponding individual directives, in particular the
directive 2009/104/EC concerning the minimum health and safety requirements for
the use of work equipment by workers at work, as amended, are to be observed and
adhered to.
In addition, he/she must comply with the local legal requirements on:
Safety of personnel (accident prevention regulations)
Accident prevention regulation DGUV Regulation 3 (previously BGV A 3) "Electrical systems and
equipment" (DGUV = Association of German Statutory Accident Insurance)
Safety of work equipment (protective equipment and maintenance)
Permitted noise load (depending on the site and time of day)
Product disposal (waste legislation)
Material disposal (waste legislation)
Cleaning (cleaning agents and disposal)
Hazardous substances (in Germany, the technical rules for hazardous substances – TRGS 555 apply)
Environmental protection regulations.
Electrical connections
The FRIABILIMETER is only allowed to be connected to a socket earthed in accordance
with the regulations, using a protective conductor.
Illuminance
The owner must ensure that there is adequate and homogeneous illumination in all
areas.
At least 300 lux is recommended (maintained illuminance).
In Germany, ASR 7/3 applies (workplace directive – artificial lighting).
General safety notes2.5
The safety equipment and safety notes described in these operating instructions must
be complied with.
1.
Disconnect the FRIABILIMETER from the electrical power supply if there are
malfunctions.
2.
Disconnect the FRIABILIMETER from the electrical power supply before cleaning
work.
3. Do not allow the FRIABILIMETER to get wet during transport, storage, cleaning and
operation.
4.
Make sure that the FRIABILIMETER is only operated when in correct working
order.
5. Never touch the mains cable with moist hands.
6. Only use genuine spare parts and accessories (see chapter 11).

Friabilimeter operating instructions
Page 14 of 48 Revision 7 © 2016 – Pfeuffer GmbH
Safety tests2.6
Pfeuffer GmbH carried out the following safety tests at the factory:
Testing and checking according to DIN EN 60204-1:
Check that the electrical equipment is in compliance with the technical documentation.
Continuous connection of the protective earth system
Insulation resistance tests
Voltage tests
Protection against residual voltages
Function tests
The functions of the electrical equipment, in particular those relating to safety and protective measures,
have been tested.
Residual dangers in connection with the FRIABILIMETER2.7
During all work on electrically operated components, pay attention to dangers from electrical
current.
Switch-off procedure2.8
DANGER
Touching live parts can be fatal!
It is essential to comply with the following switch-
off procedure prior to cleaning,
maintenance or repair work (only by specialist personnel):
Empty the FRIABILIMETER.
Switch off the FRIABILIMETER at the main switch position OFF.
Disconnect the mains cable from the electrical power supply, or pull out the
coupler.
The mains cable must be able to be kept under the direct supervision of the person in the danger
area.
During cleaning, make sure that no water, steam or dust can penetrate the electronics area.

Friabilimeter operating instructions
© 2016 – Pfeuffer GmbH Revision 7 Page 15 of 48
3Technical data
FRIABILIMETER
Malt friability measuring instrument
Sample amount
50 ±0.01 g
Product
Barley malt
Measuring time
Timer 8 minutes
Dimensions and weight3.1
Height
400 mm
Width
300 mm
Length
270 mm
Weight
12 kg
Power supply3.2
Operating voltage/
frequency
230 VAC, 50 Hz
Power consumption
70 VA
Number of phases
1-ph / PE
Protective earth
conductor
PE (yellow/green) in the mains cable
Internal fuse
315 mA slow-blow glass microfuse 5 x 20 mm
Mains cable
With removable supply cable (C19/C20 coupler); 10 A, 250 V
Installation regulations
Configured according to VDE
General data3.3
Ambient temperature
storage and transport
-10 °C – 60 °C
Ambient temperature
measurement
15 °C – 40 °C
Atmospheric humidity
20 – 80 % non-condensing
Installation condition
Level table surface without vibration

Friabilimeter operating instructions
Page 16 of 48 Revision 7 © 2016 – Pfeuffer GmbH
4Delivery, transport and storage
The Delivery, transport and storage chapter is only intended for specialist operators.
Scope of delivery4.1
The standard scope of delivery to the owner comprises:
1. FRIABILIMETER malt friability measuring instrument including sieve drum and front hood
2. Mains cable with removable connection (C19/C20 coupler)
3. Measuring caliper
4. Can of Pfeuffer test malt 400 g
5. Flat-blade screwdrivers 3 x 40 mm and 2 x 40 mm
6. Plastic funnel
7. Collecting vessel
8. Small and large cleaning brushes
9. Operating instructions
The relevant article numbers can be found in chapter 11.
Transport and packaging4.2
Systems, machines and devices from Pfeuffer GmbH are carefully tested and packaged prior to dispatch,
however it is not possible to exclude the risk of damage during transport.
Incoming check
Check for completeness with reference to the delivery note.
In case of damage
Check the delivery for damage (visual inspection).
In case of complaints
If the delivery suffered damage in transit:
Keep the packaging (to allow it to be checked subsequently by the forwarding company, or for
sending back).
Immediately inform the supplier or Pfeuffer GmbH.
Intermediate storage4.3
The freight packaging of the FRIABILIMETER and the accessory/replacement parts is configured for a
storage duration of up to six months from delivery.
Do not place any heavy objects on the packaging.
Storage conditions
Enclosed, dry room with a room temperature between min. -10 °C and max. 60 °C.

Friabilimeter operating instructions
© 2016 – Pfeuffer GmbH Revision 7 Page 17 of 48
Transport to the installation site (by the customer)4.4
The transport is only allowed to be undertaken by specialist personnel according to
the local conditions and any information indicated on the packaging material.
Unpacking
Open the packaging to avoid damage to the housing and other components.
Figure 4: Unpacking I
Remove the sieve drum, the operating instructions and
the remainder of the accessories as stated on the
delivery note.
Figure 5: Unpacking II
Remove the cardboard box.
Figure 6: Unpacking III
Open the cardboard box inside.
Figure 7: Unpacking IV
Remove the PE foam padding.

Friabilimeter operating instructions
Page 18 of 48 Revision 7 © 2016 – Pfeuffer GmbH
Figure 8: Unpacking V
Remove the front hood and the FRIABILIMETER.
Do not lift out the FRIABILIMETER by its drive and
pressure roll.
Note that the weight is approx. 12 kg.
Move the FRIABILIMETER to the installation location, paying attention to the setup instructions in
chapter 5.1.
Keep the original packaging.
Packaging for return delivery
If possible, use the original packaging and the original packaging material. If neither is available any
longer, request new packaging from Pfeuffer GmbH.
5Installation and commissioning
The Installation and commissioning chapter is only intended for specialist operators.
Installation5.1
Carefully unpack the FRIABILIMETER (see chapter 4.4).
Place the FRIABILIMETER horizontally on a solid table with a smooth, clean surface.
Make sure there is an adequate distance to all sides so that no heat buildup can occur.
Do not set up the FRIABILIMETER close to apparatus/devices that are sensitive to dust.
Avoid exposure to direct sunlight and extreme ambient conditions.
Make sure that the installation height is ergonomic according to the stature of the operating
personnel.
Connect the supplied mains cable to the FRIABILIMETER using the connector (C19/C20 coupler).
Connect the plug of the mains cable to a suitably earthed socked with protective earth
conductor.
Take the FRIABILIMETER into operation according to the instructions in chapter 7.

Friabilimeter operating instructions
© 2016 – Pfeuffer GmbH Revision 7 Page 19 of 48
6Function
Overview6.1
Figure 9: Overview
Item
Designation
Item
Designation
1
Main switch ON/OFF
8
Pull handle
2
Setscrew
9
Pressure roll
3
Start key
10
Drive rolls
4
Sticker: Timer 8 minutes
11
Sieve drum
5
Filler opening
12
Cleaning brush
6
Front hood
13
Collecting tray
7
Operating hours counter
Sequence of functions6.2
The FRIABILIMETER is a friability measuring instrument for barley malt. The friability is measured using a
mechanical abrasion process.
Weigh out a cleaned sample of 50 g on a balance with 0.01 g accuracy, and fill the sample. Pull the pull
handle and engage it in the bottom position. Press the start key. The pressure roll presses the grains of
barley malt against the rotating sieve drum with a constant spring pressure. The friable constituents fall
through the wire mesh. Glassy grains and hard fragments remain in the sieve drum. The FRIABILIMETER
switches off automatically after eight minutes. The remaining constituents in the sieve drum are
weighed back and this information is used for calculating the friability value out of one hundred.
For precise information about operation, refer to chapter 7.
12 3 4 5 6 7 8
9
10
11
12
13

Friabilimeter operating instructions
Page 20 of 48 Revision 7 © 2016 – Pfeuffer GmbH
7Operation
The FRIABILIMETER is only allowed to be operated by personnel who have been
qualified and trained in its operation.
Control elements7.1
Figure 10: FRIABILIMETER control elements
7.1.1 Main switch ON/OFF
The main switch ON/OFF switches the FRIABILIMETER on and off. After switching on, the "On" LED lights
up.
7.1.2 Pull handle
The pull handle applies pressure to the pressure roll, or removes the pressure.
7.1.3 Setscrew
The setscrew is required for precise adjustment of the FRIABILIMETER, see chapter 8.5.
7.1.4 Start key
The start key starts the investigation. The "On" LED goes out and the "Operation" LED flashes. The
FRIABILIMETER switches off automatically after eight minutes have elapsed.
7.1.5 Operating hours counter
The FRIABILIMETER is equipped as standard with an operating hours counter to provide a clear overview
of the necessary maintenance work.
Devices of an older design can be retrofitted by Pfeuffer GmbH.
3
2
5 6 74
1
Item
Designation
1
Operating hours counter
2
Pull handle
3
Setscrew
4
Main switch ON/OFF
5
"Operation" LED
6
"On" LED
7
Start key
Other manuals for Friabilimeter
1
This manual suits for next models
1
Table of contents
Other Pfeuffer Measuring Instrument manuals

Pfeuffer
Pfeuffer Friabilimeter User manual

Pfeuffer
Pfeuffer HE lite User manual

Pfeuffer
Pfeuffer HE lite User manual

Pfeuffer
Pfeuffer 8 User manual

Pfeuffer
Pfeuffer Vario 1G User manual

Pfeuffer
Pfeuffer HOH-EXPRESS HE 50 User manual

Pfeuffer
Pfeuffer HE 60 User manual

Pfeuffer
Pfeuffer SLN3 User manual

Pfeuffer
Pfeuffer GT 1 User manual

Pfeuffer
Pfeuffer Granolyser User manual