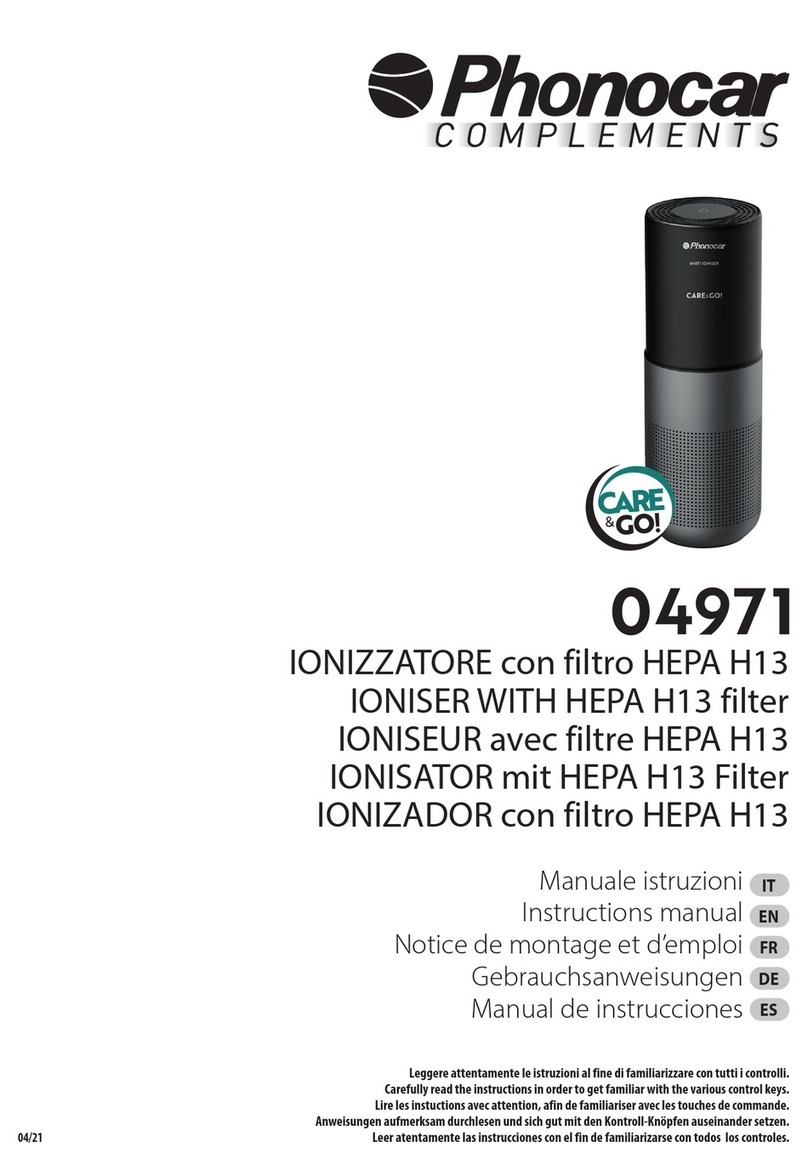
Philco CleanAir25 User manual

1
ΟΔΗΓΙΕΣ ΧΡΗΣΕΩΣ
ΚΑΘΑΡΙΣΤΗ ΑΕΡΑ
INSTRUCTION MANUAL
PHILCO CleanAir25
WithPre-filter, HEPA, Activated Carbon, UVC, PCO, Ionizer

2
ΠΑΡΑΚΑΛΟΥΜΕ ΔΙΑΒΑΣΤΕ ΚΑΙ ΑΠΟΘΗΚΕΥΣΤΕ ΤΙΣ
ΟΔΗΓΙΕΣ ΧΡΗΣΕΩΣ
ΠΡΟΣΟΧΗ
Τα παρακάτω σημεία πρέπει να τηρούνται για την αποφυγή
ηλεκτροπληξίας ή τραυματισμού.
Το προϊόν αυτό πρέπει να χρησιμοποιείται σύμφωνα με τις παρακάτω
προδιαγραφές. Οποιαδήποτε χρήση εκτός των προδιαγραφών μπορεί να
οδηγήσει σε τραυματισμό.
Ακολουθείτε πάντα τις παρακάτω βασικές προφυλάξεις όταν χρησιμοποιείτε
ηλεκτρικές συσκευές για την αποφυγή πυρκαγιάς, ηλεκτροπληξίας και τραυματισμού:
• Διαβάστε τις οδηγίες χρήσεως πριν από τη λειτουργία της συσκευής.
• Για την αποφυγή φωτιάς ή ηλεκτροπληξίας, τοποθετήστε το φις σε σωστά μονωμένη
πρίζα.
• Προστατεύστε το καλώδιο από σημεία όπου περνάει κόσμος. Μην το τοποθετείτε
κάτω από χαλιά, δίπλα σε εστίες θερμότητας, καλοριφέρ, σόμπες ή θερμαντικά.
• Μην ρίχνετε υγρά πάνω στη συσκευή για την αποφυγή ηλεκτροπληξίας και μην τη
χρησιμοποιείτε κοντά σε νερό.
• Τα παιδιά δεν καταλαβαίνουν τους κινδύνους από τη χρήση ηλεκτρικών συσκευών.
Για το λόγο αυτό, πάντα επιβλέπετε τα παιδιά όταν βρίσκονται κοντά στη συσκευή.
• Πάντα αφαιρείτε τη συσκευή από την πρίζα όταν δεν τη χρησιμοποιείτε, ή όταν
ανοίγετε το κάλυμμα, αλλάζετε φίλτρα ή την καθαρίζετε. Μην τραβάτε την πρίζα από
το καλώδιο.
• ΜΗΝ ρίχνετε ή τοποθετείτε αντικείμενα ανάμεσα στις σχισμές της συσκευής.
• ΜΗΝ καλύπτετε το καλώδιο.
• ΜΗΝ δρομολογείτε το καλώδιο κάτω από έπιπλα ή συσκευές. Προστατεύστε το από
σημεία όπου κάποιος μπορεί να σκοντάψει.
• ΜΗΝ χρησιμοποιείτε τη συσκευή με φθαρμένο καλώδιο, ή εάν πέσει κάτω η
συσκευή, μετά από δυσλειτουργία, ή εάν ο ανεμιστήρας δε λειτουργεί. Επικοινωνήστε
με το εξουσιοδοτημένο κέντρο τεχνικής υποστήριξης στο τηλ. 210620.38.38 για την
επισκευή της συσκευής.

3
• Χρησιμοποιείτε τη συσκευή μόνο για οικιακή χρήση όπως αναφέρεται στις οδηγίες
χρήσεως. Κάθε άλλη χρήση που δεν προβλέπεται από τον κατασκευαστή μπορεί να
οδηγήσει σε ηλεκτροπληξία ή τραυματισμό.
• ΜΗ χρησιμοποιείτε τη συσκευή σε εξωτερικό χώρο.
• ΜΗΝ τοποθετείτε αντικείμενα στο πάνω μέρος της συσκευής.
• ΠΟΤΕ ΜΗΝ κλείνετε τις εισαγωγές και εξαγωγές του αέρα, τις γρίλιες και μην
τοποθετείτε τη συσκευή σε μαλακές επιφάνειες όπως κρεβάτια, καναπέδες, για να
μην αναποδογυρίσει η συσκευή. Υπάρχει κίνδυνος φραγής των αεραγωγών.
• ΜΗΝ επιχειρήσετε επισκευή της συσκευής μόνοι σας. Αν η συσκευή ανοιχτεί από μη
εξουσιοδοτημένο τεχνικό, χάνεται η ισχύς της εγγύησης.
ΤΕΧΝΙΚΑ ΧΑΡΑΚΤΗΡΙΣΤΙΚΑ
Τάση: AC 230V, 50Hz
Ισχύς: 60W
Στάθμη θορύβου: 28-30dB(L), 38-40dB(M), 48-50dB(H)
Λυχνία UV: Μήκος κύματος: 254nanometers
Διάρκεια ζωής: 20,000 ώρες
Βάρος: 3.5 kgs
Διαστάσεις: 275 (L) x 175(W) x 308(H) mm
Χώρος κάλυψης: Εώς 20 m2

4
ΣΥΣΤΗΜΑ ΚΑΘΑΡΙΣΜΟΥ ΑΕΡΑ
Προφίλτρο: Παγιδεύει σκόνη και αλλεργιογόνα σωματίδια.
ΦΙΛΤΡΟ ΕΝΕΡΓΟΥ ΑΝΘΡΑΚΑ: Απορροφά οσμές, φορμαλδεΰδη, βενζόλιο και άλλα
βλαβερά αέρια.
ΦΙΛΤΡΟ HEPA: Παγιδεύει μικροσωματίδια σκόνης, καπνό, γύρη και αλλεργιογόνα.
ΛΥΧΝΙΑ UV-C: Εξολοθρεύει μικροοργανισμούς όπως μικρόβια, ιούς, βακτήρια και
μύκητες (π.χ. μούχλα).
Φωτοκαταλύτης: Όταν ο φωτοκαταλύτης διοξειδίου του τιτανίου (TiO2) απορροφά
υπεριώδη (UV) ακτινοβολία, παράγει αέριο υδρογόνου και ρίζα υδροξυλίου που
βοηθά ριζικά στην αφαίρεση των πτητικών οργανικών ενώσεων, οσμών και την
εξολόθρευση των μικροβίων.
Σημείωση: Το TiO2 ψεκάζεται στο καπάκι της λυχνίας UV με ειδικές τεχνικές.
Ιόντα: Τα αρνητικά ιόντα βελτιώνουν την ποιότητα του αέρα, εξουδετερώνοντας τα
ΔΙΑΓΡΑΜΜΑ ΣΥΣΚΕΥΗΣ
Καθαριστής αέρα
Φωτοκαταλύτης
και λυχνία UV
Φίλτρο 3 σε 1 (Προφίλτρο, Φίλτρο
ενεργού άνθρακα, HEPA)
Κάλυμμα
Πίνακας ελέγχου
Εξαγωγή

5
σωματίδια σκόνης και αντιδρώντας με τα μόρια οσμών στον αέρα. Η φύση είναι
γεμάτη με αρνητικά ιόντα σε δάση και καταρράκτες. Στη λειτουργία ιονισμού, τα
αρνητικά ιόντα φέρνουν στον χώρο αυτή την αίσθηση.
ΠΡΙΝ ΑΠΟ ΤΗ ΧΡΗΣΗ ΤΟΥ ΚΑΘΑΡΙΣΤΗ ΑΕΡΑ:
1. Αφαιρέστε προσεκτικά τον καθαριστή από το κουτί και την πλαστική σακούλα.
2. Τοποθετήστε τον σε μια σταθερή και επίπεδη επιφάνεια.
*Για την καλύτερη κυκλοφορία αέρα, τοποθετήστε τη συσκευή τουλάχιστον 50 εκ.
από τοίχους και έπιπλα.
* Βεβαιωθείτε ότι οι εισαγωγές και εξαγωγές δεν είναι μπλοκαρισμένες.
3. Πριν από τη χρήση, ανοίξτε το καπάκι, αφαιρέστε τα φίλτρα από τις συσκευασίες
τους (αν έχουν) και τοποθετήστε τα στη θέση τους.
4. Τοποθετήστε την συσκευή στο ρεύμα.
ΣΗΜΑΝΤΙΚΟ:Για να μετακινήσετε τη συσκευή, σηκώστε την από το χερούλι στο πίσω
μέρος.
ΧΡΗΣΗ ΚΑΘΑΡΙΣΤΗ
1. ΠΛΗΚΤΡΟ “ON-OFF”:
Πιέστε το πλήκτρο για να ανάψετε ή να σβήσετε τη συσκευή.
2. ΠΛΗΚΤΡΟ “SPEED”:
Η ταχύτητα του ανεμιστήρα μπορεί να μεταβληθεί όταν η συσκευή λειτουργεί
(Χαμηλή/I, Μεσαία/II, Υψηλή/III). Με κάθε πάτημα του κουμπιού (SPEED), η ταχύτητα
ΟΔΗΓΙΕΣ ΛΕΙΤΟΥΡΓΙΑΣ

6
μεταβάλλεται από Χαμηλή (low) σε Μεσαία (medium) και Υψηλή (high).
4. ΠΛΗΚΤΡΟ “UV-C/Ion”:
Πιέστε το πλήκτρο διαδοχικά για να ενεργοποιήσετε τη λυχνία UV και/ή τον Ιονιστή.
3. ΠΛΗΚΤΡΟ “TIMER”:
1) Πιέζοντας το πλήκτρο διαδοχικά, ο καθαριστής μπορεί να
χρονοπρογραμματιστεί για λειτουργία 2, 4 και 8 ωρών, σταματώντας αυτόματα
όταν ο επιλεγμένος χρόνος έχει παρέλθει.
2) Πιέστε το πλήκτρο (Timer) για να επιλέξτε τον επιθυμητό χρόνο λειτουργίας. Η
λυχνία δείχνει το χρόνο που επιλέξατε.
3) Για να επιλέξετε συνεχόμενη λειτουργία, πιέστε το πλήκτρο μέχρι να σβήσουν
όλες οι ενδείξεις χρόνου.
Προσοχή: Όταν η συσκευή δε λειτουργεί, σβήστε την και βγάλτε την από την
πρίζα.
ΤΟΠΟΘΕΤΗΣΗ ΚΑΙ ΑΦΑΙΡΕΣΗ ΦΙΛΤΡΩΝ
ΕΝΔΕΙΞΗ ΑΛΛΑΓΗΣ ΦΙΛΤΡΩΝ
Όταν η λυχνία FILTER RESET αναβοσβήνει σταθερά, είναι ώρα να αντικαταστήσετε το
φίλτρο. Αντικαταστήστε το φίλτρο καιστη συνέχεια πιέστε το πλήκτρο POWER για 5
δευτερόλεπτα μέχρι να σβήσει η ένδειξη αλλαγής φίλτρων.
*Τα φίλτρα διαρκούν περίπου 6 μήνες.
1. Ανοίξτε το κάλυμμα τραβώντας το πάνω μέρος.
2. Αφαιρέστε το φίλτρο τραβώντας τις πλαϊνές λωρίδες.
3. Τοποθετήστε το νέο φίλτρο με τον ίδιο τρόπο.
4. Βεβαιωθείτε ότι το προφίλτρο είναι κολλημένο στην εξωτερική πλευρά.
5. Τοποθετήστε το καπάκι πρώτα από την κάτω πλευρά και μετά κουμπώστε το πάνω
μέρος του.

7
6. Κρατήστε πατημένο το πλήκτρο POWER για 5 δευτερόλεπτα μέχρι να σβήσει η
ένδειξη αλλαγής φίλτρων.
Ο καθαριστής αέρα πρέπει να καθαρίζεται τουλάχιστον μια φορά το μήνα και το προ-
φίλτρο επίσης. Σε περιπτώσεις εντατικής χρήσης ή ιδιαίτερων συνθηκών μπορεί να
απαιτείται συχνότερο καθάρισμα.
ΦΙΛΤΡΑ
Καθαρίστε τα με τη βούρτσα της ηλεκτρικής σκούπας για να αφαιρέσετε τα χνούδια
και τη βρομιά.
Εμπρος (Προφίλτρο και Φίλτρο Άνθρακα)Πίσω (Φίλτρο HEPA)
ΣΗΜΕΙΩΣΗ:
-Μόνο το προφίλτρο πλένεται. Βεβαιωθείτε ότι έχει στγενώσει πριν το τοποθετήσετε
στη θέση του. Τα υπόλοιπα φίλτρα θελουν αλλαγή κάθε 6 μήνες.
ΔΙΑΡΚΕΙΑ ΖΩΗΣ ΦΩΤΟΚΑΤΑΛΥΤΗ PCO
-Περίπου 2 έτη.
ΑΝΤΙΚΑΤΑΣΤΑΣΗ ΛΥΧΝΙΑΣ UV
1. Ανοίξτε το κάλυμμα της λυχνίας UV με ένα καταβίδι.
2. Αφαιρέστε τη λυχνία UV από τη βάση προσεκτικά και ξεβιδώστε το σύνδεσμο.
3. Συνδέστε τη νέα λυχνία UV στο σύνδεσμο και τοποθετήστε την στη βάση
προσεκτικά.
ΠΡΟΣΟΧΗ: Μην παρακολουθείτε τη λυχνία UV απευθείας με γυμνό μάτι.
ΚΑΘΑΡΙΣΜΟΣ ΚΑΙ ΣΥΝΤΗΡΗΣΗ ΦΙΛΤΡΩΝ

8
ΟΔΗΓΙΕΣ ΣΥΝΤΗΡΗΣΗΣ
Χρησιμοποιήστε ένα καθαρό, στεγνό, μαλακό πανί για να καθαρίσετε τη συσκευή
εξωτερικά.
ΣΗΜΕΙΩΣΗ: Μην τοποθετείτε ξένα αντικείμενα ή τα δαχτυλά σας στο εσωτερικό.
ΠΡΟΣΟΧΗ: Μην καθαρίζετε με βενζίνη, διαλυτικό ή δυνατά καθαριστικά το εσωτερικό
ή το εξωτερικό της συσκευής. Υπάρχει κίνδυνος να την καταστρέψετε.
Μη χρησιμοποιείτε αλκοόλ ή άλλα καθαριστικά.
ΟΔΗΓΟΣ ΓΡΗΓΟΡΗΣ ΑΝΤΙΜΕΤΩΠΙΣΗΣ ΠΡΟΒΛΗΜΑΤΩΝ
Πριν κάνετε οποιονδήποτε από τους παρακάτω ελέγχους, αφαιρέστε τη συσκευή από
την πρίζα.
Χαμηλή ροή αέρα
Βεβαιωθείτε ότι τα φίλτρα είναι καθαρά.
Ελέγξτε για τυχόν εμπόδια στις εισαγωγές και
εξαγωγές αέρα.
Η συσκευή δεν ξεκινάει
Ελέγξτε την πρίζα και τις ασφάλειες.
Βεβαιωθείτε ότι το μπροστινό καπάκι έχει κουμπώσει
και ότι το φίλτρο είναι σωστά τοποθετημένο.
Υπερβολικός θόρυβος
Βεβαιωθείτε ότι δεν ακουμπάει ξένο σώμα στον
ανεμιστήρα.
Ελέγξτε ότι το φίλτρο δεν έχει βουλώσει και θέλει
αλλαγή.
Βεβαιωθείτε ότι τα μονωτικά είναι σωστά
τοποθετημένα.
Βεβαιωθείτε ότι η συσκευή είναι ευθυγραμμισμένη.
Εγγύηση: 2 χρόνια από την ημερομηνία αγοράς
ΣΕ ΠΕΡΙΠΤΩΣΗ ΒΛΑΒΗΣ, ΣΤΕΙΛΤΕ ΤΗ ΣΥΣΚΕΥΗ ΣΤΟ ΠΛΗΣΙΕΣΤΕΡΟ ΚΕΝΤΡΟ ΤΕΧΝΙΚΗΣ
ΥΠΟΣΤΗΡΙΞΗΣ SERVICEWORLD, ΜΑΖΙ ΜΕ ΤΗΝ ΕΓΓΥΗΣΗ Η ΤΗΝ ΑΠΟΔΕΙΞΗ ΑΓΟΡΑΣ.
Σημειώστε την ημερομηνία αλλαγής φίλτρου
____________ ___________ ___________
____________ ___________ ___________
____________ ___________ ___________
____________ ___________ ___________
____________ ___________ ___________
Ημέρα Μήνας Έτος

9
READ AND SAVE THESE INSTRUCTIONS
WARNINGS
Failure to comply with the warnings listed below may
result in electric shock or serious injury.
This product should be used only in accordance with the specifications
outlined in this manual. Usage other than what has been specified here may
result in serious injury.
When using electrical appliances, basic precautions should always be followed to
reduce the risk of fire, electric shock and injury to persons, including the following:
• Read all instructions before using appliance.
• IMPORTANT - This appliance has a polarized plug (one blade is wider than the other).
To reduce the risk of electric shock, this plug is intended to fit in a polarized outlet only
one way. If the plug does not fit fully in the outlet, reverse the plug. If it still does not
fit, contact a qualified electrician. Do not attempt to defeat this safety feature.
• To avoid fie or shock hazard, plug the appliance directly into a right AC electrical
outlet.
• Keep the cord out of heavy traffic areas. To avoid fie hazard, NEVER put the cord
under rugs, near heat registers, radiator, stoves or heaters.
• To protect against electrical hazards, DO NOT immerse in water or other liquids. Do
not use near water.
• Children cannot recognize the hazards associated with the usage of electrical
appliances. For this reason, always supervise children when they are near the unit.
• Always unplug the air purifier before moving it, opening the grill, changing filters,
cleaning or whenever the air purifier is not in use. Be sure to pull by the plug and not
the cord.
• NEVER drop or insert any object into any openings.
• DO NOT run cord under carpeting.
• DO NOT cover cord with throw rugs, runners, or similar coverings.
• DO NOT route cord under furniture or appliances. Arrange cord away from traffic
area and where it will not be tripped over.
• DO NOT operate any appliance with a damaged cord or plug, if motor fan fails to
10
rotate, after the appliance malfunctions, or if it has been dropped or damaged in any
manner. Send to Customer Service for assistance.
• Use appliance only for intended household use as described in this manual. Any
other use not recommended by the manufacturer may cause fie, electric shock or
injury to persons.
• DO NOT use outdoors.
• DO NOT place anything on top of unit.
• NEVER block the air openings, grills/outlets or place on a soft surface such as a bed
or sofa, as this could cause the unit to tip over, blocking the air intake or outtake
opening.
• DO NOT attempt to repair or adjust any electrical or mechanical functions on this
unit. Doing so will void your warranty. The inside of the unit contains no user
serviceable parts. All servicing should be performed by qualified personnel only.
• WARNING: To reduce the risk of fie or electric shock, do not use this fan with any
solid-state speed control device.
TECHNICAL SPECIFICATIONS
Rated Voltage: AC 230V, 50Hz
Rated Power: 60W
Noise Level: 30dB(L), 40dB(M), 50dB(H)
UV Light: Wavelength: 254nanometers
Lamp life: Approx. 20,000 hours
Weight: 3.5 kgs
Dimensions: 275 (L) x 175(W) x 308(H) mm
Coverage Area: Up to 25 m2

11
AIR CLEANING SYSTEM
PRE-FILTER: Captures initial dust and allergen particles.
ACTIVATED CARBON: Absorbs formaldehyde, benzene and other noxious gas.
HEPA: Captures dust, smoke, pollen and other allergens.
UV-C LIGHT: Destroys micro-organisms such as germs, viruses, bacteria and fungi (such
as mold toxins).
PCO: When photocatalyst titanium dioxide (TiO2) absorbs Ultraviolet (UV) radiation, it
will produce hydrogen gas and hydroxyl radical help remove VOCs, Odors and kill the
germs.
Note: TiO2 is sprayed on the UV lamp cover by special technics.
PRODUCT STRUCTURE
Main unit
UV-C & PCO
3 in 1 filter(Pre-filter, Activated
Carbon filter, HEPA filter)
Front cover
Touch panel
Air outlet

12
Ion: Negative ions improve the air quality by combining with dust or reacting with
odor molecules attached on the wall. Plenty of negative ions exist in natural
surroundings such as waterfalls or forests. In this mode, negative ions bring the room
air close to this natural environment.
BEFORE OPERATING THE AIR PURIFIER:
1. Carefully remove your air purifier from box and plastic bag.
2. Select a firm, level and flat location for the air purifier.
*For proper air flow, locate the unit at least 1 foot from any wall or furniture.
*Make sure none of the grills are blocked.
3. Before using, remove the filters then remove and discard bags.
4. Plug the power cord into a right voltage AC outlet.
IMPORTANT: When moving the air purifier, always lift unit by the carrying handle
located on back.
OPERATING THE AIR PURIFIER
1. “POWER” BUTTON:
Press this button to turn on or switch off the unit.
2. “SPEED” BUTTON:
The fan speed of the unit can be adjusted when the unit is in operation (L/I M/II H/III).
Each time that you press on the (SPEED) button, the speed is adjusted from L (low) to
OPERATING INSTRUCTIONS

13
M (medium) to H (high).
4. “UV-C/Ion” BUTTON:
Press this button to turn on/off the UV lamp and Ionizer.
3. “TIMER” BUTTON:
1) By pressing this button, the purifier can be timed to operate for intervals of 2
hours, 4 hours and 8 hours, stopping automatically when the selected operating
time has elapsed.
2) Press this button (Timer) to select the required operating time. A warning light
automatically indicates the remaining operating time.
3) To select the continuous operating mode, press the button repeatedly until
there
are no more indicator lights lit up.
Important note: When the unit is not in use, switch it off and unplug it.
INSTALLING & REMOVING FILTERS
FILTER REPLACE INDICATOR
The FILTER RESET light flickering continuously indicates that it is time to replace the
filter. Replace the filter according to the directions then press the POWER button and
hold for 5 seconds to restart the system. The light will stop flickering.
*Combination Filter will last approximately 6 months.
7. Open the front cover from the top.
8. Remove the combination filter by pull the two strips.
9. Insert new Combination Filter into the unit. Consult the strips on the filter for
correct installation direction.
10. Reattach the extra Pre-filter to the Combination Filter.
11. Reattach the front cover of the unit and securely latch into place.

14
12. Press and hold POWER Button for 5 seconds to reset Filter Change Indicator.
The air purifier should be cleaned at least once every month and the Pre-Filter should
be cleaned every month. More frequent cleaning may be required depending on
environmental conditions.
FILTERS
Clean with the brush attachment of your vacuum cleaner. This will remove lint and dirt.
Front (Pre-filter & Carbon filter) Back (HEPA filter)
NOTE:
-Only the Extra Pre-filter is washable. And make sure the pre-filter is dry when fix back
the pre-filter to the combination filter.
PCO life time
-Availability about 2 years.
UV LAMP RΕPLACEMENT
1. Open the UV lamp cover by a screw driver.
2. Take off the UV lamp from the holder carefully and unplug the connector.
3. Connect the new UV lamp to the connector and fix back the lamp to the holder
carefully.
Note: Do not watch the operating UV lamp directly.
CLEANING & MAINTAINING
THE COMBINATION FILTER

15
MAINTENANCE CAUTION
Use a clean, dry, soft cloth to wipe the external surface of the unit.
NOTE: Do NOT stick any foreign objects or your fingers inside of the unit.
CAUTION: Do NOT use gasoline, benzine, thinner, harsh cleaners, etc. on and/or in
the unit while cleaning as they will damage the product.
NEVER use alcohol or other solvents.
MINI TROUBLESHOOTING GUIDE
Before carrying out any of the following service checks, unplug the unit from the
mains.
Insufficient air flow
Check that the filters are clean
Check for any obstructions in the air inlet and outlet
Unit will not start
Check the power supply and electric fuses.
Check that the Front Cover is latched firmly in place.
Check that the Filter is firmly in place.
Excessive noise
Check for any foreign objects in contact with the fan.
The filter may be clogged and ready for replacement.
The foam sealing gaskets have been installed
incorrectly.
Uneven positioning.
Warranty: 2 years from the date of purchase
FOR ANY WARRANTY CLAIMS, PLEASE RETURN YOUR UNIT OR SEND IT TO YOUR
DEALER, TOGETHER WITH YOUR PROOF OF PURCHASE.
Label for recording the filter replacement date
ENTER THE INSTALLATION DATE OF THE NEW FILTER
____________ ___________ ___________
____________ ___________ ___________
____________ ___________ ___________
____________ ___________ ___________
____________ ___________ ___________
Day Month Year

16
ΕΞΟΥΣΙΟΔΟΤΗΜΕΝΟ ΚΕΝΤΡΟ
ΠΑΝΕΛΛΑΔΙΚΗΣ ΥΠΟΣΤΗΡΙΞΗΣ
www.serviceworld.gr
AUTHORISED SERVICE CENTER
210-620.38.38
ΑΓΟΡΑ ΑΝΑΛΩΣΙΜΩΝ-ΕΠΙΣΚΕΥΕΣ-FILTER PURCHASE-REPAIRS
Table of contents
Languages: