Register your product and get support at
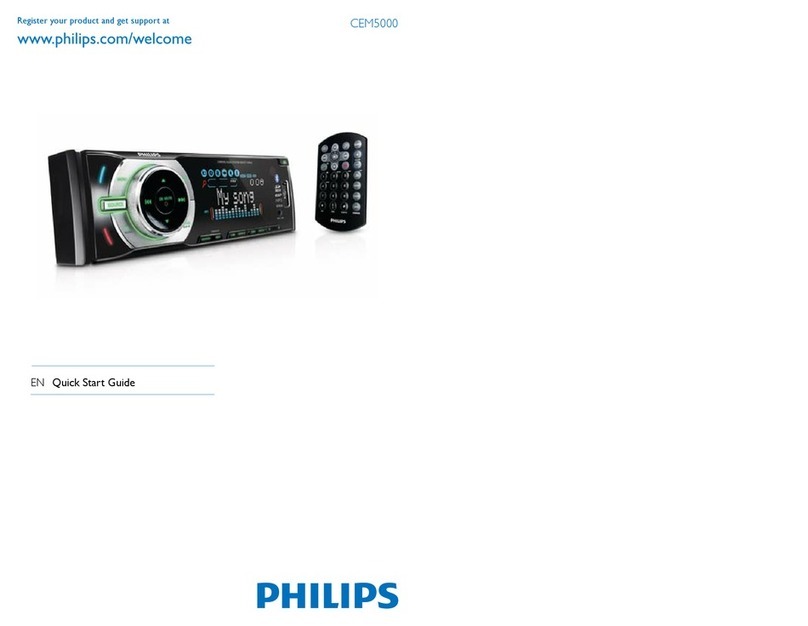
CEM5100
© 2011 Koninklijke Philips Electronics N.V.
All rights reserved.
CEM5100_QSG_00_V2.0
EN Quick start guide
ES-AR Guía de inicio rápida
PT-BR Guia de início rápido
=+7: ҄ઢܞڲ
=+&1 ිగႬᆻଶ
a
b
c
d
e
f
183mm
53mm
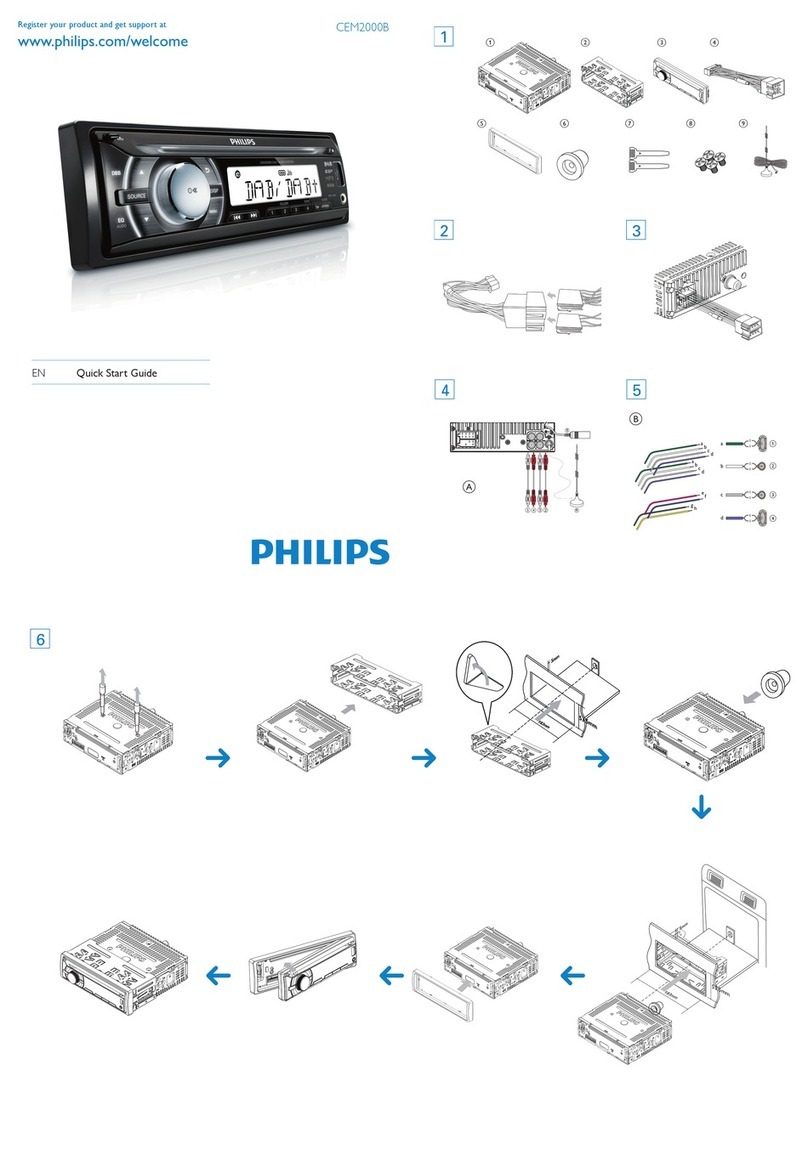
What’s in the box
Contenido de la caja
Main unit
(with a sleeve)
Unidad principal
(con manga de montaje)
Rubber cushion
Conector
ISO macho
Front panelRemote
control
Control remoto
Screw
x 1 pc
1 tornilloAlmohadilla de
goma
Disassembly tools
x 2 pcs
2 herramientas
de desmontaje
Trim plate
Panel frontal
Carrying case
Marco del tablero
User manual
Manual del
usuario
ISO male connector
Funda de
transporte
Quick start
guide
Guía de inicio
rápida
f
g
h
REAR FRONT
R
L
REAR AUX LR
i
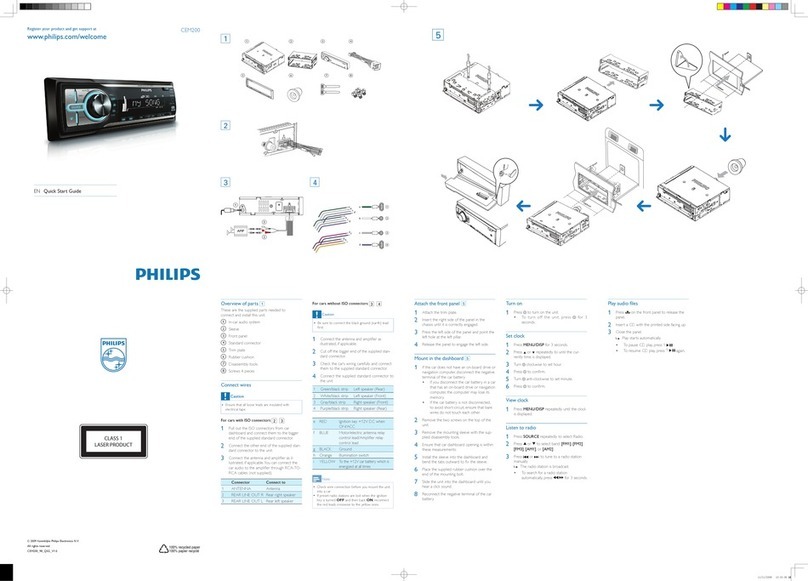
1Connect the supplied male connector to the unit.
2Check the car’s wiring carefully and connect them
to the supplied male connector.
1 Green /black strip Left speaker (Rear)
2 White/ black str ip Left spe aker (Front)
3 Gray/bla ck stri p Right speaker (Front)
4 Purple /black st rip Right spea ker (Rear)
e Red Ignition key +12V DC when
ON/ACC
f Blue Motor/electric antenna relay
control lead
g Blue/w hite
hBlack Ground
i Yellow To the +12V car batte ry
which is ene rgized at all times
3
applicable.
1Conecte el conector macho suministrado a la
unidad.
2Controle cuidadosame nte el cableado del vehículo
y conecte los cables en el conector macho
suministrado.
1 Ban da verde / n egra Parlante izqui erdo (p oster ior)
2 Termin al blanco /
negro
Parlante izquierdo (frontal)
3 Termin al gris / ne gro Parlan te derec ho (front al)
4 Termin al violet a /
negro
Parlante derecho (pos terior)
e Rojo Llave de ence ndido +12 V de
CC en ON / ACC
f Azu l Cable de contr ol del relé de la
antena el éctr ica / del mo tor
g Azul / bl anco Cable de co ntrol de l relé de l
h Negro Tierra
i A marill o A la bater ía del aut o de +12
V que recib e alimentación
consta nte
3
Connect wires: ISO male connectors
Conexión de los cables: conectores ISO macho
ÁQuick start guide
ÁGuía de inicio rápida
Turn on
To turn the unit on
press .
press and hold until the uni t is turned off.
Select country/region
1Press to turn the unit on.
»[SELECT OPERATING REGION] is displayed.
2Rotate to select an option:
[USA] (United States)
[LATIN] (Latin America)
[EUROPE] (Western Europe)
[RUS] (Russia)
[M-EAST] (Middle East)
[ASIA] (Asia Pacic)
[JAP] (Japan)
[AUST ] (Australia)
3Press
Set clock
1Press MENU
2Rotate to set hour.
3Press
4Rotate to set minute.
5Press
Listen to radio
1Press SOURCE repeatedly to select radio mode.
2Press / repeate dly to selec t band: [FM1][FM2][FM3][AM1][AM2] .
3Press and hold or
4Press or to tune to a radio sta tion manu ally.
»The radio station is broadcast.
To search for a radio station automatically press or .
Store stations automatically
1 DBB until [STORE - - -] is displayed.
2Press
»The six strongest stations of the selected band are saved in the preset channel automatically.
Store stations manually
1Tune to a station t hat you want to store.
2Press a num eric bu tton for t hree seco nds.
»The station is saved in the selected channel.
Pairing bluetooth devices
1Turn on bluetooth function on your device.
2Search for ot her bluetooth devices that can pa ir with you r device.
3Select “ Philips” in the pairing list .
4Enter default password “0000”.
»[PAIR OK] is displayed on the panel if pair ing is successful.
»The paired device connect to the car audio system automatically.
Make a call
To make call through the mobile phone.
1Use the Mobi le Phone to dial and make an ou tgoing call.
2 [CA LLI NG] is displayed.
To redial number.
1Press .
»[REDIAL] is displayed.
2Press / again.
»[CALLING] is displayed and the unit starts dialing the number dialed last time.
Call transfer
Press and hold until [TRANSFER] is displayed.
»Voice transfers from loudspeaker to mobile phone.
Encendido
Para encender la unidad
pulse .
man tenga puls ado hasta que la unidad se apague.
Selecciona el país o región
1Pulse para encender la unidad .
»Aparecerá [SELECT OPERATING REGION].
2Pulse para seleccionar una o pción:
[USA] (Estados Unidos)
[LATIN] (América La tina)
[EUROPE] (Europa occidental)
[RUS] (Rusia)
[M-EAST] (Medio Oriente)
[ASIA] (Pacíco asiático)
[JAP] (Japón)
[AUST ] (Australia)
3Pulse
Ajuste del reloj
1Pulse MENU varias veces hast a que la hor a actual aparezca en la panta lla.
2Gire
3Pulse
4Gire
5Pulse
Cómo escuchar la radio
1Pulse SOURCE varias veces para seleccionar e l modo de ra dio.
2Pulse / varias veces para se leccionar u na banda: [FM1][FM2][FM3][AM1] o [A M2].
3Mantenga pulsado o h asta q ue apare zca el dígito de frecue ncia.
4Pulse o para sintonizar una emisora de radio manualmente.
»Se emitirá la estación de radio.
Para buscar una emisora de radio automáticamente pulse o .
Guarde las emisoras automáticamente
1 DBB hasta que [STOR E - - -] aparezca en la pantalla.
2Pulse
»Se guardarán automáticamente las seis emisoras más potentes de la banda seleccionada en el
canal presintonizado.
Guarde las emisoras manualmente
1Sintonice la e misora q ue desea al macenar.
2Mantenga p ulsado un botón numér ico dur ante 3 segundos.
»La emisora se guardará en el canal seleccionado.
Emparejamiento de dispositivos Bluetooth
1Active la función Bluetooth en su dispositivo.
2Busque otros dispositivos Bluetooth que puedan conectarse con su unidad.
3Seleccione “Philips” en la lista de sincronización.
4Introduzca la contraseña predeterminada: “0000”.
»Aparecerá [PAIR OK] en la pantalla si la sincronización se realiza correctamente.
»El dispositivo emparejado se conecta con el sistema de audio del automóvil automáticamente.
Realización de llamadas
Realización de llamadas desde el teléfono móvil:
1Use el teléfono móvil para marcar un número y r ealizar u na llamada saliente.
2 [CAL LIN G] en la pantalla.
Rellamadas:
1Pulse .
»Aparecerá [REDIAL].
2Pulse / nuevamente.
»Aparecerá [CALLING] en la pantalla y la unidad comenzará a marcar el último número al que se
llamó.
Transferencia de llamadas
Mantenga pulsado varias veces hasta que aparezca [TRANSFER] en la pantalla.
»La voz se transferirá desde los parlantes al teléfono móvil.
f
g
h
REAR FRONT
R
L
REAR AUX LR
i
Receive call
1
if the incoming c all has no ph one numbe r [PHONE IN] is displayed.
2Press to answer /accept the call.
Terminate call
Press to terminate call.
Play from USB
1Slide the USB socket cover ma rked to the lef t.
2Inser t the USB d evice into th e USB socket .
»The unit starts playing from the USB
device automatically.
Insert a card
1Press to relea se the pane l.
2Inser t the car d into the ca rd slot.
3Close the fr ont panel .
»The unit starts playing from the
card automatically.
Play from iPod/iPhone
1Slide the USB socket cover ma rked to the lef t.
2Inser t USB adaptor on one end of iPod/iPho ne
cable to the U SB socket on t he main uni t.
3Inser t the othe r end of the iPod /iPhone c able
to the iPod/iPhone socket.
»The unit starts playing from the USB
device automatically.
Recepción de llamadas
1
Si la llamada entrante no tiene número telefónico aparecerá [PHONE IN] en la pantalla .
2Pulse para contestar / a ceptar la ll amada.
Finalización de llamadas
Pulse para nalizar la llamada.
Reproducción desde un dispositivo USB
1Deslice la cubi ert a de la toma US B
hacia la izquierda.
2Introdu zca el dispositivo US B en el puer to USB.
»La unidad comenzará a reproducir el
contenido del dispositivo USB automáticamente.
Introducción de una tarjeta
1Pulse para libe rar el pa nel.
2Introdu zca la tar jeta en la ranur a para tarjet as.
3Cierre el panel fr ontal.
»La unidad comenzará a reproducir el
contenido de la tarjeta automáticamente.
Conexión del iPod / iPhone
1Deslice la cubi ert a de la toma US B
hacia la izquierda.
2Inser te el adapt ador USB d e uno de los ex tremos
del cable d el iPod / iPhon e en el puer to USB de
la unidad principal.
3Conecte el otro extremo del cable en la toma
del iPod / iPhone.
»La unidad comenzará a reproducir el
contenido del dispositivo USB automáticamente.


