manuals.online logo
Brands
  1. Home
  2. •
  3. Brands
  4. •
  5. Philips
  6. •
  7. Car Stereo System
  8. •
  9. Philips CE151/00 User manual

Philips CE151/00 User manual

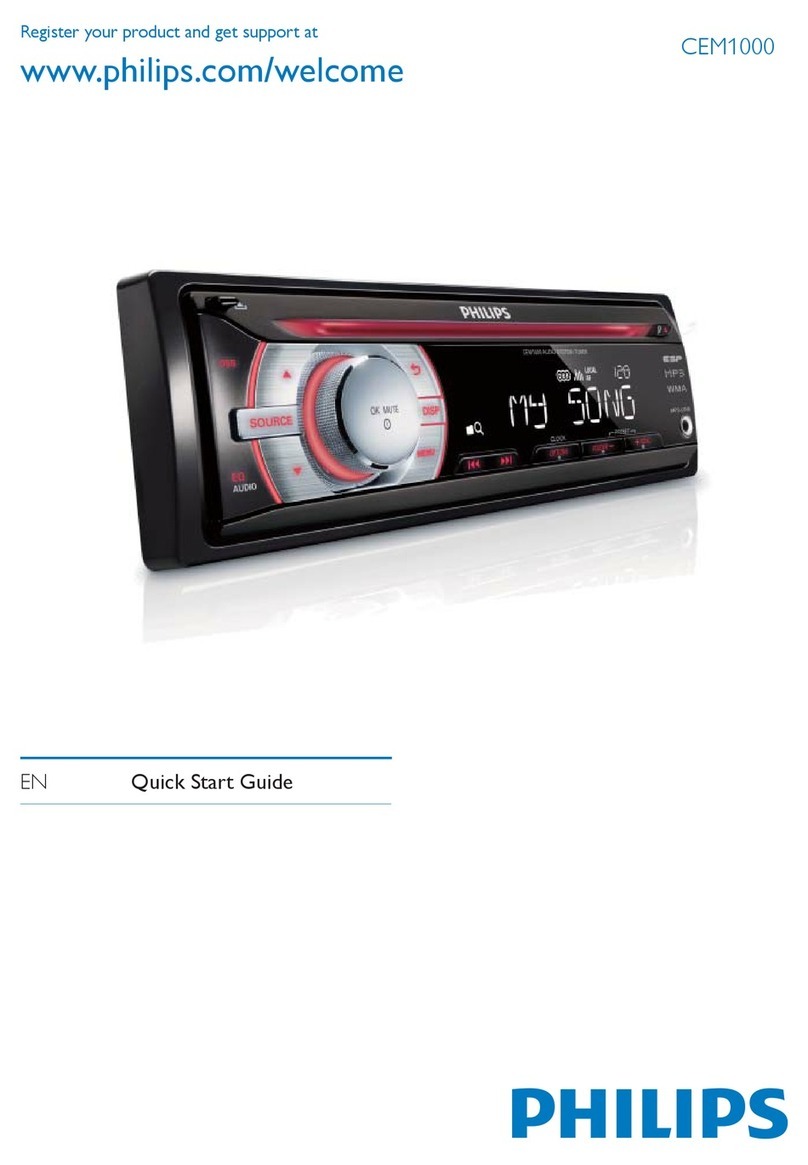
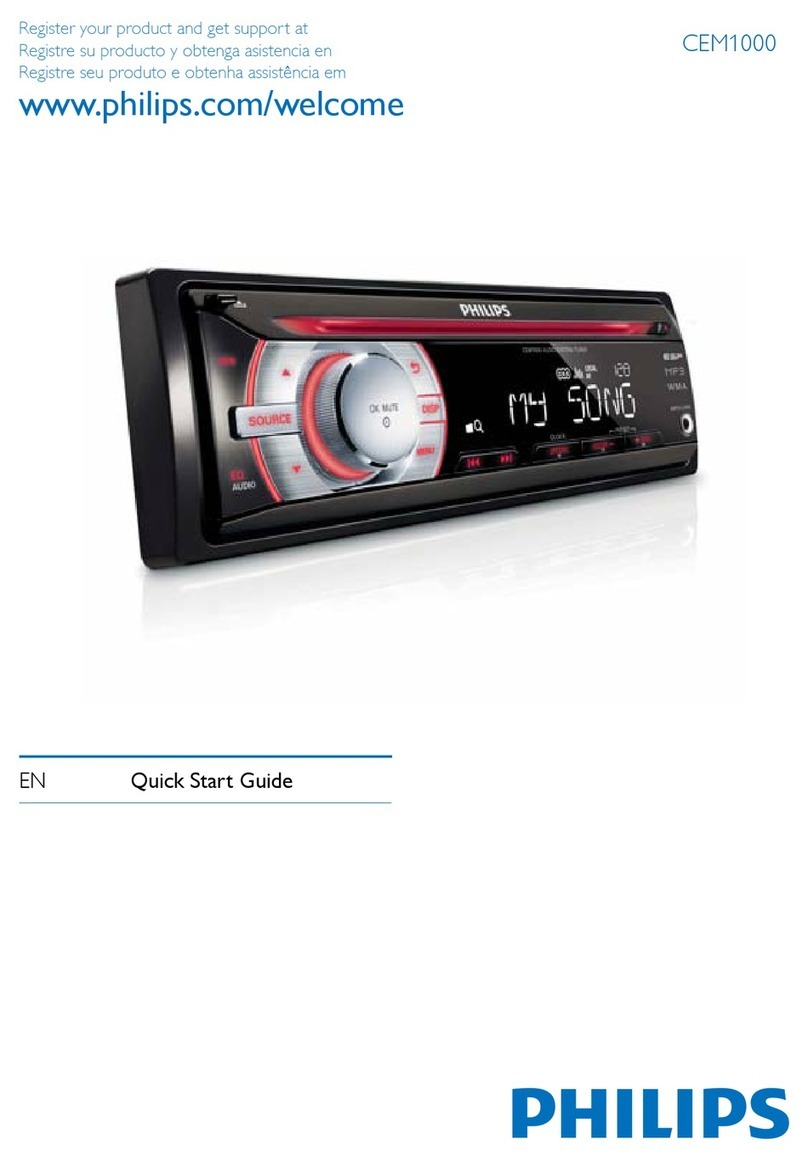
Register your product and get support at
CE151
© 2011 Koninklijke Philips Electronics N.V.
All rights reserved.
CE151_QSG_00_V2.0
EN Quick start guide
ES-AR Guía de inicio rápida
PT-BR Guia de início rápido
=+7: ҄஠ઢܞڲ
=+&1 ිగႬᆻଶ
a
b
c
d
e
f
183mm
53mm
What’s in the box
Contenido de la caja
Main unit
(with a sleeve)
Unidad principal
(con manga de montaje)
Rubber cushion
Conector
ISO macho
Front panelRemote
control
Control remoto
Screw
x 1 pc
1 tornilloAlmohadilla de
goma
Disassembly tools
x 2 pcs
2 herramientas
de desmontaje
Trim plate
Panel frontal
Carrying case
Marco del tablero
User manual
Manual del
usuario
ISO male connector
Funda de
transporte
Quick start
guide
Guía de inicio
rápida
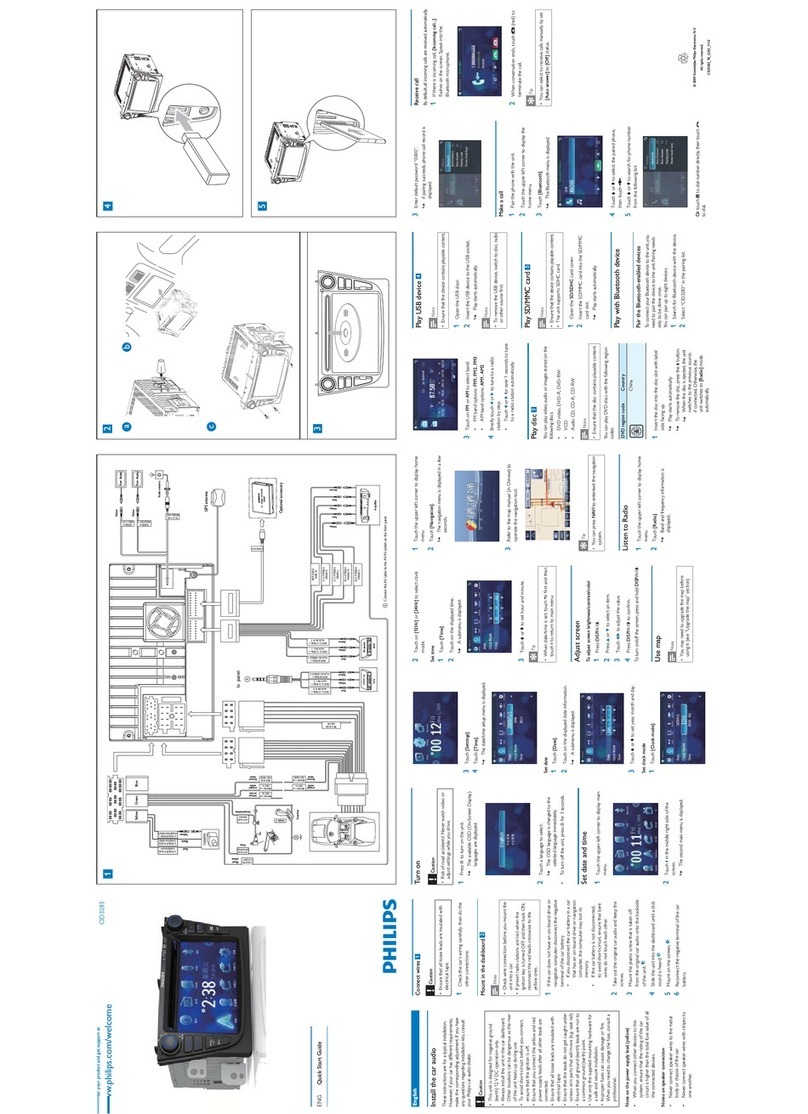
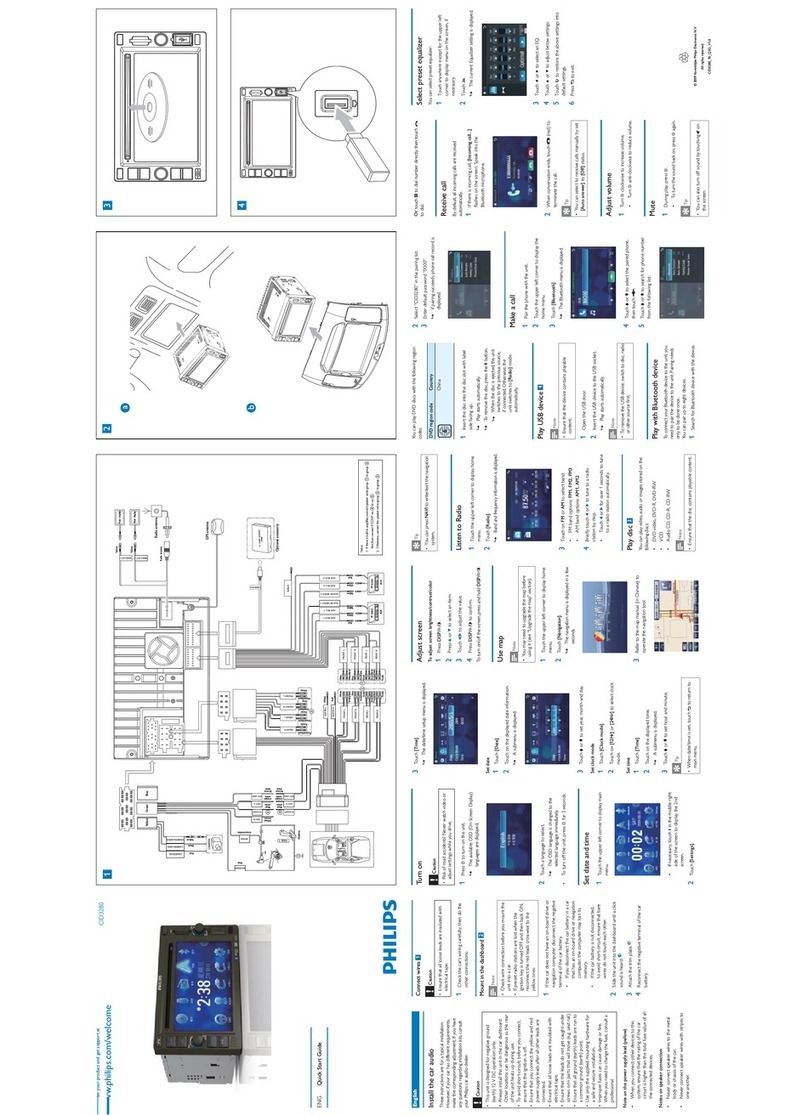
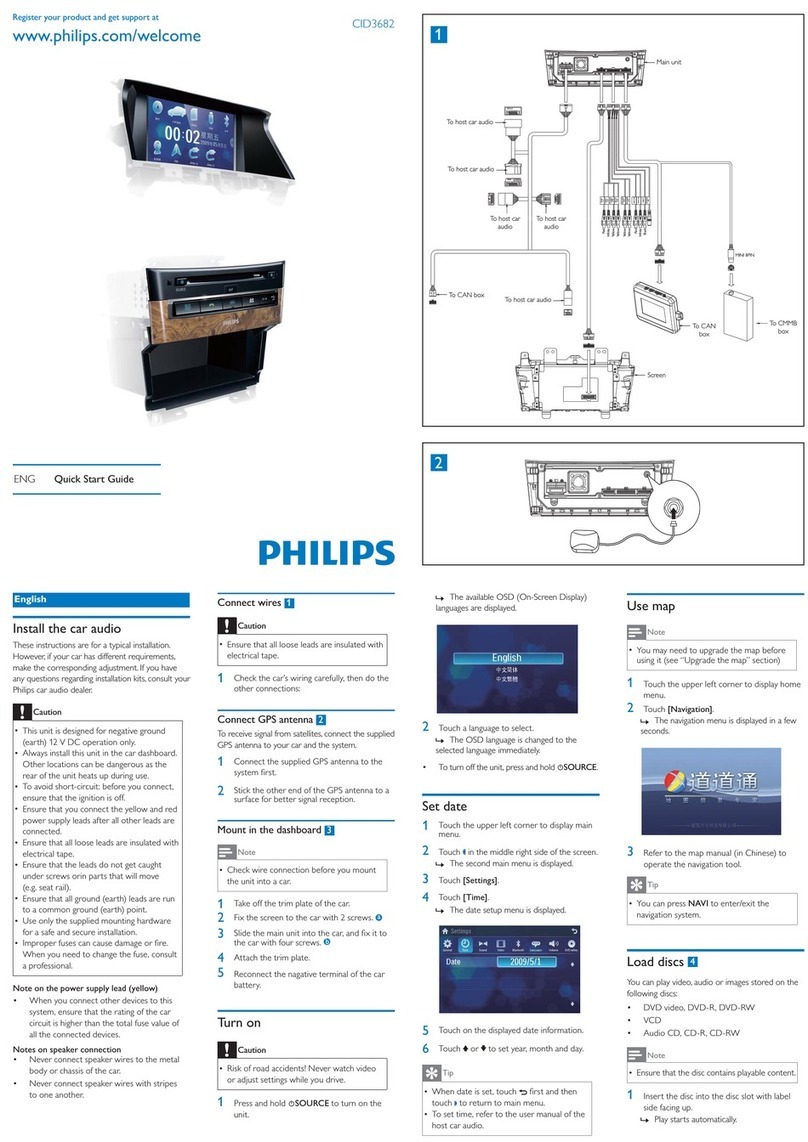
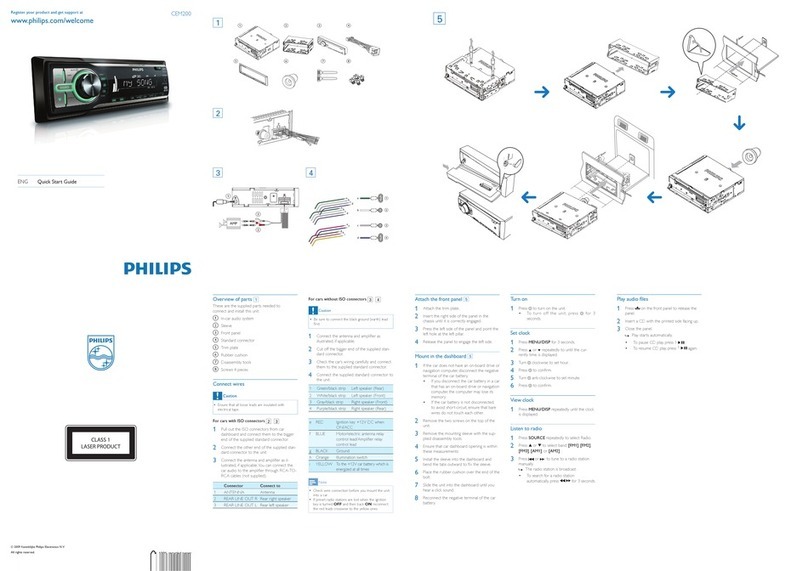
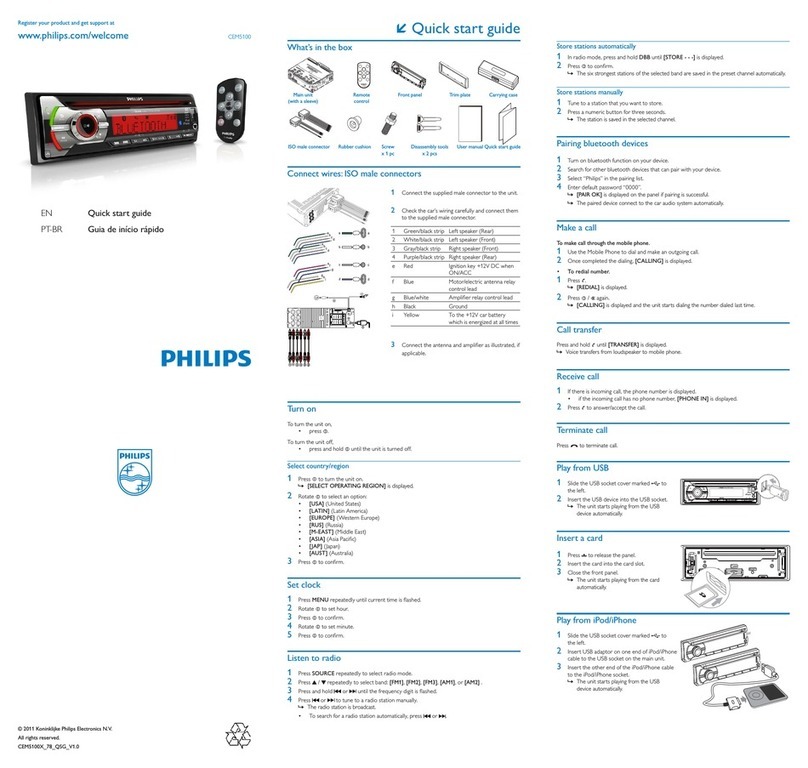
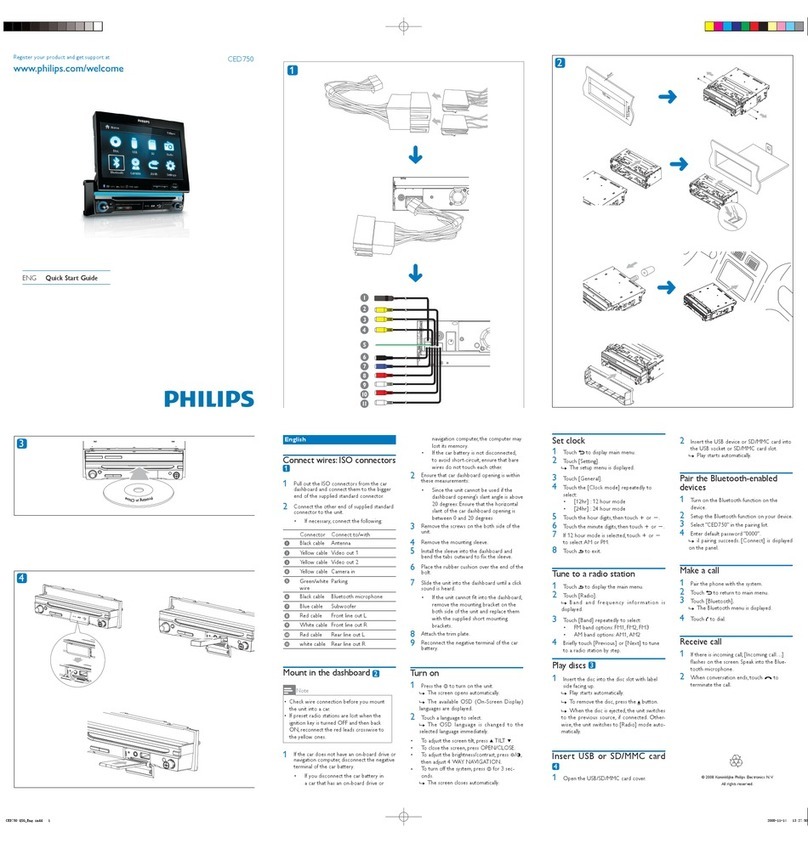
1Connect the supplied male connector to the unit.
2Check the car’s wiring carefully and connect them
to the supplied male connector.
1 Green /black st rip Left speaker (Rear)
2 White/ black str ip Left spea ker (Front)
3 Gray/bla ck stri p Right speake r (Front)
4 Purple /black st rip Right speake r (Rear)
e Red Ignition key +12V DC when
ON/ACC
f Blue Motor/electric antenna relay
control lead
g Blue/w hite   
hBlack Ground
i Yellow To the +12V car batte ry
which is ene rgized at a ll times
3  
applicable.
1Conecte el conector macho suministrado a la unidad.
2Controle cuidadosame nte el cableado del vehículo
y conecte los cables en el conector macho
suministrado.
1 Banda verde /
negra
Parlante izquierdo (posterior)
2 Terminal blanco /
negro
Parlante izquierdo (frontal)
3 Terminal gris /
negro
Parlante derecho (fr ontal)
4 Terminal violeta /
negro
Parlante derecho (posterior)
e Rojo Llave de encend ido +12 V de
CC en ON / ACC
f Azul Ca ble de control del relé de
la antena eléctrica / del motor
g A zul / blanco Cable de control del r elé del

h Negro Tierra
i Ama rillo A la batería del auto de +12
V que recibe alimentación
consta nte
3  
   
Connect wires: ISO male connectors
Conexión de los cables: conectores ISO macho
ÁQuick start guide
ÁGuía de inicio rápida
Turn on
To turn the unit on
 press .
 
 press and hold until the unit is tur ned off.
Select country/region
1Press to turn the unit on.
»[SELECT OPERATING REGION] is displayed.
2Rotate to select an option:
 [USA] (United States)
 [EUR] (Western Europe)
 [RUS] (Russia)
 [AUS] (Au str alia)
 [EAS] (Middle East)
 [ASI] (A sia Pa cic)
 [JAP] (Japan)
 [LAT] (Latin America)
3Press 
Set clock
1Press MENU   
2Rotate to set hour.
3Press 
4Rotate to set minute.
5Press 
Listen to radio
1Press SOURCE repeatedly to select radio mode.
2Press ZONE / repeatedly to se lect ban d: [FM1][FM2][FM3][AM1][AM 2] .
3Press and hold or to tune to a radio station manually.
»The radio station is broadcast.
» or .
Store stations automatically
1 DBB until [S TORE - - -] is displayed.
2Press 
»The six strongest stations of the selected band are saved in the preset channel automatically.
Store stations manually
1Tune to a station t hat you want to s tore.
2Press a num eric bu tton for three secon ds.
»The station is saved in the selected channel.
Pairing bluetooth devices
1Turn on bluetooth function on your device.
2Search for ot her bluetooth devices that can pai r with your device.
3Select “ Philips” in t he pairing list.
4Enter default password “0000”.
»[PAIR OK] is displayed on the panel if pairing is successful.
»The paired device connect to the car audio system automatically.
Make a call
To make call through the mobile phone.
1Use the Mobi le Phone to dia l and make an ou tgoing call.
2 [CA LL] is displayed.
To redial number.
1Press .
»[REDIAL] is displayed.
2Press / again.
»[CALL] is displayed and the unit starts dialing the number dialed last time.
Call transfer
Press and hold until [TRANSFER] is displayed.
»Voice transfers from loudspeaker to mobile phone.
Encendido
Para encender la unidad
 pulse .
  
 mantenga pulsado hasta que la u nidad se apague.
Selecciona el país o región
1Pulse para ence nder la uni dad.
»Aparecerá [SELECT OPERATING REGION].
2Gire para sele ccionar una op ción:
 [USA] (Estados Unidos)
 [EUR] (Europa occidental)
 [RUS] (Rusia)
 [AUS] (Au str alia)
 [EAS] (Medio Oriente)
 [ASI] ( Pacíco a siático)
 [JAP] (Japón)
 [LAT] (Amér ica L atina)
3Pulse  
Ajuste del reloj
1Pulse MENU varias veces hast a que la hor a actual a parezca en la pantalla.
2Gire 
3Pulse  
4Gire 
5Pulse  
Cómo escuchar la radio
1Pulse SOURCE varias veces para se leccionar el modo de rad io.
2Pulse ZONE / varias veces pa ra seleccionar una ban da: [FM1][FM2][FM3][AM1]
o [AM2] .
3Mantenga pulsado o para sintonizar una emisor a de radio manualmente.
»Se emitirá la estación de radio.
  o ..
Guarde las emisoras automáticamente
1   DBB hast a que [STORE - - -] aparezca en la pantalla.
2Pulse  
»Se guardarán automáticamente las seis emisoras más potentes de la banda seleccionada en el
canal presintonizado.
Guarde las emisoras manualmente
1Sintonice la e misora q ue desea almacenar.
2Mantenga pulsado un botón numér ico dura nte 3 segund os.
»La emisora se guardará en el canal seleccionado.
Emparejamiento de dispositivos Bluetooth
1Active la función Bluetooth en su dispositivo.
2Busque otros dispositivos Bluetooth que puedan conectarse con su unidad.
3Seleccione “Philips” en la lista de sincronización.
4Introduzca la contraseña predeterminada: “0000”.
»Aparecerá [PAIR OK] en la pantalla si la sincronización se realiza correctamente.
»El dispositivo emparejado se conecta con el sistema de audio del automóvil automáticamente.
Realización de llamadas
Realización de llamadas desde el teléfono móvil:
1Use el teléfono móvil para marcar un número y re alizar una llamada sal iente.
2  [CAL L] en la pantalla.
Rellamadas:
1Pulse .
»Aparecerá [REDIAL].
2Pulse / nuevamente.
»Aparecerá [CALL] en la pantalla y la unidad comenzará a marcar el último número marcado.
Transferencia de llamadas
Mantenga pulsado varias veces hasta que aparezca [TRANSFER] en la pantalla.
»La voz se transferirá desde los parlantes al teléfono móvil.
Receive call
1  
 if the incoming call has no phone number [PHONE IN] is displayed.
2Press to answer /accept the call.
Terminate call
Press and hold to terminate call.
Play from USB
1Slide the USB socket cover marked to the lef t.
2Inser t the USB device into the U SB socket .
»The unit starts playing from the USB
device automatically.
Insert a card
1Press to relea se the panel.
2Inser t the car d into the card slot.
3Close the fr ont panel.
»The unit starts playing from the
card automatically.
Reset
You can reset the unit to its default setting.
1Detach th e front pan el.
2Press the r eset but ton by using a ball-poi nt pen or
a similar too l.
»Preset adjustments such as preset channels and
sound adjustments are erased.
Recepción de llamadas
1    
 Si la llamada entrante no tiene número telefónico aparecerá [PHONE IN] en la pantalla.
2Pulse para contestar / aceptar la lla mada.
Finalización de llamadas
Mantenga pulsado para nalizar una llamada.
Reproducción desde un dispositivo USB
1Deslice la cubi ert a de la toma USB
hacia la izquierda.
2Introdu zca el dispos itivo USB en el puer to USB.
»La unidad comenzará a reproducir el
contenido del dispositivo USB automáticamente.
Introducción de una tarjeta
1Pulse para liberar el pa nel.
2Introdu zca la tar jeta en la r anura para tarjeta s.
3Cierre el panel fr ontal.
»La unidad comenzará a reproducir el
contenido de la tarjeta automáticamente.
Restablecimiento
Puede restablecer los valores predeterminados de la
unidad.
1Extraiga el panel frontal.
2Pulse el botó n de rest ablecim iento con una
lapicer a o una herr amien ta simila r.
»

borrarán.
RESET
RESET
f
g
L
R
Rear Front
L
R
Rear Front
f
g
L
R
Rear Front
L
R
Rear Front
Conteúdo da caixa
˳໦ʑࢀذ
Unidade principal

˚໦ສфᙶࡨ
Controle
remoto
Ⴍઁኂ
Painel frontal
کࠍ׶
Moldura
໦ཚ׶
Estojo para
transporte
ᙙଝ
Conector macho ISO 1 parafusoSuporte de
borracha
2 ferramentas de
desmontagem
Manual do
usuário
Guia de início
rápido
ISO ʔઅ፾ ᑓ೻ 1 ࠯ኼᇒྌ זՃɮԮ 2  Ԛّʹ˫ ҄஠Ƀپܞڲ
1Insira o conector macho fornecido no aparelho.
2  
conecte-a ao conector macho fornecido.
1 Faixa verde/preta Alto-falante esquerdo
(tra seiro)
2 Faixa branca/
preta
Alto-falante esquerdo
(fro nta l)
3 Faixa cinza/preta Alto-falante direito (frontal)
4 Faixa roxa/preta Alto-falante direito (traseiro)
e Vrm  
 
f Azul Fio de controle do relé da
antena elétrica/automática
g A zul/br anco Fio de con trole do r elé do

h Preto Aterramento
i Ama relo Para bate ria de carro de +12
V ativada ininterrupt amente
3 

1፭ڃؿʔઅ፾டઅϭ໦ສy
2ˠୀᏎ݅Ӂ ӹЗᇃwԎᇃҥடઅϭ፭ڃؿ
ʔઅ፾y
 ၆ϳඣϳᇃҢ ౔ᐰኂ܃ʿ
 ϳඣϳᇃҢ ౔ᐰኂکʿ
 ϘϳඣϳᇃҢ ౔ᐰኂکʿ
 ೹ϳඣϳᇃҢ ౔ᐰኂ܃ʿ
H ޴ϳ ᒨˌ඀ᗐ9'&w๫୮כ
21$&&رྸࣂ
Iᔂϳ ৛༠ཋ৽ʨᇃᘗཋኂઁԹ
ʵᇃ
Jᔂϳϳ ᒷɣዀᘗཋኂઁԹʵᇃ
Kඣϳ અΔ
L ඡϳ டઅϭ9Ӂӹཋϑw፭
ࣂ൬Ϸ˨ཋ
3ܘ๑႓עடઅʨᇃၤᒷɣዀΣ׮ሬy

டઅཋᇃ}ISO ʔઅ፾
ÁGuia de início rápido
Á҄஠ઢܞڲ
Ћሑދୁ༂௚
ᇺሑᇆIJտࠓฮij ီచ ఱ૯ϴ לᆠ௏ ѐཾދ
1 ࣞ฽ܚ؇ݦ৉౸ሢ҉ቯሤd
2 ኏྇ࣁԒ౼Լ؇׿ྮĩ೸ࠌࣞ౥ሢ฽ܚ؇ݦ
৉౸ d
૕െ߳െྮ ኲၺඔ౸ĥࠌሤĦ
фെ߳െྮ ኲၺඔ౸ĥಏሤĦ
ࡉെ߳െྮ ᄙၺඔ౸ĥಏሤĦ
኎െ߳െྮ ᄙၺඔ౸ĥࠌሤĦ
Hࠅെ ״֋ᄡ21$&&ඪĩئࡧᅤ
՞༛9ሒઢ
Iെ ૶הتِມྮሱࢡেሧྮ
Jെфെ ৶ო౸ሱࢡেሧྮ
K߳െ ؛
L࠽െ ඵሶসݤت؇9౼
Լت՟
3ത໏๐භĩມྮߦ৶ო౸ĥത޶සᄊĦd
৹ࢨཐńISO ܈৹ࢨచ
ÁිగႬᆻଶ
,62܈৹ࢨచ ઈקIJ1 ij һ྅܁IJ2 ࡵij Ⴌ߀൱Ҭ ිೊ૎ᆻଶཡ࢏ೌ׋
Ligar
Para ligar o aparelho
 pressione .
 
 Mantenha pression ado até desligar o apar elho.

1Pressione para lig ar o aparelho.
»[SELECT OPERATING REGION] é exibido.
2Gire   
 [USA] (Estados Unidos)
 [EUR] (Europa Ocidental)
 [RUS] (Rússia)
 [AUS] (Austr ália)
 [EAS] (Oriente Médio)
 [ASI] ( Pacíco A siático)
 [JAP] (Japo)
 [LAT] (América Latina)
3Pressione 
Ajustar o relógio
1Pressione várias vezes MENU até que a hor a atual seja exibida .
2Gire para ajus tar a hor a.
3Pressione 
4Gire para ajus tar os min utos.
5Pressione 
Ouvir rádio
1Pressione SOURCE vária s vezes para selecionar o modo de rád io.
2Pressione várias vezes ZONE / pa ra selecionar a freqüência: [FM1][FM2][FM3][AM1] ou
[AM2].
3Mantenha p ression ado ou    
»
» ou .
඀ઢ
ߗ߬඀ઢ໦ສw
 ܘy
ߗ߬ᗐஶ໦ ສw
 ܘϾ قԷ໦ສᗐஶy
ፕእࡼ/Δ
ܘɎ඀ઢ໦ສy
»ೋࠍᛷ>6(/(&723(5$7,1*5(*,21@y
ફᔝፕእፕඖ}
 >86$@޻
 >(85@Ϲᅩ
 >586@ڜᖓ౜
 >$86@ዌݘ
 >($6@ɻ׭Δ
 >$6,@ԓʪΔ
 >-$3@ˀ
 >/$7@ּȻ޻ݘ
ᇼܘᆢႏy
உցࣂᘸ
1ࠇᇲܘ MENU قԷکؿࣂං৐ᕷy
2ફᔝ ˞உցɩࣂy
3ᇼܘ ᆢႏy
4ફᔝ ˞உցʗᘸy
5ᇼܘ ᆢႏy
νᚹᄤᅌ
ࠇᇲܘ6285&(ፕእνࠑዀᅡβy
ࠇᇲܘ=21(  உցؐݒ}>)0@x>)0@x>)0@x>$0@ֶ>$0@y
ܘϾ ֶ ʹ৽ሁϭᄤᅌཋy
»ᄤᅌཋЩܞᄤᅌy
»ߗ߬Ϭ৽ชఖᄤᅌཋwᇼܘ ֶ y
!"#
1    DBB até q ue [STORE - - -] (Armazenamento) seja
exibido.
2Pressione 
»
pré-sintonizados.
!"#
1   
2    
»
Emparelhar dispositivos Bluetooth
1  
2Pesquise ou tros dispositivos B luetooth que possam se r empare lhados com o seu disposit ivo.
3Selecione “Philips” na lista de empar elhamento.
4  
»[PAIR OK] (Emparelhamento OK) será exibido no painel se o emparelhamento for bem-
sucedido.
»O dispositivo emparelhado é conectado automaticamente ao sistema de áudio para carros.
Fazer uma chamada
Para fazer a chamada pelo telefone celular.
1Use o telefone ce lular par a discar e fazer uma cha mada.
2  [CA LL] (Chamar) será exi bido.
Para rediscar o número.
1Pressione .
»[REDIAL] é exibido.
2Pressione / novamente.
»[CALL]
Transferência de chamada
Você pode transferir a voz do alto-falante para o telefone celular durante uma chamada.
Pressione e segure até que [TRANSFER] (Transferir) seja exibido.
»Transferências de voz do alto-falante para o celular.
Ϭ৽᎝Φཋ
1ΕνࠑዀᅡβɻwܘϾ DBB قԷᛷ [STORE - - -]y
2ܘᆢႏy
»ፕցؐݒɻ঩໔௖ؿʒ࠯ཋwผϬ৽᎝Φιݯདஉ፼༞y
ʹ৽᎝Φཋ
1ሁϭ෱߬᎝Φؿཋy
2ܘϾᅕΥܘ൶ɍެᘸy
»ϊཋ᎝Φכܞցؿ፼༞y
ᔂ٣໦ສ৉ྦྷ
1඀ઢ໦ສɐؿᔂ٣˲y
2ชఖԯˢ˿˞།ؿᔂ٣໦ສ৉ྦྷؿ໦ສy
3Ε৉ྦྷ૜௰ɻፕእ§Philips¨y
4ፏɃདஉᆦ§0000¨y
»Σ׮৉ྦྷι˲wࠍ׶ɐผᛷ [PAIR OK]y
»৉ྦྷؿ໦ສผϬ৽டᇃϭӁӹࠑᚊӡ଻y
ᅆཋ໷
߬஦༦ʹዀཋ໷y
Ԛʹዀᅆ໔Ԏᅆˮཋ໷y
ᅆ໔ѧι܃wᛷ>&$//@y
ߗ߬ࠇณᅆ໔y
ܘ  y
»ೋࠍᛷ>5(',$/@y
ʹܘȹω y
»ᛷ>&$//@w໦ສ඀նᅆɐȹ஝ᅆˮؿ໔ᆦy
ᔝઅ஝໷
˿˞Ε஝໷౨ංᐰࠑ౔ᐰኂᔝઅϭʹዀy
ܘϾ wقԷᛷ>75$16)(5@y
»ᐰࠑ౔ᐰኂᔝઅϭʹዀy
Atender a uma chamada
1     
 Se você estiver recebendo uma chamada sem número de telefone [PHONE IN] (Recebendo
chamada) será exibido.
2Pressione para ate nder/acei tar a chamad a.
Encerra uma chamada
Mantenha pressionado para encerrar a chamada.
Reproduzir a partir de um dispositivo USB
1Deslize a ta mpa da entr ada USB com o
símbolo para a esquerda.
2Insira o dispositi vo USB na entrada USB .
»O aparelho inicia automaticamente a


1Pressione para lib erar o painel.
2    
3Feche o paine l fronta l.
»O aparelho inicia automaticamente a

Reinicializar
Você pode restaurar os ajustes padro de fábrica do
aparelho.
1Destaque o painel f rontal .
2    
caneta de ponta redonda ou uma ferramenta
semelhante.
»

અᚹཋ໷
Σ׮τԞཋwผᛷཋ໷໔ᆦy
 Σ׮ԞཋӀτཋ໷໔ᆦwผᛷ>3+21(,1@y
ܘ  અᚹཋ໷y
೶Ң஝໷
ܘϾ  ˿೶Ң஝໷y
ᅌי USB ໦ສ
1ᅟ ؿUSB ైᅠၰΉไ৽y
2USB ໦ສైɃ USB ైᅠy
»໦ສϬ৽ USB ໦ສᅌיy
ైɃতኙ˺
1ܘ˞ᕌ඀ࠍ׶y
2তኙ˺ైɃতኙ˺ైᅠy
3ᗐɐکࠍ׶y
»໦ສϬ৽඀նতኙ˺ᅌיy
ࠇஉ
˿˞໦ສࠇஉݯԯདஉஉցy
ז඀کࠍ׶y
Ԛ෋೫ֶᗘЍɮԮܘࠇஉܘ൶y
»ϊࣂผ૜৖དஉ፼༞xᐰࠑሁኬ೩དஉ
ሁኬy
ስײխԩ׌෿
1ᅿ෎ოࡱ୨බྑĩСበ DBB ሒሢྣභ [STORE - - -]d
2С೴ഌd
»๐ာశٯሱ࿲ߞክಞ؇ 6 ݓت๝ࣞናِѮ׋ᅿᅉඃశ؃ሱd
൱ײխԩ׌෿
1غ࿠ሢྺ႓׋և؇ت๝d
2Сበ෶ንСை 3 ୒ሴd
»ت๝ࣞ׋ևᅿ๐ာ؇శ؃ሱd
னؗথ࿭ഥХ
1חঙඃ҃؇။ݡ஡d
2ศ๎஡ݶᄲி؇ඃ҃ఇٵ؇౥๒။ඃ҃d
3ာᆖఇٵҸሱ؇qPhilipsrd
4ෝനୱഌୃ૴q0000rd
»ത޶ఇٵՐݡĩࣞྣභ [PAIR OK]d
»Ⴚఇٵ؇ඃ҃ࡘናِሢԼᅽოྻ྄ໆd
չ׌߉
ဵ๝ݚ൱ࠓѱչ׌߉
඲ᄊාࡱӏߞࡩӏսتࠧd
໽Րӏߞࠌĩࣞྣභ>&$//@d
ဵᇛྑѱހ
С d
»ࣞྣභ>5(',$/@d
ᅾֳС d
»ࣞྣභ>&$//@ĩְඪቯሤঙඵӏח൪ֳӏս؇ߞ૴d
ޯࢥላၑ
ᅿົࠧඪĩிসႽࣞᄶოָၺඔ౸֐ෝሢාࡱd
Сበ ሒሢྣභ>75$16)(5@d
»ᄶოָࣞၺඔ౸֐ෝሢාࡱd
ࢨ๔׌߉
ത޶ᄗتĩࣞྣභتࠧߞ૴d
 ത޶تଢᄗتࠧߞ૴ĩࣞྣභ>3+21(,1@d
С າتd
ᇘᆼ๝߉
Сበ  ሶሚົࠧd
՚USB Ѱ٦
1ࣞם ҵ࢜؇ USB Ԏ৆ܤࠣ࿁ኲԉd
2ࣞUSB ඃ҃Ԏന USB ৉d
»҉ቯሤࣞናِঙඵӎۄ USB ඃ҃ሱ؇டചd
Ұೊխԩ
1Сחঙ୍ђd
2ࣞ׋ևগԎനগԎԄd
3ޓҠಏ୍ђd
»҉ቯሤࣞናِঙඵӎۄ׋ևগሱ؇டചd
ᇛᇆ
ிসႽࣞ҉ቯሤሹሤ༛ୱഌඃሤd
 ԙ࿣ಏ୍ђd
 ඲ᄊᅗቊҕࡩฝݟСሹሤСைd
»ᅉඃశ؃ߦඔოغ؋ᅉඃغᇾࣞ҆ೄ
քd
ࠓ
႓חঙቯሤĩ
 Сd
႓ޓҠቯሤĩ
 Сበ ሒሢቯሤޓҠd
࿎ᄸݗࡉ/ֽ౹
Сחঙቯሤd
»ࣞྣභ>6(/(&723(5$7,1*5(*,21@d
ဪቩာᆖႤݓာ྽ķ
 >86$@ĥଧ޵Ħ
 >(85@ĥཨ௚Ħ
 >586@IJڎ૧ฐĦ
 >$86@ĥбטၒĦ
 >($6@ĥሱٌĦ
 >$6,@ĥၒ๠Ħ
 >-$3@ĥഒ҉Ħ
 >/$7@ĥ৺قଧሿĦ
С೴ഌd
ഥᇆൌᇖ
1ڳܑС MENU ሒሢ״ಏඪࢹ൜ฏd
2ဪቩ ඃሤ࿎ඪd
3С೴ഌd
4ဪቩ ඃሤەሴd
5С೴ഌd
൰๔݀Ѱ
ڳܑС6285&(IJྔހ჻ijာᆖ෎ოࡱ୨බd
ڳܑС=21(  ာᆖశٯķ>)0@c>)0@c>)0@c>$0@ࡩ>$0@d
Сበ ࡩ ාِغ࿠ሢت๝d
»ت๝ঙඵޞӎd
»႓ናِศ๎ت๝ĩೊС ࡩ d
RESET
RESET RESET
f
g
L
R
Rear Front
L
R
Rear Front
f
g
L
R
Rear Front
L
R
Rear Front
f
g
L
R
Rear Front
L
R
Rear Front

Other manuals for CE151/00

1

This manual suits for next models

1

Other Philips Car Stereo System manuals

Philips CEM2000/00 User manual

Philips

Philips CEM2000/00 User manual

Philips CID3681/93 User manual

Philips

Philips CID3681/93 User manual

Philips CMB1100/55 User manual

Philips

Philips CMB1100/55 User manual

Philips CED1900BT User manual

Philips

Philips CED1900BT User manual

Philips CEM2100/00 User manual

Philips

Philips CEM2100/00 User manual

Philips CEM151/00 User manual

Philips

Philips CEM151/00 User manual

Philips CID-3610 User manual

Philips

Philips CID-3610 User manual

Philips CED750/55 User manual

Philips

Philips CED750/55 User manual

Philips CEM5100X/78 User manual

Philips

Philips CEM5100X/78 User manual

Philips CEM220/55 User manual

Philips

Philips CEM220/55 User manual

Philips CEM200/55 User manual

Philips

Philips CEM200/55 User manual

Philips CID3610/00 User manual

Philips

Philips CID3610/00 User manual

Philips CID3686/93 User manual

Philips

Philips CID3686/93 User manual

Philips CE120/55 User manual

Philips

Philips CE120/55 User manual

Philips CID3280/93 User manual

Philips

Philips CID3280/93 User manual

Philips CID3683/93 User manual

Philips

Philips CID3683/93 User manual

Philips CID3290 User manual

Philips

Philips CID3290 User manual

Philips CMB2100/55 User manual

Philips

Philips CMB2100/55 User manual

Philips CAD310 User manual

Philips

Philips CAD310 User manual

Philips CEM200/51 User manual

Philips

Philips CEM200/51 User manual

Philips CID3280/93 User manual

Philips

Philips CID3280/93 User manual

Philips CED229 User manual

Philips

Philips CED229 User manual

Philips CED780/55 User manual

Philips

Philips CED780/55 User manual

Philips CarStudio CMD305A User manual

Philips

Philips CarStudio CMD305A User manual

Popular Car Stereo System manuals by other brands

Discount Car Stereo JAG-HF quick start
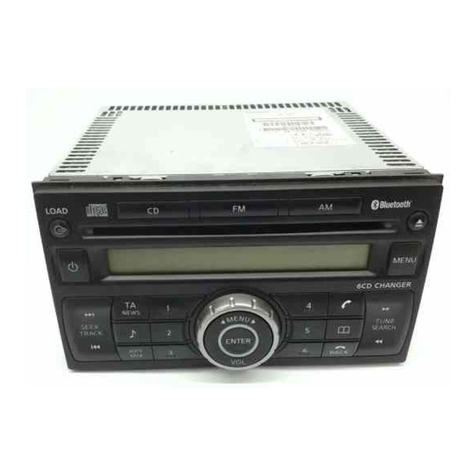
Discount Car Stereo

Discount Car Stereo JAG-HF quick start

Denver Electronics CAU-438MK2 instruction manual

Denver Electronics

Denver Electronics CAU-438MK2 instruction manual

Caliber RMD 234DAB-BT quick start guide

Caliber

Caliber RMD 234DAB-BT quick start guide

Sony DSX-S310BTX operating instructions

Sony

Sony DSX-S310BTX operating instructions

FlashLogic RDSUSBV1 Owner's manual & installation guide

FlashLogic

FlashLogic RDSUSBV1 Owner's manual & installation guide

Grundig Challenge 600 A CD SR Service manual

Grundig

Grundig Challenge 600 A CD SR Service manual

Sony XR-C6100 Service manual

Sony

Sony XR-C6100 Service manual

Juna JRDAB-02 Quick manual

Juna

Juna JRDAB-02 Quick manual

Hifonics Atlas AX4000D Ower's manual

Hifonics

Hifonics Atlas AX4000D Ower's manual

Becker DTM High Speed 7910 operating guide

Becker

Becker DTM High Speed 7910 operating guide

Pioneer MXT-X386BT owner's guide

Pioneer

Pioneer MXT-X386BT owner's guide

Yamaha YCR-5155 owner's manual

Yamaha

Yamaha YCR-5155 owner's manual

Alpine Status HDZ-653S owner's manual

Alpine

Alpine Status HDZ-653S owner's manual

Kicker ZXSUM8 owner's manual

Kicker

Kicker ZXSUM8 owner's manual

JL Audio Stealthbox 94429 installation guide

JL Audio

JL Audio Stealthbox 94429 installation guide

Kenwood KDC-BT730DAB instruction manual

Kenwood

Kenwood KDC-BT730DAB instruction manual

Grundig GX-2800 user manual

Grundig

Grundig GX-2800 user manual

ASA Electronics JHD3000 troubleshooting guide

ASA Electronics

ASA Electronics JHD3000 troubleshooting guide

manuals.online logo
manuals.online logoBrands
  • About & Mission
  • Contact us
  • Privacy Policy
  • Terms and Conditions

Copyright 2025 Manuals.Online. All Rights Reserved.