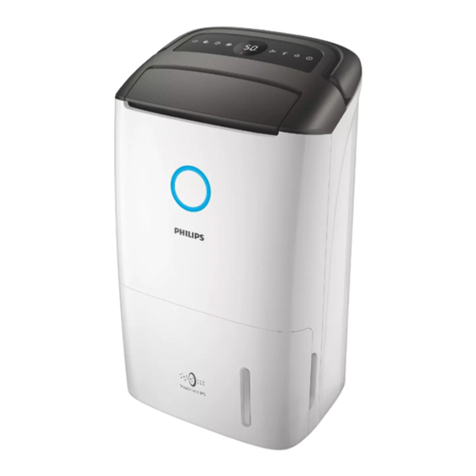
Philips AC4091 User manual

AC4091
Register your product and get support at
www.philips.com/welcome
User manual


3EN
Contents
1 Important 4
Safety 4
5
What’s in the box 5
3 Get started 6
6
8
Understand the air quality light 8
Understand the auto mode 8
Understand the healthy air protect alert 8
Understand the healthy air protect lock 8
Switch on or off 9
Change the fan speed 9
Auto 9
Manual 9
Silent mode 10
Set the timer 10
12
13
15
15
17
lifetime counter 17
9 Troubleshooting 18
10 Guarantee and service 19
Order parts or accessories 19
11 Notices 20
20
Compliance with EMF 20
Recycling 20
English

4EN
Caution
This appliance is not a substitute for proper
ventilation, regular vacuum cleaning, or use of an
extractor hood or fan while cooking.
If the power socket used to power the appliance has
poor connections, the plug of the appliance becomes
hot. Make sure that you plug the appliance into a
properly connected power socket.
Always place and use the appliance on a dry, stable,
level, and horizontal surface.
Leave at least 20cm free space behind and on both
sides of the appliance and leave at least 30cm free
space above the appliance.
Do not place anything on top of the appliance and do
not sit on the appliance.
Do not place the appliance directly below an air
conditioner to prevent condensation from dripping
onto the appliance.
switch on the appliance.
Always lift or move the appliance by the handle at
the back of the appliance.
outlet.
Do not use this appliance when you have used
indoor smoke-type insect repellents or in places with
oily residues, burning incense, or chemical fumes.
Do not use the appliance near gas appliances, heating
Always unplug the appliance after use and before
you clean it.
temperature changes, as this may cause condensation
inside the appliance.
To prevent interference, place the appliance at least
2m away from electrical appliances that use airborne
radio waves such as TVs, radios, and radio-controlled
clocks.
The appliance is only intended for household use
under normal operating conditions.
Do not use the appliance in wet surroundings or in
surroundings with high ambient temperatures, such
as the bathroom, toilet, or kitchen.
The appliance does not remove carbon monoxide
device in case of accidents with combustion
processes and hazardous chemicals.
1 Important
Read this user manual carefully before you use
the appliance, and save it for future reference.
Danger
detergent enter the appliance to avoid electric shock
Do not clean the appliance with water, any other
Warning
Check if the voltage indicated on the bottom or
indicated at the rear of the appliance corresponds
to the local power voltage before you connect the
appliance.
If the power cord is damaged, you must have it
replaced by Philips, a service center authorized by
a hazard.
Do not use the appliance if the plug, the power cord,
or the appliance itself is damaged.
This appliance is not intended for use by persons
or mental capabilities, or lack of experience and
knowledge, unless they have been given supervision
or instruction concerning use of the appliance by a
person responsible for their safety.
Children should be supervised to ensure that they do
not play with the appliance.
Do not block the air inlet and outlet, e.g. by placing
items on the air outlet or in front of the air inlet.
5EN
Congratulations on your purchase, and
welcome to Philips!
offers, register your product at www.Philips.
com/welcome.
Read this user manual carefully before you
install and use the unit. Save it for future
reference.
What’s in the box
Check and identify the contents of your
package:
Warranty
4
Quick start guide
AC40 91
ะሙාԊ
|
҄ܞኒʹ˫
www.philips.com/welcome
Air quality senser
Filter 2: Extra capacity formaldehyde
*
ອ
2:
ڳފ۞ྲྀ಄ࡎಈອ
ᓎ၉
2:
ᇲঢ়ࢽ˾ ᓎ၉
AC4187
!6"%
ອ
1:
ძݚອ
ᓎ၉
1:
ད༦ᓎ၉
AC4016
Register your product and get support at
www.philips.com/welcome
English 3
ࡩᇓ໗
19
⁚㇂Ŷဟ
33
#% K FF
Quick start guideUser manual Warranty
Air quality sensor
!"$Q++
*
(AC4187)
!6"%
4
English

6EN
3
4Remove all packaging material from the
5
2
3 Get started
;
inside, but you have to remove the packaging
Tip
against a wall for more stability.
Note
Make sure that the side with the tag is pointing
towards you.
1
side panels.
2Gently pull the bottom of the panel out
1
2

7EN
6
2
1
2
Note
Make sure that the side with the two clips is pointing
towards you, and that all hooks are properly
7To reattach the front panel, mount the
Then, gently place the panel against the
2
1
English

8EN
Understand the healthy air
protect alert
>
protect alert combination
Follow this
Filter light and
Clean the pre-
Filter light and
Replace the
Formaldehyde
Understand the healthy air
protect lock
and the
»
locked.
»
illuminate continuously.
Note
depends on the operating time and speed level
needs to be replaced.
holding the
button.
4 Use the air
Understand the air quality
light
?
light
Air quality level
Blue excellent
Deep purple good
Purple fair
Red bad
The air quality light automatically goes on
indicator goes on.
Press the button, and the air quality
light dims and blinks. The indicator goes
on.
Press the button again to turn off the
air quality light.
Note
The built-in air quality sensor measures the air quality
and automatically selects the appropriate color of
the air quality light. When the air is clean, the color
of the air quality light is in blue or deep purple.
When the air quality deteriorates, the color of the air
quality light changes to purple or red.
Understand the auto mode
The built-in air quality sensor automatically
measures the ambient air quality, and selects
the most appropriate fan speed.

9EN
B+
Auto
auto mode by default.
Manual
You can manually select the desired fan speed,
which overrides the auto mode.
1Press the
button to switch on the
2Press the button once or more
, , , , or
Tip
If the air quality light is in blue or in deep purple
color, this means the air quality is good or excellent,
and you can select a lower fan speed.
On the other hand, if the air quality light is in red or
in purple color, this means the air quality is bad or
fair. You can select the turbo fan speed to clean
the air quickly.
@
1
»All lights go on twice and you hear a
beep. Then, the lights go out again.
Control Panel
2Press the
button to switch on the
»
»The air quality light shows the quality
of the air.
3Press the
button again to switch off the
English

10 EN
Set the timer
With the timer function, you can let the
automatically switches off.
You can use the timer function in couple of
situations:
Situations You will see
Choose a fan
speed manually
One of the
, , or
the , , or
in auto mode
light is on.
One of the
, , , or
one of the ,
, or
in silent mode
The light and one of
the , , or
1Press the
button to switch on the
Silent mode
quietly.
1Press the
button to switch on the
2Press the button to select silent
mode.
»The light goes on.
To change to another fan speed, press the
button.

11EN
2Press the button to activate the
timer.
»The ( , , or *-
3Press the button repeatedly
to choose the number of hours you
-7
corresponding light goes on.
To deactivate the timer function, press the
button repeatedly until the light
( , , or *-
English

12 EN
5 Clean your air
Note
+ #-
+ V
liquid.
+ V#//>#
agents such as bleach or alcohol to clean any part of
-
+ '"#-'
V'7##-
Regularly clean the inside and outside of the
#-
1Wipe away dust with a soft dry cloth
#-
2Clean the air inlet and the air outlet with
a soft dry cloth.

13EN
2 &
panels, then lift and detach the bottom of
(J*-I
the top part of the front panel out of the
(:*-
1
2
3 7"/
-
1
2
4 H"-
"/#
to brush away the dust.
5 "-
6 &"#-
-
2
1
2
6 Clean the pre-
Note
+ 7"#-
+ "
-
H# and >/
"#-7
last for 24 hours.
1 -
English

14 EN
7To reattach the front panel, insert the top
(J*-7/#
(:*-
2
1
"/
and >-
Note
+ /"#
removing the dust with a vacuum cleaner.
+ "-
still wet, bacteria may multiply in it and shorten the
"-
+ Make sure that the side with the two clips is pointing
towards you, and that all hooks are properly
-

15EN
Note
Make sure that the side with the tag is pointing
towards you.
1
2
side panels.
3Gently pull the bottom of the panel out
1
2
4
1
2
7 Replace the
light
Note
panel will be off.
operating state.
Replace the Formaldehyde
*
Note
vacuum cleanable.
light
Tip
against a wall for more stability.
English

16 EN
8
2
1
2
Note
Make sure that the side with the two clips is pointing
towards you, and that all hooks are properly
9To reattach the front panel, mount the
Then, gently place the panel against the
2
1
10
5
2
6Remove all packaging material from the
7Place the new Formaldehyde removal
2

17EN
3Put the plug in the power socket and
4Press and hold the button for 2
seconds.
Note
on.
Reset the Formaldehyde
*
counter
After you have replaced the Formaldehyde
1
2
English

18 EN
Problem Possible solution
The color
of the air
quality light
always stays
the same.
There is not enough ventilation
in the room. Open a window,
to improve the air circulation.
is extra loud.
You have not removed all
packaging material from the
removed all packaging material.
You can change the fan speed
to lower fan speed level.
still indicates
that I need
to replace a
already did.
Perhaps you did not press the
button properly. Plug in
button and press the
button for 2 seconds.
9 Troubleshooting
This chapter summarizes the most common
problems you could encounter with the
with the information below, contact the
Consumer Care Center in your country.
Problem Possible solution
light has
been on
continuously.
No air
comes out
of the air
outlet.
to the power supply. Plug the
and switch on.
The fan
speed does
not change
when the
silent mode
is activated.
In silent mode, the fan speed
is set to a very low level. If
you want to change the fan
speed and leave the silent
mode, press the button
one or more times to set the
desired fan speed.
that comes
out of the
air outlet is
weaker than
before.
You haven’t removed all
packaging material from the
removed all packaging material.
The air
quality does
not improve,
even though
has been
operating
for a long
time.
installed in the following order,
starting with the innermost

19EN
10 Guarantee and
service
If you need information or if you have a
problem, please visit the Philips website
at www.philips.com or contact the Philips
Care Centre in your country, go to your local
Philips dealer.
Order parts or accessories
If you have to replace a part or want to
purchase an additional part, go to your Philips
dealer or visit www.philips.com/support.
If you have problems obtaining the parts,
please contact the Philips Consumer Care
English

20 EN
Philips plays an active role in the development
of international EMF and safety standards,
enabling Philips to anticipate further
developments in standardization for early
integration in its products.
device that are not expressly approved by
Philips Consumer Lifestyle may void the user’s
authority to operate the equipment.
Recycling
Your product is designed and manufactured
with high quality materials and components,
which can be recycled and reused.
When you see the crossed-out wheel bin
symbol attached to a product, it means the
product is covered by the European Directive
2002/96/EC:
Never dispose of your product with other
household waste. Please inform yourself about
the local rules on the separate collection of
electrical and electronic products. The correct
disposal of your old product helps prevent
potentially negative consequences on the
environment and human health.
$*
All unnecessary packaging has been omitted.
We have tried to make the packaging easy to
Your system consists of materials which can
be recycled and reused if disassembled by
a specialized company. Please observe the
local regulations regarding the disposal of
packaging materials, exhausted batteries and
old equipment.
11 Notices
The making of unauthorized copies of
copy-protected material, including computer
recordings, may be an infringement of
copyrights and constitute a criminal offence.
This equipment should not be used for such
purposes.
$B+J$5!K
This Philips appliance complies with all
to the instructions in this user manual, the
evidence available today.
Compliance with EMF
manufactures and sells many products
targeted at consumers, which, like any
electronic apparatus, in general have the
ability to emit and receive electromagnetic
signals.
One of Philips’ leading Business Principles is to
take all necessary health and safety measures
for our products, to comply with all applicable
legal requirements and to stay well within
the EMF standards applicable at the time of
producing the products.
Philips is committed to develop, produce and
market products that cause no adverse health
handled properly for their intended use, they
available today.
Other manuals for AC4091
1
Table of contents
Other Philips Dehumidifier manuals

Philips
Philips DE5205/81 User manual

Philips
Philips 3000 series User manual

Philips
Philips DE5205/00 User manual

Philips
Philips DE3223 User manual

Philips
Philips DE5207 User manual

Philips
Philips DE5206 User manual

Philips
Philips DE5205 User manual

Philips
Philips HU4706 User manual

Philips
Philips DE5206/00 User manual

Philips
Philips DE5206/86 User manual
Popular Dehumidifier manuals by other brands

Frigidaire
Frigidaire FDL45P Factory parts catalog

Wacker Neuson
Wacker Neuson AD 75LGR Operator's manual

Altec AIR
Altec AIR PUREGAS P1500W Series user guide

Danby
Danby DDR050BJPWDB-6 owner's manual

Wood’s
Wood’s WP-200AP user manual

Van Air Systems
Van Air Systems D-42 Installation, operation & maintenance instructions