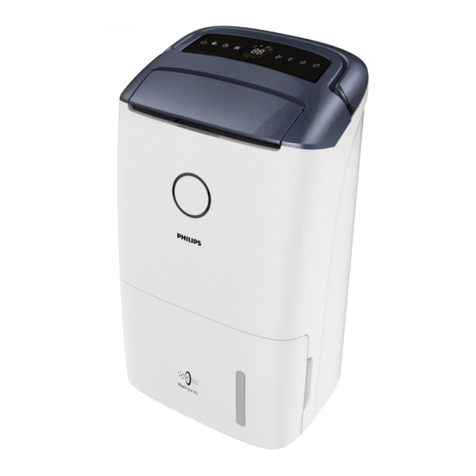
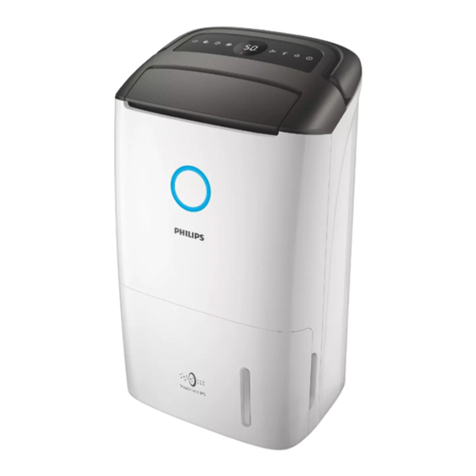
Philips DE3203/81 User manual

EN User manual 1 ZH-T 用戶手冊 17
DE3203/81


1EN
English
Contents
1 Important 2
Safety 2
2 YourAirDehumidier 4
ProductOverview 4
ControlsOverview 5
3 Gettingstarted 6
Beforerstuse 6
Positioningthedehumidier 6
Usingthearomafunction 6
4 Usingthedehumidier 7
Thehumiditylight 7
Turningonando 7
Settingthehumiditylevel 8
Continuousmode 8
SelectingtheAutomode 8
Changingthefanspeed 9
Selectinglaundrydryingmode 9
Usingtheswingfunction 9
SettingtheTimer 10
Defrostingthedehumidier 10
Usingthelighton/ofunction 10
5 Drainingthedehumidier 11
Emptyingthewatertank 11
Usingthecontinuousdrainage11
6 Cleaning 12
Cleaningthebodyofthe
dehumidier 12
Cleaningthewatertank 13
Cleaningthebackcover 13
7 Storage 14
8 Troubleshooting 15
9 Guaranteeandservice 16
Orderpartsoraccessories 16
10 Notices 16
Electromagneticelds(EMF) 16
Recycling 16

2EN
1 Important
Safety
Readthisusermanualcarefullybeforeyou
usethedehumidier,andsaveitforfuture
reference.
Danger
• Donotsprayanyammablematerialssuch
asinsecticidesorfragrancearoundthe
dehumidiertoavoidelectricshockand/ora
rehazard.
• Donotdrinktheaccumulatedwater,useit
tofeedanimals,nortowaterplants.Empty
thewatertank,andpourthewaterdown
thedrain.
Warning
• Checkifthevoltageindicatedonthebottom
orindicatedattherearoftheappliance
correspondstothelocalpowervoltage
beforeyouconnecttheappliance.
• Connectthedehumidiertothepower
socketexclusively,anddonotconnectit
throughanextensioncordtopreventre
hazardand/orelectricshock.
• Ifthepowercordisdamaged,youmust
haveitreplacedbyPhilips,aservicecenter
authorizedbyPhilips,orsimilarlyqualied
personsinordertoavoidahazard.
• Donotusetheapplianceiftheplug,
thepowercord,ortheapplianceitselfis
damaged.
• Thisappliancecanbeusedbychildren
agedfrom8yearsandaboveandpersons
withreducedphysical,sensoryormental
capabilitiesorlackofexperienceand
knowledgeiftheyhavebeengiven
supervisionorinstructionconcerninguseof
theapplianceinasafewayandunderstand
thehazardsinvolved.
• Cleaningandusermaintenanceshallnotbe
madebychildrenwithoutsupervision.
• Donotstartorstopthedehumidierby
pluggingandunpluggingthepowercord.
• Donotblocktheairinletandoutlet,e.g.by
placingitemsontheairoutletorinfrontof
theairinlet.
• Donotinsertyourngersorobjectsintothe
airinletandoutlettopreventphysicalinjury
orproductmalfunction.
• Donotusethearomafunctionifyouare
allergictoessentialoils.
• Itissuggestednotusingthearomafunction
ifyouhaverespiratoryissues.
• Ifyoufeelunwellduringtheuseof
thearomafunction,stopthisfunction
immediately.
• Donotusethearomafunctionforinfants,
pregnantwomenorwomeninlactation
period.
• It’snotrecommendedtousesubstances
otherthanessentialoils.
• Thisappliancecanonlybeusedforthe
intendedpurposeshownintheusermanual.
Caution
• Donotturntheapplianceonando
frequently.
• Ifthepowersocketusedtopowerthe
dehumidierhaspoorconnections,theplug
ofthedehumidierbecomeshot.Makesure
youplugthedehumidierintoproperly
connectedpowersocket.
• Alwaysplaceandusethedehumidierona
dry,stable,level,andhorizontalsurface.
• Leaveatleast40cmfreespacebehindand
onbothsidesofthedehumidierandleave
atleast60cmfreespaceaboveit.Insucient
ventilationmaycauseoverheatingorre
hazard.
• Donotusethisdehumidierwhenyouhave
usedindoorsmoke-typeinsectrepellentsor
inplaceswithoilyresidues,burningincense,
orchemicalfumes.
• Donotoperateorstorethedehumidier
underdirectsunlight.
• Donotusethedehumidierneargas
appliances,heatingdevicesorreplaces.
• Donotusethedehumidierinabathroom
orotherplaceswhereitislikelytocomein
contactwithwater,orwashitwithwater.
• Whenyouusethedehumidierfordrying
laundry,hangyourclothesfromadistance
wherewaterdropletswillnotdripontothe
dehumidier.
• Thedehumidierisonlyintendedfor
householduseundernormaloperating
conditions(5°C-35°C).
• Donotusethedehumidierinaroomwith
majortemperaturechanges.
• Runthepowercordundercarpeting,rugs,or
runners.Arrangethecordawayfromareas
whereitmaybetrippedover.
3EN
English
• Makesurethewatertankisproperlyinstalled
beforeyouswitchonthedehumidier.
• Donottouchtheswinglouver.
• Avoidknockingagainstthedehumidier(the
airinletandoutletinparticular)withhard
objects.
• Alwaysunplugthedehumidierafteruse
andbeforeyoumoveorcleanit.
• Poweroandunplugthedehumidier
beforedrainingthewaterfromthetank.
Otherwise,thismayresultinwaterleakage
orelectricityleakage.
• Donotdropthedehumidierasthismay
causepersonalinjury,anddamagetothe
oororhouseholditemsasaresultofwater
spillage.
• Donotplaceanythingontopofthe
dehumidier.
• Donotstandon,siton,orleanagainst
thedehumidier.Thismaycausethe
dehumidiertotipovercausinginjury.
• Donotremoveordismantletheoatinthe
tank;otherwise,thedehumidiercannot
detectwhenthetankisfullandcouldresult
inwaterleakage.
• Donotusedetergents,cleaningagents,
abrasivepowders,chemicallytreateddusters,
gasoline,benzene,thinnersorothersolvents,
astheycandamagethedehumidierorthe
watertank.Thismayresultinwaterleakage.
• Mildewmayforminthewatertank,cleanit
everyweekwithtapwater.Then,wipewitha
soft,drycloth.
• Ifyoudonotusethedehumidierforan
extendedperiodoftime,makesureallparts
arecleananddry.
• Donotusethedehumidierforfood
preservation,artorscienticworks.
• Donotpointtheairowofthedehumidier
directlyatthebodyforaprolongedperiodof
time,especiallywherethereissomeonewho
isunabletousethehumidityadjustment
function.Forinstance:infant,child,orelderly
person.Thismayharmthephysicalcondition
andleadtodehydration.
• Usethedehumidierwithcautionswhere
thewalls,furniture,andartworksare
vulnerabletodryair.
• Donotplacetheappliancedirectlybelowan
airconditionertopreventcondensationfrom
drippingontotheappliancewhichwillcause
shortcircuitandleakageofelectricity.
• Donotusethedehumidierinaroomwith
majortemperaturechanges,asthismay
causecondensationinsidethedehumidier.
• Topreventinterference,placetheappliance
atleast2mawayfromelectricalappliances
thatuseairborneradiowavessuchasTVs,
radios,andradio-controlledclocks.
• Theappliancedoesnotremovecarbon
monoxide(CO)orradon(Rn).Itcannotbe
usedasafetydeviceincaseofaccidents
withcombustionprocessesandhazardous
chemicals.
• Nevermovetheappliancebypullingthe
powercord.
• Thisapplianceisnotasubstituteforproper
ventilation,regularvacuumcleaning,oruse
ofanextractorhoodorfanwhilecooking.
• Donotsitorstandontheappliance.The
applianceisequippedwithomniwheels.
Sittingorstandingontheappliancemay
leadtopotentialinjury.
FuseSpecication:
T2.5A250V
T6.3A250V
T10A250V

4EN
2 Your Air Dehumidifier
Congratulationsonyourpurchase,andwelcometoPhilips!
TofullybenetfromthesupportthatPhilipsoers,registeryourproductatwww.philips.com/welcome.
Product Overview
A
B
C
E
J
G
H
I
F
D
K
ADisplaypanel GWatertank
BLouver HContinuousdrainageoutlet
CAiroutlet IPowercordwrappinghandle
DAromabox JBackcover
EHumidityindicationlight KHose
FOmniwheels

5EN
English
Controls Overview
A B C D FE G H I
AOn/obutton FHumiditysettingbutton
BAutomodebutton GLighton/obutton
CLaundrydryingmodebutton HAutoswingbutton
DFanspeedbutton ITimerbutton
EDisplayscreen
Displaypanel
Autodefrostingindicator Laundrydryingmodeicon
Watertankfullalert Continuousmodeicon
Automodeicon Timerindicator

6EN
1 Removethearomaboxfromthetopofthe
appliance.
2 Removethecoverofthearomabox.
3 Removethepackingmaterialsofthe
aromapadsandputonepieceofpadsinto
aromabox.
3 Getting started
Beforerstuse
Beforeusingtheappliance,removeall
packagingmaterials.
Note
• Beforeusingthedehumidier,placeit
horizontally.
Positioningthedehumidier
Toincreasethedehumidifyingeectiveness,
positionthedehumidierinalocationthatcan
drawthemostair.
Note
• Whenthedehumidierisoperating,do
notopenexteriordoorsorwindows.
Using the aroma function
Note
• Onlythearomaboxisprovided,the
essentialoilsarenotincluded.Please
purchaseandusetheessentialoilsif
needed.
• Readtheusermanualofessentialoils
carefullybeforeusingthearomafunction.
• Makesurethedehumidieris
disconnectedwithpowerbeforedropping
essentialoilsintothearomabox.
• Itissuggestednotusingthearoma
functionifyouhaverespiratoryissues.
• Donotusethearomafunctionifyouare
allergictoessentialoils.
• Ifyoufeelunwellduringtheuseof
thearomafunction,stopthisfunction
immediately.
• Donotusethearomafunctionforinfants,
pregnantwomenorwomeninlactation
period.
• It’srecommendednottousesubstances
otherthanessentialoils.

7EN
English
4 Using the
dehumidifier
The humidity light
Humidity
light color
Ambient humidity level
Blue ≤5(Lowerambienthumidity
levelcomparedwithpreset
humiditylevel)
Purple 6-15(Mediumambient
humiditylevelcomparedwith
presethumiditylevel)
Red >15(Higherambienthumidity
levelcomparedwithpreset
humiditylevel)
Thehumiditylightautomaticallygoesonwhen
theapplianceisswitchedon,andlightsupall
colorsinsequence.Inashorttimethehumidity
sensorsselectthecolorthatcorrespondstothe
surroundinghumidity.
Turningonando
Note
• Foroptimumperformance,closedoors
andwindows.
• Keepcurtainsawayfromtheairinletorair
outlet.
• Foroptimumdehumidicationeciency,
placethedehumidierinaat,stable
surface.
• Beforeturningonthedehumidier,check
ifthepowervoltagecorrespondstothe
voltageprintedonthedehumidier.
4 Dropin2-3dropsofessentialoilstothe
aromapad.
5 Closethecoverofthearomaboxandput
itbackontothetopofthedehumidier.

8EN
Continuous mode
Incontinuous mode,theappliance
constantlyworkswiththeoptimal
dehumidifyingsettings.
• Touchthe buttonrepeatedlytoselect
thecontinuousmode.
»The and displayonthescreen.
Selecting the Auto mode
• TouchtheAutomodebutton toselect
theAutomode.
»displaysonthescreen.
»Thecurrenthumidityleveldisplayson
thescreen.
1 Puttheplugofthedehumidierinthe
walloutlet.
»Thedehumidierbeeps.
2 Touchthe buttononcetoturnonthe
appliance.
»Thecurrenthumiditylevelisdisplayed
onthescreen.
»Aftermeasuringtheambient
humiditylevel,thehumiditysensor
automaticallyselectsthecolorofthe
humiditylight.
»ThedehumidiergoestotheAuto
mode.
3 Touchandhold for3secondstoturn
othedehumidier.
Setting the humidity level
Youcansetthedesiredhumiditylevelto40,50,
60,70,or--percent.
• Touchthe buttononeormoretimes
tosetthedesiredhumiditylevel,andthe
humidityindicatorlightsup.
Note
• Whenthehumidityisdecreasedto
theselectedlevel,thedehumidier
automaticallystopsdehumidifyingtheair,
butthefanwillcontinueworking.
• Ifyoudonotsetthehumiditylevel,the
defaultrelativehumidityis60%.
Tip
• AcomfortablehumiditylevelisfromRH
40%toRH60%.

9EN
English
Note
• Donotpointtheairowofthe
dehumidierdirectlyatthebodyfora
prolongedperiodoftime,especiallywhere
thereissomeonewhoisunabletousethe
humidityadjustmentfunction.
• Whenyouusethedehumidierfor
laundrydrying,hangyourclothesfroma
distancewherewaterdropletswillnotdrip
ontothedehumidier.
• Makesuretheairinletandoutletarenot
blockedbytheclothes.
• Makesurethatyoudrytheclothesona
safeandsecureplacefromdroppingto
blocktheairinletandoutlet.
Tip
• Directthelouveruntilairowsdirectly
ontotheclothestodryyourclothesmore
eciently.
Using the swing function
Thelouverisabletoswingcloseto90degrees.
Usetheswingfunctiontodirecttheairow.
1 Touchthe buttontoactivatethe
swingfunction.
2 Touchthe buttonagaintodeactivate
theswingfunction.
Tip
• Aftertheapplianceisturnedon,turn
thelouverupwardtoincreasethe
dehumidifyingeciency.
Changing the fan speed
• Touchthefanspeedbutton repeatedly
toselectthefanspeed(1,2or3)youneed.
Selecting laundry drying mode
• Touchthe buttontoselectthelaundry
dryingmode.
»Thedehumidiergoestolaundry
dryingmode.
»Thedehumidieroperatesunderthe
highestfanspeed.
» displayonthescreen.

10 EN
Setting the Timer
Withthetimerfunction,youcanletthe
dehumidieroperateforasetnumberof
hours.Whenthesettimehaselapsed,the
dehumidierautomaticallyturnso.Thetimer
isavailablefrom1to9hours.
1 Touchthe buttontoactivatethetimer.
2 Touchthe buttonrepeatedlyto
choosethenumberofhoursyouwantthe
dehumidiertooperate.
• Todeactivatethetimerfunction,touch
the buttonrepeatedlyuntil is
displayedonthescreen.
Defrostingthedehumidier
Note
• Thedefrostingfunctionisenabledonly
whenthedehumidieroperatesunder
dehumidifyingmode.
Thedehumidierisequippedwithadefrosting
sensortomakesureitisinoptimalcondition
whenbeingusedincoldweather.The
dehumidierautomaticallydetectsifdefrosting
isrequired.
Whendefrostingisrequired:
»The indicatorison.
»Defrostingwillbegindefrostingand
continueuntilthedehumidieris
completelydefrosted.
Note
• Duringdefrosting,thedehumidier
operatesinclothesdrymode.
• Thedehumidierwillresumeworking
andoperatetheprevioussettingsafter
defrostingiscompleted.
Usingthelighton/ofunction
Withthelighton/obutton,youcanswitchon
orothehumiditylightorthedisplayscreen.
1 Touchthelighton/obutton once,the
humiditylightwillgoo.
2 Touchthelighton/obutton again,
thedisplayscreenwilldimmed.
3 Touchthelighton/obutton forthe
thirdtime,alllightswillbeonagain.

11EN
English
5 Draining the
dehumidifier
Emptying the water tank
Whenthewatertankisfull:
»Theappliancebeeps,andthe
indicatorison.
1 Holdtherecessofthewatertank,andpull
itfromthedehumidier.
2 Openthewatertankcoverandemptythe
waterintoasink.
3 Wipetheoutsideofthewatertankdry
withacleancloth.
4 Putthewatertankbackintothe
dehumidier.
Note
• Thedehumidierwillresumeworking
afterthewatertankisemptied.
Using the continuous drainage
Thedehumidiercanalsodrainexcesswaterby
attachingahose.Thisallowsyoutooperatethe
dehumidierwithoutemptyingthewatertank.
1 Turnothedehumidierandunplugfrom
thewallsocket.
2 Removethewatertankfromthe
dehumidier.

12 EN
Note
• Putthewatertankbackintothe
dehumidierevenusingthecontinuous
drainage,orthedehumidiercannot
operatenormally.
• Makesurethehosetstightlysothatno
waterleaksfromthedehumidier.
• Whenusingthecontinuousdrainage,
makesurethehoseislaidatandnot
knotted.
• Makesurethehoseisnotimmersed
inwater,norraisedhigherthanthe
continuousdrainagehole.
• Placetheoutletofthehoseinsomewhere
itcaneasilydrain.
• Checkthedehumidieronceaweek
whendrainingwatercontinuouslyorleft
unattendedforanextendedperiodof
time.
6 Cleaning
Note
• Alwaysturntheapplianceoandunplug
theappliancefromtheelectricaloutlet
beforecleaning.
• Neverimmersetheapplianceinwateror
anyotherliquid.
• Neveruseabrasiveoraggressivecleaning
agentssuchasbleachoralcoholtoclean
anypartoftheappliance.
• Thebackcoveriswashable.
Cleaning the body of the
dehumidier
Regularlycleantheinsideandoutsideofthe
dehumidiertopreventdustfromcollecting.
1 Useasoft,dryclothtocleanboththe
interiorandexterioroftheappliance.
2 Theairoutletcanalsobecleanedwitha
dry,softcloth.
3 Connectthehosetothedrainageoutlet.
4 Putthewatertankbackintothe
dehumidier.

13EN
English
6 Wipetheoutsideofthewatertankdry
withacleancloth.
7 Putthewatertankbackintothe
dehumidier.
Cleaning the back cover
Cleanthebackcoverwhennecessarytokeep
itclean.
Note
• Thebackcoveriswashableandvacuum
cleanable.
1 Switchothedehumidierandunplug
fromtheelectricaloutlet.
Cleaning the water tank
Cleanthewatertankeverydaytokeepitclean.
1 Switchothedehumidierandunplug
fromtheelectricaloutlet.
2 Removethewatertankfromthe
dehumidier.
3 Openthewatertankcoverandllthe
watertankfor1/3withwater.
4 Addsomemildwashing-upliquidtothe
waterinthewatertank.
5 Washthewatertankunderarunningtap
water,andcleantheinsidesofitwitha
softcleancloth.

14 EN
7 Storage
1 Turnothedehumidierandunplugfrom
thewalloutlet.
2 Cleanthedehumidier,emptythewater
tankandwashthebackcover(seechapter
‘Cleaning’).
3 Letallpartsdrythoroughlybeforestoring.
4 Storethedehumidierinacool,dry
location.
2 Pullthebackcover,andremoveitfromthe
dehumidier.
3 Ifthebackcoverisverydirty,useasoft
brushtobrushawaythedust.Washthe
backcoverunderarunningtapwater.
4 Allowthebackcovertoairdrythoroughly
beforeplacingbackinthedehumidier.
5 Putthebackcoverbackintotheappliance.
6 Puttheplugofthedehumidierinthe
walloutlet.
7 Washyourhandsthoroughlyafter
cleaningthebackcover.

15EN
English
8 Troubleshooting
Thischaptersummarizesthemostcommonproblemsyoucouldencounterwiththedehumidier.If
youareunabletosolvetheproblemwiththeinformationbelow,visitwww.philips.com/supportor
contacttheConsumerCareCenterinyourcountryforassistance.
Problem Possible solution
Theappliancedoesnot
workeventhoughitis
pluggedintothewall
socketandswitchedon.
• Thetimerissettoaspecictimeinterval.Resetorturnothetimer.
• Tryadierentelectricalsocketorcheckthewallswitch.
• Makesurethatthewatertankisemptyandplacedinthe
dehumidierproperly.
Thewatertankisempty
butthe indictoris
stillon.
• Removethewatertankfromthedehumidierandplaceitbackto
thedehumidieragain.
Thereisnoair
dehumidication
intheroomorthe
dehumidifying
eectivenessislow.
• Makesuretheairinletandoutletarenotblocked.
• Theroomhumidityisbelowwhatthedehumidierissetto.Selecta
lowerhumiditylevel.
• Makesurethatnoexteriordoorsorwindowsareopen.
• Thecurrenttemperatureislowintheroom.Tryagainuntilthe
temperaturerisesup.
Waterleaksfromthe
dehumidier.
• Makesurethatthedehumidierisingoodconditionandthewater
tankisnotcracked.
Thedehumidierdoes
notcollectwater.
• Thehumidityislow.Thedehumidierautomaticallyresumes
workingwhenthehumiditylevelisincreased.
• Thetemperatureislow.Waituntilthetemperaturerisesup.
Theairowthatcomes
outoftheairoutletis
signicantlyweakerthan
before.
• Thebackcoverisdirty.Cleanthebackcover(seechapter
"Cleaning").
Thedehumidier
producesaunpleasant
smell.
• Therstfewtimesyouusethedehumidier,itmayproduceaplastic
smell.Thisisnormal.
• Ifthedehumidierproducesaburntodor,switchOFFandunplug
fromtheelectricaloutlet.ContacttheConsumerCareCenterinyour
countryforassistance.
Thedehumidieris
loud.
• Ifthedehumidieristooloud,changethefanspeedtoalowerfan
speedlevel.Whenusingtheproductinabedroomatnight,choose
alowerfanspeed.
• Makesurethatthedehumidierisplacedonaatandstable
surface.
Errorcodes"E3"“E4”
or"E5"displaysonthe
screen.
• Thedehumidierhasmalfunctions.ContacttheConsumerCare
Centerinyourcountry.

16 EN
10 Notices
Electromagneticelds(EMF)
ThisPhilipsappliancecomplieswithall
applicablestandardsandregulationsregarding
exposuretoelectromagneticelds.
Recycling
Donotthrowawaytheproductwiththe
normalhouseholdwasteattheendofitslife,
buthanditinatanocialcollectionpointfor
recycling.Bydoingthis,youhelptopreserve
theenvironment.
Followyourcountry'srulesfortheseparate
collectionofelectricalandelectronicproducts.
Correctdisposalhelpspreventnegative
consequencesfortheenvironmentandhuman
health.
9 Guarantee and
service
Ifyouneedinformationorifyouhavea
problem,pleasevisitthePhilipswebsiteat
www.philips.com orcontactthePhilips
ConsumerCareCenterinyourcountry(you
cannditsphonenumberintheworldwide
guaranteeleaet).IfthereisnoConsumerCare
Centerinyourcountry,gotoyourlocalPhilips
dealer.
Order parts or accessories
Ifyouhavetoreplaceapartorwantto
purchaseanadditionalpart,gotoyourPhilips
dealerorvisitwww.philips.com/support.
Ifyouhaveproblemsobtainingtheparts,
pleasecontactthePhilipsConsumerCare
Centerinyourcountry(youcannditsphone
numberintheworldwideguaranteeleaet).

17
ZH-T
繁體中文
內容
1 重要事項 18
安全 18
2 您的清淨除濕機 20
產品概覽 20
控制項概覽 21
3 快速入門 22
第一次使用前 22
擺放除濕機 22
使用香氛功能 22
4 使用除濕機 23
濕度指示燈 23
開關機 23
設定濕度等級 23
連續模式 23
選擇自動模式 24
變更風速 24
選擇乾衣模式 24
使用搖擺功能 24
設定計時器 24
除濕機除霜 25
使用開/關燈按鈕 25
5 倒空除濕機 25
清空水箱 25
使用連續排水 26
6 清潔 27
清潔除濕機的機體 27
清潔水箱 27
清潔背蓋 28
7 收納 28
8 疑難排解 29
9 保固與服務 30
訂購零件或配件 30
10 聲明 30
電磁場(EMF) 30
回收 30

18
ZH-T
1 重要事項
安全
在使用除濕機前,請先仔細閱讀本使用手冊,並
保留說明以供日後參考。
危險
• 請勿在除濕機周圍噴灑殺蟲劑或芳香劑等任何
易燃物質,以免發生觸電和/或火災等危險。
• 請勿飲用除濕後蓄積的水,亦勿用於飼養動
物或澆灌植物。清空水箱時,請將水倒入排
水孔。
警告
• 在連接本產品的電源之前,請確認本產品機體
底部或後方所標示的電壓與本地的電源電壓是
否相同。
• 請將除濕機插頭插上專用的電源插座,切勿使
用延長線,以免發生火災和/或觸電等危險。
• 如果電源線損壞,您必須將其交由
Philips、Philips授權之服務中心,或是具備相
同資格的技師進行更換,以免發生危險。
• 當插頭、電源線或產品本身受損時,請勿使用
本產品。
• 本產品可供8歲以上孩童及身體、知覺或精
神能力障礙者或經驗與知識缺乏者使用,但需
向他們提供安全使用產品相關的監督或指示說
明,且他們必須瞭解可能發生的危險。
• 若無人在旁監督,不得讓孩童清潔與維護
產品。
• 請勿透過插入及拔出電源線的方式來開關除
濕機。
• 請勿在出風口上方或進風口前面放置物品,擋
住進出風口。
• 請勿將手指或物體插入進風口及出風口,以免
身體受傷或產品故障。
• 若您對精油過敏,請勿使用香氛功能。
• 如果您有呼吸系統問題,建議不要使用香氛
功能。
• 如果您在使用香氛功能時感覺不舒服,請立即
停止此功能。
• 請勿在對嬰兒、懷孕婦女或在哺乳期間的女性
使用香氛功能。
• 不建議使用除精油之外的物質。
• 本產品只能用於使用手冊中所示的預定用途。
注意
• 請勿頻繁開關本產品。
• 如果為除濕機供電的電源插座接觸不良,除濕
機插頭會發熱。務請將除濕機插頭插入接觸良
好的插座。
• 請將除濕機放置在乾燥平穩的水平面上使用。
• 除濕機的背面及側面需至少保留40公分的
間隔距離,頂部則至少保留60公分的間隔距
離。通風不足可能會造成過熱或火災。
• 當您使用室內噴霧式驅蟲劑或在充滿油漬、焚
香或化學煙霧的地方時,請勿使用本除濕機。
• 請勿讓除濕機在陽光直射處運作,或存放於陽
光直射處。
• 請勿在燃氣設備、加熱裝置或壁爐附近使用
除濕機。
• 請勿在浴室或其他有水的地方使用除濕機,避
免除濕機被水弄濕或沖濕。
• 使用本除濕機乾衣時,請將衣物懸掛在一定
距離以外的地方,以免衣物殘留的水滴滴入
除濕機。
• 本除濕機為家用產品,僅限於正常操作環境
(5°C-35°C)下使用。
• 請勿在溫差變化極大的地方使用除濕機。
• 電源線請拉到地毯、地墊或滑槽轉輪下方。小
心安置電線,繞開可能造成絆倒的區域。
• 請在開啟除濕機電源之前,確認水箱已正確
安裝。
• 請勿碰觸搖擺送風葉片。
• 切勿使用硬物敲打除濕機(特別是進風口及出
風口)。
• 使用完後或移動、清潔之前,請務必先拔掉除
濕機的電源插頭。
• 倒空水箱前,請先關機並拔掉除濕機的插頭,
否則可能會造成漏水或漏電。
• 不得摔落除濕機,否則可能造成個人傷害、損
壞地板,或因漏水而損及家用品。
• 請勿在除濕機頂部放置任何物品。
• 請勿站或坐在除濕機上,也不得依靠在除濕機
上,否則可能使除濕機傾倒,進而造成傷害。
• 請勿移除或拆解水箱中的浮標,否則除濕機無
法偵測滿水,可能會導致漏水。
• 請勿使用清潔劑、清潔液、研磨粉、經化學處
理的除塵布、汽油、苯類、稀釋劑或其他溶
劑,以免損害除濕機或水箱,或造成漏水。
• 水箱可能會發霉,請每週以自來水清洗,接著
再以柔軟乾布擦拭。
• 若您長時間不使用除濕機時,請確認所有零件
均已清潔且乾燥。
• 請勿使用除濕機儲藏食物、藝術品或科學
作品。
• 請勿長時間將除濕機風口直接對準身體,特別
是無法使用調整濕度功能的人。例如:嬰兒、
孩童或老人。因為如此可能對身體有害,進而
導致脫水。
• 易受乾燥空氣毀損的牆壁、傢俱和藝術品周
圍,請小心使用本除濕機。
• 請勿將本產品置於空調正下方,以免凝結水珠
滴到產品上而造成短路及漏電。
Table of contents
Other Philips Dehumidifier manuals

Philips
Philips DE5205 User manual

Philips
Philips DE5206/00 User manual

Philips
Philips DE5205/81 User manual

Philips
Philips DE5205 User manual

Philips
Philips HU4706 User manual

Philips
Philips AC4091 User manual

Philips
Philips 3000 series User manual

Philips
Philips DE3223 User manual

Philips
Philips DE5206/86 User manual

Philips
Philips AC4080 User manual